Use and
Care Manual
For “NoFrost” Combined
Refrigerator-Freezers with IceMaker
CS 2080 / HC 2080
7084 832-00

2
Congratulations on your purchase. Choosing this appliance means you want all the ben-
efits of state-of-the-art refrigeration technology, guaranteeing you top quality, a long appli-
ance life span and excellent reliability.
The features on your appliance have been designed to ensure maximum convenience -
day in, day out.
This appliance has been manufactured with recyclable materials using an environmentally
friendly process, so together we’re making an active contribution to the preservation of our
environment.
To get to know all the benefits of your new appliance, please read the information con-
tained in these operating instructions carefully.
We know you will be pleased with your new appliance.
Additional benefits
• CFC-free
• Energy-optimizedrefrigerantcircuit
• Energy-efficientinsulation
• Lowenergyconsumption
• User-friendlyelectroniccontrols
• Displayoffunctionsswitchedon
• Temperaturecanbecontrolledwithinclimateratingrange,
regardless of room temperature
• Refrigeratorandfreezercompartmentsdefrostautomatically-
no need to spend time defrosting
• Bignetrefrigeratorcapacity
• Variableandpracticalfeatures
• Safety-glassstorageshelves
• Bignetfreezercapacity
• AutomaticIceMaker
• Waterfilterforgoodwaterqualityiceproduction
• Freezertemperatureincreasealarm
• Audibledooropenalarm
• Powerfailure/“frost-control”display
• Freshfoodcanbefast-frozenasrequired
• Alldrawerssuitableforfastfreezing
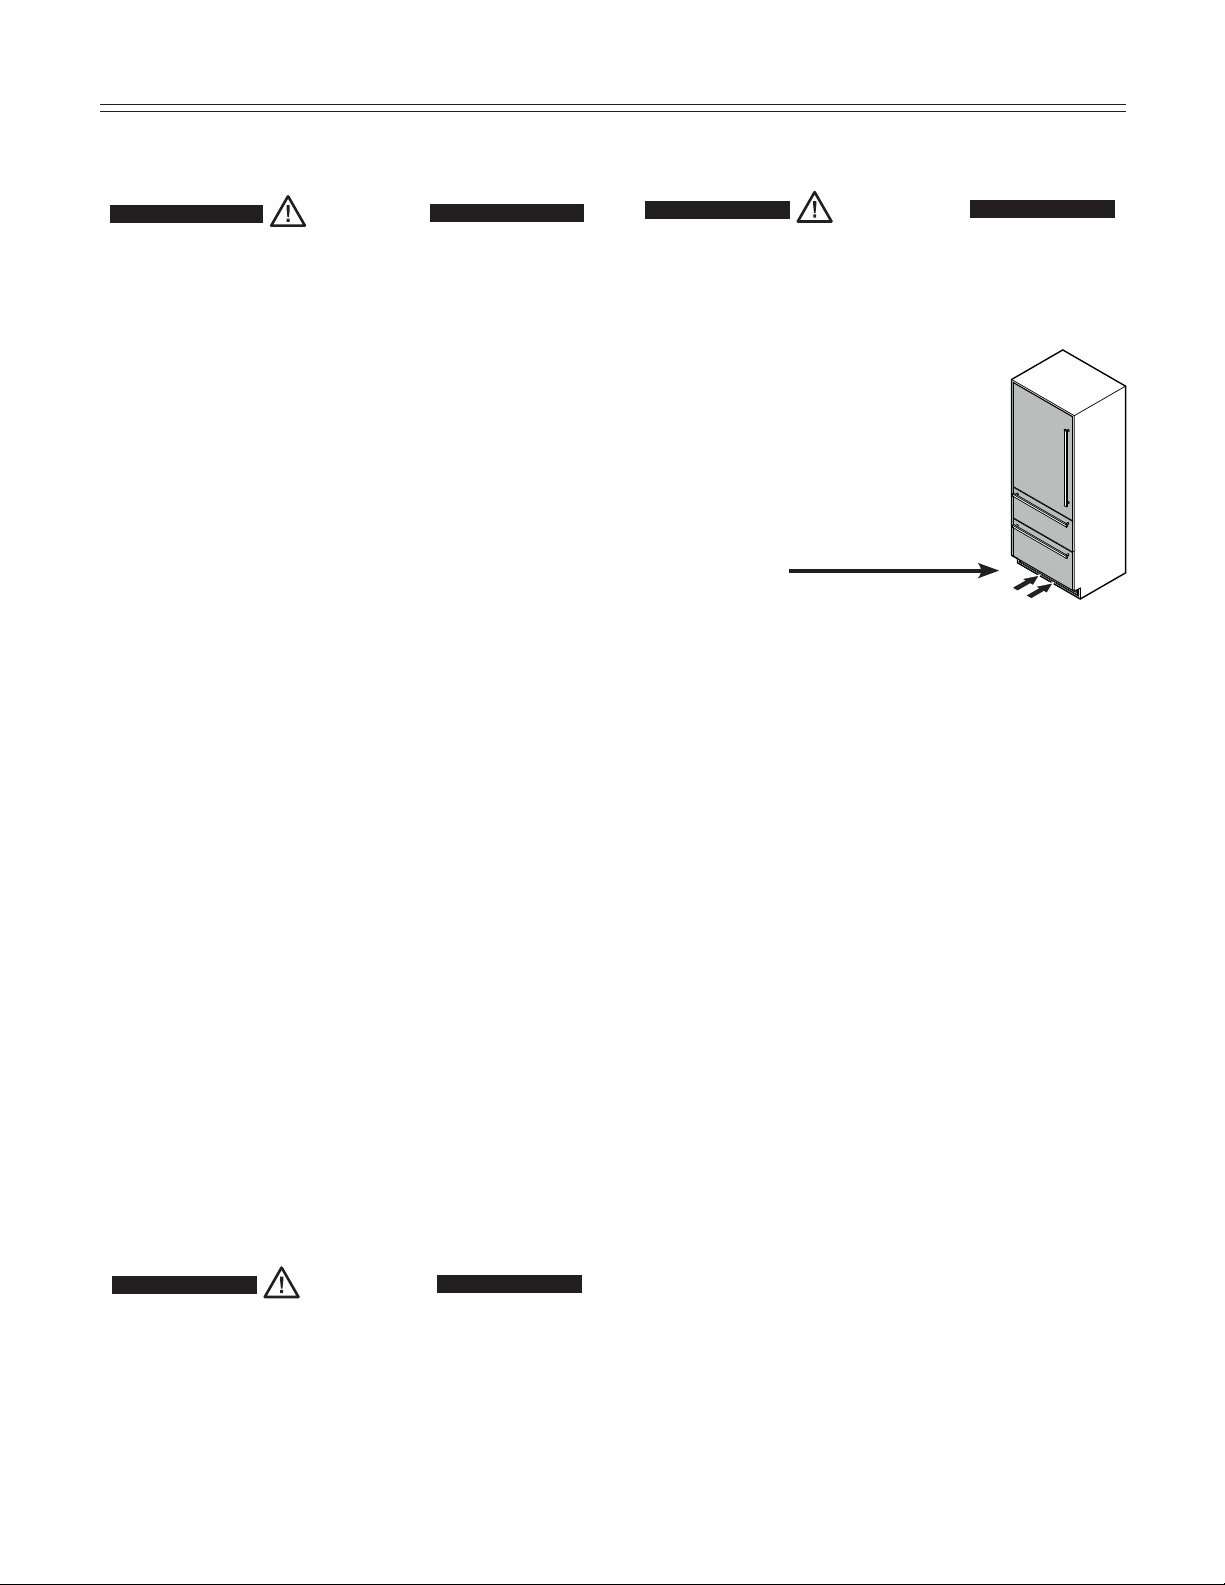
• Integratedtransportgripsonappliancehousing
• Transportcastors
• Easytoclean
• ThisunitiscertifiedasSabbathcompliantbytheStar-Korga-
nizationthusallowingtheappliancetobeusedduringreligious
holidays.FormoreinformationpleasevisitStar-Kontheweb
at www.star-k.org.
California Proposition 65
- This product contains chemicals known to the state
of California to cause cancer or reproductive harm.
- This product can expose you to chemicals including
DiisononylPhthalate(DINP)whichisknowntothe
StateofCaliforniatocausecancer.Formoreinfor-
mationgotowww.P65Warnings.ca.gov.
- This product can expose you to chemicals includ-
ingDi-isodecylPhthalate(DIDP)whichisknownto
theStateofCaliforniatocausebirthdefectsorother
reproductiveharm.Formoreinformationgoto
www.P65Warnings.ca.gov.
3
IMPORTANT
All types and models are subject to continuous
improvement. The manufacturer reserves the right
to make modifications in the shape, equipment and
technology.
Table of ConTenTs
Contents Page
DisposalofOldAppliance ............................................. 4
DisposalofthisAppliance ............................................. 4
DisposalofCarton ......................................................... 4
R600aRefrigerant ......................................................... 4
Settingup ....................................................................... 4
ImportantSafetyInformation ......................................... 5
ElectricalSafety ............................................................. 6
SafetyRegulations ......................................................... 6
WaterFilter ..................................................................... 7
InstallingtheWaterFilter ............................................... 7
RemovingtheWaterFilter ............................................. 7
DescriptionofApplianceandEquipment ...................... 8
OperatingandControlElements ................................... 9
TurningtheApplianceOnandOff ...............................10
PowerFailure/Frost-ControlDisplay ............................11
SetupMode ...................................................................12
ArrangingFood .............................................................16
ShelfArrangement ........................................................16
InteriorLight ..................................................................17
FreezerCompartmentDescription ...............................18
RemovingtheFreezerCompartmentContainers ........18
Freezing ........................................................................19
FreezingwithSuperfrost ...............................................19
FreezingandStorage ...................................................19
SafetyInstructionsandWarningsfortheAutomatic
IceMaker
........................................................................ 20
TurningtheIceMakerOnandOff .............................. 20
IceMakerDescription ................................................ 20
Defrosting ..................................................................... 21
Cleaning ....................................................................... 21
CleaningtheAirFilter .................................................. 22
VacationTips ............................................................... 23
Troubleshooting ........................................................... 24
IceMakerTroubleshooting .......................................... 25
ApplianceInformation .................................................. 25
LiebherrWarrantyPlan ................................................ 26
Please Read and Follow these
Instructions
TheseinstructionscontainDanger,Warningand
Caution statements.
This information is important for safe and efficient
installation and operation.
AlwaysreadandfollowallDanger,Warningand
Caution statements!
DANGER!
Danger indicates a hazard which
will cause serious injury or death if
precautions are not followed.
WARNING!
Warning indicates a potentially hazardous
situation which, if not avoided, could
result in death or serious injury.
CAUTION!
Caution indicates a potentially hazardous
situation which, if not avoided, may result
in minor or moderate injury.
IMPORTANT
This highlights information that is especially relevant
to a problem-free installation and operation.
4
safeTy
Disposal of Old Appliance
DANGER!
Risk of child entrapment.
Child entrapment and suffocation are not problems of
the past.
Junked or abandoned refrigerators are still dangerous –
eveniftheywillsitfor“justafewdays.”
Ifyouaregettingridofyouroldrefrigerator,please
follow these instructions to help prevent accidents.
Before you discard old appliances:
• Takeoffthedoors.
• Leavetheshelvesinplacesothatchildren
may not easily climb inside.
• Cutoffthepowercablefromthediscarded
appliance. Discard separately from the
appliance.
• Besuretofollowyourlocalrequirementsfor
disposal of appliances.
Contact the trash collection agency in
your area for additional information.
Disposal of this Appliance
This appliance contains flamable gases within
the refrigeration circuit and insulation foam.
Contact the Municipality or Disposal Company
in your area for information on approved
recycling or disposal.
R600a Refrigerant
WARNING!
The refrigerant contained within the
appliance R600a is environmentally
friendly,butflammable.Leaking
refrigerant can ignite.
To prevent possible ignition follow
the warnings below:
•
Keep ventilation openings, in
the appliance enclosure or in
the built-in structure, clear of
obstruction.
• Donotusemechanicaldevicesorother
means to accelerate the defrosting process,
other than those recommended by the
manufacturer.
• Donotdamagetherefrigerantcircuit.
• Anyrepairsandworkontheappliance
should only be performed by the customer
service department.
• Donotuseelectricalappliancesinsidethe
food storage compartments of the appliance,
unless they are of the type recommended by
the manufacturer.
Disposal of Carton
The packaging is designed to protect the appliance and
individual components during moving and is made of
recyclable materials.
WARNING!
Keep packaging materials away from
children. Polythene sheets and bags can
cause suffocation!
Pleaserecyclepackagingmaterialwherefacilitiesare
available.
Setting up
Avoidplacingtheapplianceindirectsunlightornear
the stove, range top, radiators and similar heat sources.
Assoonasyouuncratetheunit:
• Examinetheunitandpackagingforshippingdam-
age. Contact the carrier immediately if you suspect
there is any damage.
• Notethetype(modelnumber),index,appliance/
serial number, date of purchase and where pur-
chased on the spaces provided in the back of this
manual.

5
safeTy
Important Safety Information
• Topreventinjurytoyouordamagetotheunit,
the appliance should be unpacked and set up by
two people.
• Iftheapplianceisdamagedondelivery,contact
the supplier immediately before connecting to
the power source.
• Toguaranteesafeoperation,ensurethatthe
appliance is set up and connected as described
in these operating instructions.
• Disconnecttheappliancefromthepowersource
ifafaultoccurs.Pullouttheplug,turnoffor
remove the fuse.
• Whendisconnectingtheappliance,usetheplug.
Donotpullonthecable.
• Anyrepairsandworkontheapplianceshould
only be carried out by the customer service
department.Unauthorizedworkmaybe
dangerous to the user. Changing the power
source cable should only be done by the
customer service department.
• Donoteaticecream,particularlyicecream
treats, or ice cubes, immediately from the
freezercompartment.Thereisariskof“burning”
because of the very cold temperatures.
• Donotconsumefoodwhichhasbeenstoredfor
too long; it could cause food poisoning.
• Donotstoreexplosivesorspraysusing
combustible propellants such as butane,
propane, pentane, etc. in the appliance.
Electricalcomponentsmightcauseleakinggas
to ignite. You may identify such sprays by the
printed contents or a flame symbol.
• Donotallowchildrentoplaywiththeappliance.
Children must not climb, sit or stand on the
shelves, drawers or door.
• Topreventpossibleinjuryduetoanelectrical
shock, be sure to disconnect the power cord or
turn off the circuit breaker before cleaning the
appliance.
• Toavoidinjuryordamagetotheappliance,do
not use steam cleaning equipment to clean the
appliance.
• Donotoperatetherefrigeratorinthepresence
of explosive fumes.
• Intheeventofapoweroutage,minimize
openingtherefrigeratordoor(s).Protectthefood
either by placing dry ice on top of the packages
orusingalocalfrozenfoodlockerifthepower
failureisofalongduration.Donotattemptto
re-freezeanypreviouslyfrozenfoodthathas
thawed.
6
safeTy
Safety Regulations
Theapplianceisdesignedtocool,freezeandstorefood
andtomakeice.Itisdesignedasahouseholdappli-
ance.
IMPORTANT
The appliance is not intended for outdoor use.
The appliance is manufactured to operate within spe-
cific ambient temperature limits according to its climate
rating.
The climate rating indicates the ambient temperature
at which the appliance may be operated in order to
achieve full refrigeration performance.
Climate Rating Ambient Temperature
SN-T 50°Fto109°F(10°Cto43°C)
IMPORTANT
Do not operate the appliance outside the
specified ambient temperature range.
- The refrigerant circuit has been tested for leaks.
- The appliance complies with current safety regula-
tions
CAN /CSAC22.2No.60335-1-11
UL60335-1FifthEdition
CAN/CSAC22.2No.60335-2-24-06
UL60335-2-24FirstEdition
We recommend cleaning the appliance before turning it
onforthefirsttime.SeeCleaning.
Turn on the appliance several hours before loading it.
Donotloadwithfrozenfooduntilthetemperature
showsapproximately0°F(-18°C).
WARNING!
Do not allow children to play with the
appliance. Children must not climb, sit or
stand on the racks or door.
Failure to follow these instructions may
result in death or serious injury.
Electrical Safety
Connectthisappliancetoa15ampor20amp,110-
120VAC,circuitwhichisgroundedandprotectedbya
circuit breaker or fuse.
We recommend using a dedicated circuit for this appli-
ance to prevent circuit overload and the chance of
interruption to the appliance.
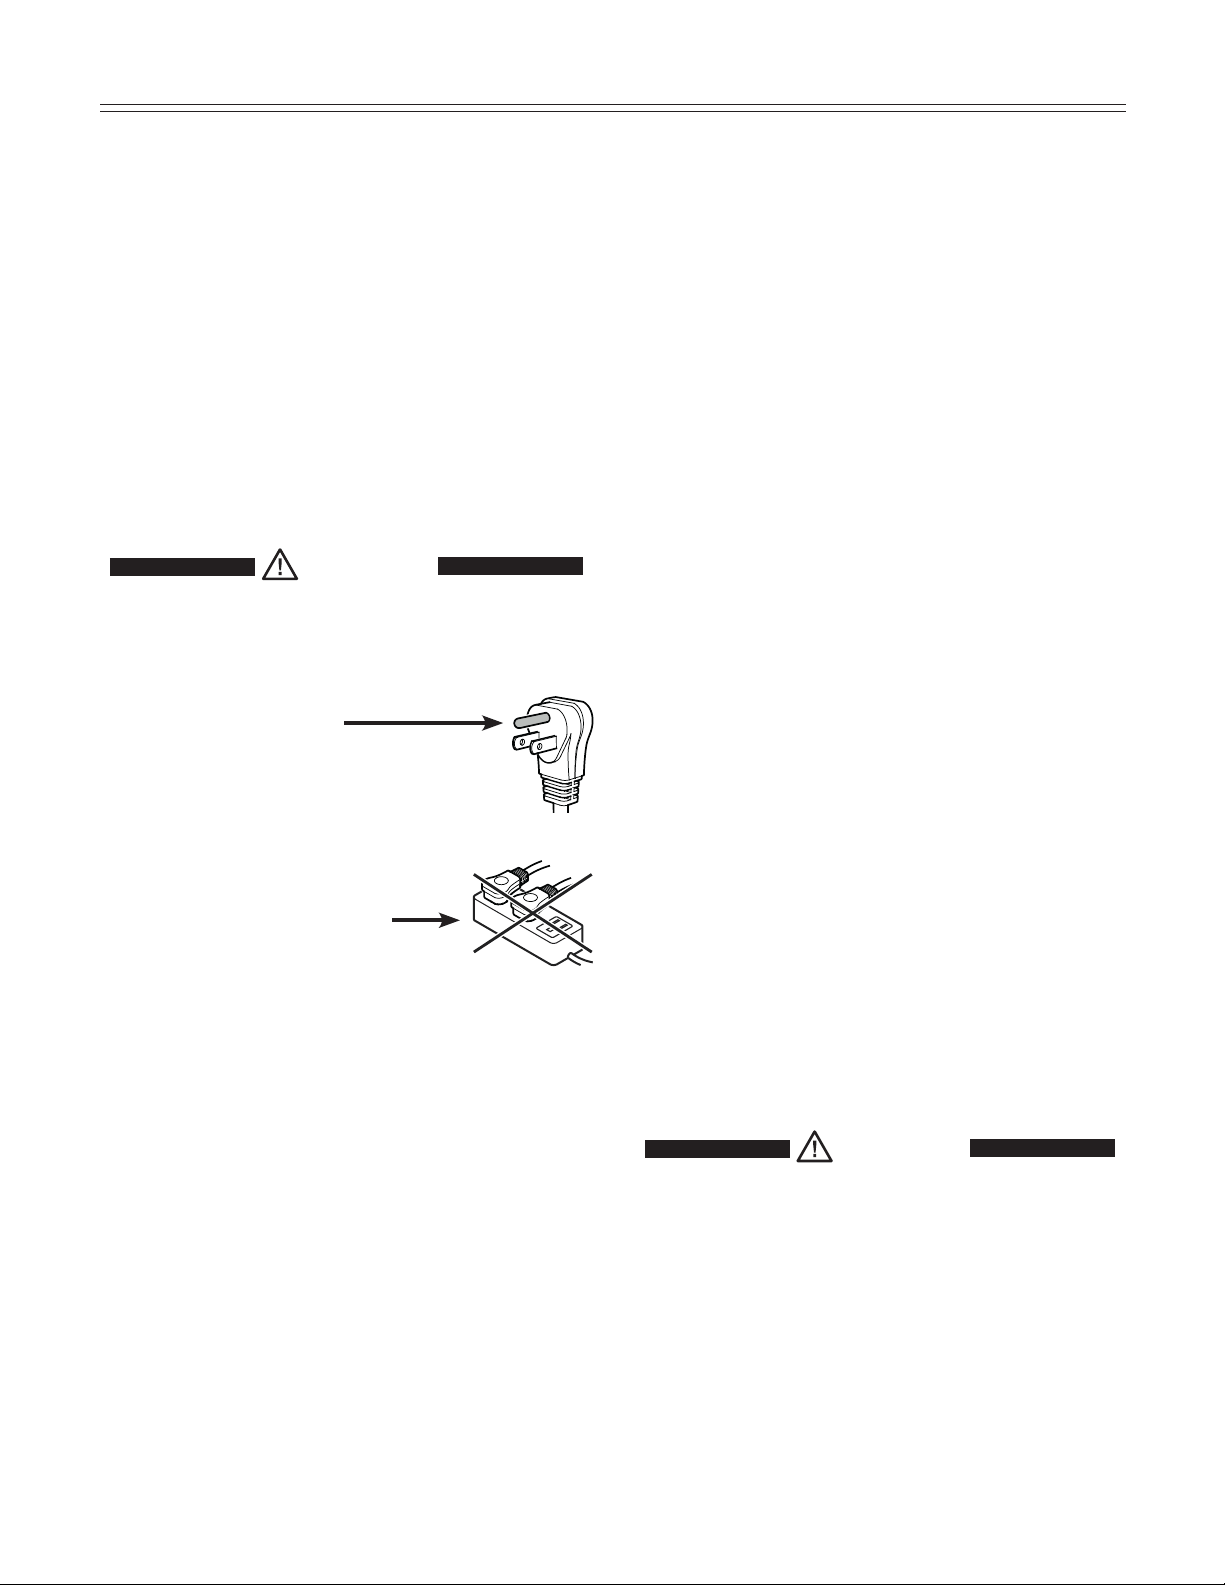
Thisapplianceisequippedwithathree-prong(ground-
ing)polarizedplugforyourprotectionagainstpossible
shockhazards.
Where a two-prong wall receptacle is encountered,
contact a qualified electrician and have it replaced with
a properly grounded three-prong receptacle in accor-
dance with all local codes and ordinances.
WARNING!
Electrocution hazard.
Electricalgroundingrequired.
•
Do not remove the round grounding
prong from the plug.
•
Do not use extension cords or
ungrounded (two prong) adapters.
• Donotuseapowercordthatis
frayed or damaged.
•
Do not use a power strip.
Failure to follow these instructions may
result in fire, electrical shock or death.
7
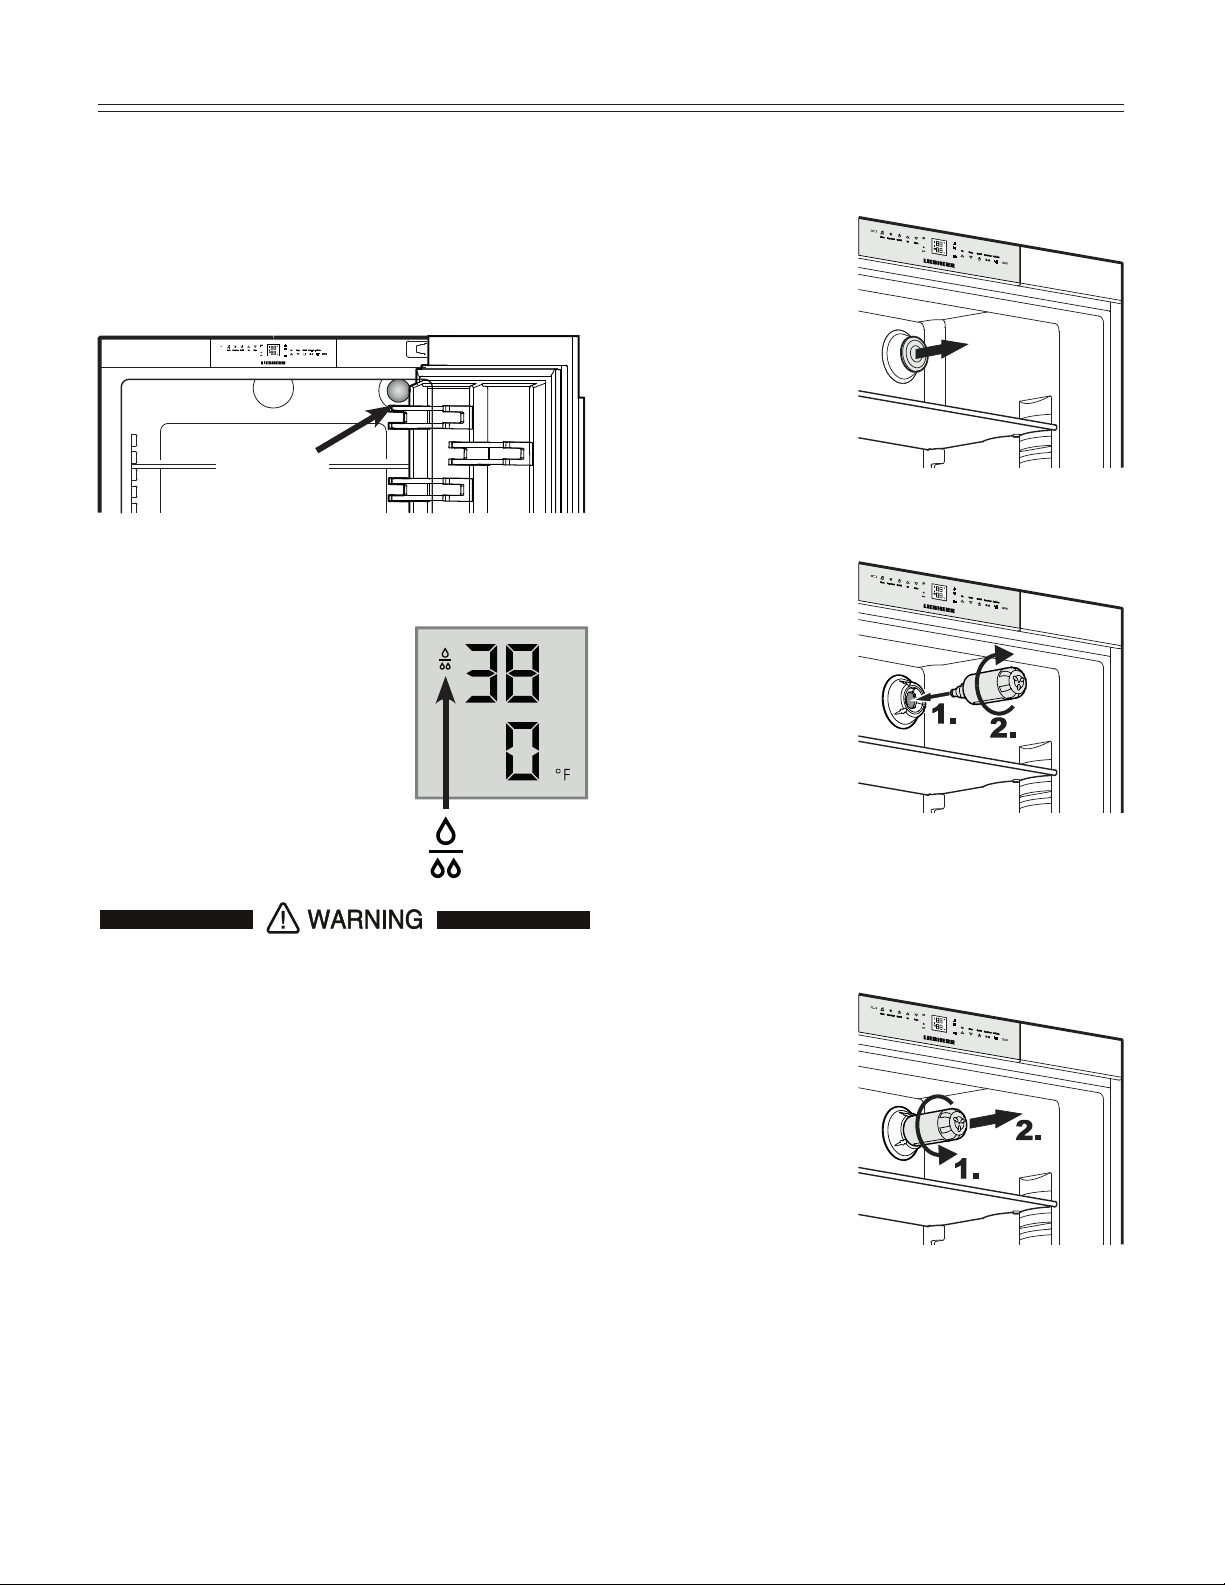
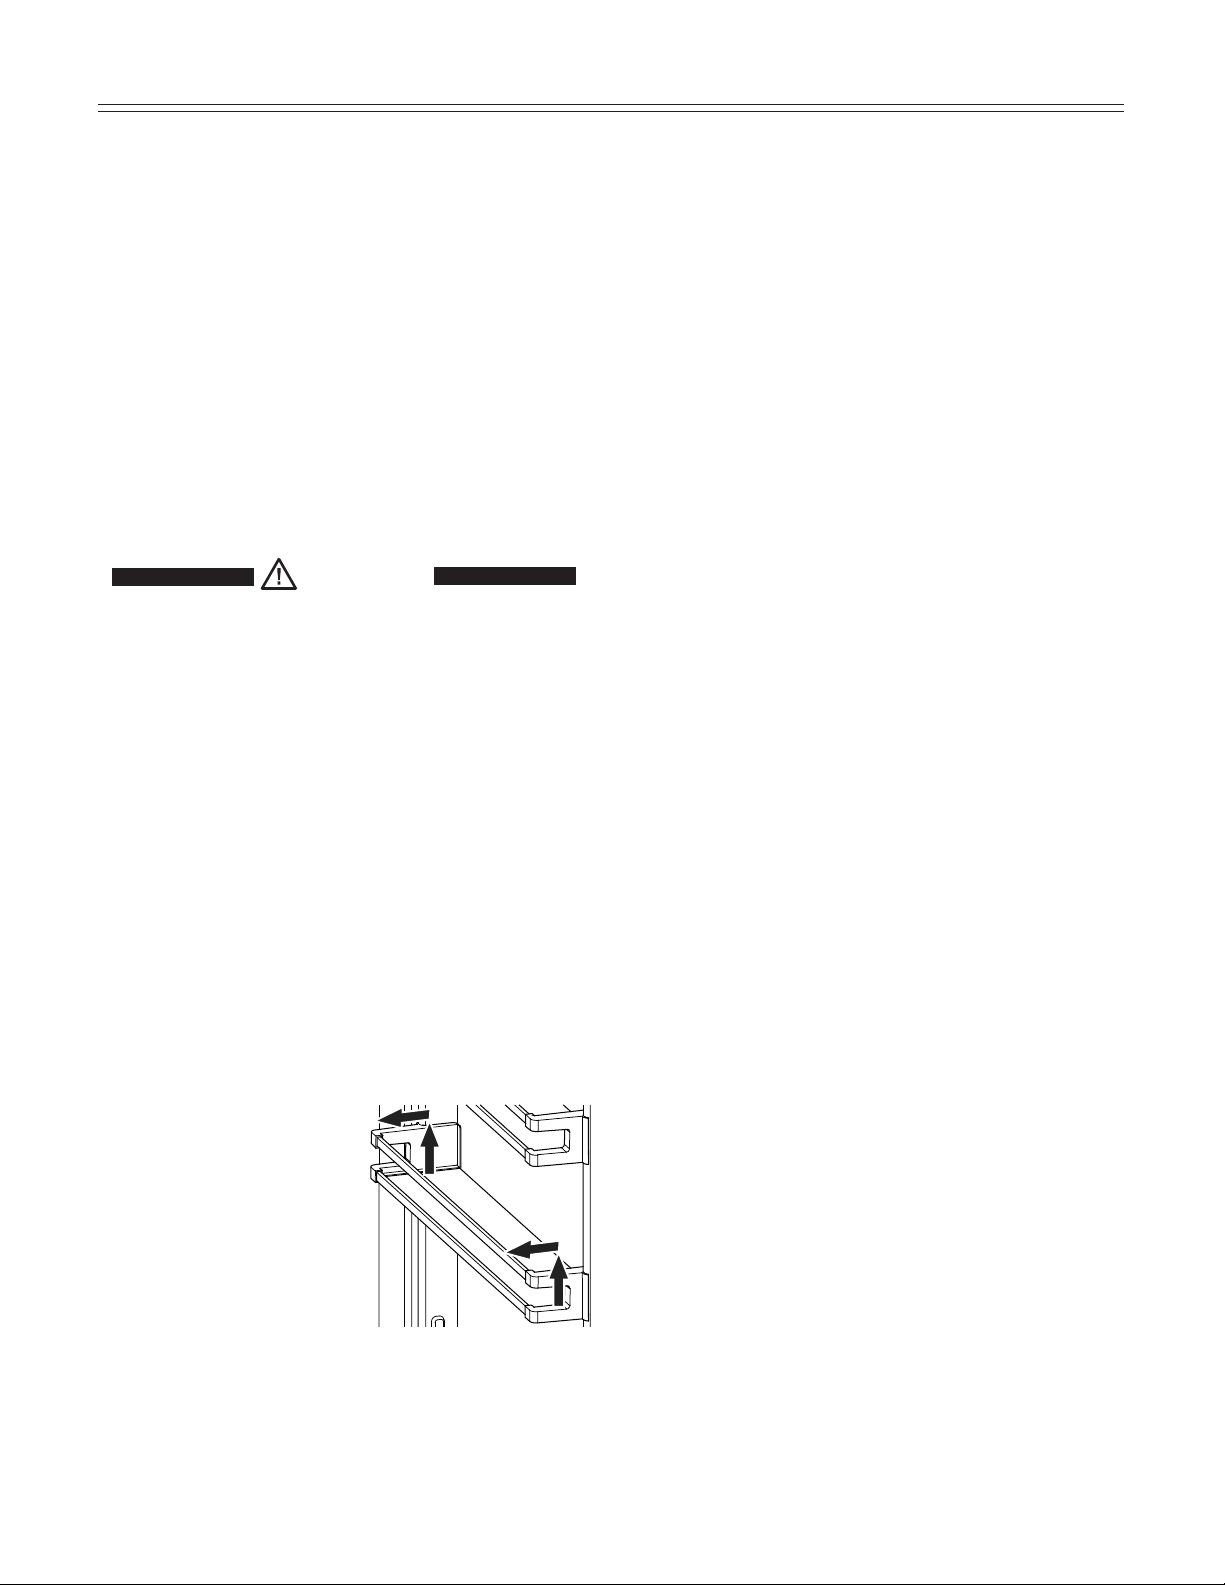
WaTer filTer
Water Filter - Figure 1
Beforeturningontheapplianceinstallthewaterfil-
ter provided in the interior rear wall of the refrigerator
compartment. This ensures good ice cube quality and
keeps the water circuit free of solids such as sand.
Water filter
location
Installing the Water
Filter - Figure 2 and Figure 3
1. Removecoverofthe
filter socket.
2. Insertthefilterand
turnit90°clockwise.
Removing the Water Filter -
Figure 4
3. Turnthefilter90°
counterclockwise
and remove.
Figure 1
Figure 2
Figure 3
Figure 4
IMPORTANT NOTE
Itisnotnecessarytoturnoffthewatersupply
when removing or installing the water filter.
Replacethefilterwhenthedrop
symbol appears on the tempera-
ture display.
Filterscanbeobtainedfromyour
LiebherrDealerorDistributor.
To avoid the risk of
bacteria growth,
the
water filter must be changed when the
waterdrop symbol appears on the display!

8
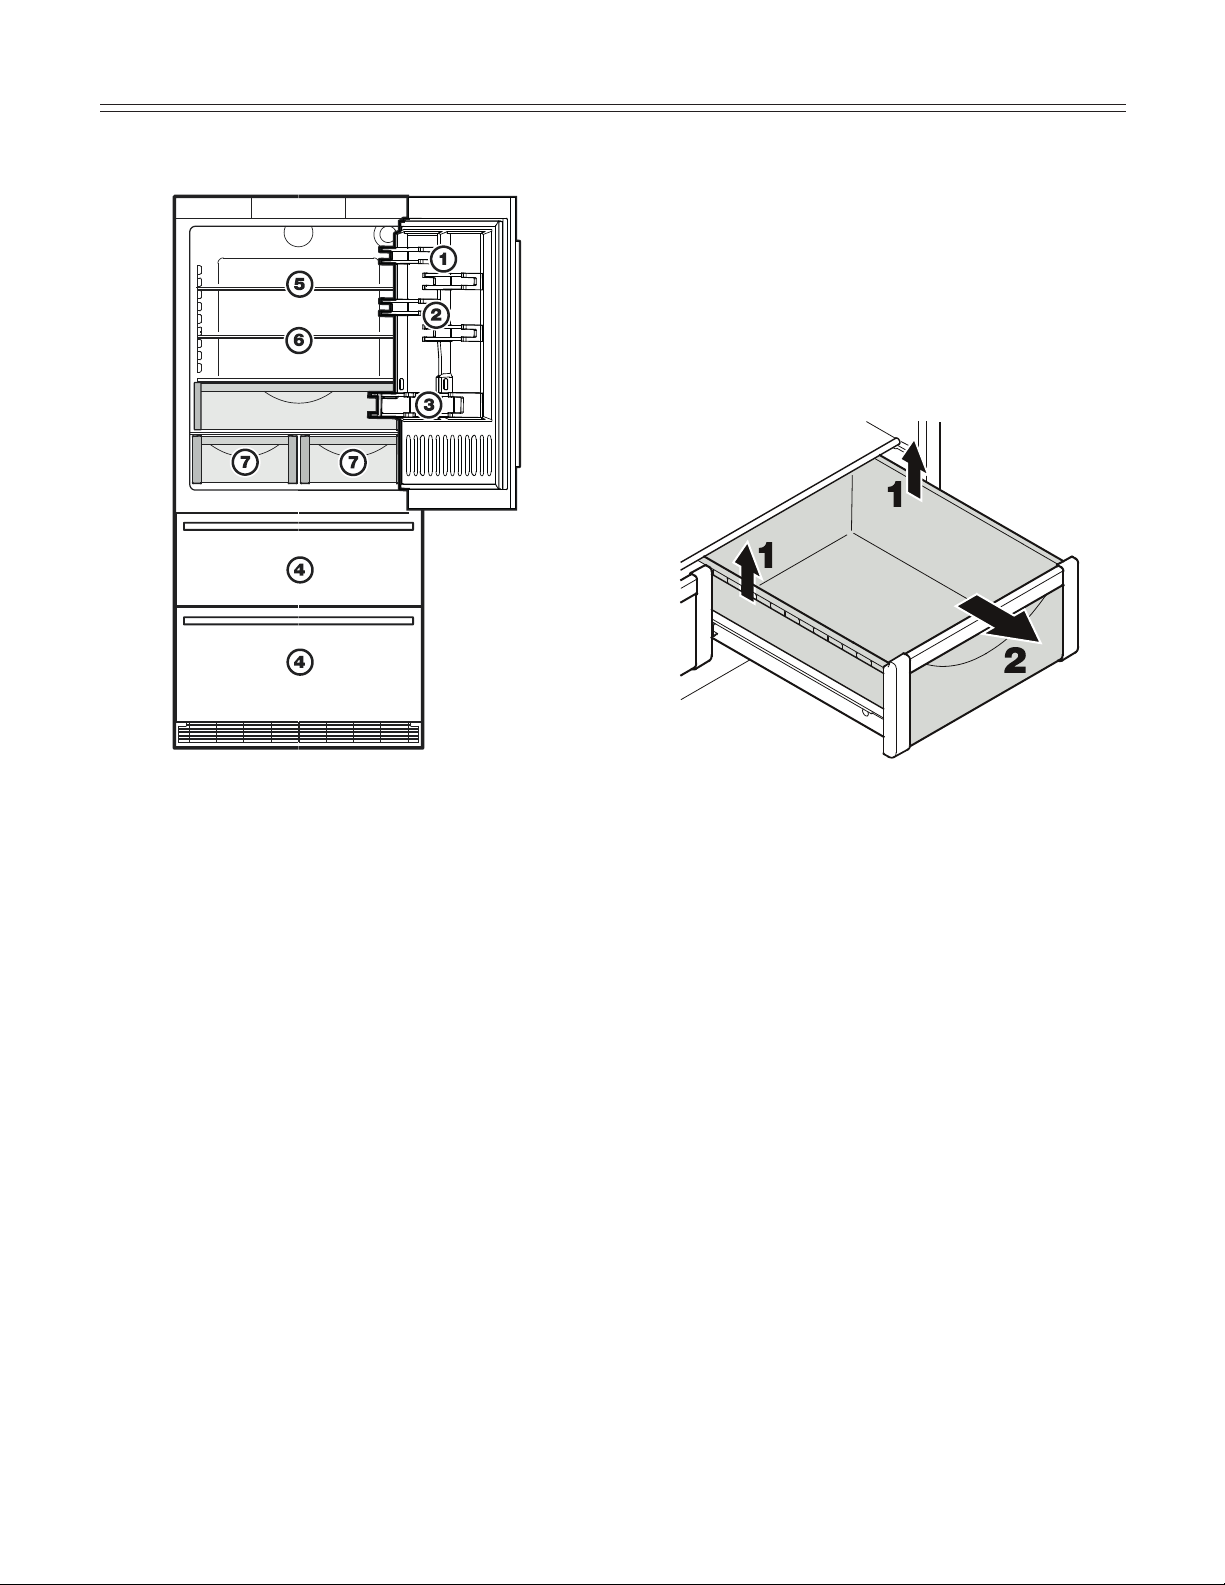
Description of Refrigerator
(1) OperatingandControlElements
(2) AdjustableDoorRacks
(3) AdjustableShelves
(4) GallonRack
(5) ModelPlate(behindtheVegetableBinontheleft
handside)
(6) Drawer
(7) VegetableDrawers
(8) WaterFilter
Description of Freezer
(9) UpperFreezerDrawer
(10) LowerFreezerDrawer
(11) IceMaker(intheinterioroftheUpperFreezer
Drawer)
(12) VentilationGrille
(13) Adjustable-HeightUnit(behindtheVentilation
Grille
(14) Lowerhinge
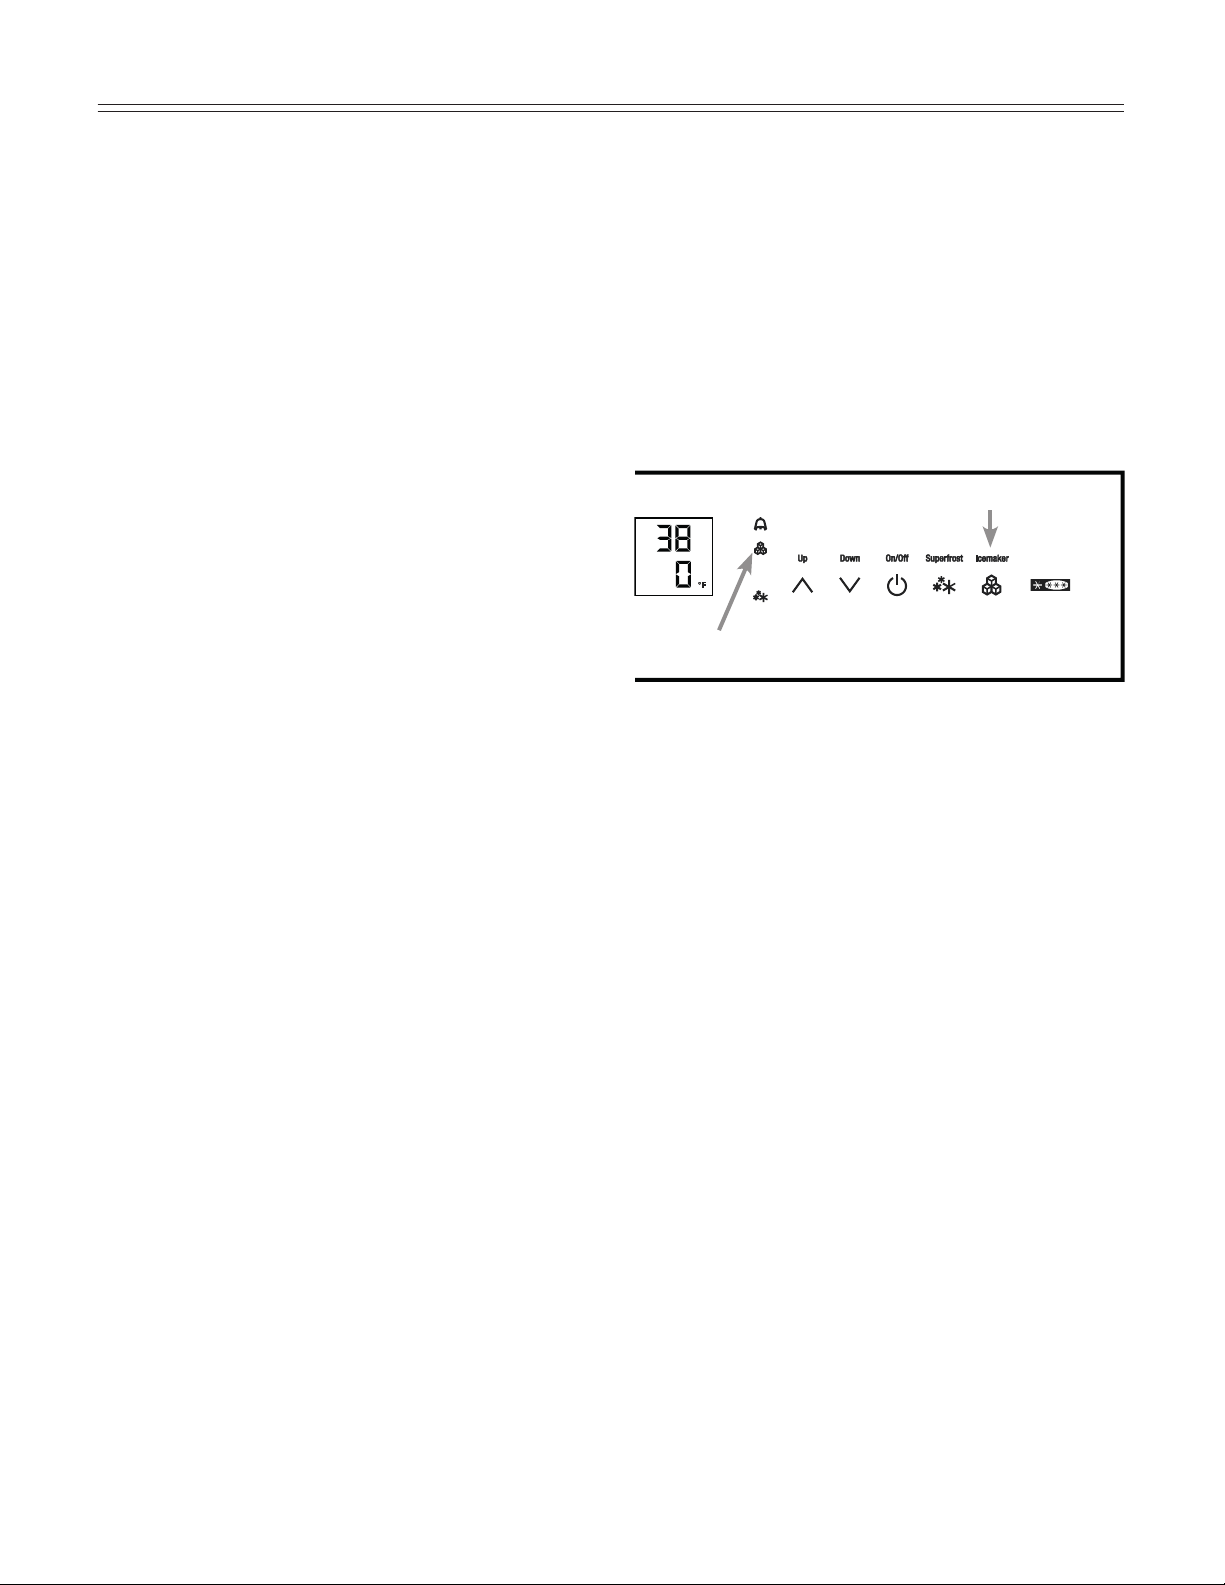
feaTures
Figure 5
Description of Appliance and Equipment - Figure 5

9
feaTures
Freezer operating icons
TemperatureUpcontrol(to
increasethefreezertempera-
ture)
TemperatureDowncontrol(to
reducethefreezertempera-
ture)
FreezerOn/Off
Superfrost
IceMakerOn/Off
Figure 6
Refrigerator operating icons
Alarmmute(refrigeratorand
freezer)
Supercool
RefrigeratorOn/Off
TemperatureUpcontrol(to
increase the refrigerator tem-
perature)
TemperatureDowncontrol(to
reduce the refrigerator tem-
perature)
Refrigerator
operating icons
Appliance
control icons
Freezer
operating icons
Temperature and control display
Figure 7
DisplaymodedegreesCelsius
DisplaymodedegreesFahrenheit
Refrigeratortemperaturedisplay
Freezertemperaturedisplay
Water filter has to be changed
Sabbathmodeisactivated
Menumodeisactivated
(forsettingadditionalfunctions)
Operating and Control Elements - Figure 6, Figure 7
Theelectroniccontrolpanelhasthenew“Touch capacitance technology”.Anyfunctioncanbeactivatedbyafin-
gertip on the symbol of the operating icons.
The exact contact point is between the symbol and its label
Appliance control icons
PowerFailureLED
AirFilterLED
WhenthisLEDlightsuptheair
filter in the toe kick area has to be
cleaned.
SupercoolingLED
ChildLockLED
AlarmLED
IceMakeronLED
SuperfrostLED
10
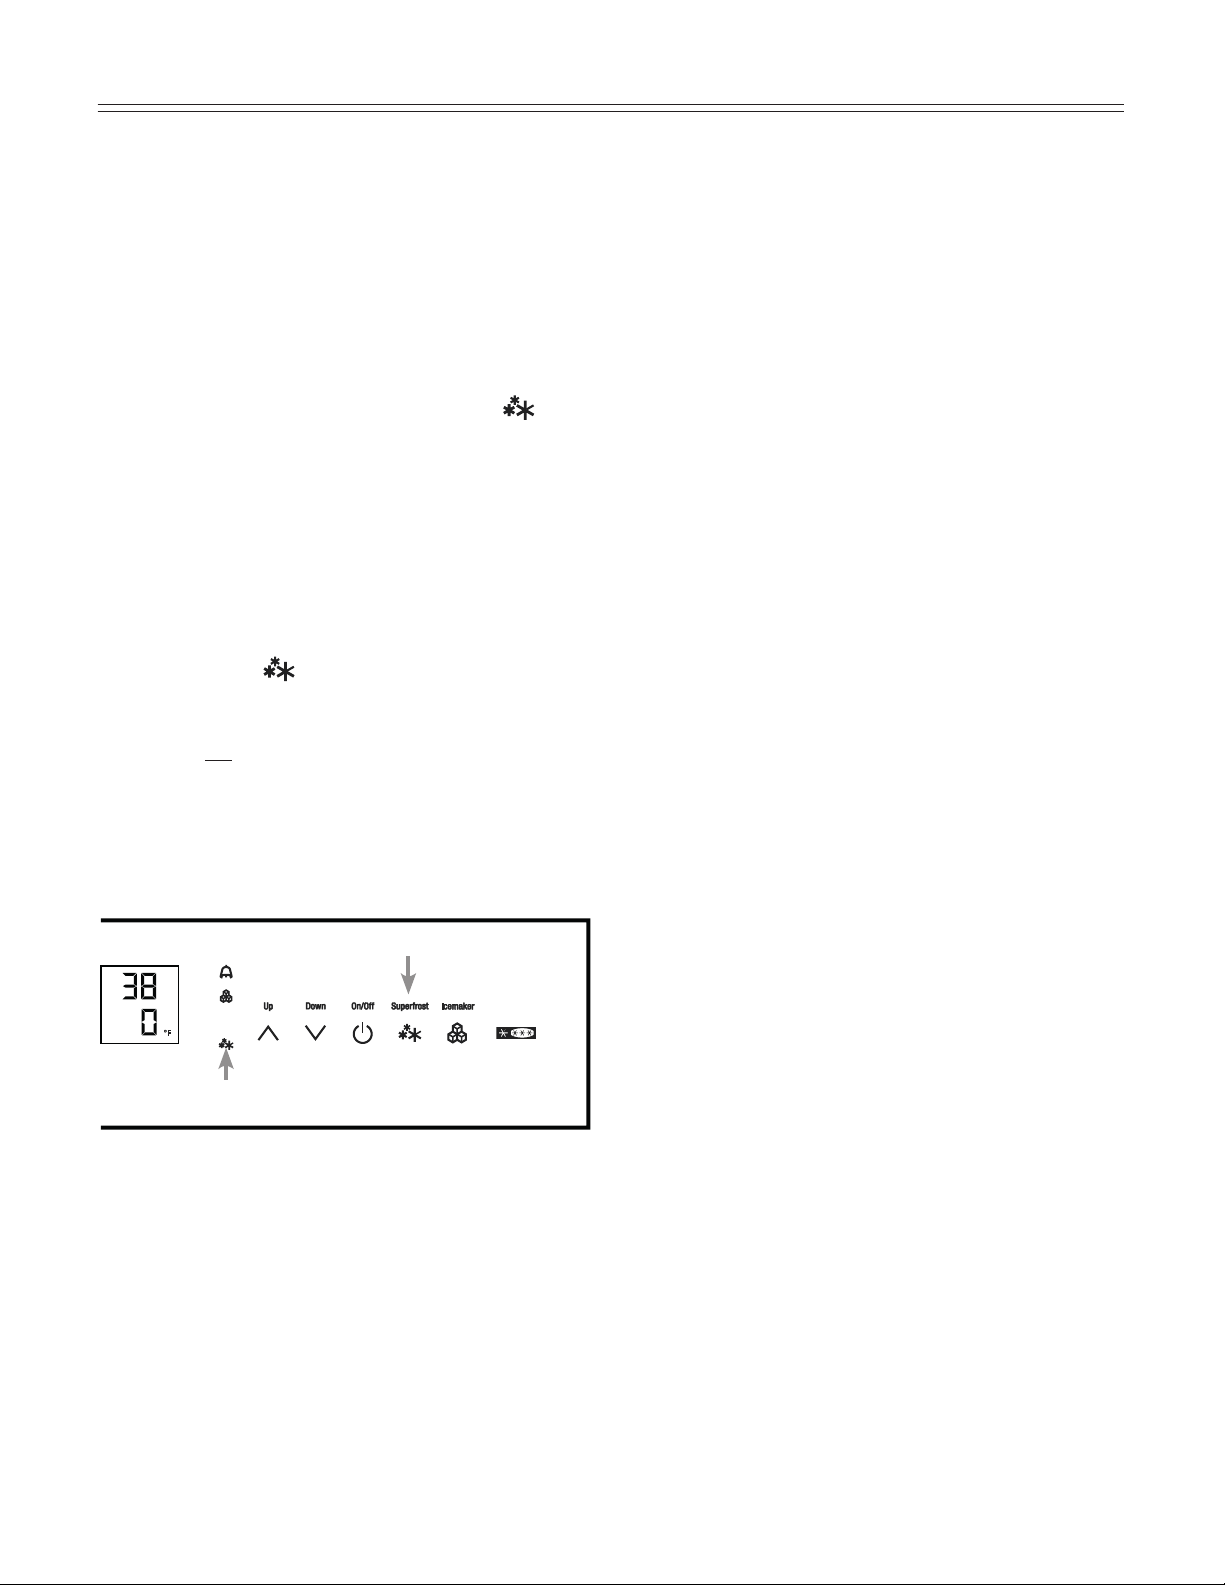
operaTion
Turning the Appliance On and
Off - Figure 8
Clean the appliance before turning it on for the first
time.SeeCleaning.
Donotplacefrozenfoodinthefreezeruntilthetemper-
atureshowsatleast0°F/-18°C.Therefrigeratorand
freezercompartmentscanbeoperatedseparately.
1. Turning on:
TouchtheRefrigeratorOn/Officon
andtheFreezerOn/Officon
sotheTemperatureDisplays light up.
The interior light will turn on if one of the refrigerator
doorsorfreezerdrawersareopen.
2. Turning off: To turn off the refrigerator or
freezer,touchthecorrespondingOn/officonfor
approximately 3 seconds so the temperature
display and interior lights go out.
Setting the Temperature - Figure 8
The appliance is pre-set for normal operation. We rec-
ommendtemperaturesof38°F(3°C)intherefrigerator
and0°F(-18°C)inthefreezer.
To reduce the temperature:
TouchtheDOWNicononthelefttoreducetherefrig-
eratortemperatureandtheDOWNiconontherightto
reducethefreezertemperature.
To increase the temperature:
TouchtheUPicononthelefttoincreasetherefrigera-
tortemperatureandontherighttoincreasethefreezer
temperature.
1. While you are entering the temperature, the set
temperature will flash on the display.
2. When you touch the temperature setting icons
for the first time, the most recent setting is dis-
played.
3. You can change the settings in increments of
1°F(1°C)bybrieflytouchingtheiconsagain.If
the icons are held the temperature setting will
change faster.
4. Approximatelyfivesecondsaftertheiconhas
been released, the display will automatically
showtheactualfreezingorcoolingtemperature.
5. Youcanchangethetemperatures:
• In the refrigerator –between36°Fand44°F(2°C
and6°C)and
• In the freezer–between-15°Fand7°F
(-27°Cand-14°C).
Figure 8
RefrigeratorOn/Officon
FreezerOn/Officon
Temperaturecontrolicons-Refrigerator
Temperaturecontrolicons-Freezer
Alarmicon
AlarmLED
Freezertemperature display
PowerfailureLED
SuperCoolicon
SuperCoolLED
11
operaTion
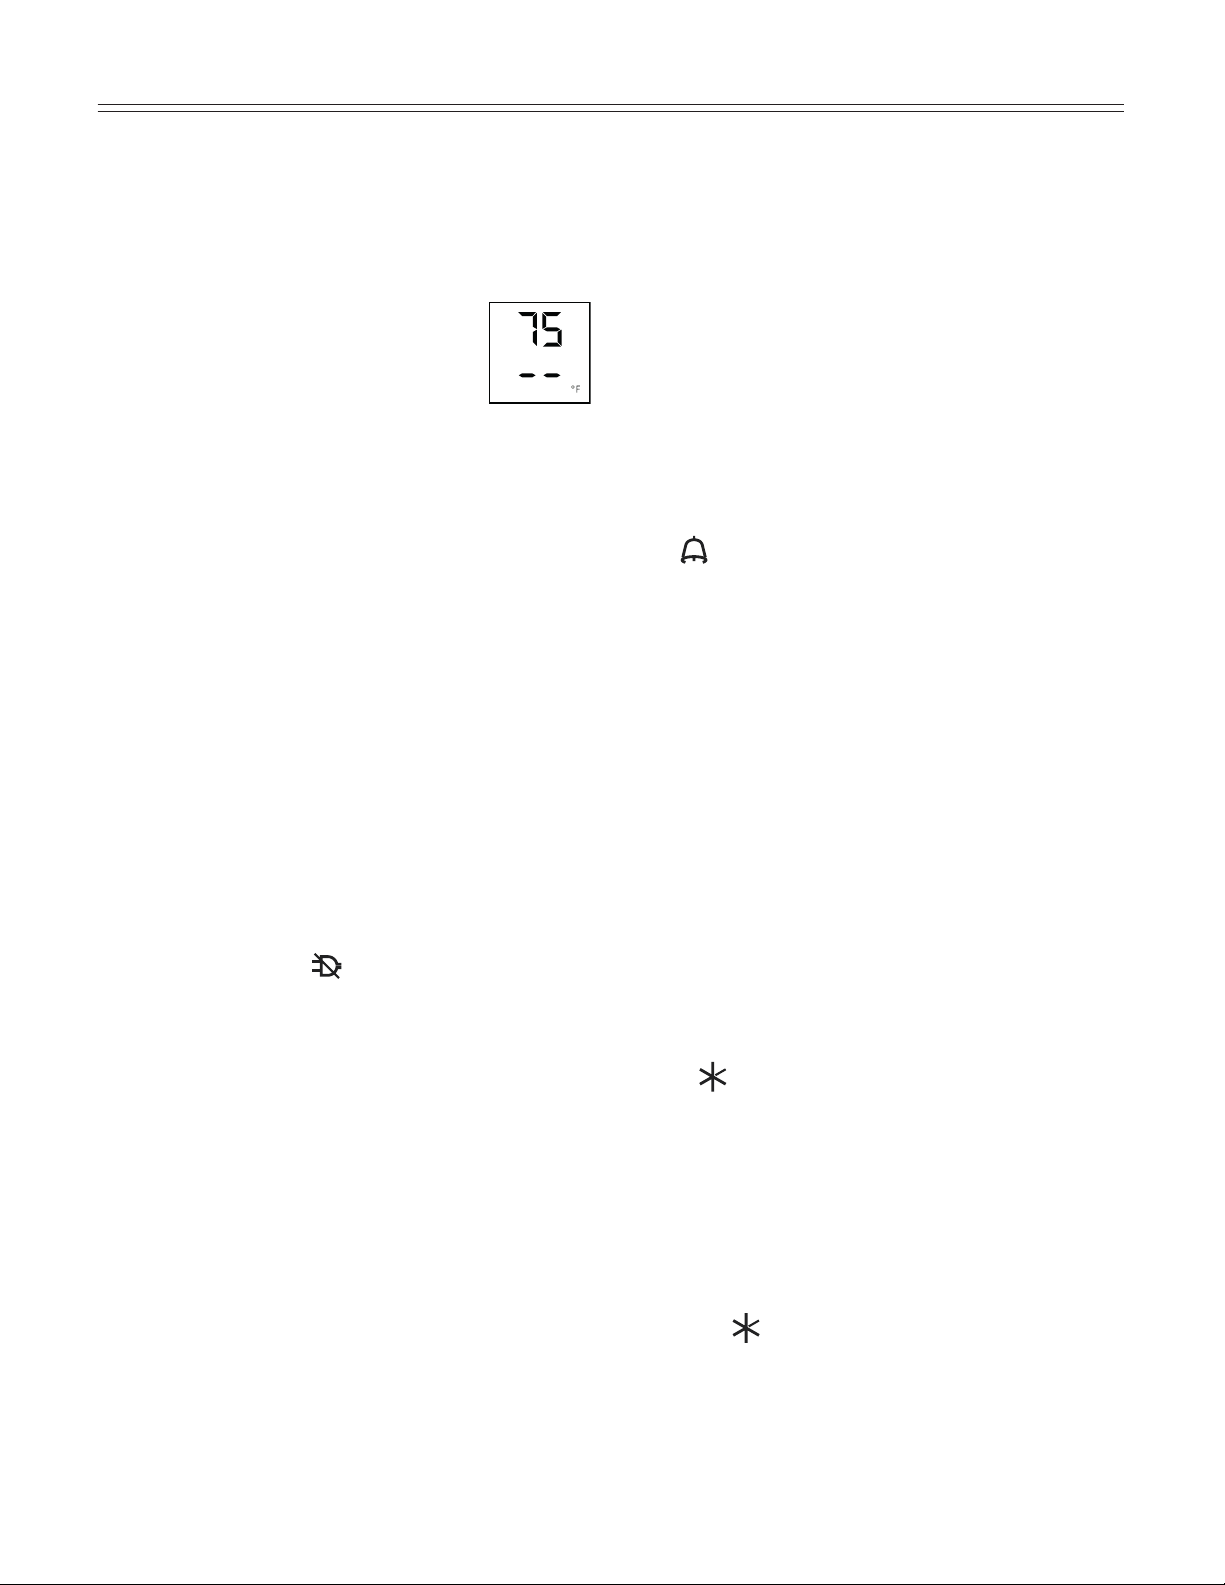
Temperature Display - Figure 8
Innormaloperation,thefollowingsettingswillbe
displayed:
• theaveragerefrigeratortemperature
• thewarmestfrozenfoodtemperature.
When starting up for the first time or when
the appliance is warm, dashes will appear
inthefreezertemperaturedisplay,untilthe
temperatureinthefreezercompartmentis
32°F(0°C).
Itwilltakebetweenthreeandeighthoursforthe
requiredtemperature,0°For38°F(-18°Cor3°C)to
be reached and displayed permanently in the display,
depending on the ambient conditions and the tempera-
ture setting.
The display will flash:
• ifyouchangethetemperatureor
• ifthetemperaturerisesbyseveraldegrees,indicat-
ingcoldloss,e.g.ifyouplacefresh,“warm”foodin
thefreezerorifyouremoveorrepackfrozenfood,
the temperature may rise for a short time due to
warmairflowingintothefreezer.
• If“F1” to “F5” appears in the display, the appliance
hasafault.Havethefaultnumberavailablewhen
you contact the customer service department.
Audible Alarm Signal - Figure 8
Theaudiblealarmsignalhelpstoprotectfrozenfood
and to save energy.
The audible alarm signal is switched off by touching
the alarm icon.
Audible door alarm
This sounds when the door has been left open
forlongerthanabout180seconds.Thesound
switch-off function is active as long as the door is
left open. The alarm automatically switches back to
standby when the door is shut.
Audible/visual temperature alarm
Italwayssoundsifthefreezertemperatureisnot
low enough. The temperature display and the alarm
LED
flashes at the same time.
Thiscanbecausedby:
- warm,freshfoodbeingplacedinthefreezer;
- too much warm air from the outside entering
whenre-arrangingorremovingfrozenfood,
- a fault in the appliance.
The temperature display will continue to flash until
thecauseofthealarmhasbeenrectied.Itwill
then stop flashing and light up continually. The au-
dible warning signal is now automatically reset.
Power Failure/Frost-Control
Display - Figure 8
IfthepowerfailureLED islit,thismeansthefreezer
temperature has risen too high during the last few
hoursordaysduetoapowerfailure.Thefreezertem-
perature display flashes at the same time.
• IfyoutouchtheAlarm icon now, the highest tem-
perature registered during the power failure will be
displayed.
• Checkthequalityofthefoodincaseithasbecome
too warm or even defrosted.
• Thehighesttemperaturewillappearforapproxi-
matelyoneminute.Afterthat,theactualtemperature
inthefreezerwillreappear.
ThedisplaycanbeturnedoffbytouchingtheAlarm
icon again.
Supercool - Figure 8
TouchingtheSupercooliconswitchestherefrigerator
compartmenttomaximumcooling.Itisrecommended
particularly if you wish to cool large quantities of food,
drinks, freshly baked goods or meals rapidly.
• Turning on:TouchtheSupercoolicon briefly so the
LED
turns on. The refrigerator temperature will
drop to its lowest value.
IMPORTANT
The Supercool function uses slightly more
energy. After approximately six hours, however,
the refrigerator switches back automatically to
normal energy-saving operation. If required, the
Supercooling function can be turned off sooner.
• Turning off:TouchtheSupercooliconagainuntil
theLED
turns off.
12
operaTion
How to activate the setup mode - Figure 9
• TouchtheSuperfrost icon for approximately five
seconds
- the SuperfrostLED
turnsonfor5seconds
-after5seconds
will flash in the display.
The appliance is in the setup mode now.
You can select the setup mode functions by touching
thefreezercompartmentUp/Down icons.
Note
In the setup mode the display will flash continuously.
Exit setup mode:
• TouchthefreezercompartmentOn/Off icon. The
appliance will change back to normal operation.
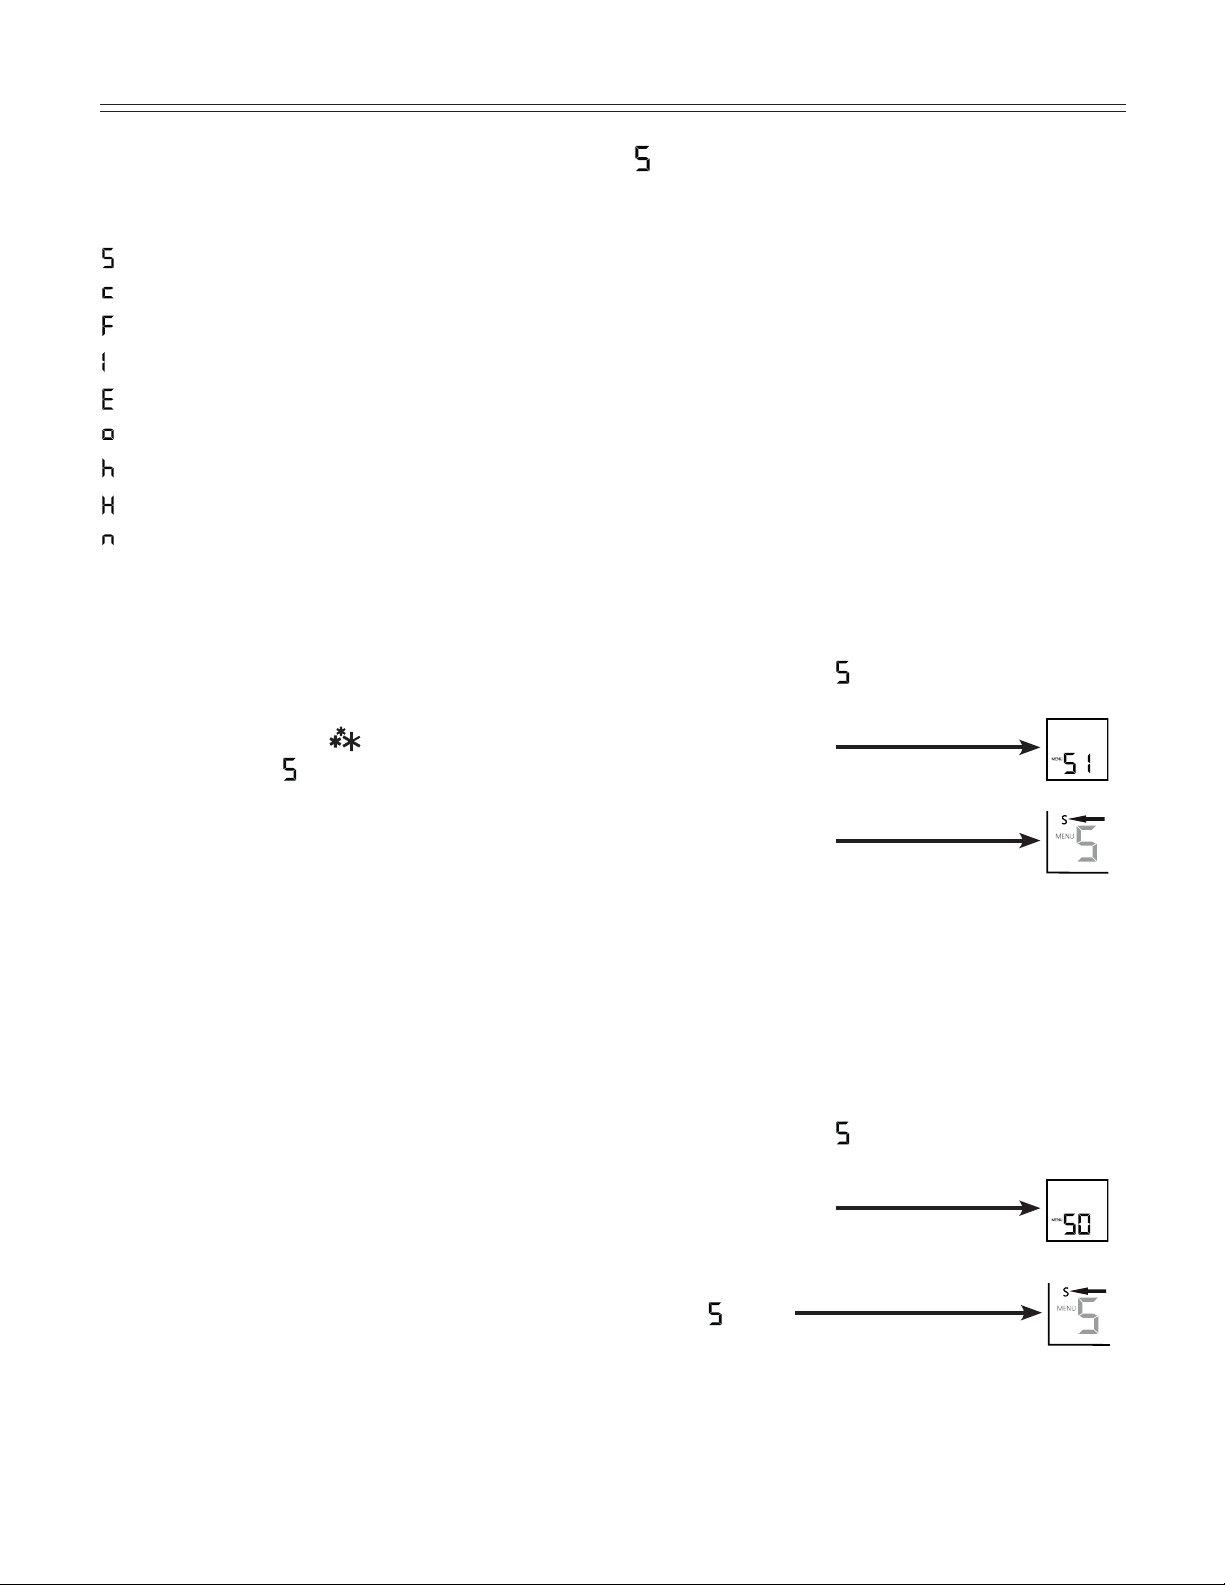
Setup Mode
Inthesetupmodeyoucanactivatethefollowingfunc-
tions:
=Sabbathmode
= Child proof lock
=Dropsymbolreset
=Icemakerfunctiontest(forservicepersonnelonly)
=WaterquantityforIcecubetray
= Temperature display mode
=Displaybrightness
=Lowerhingeheatingcontrol
=ResetAirfilterLED
= Sabbath mode
ThisfeatureconsiderstheReligiousrequirementson
SabbathorHolidays.WhentheSabbathmodeisactive
some functions of the electronic controls are switched
off.
The door can be opened and closed at any
time.
• Thelightingremainsoff.
• Thecoolingfanremainsinitsactualstate:Ifitison
it remains on, if it is off it remains off.
• Thereisnodooralarm.
• Thereisnotemperaturealarm.
• Defrostcyclesareindependentofthenumberof
times and length of door openings.
• TheunitwillreturnintoSabbathModeafterapower
failure.
How to activate the Sabbath mode
• ActivatethesetupmodebytouchingtheSuperFrost
iconfor5seconds.
- the display shows
• TouchtheSuperFrost icon
- the display shows
• TouchtheSuperFrost icon again
- the display shows
-theSabbathmodeisactivated.
• Exitsetupmodebytouchingthe
freezercompartmentOn/Off icon.
Sabbathmodeswitchesoffautomaticallyafter
120hoursifitisnotmanuallyswitchedoffbeforehand.
How to deactivate the Sabbath mode
• ActivatethesetupmodebytouchingtheSuperFrost
iconfor5seconds.
- the display shows
• TouchtheSuperFrost icon
- the display shows
• TouchtheSuperFrost icon again
- the
symbol
in the display disappears,
theSabbathmodeisdeactivated.
• Exitsetupmodebytouchingthe
freezercompartmentOn/Off icon.
13
operaTion
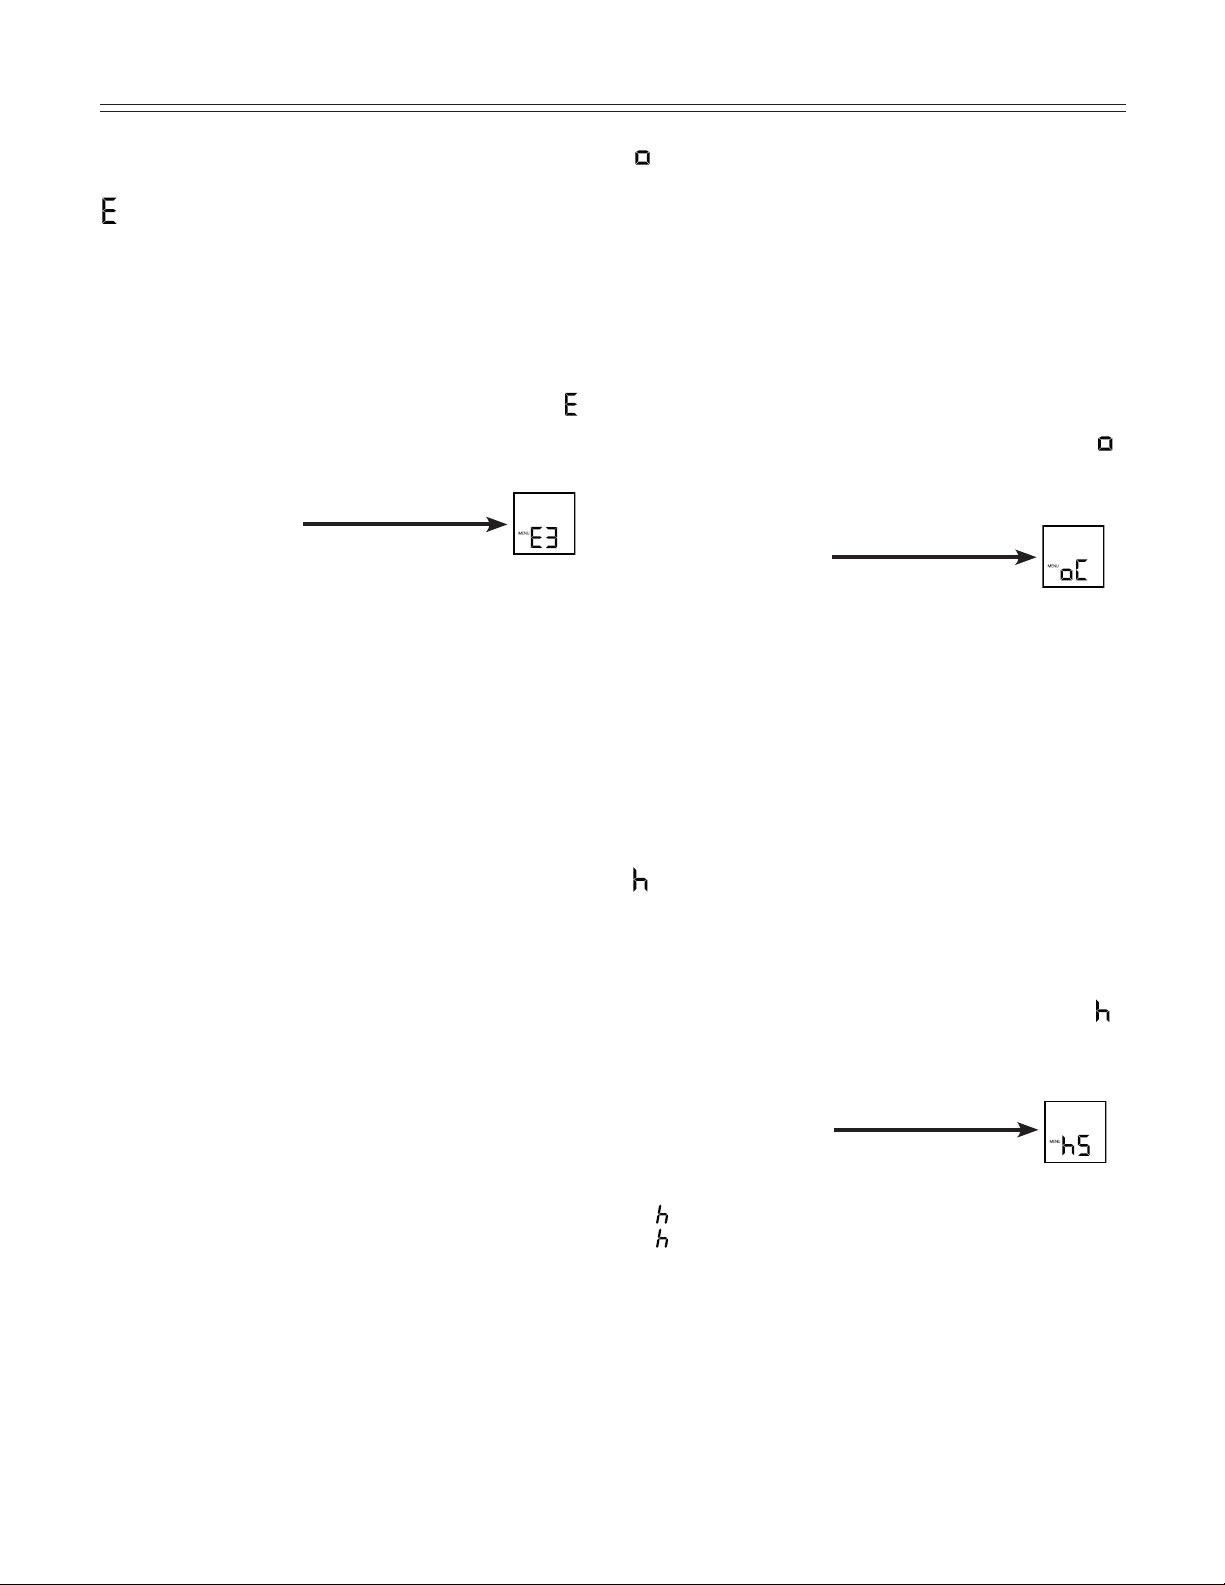
= Drop symbol reset
AftertheWaterfilterhasbeen
changed the drop symbol on the
display must be reset.
How to reset the drop symbol
• ActivatethesetupmodebytouchingtheSuperfrost
iconfor5seconds.
• Touchthefreezer compartment Down icon until
appearsinthefreezertemperaturedisplay.
• TouchtheSuperfrost icon
- the display shows
• TouchtheSuperfrost icon again
- the display shows
• Thedropsymboldisappears.
• Exitsetupmodebytouchingthefreezercompart-
ment On/Off icon.
= Ice maker function test
Activationbyservicepersonnelonly.
= Child lock
The child lock is designed to protect the appliance
from being turned off accidentally.
How to activate the child lock
• ActivatethesetupmodebytouchingtheSuperfrost
iconfor5seconds
• Touch the freezer compartment Down icon until
appearsinthefreezertemperaturedisplay.
• TouchtheSuperfrost icon
- the display shows
• TouchtheSuperfrost icon again
-theLED
is lit and the child lock is activated.
• Exitsetupmodebytouchingthefreezercompart-
ment On/Off icon.
How to deactivate the child lock
• ActivatethesetupmodebytouchingtheSuperfrost
iconfor5seconds.
- the display shows
• TouchtheSuperfrost icon
- the display shows
• TouchtheSuperfrost icon again
-theLED
goes out. The child lock is deactivated.
• Exitsetupmodebytouchingthefreezercompart-
ment On/Off icon.
Figure 9
FreezerOn/Officon
FreezercompartmentUp/Downicons
SuperFrosticon
ChildlockLED
14
operaTion
= Temperature display mode
You can choose the unit of temperature for the dis-
playindegreesFahrenheitordegreesCelsius.
Note
The factory setting is degrees Fahrenheit.
How to change the temperature display to
degrees Celsius
• ActivatethesetupmodebytouchingtheSuperfrost
iconfor5seconds.
• Touchthefreezer compartment Down icon until
appearsinthefreezertemperaturedisplay.
• TouchtheSuperfrost icon
- the display shows
• TouchtheSuperfrost icon again
- the temperature reading is now displayed in degree
Celsius.
• Exitsetupmodebytouchingthefreezercompart-
ment On/Off icon.
Note
To change the temperature display back to degrees
Fahrenheit, follow the steps above.
= WaterquantityforIcecubetray
IftheproducedicecubesoftheIceMakeraretoo
small,theinflowingwaterquantitycanbeadjusted.
Howtoadjustthewaterquantity
• ActivatethesetupmodebytouchingtheSuperfrost
iconfor5seconds.
• Touch the freezer compartment Down icon until
appearsinthefreezertemperaturedisplay.
• TouchtheSuperfrost icon
- the display shows
• Touchfreezer compartment Up icon
once only so
E 4 appears in the display.
IMPORTANT
Do not increase for more than one step. If the
adjusted value is too high the ice cube tray of the
Ice Maker could overflow.
• TouchtheSuperfrost icon again.
• Exitsetupmodebytouchingthefreezercompart-
ment On/Off icon.
Checktheicecubesizewithinthenextdays.Ifthe
ice cubes are still smaller as desired, follow the steps
above again.
Setup Mode - Figure 10
= Display brightness
How to adjust the display brightness
• ActivatethesetupmodebytouchingtheSuperfrost
iconfor5seconds.
• Touch the freezer compartment Down icon until
appearsinthefreezertemperaturedisplay.
• TouchtheSuperfrost icon
- the display shows
• Touchfreezer compartment
Up/Down icons to select
0 = minimum to
5 = maximum brightness
• TouchtheSuperfrost icon at the desired value.
• Exitsetupmodebytouchingthefreezercompart-
ment On/Off icon.

15
operaTion
= Lowerhingeheatingcontrol
Ifcondensedwaterappearsinthelowerhingearea
oronthebaseplatebetweenrefrigeratorandfreezer
compartment increase the output of the heating located
behind the base plate.
The factory setting is set to
= medium output
How to change the heating output
• ActivatethesetupmodebytouchingtheSuperfrost
iconfor5seconds
• Touch the freezer compartment Down icon until
appearsinthefreezertemperaturedisplay.
• TouchtheSuperfrost icon
- the display shows
• Touchfreezer compartment
Up/Down icons to select
= at slight condensation
= at heavy condensation
= heating off
• TouchtheSuperfrost icon at the desired value.
• Exitsetupmodebytouchingthefreezercompart-
ment On/Off icon.
Note
With normal ambient conditions no condensation will
appear. With high humidity and low ambient tempera-
ture this feature helps to prevent condensation.
= ResetairfilterLED
Aftertheairfilterinthetoekickareahasbeencleaned
theairfilterLEDmustbereset.Forhowtocleantheair
filterrefertochapter“Cleaning”.
HowtoresettheairfilterLED
• ActivatethesetupmodebytouchingtheSuperfrost
iconfor5seconds.
• Touchthefreezer compartment Down icon until
appearsinthefreezertemperaturedisplay.
• TouchtheSuperfrost icon
- the display shows
• TouchtheSuperfrost icon again
- the display shows
• TheairfilterLED disappears.
• Exitsetupmodebytouchingthefreezercompart-
ment On/Off icon.
Figure 10
SuperFrosticon
FreezerOn/Officon
FreezercompartmentUp/Downicons
Freezertemperature
display
16
Shelf Arrangement
refrigeraTor ComparTmenT
To remove the vegetable drawer
Pullthedrawerstraightout,gripatthebackandliftout
- Figure 12.
To install the vegetable drawer
Placethedrawerontherails.Therailsmustbefully
extendedandalignedwiththefrontofthedrawer.Slide
the drawer in.
Arranging Food - Figure 11
Figure 12
(1) Butter,cheese
(2) Eggs,cans,drinks,bottles
(3) Galloncontainers
(4) Frozenfood,icecubes
(5) Meatandsausageproducts,dairyproducts
(6) Bakedgoods,pre-cookedmeals
(7) Fruit,vegetables,salad
IMPORTANT
• Liquids and food which give off or absorb odors and
flavors should always be stored covered or in closed
containers.
• High-percentage alcohols should be tightly sealed
and stored upright.
• Fruit, vegetables and salad can be stored unpacked
in the bins.
Figure 11
refrigeraTor ComparTmenT
17
refrigeraTor ComparTmenT
Interior Light
The interior light is located at the left, right and top in
the refrigerator compartment (Figure 15) and above
eachdrawerinthefreezercomartment.Itturnsonif
oneofthedoorsoronefreezerdrawerisopened.
The light turns off automatically if one of the doors or
onefreezerdrawerhasbeenopenedforapproximately
15minutes.Theaudiblealarmsoundsatthesame
time.
ThelightintensityoftheLEDlightcorrespondsto
laser class 1/1M.
IMPORTANT
The light cover may only be removed by customer
service staff.
CAUTION!
Risk of eye damage.
If the cover is removed, do not look
directly at the light through optical lenses
from a close distance.
Figure 15
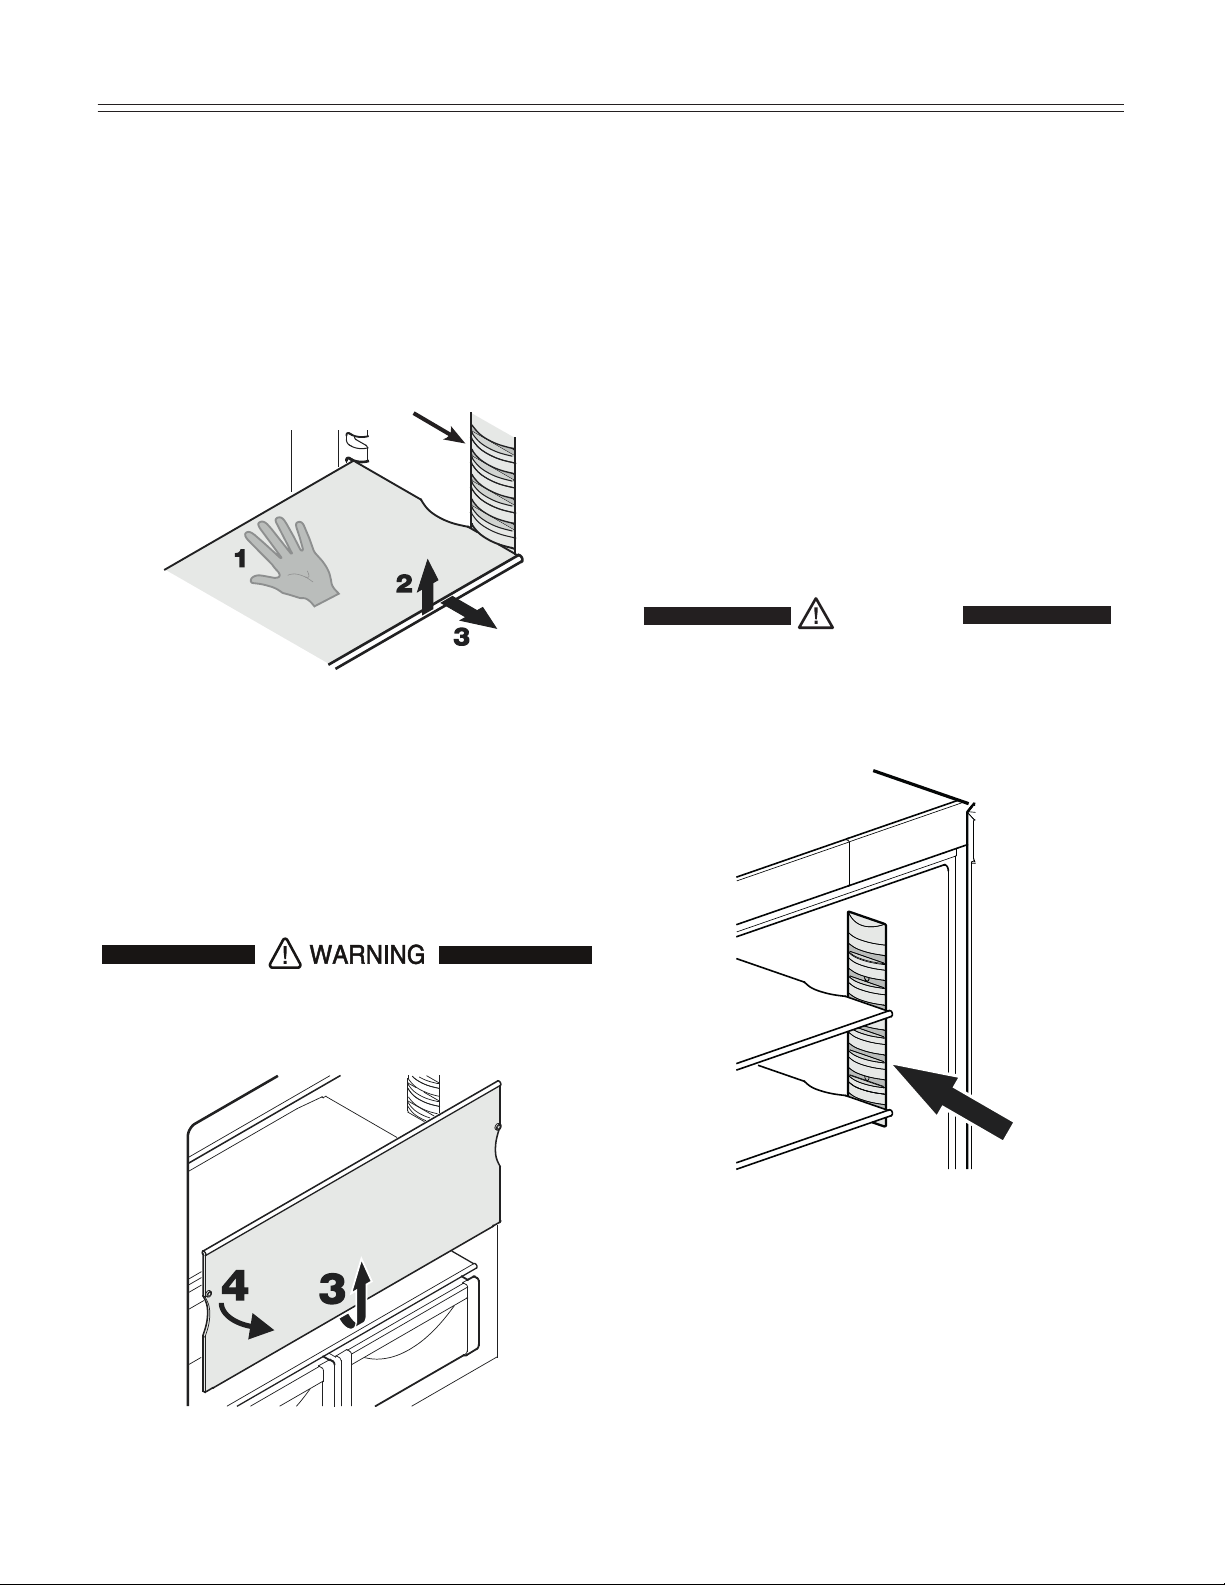
Removing the shelves - Figure 14
1.Followthefirstthreestepsinthechapterabove.
2.Lifttheshelfdownandstopjustovertheupperveg-
etable bin.
3.Movethefrontoftheshelfupwardsuntiltheshelfis
in a vertical position.
4. Turn the shelf out at left and remove.
To avoid it falling down, always hold the shelf
with both hands when removing.
Repositioning the shelves - Figure 13
1.Holdtheshelfunderneathwithyourhandtoavoid
from tipping down backwards when removing.
2.Lifttheshelfatthefront.
3.Removetheshelfforwarduntilthecircularcutoutof
the shelf is in line with the interior light cover.
4.Lifttheshelfupordownandreplaceinthedesired
position.
Figure 13
Interiorlightcover
Figure 14
18
freezer ComparTmenT
Figure 16
Removing the Freezer
Compartment Containers
Thecontainersofbothfreezerdrawerscanbe
removed.
• Unlatchthecontainerontheleftandrightcornersby
pullingupwards(1)- Figure 17.
• Slidethecontainerbackwards(2)- Figure 17.
Figure 17
• Tiltthecontaineratanangleandremove-
Figure 18.
Installthecontainerinthereverseorder.
Figure 18
Freezer Compartment
Description
The ice maker is located in the upper drawer on the left
side.
The ice cubes fall out of the ice maker into the drawer.
The upper drawer is divided by a partition wall for stor-
ingicecubesintheleftpartofthedrawer(Figure 16).
Ifyouneedmoreicecubestoragespace,pullupthe
partitionwallandrefitontheadjacentrail(Figure 16).
Ifyouneedthewholedrawerforicecubestorage,the
partition can be removed by pulling it upwards and out.
Ifyouneedthewholeupperdrawerforfreezingand
storingfood,turnofftheicemaker(seechapter
“TurningtheIceMakerOnandOff”).
Thebottomdrawerisintendedforfreezingandstoring
food.Icecubescanalsobestoredinthisdrawer.
Spaceforicecubes
19
freezer ComparTmenT
Freezing
Freshfoodshouldbefrozencompletelyandasrapidly
aspossible.ThisisprovidedbytheSuperfrostfeature
and ensures that the nutritional value, appearance and
flavor of the food remains intact.
Freezing with Superfrost - Figure 19
• TouchtheSuperfrosticonbrieflysotheLED turns
on.
• Wait24hours.
• Thenplacethefreshfoodinsidethefreezer.
• TheSuperfrostfunctionturnsoffautomatically.
Dependingonthequantityoffoodplacedinthe
freezer,thiswillnormallybebetween30andmaxi-
mumof65hours.
Thefreezingprocessisnowcomplete;the
SuperfrostLED
willturnoff,andthefreezerwill
change back to normal energy-saving operation.
IMPORTANT
You should not turn on the Superfrost function:
• when placing frozen food in the freezer;
• when freezing up to approximately 4-1/2 lbs (2 kg)
fresh food daily.
Figure 19
Freezing and Storage
• Packfrozenfoodinstandardfreezerbagsorreus-
able plastic, metal or aluminum containers.
• Donotallowfreshfoodwhichistobefrozentocome
intocontactwithfoodalreadyfrozen.Alwayskeep
packages dry in order to avoid them sticking togeth-
er.
• Alwayswritethedateandcontentsonthepackage
and do not exceed the stated storage time for the
food. This prevents spoiling.
• Packfoodwhichyouarefreezingyourselfinquanti-
ties right for your household. To ensure the food
freezesrightthroughquickly,thefollowingquantities
shouldnotbeexceededperpackage:
- fruit,vegetables:upto2-1/4lbs(1kg);
- meat:upto5-1/2lbs(2.5kg).
• Donotfreezebottlesandcanswhichcontaincar-
bonateddrinksastheymightburst.Drinkscanbe
cooled down quickly, but take the bottles out of the
freezercompartmentafteranhouratthemost.
• Onlytakeoutasmuchfoodasneededforthawing.
Cook food which has been thawed as quickly as
possible.Frozenfoodcanbethawedinthefollowing
ways:
- in a microwave oven
- intherefrigerator:thesaferwaytothawfood
becausethereislesschanceofbacteriagrowth.Use
this method for high density food such as roasts or
poultry.
SuperFrostLED
SuperFrosticon

20
iCemaker
Safety Instructions and
Warnings for the Automatic Ice
Maker
• Theicemakerisdesignedexclusivelytomakeice
cubes in quantities needed by a household.
• Allrepairsandworkontheicemakermayonlybe
done by customer service personnel or other appro-
priately trained personnel.
• Do not consume or use the first three batches
of ice. This applies both to using the appliance
for the first time and also using it after it has not
been used for a long period of time.
• The manufacturer cannot accept liability for
damagecausedbyequipmentorwaterlines
between the solenoid valve and the water supply.
• Theicemakerwillonlymakeicecubesifthefreezer
compartmentisoperatingandbothfreezerdrawers
are completely closed.
Ice Maker Description
Afteryoustarttheicemakerforthefirsttime,itmay
take up to 24 hours before the first ice cubes are ready.
The ice cubes fall out of the ice maker into the drawer
(seechapter“Freezercompartmentdescription”).
IMPORTANT
The first three batches of ice must not be consumed
or used.
When the ice reaches a certain level in the drawer, the
appliance stops producing ice automatically.
Theproductioncapacityis100-120icecubesin
24hoursatatemperatureof0°F(-18°C)insidethe
freezercompartment.
Tohavethemaximumcapacityofapprox.150ice
cubesin24hours,activatetheSuperFrostfunction.
Be aware that this increases the energy consump-
tion because the compressor will run constantly.
Note
If the IceMaker LED flashes, the ice maker is not
being supplied with water. Check if the shut off
valve of the water supply is opened.
Figure 20
SuperFrosticon
FreezercompartmentUp/Downicons
IceMakericon
IceMakerLED
Turning the Ice Maker On and
Off
(Figure 20)
To turn the ice maker on
• TouchtheIceMaker icon so the IceMakerLED
comes on.
To turn the ice maker off
Ifyoudonotneedanyicecubes,theicemakercanbe
turnedoffindependentlyofthefreezercompartment.
• TouchtheIceMakericonsotheIceMakerLEDgoes
out.
Ice maker at vacations
Seechapter“Vacationtips”
21
Cleaning
WARNING!
• Topreventpossibleinjuryduetoan
electrical shock, be sure to disconnect the
power cord or turn off the circuit breaker
before cleaning the appliance.
• Toavoidinjuryordamage,donotusesteam
cleaningequipmenttocleantheappliance.
• Toavoidshort-circuits,ensurenocleaning
water penetrates into the electrical
components when cleaning the appliance.
Do not use a sponge or cloth that is overly
wet.
Do not use abrasive or scouring sponges. Do not use
concentrated cleaning agents. Never use abrasive or
acid cleaners or chemical solvents.
• Removeallfoodfromtherefrigeratorandfreezer
compartments and store in a cool place temporarily.
Storefrozenfoodinotherfreezersifavailable.
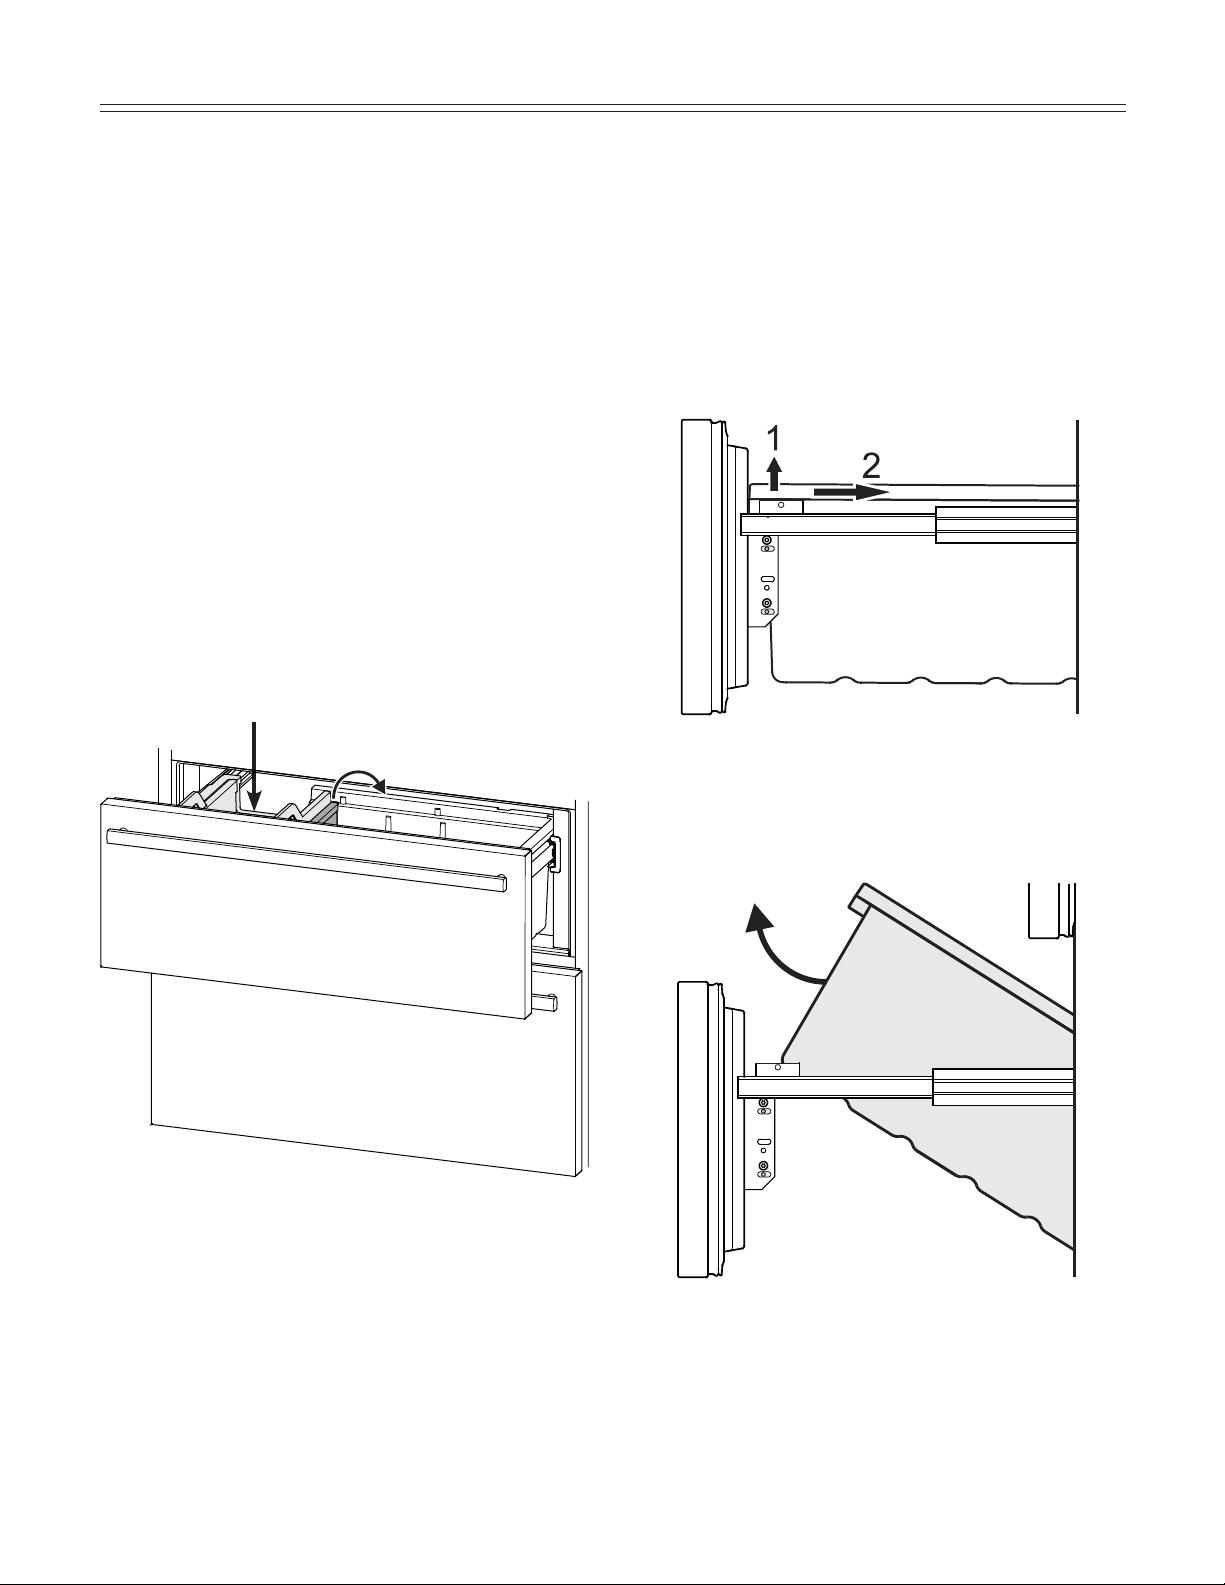
• Removethedoorracksas
shown in Figure 21.
• Removevegetabledraw-
ers as shown in Figure 14.
• Removeglassshelvesas
shown in Figure 16.
• Removethefreezerdraw-
er containers as shown in
Figure 17 and Figure 18.
• Acompoundoflukewarmwateranddishwasher
detergent is recommended for cleaning the appli-
ance and equipment parts.
DefrosTing/Cleaning
Defrosting
Refrigerator compartment
The refrigerator compartment defrosts automatically.
The water that forms on the rear wall drains into a
reservoir at the back of the appliance and evaporates
automatically through the compressor heat.
Freezer compartment
TheNoFrostsystemautomaticallydefroststhefreezer
compartment.Anymoisturewillcollectontheevapora-
torandfreeze.Itwillperiodicallydefrostandevaporate.
IMPORTANT
Do not clean the equipment parts in a dishwasher.
Strips of these parts could get loose.
• Dryallpartswellwithacloth.
• Do not damage or remove the model plate on the
insideoftheappliance.Itisveryimportantforservic-
ing your appliance.
• Installallequipmentpartsandreplacethefoodin
the appliance.
• Turntheapplianceon.
Cleaning instructions for stainless steel
panels
Keepyourstainlesssteellookingnewbycleaningwith
a good quality stainless steel cleaner or polish monthly.
Highqualitystainlesssteelcleanersandconditioners
are commercially available.
Do not clean with steel wool pads or abrasive pads.
Do not use cleaners that are not for use on stain-
less steel, such as glass, tile or counter cleaners.
These types of cleaners can damage the surface
permanently.
Figure 21

22
Cleaning
Figure 23
Figure 22
• Openthebottomfreezerdrawerandunscrewthe
ventilation grille - Figure 22.
• Cleanthefilterinadishwasherorbyhandwithluke-
warm water and dishwasher detergent.
• Installtheairfilterinthereverseorder.
• Installtheventilationgrille.
• Installallequipmentpartsandreplacethefoodinthe
appliance.
• Turntheapplianceon.
• ResettheairfilterLED.
RefertochapterSetup Mode -
= Resetairfilter
LED
• Pushdownthebuttonoftheairfilter,tilttothefront
and remove - Figure 23.
Cleaning the Air Filter
Vacation Tips (Figure 24)
Short vacations
Itisnotnecessarytoturnofftherefrigeratorandfreez-
er if you will be away for less than four weeks.
• Shutoffthewatersupplytotheicemaker.
> WhentheIceMakerLEDstartsblinking,theremain-
ing water in the supply line is in the ice maker.
• Leavetheicemakeronandworkingforonedayso
thattheremainingicecubesareejected.
• TouchtheIceMakericonsothattheIceMakerLED
goes out.
• Transferallicecubestotherightpartofthedrawer
or to the bottom drawer.
• Useallperishables.
• Freezeotheritems.
Longvacations
Ifyouwillbeawayforamonthormore:
• Shutoffthewatersupplytotheicemaker.
> WhentheIceMakerLEDstartsblinking,theremain-
ing water in the supply line is in the ice maker.
• Leavetheicemakeronandworkingforonedayso
thattheremainingicecubesareejected.
• TouchtheIceMakericonsothattheIceMakerLED
goes out.
• Removeallicecubesfromthedraweranddispose
of them.
• Removeallfoodfromtherefrigeratorandfreezer
compartments.
• Turnofftherefrigeratorandfreezercompartments.
• Cleantheappliance.RefertoCleaning.
• Leavethedoorandbothfreezerdrawersopento
prevent unpleasant odors. This will also keep mold
from building up.
Turning on the ice maker after vacation
• Openthewatersuppytotheicemaker.
• TouchtheIceMakericonsothattheIceMakerLED
comes on.
IMPORTANT
Do not consume or use the first three batches of
ice after the ice maker has not been used for longer
than one week.
Figure 24
IceMakericon
IceMakerLED
23
VaCaTion
24
TroubleshooTing
Problem Possible Cause and Remedy
Appliancedoesnot
work, display is off
- Istheapplianceturnedonproperly?
- Isthepowercordproperlyinsertedintheoutlet?
- Isthecircuitbreakerorfuseinoperatingcondition?
The interior light does
not come on
- Istheapplianceturnedon?
Motorseemsto
run too long
- Istheambienttemperaturetoohot?SeeSafety Regulations.
- Hastheappliancebeenopenedtoooftenorleftopentoolong?
- Alargeamountoffoodhasbeenadded.
- UnitisinSuperCoolmode.Verifyunitisinnormaloperationmode.
The temperature is
not cold enough
- Isthetemperaturesettingcorrect?SeeSetting The Temperature.
- Hasanexcessiveamountoffreshfoodbeenplacedintheappliance?
- Doesaseparatelyinstalledthermometershowthecorrectreading?
- Istheventilationsystemworkingproperly?
- Istheappliancesetuptooclosetoaheatsource?
Freezertemperature
display shows two
dashes‘‘--”.
Thefreezertemperaturedisplaywillonlyshowtemperaturesthatarebelowfreezing.
Wheninitiallystartingthefreezer,itwillnotbebelowfreezing.Itwilltakethreetofive
hours(dependingonambientconditions)forfreezingtemperaturestobeachievedand
thus displayed numerically.
This may also occur after a power failure.
Troubleshooting
Your appliance is designed and manufactured for a long life and reliable operation.
Ifaproblemoccursduringoperation,checkwhetheritisduetoanoperatingerror.Pleasenotethatevenduringthe
warranty period, some repair costs may be your responsibility.
Youmaybeabletocorrectthefollowingfaultsbycheckingthepossiblecausesyourself:
25
TroubleshooTing
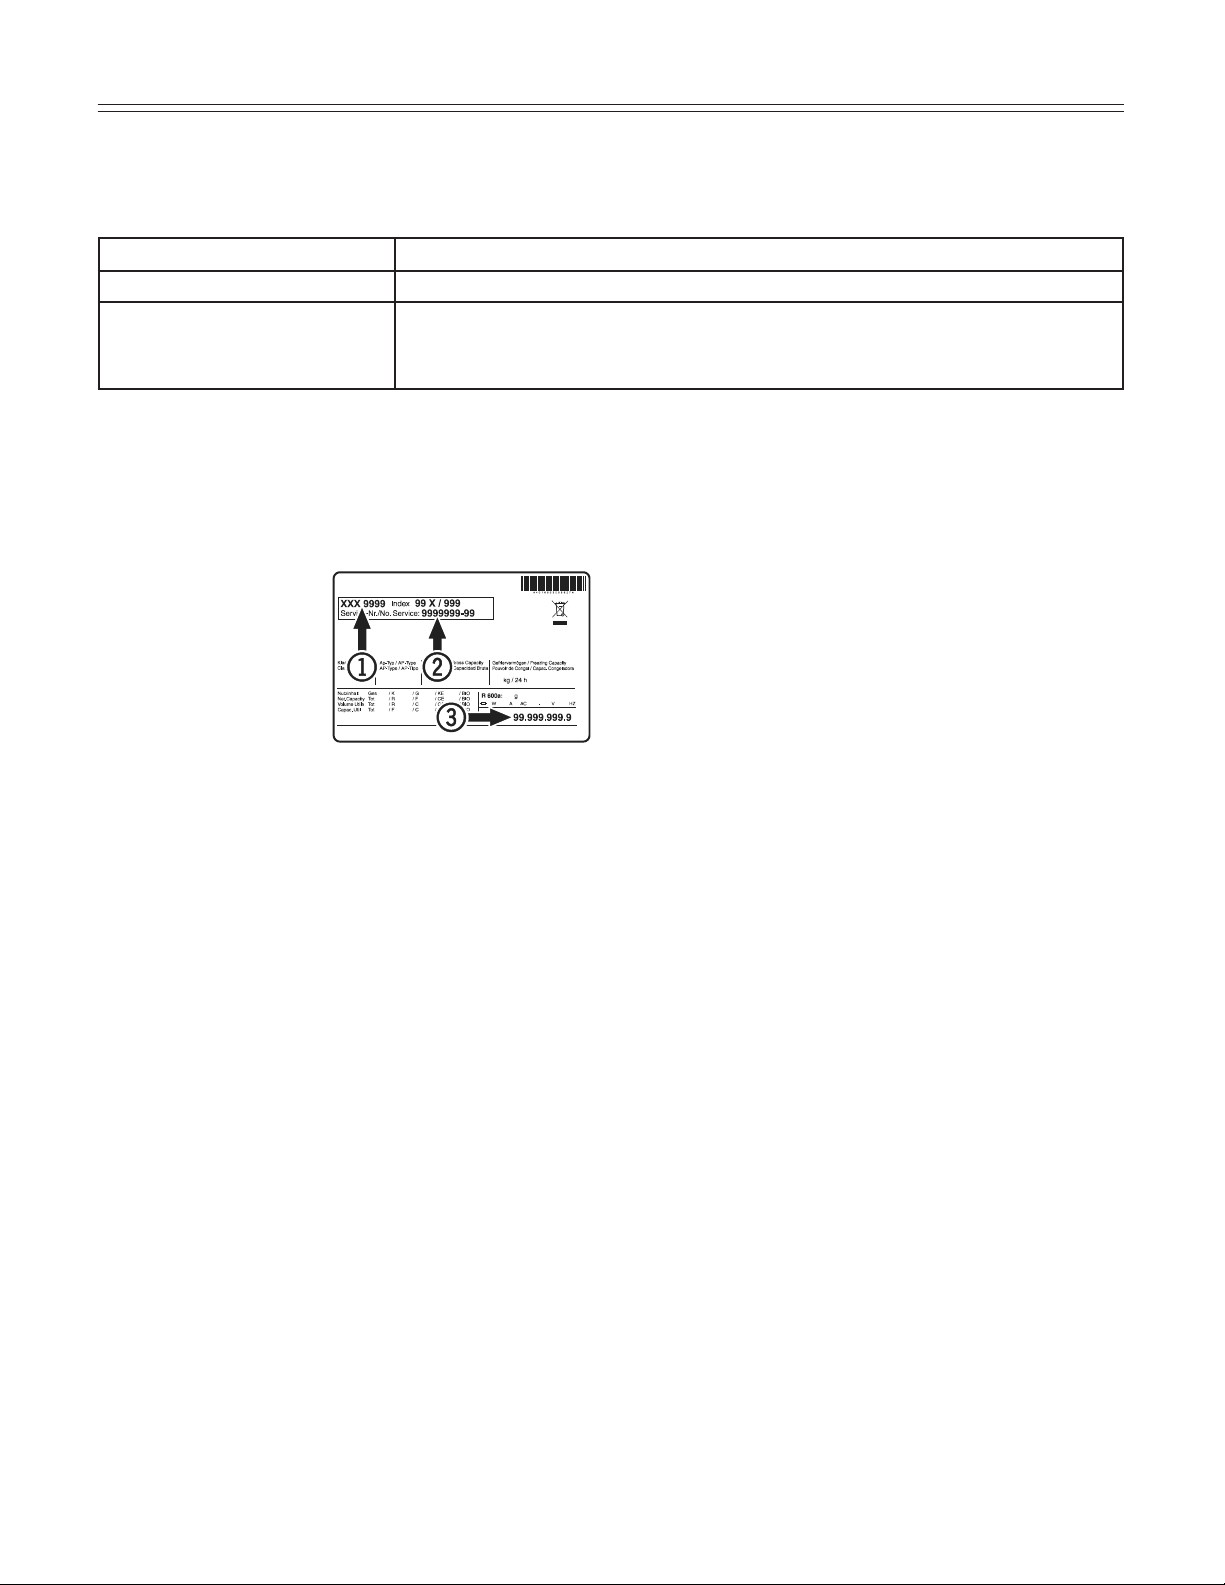
Customer Service
Ifnoneoftheabovepossiblecausesapply,andyou
can not rectify the fault yourself, contact your nearest
customer service representative.
Indicatethetype(1) of
appliance, service num-
ber (2) and the appli-
ance/serialnumber
(3) as indicated on the
model plate.
The position of the model plate is shown in the section
entitled Description of the Appliance.
Appliance Information
Recordthisinformationwhentheapplianceisinstalled.
TypeDesignation: _____________________________
ServiceNumber: ______________________________
Appliance/SerialNumber: ______________________
DateofPurchase: _____________________________
WherePurchased: ____________________________
Ice Maker Troubleshooting
Youmaybeabletocorrectthefollowingfaultsyourself:
Problem Possible Cause and Remedy
Icemakercannotbeturnedon - Istheapplianceconnectedtotheelectricaloutlet?
Icemakerisnotmakinganyice - Istheicemakerturnedon?
- Isthewatersupplylineopen?
- Arebothfreezerdrawersclosedproperly?

26
WarranTy
LIEBHERR WARRANTY PLAN
FULLTWOYEARWARRANTY
Fortwoyearsfromthedateoforiginalpurchase,yourLiebherrwarrantycoversallpartsandlabortorepairor
replace any part of the product which proves to be defective in materials or workmanship.
FULLFIVEYEARWARRANTY
Forfiveyearsfromthedateoforiginalpurchase,yourLiebherrwarrantycoversallpartsandlabortorepairor
replaceanycomponentsthatprovetobedefectiveinmaterialsorworkmanshipinthesealedsystem.The“Sealed
System”meansonlythecompressor,condenser,evaporator,drierandallconnectingtubing.
LIMITED6THTHROUGH12THYEARWARRANTY
Fromthe6ththrough12thyearfromthedateoforiginalpurchase,yourLiebherrwarrantycoversallpartsthatprove
tobedefectiveinmaterialsorworkmanshipintheSealedSystem(partsonly).
TERMSAPPLICABLETOEACHWARRANTY
AllserviceprovidedbyLiebherrunderthewarrantymustbeperformedbyauthorizedLiebherrservicerepresenta-
tives,unlessotherwisespecifiedbyLiebherr.Servicewillbeprovidedinthehomeduringnormalbusinesshours.
Thiswarrantyappliesonlytoproductsinstalledfornormalresidentialuse.Detailsregardinganon-residentialwar-
ranty are available on request.
ThewarrantyappliesonlytoproductsinstalledinCanadaandanyoneofthefiftystatesoftheUnitedStatesorthe
DistrictofColumbia.Thiswarrantydoesnotcoveranypartsorlabortocorrectanydefectcausedbynegligence,
accident or improper use, maintenance, installation, service or repair, including but not limited to improper removal
and reinstallation of the condensing unit.
THEWARRANTIESDESCRIBEDABOVEAREMADEEXPRESSLYINLIEUOFANYOTHERWARRANTIES,
EXPRESSEDORIMPLIED,INCLUDINGANYIMPLIEDWARRANTYOFMERCHANTABILITYORFITNESS
FORAPARTICULARPURPOSE,ANDOFANYOTHEROBLIGATIONORLIABILITYONTHEPARTOF
LIEBHERR.INNOEVENTSHALLLIEBHERRBELIABLEFORSPECIAL,INCIDENTALORCONSEQUENTIAL
DAMAGESARISINGFROMTHEBREACHOFTHESEWARRANTIESORANYOTHERWARRANTIES,
WHETHEREXPRESS,IMPLIEDORSTATUTORY.
SomeStatesdonotallowtheexclusionorlimitationofincidentalorconsequentialdamagessotheabovelimitation
or exclusion may not apply to you. This warranty gives you specific legal rights and you may also have other rights
whichvaryfromStatetoState.
Toreceivepartsand/orserviceandthenameoftheLiebherrauthorizedservicerepresentativenearestyou,contact
yourLiebherrdealerordistributororcontacttheLiebherrdesignatednationalserviceprovider:
intheUS:Service-appliances.us@liebherr.com,orcall1-866-LIEBHERor1-866-543-2437
inCanada:www.euro-parts.ca,orcall1-888-LIEBHER,1-888-543-2437.

www.liebherr-appliances.com
*708483200*
For Service in the U.S.
LiebherrServiceCenter
TollFree:1-866-LIEBHERor1-866-543-2437
Email:Service-appliances.us@liebherr.com
PlusOne Solutions, Inc.
3501QuadrangleBlvd,Suite120
Orlando,FL32817
For Service in Canada
LiebherrServiceCenter
TollFree:1-888-LIEBHERor1-888-543-2437
www.euro-parts.ca
EURO-PARTS CANADA
39822BelgraveRoad
Belgrave,Ontario,N0G1E0
Phone:(519)357-3320
Fax:(519)357-1326