Loading ...
Loading ...
Loading ...
Leveling Refrigerator
Materials Required Ii
¼" O.D. (6 mm) flexible copper tubing is required. Length
of copper tubing must reach from water supply
connection to water valve inlet port on back of
refrigerator, plus additional 8' (2 m) of tubing for a service
loop. A service loop will allow refrigerator to be pulled 1.
away from the wall without disconnecting tubing. 2.
Procedure 3.
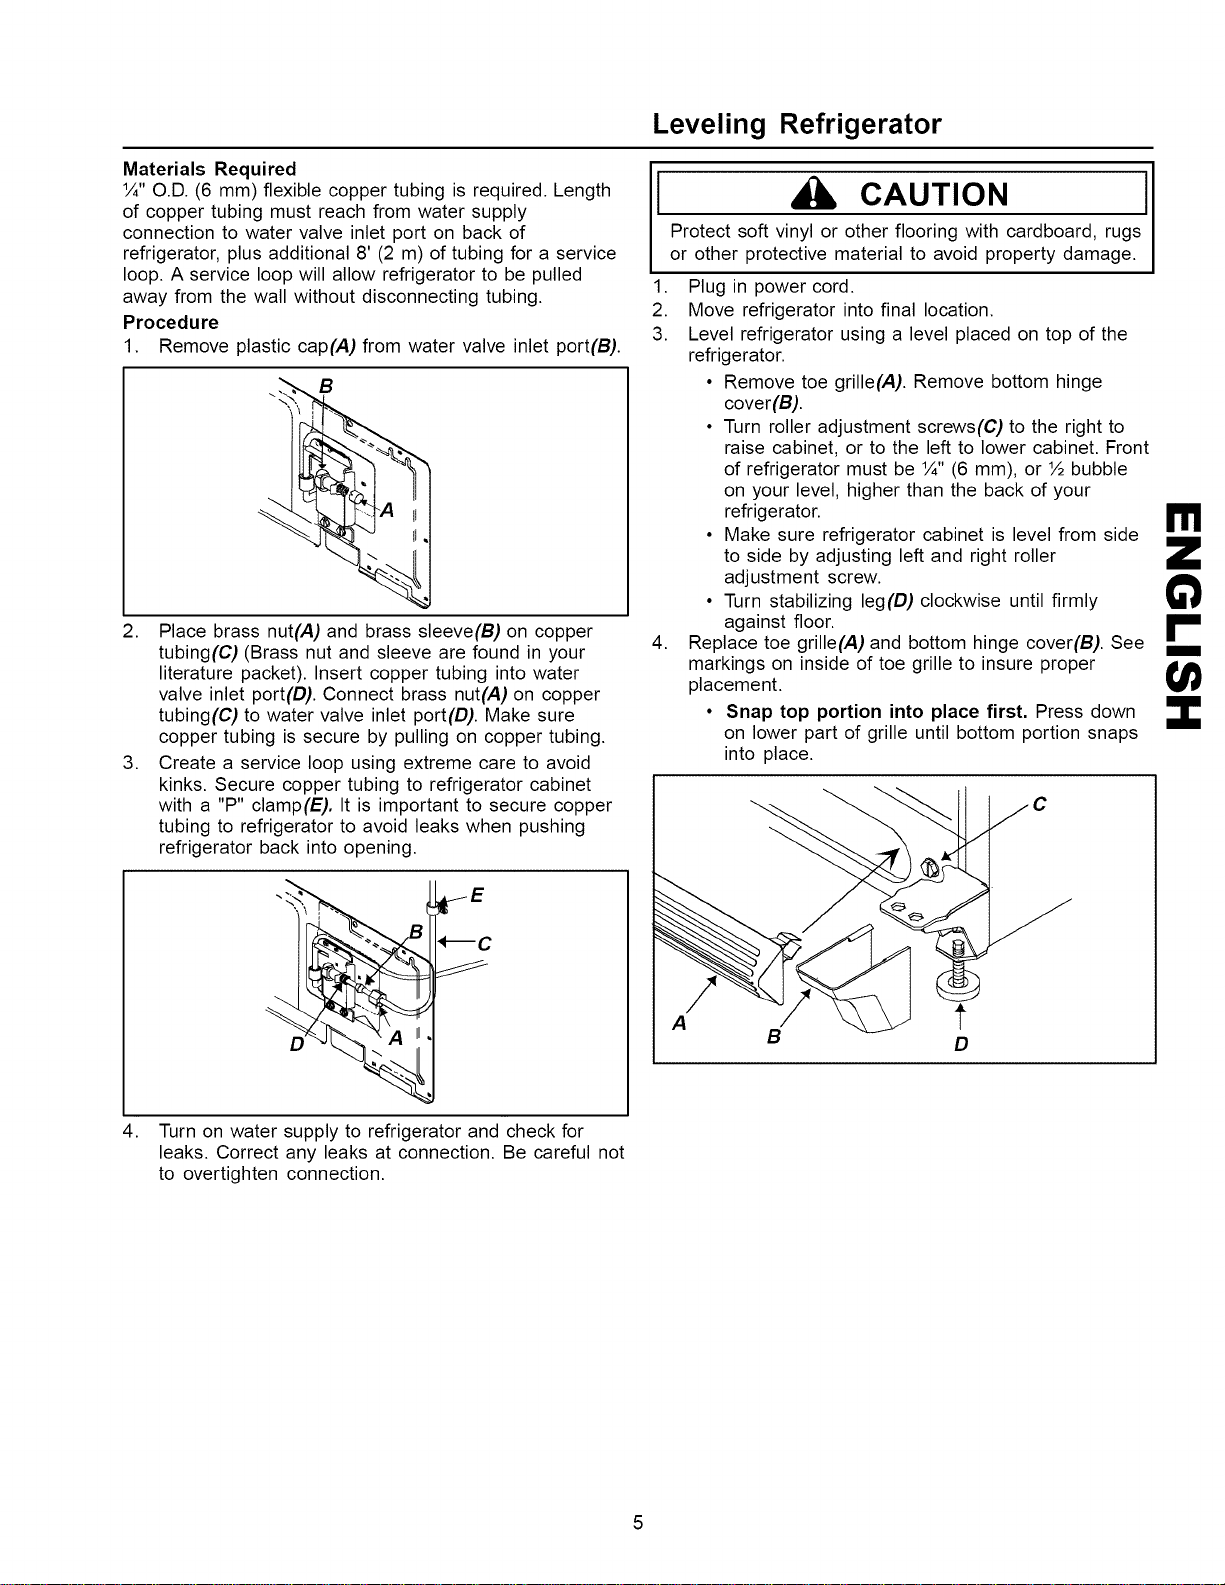
1. Remove plastic cap(A) from water valve inlet port(B).
2. Place brass nut(A) and brass sleeve(B) on copper
tubing(C) (Brass nut and sleeve are found in your
literature packet). Insert copper tubing into water
valve inlet port(D). Connect brass nut(A) on copper
tubing(C) to water valve inlet port(D). Make sure
copper tubing is secure by pulling on copper tubing.
3. Create a service loop using extreme care to avoid
kinks. Secure copper tubing to refrigerator cabinet
with a "P" clamp(E). It is important to secure copper
tubing to refrigerator to avoid leaks when pushing
refrigerator back into opening.
.
CAUTION iI
Protect soft vinyl or other flooring with cardboard, rugs
or other protective material to avoid property damage.
Plug in power cord.
Move refrigerator into final location.
Level refrigerator using a level placed on top of the
refrigerator.
• Remove toe grille(A). Remove bottom hinge
cover(B).
• Turn roller adjustment screws(C) to the right to
raise cabinet, or to the left to lower cabinet. Front
of refrigerator must be ¼" (6 mm), or ½ bubble
on your level, higher than the back of your
refrigerator.
• Make sure refrigerator cabinet is level from side
to side by adjusting left and right roller
adjustment screw.
• Turn stabilizing leg(D) clockwise until firmly
against floor.
Replace toe grille(A) and bottom hinge cover(B). See
markings on inside of toe grille to insure proper
placement.
• Snap top portion into place first. Press down
on lower part of grille until bottom portion snaps
into place.
A
B
D
4. Turn on water supply to refrigerator and check for
leaks. Correct any leaks at connection. Be careful not
to overtighten connection.
I11
5
Loading ...
Loading ...
Loading ...