Loading ...
Loading ...
Loading ...
Rinnai 17 Portable Room AC OIM
GENERAL MAINTENANCE
It is recommended that after each cooling season the exterior
panels and display of the appliance are cleaned with a soft damp
cloth�
Air lters should be checked and cleaned every week during
periods of heavy use. For intermittent use this can be extended to
2 to 3 weeks.
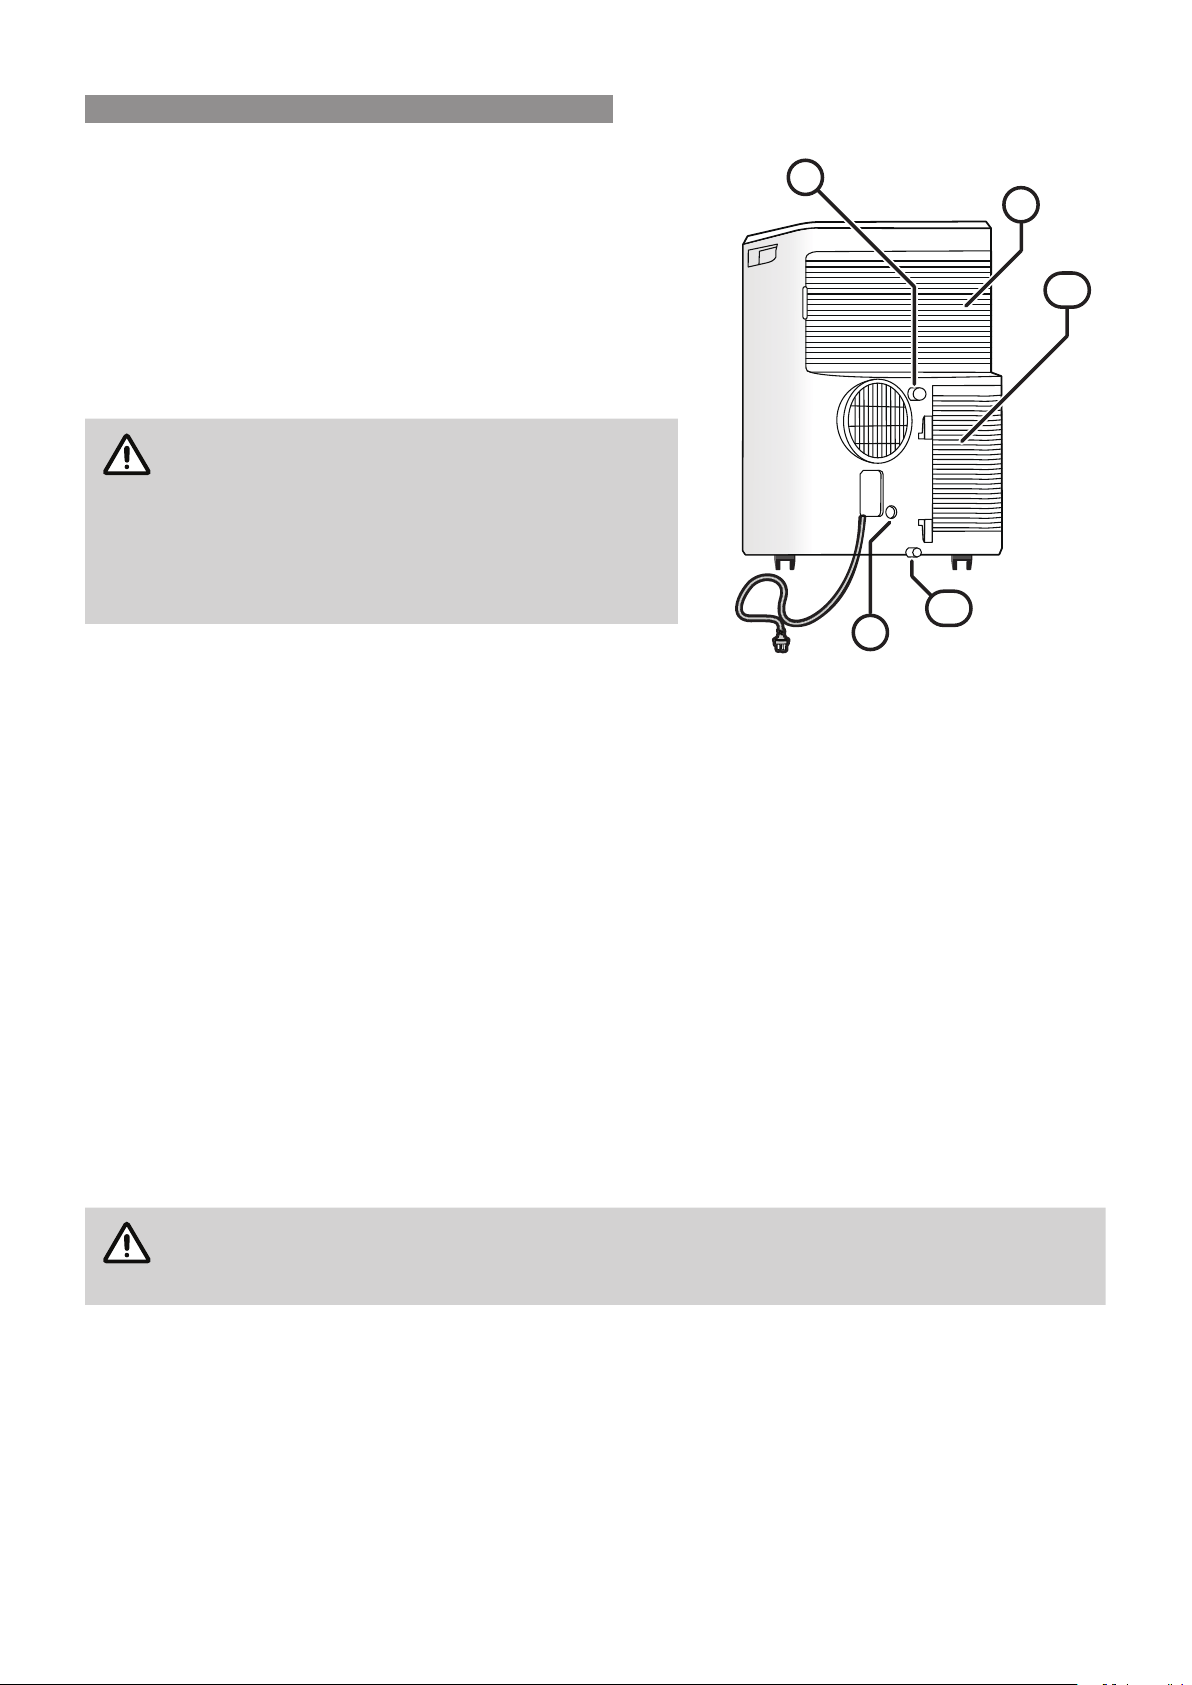
If storing the appliance for a prolong period remove the plugs and
hoses from the drain outlets (7) , (8) and (12).
CAUTION
ALWAYSturnothepowerbeforeyouperformany
maintenance.
DO NOTusesolvents,alcoholorharshcleanerson
thisapplianceorthelters.
NEVER use water that is hotter than 40°C when
you clean the lters. It may cause deformation or
discolouration.
CLEANING THE AIR FILTER
There are two air lters in this appliance, there is one lter each tted to the inside of the Room Air Intake Grill (9),
and the Lower Air Intake (10).
Before removing the grills, ensure the power cord is disconnected from the power supply.
1� Remove the grills:
To remove the Room Air Intake Grill (9) pull down on the top tab and un-clip the grill.
To remove the Lower Air Intake Grill (10) use a Philips head screw driver to remove the securing screw and
un-clip the grill�
2� Un-clip the lters from each of the grills. Clean the lters with a vacuum cleaner or with warm water. If dirt is
dicult to remove, wash the lter in lukewarm water with a mild detergent.
3� Ensuring that the lters are dry before replacing, then clip the lters back into the grill covers.
4� Re-attach the grills:
To re-attach the Room Air Intake Grill (9) ensure that all the tabs are properly seated and that the grill is
securely clipped back into place.
To re-attach the Lower Air Intake Grill (10) ensure that all the tabs are properly seated and that the grill is
securely clipped back into place and that the securing screw is replaced.
The power may now be reconnected�
NOTE
Failuretocleantheltersregularlycancauseexcessivecondensationtoformandreducethe
applianceseciency.
Ifyouneedreplacementlters,pleasecontactRinnai.
8
9
7
12
10
Back
CARE & MAINTENANCE
Loading ...
Loading ...
Loading ...