Loading ...
Loading ...
Loading ...
Installation instructions en
13
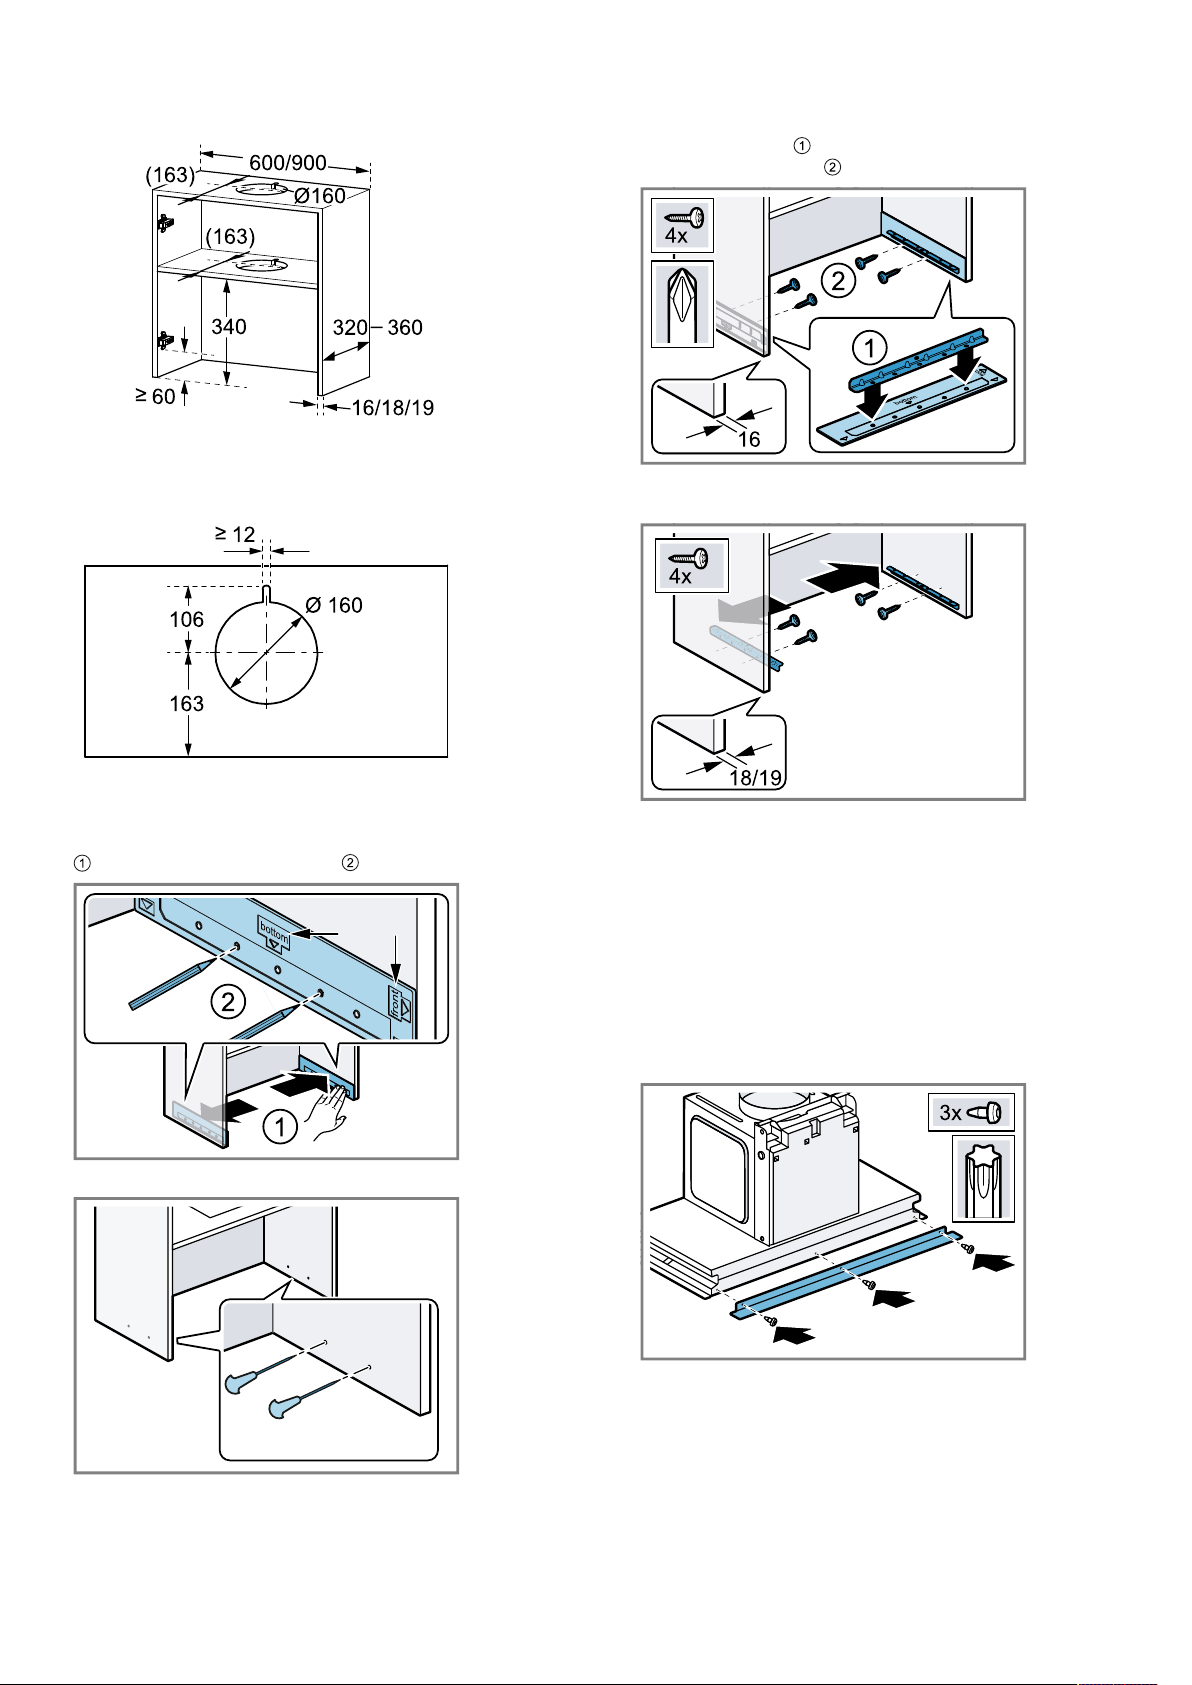
3.
Make the cut-out for the exhaust pipe in the cabinet.
4.
Make the cut-out for the exhaust pipe in the interme-
diate floor.
‒ Make the recess for the mains connection.
5.
Ensure that the fitted unit is still stable after the cut-
outs have been made.
6.
Place the installation aid on the inside of the cabinet
and mark the fixing points .
7.
Use a bradawl to mark the fixing points.
8.
For a wall thickness of 16mm: Place the installation
aids on the rails and screw the rails into the side
walls of the cabinet .
PZ2
9.
For a wall thickness of 18mm and 19mm: Screw in
the rails without the installation aid.
Preparing the appliance
1.
Note:
¡ Avoid damaging sensitive surfaces when in-
stalling the appliance.
¡ For a cabinet depth (outer dimension) between
320mm and 340mm, use the narrow wall filler
strip.
¡ For a cabinet depth (outer dimension) between
340mm and 360mm, use the wide wall filler
strip.
Screw the lower wall filler strip onto the appliance.
20
Loading ...
Loading ...
Loading ...