Loading ...
Loading ...
Loading ...
- 35 -
30-AFRY202100 EN
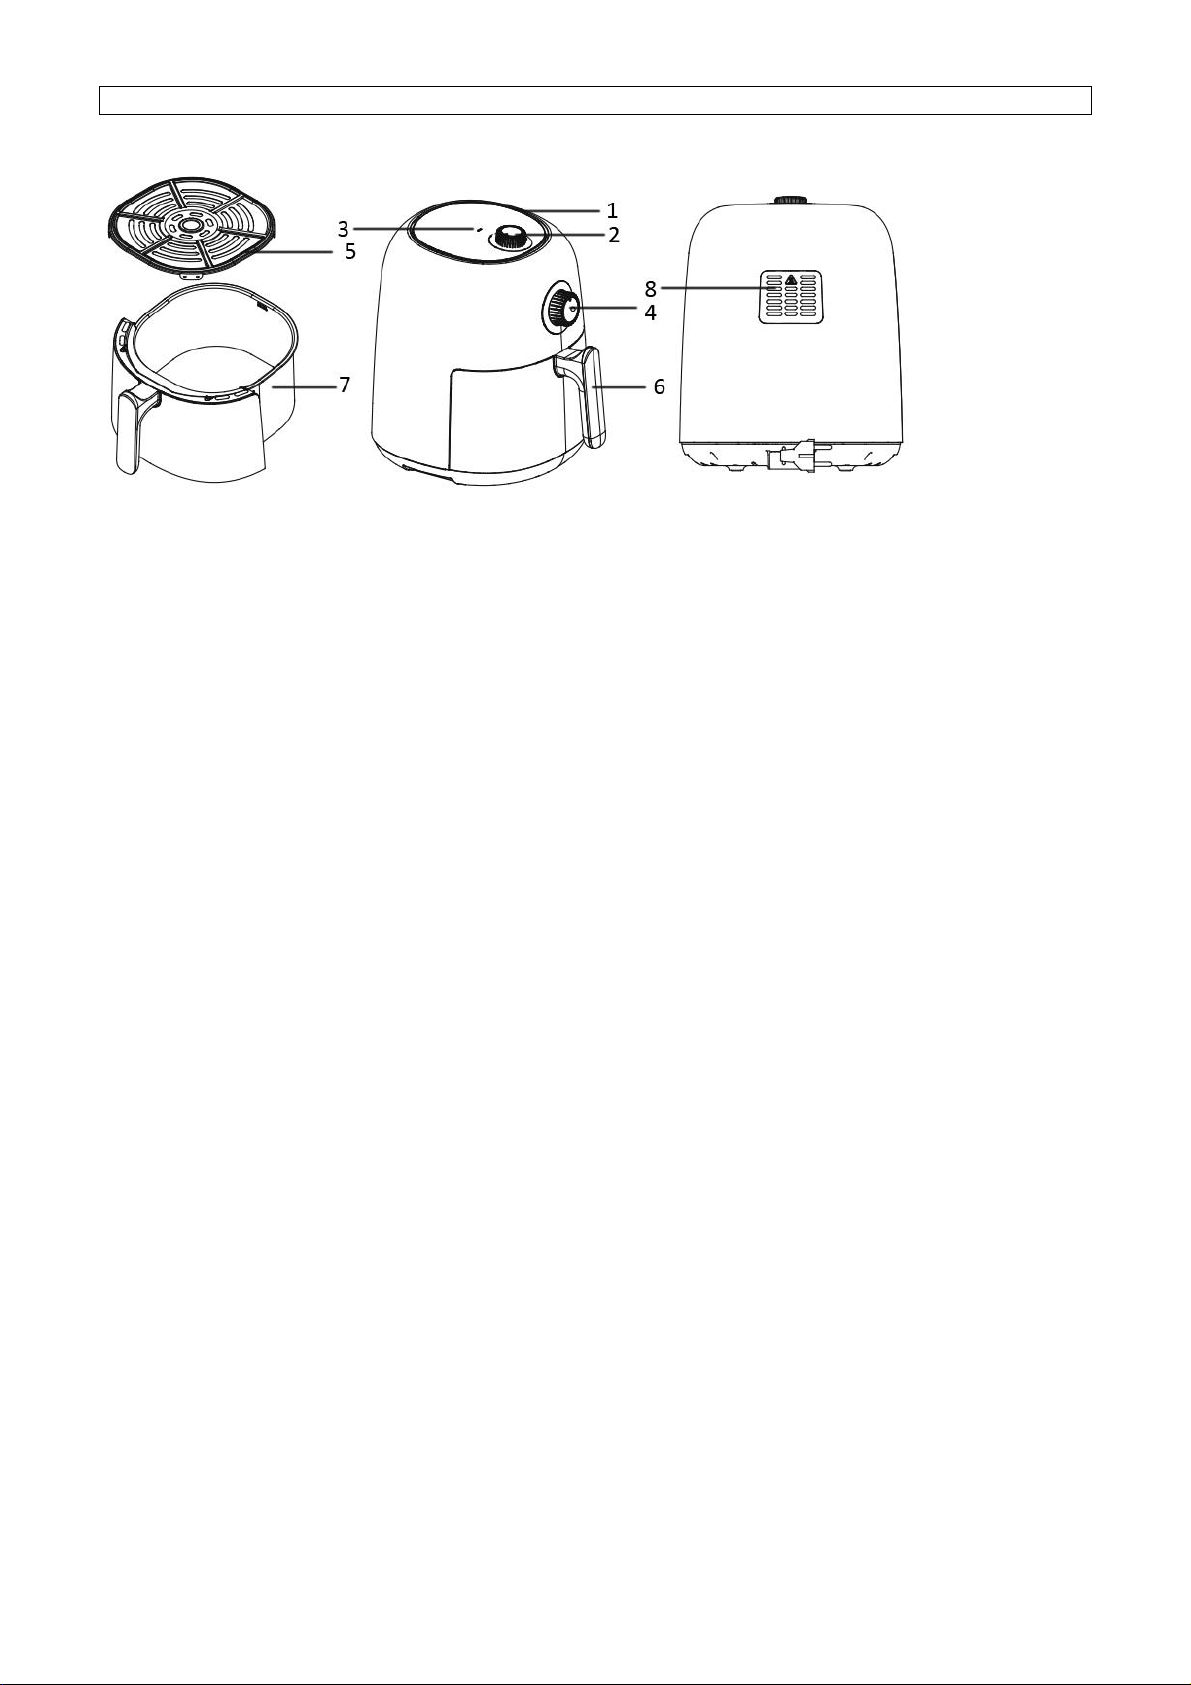
PARTS DESCRIPTION
1. Air inlet
2. Temperature control knob
3. Heating light
4. Timer knob
5. Frying grill
6. Basket handle
7. Basket
8. Air outlet
BEFORE USE
First read all instructions before use and retain for later reference. Only plug this appliance into an earthed
socket. Before first use, remove the packing materials. Clean the basket and frying grill. (See “cleaning and
maintenance”) Wipe inside and outside of the appliance with a soft cloth. Make sure that the electrical parts
remain dry. This appliance heats food at all directions and most of the ingredients do not need any oil.
Operate the appliance before first use for approximately 10 minutes in order to burn off production residues.
Make sure there is good ventilation. The appliance may emit some smoke and a characteristic smell when you
switch it on for the first time. This is normal and will stop soon.
Note: Always use the frying grill with the silicone cases attached. They will help to stabilize the frying grill in
the basket during cooking.
USE
1. Place the appliance on a dry, stable surface.
2. Since the appliance becomes hot during use, make sure that it is not too close to other objects.
3. Pull out the basket from the appliance by the basket handle. Put the frying grill into the basket.
4. Place the ingredients into the basket. (Do not exceed the MAX level indicated inside the basket.) Slide the
basket into the appliance. Make sure they are placed correctly and closed completely. Caution: Do not
touch the basket during use or after use in short time as it gets very hot. Only hold the basket by the
handle.
5. Connect the power plug to a suitable outlet.
6. Set the temperature control knob to the required temperature setting, which is suitable for what you are
frying. Consult the temperature table.
7. Turn the timer knob to choose the appropriate frying time. The appliance is switched on.
8. During the hot air frying process, the heating light comes on and goes out from time to time. This
indicates that the heating element is switched on and off to maintain the set temperature.
9. When the cooking is finished, you will hear the timer bell rings. You can also switch off the appliance
manually by turning the timer knob to “0”.
10. Pull out the basket from the appliance by the basket handle. Check if the ingredients are ready. If not,
simply slide the basket back into the appliance and set the timer to a few extra minutes.
Loading ...
Loading ...
Loading ...