Loading ...
Loading ...
Loading ...
25
To Convert Surface Burners (Propane Gas to Natural
Gas)
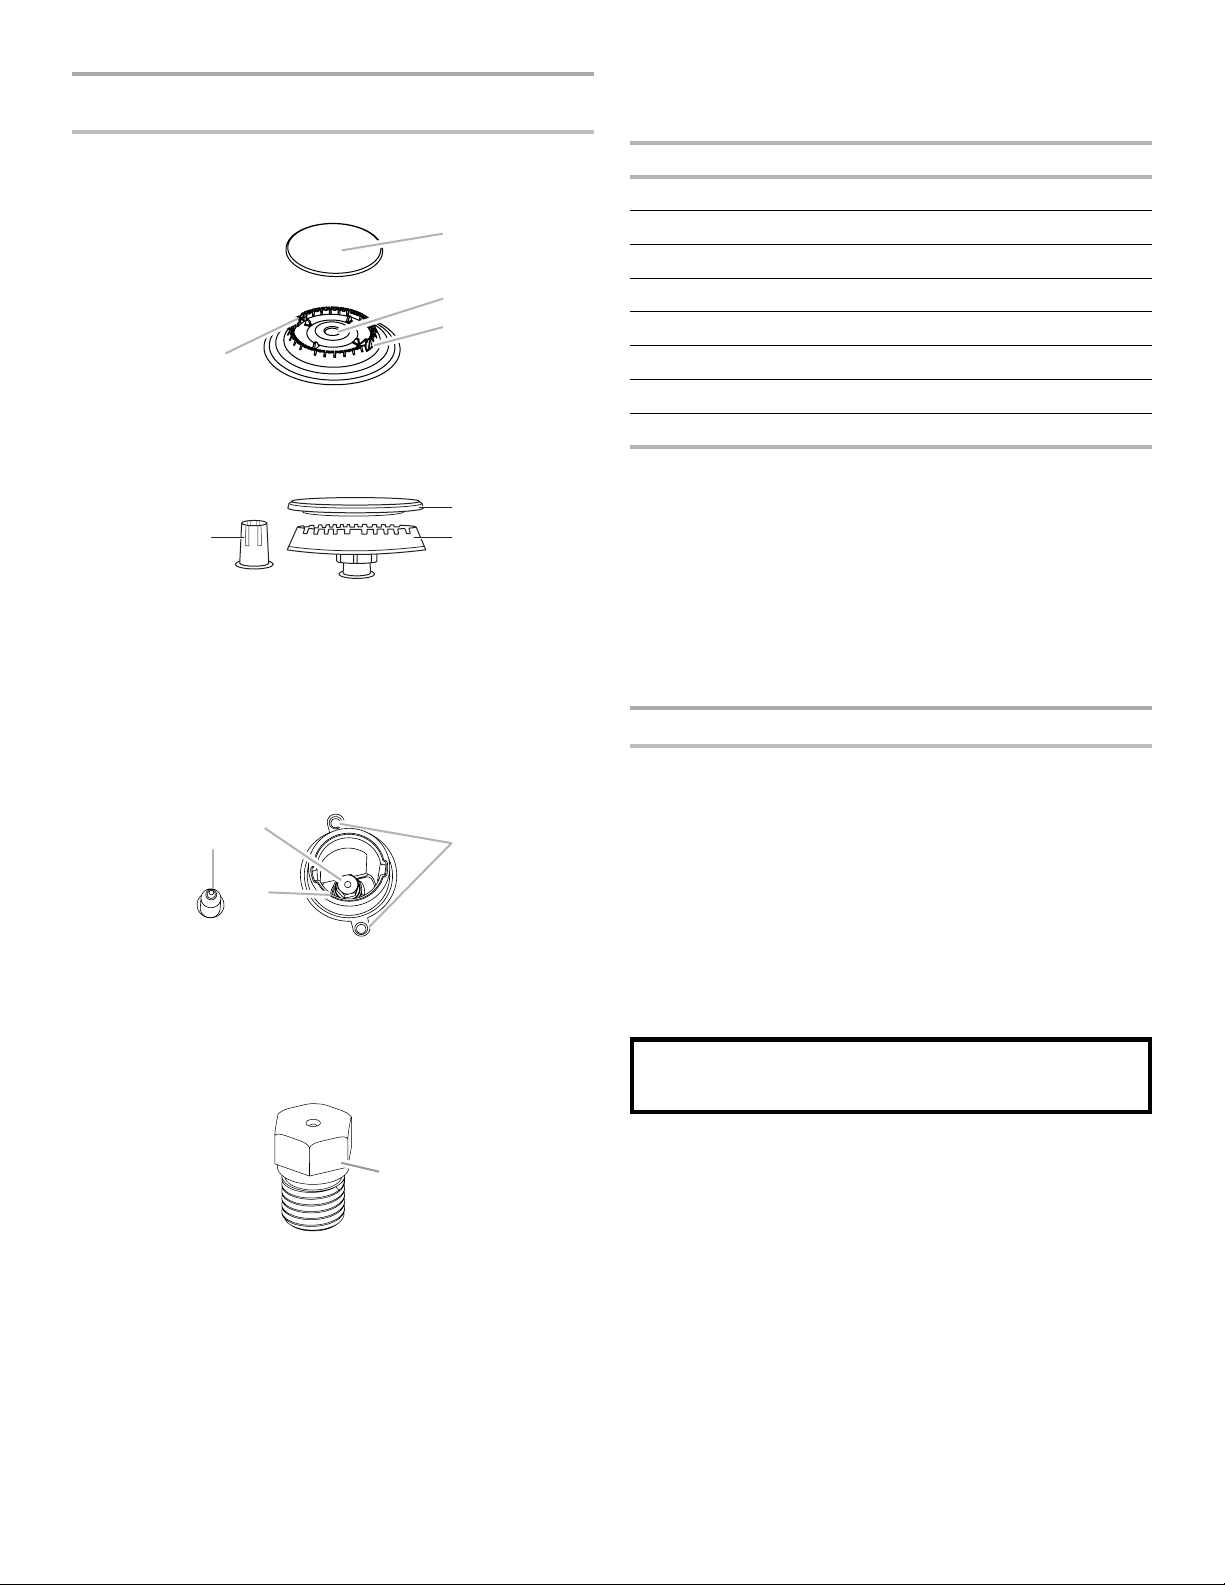
1. If they are installed, remove the burner grates.
2. Remove the burner caps.
3. Remove the burner base.
4. Apply masking tape to the end of a
9
/
32
" (7 mm) nut driver to
help hold the gas orice spud in the nut driver while changing
it. Press nut driver down onto the gas orice spud and
remove by turning it counterclockwise and lifting out. Set gas
orice spud aside.
5. Gas orice spuds are stamped with a number on the side.
Replace the Propane gas orice spud with the correct
Natural gas orice spud.
D
A
B
C
A. Igniter electrode
B. Burner cap
C. Gas tube opening
D. Burner base
A
B
C
D
A. Igniter electrode
B. Orice spud
C. Orice spud holder
D. Screws
XXX
A
A. Stamped number
Burner RatingColor Size (mm) ID Number
19,000 BTU (ST) White/Gray 1.84 184
17,000 BTU (ST) N/A1.75 175
17,000 BTU White/Blue1.90 190
15,000 BTU White/Green 1.80 180
9,200 BTU White/Black1.35135
8,000 BTUWhite/Yellow 1.25 125
5,000 BTU White/Orange1.00100
1,200 BTUBlack 0.52 52
Refer to the following chart for the correct Natural gas orice
spud placement. Remove choke from x-large burner base.
Natural Gas Orice Spud Chart
NOTE: Refer to the model/serial/rating plate located on the oven
frame behind the top right-hand side of the oven door for proper
sizing of spuds for each burner location.
6. Place Propane gas orice spuds in the orice spud bag.
IMPORTANT: Keep the Propane gas orice spuds in case of
reinstallation with Propane gas.
7. Replace the burner base.
8. Replace burner cap.
9. Repeat steps 1 to 7 for the remaining burners.
10. Replace the baking drawer. See the “Remove/Replace
Drawer” section.
Complete Installation (Propane Gas to Natural Gas)
1. Refer to the “Make Gas Connection” section for proper
connection of the range to the gas supply.
2. Refer to the “Electronic Ignition System” section for proper
burner ignition and operation.
3. Refer to the “Adjust Flame Height” section for burner ame
adjustments.
IMPORTANT: You may have to adjust the low setting for
each cooktop burner.
Checking for proper cooktop, bake, and broil burner ame is
very important. Natural gas ames do not have yellow tips.
4. Refer to “Complete Installation” in the “Installation
Instructions” section of this manual to complete this
procedure.
IMPORTANT: Make sure to save the orifices that have
just been replaced in the conversion.
A
B
C
X-Large Burner
A. Burner cap
B. Burner base
C. Gas tube opening
D. Choke (for use with x-large burner, Propane gas only)
Loading ...
Loading ...
Loading ...