Loading ...
Loading ...
Loading ...
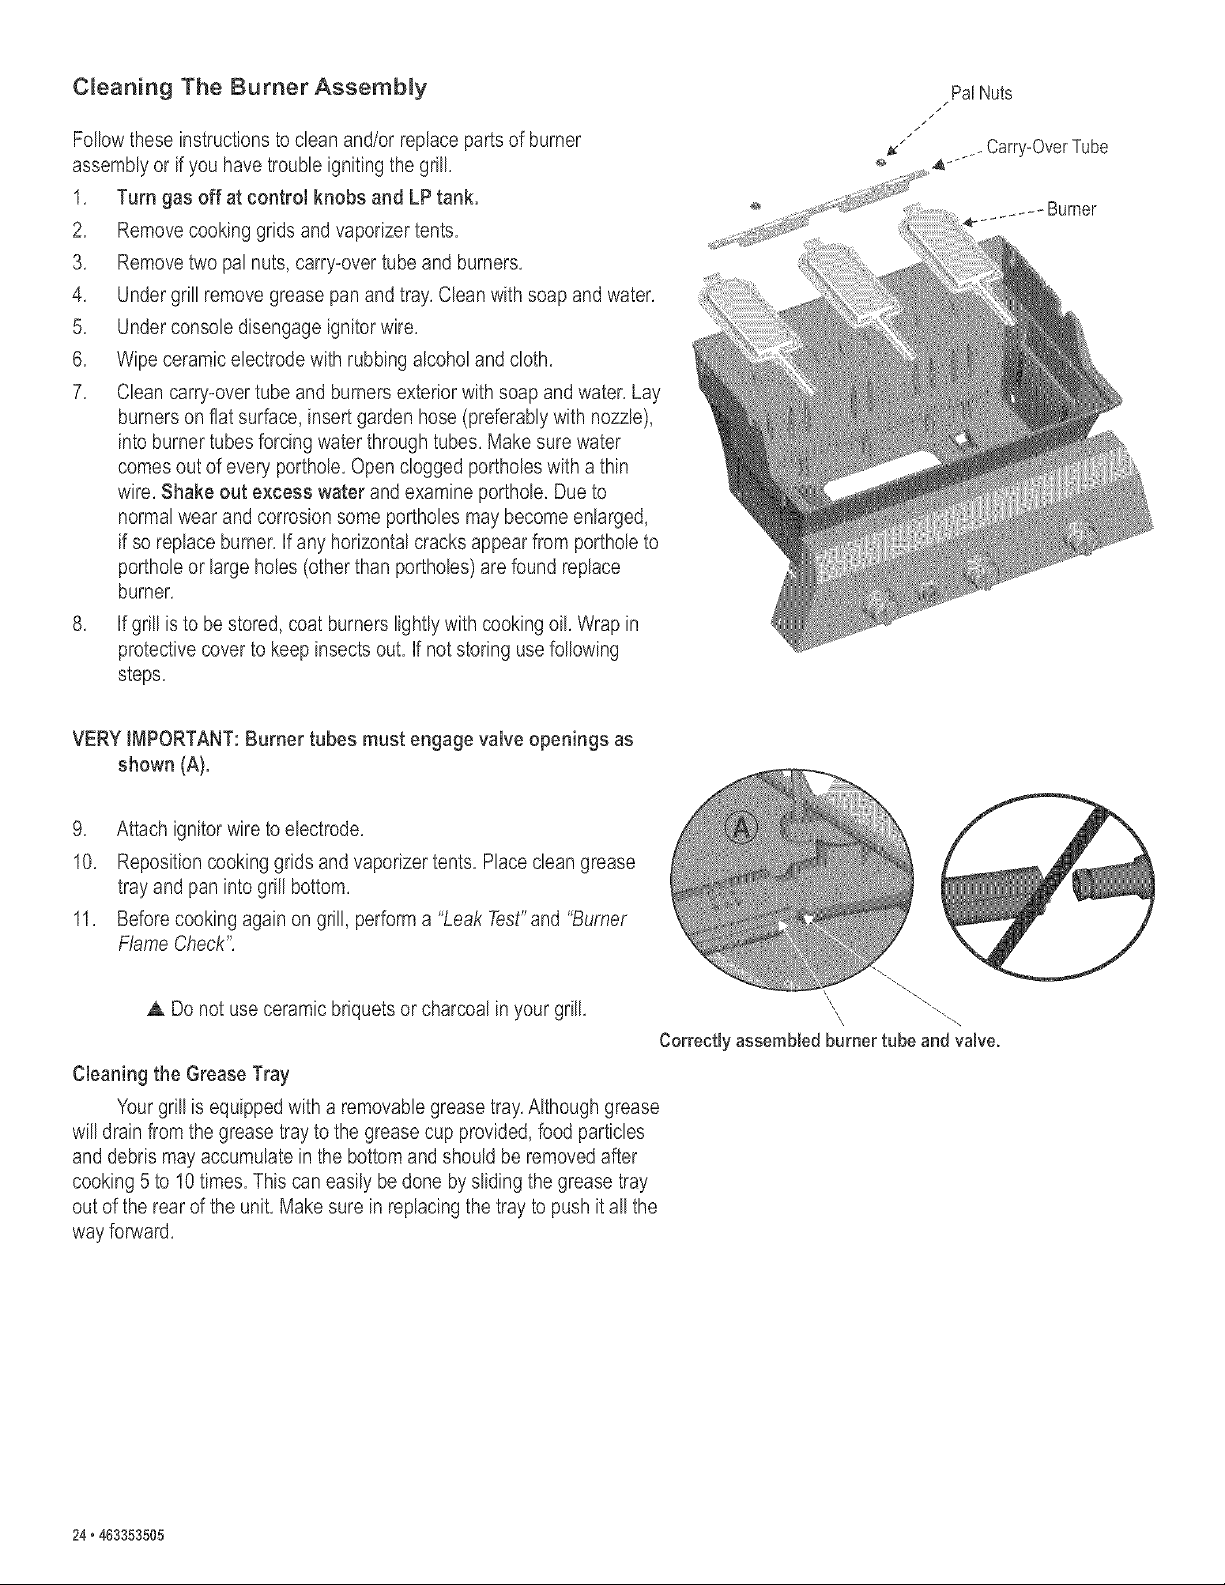
C_eaning The Burner Assembly
Follow these instructions to clean and/or replace parts of burner
assembly or if you have trouble igniting the grill,
1, Turn gas off at control knobs and LP tank.
2, Remove cooking grids and vaporizer tents,
3, Remove two pal nuts, carry-over tube and burners,
4, Under grill remove grease pan and tray, Clean with soap and water,
5, Under console disengage ignitor wire,
6, Wipe ceramic electrode with rubbing alcohol and cloth,
7, Clean carry-over tube and burners exterior with soap and water, Lay
burners on flat surface, insert garden hose (preferably with nozzle),
into burner tubes forcing water through tubes, Make sure water
comes out of every porthole, Open clogged portholes with a thin
wire, Shake out excess water and examine porthole, Due to
normal wear and corrosion some portholes may become enlarged,
if so replace burner, If any horizontal cracks appear from porthole to
porthole or large holes (other than portholes) are found replace
burner,
8, If grill is to be stored, coat burners lightly with cooking oil, Wrap in
protective cover to keep insects out, If not storing use following
steps,
VERY IMPORTANT: Burner tubes must engage valve openings as
shown (A),
9, Attach ignitor wire to electrode,
10, Reposition cooking grids and vaporizer tents, Place clean grease
tray and pan into grill bottom,
11, Before cooking again on grill, perform a "Leak Test"and "Burner
Flame Check",
,& Do not use ceramic briquets or charcoal in your grill, ",, ""-..
Correctly assembled burner tube and valve.
Cleaning the Grease Tray
Your grill is equipped with a removable grease tray,Although grease
will drain from the grease tray to the grease cup provided, food particles
and debris may accumulate in the bottom and should be removed after
cooking 5 to 10 times, This can easily be done by sliding the grease tray
out of the rear of the unit, Make sure in replacing the tray to push it all the
way forward,
24 _463353505
Loading ...
Loading ...
Loading ...