Loading ...
Loading ...
Loading ...

English
10
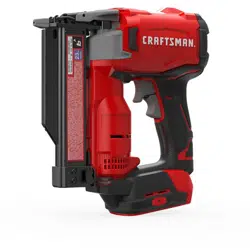
Installing and Removing the Battery Pack
(Fig.F)
WARNING: Ensure the tool/appliance is in the off
position before inserting the batterypack.
nOTE: For best results, make sure your battery pack is
fullycharged.
To install the battery pack
1
into the tool handle, align the
battery pack with the rails inside the tool’s handle and slide it
into the handle until the battery pack is firmly seated in the
tool and ensure that it does notdisengage.
To remove the battery pack from the tool, press the release
button
2
and firmly pull the battery pack out of the tool
handle. Insert it into the charger as described in the charger
section of thismanual.
Proper hand position requires one hand on the handle
3
as
shown.
Proper Hand Position (Fig.E)
WARNING: To reduce the risk of serious personal injury,
ALWAYS use proper hand position asshown.
WARNING: To reduce the risk of serious personal
injury, ALWAYS hold securely in anticipation of a
suddenreaction.
OPERATION
WARNING: To reduce the risk of serious personal
injury, turn unit off and remove the battery pack
before making any adjustments or removing/
installing attachments or accessories. An
accidental start‑up can causeinjury.
PIN SPECIFICATIONS
Model CMCn623
Pins DeWALT DWPN23xxx
PORTER-CABLE PPN23xxx, PN23PP
BOSTITCH PT-23xx-3M, BTPN23PP
Gauge 23
Headless pin range 5/8"–1 3/8" (16 mm–35 mm)
Magazine capacity 110 nails
TOOL SPECIFICATIONS
Model CMCn623
Length 9.21" (234 mm)
Height 8.30" (211 mm)
Width 3.15" (80 mm)
Weight 4.1 lbs (1.85 kg)
Adjusting Depth (Fig.I)
WARNING: To reduce risk of serious injury from
accidental actuation when attempting to adjust
depth, ALWAYS:
• Remove batterypack.
• Always point the nose of the nailer away fromyou.
• Avoid contact with trigger duringadjustments.
The depth that the fastener is driven can be adjusted using
the depth adjustment screw
15
and a hex key
16
which
is stored on the tool housing. The depth of drive is factory
adjusted to a nominal setting. Test fire a fastener and check
depth. If a change is desired:
1. To drive the nail deeper, rotate the depth adjustment
screw counterclockwise.
2. To drive a nail shallower, rotate the depth adjustment
screw clockwise.
Test drive another fastener and check depth. Repeat as
necessary to achieve desiredresults.
Dry Fire Lock Out
The tool will detect when there are about 10 pins left, and
shut off. When additional pins are loaded, the tool will return
to normal function.
Loading the Tool (Fig.G)
NOTICE: Use only pins recommended for use in your
pin nailer which meet the CRAFTSMAN specifications.
Refer to Pinspecifications.
1. Depress the magazine release lever
6
.
2. Pull sliding portion of magazine
7
back.
3. Load the stick of pins with the arrow pattern pointing
to the left as shown. If pins have black dots instead of
arrows, the dots should be positionedup.
4. Close magazine until it latches. The tool is now ready
foruse.
Preparing the Tool
nOTE: The battery pack is not fully charged out of the carton.
Follow instructions outlined (refer to ChargingaBattery).
1. Read the Nailer Safety Warnings section of thismanual.
2. Wear eye and earprotection.
3. Remove battery fromtool.
4. Ensure magazine is empty of allfasteners.
5. Check for smooth and proper operation of pusher
assemblies. Do not use the tool if pusher assembly is not
functioning properly.
6. Keep tool pointed away from yourself andothers.
7. Insert fully charged batterypack.
nOTE: The CMCB101 charger is not CRAFTSMAN VersaTrack™
Trackwallcompatible.
SAVE THESE INSTRUCTIONS FOR
FUTURE USE
Trigger Operation with a Secondary
Trigger (Fig.A)
WARNING: Never inadvertently pull or grasp the
secondary trigger when moving about, changing work
location, when holstering or hanging tool, or when
preparing work surface for fasteningoperation.
Loading ...
Loading ...
Loading ...