Documents: Go to download!
User Manual
- User Manual - (English)
- Installation Instruction - (English)
- Warranty - (English)
- Energy Guide - (English)
- Dimension Guide - (English)

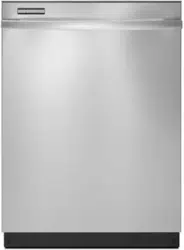
User Instructions for Whirlpool GU2475XTVY1
Table of Contents
- DISHWASHER SAFETY
- QUICK STEPS
- DISHWASHER USE
- CYCLE AND OPTION DESCRIPTIONS
- DISHWASHER FEATURES
- DISHWASHER CARE
- TROUBLESHOOTING
- WARRANTY
Quick Steps
- Prepare and load dishwasher.
- Add detergent for cleaning and rinse aid for drying
- Select a cycle and option.
- Start dishwasher
Dishwasher Use
STEP 1 Prepare and Load the Dishwasher
IMPORTANT: Remove leftover food, bones, toothpicks and other hard items from the dishes. Remove labels from containers before washing.
■ Make sure nothing keeps spray arm(s) from spinning freely. It is important for the water spray to reach all soiled surfaces.
■ Make sure that when the dishwasher door is closed no items are blocking the detergent dispenser.
■ Items should be loaded with soiled surfaces facing down and inward to the spray as shown. This will improve cleaning and drying results.
■ Avoid overlapping items like bowls or plates that may trap food.
■ Place plastics, small plates and glasses in the upper rack. Wash only plastic items marked “dishwasher safe.”
■ To avoid thumping/clattering noises during operation: Load dishes so they do not touch one another. Make sure lightweight load items are secured in the racks.
■ When loading silverware, always place sharp items pointing down and avoid “nesting” as shown.
STEP 2 Add Detergent
NOTE: If you do not plan to run a wash cycle soon, run a rinse cycle. Do not use detergent.
■ Use automatic dishwasher detergent only. Add powder, liquid or tablet detergent just before starting a cycle.
■ Fresh automatic dishwasher detergent results in better cleaning. Store tightly closed detergent container in a cool, dry place.
■ The amount of detergent to use depends on: How much soil remains on the items
- Heavily soiled loads require more detergent. The hardness of the water
- If you use too little in hard water, dishes won't be clean. If you use too much in soft water, glassware will etch.
Soft to Medium Water (0-6 grains per U.S. gallon) [typical water softener water and some city water] Medium to Hard Water (7-12 grains per U.S. gallon) [well water and some city water]
■ Depending on your water hardness, fill the Main Wash section of the dispenser as shown. Fill the Pre-Wash section to the level shown, if needed.
NOTE: Fill amounts shown are for standard powdered detergent. Follow instructions on the package when using other dishwasher detergent.
Add Rinse Aid
■ Your dishwasher is designed to use rinse aid for good drying performance. Without rinse aid your dishes and dishwasher interior will have excessive moisture. The heat dry option will not perform as well without rinse aid.
■ Rinse aid keeps water from forming droplets that can dry as spots or streaks. They also improve drying by allowing water to drain off of the dishes after the final rinse.
■ Rinse aid helps to reduce excess moisture on the dish racks and interior of your dishwasher.
■ Check the rinse aid indicator. Add rinse aid when indicator drops to “Add” level.
■ To add rinse aid, turn the dispenser cap to “Refill” and lift off. Pour rinse aid into the opening until the indicator level is at “Full.” Replace the dispenser cap and turn to “Lock.” Make sure cap is fully locked.
NOTE: For most water conditions, the factory setting of 2 will give good results. If you have hard water or notice rings or spots, try a higher setting. Turn the arrow adjuster inside the dispenser by either using your fingers or inserting a flat-blade screwdriver into the center of the arrow and turning.
STEP 3
Select a Cycle (cycles vary by model)
See “Cycle and Option Descriptions” charts in the following section. Heavier cycles and options affect cycle length. Some cycles and options will take up to 3¹⁄₂ hours to complete
Select Options (options vary by model)
See “Cycle and Option Descriptions” charts in the following section. You can customize your cycles by pressing the options desired.
STEP 4 Start or Resume a Cycle
■ Run hot water at the sink nearest your dishwasher until the water is hot. Turn off water. For best dishwashing results, water should be 120ºF (49ºC) as it enters the dishwasher.
■ Push door firmly closed. The door latches automatically. Select the wash cycle and options desired OR press START/RESUME to repeat the same cycle and options as in the previous wash cycle.
■ You can add an item anytime before the main wash starts. Open the door slowly and add the item. Close the door firmly within 3 seconds. Press START/RESUME.
Cycle and Option Descriptions
This information covers several different models. Your dishwasher may not have all the cycles and options described. You can customize your cycle by selecting an option. See option selections. If you change your mind, press the option again to turn off the option, or select a different option. You can change an option anytime before the selected option begins. *Maximum wash times depend on water temperature, heavy soil condition, dish load size and options selected.
IMPORTANT: The sensor in your dishwasher monitors the soil level. Cycle time and/or water usage can vary as the sensor adjusts the cycle for the best wash performance. If the incoming water is less than the recommended temperature or food soils are heavy, the cycle will automatically compensate by adding time, heat and water as needed.
Dishwasher Care
Cleaning the Dishwasher
Clean the exterior of the dishwasher with a soft, damp cloth and mild detergent. If your dishwasher has a stainless steel exterior, a stainless steel cleaner is recommended - Stainless Steel Cleaner and Polish Part Number 31464. Clean the interior of the dishwasher, with a paste of powdered dishwasher detergent and water or use liquid dishwasher detergent on a damp sponge to clean the cooled-down interior. A white vinegar rinse may remove white spots and film. Vinegar is an acid, and using it too often could damage your dishwasher. Put 2 cups (500 mL) white vinegar in a glass or dishwasher-safe measuring cup on the bottom rack. Run the dishwasher through a complete washing cycle using an air-dry or an energy-saving dry option. Do not use detergent. Vinegar will mix with the wash water.
If you have a drain air gap, check and clean it if the dishwasher isn't draining well.
Storing the Dishwasher
If you will not be using the dishwasher during the summer months, turn off the water and power supply to the dishwasher. In the winter, if the dishwasher could be exposed to near freezing temperatures or is left in a seasonal dwelling such as a second home or vacation home, avoid water damage by having your dishwasher winterized by authorized service personnel.
See other models: WRX735SDBM00 LSQ8543JQ0 GI15NFLTB0 YWED9600TW1 ED5VHEXTB01

