Loading ...
Loading ...
31-3000210 Rev. 1 3
Installation Instructions
3
INSTALL WASHER/DRYER
BRACKETS
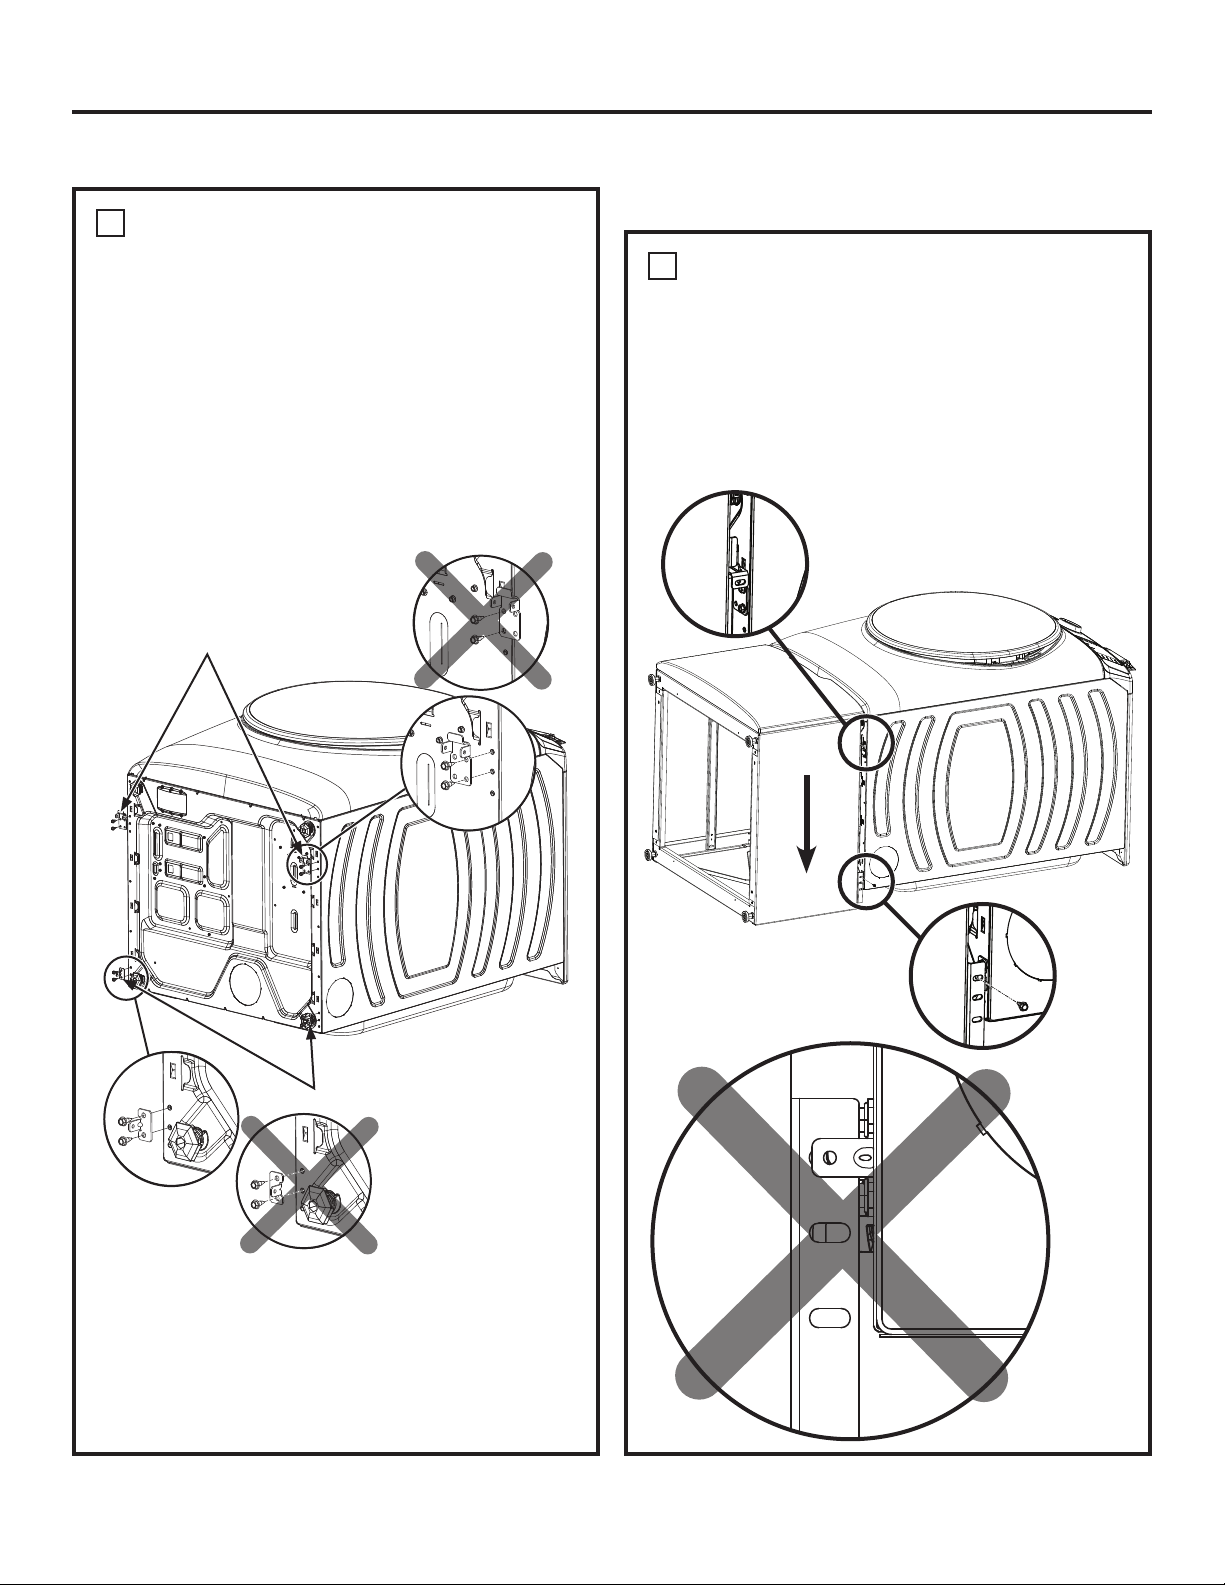
Front Brackets
Ŷ/D\WKHXQLWRQLWVEDFNRQDSURWHFWLYHVXUIDFH
Ŷ(QVXUHOHYHOLQJOHJVDUHWKUHDGHGLQWR
minimum height position.
Ŷ,QVWDOOIURQWEUDFNHWVRQWKHERWWRPRIWKH
washer or dryer as shown. Use the 2 holes
closest to the front and the 2 outermost holes
on the bracket. The bracket should not go
beyond the edge of the appliance.
Rear Brackets
Ŷ,QVWDOOUHDUEUDFNHWVRQWKHERWWRPRIWKH
washer or dryer as shown above. Use the top
2 holes on the bottom of the appliance with the
tab on the bracket facing the outside.
PREPARE THE UNIT
4
JOIN REAR BRACKETS
Ŷ/LIWSHGHVWDODQGKRRNIURQWEUDFNHWVRISHGHVWDO
to front brackets of washer or dryer.
Ŷ$OLJQUHDUEUDFNHWVRQZDVKHURUGU\HUZLWKUHDU
brackets on pedestal and fasten with screws.
Make sure the bracket from the appliance is to
the INSIDE of the pedestal bracket and not the
outside.
ATTACH PEDESTAL TO
UNIT
Front Brackets
Rear Brackets
J
Loading ...
Loading ...
Loading ...