Loading ...

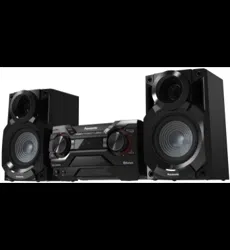
Overview of controls
Do the procedures with the remote control. You can also use the buttons on the main unit if they are the same.
A Standby/on switch [`], [1]
Press to switch the unit from on to standby mode or vice
versa. In standby mode, the unit is still consuming a
small amount of power.
B Select the audio source
On the main unit:
To start Bluetooth
®
pairing, press and hold [ –PAIRING].
C Basic playback control
D View the setup menu
E View the content information
F Select or confirm the option
G Open or close the disc tray
H Decrease the brightness of the display panel
To cancel, press the button again.
I Adjust the volume level
J Mute the sound
To cancel, press the button again.
“MUTE” is also cancelled when you adjust the volume or
when you switch off the system.
K View the play menu
L Select the sound effects
M Remote control sensor
Distance: Within approximately 7 m
Angle: Approximately 20° up and down, 30° left and right
N Select MP3 album or track
Press [ALBUM/TRACK] to select album or track.
Browse tracks or albums
Turn [MULTI CONTROL] to browse.
To start playback from the selection, press [4/9].
O USB port ( )
USB status indicator
P Display panel
Q Disc tray
R Select DJ jukebox
Media playback
The following marks indicate the availability of the feature.
Basic playback
CD USB BLUETOOTH
Note:
Depending on the Bluetooth
®
device, some operations may not
work.
Viewing available information
CD USB BLUETOOTH
You can view the available information, such as MP3 album
and track number, on the display panel.
Press [DISPLAY].
Note:
• Maximum characters that can be shown: Approximately 32
• This system supports ver. 1.0, 1.1 and 2.3 ID3 tags.
• Text data that the system does not support can show
differently.
Play menu
CD USB
1 CD
Press [PLAY MENU].
USB
Press [PLAY MENU] to select “PLAYMODE”.
2 Press [R, T] to select the setting and then press
[OK].
Note:
• During random playback, you cannot skip to tracks which
have been played.
• The setting is cancelled when you open the disc tray.
Link mode
BLUETOOTH
You can change the link mode to suit the connection type.
Preparation
If this system is connected to a Bluetooth
®
device,
disconnect it (Z“Disconnecting a device”).
1 Press [PLAY MENU] to select “LINK MODE”.
2 Press [R, T] to select the mode and then press [OK].
Note:
Select “MODE 1” if the sound is interrupted.
Radio
Preparation
Press [RADIO/AUX] to select “FM” or “AM”.
Manual tuning
1
Press [PLAY MENU] to select “TUNE MODE”.
2 Press [R, T] to select “MANUAL” and then press
[OK].
3 Press [2/3] or [5/6] to tune in to the
station.
To tune automatically, press and hold the button until
the frequency starts changing quickly.
“STEREO” is shown when a stereo broadcast is being
received.
Using the main unit
1 Press [TUNE MODE] to select “MANUAL”.
2 Press [2/3] or [5/6] to tune in to the
station.
Memory presetting
You can preset up to 30 FM and 15 AM stations.
Ű Automatic presetting
1 Press [PLAY MENU] to select “A.PRESET”.
2 Press [R, T] to select “LOWEST” or “CURRENT” and
then press [OK].
The tuner presets all the stations it can receive into the
channels in ascending order.
To cancel, press [8].
Ű Manual presetting
1 Press [PLAY MENU] to select “TUNE MODE”.
2 Press [R, T] to select “MANUAL” and then press
[OK].
3 Press [2/3] or [5/6] to tune in to the
station.
4 Press [OK].
5 Press [R, T] to select a preset number and then
press [OK].
Do steps 3 through 5 again to preset more stations.
The new station replaces any station that occupies the
same preset number.
Ű Selecting a preset station
1 Press [PLAY MENU] to select “TUNE MODE”.
2 Press [R, T] to select “PRESET” and then press
[OK].
3 Press [2/3] or [5/6] to select the preset
station.
Using the main unit
1 Press [TUNE MODE] to select “PRESET”.
2 Press [2/3] or [5/6] to select the preset
station.
Improving the sound quality
When “FM” is selected
1 Press [PLAY MENU] to select “FM MODE”.
2 Press [R, T] to select “MONO” and then press [OK].
To cancel, select “STEREO”.
“MONO” is also cancelled when you change the
frequency.
To memorise the setting
Continue with step 4 of “Manual presetting”.
When “AM” is selected
1 Press [PLAY MENU] to select “B.PROOF”.
2 Press [R, T] to select the setting that provides the
best reception and then press [OK].
Checking the signal status
When “FM” is selected
For Australia and New Zealand
Press [DISPLAY].
For others
Press [PLAY MENU] to select “FM STATUS” and then
press [OK].
RDS broadcasting
Except for Australia and New Zealand
This system can show the text data transmitted by the radio
data system (RDS) available in some areas.
Press [DISPLAY].
Note:
RDS may not be available if reception is poor.
AM allocation setting
By main unit only
This system can also receive AM broadcasts allocated in
10 kHz steps.
1 Press [RADIO/AUX] to select “FM” or “AM”.
2 Press and hold [RADIO/AUX].
After a few seconds, the display panel shows the current
minimum radio frequency. Release the button when the
minimum frequency changes.
• To go back to the initial setting, do the above steps again.
• Preset frequencies are erased after you change the
setting.
CD :
USB :
BLUETOOTH :
CD-R/RW in CD-DA format or with MP3 files.
USB device with MP3 files.
Bluetooth
®
device.
Play Press [4/9].
Stop Press [8].
USB
The position is memorised.
“RESUME” is shown.
Press again to stop fully.
Pause Press [4/9].
Press again to continue playback.
Skip Press [2/3] or [5/6] to skip track.
CD USB
Press [R, T] to skip MP3 album.
Search Press and hold [2/3] or [5/6].
OFF
PLAYMODE
Cancel the setting.
1-TRACK
1
Play one selected track.
Press [2/3] or [5/6] to select
the track.
1-ALBUM
1
Play one selected MP3 album.
Press [R, T] to select the MP3 album.
RANDOM
RND
Play all tracks randomly.
1-ALBUM
RANDOM
1 RND
Play all tracks in one selected MP3
album randomly.
Press [R, T] to select the MP3 album.
ALL REPEAT Repeat all tracks.
1-TRACK
REPEAT
1
Repeat 1-TRACK.
1-ALBUM
REPEAT
1
Repeat 1-ALBUM.
RANDOM
REPEAT
RND
Repeat random playback.
1-ALBUM
RANDOM
REPEAT
1 RND
Repeat 1-ALBUM RANDOM.
MODE 1 Emphasis on connectivity.
MODE 2 Emphasis on sound quality.
LOWEST Tuning begins from the lowest frequency.
CURRENT Tuning begins from the current frequency.
FM – – – – The FM signal is in monaural.
The system is not tuned in to a station.
FM ST The FM signal is in stereo.
FM MONO “MONO” is selected as the “FM MODE”.
PS Programme service
PTY Programme type
FREQ Frequency
Preparing media
Disc
1
Press [CD x] (main unit: [x OPEN/CLOSE]) to open the disc tray.
Put in a disc with the label facing up.
Press again to close the disc tray.
2 Press [USB/CD] to select “CD”.
USB
Preparation
Before you connect a USB device to the system, make sure you do a backup of the data.
1 Decrease the volume and connect the USB device to the USB port.
Hold the main unit when connecting or disconnecting the USB device.
2 Press [USB/CD] to select “USB A” or “USB B”.
USB status indicator lights up in red when selected.
Note:
Do not use a USB extension cable. The system cannot recognise USB device connected through a cable.
Bluetooth
®
You can connect and play an audio device wirelessly through Bluetooth
®
.
Preparation
• Switch on the Bluetooth
®
feature of the device and put the device near the system.
• Read the operating instructions of the device for details.
Ű Pairing a device
Preparation
If this system is connected to a Bluetooth
®
device,
disconnect it (Z“Disconnecting a device”).
1 Press [ ].
If “PAIRING” is shown, continue with step 4.
2 Press [PLAY MENU] to select “PAIRING”.
3 Press [R, T] to select “OK? YES” and then press
[OK].
“PAIRING” is shown.
To cancel, select “OK? NO”.
4 Select “SC-AKX200” from the Bluetooth
®
menu of
the device.
If prompted for a passkey, input “0000”.
The device connects with this system automatically after
pairing is complete.
The name of the connected device is shown for a few
seconds.
Using the main unit
1 Press and hold [ –PAIRING] until “PAIRING” is
shown.
2 Select “SC-AKX200” from the Bluetooth
®
menu of
the device.
Note:
You can pair up to 8 devices with this system. If a 9th device is
paired, the device that has not been used for the longest time will
be replaced.
Ű Connecting a device
Preparation
If this system is connected to a Bluetooth
®
device,
disconnect it (Z“Disconnecting a device”).
1 Press [ ].
“BLUETOOTH READY” is shown.
2 Select “SC-AKX200” from the Bluetooth
®
menu of
the device.
The name of the connected device is shown for a few
seconds.
3 Start playback on the device.
Note:
• A device must be paired to connect.
• This system can only connect to one device at a time.
• When “BLUETOOTH” is selected as the source, this system
will automatically try to connect to the last connected device.
Ű Disconnecting a device
1 Press [ ].
2 Press [PLAY MENU] to select “DISCONNECT?”.
3 Press [R, T] to select “OK? YES” and then press
[OK].
“BLUETOOTH READY” is shown.
To cancel, select “OK? NO”.
Using the main unit
Press and hold [ –PAIRING] until “PAIRING” is shown.
Note:
A device is disconnected when you:
• Select a different source.
• Move the device out of the maximum range.
• Disable the Bluetooth
®
transmission of the device.
• Switch off the system or the device.
External equipment
You can connect a VCR, DVD player etc. and listen to the
audio through this system.
Preparation
• Disconnect the AC mains lead.
• Switch off all equipment and read the appropriate
operating instructions.
1 Connect the external equipment.
2 Press [RADIO/AUX] to select “AUX”.
3 Play the external equipment.
To adjust the input level
1 Press [PLAY MENU] to select “INPUT LEVEL”.
2 Press [R, T] to select “NORMAL” or “HIGH” and
then press [OK].
Note:
• Select “NORMAL” if the sound is distorted during “HIGH”
input level.
• Components and cables are sold separately.
• If you want to connect equipment other than those described,
refer to the audio dealer.
• Sound distortion can occur when you use an adaptor.
Others
Auto off
This system automatically switches off when you do not use
it for approximately 20 minutes.
1 Press [SETUP] to select “AUTO OFF”.
2 Press [R, T] to select “ON” and then press [OK].
To cancel, select “OFF”.
Note:
This function does not work when you are in radio source or
when a Bluetooth
®
device is connected.
Bluetooth
®
standby
This function automatically switches on the system when
you establish a Bluetooth
®
connection from a paired device.
1 Press [SETUP] to select “BLUETOOTH STANDBY”.
2 Press [R, T] to select “ON” and then press [OK].
To cancel, select “OFF”.
Note:
Some devices may take longer to respond. If you are connected
to a Bluetooth
®
device before switching off the system, wait for a
minimum of 5 seconds before connecting to this system from
your Bluetooth
®
device again.
Software version
You can check the software version of the system.
1 Press [SETUP] to select “SW VER.” and then press
[OK].
The software version is shown.
2 Press [OK] again to exit.
DVD player (not supplied)
Audio cable
(not supplied)
Rear panel of
this main unit
Troubleshooting
Before requesting service, make the following checks. If you are in doubt about some of the check points, or if the solutions
indicated do not solve the problem, consult your dealer for instructions.
Ű Common problems
The unit does not work.
• The safety device has been activated. Do the following:
1. Press [1 ] on the main unit to switch the unit to standby
mode. If the unit does not switch to standby mode,
– Press and hold the button for a minimum of 10 seconds.
Or,
– Disconnect the AC mains lead and then connect it again.
2. Press [1 ] again to switch on the unit. If the problem
persists, consult your dealer.
The display panel lights up and changes continuously in
standby mode.
• Press and hold [8] on the main unit to select “DEMO OFF”.
No operations can be done with the remote control.
• Examine that the battery is installed correctly.
Sound is distorted or no sound.
• Adjust the volume of the system.
• Switch off the system, determine and correct the cause, and
then switch on again. It can be caused by straining of the
speakers through excessive volume or power, and when using
the system in a hot environment.
A humming sound can be heard during playback.
• An AC mains lead or fluorescent light is near the cables. Keep
other appliances and cords away from the cables of this
system.
The sound level reduces.
• The protection circuit has been activated due to the
continuous use at high volume output. This is to protect the
system and maintain the sound quality.
Ű Disc
Display not shown correctly.
Playback does not start.
• You have not put in the disc correctly. Put it in correctly.
• Disc is dirty. Clean the disc.
• Replace the disc if it is scratched, warped, or non-standard.
• There is condensation. Let the system dry for 1 to 2 hours.
The total number of tracks displayed is incorrect.
The disc cannot be read.
Distorted sound is heard.
• You put in a disc that the system cannot play. Change to a
playable disc.
• You put in a disc that has not been finalised.
Ű USB
The USB device or the contents in it cannot be read.
• The format of the USB device or the contents in it are not
compatible with the system.
• USB devices with storage capacity of more than 32 GB cannot
work in some conditions.
Slow operation of the USB device.
• Large content size or large memory USB device takes longer
time to read.
Ű Bluetooth
®
Pairing cannot be done.
• Check the Bluetooth
®
device condition.
• The device is out of the 10 m communication range. Move the
device nearer to the system.
The device cannot be connected.
• The pairing of the device was unsuccessful. Do pairing again.
• The pairing of the device has been replaced. Do pairing again.
• This system might be connected to a different device.
Disconnect the other device and try pairing the device again.
• The system may have a problem. Switch off the system and
then switch on again.
The device is connected but audio cannot be heard through
the system.
• For some built-in Bluetooth
®
devices, you have to set the
audio output to “SC-AKX200” manually. Read the operating
instructions of the device for details.
Sound from the device is interrupted.
• The device is out of the 10 m communication range. Move the
device nearer to the system.
• Remove any obstacle between the system and the device.
• Other devices that use the 2.4 GHz frequency band (wireless
router, microwaves, cordless phones, etc.) are interfering.
Move the device nearer to the system and distance it from the
other devices.
• Select “MODE 1” for stable communication.
Ű Radio
Sound is distorted.
• Use an optional FM outdoor antenna. The antenna should be
installed by a competent technician.
A beat sound is heard.
• Switch off the TV or move it away from the system.
• Move mobile telephones away from the system if the
interference is apparent.
• When in AM tuner mode, select the “B.PROOF” setting that
provides the best reception.
A low hum is heard during AM broadcasts.
• Move the antenna away from other cables and cords.
Ű Main unit displays
“ADJUST CLOCK”
• The clock is not set. Adjust the clock.
“ADJUST TIMER”
• The play timer is not set. Adjust the play timer.
“AUTO OFF”
• The system has not been used for 20 minutes and will switch
off within a minute. To cancel, press any button.
“ERROR”
• An incorrect operation was done. Read the instructions and try
again.
“F61”
• Examine and correct the speaker cords connection.
• Disconnect the USB device. Switch off the system and then
switch on again.
“F70”
• Examine the Bluetooth
®
connection.
• Disconnect the Bluetooth
®
device. Switch off the system and
then switch on again.
“F76”
• There is a problem with the power supply.
• Disconnect the AC mains lead and consult your dealer.
“F77”
• Disconnect the AC mains lead and consult your dealer.
“NO DEVICE”
• The USB device is not connected. Examine the connection.
“NO DISC”
• You have not put in a disc.
“NO PLAY”
“UNSUPPORT”
• Examine the content. You can only play supported format.
• The system may have a problem. Switch off the system and
then switch on again.
“NO TRACK”
• There is no album or track in the USB device.
“PLAYERROR”
• An unsupported MP3 file has been played. The system will
skip that track and play the next one.
“REMOTE 1”
“REMOTE 2”
• The remote control and the main unit are using different
codes. Change the code of the remote control.
– When “REMOTE 1” is shown, press and hold [OK] and [ ]
for a minimum of 4 seconds.
– When “REMOTE 2” is shown, press and hold [OK] and
[USB/CD] for a minimum of 4 seconds.
“TEMP NG”
• The temperature protection circuit has been activated, and the
system will switch off. Let the unit cool down before switching
it on again.
• Check that the ventilation opening of the unit is not
obstructed.
• Ensure this unit is well ventilated.
“USB OVER CURRENT ERROR”
• The USB device is using too much power. Disconnect the
USB device, switch off the system and then switch on again.
“VBR”
• The system cannot show the remaining play time for variable
bit rate (VBR) tracks.
Remote control code
When other Panasonic equipment responds to the remote
control of this system, change the remote control code for
this system.
Preparation
Press [USB/CD] to select “CD”.
Ű To set the code to “REMOTE 2”
1 Press and hold [USB/CD] on the main unit and
[USB/CD] on the remote control until “REMOTE 2” is
shown.
2 Press and hold [OK] and [USB/CD] on the remote
control for a minimum of 4 seconds.
Ű To set the code to “REMOTE 1”
1 Press and hold [USB/CD] on the main unit and [ ] on
the remote control until “REMOTE 1” is shown.
2 Press and hold [OK] and [ ] for a minimum of
4seconds.
System memory reset
Reset the memory when the following situations occur:
• There is no response when buttons are pressed.
• You want to clear and reset the memory contents.
1 Disconnect the AC mains lead.
2 While you press and hold [1] on the main unit,
connect the AC mains lead again.
Continue to press and hold the button until
“–––––––––” is shown.
3 Release [1].
All the settings are set back to the factory preset.
It is necessary to set the memory items again.
Sound effects
Preset EQ
1 Press [SOUND] (main unit: [LOCAL EQ]) to select
“PRESET EQ”.
2 Press [R, T] to select the desired preset EQ setting
and then press [OK].
Or turn [MULTI CONTROL] to select the desired preset
EQ setting.
Manual EQ
1 Press [SOUND] (main unit: [LOCAL EQ]) to select
“MANUAL EQ”.
2 Press [R, T] to select the sound effect.
Or turn [MULTI CONTROL] to select the sound effect.
3 Press [2/3] or [5/6] to select the setting
and then press [OK].
D.Bass
1 Press [SOUND] to select “D.BASS” and then press
[R, T] to select “D.BASS LEVEL” or “D.BASS BEAT”.
Or press [D.BASS] on the main unit to select
“D.BASS LEVEL” or “D.BASS BEAT”.
To cancel, select “OFF D.BASS”.
2 Press [2/3] or [5/6] to select the setting
and then press [OK].
Or turn [MULTI CONTROL] to select the setting.
DJ jukebox
USB
You can use DJ jukebox to add cross-fading effect between
songs. You can also use additional features with the
“Panasonic MAX Juke” app (Zbelow).
1 Press [PLAY MENU] to select “JUKEBOX”.
2 Press [R, T] to select the setting and then press
[OK].
Using the main unit
Press [DJ JUKEBOX] to select the setting.
Ű Changing the repeat setting
1 Press [PLAY MENU] to select “PLAYMODE”.
2 Press [R, T] to select the setting and then press
[OK].
Using the main unit
In the stop mode, turn [MULTI CONTROL] to select the
setting.
Note:
DJ jukebox is switched off when you switch off the system or
change to another source.
Clock and timers
Setting the clock
This is a 24-hour clock.
1 Press [SETUP] to select “CLOCK”.
2 Press [R, T] to set the time and then press [OK].
To check the time
Press [SETUP] to select “CLOCK” and then press [OK].
In standby mode, press [DISPLAY].
Note:
Reset the clock regularly to maintain accuracy.
Sleep timer
The sleep timer switches off the system after the set time.
1 Press [SETUP] to select “SLEEP”.
2 Press [R, T] to select the setting (in minutes) and
then press [OK].
To cancel, select “OFF”.
Note:
• The remaining time is always shown on the display. The
display changes temporarily when you perform other
operations.
• The play timer and sleep timer can be used together.
• The sleep timer always comes first. Be sure not to set an
overlap of timers.
Play timer
(Except for Bluetooth
®
and AUX source)
You can set the timer to come on at a certain time to wake
you up.
Preparation
Set the clock.
1 Press [SETUP] to select “TIMER ADJ”.
2 Press [R, T] to set start time and then press [OK].
3 Do step 2 again to set the end time.
4 Press [R, T] to select the source you want to play
and then press [OK].
To start the timer
1 Press [SETUP] to select “TIMER SET”.
2 Press [R, T] to select “PLAY ON” and then press
[OK].
“#” is shown.
To cancel, select “PLAY OFF”.
The system must be switched off for the timer to
operate.
To check the setting
Press [SETUP] to select “TIMER ADJ” and then press
[OK].
In standby mode, press [DISPLAY] two times.
Note:
• The timer starts at a low volume and increases gradually to the
preset level.
• The timer comes on at the set time every day if the timer is on.
• If you switch off the system and then switch on again while a
timer is in operation, the timer will not stop at the end time.
OFF CROSSFADE Cancel cross-fading.
ON CROSSFADE Add cross-fading.
OFF Switch off DJ jukebox.
RANDOM REPEAT
RND
Repeat random playback.
ALL TITLE REPEAT Repeat all tracks.
Using the “Panasonic MAX Juke” app
You can download and install the free Android™ app
“Panasonic MAX Juke” on Google Play™ for additional
features, such as to request song playback from multiple
devices simultaneously.
A3 4 Portrait.indd 2A3 4 Portrait.indd 2 13/02/2015 3:07:33 PM13/02/2015 3:07:33 PM