GEAppliances
0
©
o_,,!
,,.,,,,
J /
------____
/
JE1860
Part No. 164D3370P088 Pub.No, 49°40089 2-99 CG 3828WSA1134
IMPORTANTSAFETYINFORMATION.
READALL iNSTRUCTiONSBEFOREUSING
A WA '!
For your safety, the information in this manual must be
followed to minimize the risk of fire or explosion, electric
shock, or toprevent property damage, personal injury, or
loss of life.
PRECAUTIONSTOAVOID
POSSIBLEEXPOSURETO
EXCESSIVEMICROWAVEENERGY
0o NotAttemptto operate m
this oven wnh tile door open
since open-door operation
can resuh in hannthl
exposure to microwave
energ T. It is imporlant not
to defeat or tamper _dth the
s_ety interlocks.
m OoNot Place aW ol_ject
between the oven flont f_t(e
and the door or allow soil
or cleaner residue to m
accumulate on sealing
surt?tces.
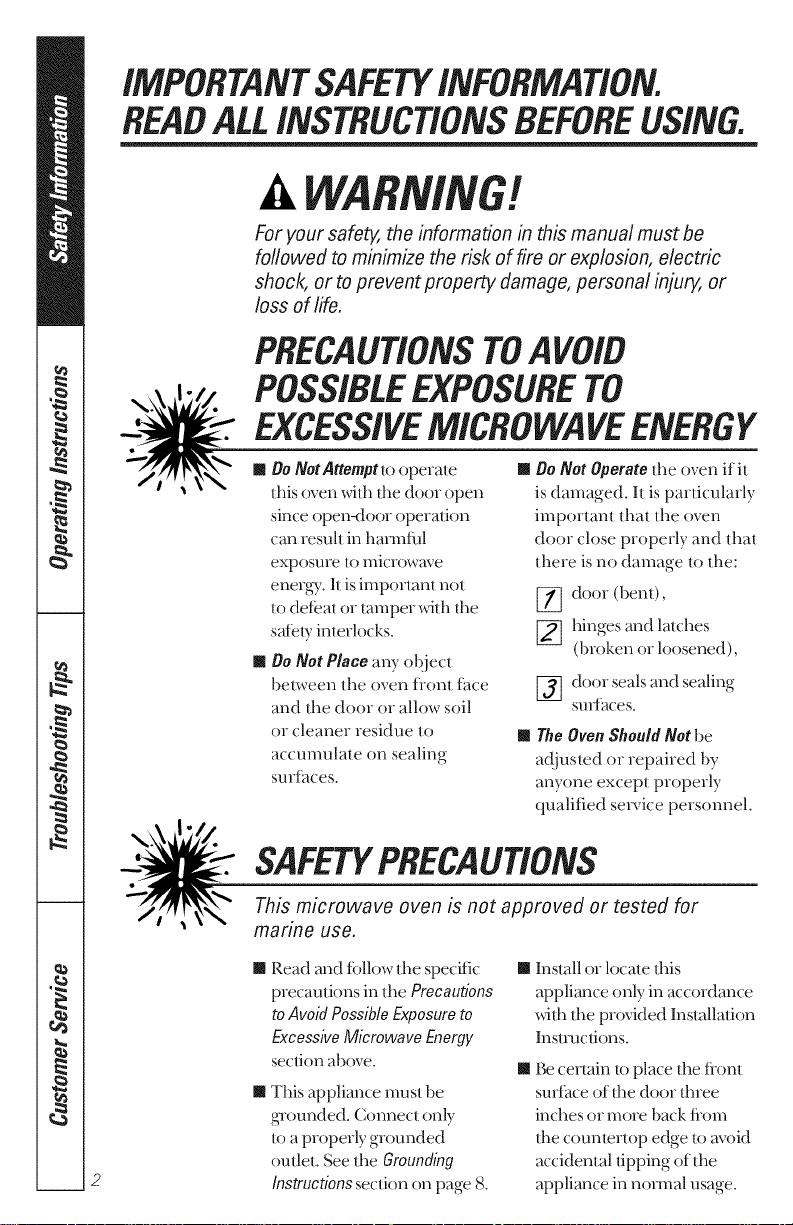
0o Not Operatethe oven if it
is damaged. It is particularly
important that the oven
door close properly and that
there is no damage to the:
[_ door (bent),
[_ hinges and latches
(broken or loosened),
[_] door sealsand sealing
smti_ces.
TheOvenShouldNotbe
a_!justed or repaired by
anyone except properly
qualified se_qce personnel.
SAFETYPRECAUT/ONS
This microwave oven is not approved or tested for
marine use.
2
m Read and tbllow the specNc m
precautions in the Precautions
toAvoid PossibleExposureto
ExcessiveMicrowave Energy
section above.
m
This appliance must be
gTounded. Connect only
to a properly grounded
outlet. See the &ounding
Instructionssection on page 8.
m
Install or locate this
appliance only in accordance
_th the provided Installation
Instructions.
1_ certain to place the flont
sud_ue of the door fllree
inches or more back fiom
tile coumertop edge t,) avoid
accidental tipping of the
appliance in normal usage.
Use this appliance only for its intended purpose as
described in this Owner's Manual
m Do not mounl this appliance m
over a sink.
m Do not mount the microwave
oven over or near any portion
of a heating or cooking
appliance.
m Do not store anyfl_ing directly
on R)p of the microwave oven
sml_tce when the microwave
oven is in operation.
m Do not operate this appliance
if it has a damaged power
cord or plug, if it is not
working properly, or if it has
been damaged or dropped.
m Do not cover or block aW
openings on the appliance.
m Use fl_is appliance only fi_rits
intended use as described in
this mmmal. Do nol use
corrosive chemicals or vapors
in this appliance. This
microwave oven is specifically
designed to heat, dU or cook
tood, and is not intended tbr
laborato U or indusnial use.
m Do not store this appliance
outdoors. Do not use this
product near wate_tbr
example, in a wet
basement, near a swimming
pool or near a sink.
m Keep power cord awayflom
heated suri?tces.
m Do not immerse power cord
or plug in water.
m Do not let power cord hang
over edge of table or counter.
To reduce the risk of fire in
the oven cavity:
-- Do not overtook food.
Cmetully attend appliance
if paper, plastic or other
combustible materials are
placed inside the oven while
cooking.
-- Remove wire twist=ties and
metal handles flom paper
or plastic containers betbre
placing them in the oven.
m
m
m
Do not use the oven for
slwrage purposes. Do not
leave paper products,
cooldng umnsils or tbod in
the oven when not in use.
If materials inside tim oven
should ignite, keep the oven
door closed, Into the oven off
and disconnect the power
cord, or shut offpower at the
tuse or ciivuit breaker panel.
If the door is opened, the fire
m Wspread.
See door surface cleaning
insnuctions in the Care and
cleaning of the microwave
oven section of this manual.
This appliance should be
serviced only by qualified
service personnel. Contact
nearest authorized service
t_tcility tbr examination,
repair or ar!justment.
As with aW appliance, close
supe_,ision is necessa U
when used by children.
3
IMPORTANTSAFETYINFORMATION.
READALL INSTRUCTIONSBEFOREUSING
ARCING
,!
m
If you see arcing, press the CLEAR/OFFpad and correct
the problem.
Arcing is the microwave lerm
tbr sparks in dm oven. Arcing
is caused by:
m Metal or tbil touching the
side of the oven.
m Foil not molded to tbod
(upturned edges act like
antennas).
m Metal, such as tsvisHies,
poulnv pins or gold-_immed
dishes, in d_e microwave.
m Recycled paper towels
containing small metal pieces
being used in tl_e microwave.
FOODS
m
m
m
Do not pop popcorn in your
microwave oven unless in a
special microwave popcorn
a(cessoi T or unless you use
popcorn labeled tbr use in
ulicrowave ovens.
_)me products such as
whole eggs and sealed
containers-tbr example,
closed jars-will explode and
should not be heated in d_is
microwave oven. Such use of
d_e microwave oven could
_>sult in inju U.
Do not boil eggs in a
microwave oven. Pressure will
build up inside egg yolk and
will cause it lo burst, possibly
resulting in inju U.
m
m
Operating the microwave
wid_no tbod inside tbr more
d_an a minute or two may
cause damage to tl_eoven
and could slarl a life. It
increases the heat around tl_e
magnetron and can shorten
tl_e li*eof tl_e oven.
Foods wid_ unbroken outer
"skin" such as potatoes, hot
dogs, sausages, tomatoes,
apples, chicken livers and
odmr giblets, and egg yolks
should be pie_ved to allow
steam to escape dunng
cooking.
#
! SUPERHEATEDWATER m
Microwaved water andother
liquidsdo not alwaysbubble
when theyreach the boiling
point. Theycan actuallyget
superheatedand not bubble
atall.
Superheatedliquid will bubble
upout ofthe cup wheniris
movedor when somethinglike
aspoonortea bagisputinto it.
Topreventthisfromhappening
andcausinginjury,do notheat
anyliquidfor morethan2
minutesper cup.After heating,
let the cupstandin the
microwave for30seconds
beforemovingit or putting
anythingintoit.
m Avoid heating baby food in
glassjars, even _th the lid m
off. Make sure all inf_tnt food
is thoroughly cooked. Sdr
food to distlJbute the heat
evenly. Be cmeful to prevent
scalding when wanning
fbnnula. The container m W
feel cooler than the formula
really is. Alwws test the
formula before feeding m
the baby.
m Don't deflost flozen
beverages in nmrow-necked
bottles (especially
cmbonated beverages). Even
if the container is opened,
pressure can build up. This
can cause the container to
burst, possibly resulting in
iqjuu.
m
Spontaneous boilin,g=Under
certain special circumstances,
liquids m W start IOboil
during or shortly afier
removal flom the microwave
oven. To prevent bums flom
splashing liquid, we
recommend the ibllo_qng:
before removing the
container fiom the oven,
allow the container to stand
in the oven for 30 to 40
seconds 'at)er the oven has
shut off. Do not boil liquids
in nanow-necked containers
such as soft dnnk bottles,
_ine flasks and especially
nanow-necked coffee cups.
Even if the container is
opened, excessive stealn can
build up and cause it to burst
or oveIt]ov,'.
Hot f(_ods and smam can
cause bums. 1_ careful when
opening aW containers of
hot fbod, including popcorn
bags, cooking pouches and
boxes. To prevent possible
inju U, direct stealn away
flom hands and f_tce.
Do not overtook potatoes.
They could dehydrate and
catch fire, causing damage
to your oven.
Cook meat and poulu T
fl_oroughly-meat toat
least an INTERNAL
temperature of 160 °F.
and pouln Tto at least an
INTERNAL temperature
of 180 °F. Cooking to these
temperatures usually protects
against f_)odbome illness.
5
IMPORTANTSAFETYINFORMATION.
READALL INSTRUCTIONSBEFOREUSING
MICflOWAW-SAFECOOKWAflE
Make sure all cookwme used in
your microwave oven is suitable
tbr microwaving. Most glass
casseroles, cooking dishes,
measming cups, custard cups,
potm_ 7 or china dinnerware
which does not have metallic
him or glaze _qth a metallic
sheen can be used. Some
cookware is labeled "suitable
for microwaving."
m If you are not sure if a dish is
microwave-sate, use this test:
Place in tl_e oven botl_ the
dish you are testing and a
glass measuring cup tilled
_qtl_ 1 cup ofwaler-sel the
measming cup either in or
next twfi_e dish. Microwave
1minute at high. If the dish
heats, it should not be used
for microwaving.
If fi_edish remains cool and
only the water in the cup
heals, fi_en tim dish is
microwave-sate.
m
If you use a Ineal
fl_em_ometer while cooking,
make sure il is sate t(_i use
in microwave ovens.
m Do not use recTcled paper
products. Recycled paper
towels, napkins and waxed
paper can contain metal
tlecks which may cause mcing
or ignite. Paper products
containing wlon or nylon
tilaments should be avoided,
as they mW also ignite.
m Some styrotoam nays (like
fi_ose that meat is packaged
on) have a thin suJp of metal
embedded in the bottom.
"_q_enmicrowaved, the metal
can burn the tloor of the
oven or ignite a paper towel.
m Do not use tile ulicrowave It
&T newspapers.
m Not all plasticwrap issuitable
tot use in lnicrowave ovens.
Check the package for
proper use.
m Paper towels, waxed paper
and plastic wrap can be used
to cover dishes in order to
retain moisture and prevent
spattering. Be sure to vent
plastic wrap so steam can
escape.
m Cool<ware may become hot
because of heat uansfened
tiom tim heated tood. Pot
holders may be needed to
handle the cookware.
6
m "Boilable" cooking pouches
and tightly closed plastic bags
should be slit, pie_ved or
vented as directed by
package. If they me not,
plastic could burst dm{ng or
immediately after cooking,
possibly resulting in inju U.
Also, plastic storage
containers should be at least
pmtially uncovered because
they f_)nn a tight seal. When
cooking _4th containers
tighdy cove_>d _4tll plastic
wrap, remove covering
cmefully and direct smam
awW flom hands and t_tce.
m Use ft)il only as direcmd in
tllis Kuide. TV dinners may
be microwaved in t_)ilnays
less than 3/4" high; remove
tile top f_il cover and remm
tile t_Wtv) tile box. _qlen
using ff)il in file microwave
oven, keep tile toil at least
1inch awW flom tile sides
of tile oven.
m Plastic cookware--PlastJc
cookwme designed f_)r
microwave cooking is ve_T
usetul, but should be used
caret_ally. Even microwave-
s_e plastic m Wnot be as
tolerant of overcooking
conditions as me glass or
ceramic materials and m W
soften or chin it subjected
to short periods of
ove_vooking. In longer
exposures to ove_vooking,
tile ff)od and cookware
could ignim.
Follow these guidelines:
%
1[Tsemicrowave-sate
plastics only and use
diem in strict compliance
with the cool<wme
inanuthcturer's
recolnulendations.
Do not microwave empty
containers.
Do not pemlit children
to use plastic cookware
without complete
supervision.
IMPORTANTSAFETYINFORMATION.
READALL INSTRUCTIONSBEFOREUSING
Improper use of the grounding plug can result in a risk of
electric shock.
GROUNDINGINSTRUCTIONS
This appliance must be grounded. In the evenl of an elecnical short
ci_cuit, Dounding _educes d_e risk of elecnic shock by providing an
escape wi_e tbr d_e elecnic cunenl.
This appliance is equipped with a power cord having a grounding
wi_e with a grounding plug. The plug musl be plugged inlo an
oullel lha| is properly inslalled and Dounded.
Consuh a qualified electrician or se_dce technician it the
grounding instructions are not completely understood or if
doubt exists as lo whether the appliance is properly grounded.
If the outlet is a standard 2-prong wall oudet, it is your pe_sonal
responsibility and obligation to have it replaced with a properly
grounded 3-prong wall outlet.
Do not under any circumstances cut or remove d_e d_i_d (ground)
prong flom dm power cord.
We do not recommend using an exmnsion cord with d_is appliance.
If din power cord is too short, have a qualified elecuician or seevice
technician install an outlet nero d_e appliance. (See WARNING--
EXTENSIONCORDSsec don.)
For best operation, plug this appliance into its own electrical outlet
to prevent flickenng of lights, blowing of thse or tripping of ci_cuit
breaker.
8
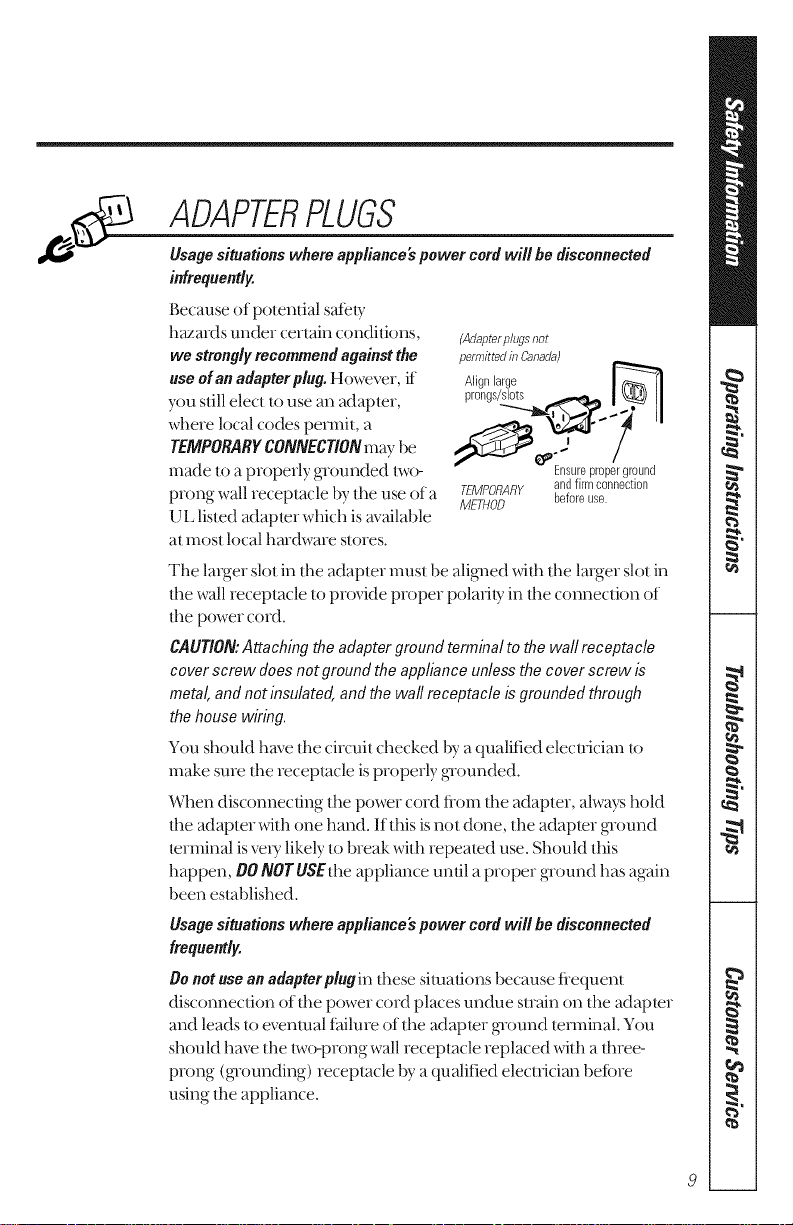
ADAPTERPLUGS
Usage situations where appliance's power cord will he disconnected
infrequently.
gecause of potential s'ateb_
h_ads under certain conditions,
we strongly recommend against the
use of an adapter plug. However, L[
you still ele(I to use an adapter,
where local codes pennil, a
TEMPORARY CONNECTIONmay be
made lo a properly grounded two-
prong wall recepta(le by tile use of a
{JIJlisted adapter which is available
at inost local hmdware stores.
(Adapter plugs not
permitted b Canada)
Ensureproperground
TEMPORARY andfirmconnection
METHOD beforeuse.
Tile larger slot in die adapter must be alig]led widl the larger slot in
the wall receptacle to provide proper polmiI}_ in the connection of
tile power cord.
CAUTION: Attaching the adapter ground terminal to the wall receptacle
cover screw does not ground the appliance unless the cover screw b
metal, and not insuleted, and be wall receptacle b grounded through
the house wiring.
You should have tile cir(uit checked by a qualified eIecuician to
make sure the recep/ncle is properly gTounded.
When disconnecting the power cord flom tile adapter, always hold
tile adapter with one hand. If this is not done, the adapter glound
terminal is verdi likely Io break with repeated use. Should this
happen, O0 NOT USEthe appliance undl a proper gTound has again
been es/nblished.
Usage situations where appliance's power cord will he disconnected
frequently.
Do not use an adapter plugin dlese situations be(ause flequenl
disconneclion of die power cord pla(es undue strain on tile adapter
and leads lo eventual failure of the adapter gTound/enninal. You
should have the t_vo-prong wall receptacle replated with a three-
prong (glounding) receptz4cle by a qualified elecnician beibre
using tile appliance.
9
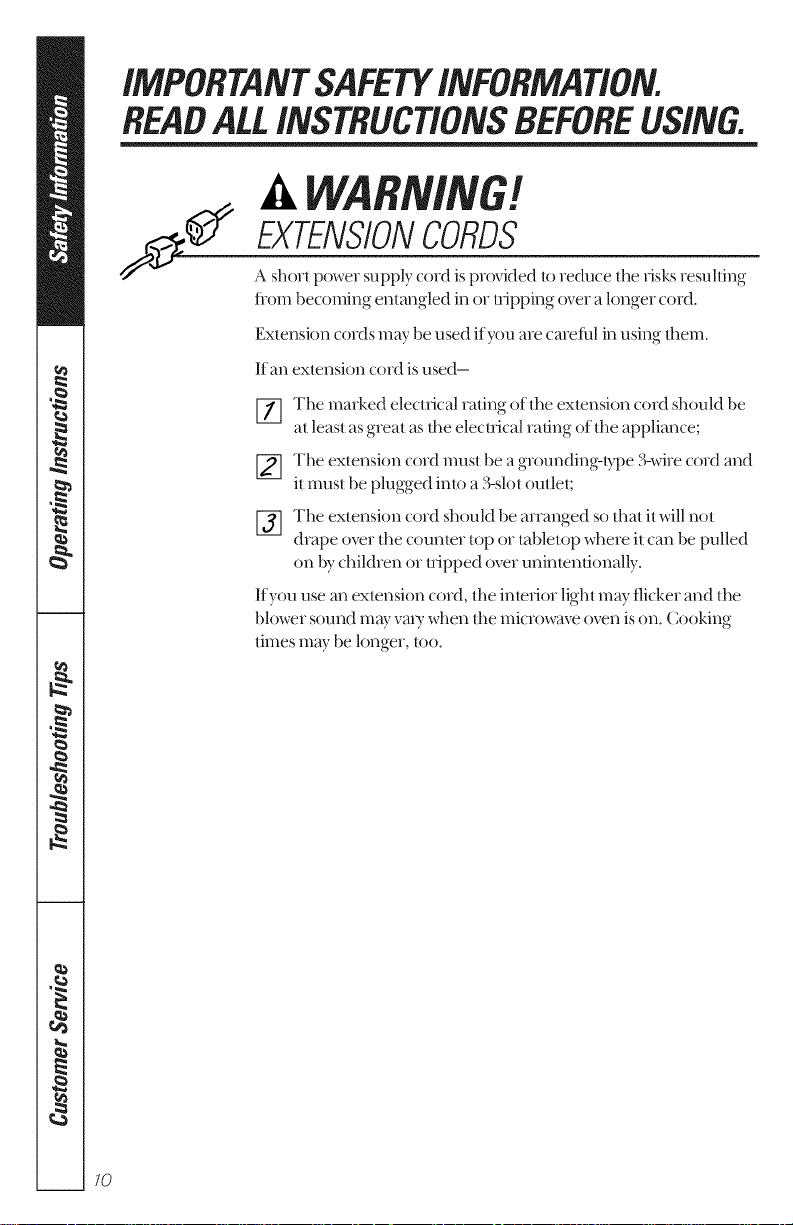
IMPORTANTSAFETYINFORMATION.
READALL INSTRUCTIONSBEFOREUSING
flom becoming entangled in or t_Jpping over a longer cord.
Extension cords may be used if you are careti_l in using fllem,
If an extension cord is used-
[_ The marked electrical rating of the extension cord should be
at least as great as file electrical rating of file appliance;
_] ile extension cord must lye a groundin,g_t?_pe 3-wire cord and
it must be plugged into a 3-slot outlet;
_] he extension cord should be ananged so that it will not
drape over tile counter top or tabletop where it can be pulled
on by children or t_ipped over unintentionally.
If you use an extension cord, tile interior light may flicker and the
blower sound Illay vai)7 when tile microwave oven is on. Cooking
times may be longer, too.
7O

fleadandfollowthisSafety
Informationcarefully.
SAVETHESEINSTRUCTIONS
77
Congratulations!
YouAmNow Partof theGEFamily.
Welcome to the GE family. We're proud of our quality products mad we are committed
to providing dependable sepdce. You'll see it in this easy-to-use Owner's Manual and
you'll hear it in the tiiendly voices of our custollleI sepdce department.
Best of all, you'll experience these values each lime you use your microwave oven.
That's important, because your new microwave oven will be part of your t_tmily t_)r
many years. And we hope you will be part of ours fi)r a long time tt) come.
Wethank you i_)rbuying GE.We appreciate your purchase, and hope you will
continue to relyon us whenever youneed quality appliances fi)ryour home.
,,'ka-
Important!
Fill out and _eturn the Consumer Product Regisnadon Card
that is packed with this product.
WritetheModel& SerialNumbersHem.
#
#
Youcan find them on a/abelinside the oven.
Staple sales slip or cancelled check hem.
Proof of the original purchase date is needed to obtain service
under the warran_
72
GE& You,
A ServicePartnership.
Ask any GEappliance owner and they will
tefl you we stand behind our products with
unmatched quality service. However, did
you know that most questions result from
simple problems that you can easily fix
yourself in just a few minutes ?This
Owner's Manual can tell you how
(_ fleadthisManual
Inside you will find many helpful
hinls on how touse and maintain
your microwave oven properly.
.lust a littlepreventive cme on your
pro1 can save you a great deal of
time and money over the life of
your microwm,e oven.
ReviewtheSectionon
TroubleshootingTips
You'll find many answers to
common problems here. If
you review our chart of
Troubleshooting Tips first,
you may not need tocall tot
service at all.
ff YouNeedService
If you do need se_ice, you can
relax kno_dng help is only a
phone call away. A list of toll-flee
CuStOlller sei_:ice nunlbers is
included in the back secdon.
Or you can alwws call the
GE Answer Cenler ®at
800.626.2000, 24 hours a dW,
7 days a week.
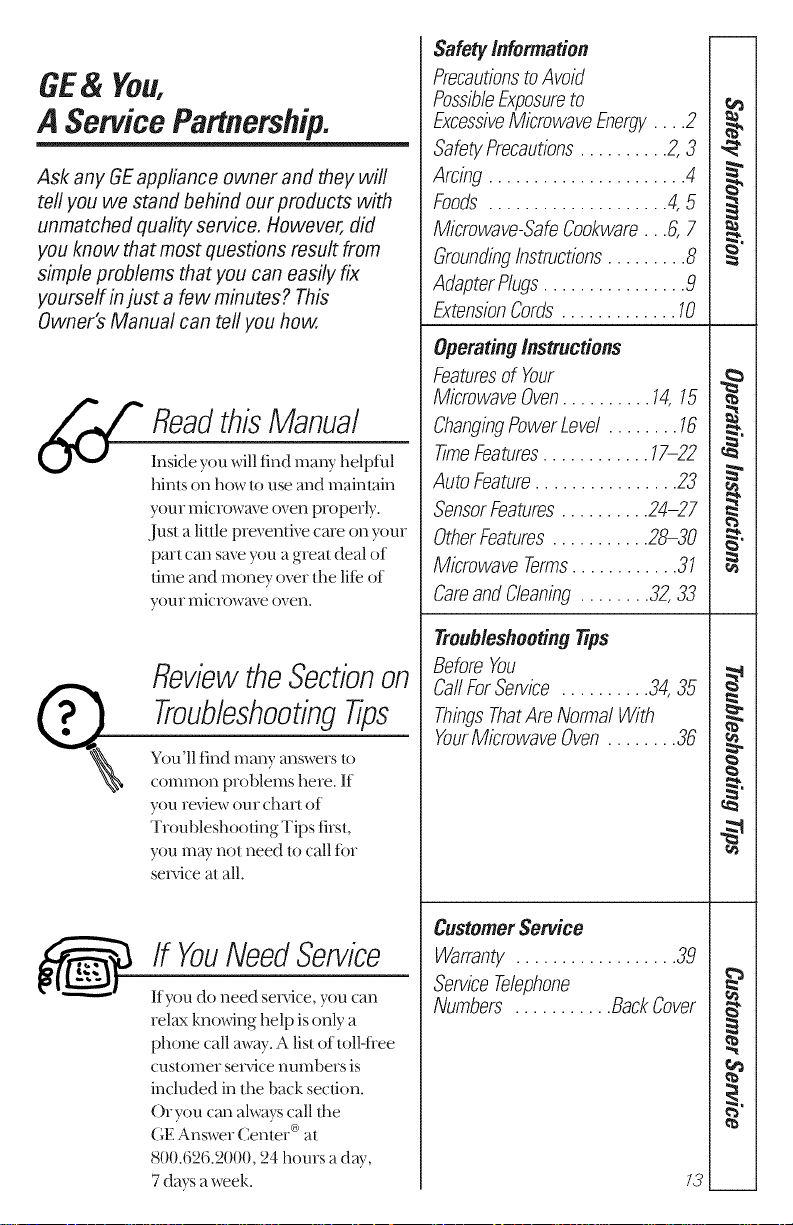
Safety Information
PrecautionstoAvoid
PossibleExposureto
ExcessiveMicrowaveEnergy.... 2
SafetyPrecautions.......... 2,3
Arcing ...................... 4
Foods .................... 4,5
Microwave-SafeCookware...6, 7
&ounding Instructions......... 8
AdapterPlugs................ 9
ExtensionCords ............. 10
Operating Instructions
Featuresof Your
MicrowaveOven.......... 14,15
ChangingPowerLevel ........ 16
TimeFeatures............ 17-22
AutoFeature................ 23
SensorFeatures.......... 24-27
OtherFeatures........... 28-30
Microwave Terms............ 31
CareandCleaning ........ 32,33
TroubleshootingBps
BeforeYou
CallForService .......... 34,35
ThingsThatAre Normal With
YourMicrowaveOven ........ 36
CustomerService
Warranty .................. 39
ServiceTelephone
Numbers ........... BackCover
/3
g
g
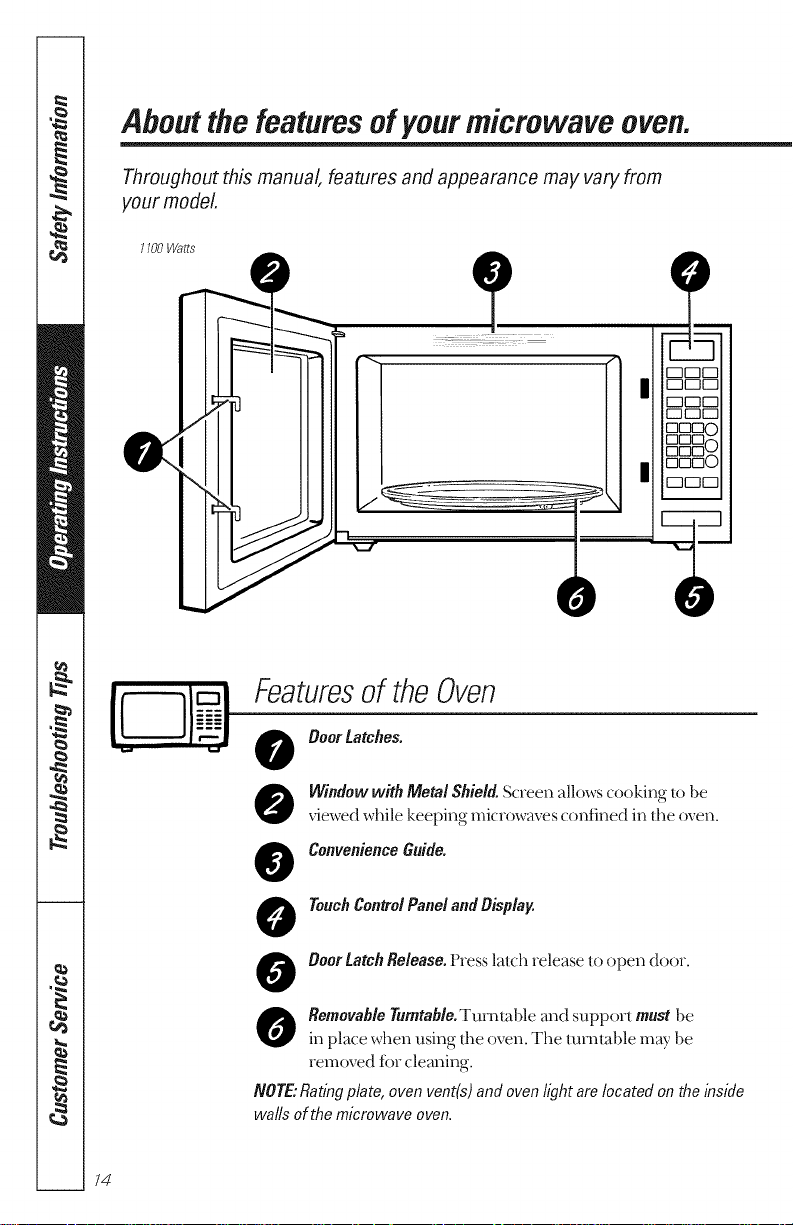
Aboutthefeaturesofyourmicrowaveoven.
Throughout this manual, features and appearance may vary from
your model
1100Watts
I
0
0
m
K2
r-q ]r-q
5C3
E_ 3r-q
E3 3E3
rnE _3C)
E3E
E3E -_()
DE _0
C3 3C3
0
Featuresof theOven
0
@
0
0
0
Window with Metal Shield. Screen allows cooking to be
_4ewed while keeping microwaves confined in the oven.
ConvenienceGuide.
TouchControlPanelandBisplay.
Boor Latch Release. Press latch release to open door.
Removable Turntable. Tumlnble and support must be
in place when using fl_e oven. The tumtnble may be
removed fbr cleaning.
/VOTE,"Rating plate, oven vent(s) and oven light are located on the inside
walls of the microwave oven.
74
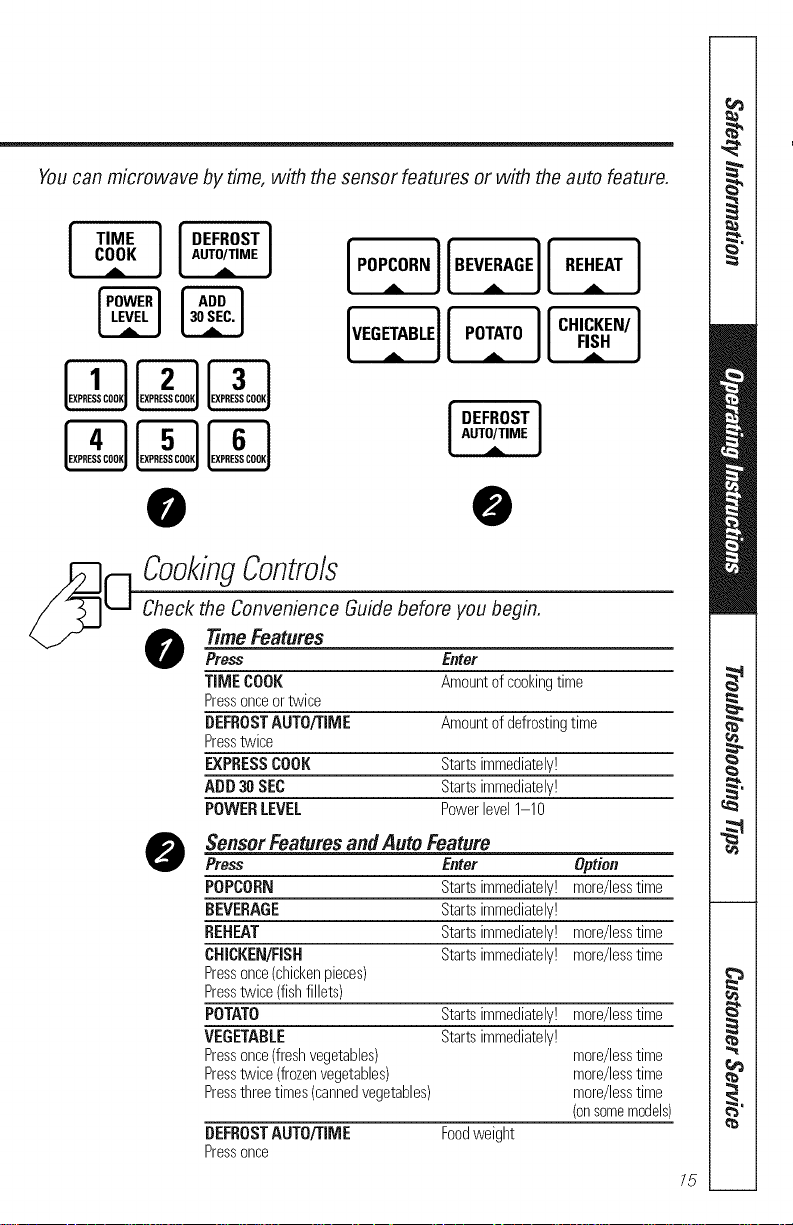
Youcan microwave by time, with the sensor features or with the auto feature.
[
TIME ] !OEF.OST!
cook/
[ DEFROST]
0 0
CookingControls
Check the Convenience Guide before you begin.
Bme Features
Press Enter
TIMECOOK Amountofcookingtime
Pressonceortwice
DEFROSTAUTO/TIME Amountofdefrostingtime
Presstwice
EXPRESSCOOK Startsimmediately!
ADD30SEC Startsimmediately!
POWERLEVEL Powerlevel1-10
SenserFeatures andAuto Feature
Press Enter Option
POPCORN Startsimmediately!more/lesstime
BEVERAGE Startsimmediately!
REHEAT Startsimmediately!more/lesstime
CHICKEN/FISH Startsimmediately!more/lesstime
Pressonce(chickenpieces)
Presstwice(fishfillets)
POTATO Startsimmediately!more/lesstime
VEGETABLE Startsimmediately!
Pressonce(freshvegetables) more/lesstime
Presstwice(frozenvegetables) more/lesstime
Pressthreetimes(cannedvegetables) more/lesstime
(onsomemodels)
DEFROSTAUTO/TIME Foodweight
Pressonce
|
|
E
75
76
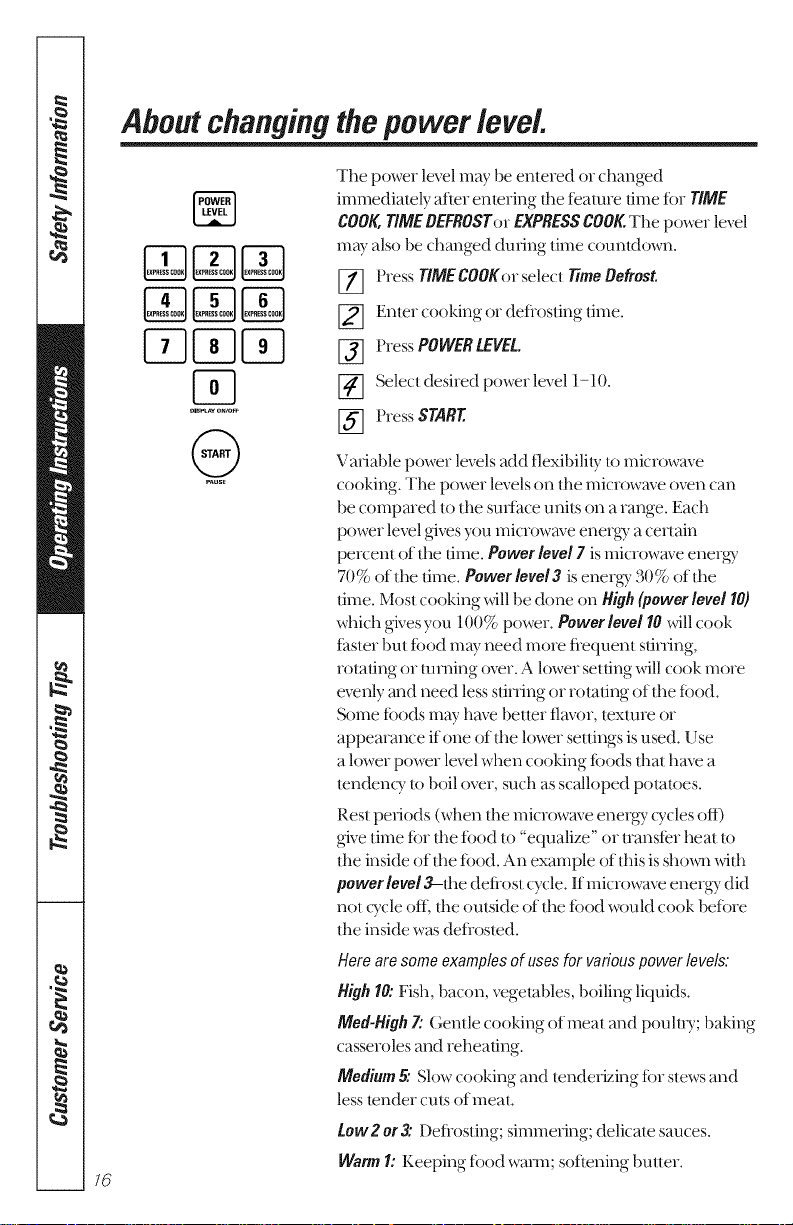
Aboutchanging thepower level.
D=SPLAVO_/O_F
Tile power level may be entered or changed
immediately after entering the featme time fbr TIME
COOK,rIME DEFROSTor EXPRESSCOOK.The power level
m Walso be changed dunng time countdown.
_] Press TIMECOOKor select _me Defrost
Enter cooking or deflosting time.
P_>ssPOWERLEVEL
_-_ Select desi_ed power level 1-10.
_] Press START.
Variable power levels add flexibility to microwave
cooking. The power levels on the microwave oven can
be compmed to the sm_{hceunits on a _ange. Each
power level gives you microwave energ): a certain
pe_vent of the time. Powerlevel7 is microwave energy
70% of the time. Power level 3 is energ)_ 30% of the
time. Most cooking _411be done on High(power level I0)
which gives you 100% power. Power level I0 will cook
f_tster but tbod m Wneed more flequenl stin_ing,
mtating or mining over. A lowe_ setting will cook more
evenly and need less stin_ing or rotating of the R_od.
Some floods may have beue_ flavor, mxture or
appearance if one of file lower settings is used. Use
a lowe_ power level when cooking foods that have a
tenden W to boil ove_, such as scalloped potatoes.
Rest pe_iods (when the microwave ene_g7 wcles off)
give time R_rthe fbod u_"equalize" or nansier heat to
the inside of the tbod. An example of this is shown with
power level 3-fire deflost cycle. If microwave ene_g Tdid
not wcle DiE tile outside of the tbod would cook beth,>
the inside was deflosted.
Herearesomeexamplesofusesfor variouspower levels."
HighI0: Fish, bacon, vegetables, boiling liquids.
Meal-High7."Gentle cooking of meat and pouluT; baking
casseroles and reheating.
Medium K Slow cooking and tenderizing tbr stews and
less tender cuts of meat.
Low2or& Defrosting; simme_ing; delicate sauces.
WarmI: Keeping tbod warm; softening butler.
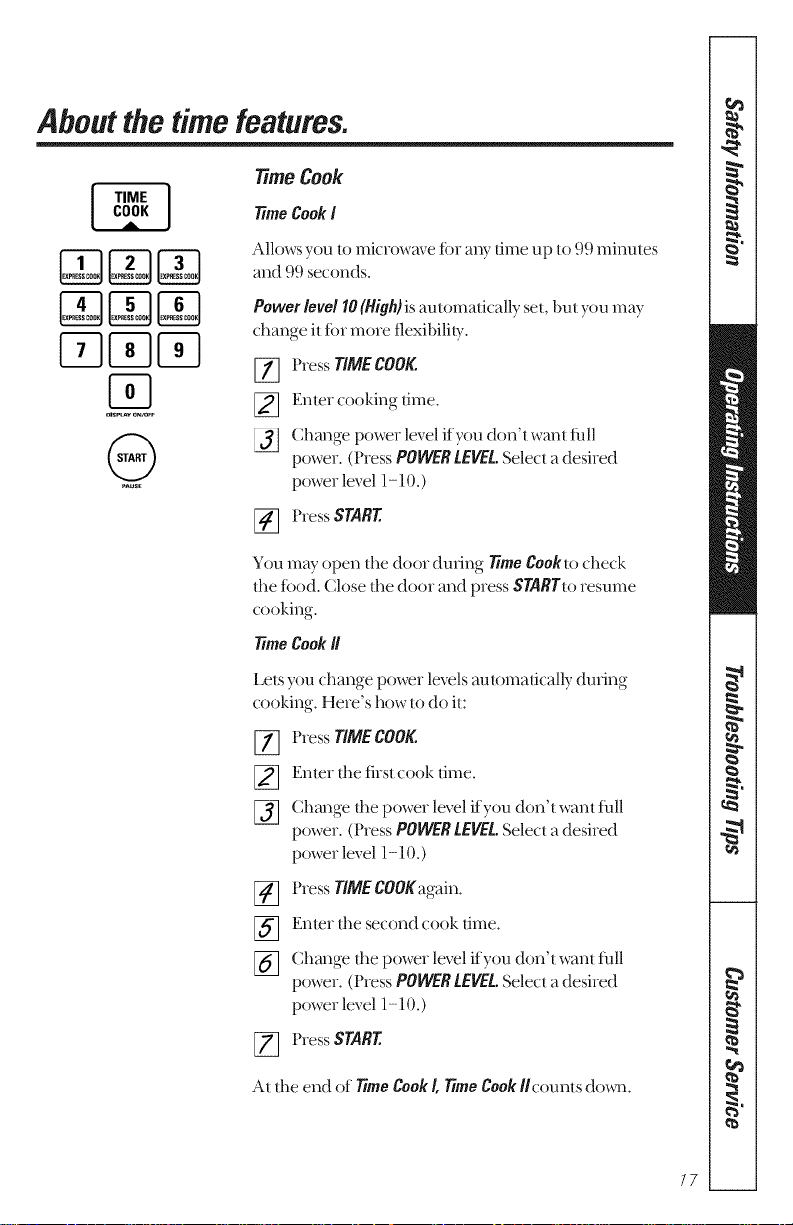
Aboutthe time features.
time Cook
77meCookI
OiS_LAVOWOrF
Allows you 1o microwm_e tbr any lime up to 99 minutes
and 99 seconds.
Powerlevel I0 (High)is automatically sel, but you may
change il tbr more flexibility.
[_ Press TIMECOOK.
[2] Enter cooking time.
(_hange power level ifyou don'l wm]l thll
power, (Press POWERLEVEr.Select a desired
power level 1-10.)
_] Press START.
You may open the door during 77meCooklo check
fl_e food. Ck)se fl_e door and press 8TARTto resume
cooking.
time Cook//
Lets you change power levels automatically during
cooking. Here's how to do it:
%
%
f_
%
%
Press TIMECOOK.
Enter the first cook time.
Change file power level if you don't want full
power. (Press POWER tEVEt. Select a desired
power level 1-10.)
Press TIMECOOKagain.
Enter the second cook time.
Change file power level if you don't want tull
power. (Press POWERLEVEL,Select a desired
power level 1-10.)
_] Press START.
At tile end of 77meCook I, 77meCook Rcounts do'_m.
|
|
8
-7,
77
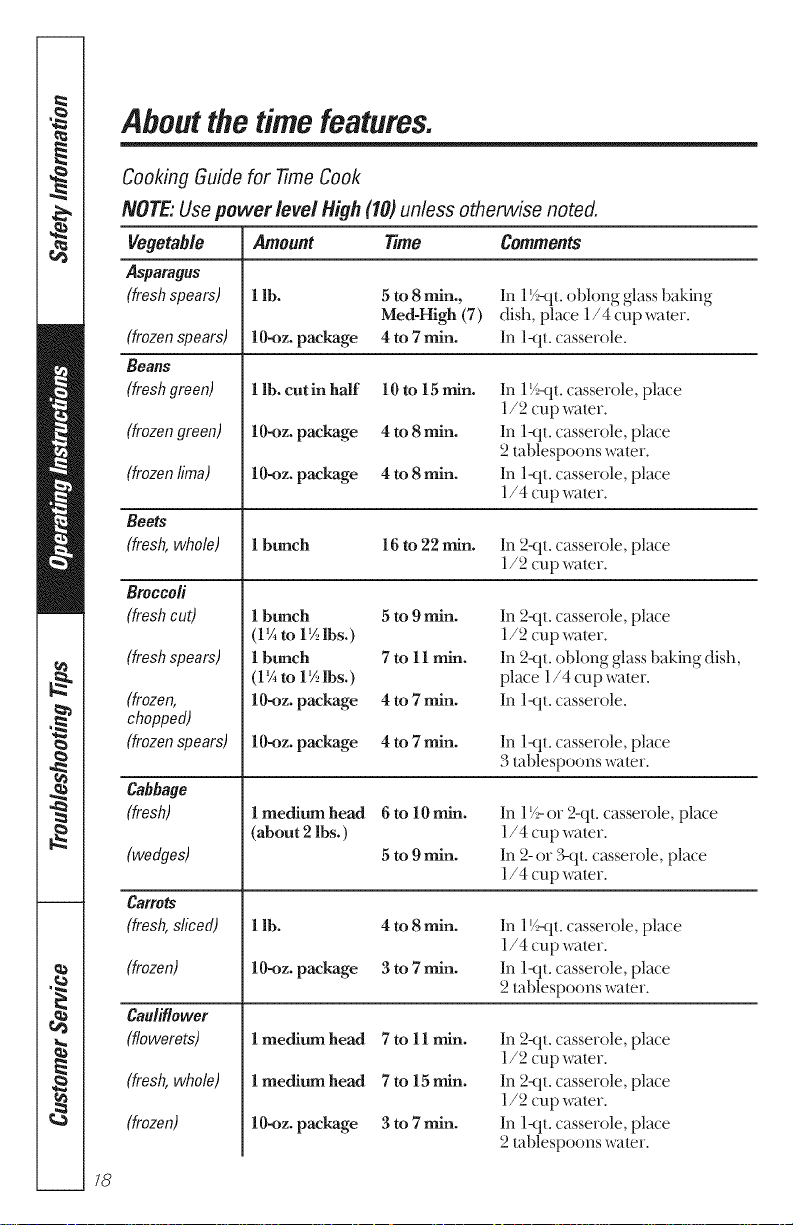
Aboutthe time features.
Cooking Guide for 77meCook
NOTE: Use power level High (10) unless otherwise noted.
Amount Time Comments
l lb. 5 to 8 rain, In 1V=_tt.oblong glass baking
Me&High (7) dish, place 1/4 cup waler.
10-oz. package 4 to 7 rain. In 1-<It.casserole.
/8
Vegetable
Asparagus
(freshspears)
(frozenspears)
Beans
(freshgreen)
(frozengreen)
(frozenlima)
Beets
(fresh,whole)
Broccoli
(freshcut)
(freshspears)
(frozen,
chopped)
(frozenspears)
Cabbage
(fresh)
(wedges)
Carrots
(fresh,sliced)
(frozen)
Cauliflower
(f/owerets)
(fresh,whole)
(frozen)
1 lb. cut in half 10 to 15 rain.
lO-oz, package 4 to 8 rain.
lO-oz, package 4 to 8 rain.
In 17__lt.casserole, place
1/2 cup water.
In 1-qt. casserole, place
2 tablespoons water.
In 1-<it.casserole, place
1/4 cup wamr.
1 bunch
16 to 22 rain. In 2-qt. casserole, place
1/2 cup wamr.
1 bunch
(1% to 1%lbs.)
1 bunch
(l%to 1½lbs.)
lO-oz, package
lO-oz, package
5tog_n.
7toll min.
4to7_n.
4to7_n.
In 2-qt. casserole, place
1/2 cup water.
In 2-q[. oblong glass baking dish,
place 1/4 cup water.
In 1-<it.casserole.
In 1-qL casserole, place
3 tablespoons wamr.
1 medium head
(about 2 lbs.)
6to lOmin.
5 to 9min.
In 1V_or 2-qt.casserole, place
1/4 cup water.
In 2-or 3-qt.casserole, place
1/4 cup wamr.
1 lb.
lO-oz, package
4to8_n.
3to7_n.
In 17__lt.casserole, place
1/4 cup water.
In 1-qL casserole, place
2 tablespoons wamr.
1 medium head
1 medium head
lO-oz, package
7to 11 rain.
7to 15 rain.
3 to 7min.
In 2-qt. casserole, place
1/2 cup water.
In 2-qt. casserole, place
1/2 cup water.
In 1-qL casserole, place
2 tablespoons wamr.
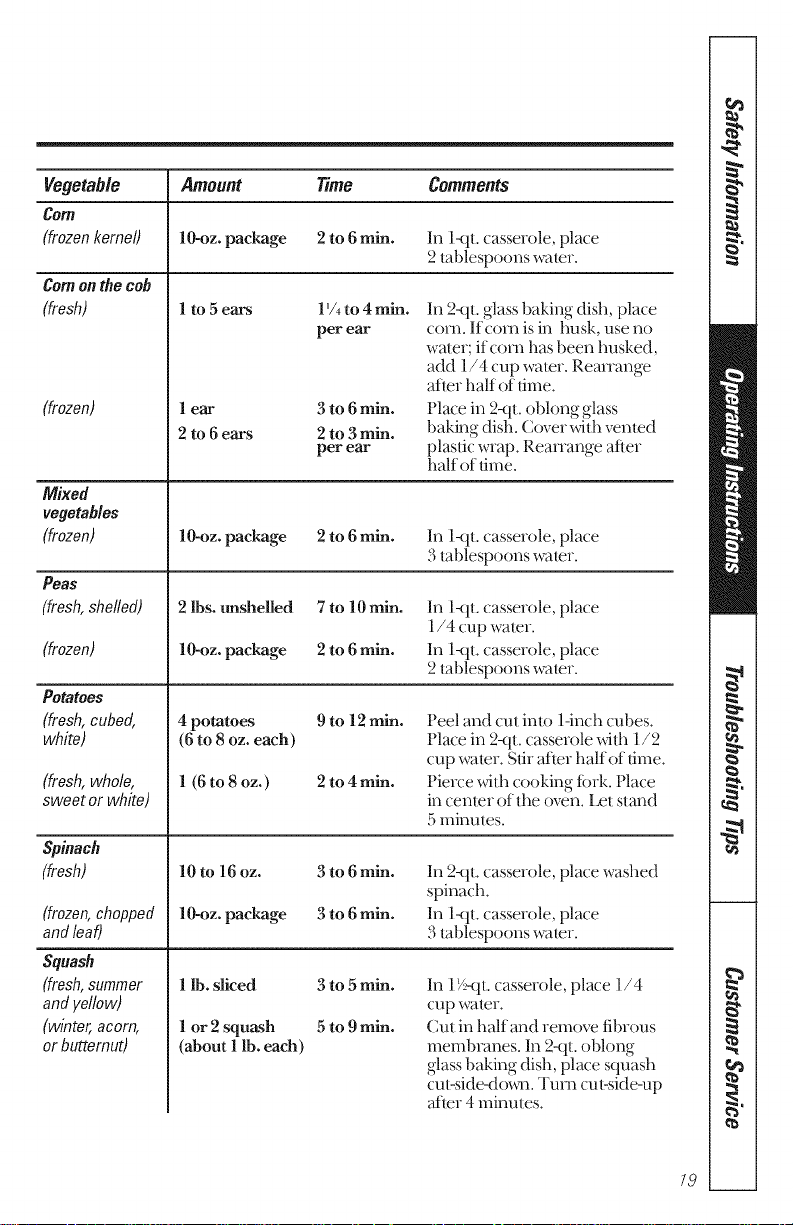
Vegetable Amount Time Comments
Corn
(frozen kernel) lO-oz, package 2 to 6min. In l-qt. casserole, place
2 tablespoons water.
Cornonthe cob
(fresh)
(#ozen)
Mixed
vegetables
(frozen)
Peas
(fresh,shelled)
(frozen)
Potatoes
(fresh,cubed,
white)
(fresh, whole,
sweet or wh#e)
Spinach
(fresh)
(frozen,chopped
andleaf)
Squash
(fresh,summer
andyellow)
(winter,acorn,
or butternut)
1 to 5 ears 1'Ato 4 rain.
per ear
1 ear 3 to 6 rain.
2 to 6 ears 2 to 3 rain.
per ear
In 2-qt. glass baking dish, place
com. If corn is in husk, use no
water; ifcorn has been husked,
add 1/4 cup water. RemTange
after half of time.
Place in 2-qt. oblong glass
baking dish. Cover with venmd
plastic wrap. Reanange after
half of time.
10-oz. package 2 to 6min. In 1-qt. casserole, place
3 tablespoons water.
2 lbs. unshelled 7 to 10 rain.
10-oz. package 2 to 6 min.
In 1-qt. casserole, place
1/4 cup water.
In 1-qt. casserole, place
2 tablespoons wamr.
4 potatoes 9 to 12 min.
(6 to 8 oz. each)
1 (6 to 8 oz.) 2 to 4rain.
Peel and cut imo 1-inch cubes.
Place in 2-qt. casserole _fitl_ 1/2
cup wamr. Stir atier half of time.
Pierre _fith cooking tork. Place
in center of the oven. Eel stand
5 minutes.
10to 16oz. 3 to 6rain.
10-oz. package 3 to 6min.
In 2-qt.casserole, place washed
spinach.
In 1-qt.casserole, place
3tablespoons wamr.
1 lb. sliced 3 to 5min.
1 or 2 squash 5 to 9rain.
(about 1lb. each)
In 17__tt.casserole, place 1/4
cup water.
Cut in half and remove tibrous
membranes. In 2-qL oblong
glass baking dish, place squash
cu>side-do,_a. Turn cu>side-up
'aider 4 minutes.
|
|
/9

Aboutthe time features.
2O
time Defrost
Allows you to deflost fbr a selected length of tilne. See
the Defrosting Guidefbr suggested times. (Auto Defrost
explained in tim About the autofeaturesection.)
[7] Press DEFROSTAUTORIMEt_vice.
f_ Enter deflosting time.
_-_ Press START
[] Turn tbod over when the oven signals.
[_ Press START
Power level is automatically set at 3, but can be changed.
You can defrost small items quickly by raising the power
level after entering the time. Powerlevel7 cuts the total
defiosfing time in about half; power level I0 cuts the
total time to appmximamly 1/3. However, food x_411
need more frequent attention than usual.
At one half of selected deflosfing time,/he oven signals
TURN.At this time, turn food over and break apmt or
reanange pieces ffw more even deflosfing. Shield aW
warm areas with small pieces of fbil.
A dull/humping noise may be hemd during deflosfing.
This is normal when oven is not operating at Highpower.
DefrostingTips
m Foods fiozen in paper or plasdc can be deflosted in
the package. Closed packages should be slit, pierced
or vented AFTER fbod has parflally defrosted. Plastic
storage containers should be partially uncovered.
m Family-size, prepackaged fiozen dinners can be
defrosted and microwaved. If the food is in a foil
container, t_ansfer it to a microwave-sale dish.
m Foods that spoil easily should not be allowed Io sit out
tbv more than one hour after deflosfing. Room
mmperatme promotes the growth of harmful bacmfia.
m For more even deflosfing of linger foods, such as
masts, use Auto Defrost,Be sure lmge meats are
completely deffosmd befbre cooking.
m %qmn deflosmd, fbod should be cool but softened in
all meas. If still slightly iW, remm to the microwm_e
veIT briefly, or let it stand a few minums.
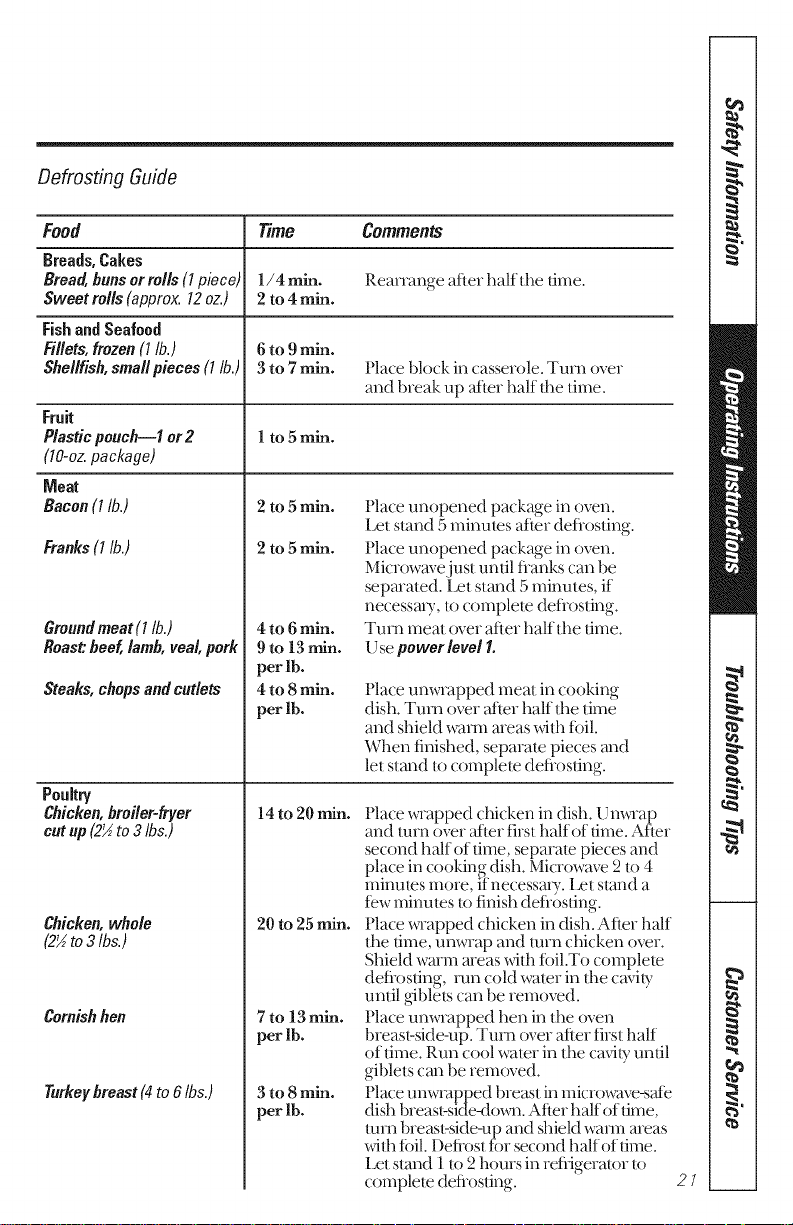
Defrosting Guide
Food Time Comments
Breads,Cakes
Bread,bunsorrolls(l p/ece) 1/4 mln. Reanange after half the dine.
Sweetrolls(approx.12oz.) 2to 4 rain.
Fishand Seafood
Fillets,frozen(1lb.) 6to 9mln.
Shellfish,small pieces(1lb.) 3 to 7rain. Place block in casserole. Turn over
and break up 'aider half d_e dine.
Fruit
Plasticpouch--f or2 1 to 5rain.
(lO-oz. package)
Meat
Bacon (1lb.)
Franks(1lb.)
Groundmeat (1 lb.)
Roast."beef, lamb, veal, pork
2 to 5min.
2 to 5min.
Steaks,chopsandcutlets
Poultry
Chicken,broiler-fryer
cut up (2'_to3Ibs.)
Chicken,whole
(2½to3 Ibs.)
Cornishhen
Turkey breast (4 to 6/bs.)
4 to 6rain.
9 to 13rain.
per lb.
4to 8rain.
per lb.
14 to 20 rain.
20 to 25 rain.
7to 13 rain.
per lb.
3 to 8 rain.
per lb.
Place unopened package in oven.
Let stand 5 minutes after deflosfing.
Place unopened package in oven.
Microwave just until flanks can be
separated. [Jet stand 5 minutes, if
necessm T, to complete deflosting.
Turn meat over after half the lime.
Use power level1.
Place unwrapped meat in cooking
dish. Turn over 'atier half the time
and shield warm meas _itl_ toil.
When finished, separate pieces and
let stand to complete deflosfing.
Place wrapped chicken in dish. I Jnwrap
and mrn over attev first half of dine. After
second half of time, separam pieces and
place in cooking dish. Mk rowave 2 to 4
minutes illoie, ifnecessalv. Let stand a
tew minutes to finish deflosting.
Place wrapped chicken in dish. After half
the time, unwrap and tmn chicken over.
Shield wmm meas _ith toil.To complem
defiosting, run cold water in tl_e cm,ity
until ,giblets can be removed.
]['lace unwrapped hen in the oven
breast>side-up. Turn overafter first half
of time. Run cool water in the caxqtyuntil
giblets can be removed.
Place unwrapped breast in micro_ave-s_e
dish breast-side-doxm. After half of dine,
tam breas>0de-up and 0_ield warm meas
_itl_ toil. Deflwst tbr second half of dine.
Let stand 1 to 2 hours in refligerator to
complete deflosfing.
21
|
|
E
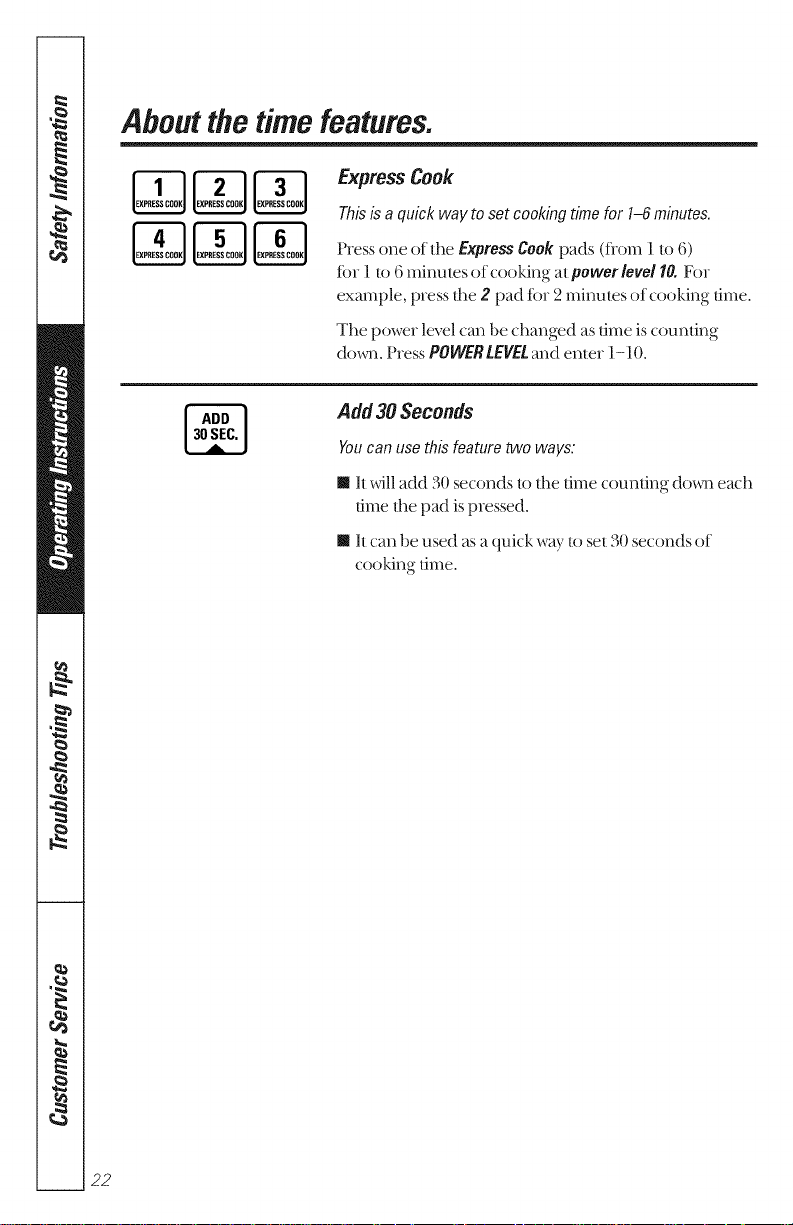
Aboutthe time features.
Express Cook
Thisis aquick way toset cookingtimefor 1-6minutes.
Pressone of the ExpressCook pads (flom 1It) 6)
tbr 1to 6 minules of cooking at power level10.For
example, press the 2 pad tbr 2 minutes of (ooking lime.
Tile power level can be changed as lime is coundng
do_. Press POItVERLEVEI.and enler 1-10.
Add30Seconds
Youcan usethisfeaturetwo ways:
m It will add 30 seconds/o tile time (ounling down ea(h
lime file pad is pressed.
m It can be used as a quick wW to sol 30 seconds of
cooking lime.
22

Aboutthe autofeature.
AutoDefrost
msP_Avo_or_
Guide
i i J>'_
TheAuto/fime Defrost teatm egivesyou t>a)waysto
defrost flozen foods, Press AUTO/T/MEBEEonce
for Auto Defrostor twice fbr )TreeDefrost
[Jse Auto Defrost fbr meat, pouh_ T and fish.
1)se_me Defrost tbr most other flozen tbods.
Auto Defrost automatically sets the deflosting times and
power levels to give even deflosfing results ibr meats,
pouh_ 7 and fish weighing up to six pounds.
Press AUTO/TIMEDEEonce.
Using the ConversionGuidebelow, enter fi)od
weight. For example, press pads Iand 2 tbr 1.2
pounds (1 pound, 3 ounces).
_] Press START.
( time Defrost is explained in the About the time features
section.)
There is a handy guide located on the inside front of the oven.
m Remove meat flom package and place on microwm,e-
saie dish.
m Twice during deflost, dm oven siglmls TURN.At each
TURNsignal, tam the tbod over. Remove deflosmd
meat or shield warm areas _4th small pieces oftbil.
m After deflosdng, most meats need to stand 5 minu/es
to complem deflosfing. Lmge roasts should stand fbr
about 30 minutes.
ConversionGuide
Iftheweightoffoodisstatedinpoundsandounces,theounces
mustbeconvertedtotenths(.1)efapound
WeightofFoodin Dunces EnterFoodWeight
(tenthsof apound)
1-2 .1
3 .2
4-5 .3
8-7 .4
8 .5
9-10 .6
11 .7
12-13 .8
14-15 .9
23
|
I
E
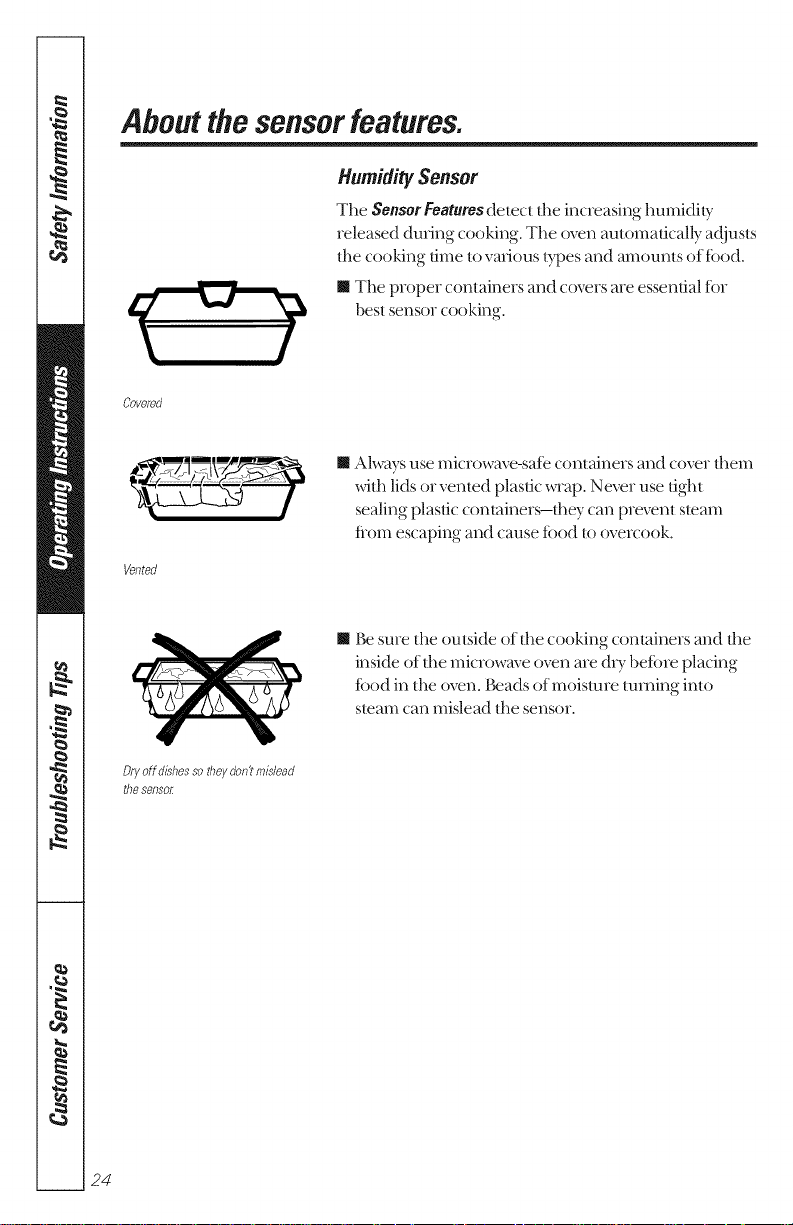
Aboutthe sensor features.
HumiditySensor
Tile Sensor Features delect tile increasing humidity
released duling cooking. Tile oven automatically ac!jus/s
tile cooking time to vmious types and alnounls of t(_od.
m Tile proper containers and covers are essential fbr
best sensor cooking.
Vented
m Always use microwave-sate containers and cover them
_tll lids or vented plastic wrap. Never use tight
sealing plastic containe_s-they can prevent steam
tiom escaping and cause tbod to ove_vook.
m 1_ sure tile outside of tile cooking containers and file
inside of tile microwave oven are &T bet()re placing
tbod in tile oven. I_ads of moisture turning into
steam can mislead tile sensor.
Dry off d_hes so thW don't mislead
the sensol_
24
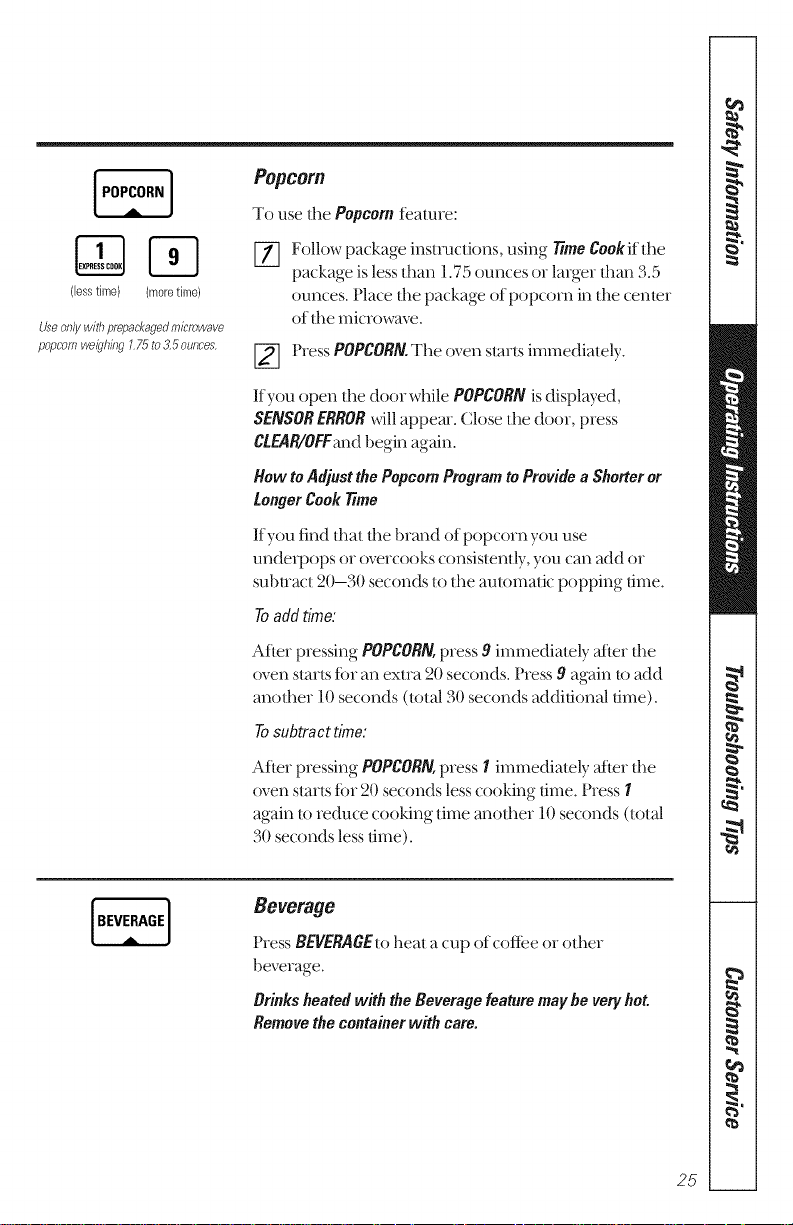
{Jesstime) {moretime)
Useonlywith prepackagedmicrowave
popcorn weighiag 1 75 to 3,5 ounces,
Popcorn
To use the Popcornteatme:
_-_ Follow package insu-ucfions, using 77meCookifthe
package is less than 1.75 ounces or larger dlan 3.5
ounces. Place tile package of popcorn in tile center
of tile microwave.
[] Press POPCORN.Tile ovenstarts immediately.
Ifyou open the door while POPCORNisdisplayed,
SENSORERRORwillappem. Closetile door, press
CLEAR/OFFandbegin again.
Howto Adjust the PopcornProgramto Providea Shorteror
LongerCooktime
If you find that tile brand of popcorn you use
unde_pops or overcooks consistently, you can add or
sulmact 2(}-3(} seconds to tile automatic popping time.
Toadd time."
After pressing POPCORN,press 9 immediately 'aider tile
oven starts tbr an extra 20 seconds. Press 9 again to add
another 10 seconds (total 30 seconds additional lime).
Tosubtract time."
After pressing POPCORN,press I immediately 'at}orfile
oven starts tbr 20 seconds less cooking lime. Press I
again toreduce cooking dine another 10seconds (total
30 seconds less lime).
Beverage
Press BEVERAGEto heat a cup of coffee or other
beverage.
Brinks heatedwith theBeveragefeaturemaybe veryhot
Removethecontainerwithcare.
|
|
E
25
Aboutthe sensor features.
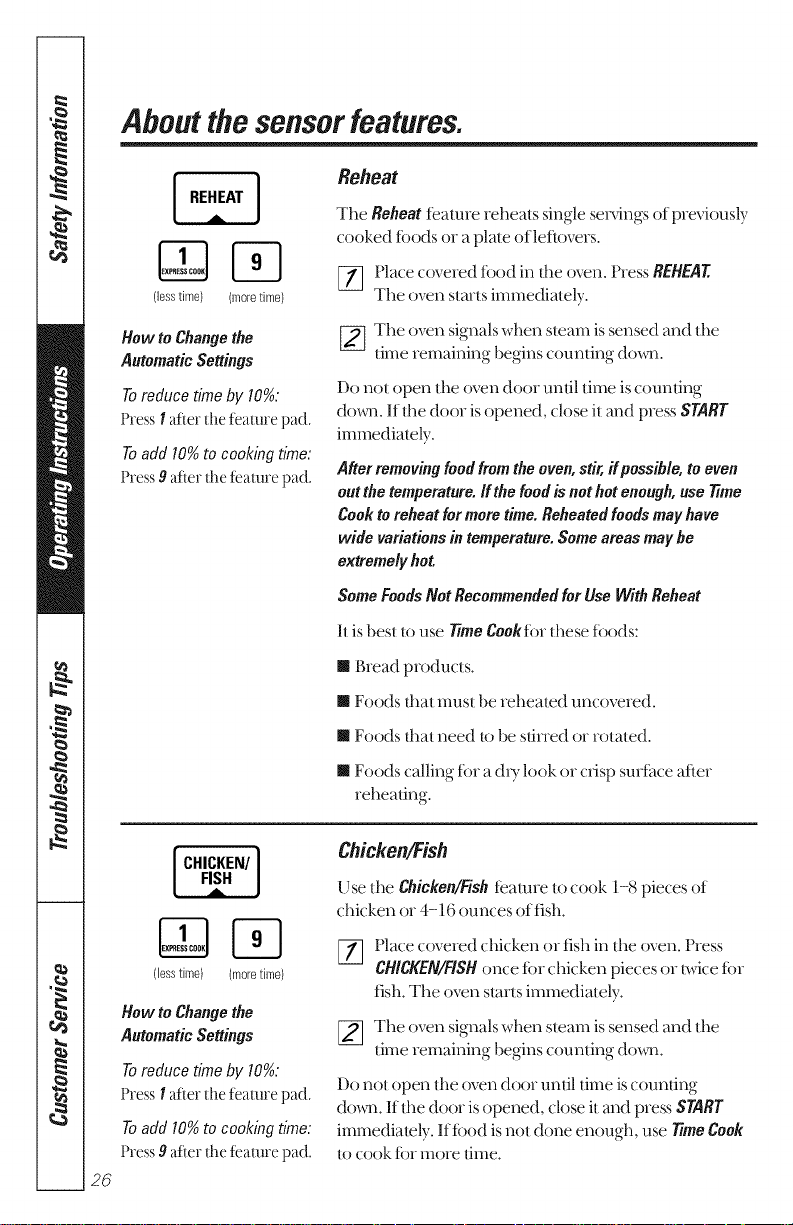
(lesstime) (moretime)
How to Change the
Automatic Settings
Toreduce time by 10%:
P_essI after ,,liet}ta!ure pad.
Toadd 10%to cookbg time:
P_ess 9 after [l_eteamre pad.
Reheat
The Reheatfeature reheats single servings of previously
cooked tbods or a plate of leftovers.
[] Place covered tbod in the oven. Press REHEAT.
The oven starts immediately.
[]The oven signals when steam is sensed and the
time remaining begins counting doom.
Do not open the oven door until time is counting
do*re. If the door is opened, close it and press START
immediately.
After removingfoodfromtheoven,stir,if possible,toeven
out thetemperature.Ifthefoodis nothotenough,use 77me
Cooktoreheatformoretime.Reheatedfoodsmayhave
widevariations in temperature.Someareasmaybe
extremelyhot
SomeFoodsNot RecommendedforUseWithReheat
Itis best to use 77meCookfbr these foods:
m Bread products.
m Foods that must be reheated uncovered.
m Foods that need to be sdned or rotated.
m Foods calling fi)r a dU k)okor crisp surihce after
reheating.
26
[ FISH jCHICKEN/]
(lesstime) (moretime)
How to Change the
Automatic Settings
Toreduce time by 10%:
P,ess I after fl_eteamre pad.
Toadd 10%to cookingtime:
P_ess9 after Ihe tealure pad.
Chicken/Fish
Use the Chicken/Fishteature to cook 1-8 pieces of
chicken or 4-16 ounces of fish.
_] Place covered chicken or fish in the oven. Press
CHICKEN/FISHonce tbr chicken pieces or t_viceibr
fish. The oven starts immediately.
_The oven signals when steam is sensed and the
nine remaining begins coundng do,re.
Do not open the oven door until time is counting
do,re. If the door is opened, close it and press START
immediately. Iffbod is not done enough, use JTmeCook
to cook i()r more time.
0,Lx J
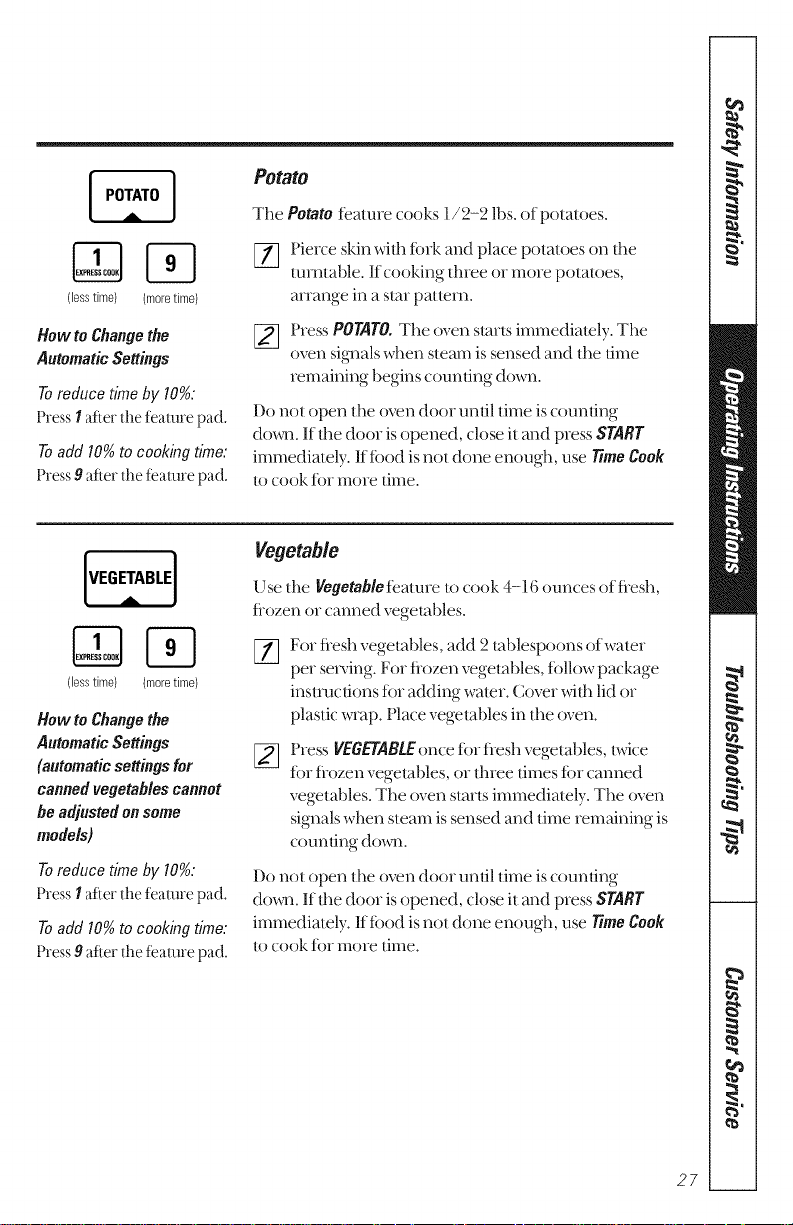
(Jesstime) (moretime)
Howto Changethe
AutomaticSettings
Toreduce time by 10%:
Press I after d_eteamre pad.
Toadd 10%to cookingtime:
Press 9 after [he teamre pad.
Potato
The Potato tealure cooks 1/2-2 lbs. of potatoes.
[] ierce skin with fbrk and place potatoes on the
tumlable. If cooking thiee or more potatoes,
anange in a star pattern.
[] Press POTATO,The oven starts immediately. The
oven sig_als when steam is sensed and the time
remaining begins counting down.
Do not open the oven door until time is counting
do*re. If the door is opened, close it and press START
immediately. If tbod is not done enough, use _me Cook
to cook ibr more time.
(lesstime) (moretime)
Howto Changethe
AutomaticSettings
(automaticsettingsfor
cannedvegetablescannot
he adjustedon some
models)
Toreduce time by 10%:
Press I after Ihe teaIure pad.
Toadd 10%to cooldngtime:
Press 9after the tealure pad.
Vegetable
[ Jse the Vegetable feature to cook 4-16 ounces of flesh,
flozen or canned vegetables.
%
For fiesh vegetables, add 2 tablespoons of water
per serving. For fiozen vegelables, tbllow package
insnuctions fi)r adding wamr. Cover with lid or
plastic wrap. Place vegetables in dm oven.
Press VEGETABLEonce tbr flesh vegetables, t_dce
tbr flozen vegetables, or three times tbr canned
vegetables. The oven starls immediately. The oven
signals when steam is sensed and time remaining is
counting down.
Do not open the oven door until time is counting
do,re. If the door is opened, close it and press START
immediately. If tbod is not done enough, use 77meCook
to cook ibr more time.
|
|
E
27
About the other features.
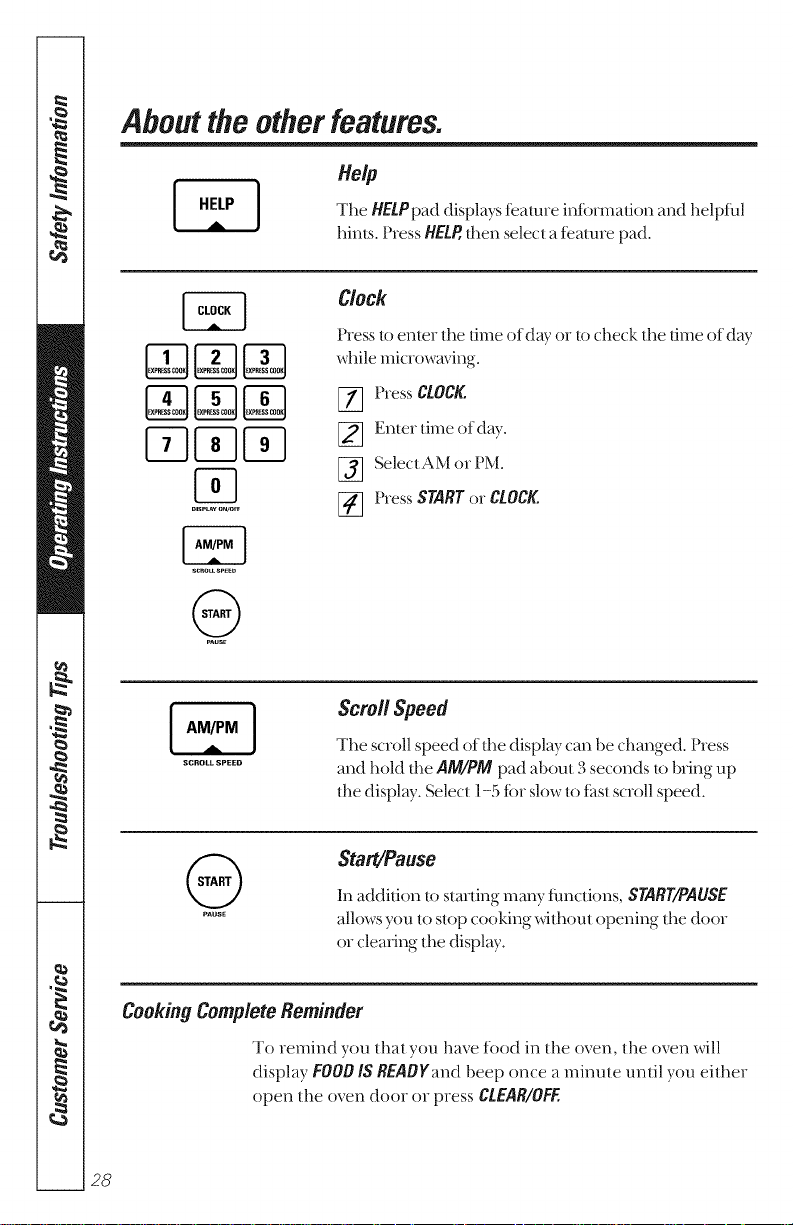
Help
The HEtPpad displays feature intbnnation and helpful
hints. Press HELP,then select a feature pad.
EB
SCROLLS_E_
Clock
Press/(;, enter the time of day or tocheck the time of day
while microwaving.
_i] Press CLOCK.
Enmr time of day.
SelectAM or PM.
Press STARTor CLOCK.
SCROLLSPEED
Scroll Speed
The scroll speed of the display can be changed. Press
and hold tim ,RM/P/VIpad about 3 seconds to bring up
the display. Select 1-5 tbr slow to t_tstscroll speed.
Start/Pause
In addilion to starting many thnctions, SYART/PAtlSE
allows you to stop cooking _thout opening the door
or clearing the display.
Cooking Complete Reminder
To remind you Ileal you have rood in the oven, the oven will
display FOODIS READYand beep once a minute until you either
open the oven door or press CLEAR/OFF.
28
sc.ett s_Eo
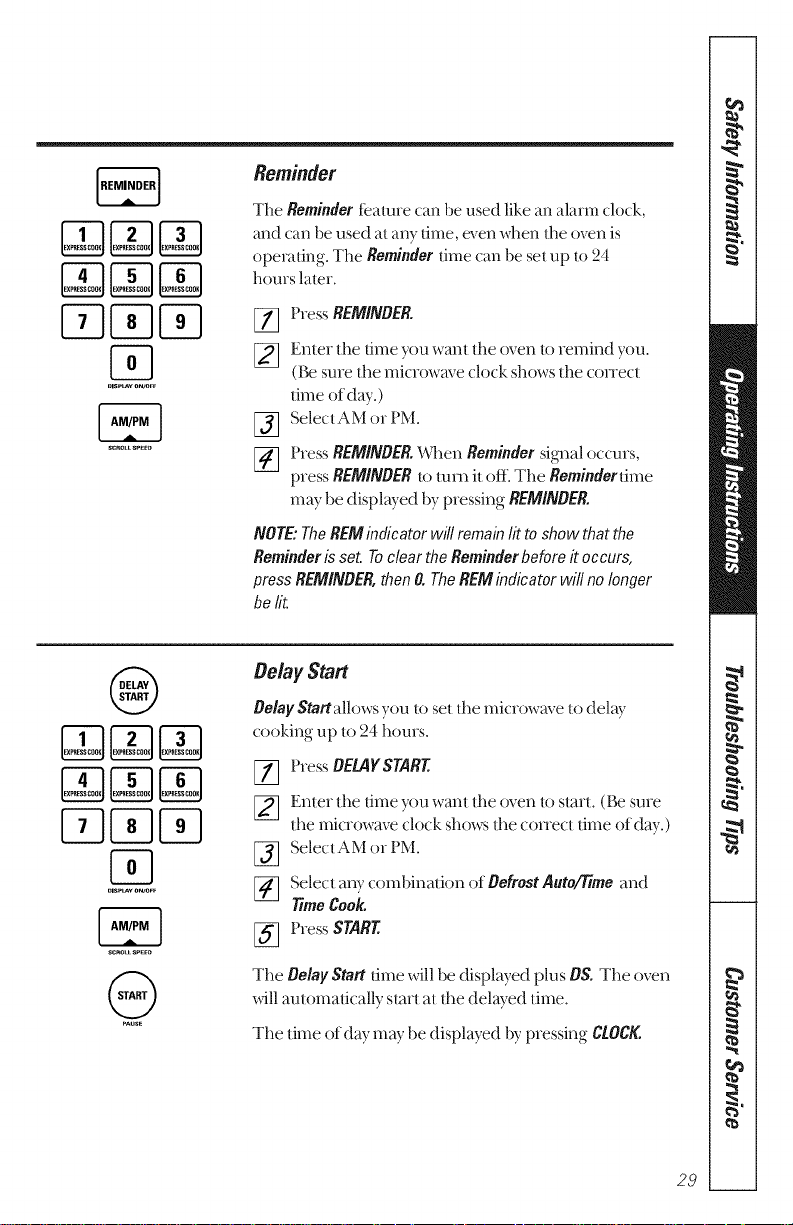
Reminder
The Reminder f_ature can be used like an al;um clock,
and can be used at any dine, even when file oven is
operating. The Reminder time can be se_ up to 24
hours later.
%
Press REMINDER.
Enter the time you want file oven to remind you.
(lk_ sure tile microwave clock shows the COITeCI
time of day.)
Select AM or PM.
Press REMINDER.%qmn Remindersig13aloccurs,
pressREMINDERto turn it off. The Reminderdme
may be displayed by pressing REMINDER.
NOTE,"TheREMindicator will remab lit toshow that the
Reminderisset. Toclearthe Reminderbeforeit occurs,
pressREMINDER,thenO.TheREMindicator will nolonger
be lit.
@
SC.eLtSP_ED
Delay Start
Belay Start allows you to sel the micrownve to delny
cooking up to 24 horns.
Press DELAY START
%
%
Enter the time you want tile oven to start. (13_ sure
the microwave clock shows file conect time of day.)
Select AM or PM.
Select anycombination of DefrostAuto/77meand
?TreeCook.
Press START
The DelayStart time will be displayed plus DS, The oven
will automatically start at file delayed time.
The time of day may be displayed by pressing CLOCK,
|
|
E
29

About the other features.
®
Child Lock-Out
You may lock the connol panel to prevent tim
microwave flom being accidenlally started or used
by children.
To lo(k or unlo(k tile controls, press and hold CLEAR/OFF
fbr aboul three seconds. When tile control panel is
locked, LOCKEDwill appear in tile display.
SoundLevel
Tile beeper sound level can be adjusted. Press SOUND
LEVEL.Choose 0-3 fbr mute to loud.
_mer On/Off
_mer On/Off operates as a minute timer and can be used
at any time, even when tile oven is operating.
Press TIMERON/OFE
Enter time you want tocount down.
Press TIMERON/OFFtostart.
When time is up, file oven will siglml. To trim offdm
timer signal, press TIMERON/OFF
NOTE"Thetimerindicator willhe lit while the timeris
operating.
r-q
DISPLAY ON/OFF
Display On/Off
To turn tile clock display on or off, press and hold 0 for
about 3 seconds. Tile Display On/Off feature cannot be
used while a cooking feature is in use.
3O
TurntableOn/Off
For best cooking results, leave tile turntable on.
It can be turned (;,fff_;,rlarge dishes. Press TURNTABLE
to turn tile turntable on or off.
Sometillles tile turntable can become too hot to
touch. Be caretul touching the turntable during and
after cooking.
Microwaveterms.
_ve_g
Shielding
Standing77me
Venting
Definition
Arcing is the mic)owave term t_)r sparks in the oven. Arcing is
caused by:
m metal or fbil touching the side of the oven.
m tbil thai is not molded to tbod (upturned edges act like
antennas).
m metal such as tx_dst-ties,poultry7 pins gold-rimmed dishes.
m recycled pape) towelscontaining smallmetal pieces.
Cove)shold in moistme, allowtbr more even heating and reduce
cooking time. Venting plastic wrap or cove)_ingwith waxpape)
allowsexcess steam to escape.
In a regulm oven, you shield chicken b)easts or baked tbods to
prevent ove>brox_ing. When microwaving, youuse small sn_ips
oft{)ilto shield thin parts, such asthe tipsof wingsand legson
poultU, which would cook betbre linger pmts.
When you cook with reg-ulm ovens, f_)ods such as roasts or cakes
are allowed to stand to finish cooking o) to set. Standing time is
especially important in mic)owave cooking. Nora that a
mic)owaved cake is not placed on a cooling rack.
Aiie) cove)Jng a dish _th plastic wrap, you vent the plastic wrap by
turning back one coFt_e) st) excess steam can escape.
|
|
E
?7
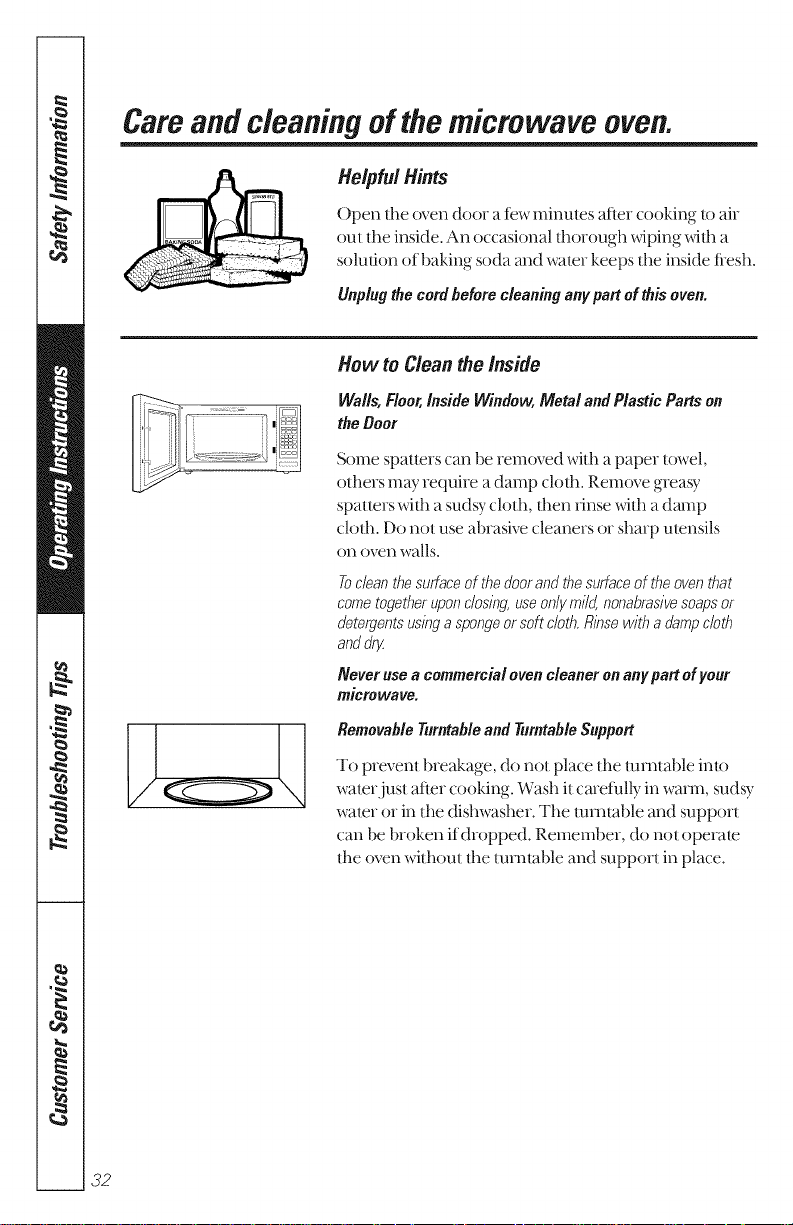
Care and cleaning of the microwave oven.
Helpful Hints
()pen the oven door a few minutes after cooking to air
oul the inside. An occasional fl_orough wiping wifl_ a
solulion of baking soda and water keeps the inside flesh.
Unplugthe cordbeforecleaninganypartof this oven.
[I_- _ ..........,
How to CleantheInside
Walls,Floor,InsideWindow,Metal andPlasticPartson
theDoor
Some spatters can be removed with a paper towel,
others may require a damp clofl_. Remove greasy
spatters wifl_ a sudsy cloth, then rinse with a dalnp
cloth. Do not use abrasive cleaners or sharp utensils
on oven walls.
Toc/ean thesurface of thedoor and thesurfaceof the oven that
come together uponc/osing,use on/}!mi/d,,nonabrasivesoapsor
detergents usinga spongeor soft cloth.Rinse with a dampcloth
anddr_
Neveruseacommercialovencleaneronanypartofyour
microwave.
RemovableTurntableand TurntableSupport
To prevent breakage, do not place the tnmtable into
water just after cooking. Wash it cmefhlly in wam_, sudsy
wa|er or in the dishwasher. The mini:able and support
can be broken if dropped. Remember, do not opera|e
the oven without the turntable and support in place.
I
How to Cleanthe Outside
Do notusecleanerscontainingammoniaor alcoholonthe
microwaveoven,Ammoniaor alcoholcan damagethe
appearanceof the microwave.
Case
Clean the outside of the microwave with a suds}, cloth.
Rinse and then dU. Wipe the window dean with a
damp cloth.
ControlPanelandDoor
Wipe x_dtha damp cloth. DU thoroughly. Do not use
cleaning sprws, large alnounts of soap and wamr,
abrasives or sharp ol_jec/s on the panel-they can
damage it. Some paper towels can also scratch the
connol panel.
BoorSurface
It's important to keep the mea clean where the
door seals against the microwave. Use only mild,
non-abrasive detergents applied with a dean sponge
or soft cloth. Rinse well.
Stainless Steel (on some models)
To clean the smt_tce use hot soapy water, then rinse and
dr}i.Do not use steel wool pads or other abrasive
cleaners. They will scratch the suriace.
|
|
33
Beforeyoucarl forservice...
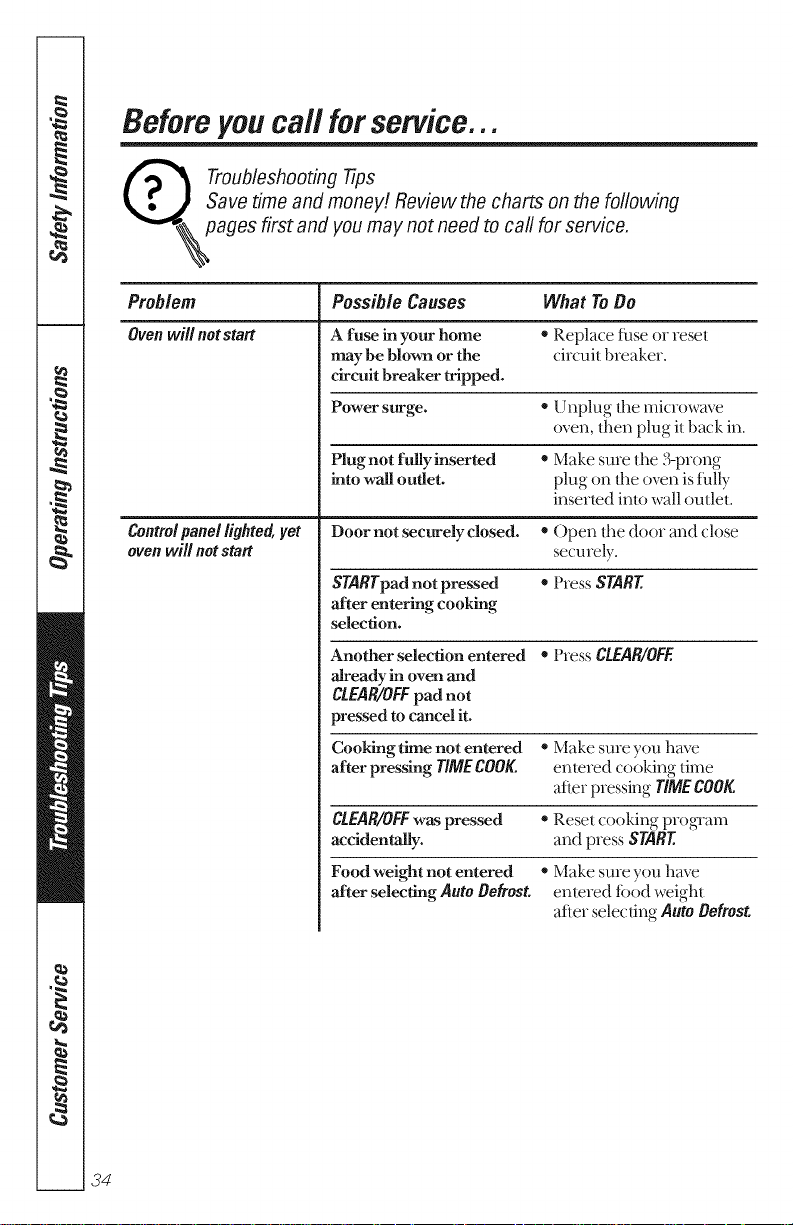
Troubleshooting 77ps
Save time and money! Review the charts on the following
pages first and you may not need to call for service.
Problem Possible Causes What ToDo
Ovenwill notstart
Controlpanellighted,yet
ovenwill notstart
A fuse in your home
may be blown or the
circuit breaker tripped.
o Replace tuse or reset
circuit breaker.
Power surge. * Unplug the microwave
oven, then plug it back in.
Plug not fully inserted
into wail outlet.
* Make sure the 3-prong
plug on tl_eoven is fully
insened inlo wall outlel.
Door not securely closed. * ()pen tim door and close
securely.
SrPRrpad not pressed * Press START
after entering cooking
selection.
Another selection entered o Press CLEAR/OFE
already in oven and
CLEAR/OFFpad not
pressed to cancel it.
Cooking time not entered o Make sme you have
after pressing TIMECOOK. entered cooking time
atier pressing TIMECOOK.
CLEAR/OFFwas pressed o Reset cooking program
accidentally, and press START
Food weight not entered o Make sure you have
after selecting Auto Oefrost entered tbod weight
after selecting Auto Oefrost
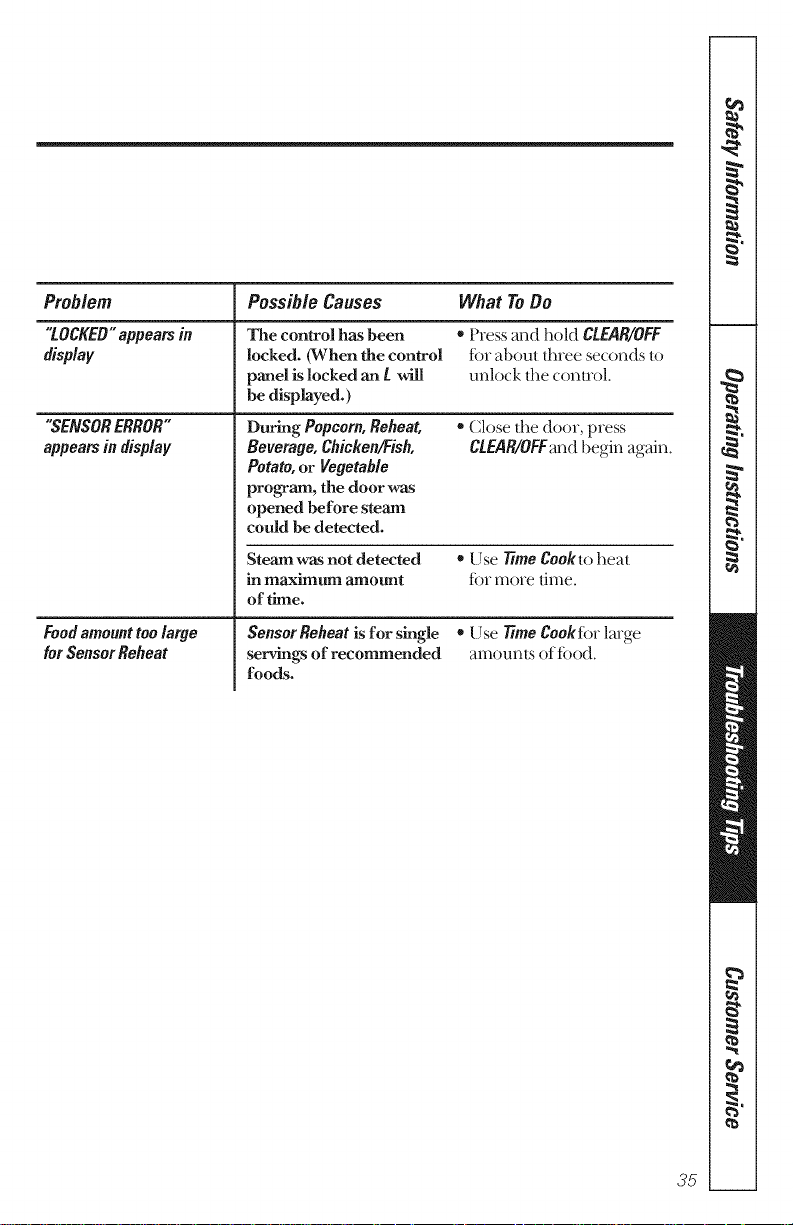
Problem Possible Causes What ToDo
"iOCKEO'appeamin The control has been =l'ressandholdCiEAR/OFF
display locked. (When the control t_)rabout three seconds to
panel is locked an / will unlock lhe conwol.
be displayed.)
"SENSORERROR" . Close lhe door, press
appearsin display CLEAR/OFFand begin again.
Foodamounttoolarge
forSensorReheat
During Popcorn,Reheat,
Beverage,Chicken/Fish,
Potato,or Vegetable
program, the door was
opened before steam
could be detected.
Steam was not detected
in maximum amount
of time.
* Use 77meCookto heat
t_)rmore time.
Sensor Reheat is for single * l)se 77me Cook for large
servings of recommended amounls of t_)od.
foods.
!
I
"t
_t
35
Beforeyou call forservice...
ThingsThatAm Normal With YourMicrowave Oven
m Steam or vapor escaping fiom around tile door.
m IJght reflection around door or outer case.
m Dimming oven lig]lt and change in the blower sound at power
levels other than high.
m Dull thumping sound while oven is operating.
m
TV/radio intefierence might be no6ced while using the
microwave. Similar to the inmfierence caused by other small
appliances, it does not indicate a problem with the microwave.
Plug tile microwave into adifferent electrical ci_vuit, move the
radio or TV as Ira awW flom the mic_owave aspossible, or check
the position and siglml of the TV/radio antenna.
38

Notes.
m
w
37
Q_
Q_
i
38
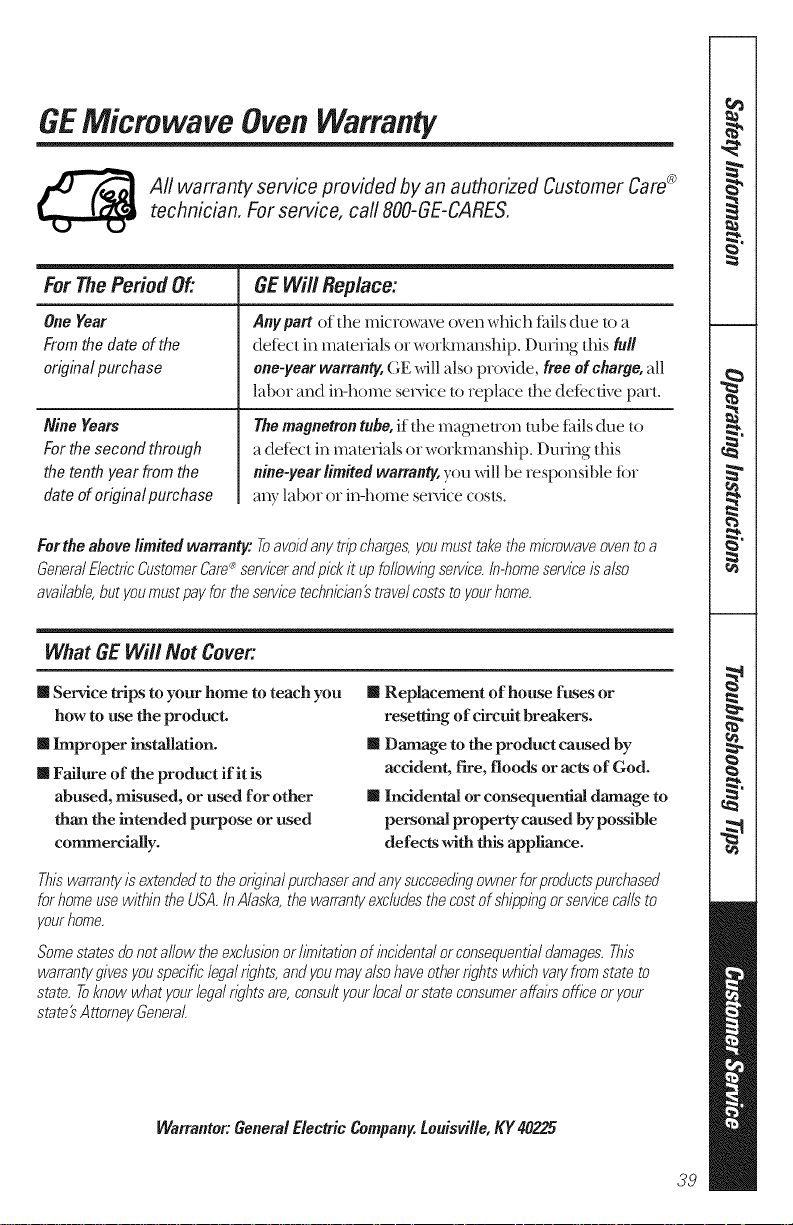
GEMicrowaveOvenWarranty
_ fi warranty service provided by an authorized Customer Care®
technician. Forservice, call 800-GE-CARES.
For ThePeriod Of" GEWill Replace:
One Year Any part of the microwave oven which tails clue to a
From the date of the del(ct in materials or workmanship. During this full
originalpurchase one-yearwarranty,GE _ll also provide, freeofcharge,all
labor and in-home sevvice toreplace the defective part.
Nine Years
Forthe secondthrough
thetenth yearfromthe
dateoforiginalpurchase
Themagnetrontube, if the mag_euon robe thils due to
a defect in materials or workmanship. During this
nine-year limited warranty, you will be responsible tbr
aW labor or in-home sevvice costs.
Fortheabove limited warranty,"Toavoidanytripcharges,youmusttakethemicrowaveoventoa
GeneralElectricCustomerCare_'servicerandpickit upfollowingservice.In-homeserviceisalso
ava/Table,butyoumustpayfortheservicetechnician'stravelcoststoyourhome.
What GEWill Not Cover:
m Service wips to your home to teach you
how to use the product.
m Improper installation.
m Failure of the product if it is
abused, misused, or used for other
than the intended purpose or used
commercially.
m Replacement of house fuses or
resetting of circuit breakers.
m Damage to the product caused by
accident, fire, floods or acts of God.
m Incidental or consequential damage to
personal property caused by possible
defects with this appliance.
Thiawarrantyisextendedto theoriginalpurchaserandanysucceedthgownerforproductspurchased
forhomeusewithththeUSA.InAlaska,thewarrantyexcludesthecostofshippingorservicecallsto
yourhome.
Some states donot allow theexclusion or hmitation of incidentalor consequential damages.Thia
warrantyrives you specific legal rights, andyou may alsohave other rights which varyfromstate to
state. Toknow what your legal rights are, consult your local or state consumeraffairs office oryour
state'sAttorney General.
Warrantor:GeneralElectricCompany,Louisville,KY40225
39

ServiceTelephoneNumbers.
GEAnswerCenter® 800.828.2000
The GE Answer Center ®is open 24 hours a day 7 days a week.
In-HomeRepairService800-CE-CARES(800-M2-2737)
Expert GE repair service is only a phone call away,
SpecialNeedsService800.626.2000
TDD800-TDD-GEAC(800-833-4322)
GE offers, tiee of chmge, a brochure to assist in planning a banie>
tiee kitchen tor persons with limited mobility.
ServiceContracts8oo-_2_-2224
Purchase a GE service contract while your warranty is still in effect and
you'll receive a substantial discount. GE Consumer Service will still be
there after your warrm"W expires.
PartsandAccessories800-626-2002
Individuals qualified to service their o,m appliances can have parts or
accessories sent direcdy to their homes (VISA, MasterCmd and
Discover cards are accepted).
Instructionscontained in thismanual coverprocedurestobeperformed
byanyuser.Otherservicing generally shouldhe referredtoqualified
servicepersonnel.Cautionmustheexercised,since improperservicing
maycauseunsafeoperation.
ServiceSatisfaction
If you me not satisfied _ith tim se_,ice you receix_ flom GE,
tbllow these three steps. First contact the people who se_,iced your
appliance. Next if you me still not pleased, wfim all/he details-
including your phone numbe_=u): Manager, Customer Relalions,
GE Appliances, Appliance Prok, Dmisville, KY 40225. Finally,if your
problem is still not resolved, w_im:
Major Appliance (_onsumer Action Prograrn
20 North Wacker D_ive, Chicago), IL 60606.
40 PdntBdb Kaea

