Loading ...
Loading ...
Loading ...
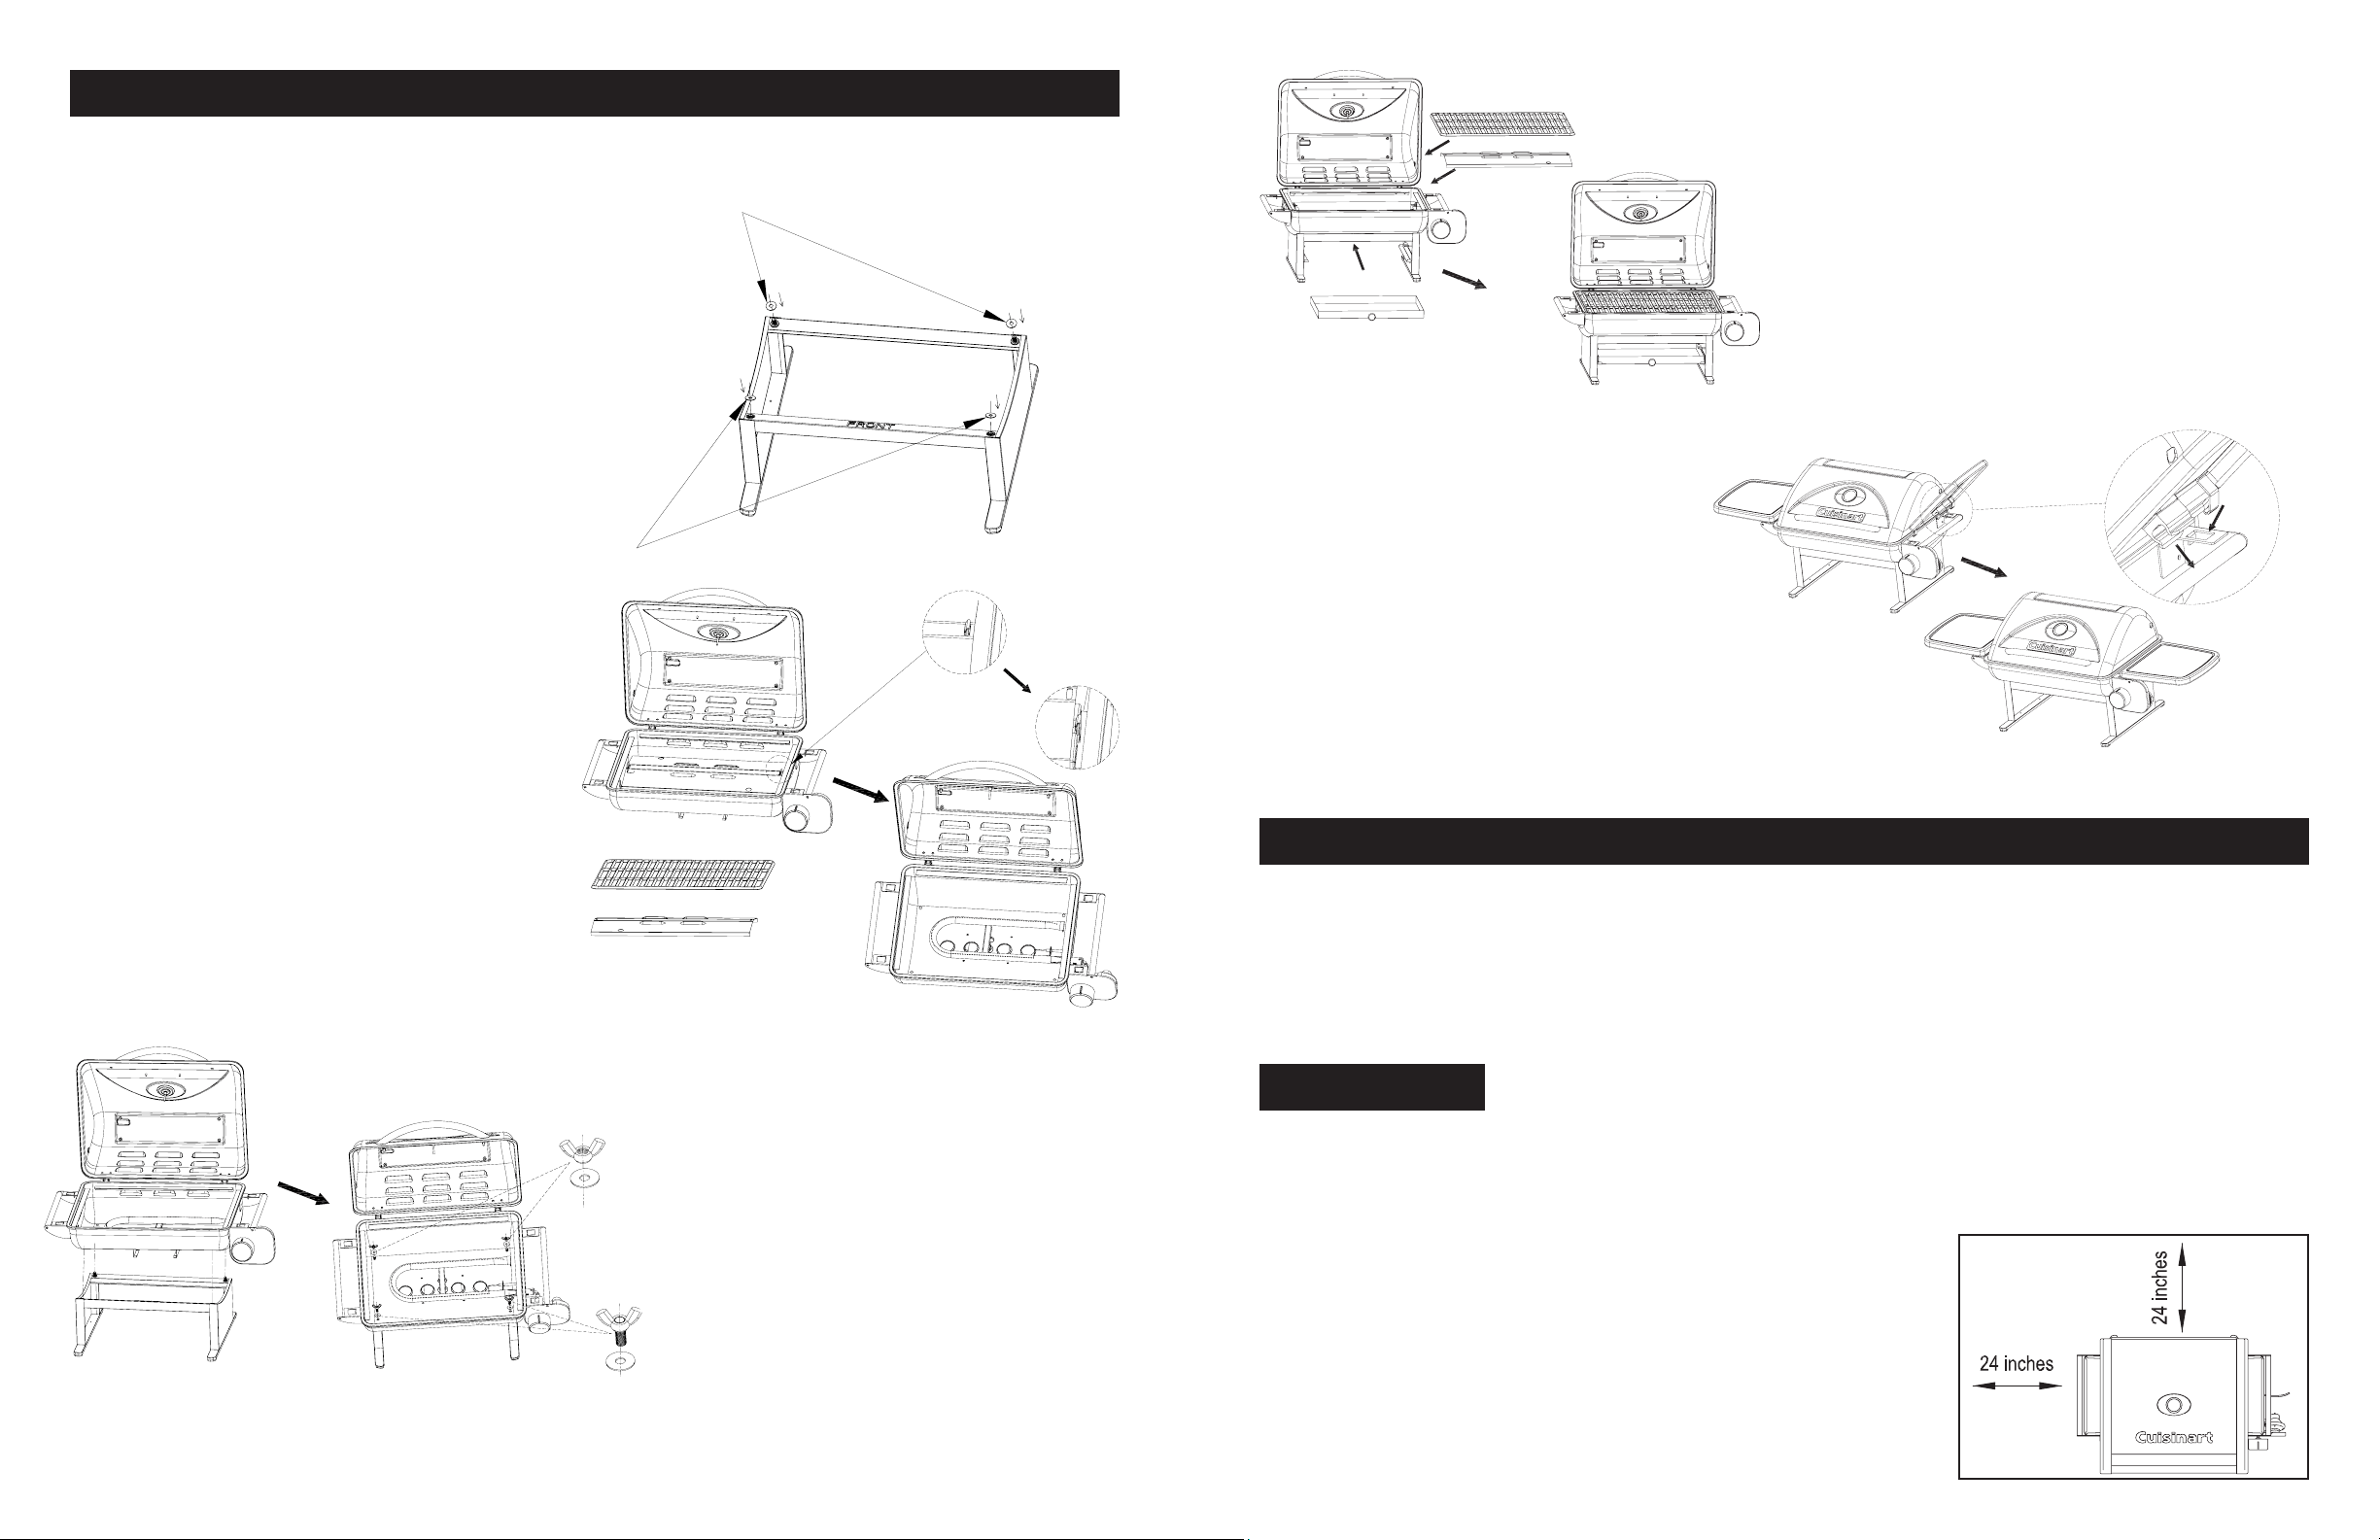
4. Assembly Instructions
Remove all the contents from packaging, and make sure all parts are present before
attempting to assemble!
6
7
Step 1:
Assemble washers on the grill leg assembly.
Place one Black Washer (Part C) over each of
the two bolt posts on the rear of the Grill Leg
Assembly (Part 2).
Remove tape backing from two White Washers
(Part D) and place over the two holes on the
front corners of the Grill Leg Assembly.
Step 4:
Replace Flame Tamer, Cooking Grate and
Drip Tray
Place Flame Tamer over locking tabs and secure
with two cotter pins
Place Cooking Grate back onto grill.
Slide Drip Tray (Part 5) into place below Firebox
Step 2:
Remove Side Tables, Cooking Grate and
Flame Tamer
Open the Grill Lid and remove the two Side
Tables (Part 6) and the Cooking Grate (Part 3)
Remove Flame Tamer (Part 4) by removing
the two cotter pins and lifting Flame Tamer off
locking tabs.
This should allow visual location of 4 screw
holes in the bottom corners of the Firebox
Assembly.
Step 5:
Connect Side Tables
There are two identical side tables.
There is no left or right side.
Angle Side Table (Part 6) at a 45 degree angle
and insert the two lock tabs into the shelf
receiver brackets.
Push down on side table and Table Support Bracket under the table
should lock into place on Carry Handle Assembly for secure t.
Repeat with opposite side table.
Step 3:
Grill and Grill Leg Assembly
Line up the rear screw holes of the Lid and
Firebox over the 2 bolt posts of the rear of the
Grill Leg Assembly. Drop the Lid and Firebox
onto the back posts and line up front screw
holes. Do not add wing nuts.
Screw two Wing Nut Screws (Part A) with
Black Washer (Part C) into the two front screw
holes. Do not tighten completely.
Place one Wing Nut (Part B) with Black Washer
(Part C) over each of the the rear bolt posts.
Tighten Wing Nuts.
Tighten front Wing Nut Screws fully.
Part C
Part D
5. Operating Your Grill
5.1 Select a proper location
Once you have assembled your new grill, nd a suitable location for use.
Note: The use and installation of this product must conform to local codes. In the absence of local codes, use the
National Fuel Gas Code: ANSI Z223.1/NFPA54, Storage and Handling of Liqueed Petroleum Gases, ANSI.NFPA 58
or Natural Gas and Propane Installation Code, CSA B149.1; Propane Storage and Handling, CSA B149.2.
m DANGER
1. Never use this outdoor grill inside any building, garage, shed or breezeway, or inside any boat, trailer or
recreational vehicle and/or boat, to prevent possible re and to prevent the possibility of carbon monoxide
poisoning or asphyxiation.
2. Always place your grill on a hard and level surface far away from combustible materials and structures.
3. Do not use this grill under overhead combustible surface or covered area
(e.g., awnings, umbrellas, porches or gazeboes ). Keep all combustible
surfaces at least 24” (61cm) away.
4. Locate the grill away from any combustible and non-combustible material or
construction by at least 24 inches (61cm) from back and 24 inches (61cm)
from side.(See the diagram below)
5. Never store or use gasoline or other ammable or volatile substances in the
vicinity of this grill or in the vicinity of any other heat-generating appliance,
because of the danger of starting a re.
6. Do not obstructing the ow of combustion and ventilation air.
Loading ...
Loading ...
Loading ...