I _&YI'AG
Form No. A/04/03
Safety
Care & Cieartinff ................... 15-17
Self-CHeanOver]
CUeaningProcedures
Part No. 8112P217-60
Guia del Usuario ......................... 44
02003 Maytag Appliances Sales Co. Litho U.S.A.
installer: Please leave this manual with this appfiance.
Consumer: Hease read and keep this manual for future
reference. Keepsales receipt and/or canceled check as proof
ot purchase.
Model Numbel
Seria Number
Date of Purchase
Maytag Customer Assistance
]-800-688-9900 USA
]-800-688-2002 Canada
1-800-688-208Q ( U.S.TTY for hearing or speech irrlpaired_
(Mon.Wri., 8 am-8 pm Eastern Time)
Internet: http:!/wvwv.m aytag.com
in our continuing effort to improve the quafity and perfor-
mance of our cooking products, it may be necessary to make
changes to the appfiance without revising this g uide.
For sendce #_fermade#, see page 21.
To ensere proper and safe operation: Appliance
must be properly installed and grounded by a qualified
technician. Do not attempt to adjust, repair, service, or
replace any part of your appliance unless it is specifi-
cally recommended in this guide. All other servicing
should be referred to a qualified servicer.
Always disconnect power to appliance before servicing.
To Prevent Fire or Smoke
* Be sure all packing materials are removed from the
appliance before operating it.
Keep area around appliance clear and free from
combustible materials. Flammable materials should not
be stored in an oven.
Many plastics are vulnerable to heat. Keep plastics
away from parts of the appliance that may become
warm or hot.
To prevent grease fires, do not let cooking grease or
other flammable materials accumulate in or near the
appliance.
iMPORTANT SAFETY
INSTRUCTIONS
Warning and Important Safety Instructions appearing in
this guide are not meant to cover all possible conditions
and situations that may occur. Common sense, caution,
and care must be exercised when installing, maintain-
ing, or operating the appliance.
Always contact your dealer, distributor, service agent, or
manufacturer about problems or conditions you do not
understand.
Recognize Safety Symbols, Words, Labels
COULD resu!t !n severe persona! injury 0r death.
WARNnNG' Hazards or unsafe practices which
CA[JTUON _ Hazards or unsafe practices wh!ch
COULD result in mino_ personal injury.
Read and follow aH instructions before using this
appmiance to prevent the potential risk of fire, electric
shock, personal injury or damage to the appliance as a
result of improper usage of the appliance. Use appliance
only for its intended purpose as described in this guide.
In Case of Fire
Use dry chemical or foam-type extinguisher or baking
soda to smother fire or flame. Never use water on a
grease fire.
1.Turn off appliance to avoid spreading the flame.
2oNEVER pick up or move a flaming pan.
3. Smother fire or flame by closing the oven door.
Child Safety
above an app!iance. Children cJJmbjng on the appli-
ance Or on the appliance d00rt0 reach items could be
sedous!y injured,
NEVER leave children alone or unsupervised near the
appliance when it is in use or is still hot. Children
should never be allowed to sit or stand on any part of
the appliance as they could be injured or burned.
Children must be taught that the appliance and
utensils in it can be hot. Let hot utensils cool in a safe
place, out of reach of small children. Children should
be taught that an appliance is not a toy. Children
should not be allowed to play with controls or other
parts of the unit.
About Your Appliance
above. Misuse of appDnce doors, such as stepping,
leaning or sitting On the door, may resu!t in possible
serious injuries,
To prevent potential hazard to the user and damage to
the appliance, do not use appliance as a space heater
to heat or warm a room. Also, do not use the oven as a
storage area for food or cooking utensils.
Do not obstruct the flow of air by blocking the oven
vent.
• DO NOT TOUCH HEATING ELEMENTS OR INTERIOR
SURFACES OF OVEN. Heating elements may be hot
even though they are dark in color, hterior surfaces of
any oven become hot enough to cause burns. During
and after use, do not touch, or let clothing or other
flammable materials contact heating elements or
interior surfaces of oven until they have had sufficient
time to cool. Other surfaces of the appliance may
become hot enough to cause burns - among these
surfaces are: oven vent openings and surfaces near
these openings, oven doors, windows of oven doors.
Do not touch a hot oven light bulb with a damp cloth
as the bulb could break. Should the bulb break,
disconnect power to the appliance before removing
bud to avoid electrical shock.
A fan should be heard during some bake, convect
bake, convect roast, and all broil and cleaning opera-
tions. If you do not hear the fan, call an authorized
servicer.
• NEVER use aluminum foil to cover an oven rack or
oven bottom. Misuse could result in risk of electric
shock, fire, or damage to the appliance. Use foil only
as directed in this guide.
Cooking Safety
Never heat an unopened food container in the oven.
Pressure build-up may cause container to burst
resulting in serious personal injury or damage to the
appliance.
• Use dry, sturdy potholders. Damp potholders may
cause burns from steam. Dish towels or other substi-
tutes should never be used as potholders because they
can trail across hot elements and ignite or get caught
on appliance parts.
Wear proper apparel. Loose fitting or long hanging-
sleeved apparel should not be worn while cooking.
Clothing may ignite and cause burns if garment comes
in contact with heating elements.
Always place oven racks in the desired positions while
oven is cooL Slide oven rack out to add or remove
food, using dry, sturdy potholders. Always avoid
reaching into the oven to add or remove food. If a rack
must be moved while hot, use a dry potholder. Do not
let potholder contact hot element in oven.
Use care when opening the oven door. Let hot air or
steam escape before removing or replacing food.
• PREPARED FOOD WARNUNG: Follow food
manufacturer's instructions. If a plastic frozen food
container and/or its cover distorts, warps, or is other-
wise damaged during cooking, immediately discard
the food and its container. The food could be contami-
nated.
Do not allow aluminum foil or meat probe to contact
heating element.
Always turn off all controls when cooking is com-
pleted.
Utensil Safety
Follow the manufacturer's directions when using oven
cooking bags.
This appliance has been tested for safe performance
using conventional cookware. Do not use any devices
or accessories that are not specifically recommended
in this manual. Do not use add-on oven convection
systems. The use of devices or accessories that are not
expressly recommended in this guide can create
serious safety hazards, result in performance prob-
lems, and reduce the life of the components of the
appliance.
Only certain types of glass, glass/ceramic, ceramic,
earthenware, or other glazed utensils are suitable for
oven service without breaking due to the sudden
change in temperature. Follow utensil manufacturer's
instructions when using glass.

Cmeaning Safety
• Turn off all controls and wait for appliance pars to
cool before touching or cleaning. Clean with caution.
Use care to avoid steam burns if a wet sponge or cloth
is used to wipe spills on a hot surface. Some cleaners
can produce noxious fumes if applied to a hot surface.
Clean only parts listed in this guide.
Self-Clean Oven
during the se!f:cJean cYCle,
Do not clean door gasket. The door gasket is essential
for a good seal Care should be taken notto rub,
damage, or move the gasket.
Do not use oven cleaners or oven liners of any kind in
or around any part of the self-clean oven.
Before self-cleaning the oven, remove broiler pan,
oven racks and other utensils, and wipe off excessive
spillovers to prevent excessive smoke or flare ups.
important Safety Notice and
The California Safe Drinking Water and Toxic Enforce-
ment Act of 1986 (Proposition 65} requires the Governor
of California to publish a list of substances known to the
State of California to cause cancer or reproductive harm,
and requires businesses to warn customers of potential
exposures to such substances.
Users of this appliance are hereby warned that when
the oven is engaged in the self-clean cycle, there may
be some low-level exposure to some of the listed
substances, including carbon monoxide. Exposure to
these substances can be minimized by properly venting
the oven to the outdoors by opening the windows and/
or door in the room where the appliance is located
during the self-clean cycle.
UMPORTANT NOTUCE REGARDUNG PET BURDS:
Never keep pet birds in the kitchen or in rooms where
the fumes from the kitchen could reach. Birds have a
very sensitive respiratory system. Fumes released during
an oven self-cleaning cycle may be harmful or fatal to
birds. Fumes released due to overheated cooking oil, fat,
margarine and overheated non-stick cookware may be
equally harmful
Note: For microwave oven operation (select modelsD
refer to the use and care guide packed in the micro-
wave oven.
Save These instructions for Future Reference
3
@
Control Panel
A B CDE FG
H
1 2 3
4 5 6
7 8 9
$ K L M N O
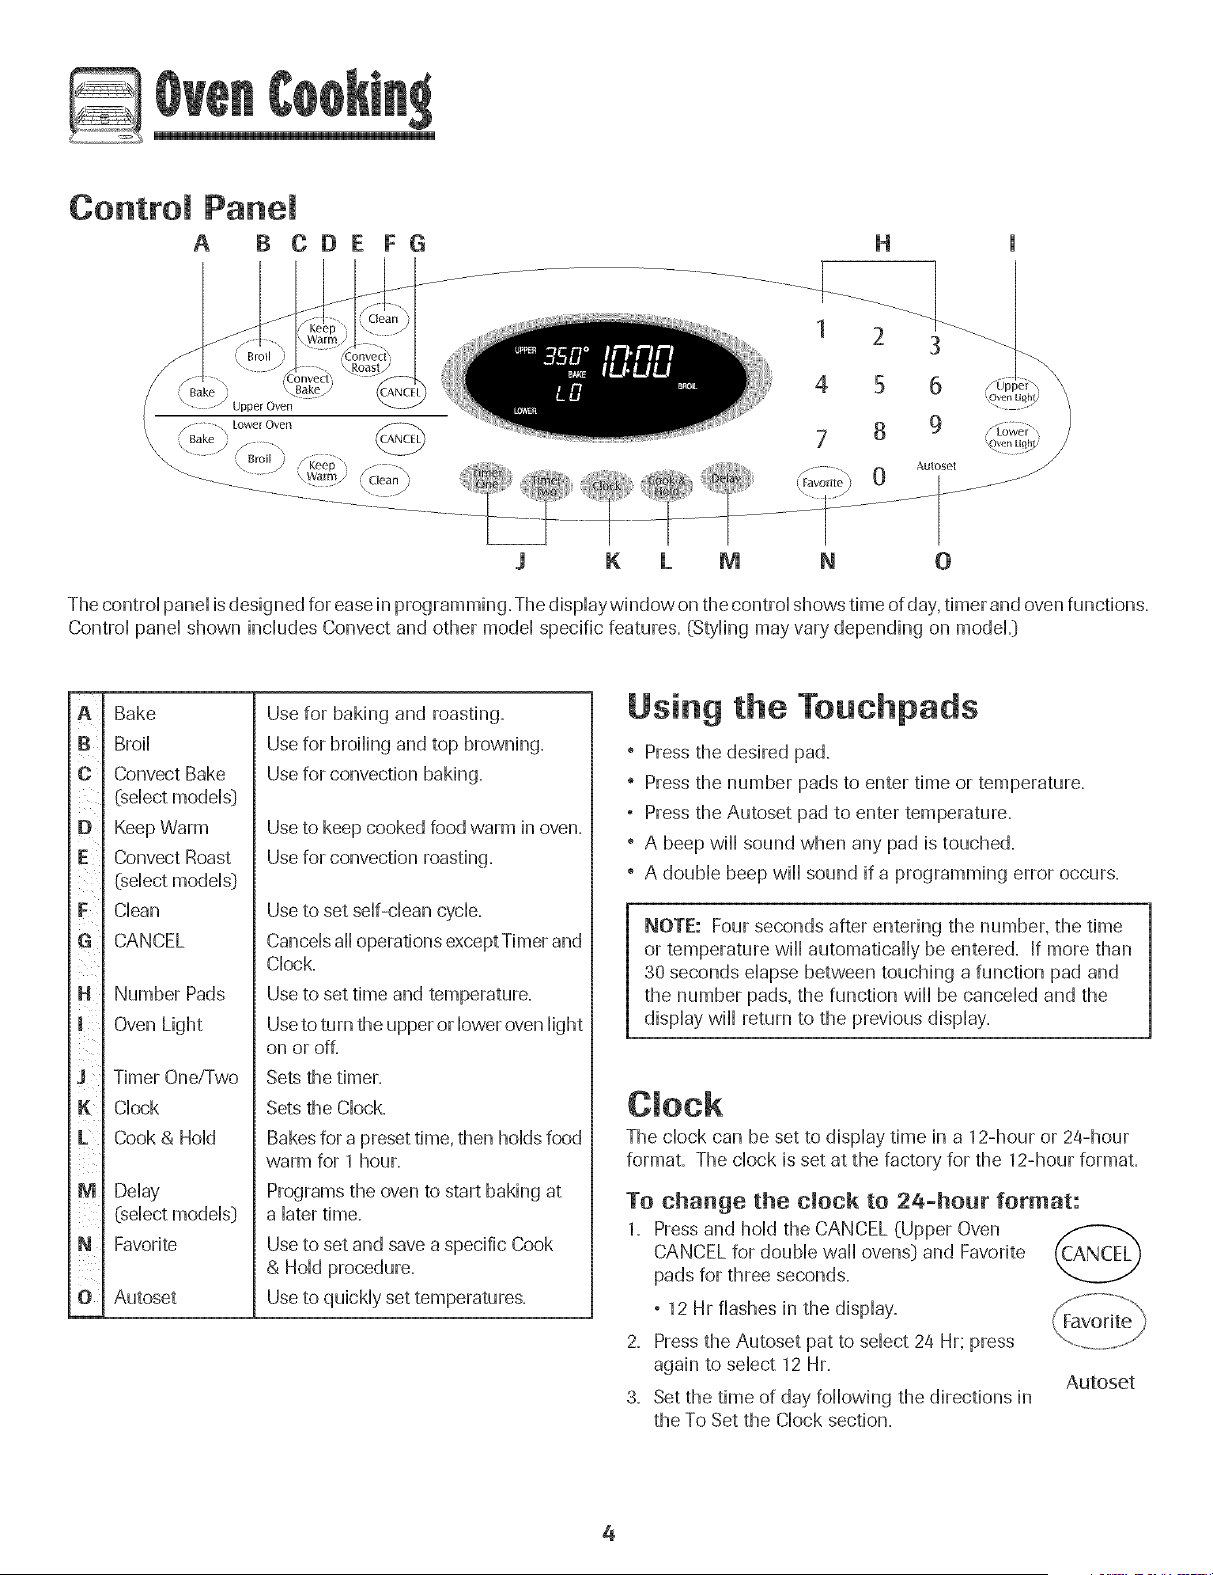
The contro[ pane[ is designed for ease in programming. The dispiaywindow on the contro[ shows time of day, timer and oven functions.
Contro[ pane[ shown inciudes Convect and other mode[ specific features. (Styiing may vary depending on modeL)
m
A
[}
c ¸
E
F
$
K
L
M
N
ii
O
Bake
Broi]
Convect Bake
(select models]
Keep Warm
Convect Roast
(select models}
Clean
CANCEL
Number Pads
Oven Light
Timer One/Two
Clock
Cook & Hold
Delay
(select models)
Favorite
Autoset
Use for baking and roasting.
Use for broiling and top browning.
Use for convection baking.
Use to keep cooked food warm in oven.
Use for convection roasting.
Use to set self-clean cycle.
Cancels ail operations except Timer and
Clock.
Use to set time and temperature.
Useto turn the upper or lower oven light
on or off.
Sets the timer.
Sets the Clock.
Bakes for a preset time, then holds food
warm for 1 hour.
Programs the oven to start baking at
a later time.
Use to set and save a specific Cook
& Hold procedure.
Use to quickly set temperatures.
Using the Touchpads
" Press the desired pad.
" Press the number pads to enter time or temperature.
, Press the Autoset pad to enter temperature.
" A beep will sound when any pad is touched.
" A double beep will sound if a programming error occurs.
NOTE: Four seconds after entering the number, the time
or temperature will automatically be entered. If more than
30 seconds elapse between touching a function pad and
the number pads, the function will be canceled and the
display will return to the previous display.
The clock can be set to display time in a 12-hour or 24-hour
format. The clock is set at the factory for the 12-hour format.
To change the clock to 24-hour format:
1, Press and hold the CANCEL (Upper Oven
CANCEL for double wall ovens) and Favorite
pads for three seconds,
, 12 Hr flashes in the display,
2, Pressthe Autoset pat to select 24 Hr; press
again to select 12 Hr,
3, Set the time of day following the directions in
the To Set the Clock section,
Autoset
4
@
To set the Clock:
1. Press the Clock pad.
, The time of day flashes in the display.
2. Press the appropriate number pads to set the time of day.
, Colon flashes in the display.
3. Press the Clock pad again or wait four seconds.
, The colon will remain on.
When electrical power is supplied or after a power interrup-
tion, the last clock time before power was interrupted will
flash.
To recall the time of day when another time function is
showing, press the Clock pad.
Clock time cannot be changed when the oven has been
programmed for Delay cook or clean or Cook & Hold.
To canceJ the CJock display:
[f you do not want the time of day to display:
Press and hold the CANCEL and Clock pads for
three seconds. The time of day will disappear
from the display.
When the clock display is canceled, press the
Clock pad to briefly display the time of day............................................
When the clock display is canceled, after 15 minutes, the oven
control will go into Standby Mode to save energy. The display
will be blank and the oven light will not operate. To "wake up"
the control from Standby Mode, press any touchpad. A double
beep will sound.
To restore the Clock display:
Press and hold the CANCEL and Clock pads for three sec-
onds. The time of day will reappear in the display.
The timer can be set from one minute (00:01} up to 99 hours
and 59 seconds (99:59}.
The timer can be used independently of any other oven
activity. It can also be set while another oven function is
operating.
The Timer does not control the oven. It only controls a
beeper.
To set the Timer:
1. Press the Timer pad.
° 00:00 and TIMER icon flash in the display.
2. Press the appropriate number pads until the correct time
appears in the display.
° The colon and TIMER icon will continue to flash.
3. PressTimer pad again or wait four seconds.
° The colon stops flashing and the time begins counting
down.
° The last minute of the timer countdown will be displayed
in seconds.
4. At the end of the set time, one long beep will sound and
"End" wii[ be displayed.
5. Pressthe Timer pad to clear the display.
To cancel the Timer:
1. Press and hold the Timer pad for three seconds.
OR 0
2. Pressthe Timer pad and press '0' using the number pads.
Locking the Centre[
and Oven Door
The touchpad and oven door can be locked for safety,
cleaning, or to prevent unwanted use. The touchpads will not
function when locked.
[f the oven is currently in use, the touchpads and door cannot
be locked.
The current time of day will remain in the display when the
touchpads and door are locked.
To lock:
1. Press and hold the CANCEL and Cook & Hold
pads for three seconds.
° OFFappears in the display
° The LOCK icon flashes while the door is
locking.
To unlock:
Press and hold the CANCEL and Cook & Hold pads for three
seconds. OFFdisappears from the display.
_ Note: The touchpads and oven door cannot be locked if
the oven temperature is 400° F or above.
Fault Codes
The BAKE or LOCK icon may flash rapidly in the display to
alert you if there is an error or a problem. If the BAKE or
LOCK icon flashes in the display, press CANCEL pad. If the
BAKE or LOCK icon continues to flash, disconnect power to
the appliance. Wait a few minutes, and then reconnect
power. If the icon flashing still continues, disconnect power to
the appliance and caii an authorized servicer.
5

To set Bake:
1. Press the Bake pad. Bake
, The BAKE icon will flash.
Autoset
, 000 wifl flash in the dispiay.
2. Sdect the oven temperature. Press the Autoset pad for
350° F or the appropriate number pads.
, Each addidonai press of the Autoset pad will increase
the temperature by 25°.
, The oven temperature can be set from 170° to 550°.
3. Press Bake pad again or wait four seconds.
, The BAKE icon will stop flashing and Hightin the dispiay.
, The PREHEATicon will Hightin the dispiay.
° 100° or the actual oven temperature if over 100° F will
dispiay. It wifl rise in 5° increments until the preset
temperature is reached.
4. Allow the oven to preheat for 8-15 minutes.
° When the set oven temperature is reached, one long
beep will sound.
° The set temperature will display.
° The PREHEATicon will turn off.
° To recall set temperature during preheat, press Bake pad.
5. Place food in the oven.
8. Check cooking progress at the minimum cooking time.
Cook longer if needed.
7. When cooking is finished, press CANCEL pad. ('_ANCEh
8. Remove food from the oven.
Baking Notes:
° To change the oven temperature during cooking, press
Bake, then press the Autoset or appropriate number pads
until the desired temperature is displayed.
° To change the oven temperature during preheat, press the
Bake pad twice, then press the Autoset pad or appropriate
number pads until the desired temperature is displayed.
° If you forget to turn off the oven, it will automatically turn
off at the end of 12 hours. If you wish to deactivate this
feature, see page 11.
° For additional baking and roasting tips, see "Cooking Made
Simple" booklet.
6
Baking Differences Between Your
and New Oven
It is normal to notice some baking time differences between a
new oven and an old one, See"Adjusting the OvenTemperature"
on page 12.
Baking with Convection
(select models}
When convection baking, enter your normal baking tempera-
ture. The control will automatically reduce the set oven
temperature by 25°.
To set Convect Bake:
1,
Pressthe Convect Bake pad.
° The BAKE and FAN icons will flash
Autoset
° 000 will flash in the display.
2. Select the oven temperature. Press the Autoset pad for
350° F or the appropriate number pads.
° Each additional press of the Autoset pad will increase
the temperature by 25 degrees. The oven temperature
can be set from 170° to 550°.
3. Press Convect Bake pad again or wait four seconds.
° The BAKE icon will stop flashing.
° The PREHEATicon will light in the display.
, 100° or the actual oven temperature if over 100° F will
display. It will rise in 5° increments until the preset
temperature is reached.
° The FAN icon will start to rotate.
4. Allow the oven to preheat for 8-15 minutes.
° When the set oven temperature is reached, one long
beep will sound.
° The PREHEATicon will turn off.
° The set temperature will display.
° To recall the set temperature during preheat, press the
Convect Bake pad.
5. Place food in the oven.
8. Check cooking progress at the minimum cooking time.
Cook longer if needed.
7. When cooking is finished, press CANCEL pad.
8. Remove food from the oven.
Roasting With Convection
(:select models)
When convection roasting, enter your normal roasting time
and temperature. The controHwill automatically prompt you to
check the food for aloneness at 75% of the set time.
, When convection roasting, the cooking time must be set
before setting the temperature.
° If your recipe requires a preheated oven, add 15 minutes
to the cooking time programmed.
, Roasting times can vary with different cuts of meat.
° Refer to "Cooking Made SimpW' booHet for suggested
roasting temperatures and times.
To set Convect Roast:
1. Press the Convect Roast pad.
° The ROASTand FAN icons will flash
, 00:00 will flash in the dispDy.
° 000 Hightsin the display.
2. Enter the roasting time using the number pads.
° Time can be set from 10 minutes (00:10) to 11 hours,
59 minutes (11:59).
, Press Convect Roast again or wait 4 seconds.
, 'Roast' flashes in the display.
3. Select the oven temperature. Press the
Autoset pad for 350° F or the appropriate
number pads.
° Each additional press of the Autoset pad will increase
the temperature by 25°.
, The oven temperature can be set from 170° to 550°.
Autoset
6.
7.
8.
9.
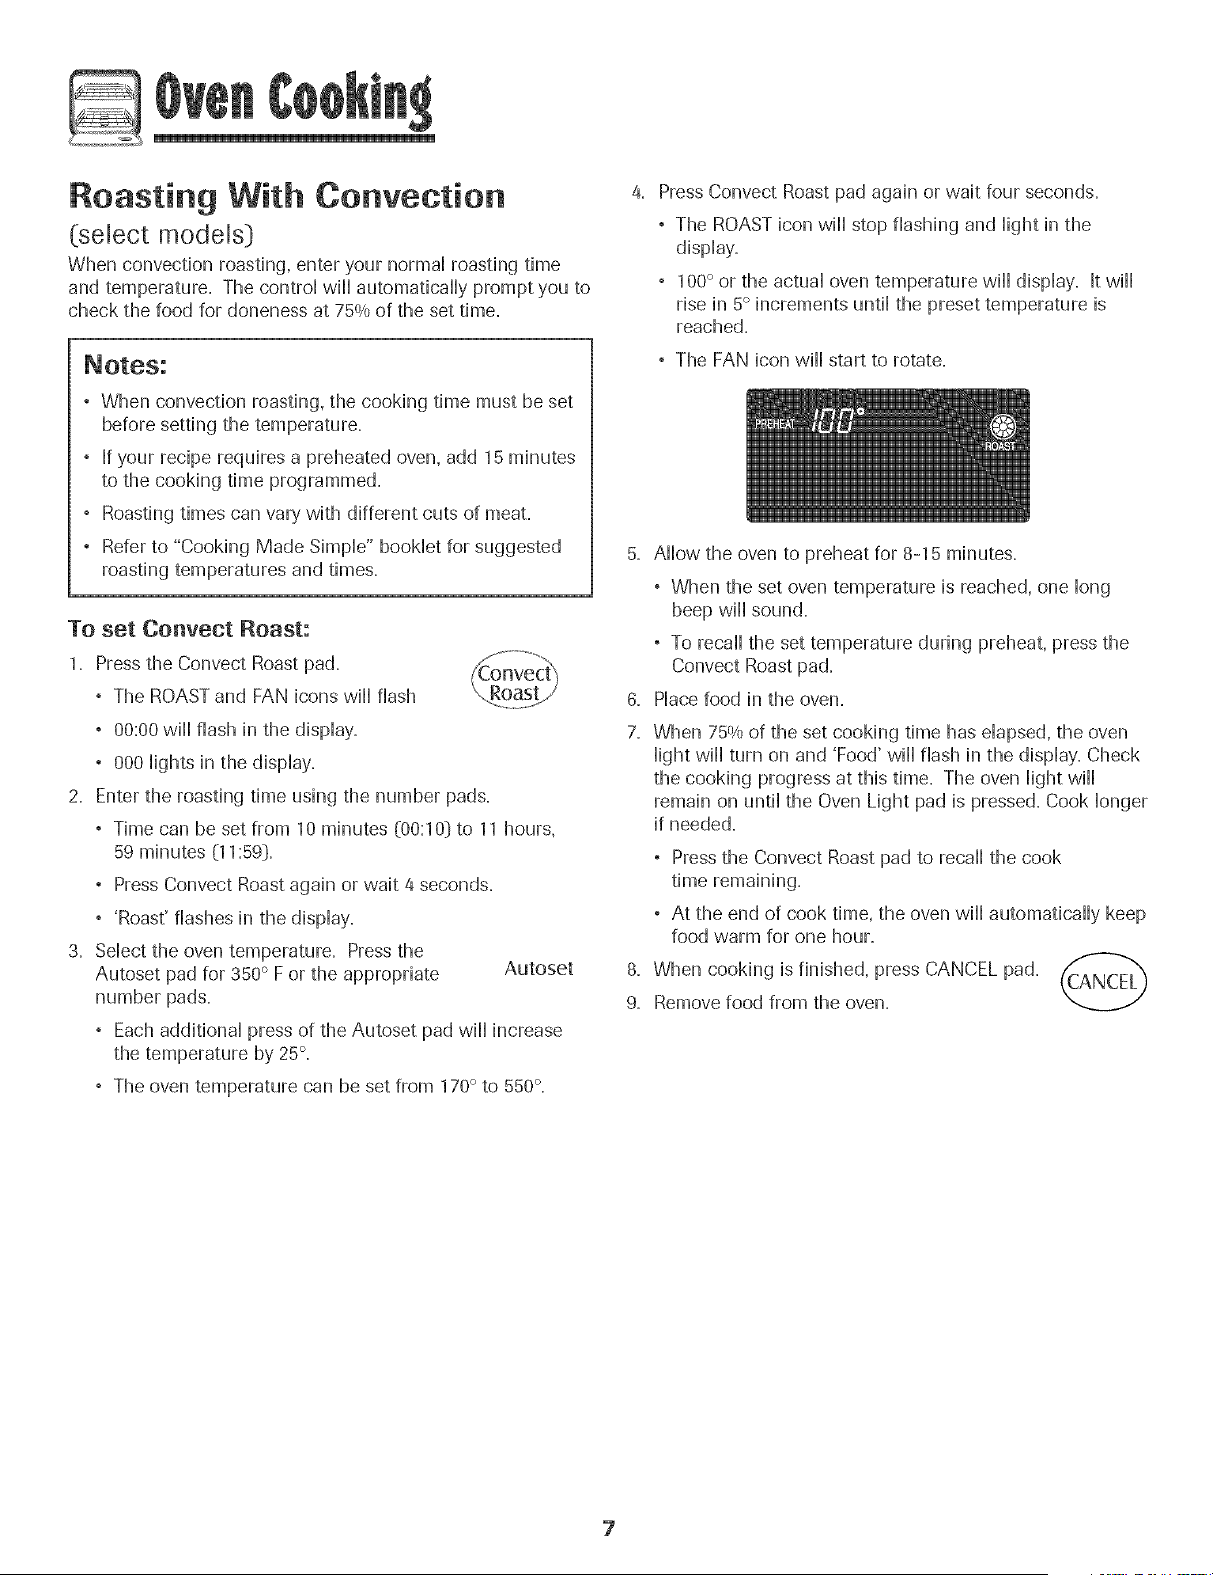
Press Convect Roast pad again or wait four seconds.
° The ROAST icon will stop flashing and light in the
display.
, 100° or the actual oven temperature will display. It will
rise in 5° increments until the preset temperature is
reached.
, The FAN icon will start to rotate.
Allow the oven to preheat for 8-15 minutes.
° When the set oven temperature is reached, one long
beep will sound.
° To recall the set temperature during preheat, press the
Convect Roast pad.
Place food in the oven.
When 750/0of the set cooking time has elapsed, the oven
light wi[[ turn on and 'Food' wi[[ flash in the display. Check
the cooking progress at this time. The oven light will
remain on until the Oven Light pad is pressed. Cook longer
if needed.
Press the Convect Roast pad to recall the cook
° At the end of cook time, the oven will automatically keep
food warm for one hour.
When cooking is finished, press CANCEL pad.
Remove food from the oven.
7
Cook & Homd
When using the Cook & Homdoption, the oven begins to heat
immediateiy after the controi has been set. Then, the oven
cooks for a specified iength of time. When that time has
eiapsed, the oven wiii keep the food warm for up to an hour
then automaticaHHyturn off.
TO set Cook & Hold:
1. Press the Cook &Hoid pad.
° The HOLD icon wiii flash to indicate that you are in Cook &
Hoid programming.
° 00:00 wiii flash in the dispiay.
2. Seiect the amount of time you want to cook by using the
number pads.
° The HOLD icon continues to flash.
° The time wiii Hightin the dispiay.
° Time can be set from 00:10 to 11:59.
3. Press Bake, Convect Bake or Convect Roast (seiect modeis}
and seiect the oven temperature. Press the Autoset pad for
350° F or the appropriate number pads.
° The desired cycie icon wiii flash. Bake
° The oven temperature can be set from 170° F to 550° F.
4. Press the desired cycie pad again OR wait four seconds.
° The desired cycie icon wiii remain Hit.
° The cooking time wiii show in the dispiay.
° The PREHEATicon wiii show in the dispiay.
° The actuai oven temperature wiii be dispiayed
during preheat.
° The set temperature wiii dispiay when the oven is
preheated.
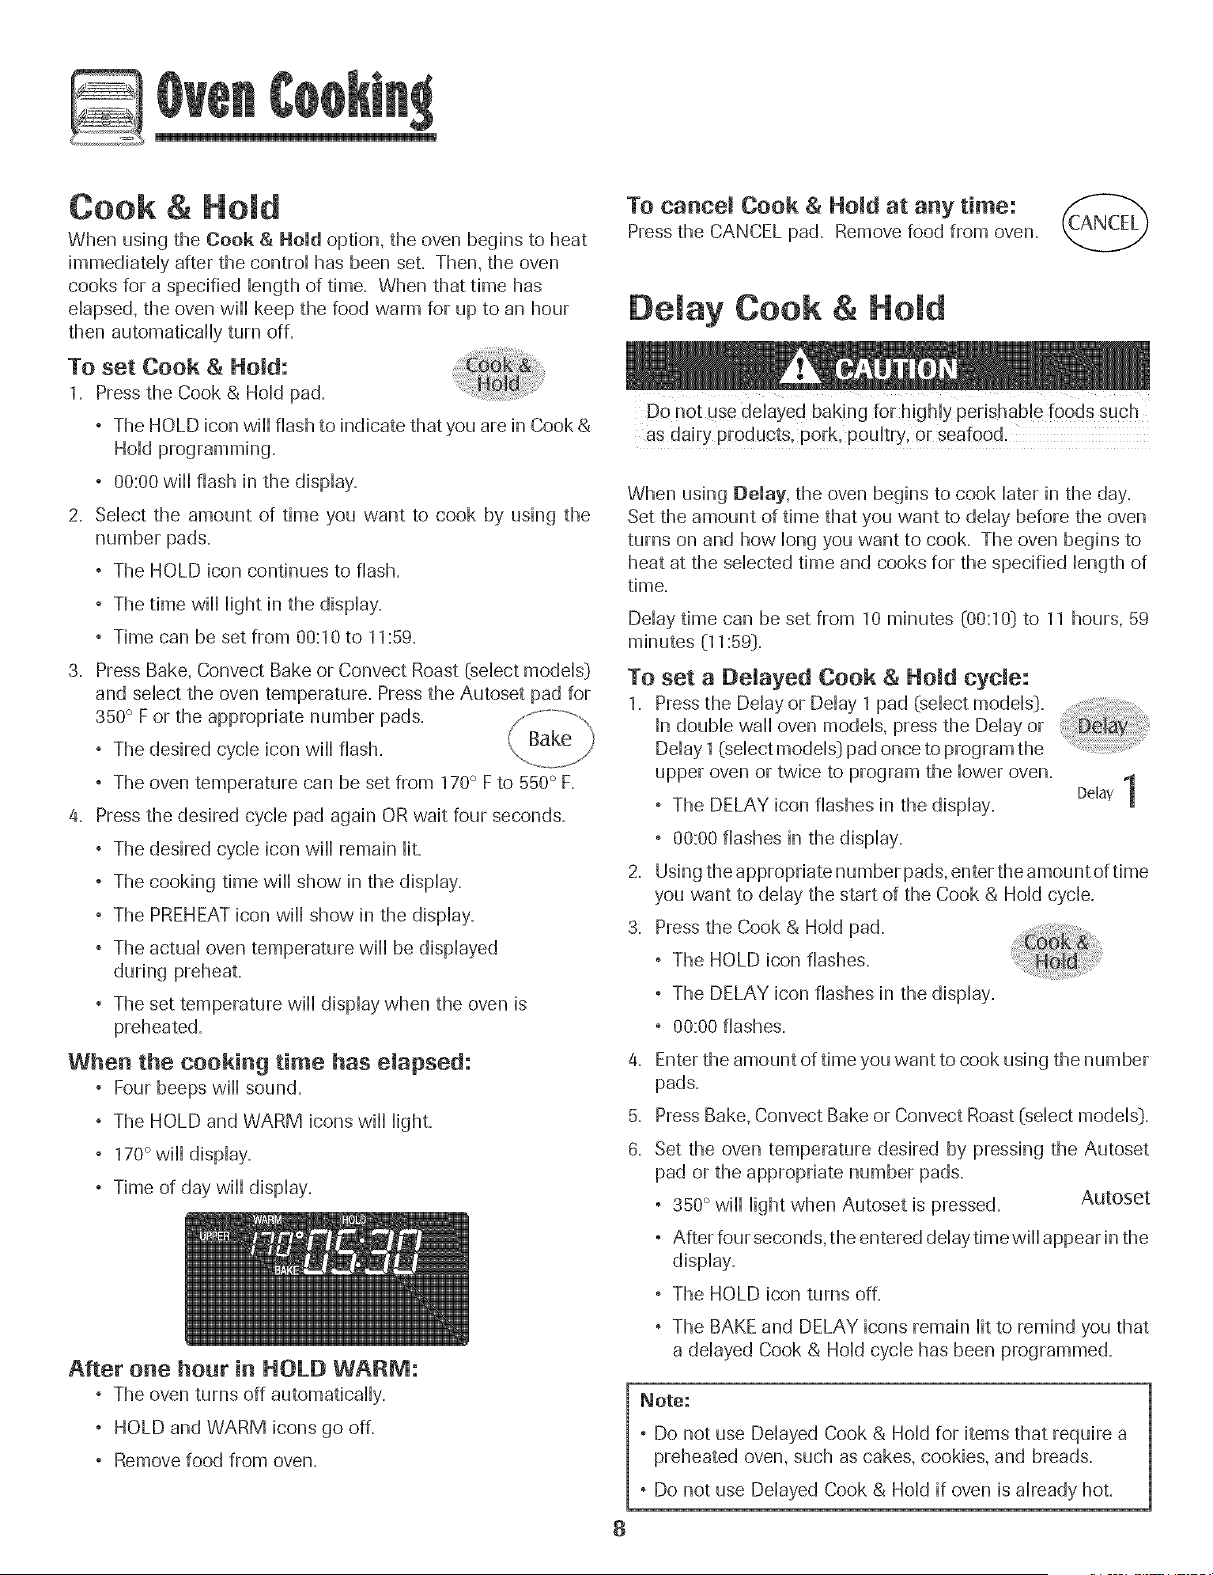
When the cooking time has elapsed:
° Four beeps wiii sound.
° The HOLD and WARM icons wiii Hight.
° 170°wiii dispiay.
, Time of day wiii dispiay.
After one hour in HOLD WARM:
, The oven turns off automaticaiiy.
° HOLD and WARM icons go off.
° Remove food from oven.
To cancel Cook & Hold at any time:
Pressthe CANCEL pad. Remove food from oven.
Delay Cook & Hold
Do not use delayed baking for highiy perishabHefoods such
as dairy products, pork, pouHtry,oFseafood,
When using Delay, the oven begins to cook Haterin the day.
Set the amount of time that you want to delay before the oven
turns on and how long you want to cook. The oven begins to
heat at the selected time and cooks for the specified length of
time,
Delay time can be set from 10 minutes (00:10} to 11 hours, 59
minutes (11:59}.
TO set a Delayed Cook & Hold eyde:
1,
Pressthe Delay or Delay 1 pad (select models}.
In double waii oven models, press the Delay or
Delay 1(select models} pad once to program the
upper oven or twice to program the lower oven.
Delay 1
, The DELAY icon flashes in the dispiay.
, 00:00 flashes in the dispiay.
Using the appropriate number pads, enter the amount of time
you want to deiay the start of the Cook &Hoid cycie.
Pressthe Cook & Hoid pad.
° The HOLD icon flashes.
° The DELAY icon flashes in the display.
, 00:00 flashes.
4,
5.
6.
Enter the amount of time you want to cook using the number
pads.
PressBake, Convect Bake or Convect Roast (seiect modeis}.
Set the oven temperature desired by pressing the Autoset
pad or the appropriate number pads.
° 350° will[ Hightwhen Autoset is pressed. Autoset
° After four seconds, the entered deiaytimewii[ appear in the
dispiay.
° The HOLD icon turns off.
° The BAKE and DELAY icons remain lit to remind you that
a delayed Cook & Hold cycle has been programmed.
Note:
° Do not use Delayed Cook & Hold foritems thatrequire a
preheated oven, such as cakes, cookies, and breads.
° Do not use Delayed Cook & Hold if oven is already hot.
@
To set Broil:
1. Press the Broii pad.
, The BROIL icon flashes.
, 00Oflashes.
, SETflashes.
2. Press the Autoset pad once to set Hi broi[ or Autoset
twice to set LO broil
. Hi or LO will[ be dispiayed.
Seiect Hi broi[ for norma[ broiiing. Seiect LO broi[ for
How-temperature broihng of [onger cooking foods such
as pouitry.
3. After four seconds, the oven will[ start.
, The BROIL icon will[ remain Hit.
. Hi or LO will[ remain Hit.
4. For optimum browning, preheat broil element for 3-4
minutes before adding food.
5. Piace food in the oven. Leave oven door open about four
inches (the first stop}.
8. Turn meat once about halfway through cooking.
7. When food is cooked, press the CANCEL pad.
Remove food and broiler pan from the oven.
, The time of day will reappear in the display.
Broil @ores:
, For best results when broiling, use a pan designed for
broiling.
° Expect broil times to increase and browning to be
slightly lighter if appliance is installed on a 208-volt
circuit.
, if more than 30 seconds elapse between pressing the
Broil pad and the Autoset pad, the oven wiil not be set
and the display wiil return to the previous display.
° A cooling fan wiil automatically turn on during broiling, if
it does not operate, contact an authorized servicer.
, Hi is used for most broiling. Use LO broil when broiling
longer cooking foods. The lower temperature allows
food to cook to the weil done stage without excessive
browning.
, Broil times may be longer when the lower broiling
, Food should be turned halfway through broiling time.
° For additional broiling tips and temperatures, refer to the
"Cooking Made Simple" bookleL
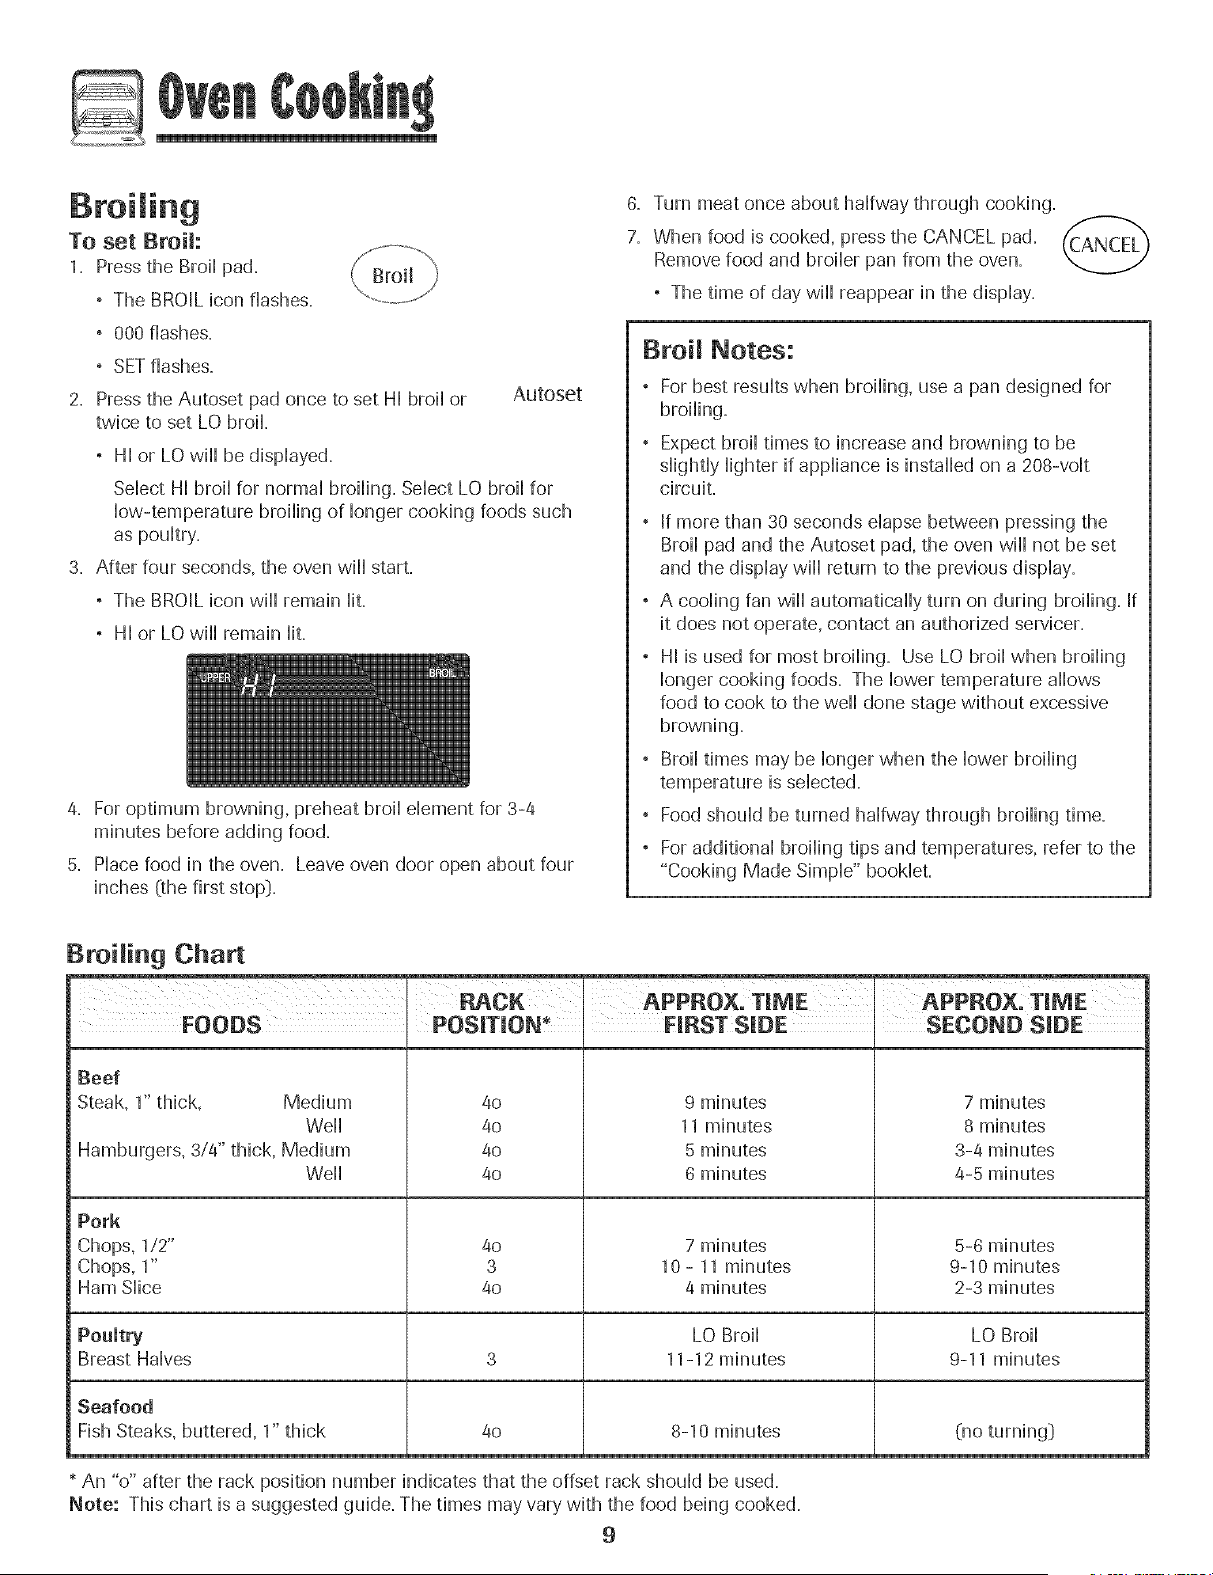
Broiling Chart
FOODS POSiTiON* _ FIRST SiDE SECOND SiDE
Beef
Steak, 1" thick, Medium
Well
Hamburgers, 3/4" thick, Medium
Well
Pork
Chops, 1/2"
Chops, 1"
Ham Slice
4o
40
40
4o
9 minutes
11 minutes
5 minutes
8 minutes
7 minutes
8 minutes
3-4 minutes
4-5 minutes
4o
3
4o
7 minutes
10 - 11 minutes
4 minutes
5-8 minutes
9-10 minutes
2-3 minutes
Poultry LO Broil LO Broil
Breast Halves 3 11-12 minutes 9-11 minutes
Seafood
Fish Steaks, buttered, 1" thick
8-10 minutes4o
(no turning}
* An "o" after the rack position number indicates that the offset rack should be used.
Note: This chart is a suggested guide. The times may vary with the food being cooked.
9
Keep War
For safeHykeephg hot foods warm or for warmhlg breads and
pHates=
To set Keep Warm:
1= Press the Keep Warm pad=
° The WARM icon flashes.
° 000 flashes in the dispHay= Autoset
2= SeHectthe Keep Warm temperature. Press the Autoset pad
or the appropriate number pads.
° 170° wiHHHightwhen the Autoset pad is pressed.
° Each press of the Autoset pad wiHHincrease the
temperature by 5°=
The Keep Warm temperature can be set from 145° to 190°=
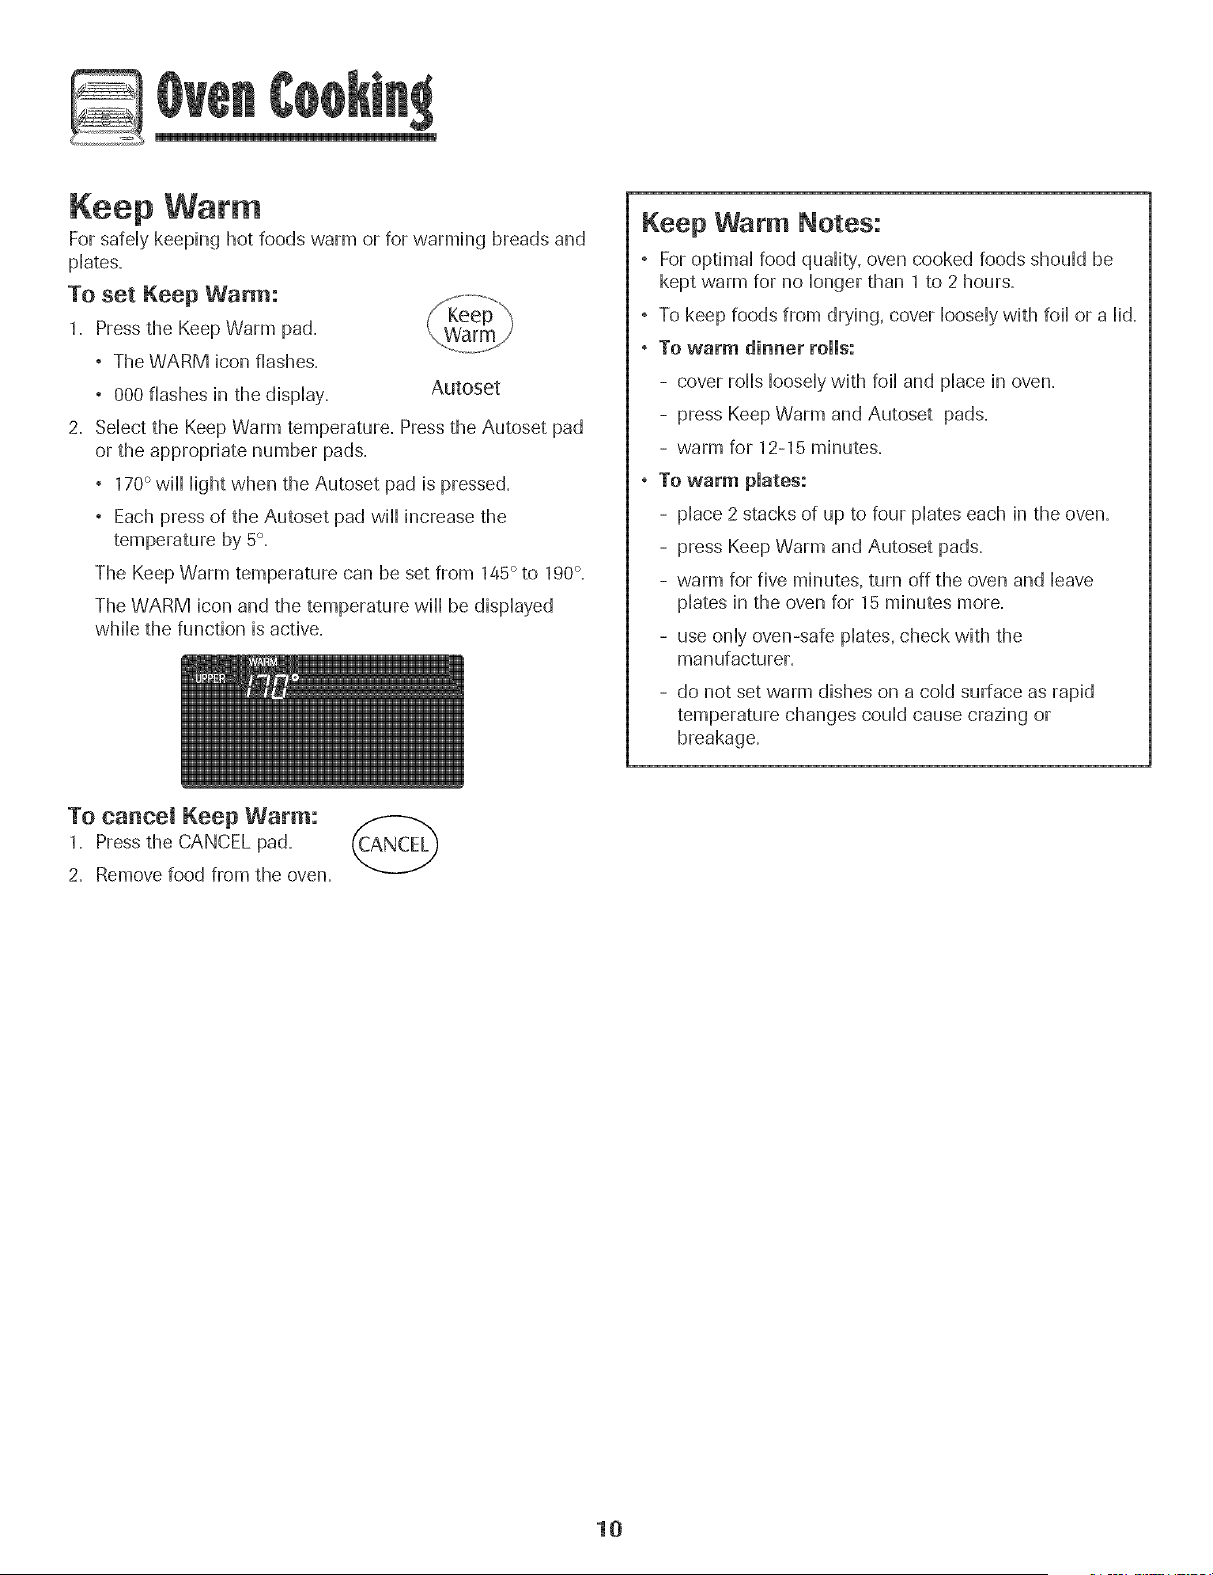
The WARM icon and the temperature wiHHbe dispHayed
wMHethe function is active.
Keep Warm Notes:
° For optimaHfood quaHity,oven cooked foods shouHdbe
kept warm for no Hongerthan 1 to 2 hours.
° To keep foods from drying, cover HooseHywith foiHor a Hid=
° To warm dinner rolls:
- cover forthsHooseHywith foiHand pHacein oven.
- press Keep Warm and Autoset pads.
- warm for 12-15 minutes.
° To warm pmates:
- pHace2 stacks of up to four pHateseach in the oven.
- press Keep Warm and Autoset pads.
- warm for five minutes, turn off the oven and Heave
pHatesin the oven for 15 minutes more.
- use onHyoven-safe pHates,check with the
manufacturer.
- do not set warm dishes on a cold surface as rapid
temperature changes could cause crazing or
breakage.
To cancel Keep Warm:
1. Press the CANCEL pad.
2. Remove food from the oven.
10
@
Automatic Shut-Off/Sabbath
Mode
The oven vviHautomatically turn off after 12 hours if you
acddentaHy Heaveit on. This safety feature can be turned off.
To cancel the 12=hour shut-off and run the oven
continuously for 72 hours: ........................
1. Press and hoM the Clock pad for three seconds
° "SAb" will be displayed and flash for five seconds.
° "SAb" will then be displayed continuously until turned
off or until the 72-hour time limit is reached.
° The BAKE icon will also be displayed if a bake cycle is in
use while the oven is in Sabbath Mode.
° All keys are inactive except CANCEL and Clock. All other
functions EXCEPTBAKE (Timer, Keep Warm, Clean, etc.}
are locked out during the Sabbath Mode.
° A Cook & Hold can be programmed during the Sabbath
Mode, however a Delay Cook & Hold is not allowed.
To cancel the Sabbath Mode:
1. Press the CLOCK pad for three seconds.
OR
2. After 72 hours, the Sabbath Mode will end.
° "SAb" will flash for five seconds.
° The time of day will return to the display.
Sabbath Mode Notes:
° Sabbath Mode can be turned on at any time with or
without the oven on.
° Sabbath Mode cannot be turned on if the keypads are
locked out or when the door is locked.
° Most prompts and messages and all beeps are
deactivated when Sabbath Mode is active.
° If the oven is baking when Sabbath Mode is set, the
BAKE icon will go out at the end of the baking cycb.
There will be no audible beeps.
° If the oven light is desired while in Sabbath Mode, it
must be turned on before the Sabbath Mode is started.
, When the Sabbath Mode is started, the temperature
display will immediately show the set temperature, rather
than the actual oven cavity' temperature. No preheat
beep will sound.
, The self-dean cycle and automatic door lock do not
operate during the Sabbath Mode.
, Pressing CANCEL pad will cancel a Bake cycle, however
the control will stay in the Sabbath Mode.
, If power fails, the oven will power up in Sabbath Mode
with 72 hours remaining and no cycb active.
11
Adjusting the Oven Temperature
Oven temperatures are carefully tested for accuracy at the
factory. It is normal to notice some baking or browning
differences between a new oven and an old one. As ovens
get older, the oven temperature can shift.
You may adjust the oven temperature if you think the oven is
not baking or browning correctly. To decide how much to
change the temperature, set the temperature 25 degrees
higher or lower than your recipe recommends, then bake.
The results of the first bake should give you an idea of how
much to adjust the temperature.
TO adjust the oven temperature:
1. Press the Bake pad.
2. Enter 550° by pressing the appropriate number pads.
3. Press and hold the Bake pad for several seconds or until
00° appears in the display.
If the oven temperature was previously adjusted, the
change will be displayed. For exampb, if the oven tem-
perature was reduced by 15° the display will show "-15 °'.
4. Press the Autoset pad to adjust the temperature.
Each time the Autoset pad is pressed, the temperature
changes by 5°, The oven temperature can be increased or
decreased by 5° to 35°,
5. The time of day will automatically reappear in the display.
You do not need to readjust the oven temperature if there is a
power failure or interruption. Temperature adjustment applies
to Bake, Convect Bake and Convect Roast (select models)
only.
The Favorite pad allows you to save the time and temperature
from a Cook & Hold Bake, Convect Bake or Convect Roast
(select models) cycle.
To set a Favorite cycle, a Cook & Hold function must be either
active or just programmed.
TO set a new Favorite cycle or to save a cur-
rently running Cook & Hold as a Favorite:
1. Program a Cook & Hold cycle as described in the Cook &
Hold section on page 8.
2. Pressand hold the Favorite pad for three
seconds.
° The newly set or currently running Cook & Hold cycle
wiii be saved.
° A beep wiii sound to indicate that the controi has
accepted the Favorite setting.
To start a cycle programmed into Favorite:
1. Press the Favorite pad.
, Time and temperature for the set Cook & Hold cycle will
be displayed. (If no Cook & Hold cycb has been pro-
grammed, "nonE" is displayed.)
2. Pressthe Bake, Convect Bake or Convect Roast (select
models) pad.
, The Favorite cycb will begin immediately.
° The selected cycle icon will light in the display
° The cooking time will light in the display
When the cooking time has elapsed:
° The selected cycle icon will turn off.
° The HOLD WARM icon will light.
, 170°wflHdisplay.
To eaneem a Favorite eyeJe in progress:
1. Press the CANCEL pad.
° The stored Favorite cycle wiii not be affected.
2. Remove food from the oven.
12
Oven Light
The Oven Light automatically comes on whenever the oven
door is opened. When the door is dosed, press the Oven Light
pad to turn the Oven Light on or off. A beep will sound every
thne the Oven Light pad is pressed.
Oven Vent
The oven vent is Hocatedbdow the controHpand on your wall
oven.
When tile oven is hi use, tile area near tile oven vent may
become hot enough to cause bums, Do not block tile vent
opening for best baking results.
Oven Fans
The cooling fan will automatically turn on during cleaning.
broiling and some baking operations, it is used to help keep
internal parts on the control panel cool. The fan will automati-
cally turn off when parts have cooled. The fan may continue
to operate after the oven has been turned off. This is normal.
A convection fan (select models) is used to circulate hot air
in the oven when the convection feature is selected. It
automatically turns on whenever a Convect pad is pressed
and will turn off when Convect is canceled.
Note: The convection fan will automatically stop whenever
the oven door is opened.
Oven Racks
* Do not attempt to change the rack position when the oven
is hot.
Do not use the oven for storing food or cookware.
Single and Double Convect Ovens - two flat and one
offset rack were packaged for each oven.
Single and Double Non-Convect Ovens - one flat and one
offset rack were packaged for each oven.
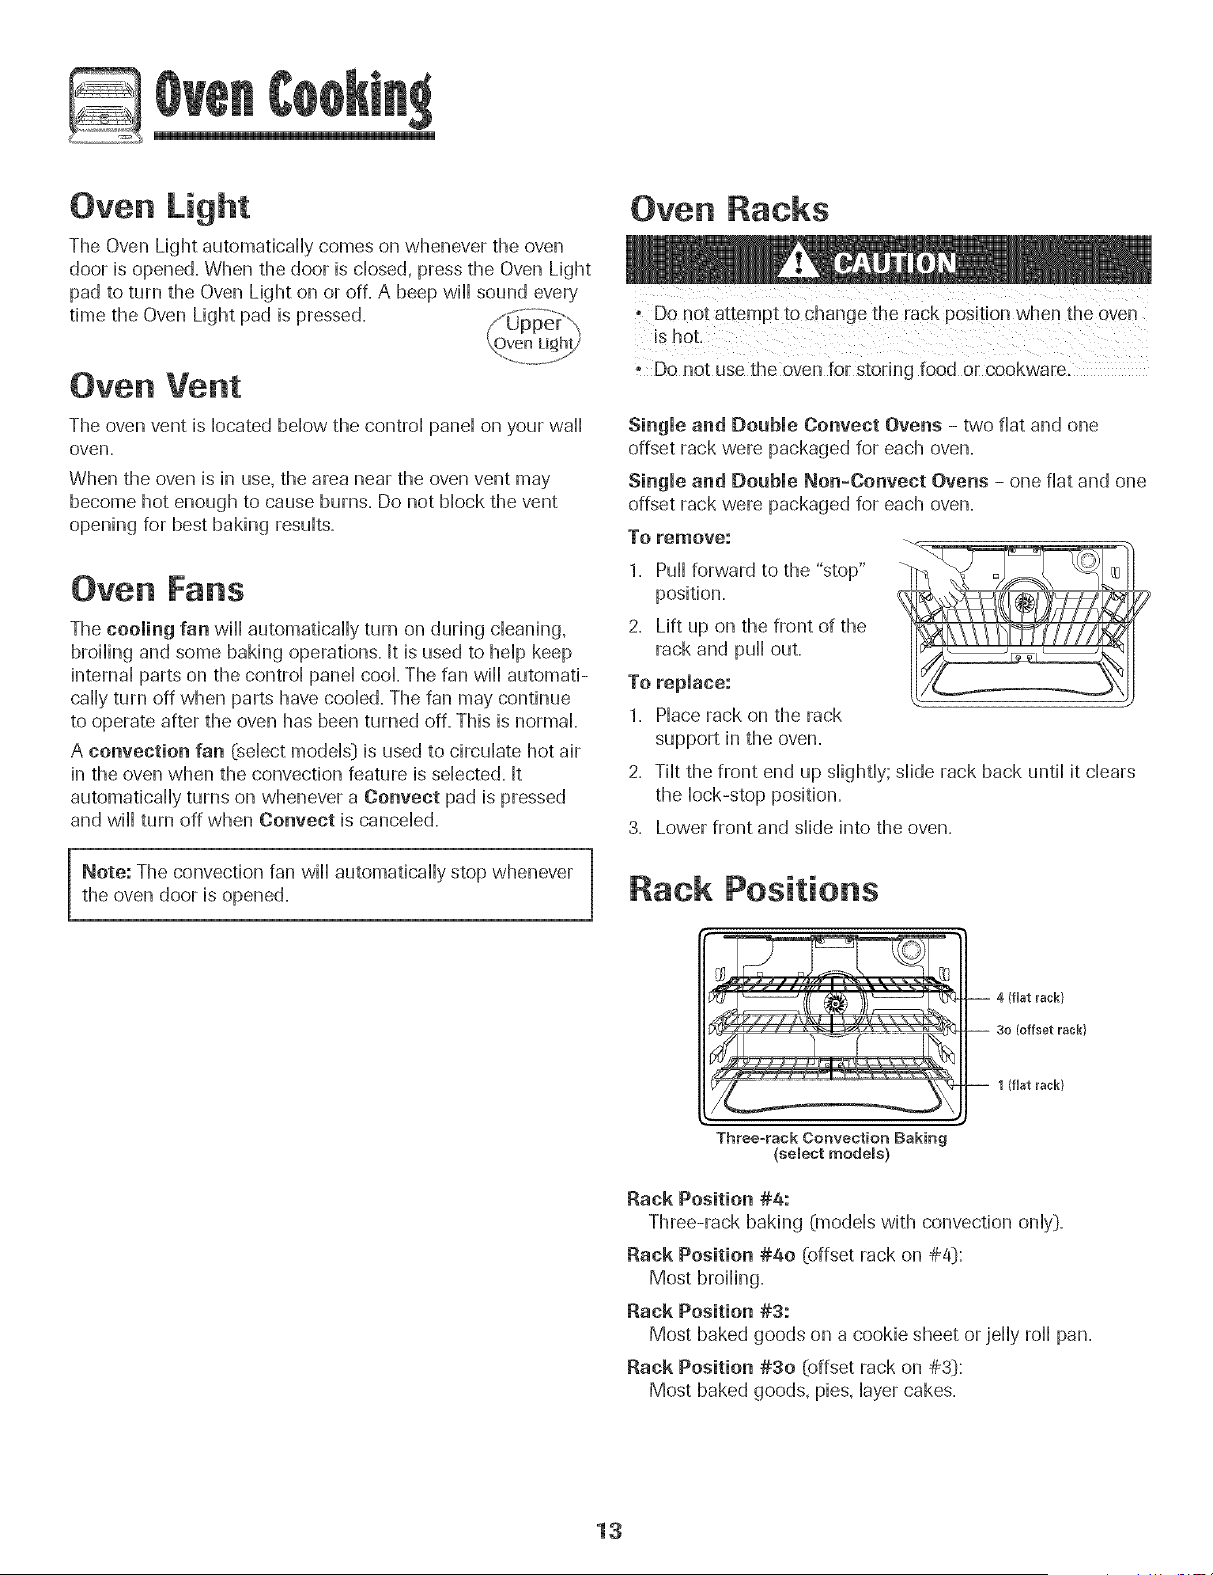
To remove:
1. Pu[[ forward to tile "stop"
position.
2. Lift up on the front of the
rack and pull out.
To replace:
1. Place rack on the rack
support in the oven.
2. Tilt the front end up slightly; slide rack back until it clears
the lock-stop position.
3. Lower front and slide into the oven.
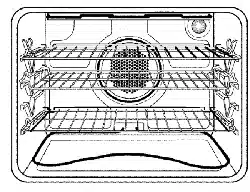
Rack Positions
4 (fiat reck}
30 (offset reck)
1 (fiat reek)
Three-rack Convection Baking
(select modeRs)
Rack Position #4:
Three-rack baking Onodds with convection only).
Rack Position #4o (offset rack on #4):
Most broiling.
Rack Position #3:
Most baked goods on a cookie sheet or jelly roll pan.
Rack Position #3o (offset rack on #3):
Most baked goods, pies, layer cakes.
13
Rack Position #2:
Roasting small cuts of meat, cakes in tube or bundt pans,
casseroHes.
Rack Position #20 Coffseton #2D:
Roasting, [oaves of bread, angd food cake.
Rack Position #1 :
Large cuts of meat and turkey, custard pie, dessert souffle.
Multiple Rack Cooking:
Two racks: Use #20 and #4=
Three racks (convection cooking - sdect moddsD:
Use #1, #30, #4= (See illustration on page 13=_)
The use of the offset rack is denoted in the [ist as an "o"
after the rack position number.
When baking on two or three racks, check foods at the
minimum suggested time to avoid over=browning or
over=cooking=
Do not cover an entire rack with aluminum foi[ or pHacefoi[
on the oven bottom. Baking resuHtswill be affected and
damage may occur to the oven bottom.
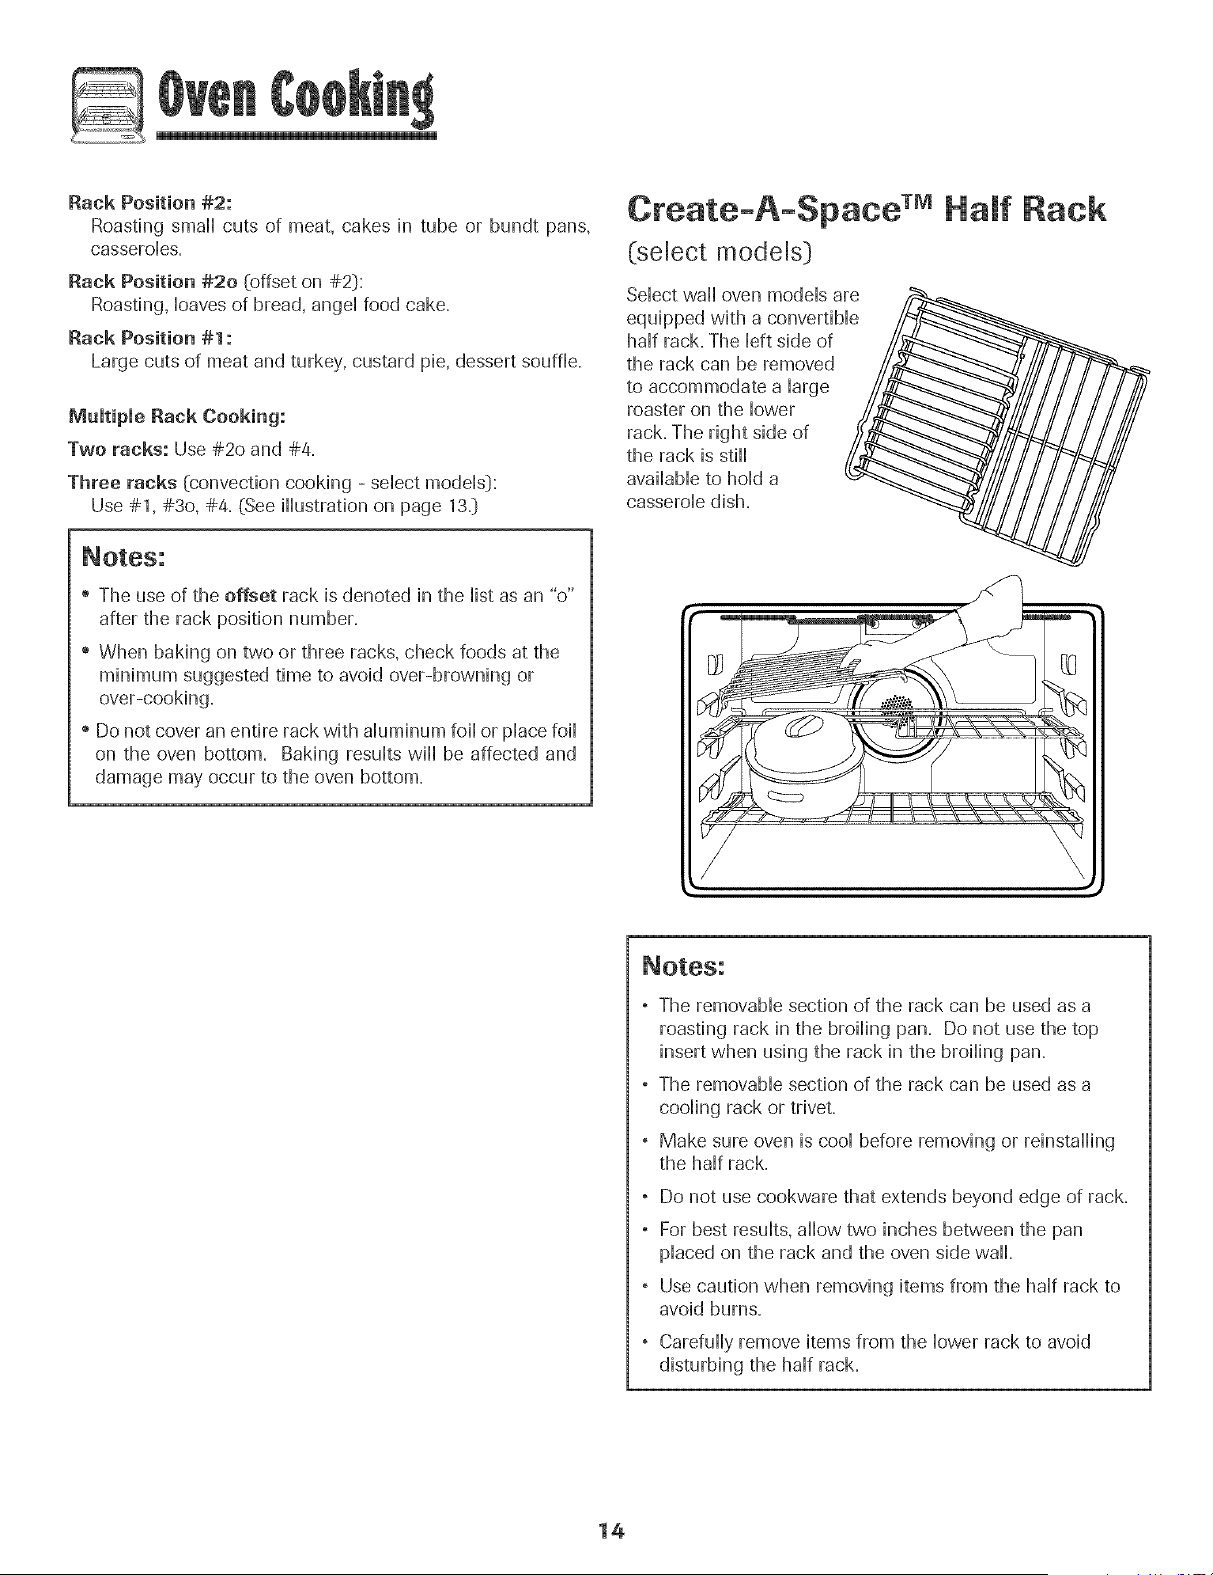
Create-A-Space TMHalf flack
(select models}
Select wall oven models are /_
equipped with a convertible_
half rack. The left side of
the rack can be removed
to accommodate a large
roaster on the lower
rack. The right side of
the rack is still
available to hold a _
casserole dish.
//
, The removable section of the rack can be used as a
roasting rack in the broiling pan. Do not use the top
insert when using the rack in the broiling pan.
° The removable section of the rack can be used as a
cooling rack or trivet.
° Make sure oven is cool before removing or reinstalling
the half rack.
, Do not use cookware that extends beyond edge of rack.
° For best results, allow two inches between the pan
placed on the rack and the oven side wall.
° Use caution when removing items from the half rack to
avoid burns.
Carefully remove items from the lower rack to avoid
disturbing the half rack.
14
Seff-C ean Oven
o Jt is norreal for parts of the oven to become hot during a
self-clean cycle.
- To prevent damage to oven door. do not attempt to open
the door when LheLOCK icon is displayed.
, Avoid touching door. window or oven vent area during a
dean cycle.
- Do not use commercial oven cleaners on the oven finish
or around any pare of the oven. They wiii damage the
finish ol parts.
The self-clean cycle usesabove-normal cooking temperatures to
automatically clean the oven interior.
It is normal for flare-ups, smoking, or flaming to occur during
cleaning if the oven is heavily soiled. It is better to clean the oven
regularly rather than to wait until there is a heavy build-up of soil
in the oven.
During the cleaning process, the kitchen should be well venti-
lated to get rid of normal odors associated with cleaning.
Before Seff-Cmeaning
1. Remove broiler pan, all pans, and oven racks from the oven.
The oven racks will discolor and may not slide easily after a
self-clean cycle if they are not removed.
2. Clean oven frame, door frame (area outside of gasket, and
around the opening in the door gaske0 with a nonabrasive
cleaner such as Bon Ami* or detergent and water. The self-
cleaning process does not clean these areas. They should be
cleaned to prevent soil from baking on during the clean cycle.
{The gasket is the seal around the oven door and window}.
3. To prevent damage, do not clean or
rub the gasket around the oven door.
The gasket is designed to seal in heat
during the clean cycle.
4. Wipe up excess grease or spillovers
from the oven bottom. This prevents
excessive smoking, flare-ups or fiam-
ing during the clean cycle. To make cleaning easier, the
heating dement can be lifted slightly (about 1 inch}.
5. Wipe up sugary and acidic spillovers such as sweet potatoes,
tomato, or milk-based sauces. Porcelain enamel is acid-
resistant, not acid-proofi The porcelain finish may discolor if
acidic or sugar}, spills are not wiped up before a self-clean
cycle.
To set Self-Clean:
Notes:
Oven temperature must be below 400° F to program a
clean cycle.
In double wall oven models, only one oven can be
cleaned at a time.
1. Close the oven door.
2. Press the Clean pad.
° The CLEAN icon flashes.
° "SET" flashes in the display. Autoset
3. Press the Autoset pad.
° "MEd" (Medium Soil, 3 hours} is displayed.
4. Press the Autoset pad to scroll through the self-cleaning
settings.
"HW/" (Heavy Soil, 4 hours}
"MEd" (Medium soil, 3 hours}
"LITE" ( Light Soil, 2 hours}
Choosing the soil level of the oven automatically programs
the self-cleaning time.
5. After four seconds, the oven will start cleaning.
° If the door is not closed, beeps will sound and 'door' will
display. If the door is not closed within 30 seconds, the
self-cleaning operation will be canceled and the display
will return to the time of day.
° The CLEAN icon will appear in the display.
° The LOCK icon will flash in the display. Once the
door locks, the icon will remain steady.
° The cleaning time will start counting down in the display.
To Delay a Self-Clean Cycle: .......................
1. Press the Delay or Delay 1 pad (select models}
° The DELAY icon flashes.
t
° 00:00 will flash in the display. Delay|
2. Enter the amount of time you want to delay the cycle using
the appropriate number pads.
3. Press the Clean pad.
° SETflashes in the display.
4. Press the Autoset pad.
Autoset
° "LITE" (Light soil level} is displayed.
* Brand names for cleaning products are registered trademarks of the respective manufacturers.
15
5. PresstheAutosetpadtoscrollthroughthe Autoset
stir-cleaningsettings.
"HVy"(HeavySoil4hours}
"MEd"(MediumSoii,3hours}
"LITE"(LightSoil2 hours}
Choosingthesoiibveioftheovenautomaticallyprograms
thesdf-cbaningtime.
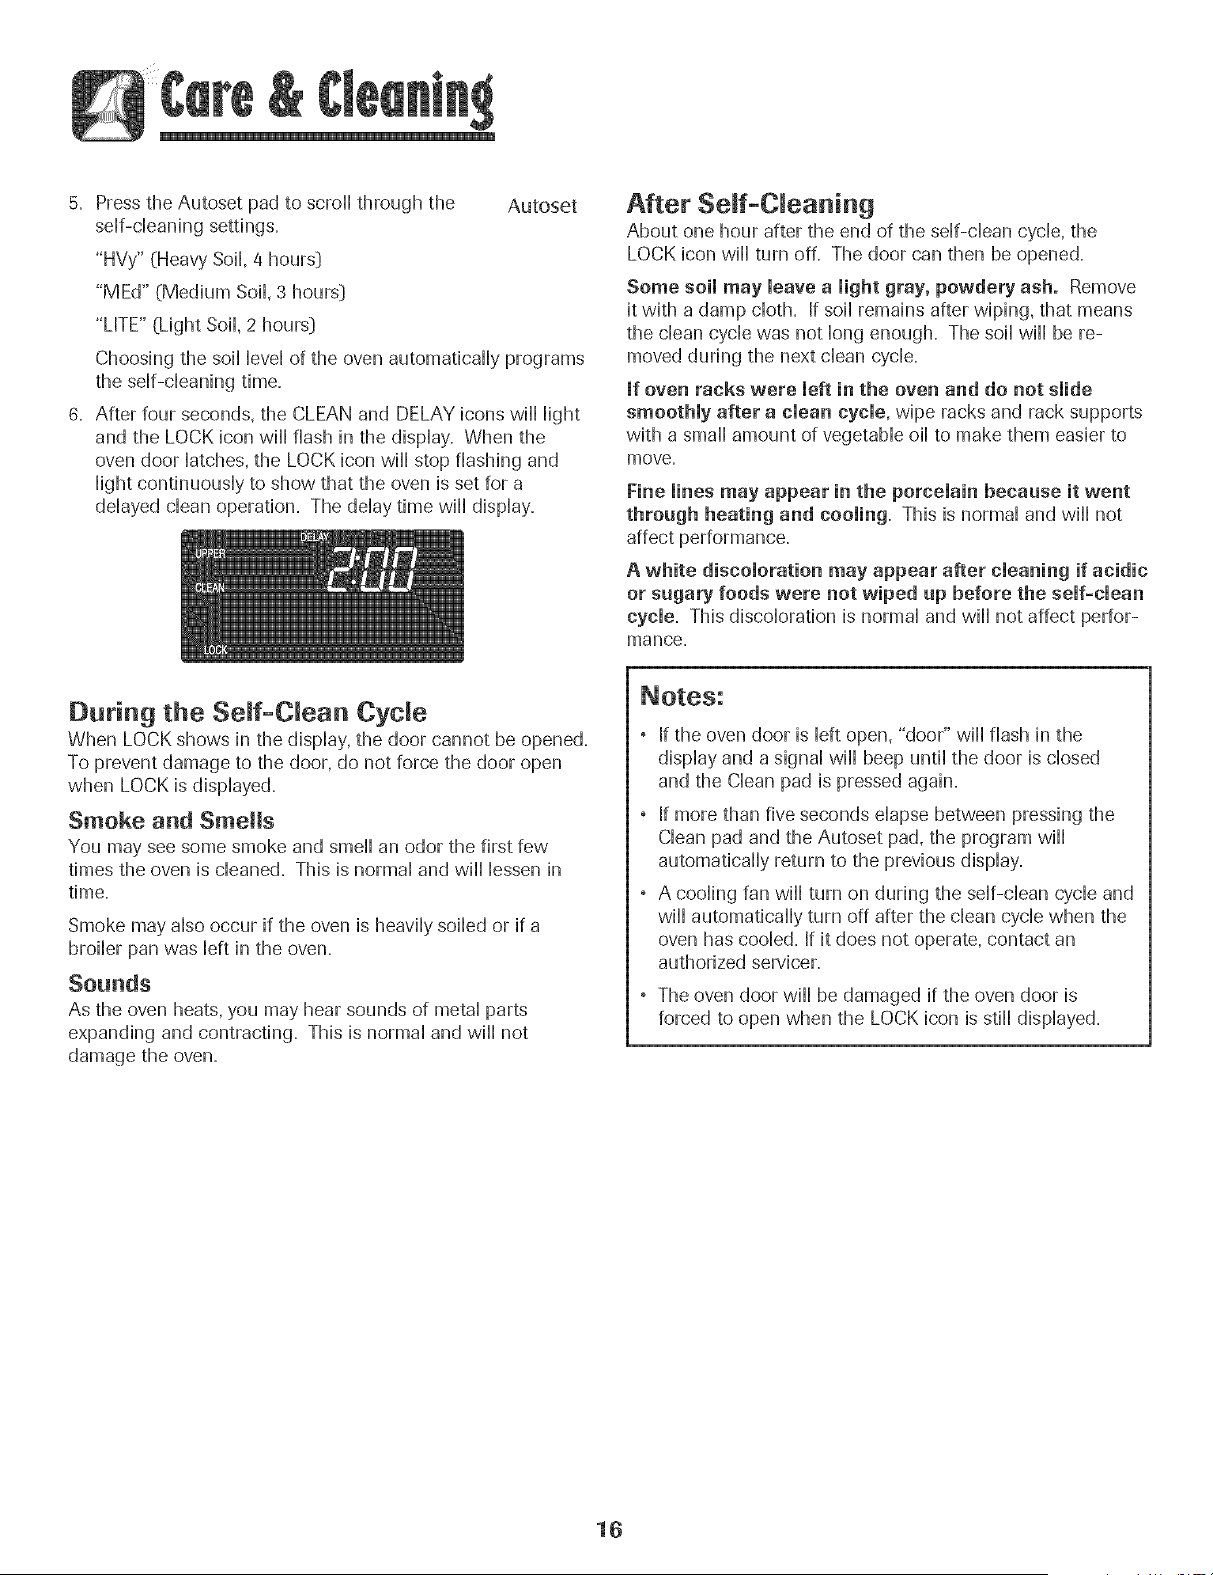
6. Afterfourseconds,theCLEANandDELAYiconswillHight
andtheLOCKiconwillflashinthedispiay.Whenthe
ovendoorHatches,theLOCKiconwillstopflashingand
Hightcondnuousiytoshowthattheovenissetfora
ddayeddeanoperation.Theddaytimewilldisplay.
After Seff-C eaning
About one hour after the end of the self-dean cycle, the
LOCK icon will turn off. The door can then be opened.
Some soil may leave a light gray, powdery ash. Remove
it with a damp cloth. If soil remains after wiping, that means
the clean cycb was not long enough. The soil will be re-
moved during the next dean cycb.
mfoven racks were left in the oven and do not slide
smoothly after a clean cycle, wipe racks and rack supports
with a small amount of vegetaMe oil to make them easier to
move.
Fine lines may appear in the porcelain because it went
through heating and cooling, This is normal and will not
affect performance.
A white discoloration may appear after cleaning if acidic
or sugary foods were not wiped up before the self-clean
cycle. This discobration is normal and will not affect perfor-
mance.
During the Seff-CRean Cycle
When LOCK shows in the display, the door cannot be opened,
To prevent damage to the door, do not force the door open
when LOCK is displayed,
Smoke and Smells
You may see some smoke and smell an odor the first few
times the oven is cleaned. This is normal and will lessen in
time.
Smoke may also occur if the oven is heavily soiled or if a
broiler pan was left in the oven.
Sounds
As the oven heats, you may hear sounds of metal parts
expanding and contracting. This is normal and will not
damage the oven.
If the oven door is left open, "door" wiii flash in the
display and a signal will beep until the door is closed
and the Clean pad is pressed again.
If more than five seconds elapse between pressing the
Clean pad and the Autoset pad, the program will
automatically return to the previous display.
A cooling fan will turn on during the self-clean cycle and
will automatically turn off after the clean cycle when the
oven has cooled. If it does not operate, contact an
authorized servicer.
The oven door wiii be damaged if the oven door is
forced to open when the LOCK icon is still displayed.
16
Cleaning Procedures
.To preven[ staining or discoloration, dean appUiance after each use,
Brand names are registered trademarks of the
respective manufacturers.
*_To order call 1-800-088-9900 USA or
1-800-088-2002 Canada
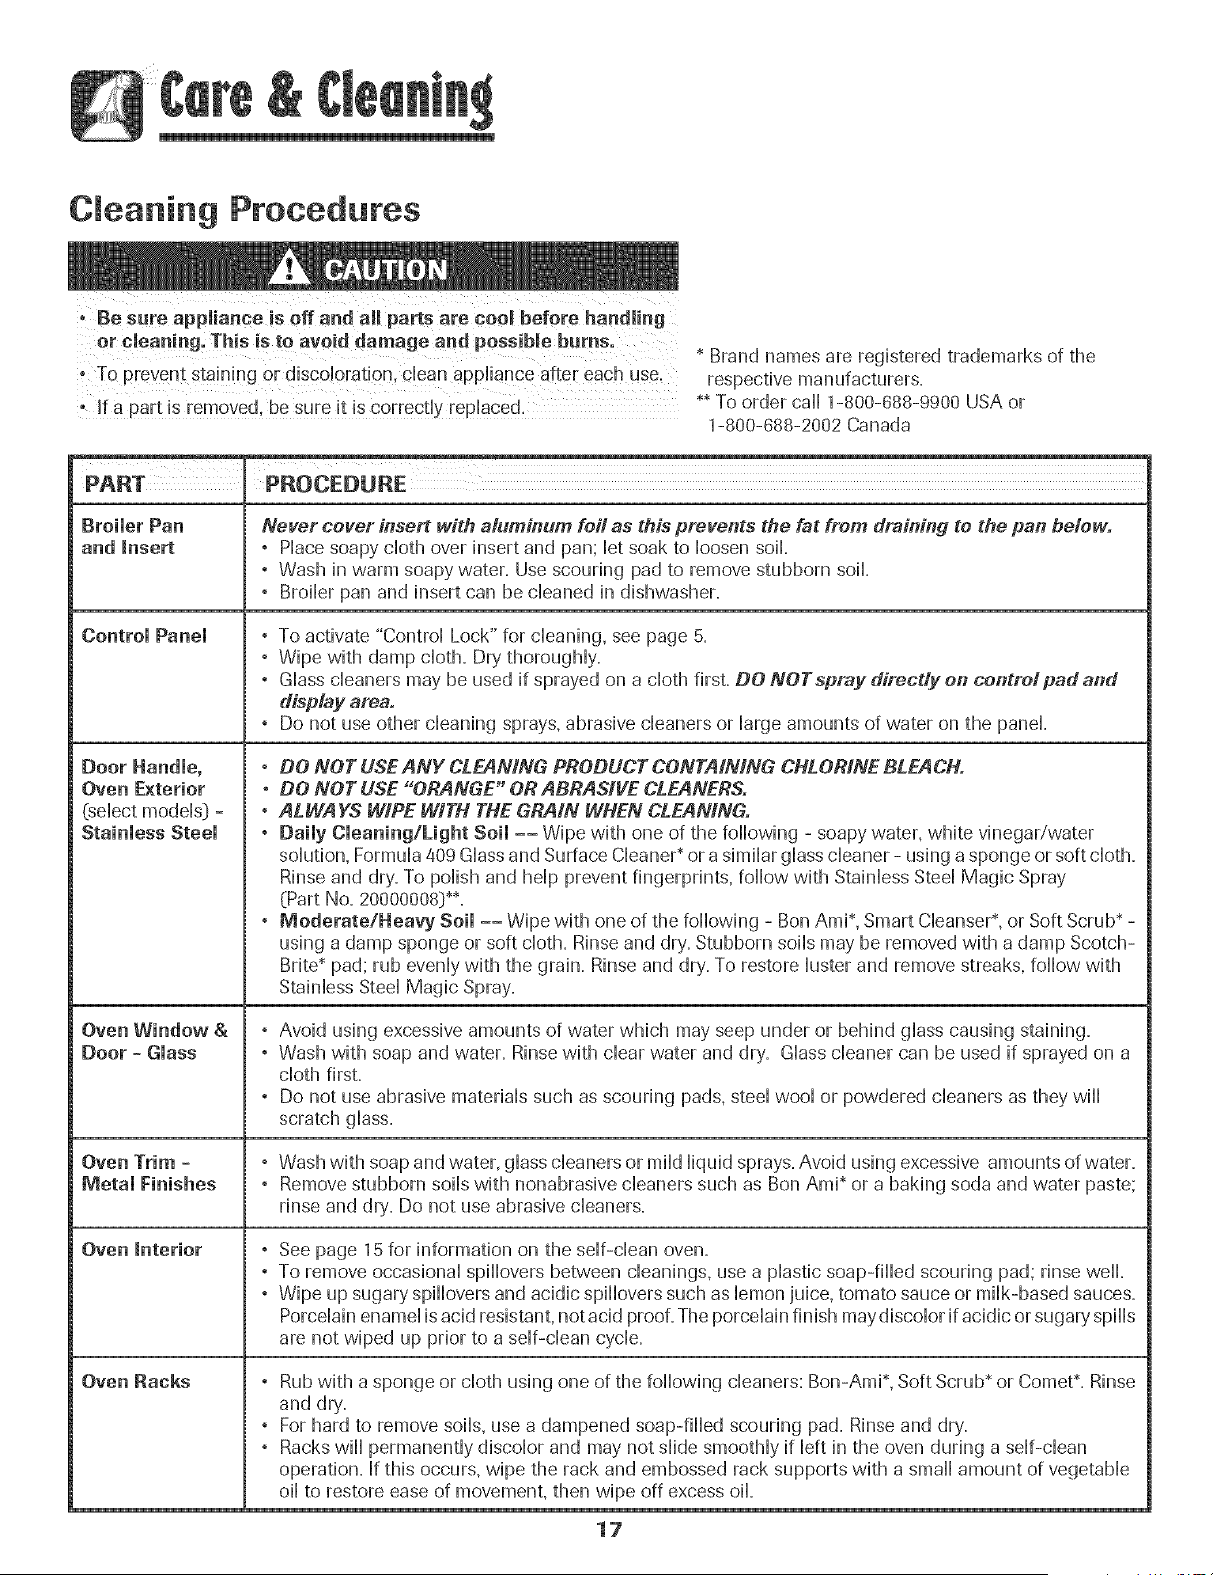
PART PROCEDURE
Broiler Pan Never cover insert with alum#turn foil as this prevents the fat from draining to the pan below.
and insert ° PHacesoapy cloth over hsert and pan; Hotsoak to Hoosensoft=
, Wash in warm soapy water. Use scouring pad to remove stubborn soil.
, Broiler pan and insert can be cleaned in dishwasher.
Control Panel ° To activate "Control Lock" for cleaning, see page 5=
, Wipe with damp cloth. Dr}, thoroughly.
, Glass cleaners may be used if sprayed on a cloth first. DO NOTspray directly on eontrolpad and
display area.
, Do not use other cleaning sprays, abrasive cleaners or large amounts of water on the panel.
, DO NOT USEANY CLEANING PRODUCT CONTAINING CHLORINE BLEACH.
Oven Exterior • DO NOT USE ORANGE OR ABRASIVE CLEANERS.
(select models_ = ° ALWAYS VJIPE WITH THE GRAIN WHEN CLEANING.
Stainless Steel ° Daily Cleaning/Light soil -= Wipe with one of the foflowing - soapy water, white vinegar/water
solution, Formula 409 Glassand Surface Cleaner* or a similar glass cleaner - using a sponge or soft cloth.
Rinse and dry=To polish and help prevent fingerprints, follow with Stainless Steel Magic Spray
(Part No=20000008:}_=
° Moderate/Heavy Soil -- Wipe with one of the following - Bon Ami _,Smart Cleanser_,or Soft Scrub* -
using a damp sponge or soft cloth. Rinse and dry=Stubborn soils may be removed with a damp Scotch-
Brite* pad; rub evenly with the grain. Rinse and dry=To restore luster and remove streaks, follow with
Stainless Steel Magic Spray.
Oven Window & ° Avoid using excessive amounts of water which may seep under or behind glass causing staining.
Door - Glass , Wash with soap and water. Rinse with clear water and dry= Glass cleaner can be used if sprayed on a
cloth first.
° Do not use abrasive materials such as scouring pads, steel wool or powdered cleaners as they will
scratch glass.
Oven Trim = , Wash with soap and water, glass cleaners or mild liquid sprays. Avoid using excessive amounts of water.
Metal Finishes , Remove stubborn soils with nonabrasive cleaners such as Bon Ami _or a baking soda and water paste;
rinse and dry'. Do not use abrasive cleaners.
Oven interior , See page 15 for information on the self-clean oven.
, To remove occasional spfllovers between deanings, use a plastic soap-filled scouring pad; rinse well.
, Wipe up sugary spfllovers and acidic spfllovers such as lemon juice, tomato sauce or milk-based sauces.
Porcelain enamel is acid resistant, not acid proof. The porcelain finish may discolor if acidic or sugary spills
are not wiped up prior to a self-clean cycle.
Oven Racks , Rub with a sponge or cloth using one of the following cleaners: Bon-Ami*, Soft Scrub* or Comet_- Rinse
and dry,.
° For hard to remove softs, use a dampened soap-filled scouring pad. Rinse and dry.
° Racks will permanently discolor and may not slide smoothly if left in the oven during a self-clean
operation. If this occurs, wipe the rack and embossed rack supports with a small amount of vegetable
oil to restore ease of movement, then wipe off excess oil
17
Oven Light
, Before repUacing light bulb, DISCONNECT POWERTO
OVEN.
Be sure buUbis CooU.'
may break.
To replace oven light:
1. Use a dry pothoHderand very carefully unscrew buHbcover
and buHb=
2. RepHacewith a 40 watt, oven-rated appHiancebuHb.BuHb
with a brass base is recommended to prevent fusing of
buHbinto socket.
3. RepHacebuHbcover and reconnect power to oven.
4. Reset chock,
Oven Window
To protect the oven door window:
1. Do not use abrasive cleaning agents such as steal wooH
scouring pads or powdered cleansers as they may scratch
the gHass.
2. Do not hit the gHasswith pots, pans, furniture, toys, or
other objects.
3. Do not chosethe oven door untiHthe oven racks are in
pHace.
Scratching, hitting, jarring or stressing the glass may weaken
its structure causing an increased risk of breakage at a later
date.
18
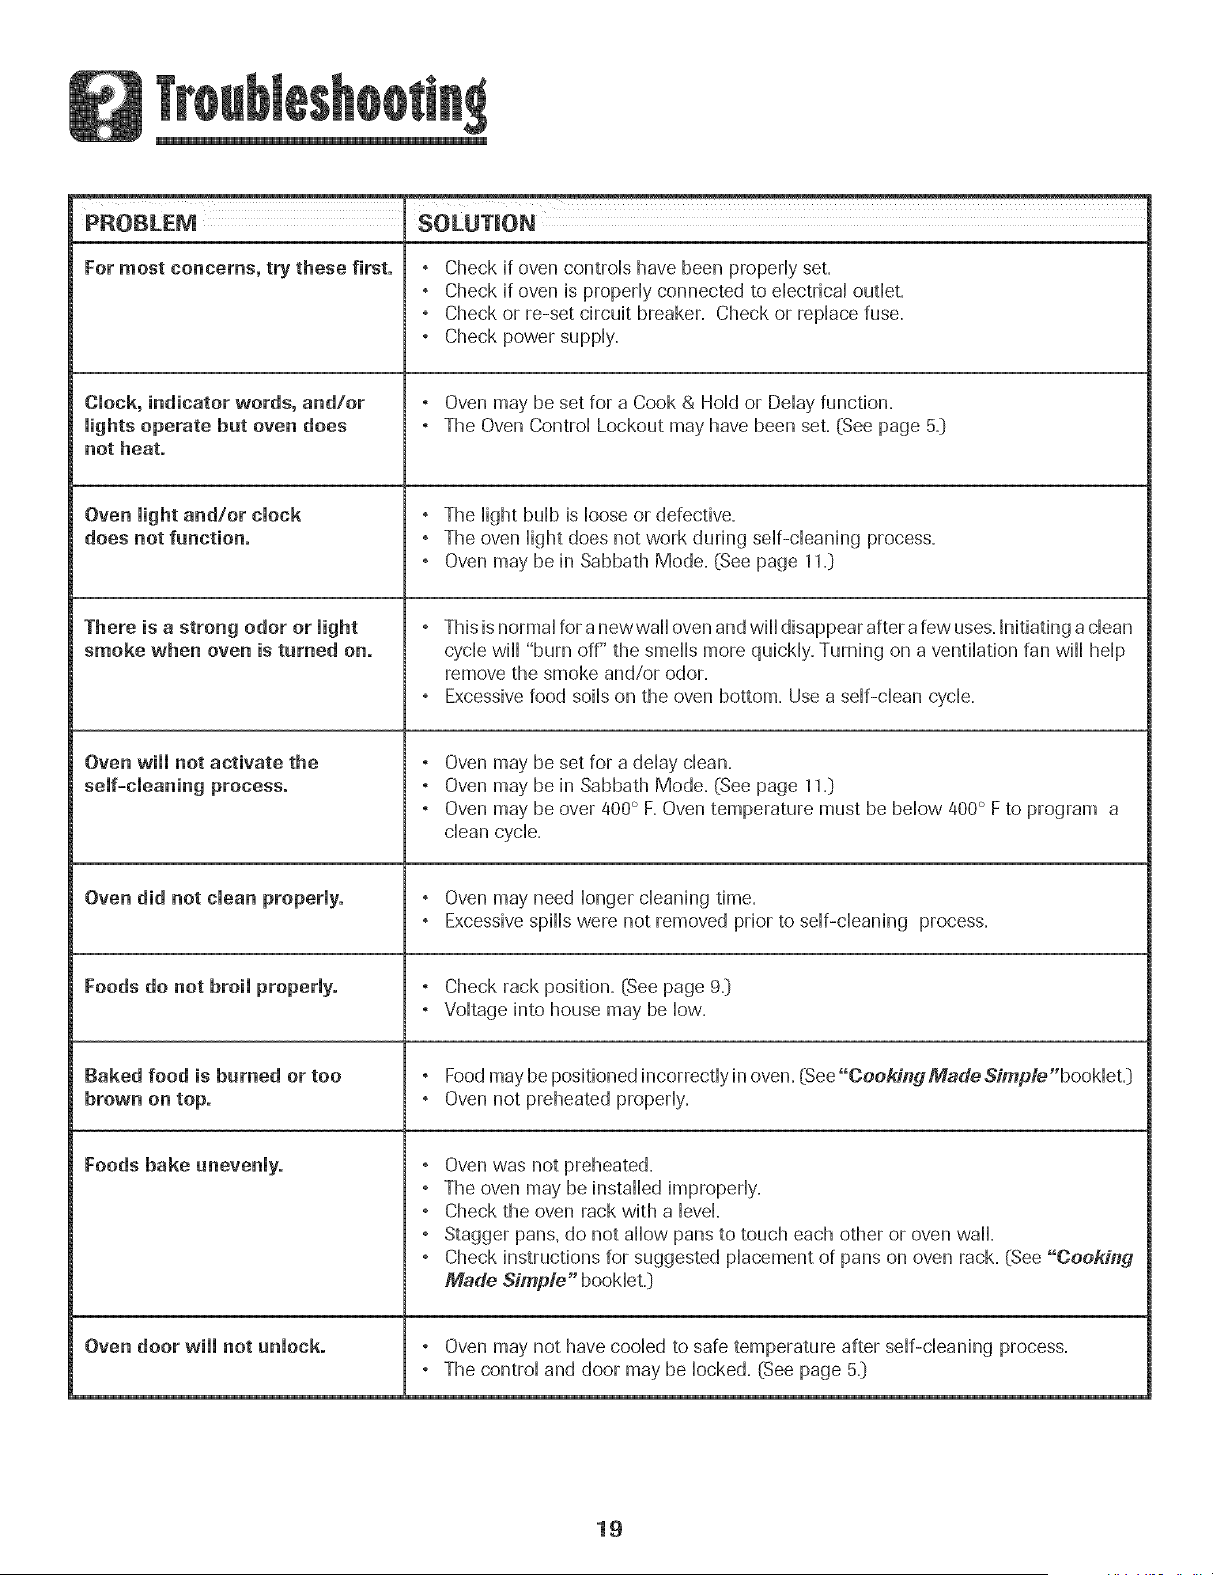
PROBLEM SOLUTION
For most concerns, try these first.
CJock, indicator words, andlor
Jights operate but oven does
not heat.
Oven light andlor clock
does not function.
There is a strong odor or light
smoke when oven is turned on.
Oven wiii not activate the
Oven did not dean properly.
Foods do not broil properly.
Baked food is burned or too
brown on top.
Foods bake unevenly.
Oven door will not unlock.
, Check if oven controls have been properly set.
, Check if oven is properly connected to electrical outlet.
, Check or re-set circuit breaker. Check or replace fuse.
, Check power supply.
, Oven may be set for a Cook & Hold or Delay function.
, The Oven Control Lockout may have been set. (See page 5._)
, The light bulb is loose or defective.
, The oven light does not work during self-cleaning process.
, Oven may be in Sabbath Mode. (See page 11=)
, This is normal for a newwall oven and will disappear after a few uses.Initiating a clean
cycle will "burn off" the smells more quickly. Turning on a ventilation fan will help
remove the smoke and/or odor.
, Excessive food soils on the oven bottom. Use a self-clean cycle.
, Oven may be set for a delay clean.
° Oven may be in Sabbath Mode. [See page 11.)
° Oven may be over 400° F. Oven temperature must be below 400° F to program a
clean cycle.
, Oven may need longer cleaning time.
, Excessive spills were not removed prior to self-cleaning process.
° Check rack position. (See page 9.)
, Voltage into house may be low.
° Food may be positioned incorrectly in oven. (See"Cookin_3MadeSimple"booklet.)
° Oven not preheated properly.
° Oven was not preheated.
° The oven may be installed improperly.
° Check the oven rack with a level.
° Stagger pans, do not allow pans to touch each other or oven wall.
° Check instructions for suggested placement of pans on oven rack. (See "CoeA'ing
Made Simple" booklet.)
, Oven may not have cooled to safe temperature after self-cleaning process.
° The control and door may be locked. (See page 5.)
19
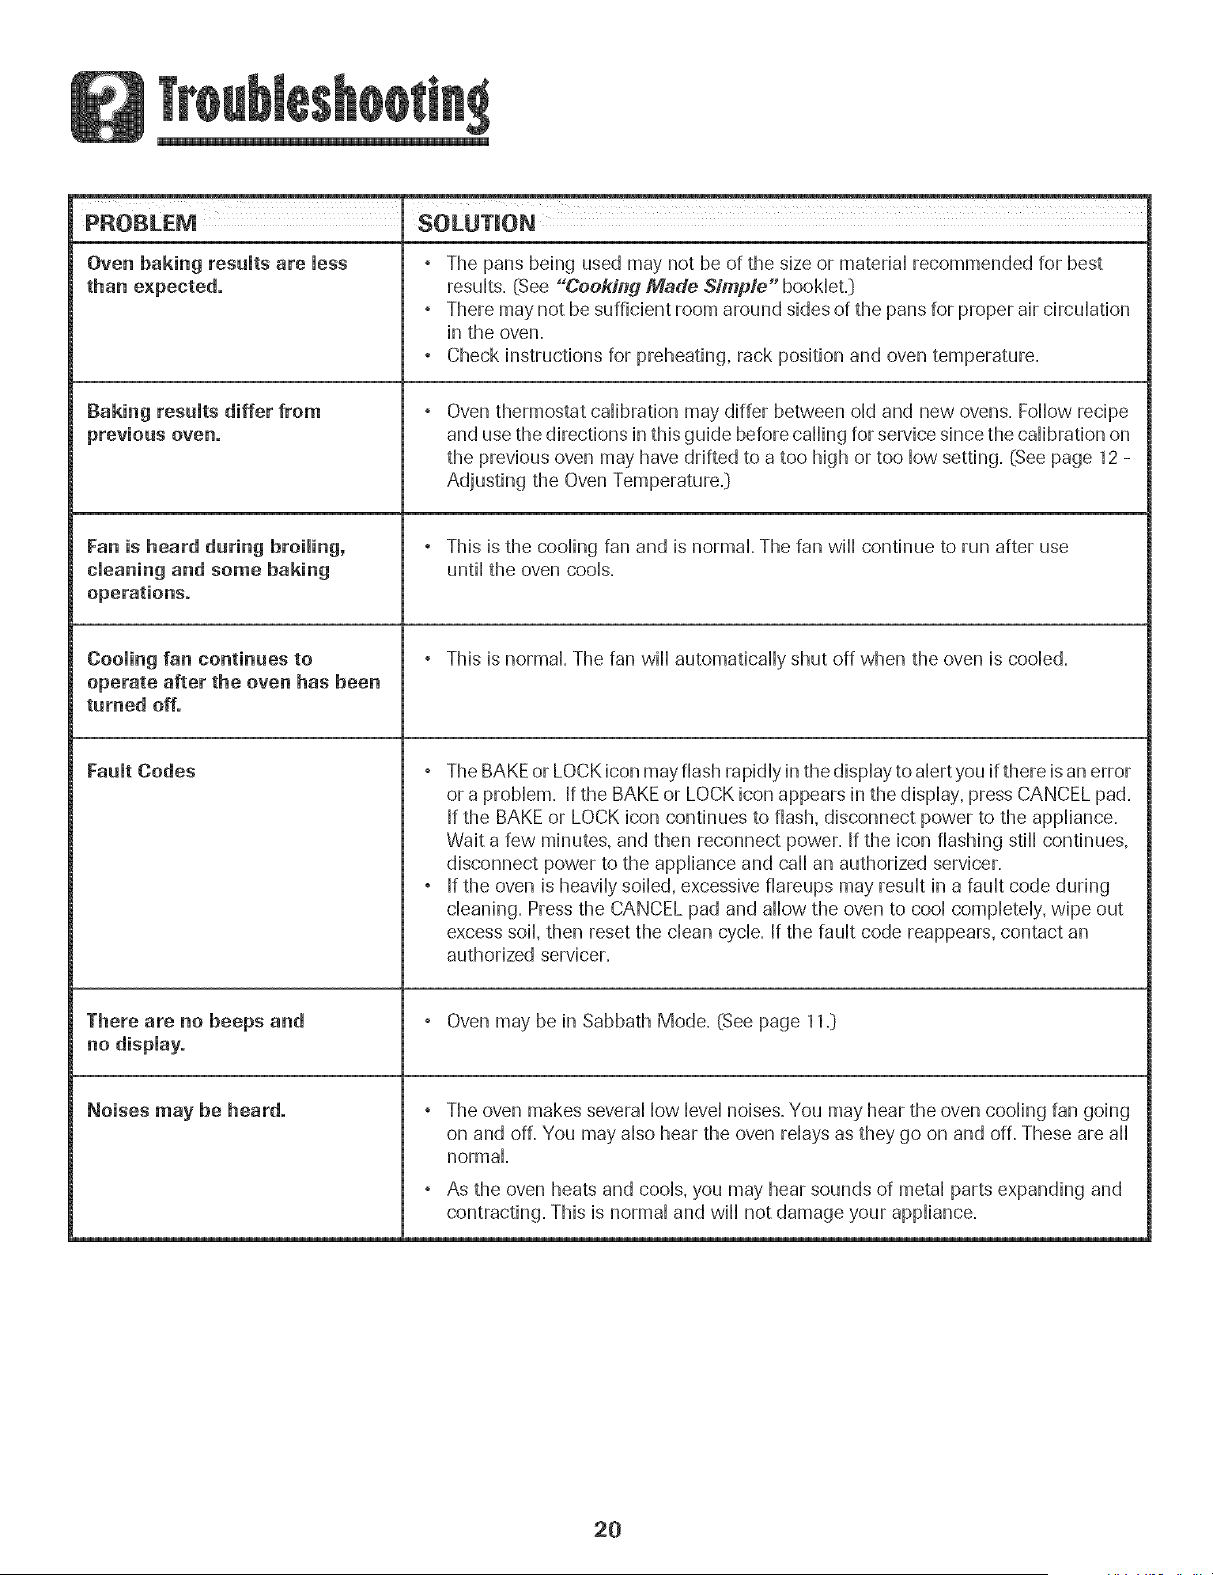
PROBLEM SOLUTION
Oven baking results are less ° The pans behg used may net be of the size or materiaHrecommended for best
than expected, resuHts.(See "Cookii_g Made Simple" booHeLD
" There may not be sufficient room around sides of the pans for proper air circuHation
in the oven.
, Check instructions for preheating, rack position and oven temperature.
Baking results differ from , Oven thermostat calibration may differ between old and new ovens. Follow recipe
previous oven. and use the directions in this guide before calling for service since the calibration on
the previous oven may have drifted to a too high or too low setting. (See page 12 -
Adjusting the Oven Temperature.:)
Fan is heard during broiling, , This is the cooling fan and is normal. The fan will continue to run after use
cleaning and some baking until the oven cools.
operations.
Cooling fan continues to , This is normal. The fan will automatically shut off when the oven is cooled.
operate after the oven has been
turned off.
Fault Codes , The BAKEor LOCK icon may flash rapidly in the display to alert you if there is an error
or a problem. If the BAKE or LOCK icon appears in the display, press CANCEL pad.
If the BAKE or LOCK icon continues to flash, disconnect power to the appliance.
Wait a few minutes, and then reconnect power. If the icon flashing still continues,
disconnect power to the appliance and call an authorized servicer.
, If the oven is heavily soiled, excessive fiareups may result in a fault code during
cleaning. Press the CANCEL pad and allow the oven to cool completely, wipe out
excess soil, then reset the clean cycle. If the fault code reappears, contact an
authorized servicer.
There are no beeps and , Oven may be in Sabbath Mode. (See page 11.)
no display.
Noises may be heard. , The oven makes several low level noises. You may hear the oven cooling fan going
on and off. You may also hear the oven relays as they go on and off. These are all
normal.
, As the oven heats and cools, you may hear sounds of metal parts expanding and
contracting. This is normal and will not damage your appliance.
2O
N
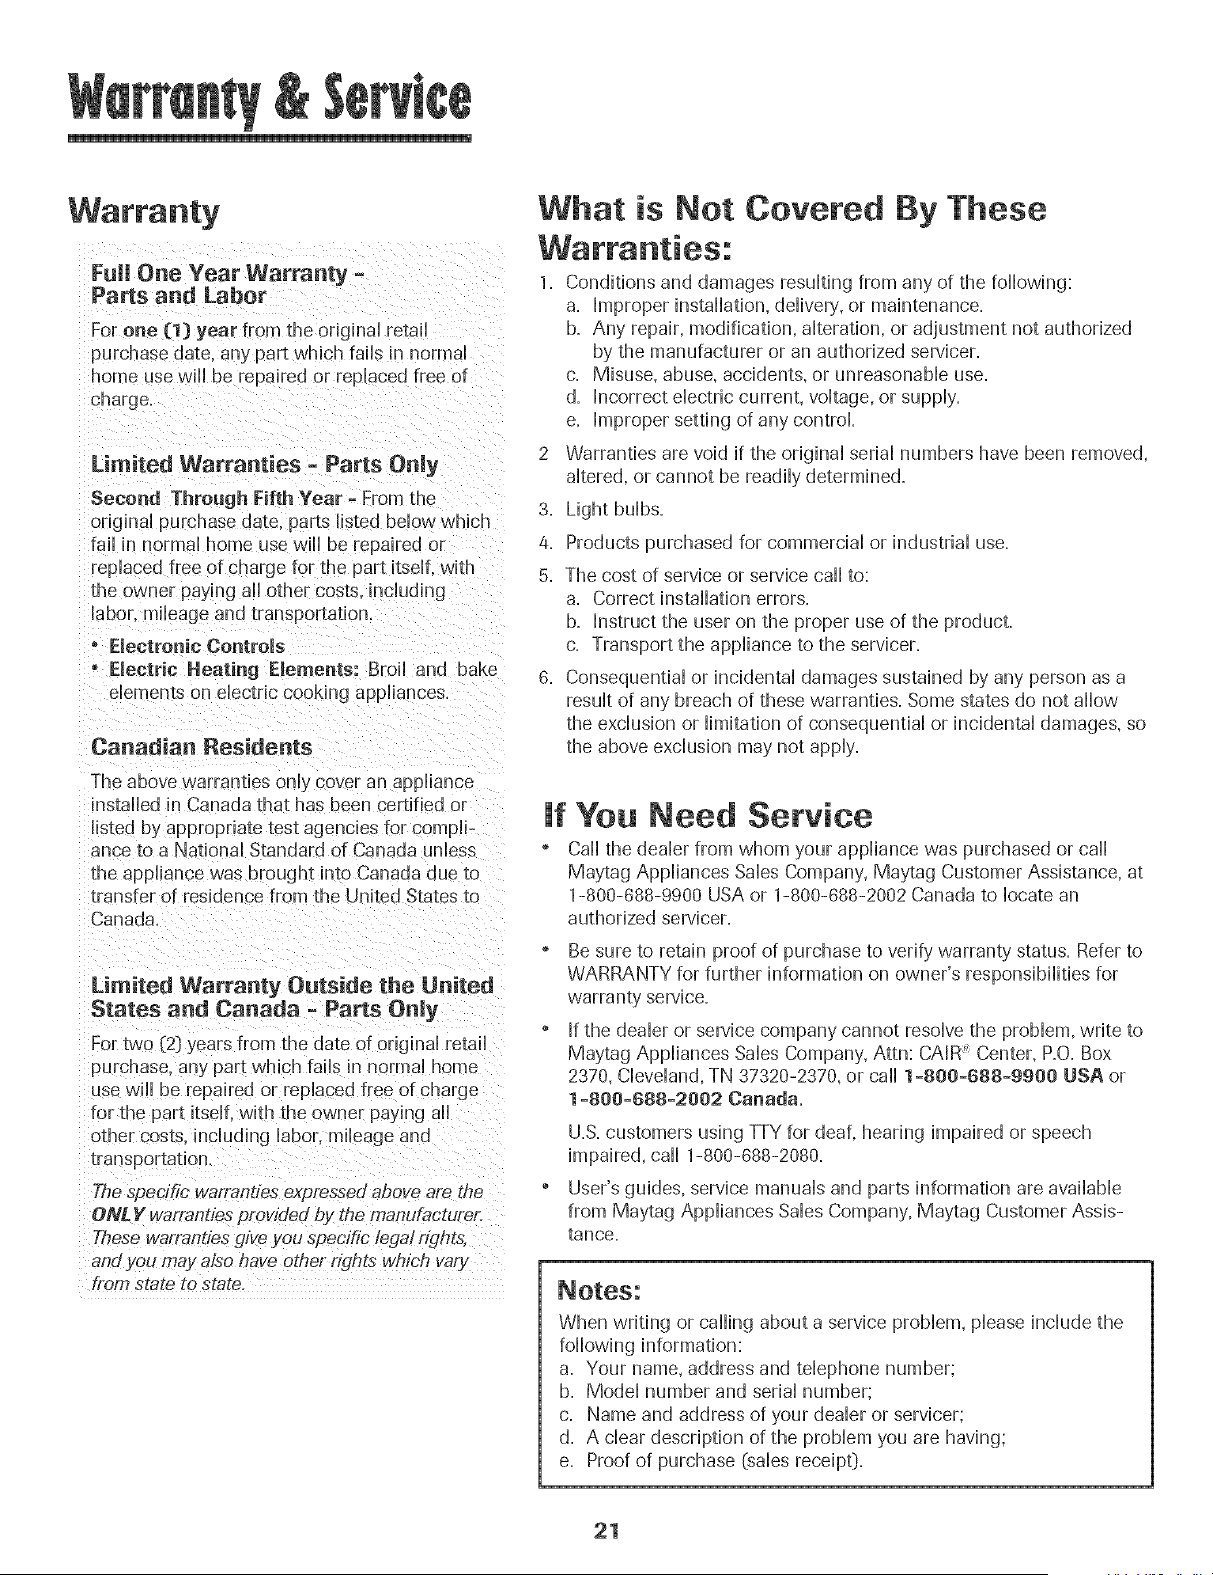
Full One Year Warranty -
Parts and Labor
For one (1) year from the original retail
purchase date. any part which fails iH normal
home use _ ill be repaired or replaced free o1
charge.
Limited Warranties - Parts Only
Second Through Fifth Year - From the
original purchase date. 3arts listed belov° which
fail in normal home use wil be repaired or
replaced free of charge for the part itself, with
the owner paying al other costs, including
labor, mileage and transportation.
" Electronic Centrols
o Electric Heating Elements: Broil and bake
dements on ebctric cooking appliances,
Canadian Residents
The above warranties only cover an appliance
installed in Canada that has been certified or
listed by appropriate test agencies for compli-
ance to a National Standard of Canada unless
the appliance was brought into Canada due to
transfer of residence from the United States to
Canada ....
Limited Warranty Outside the United
States and Canada - Parts Only
For two '_2}years from the date of or ginai retail
purchase, any part which fails in normal home
use will be repaired or replaced free of charge
for the part itself, with the owner paying al
other costs, including labor, mileage and
transportation.
The specific warranties expressed above are the
ONL _"waffanbes provided by the manufacturer:
These warranZles gtve you specific/egal rTg#ts,
and you may a/so have other r/dhts which vary
from state to state.
What is Not Covered By These
1. Conditions and damages resulting from any of the following:
a. Improper installation, delivery, or maintenance.
b. Any repair, modification, alteration, or adjustment not authorized
by the manufacturer or an authorized servicer.
c. Misuse, abuse, accidents, or unreasonable use.
d. Incorrect electric current, voltage, or supply.
e. Improper setting of any control
2 Warranties are void if the original serial numbers have been removed,
altered, or cannot be readily determined.
3. Light bulbs.
4. Products purchased for commercial or industrial use.
5. The cost of service or service caii to:
a. Correct installation errors.
b. Instruct the user on the proper use of the product.
c. Transport the appliance to the servicer.
6. Consequential or incidental damages sustained by any person as a
result of any breach of these warranties. Some states do not allow
the exclusion or limitation of consequential or incidental damages, so
the above exclusion may not apply.
If You Need Service
* Call the dealer from whom your appliance was purchased or call
May'tag Appliances Sales Company, Maytag Customer Assistance, at
1-800-688-9900 USA or 1-800-088-2002 Canada to locate an
authorized servicer.
Be sure to retain proof of purchase to verify warranty' status. Refer to
WARRANTY for further information on owner's responsibilities for
warranty' service.
" If the dealer or service company cannot resolve the problem, write to
Maytag Appliances Sales Company, Attn: CAIR_ Center, P.O.Box
2370, Cleveland, TN 37320-2370, or carl 1-800-688-9900 USA or
1-800-688-2002 Canada.
U.S. customers using TTY for deaf, hearing impaired or speech
impaired, call 1-800-088-2080=
User's guides, service manuals and parts information are available
from Maytag Appliances Sales Company, Maytag Customer Assis-
tance.
When writing or calling about a service problem, please include the
following information:
a. Your name, address and telephone number;
b. Model number and serial number;
c. Name and address of your dealer or servicer;
d. A clear description of the problem you are having;
e. Proof of purchase (sales receipt}.
21
M[& AG
Cuisson .................................. 26-36
Cuisso I1 coura[/_e
Cuisson a_ec convection
Cubson et maintien
D6marrage diRere
Cuisson au gril
Maintien au chaud
Favorite
Grilles du four
Nettoyage .............................. 37-3g
Four autonetto} ant
M6thodes de nettoyage
Garantie et service .................... 43
Guia del Usuario ......................... 44
installateur: Remettre ce guide au propd6taire.
Consemmateur: Lire Ie guide: Jeconserver pour consultation
ul_@fieure.Conserver Jafacture d'achat ou le cheque encaiss6
comme preuve de J'achat.
Numdro ae mode[e
Numernde sede
Dated'achat
Si vous avez des questions, veuiiJez nous appeler :
May[ag Customer Assistance
]-800-688-2002 Canada
0until au vendredL 8 h _ 20 h. heure de I'Est}
Interne_: htt p:/iwww.maytag.com
Dans Jecadre de nos pratiques d'amdlioration constante de a
quaJit6 et de la perbrmance de nos pmduits de cuisson, des
modifications de I'appareii qui ne sent pas mentionn@s dans ce
gude ont pu 6tre introduites
Repettez-veus # la page 43 pour plus d'infermatiees
ceecemant le se_ice apr_s-venteo
# #
INSTRUCTIONS DE SC:CURIT¢:
JM PO RTANTES
Les instructions de s@urite importantes et bs paragraphes
_avertissemenb>de ce guide ne sent pas destines a couvrir toutes
bs conditions et situations qui pourraient se presenter, II faut
faire preuve de ben sees, de prudence et de soin Iors de
Finstdlation, de Fentretien ou du fonctionnement de Fapparefl,
Toujours prendre contact avecb @taillant, b distributeur, [agent
de service aprCs-vente ou b fabricant clans b cas de proNemes
ou de conditions qui ne seraient pas comprises,
Reconna_tre Jes etiquettes, paragraphes
et symboJes sur Ja securit6
AVERTJSSEMENT = Dangers ou pratiques dangereuses qui
POURRAIENTrdsulter en de g ravesblessures ou memo Jamort,
Lire toutes los instructions avant d'utiliser cot appareii;
observertoutes bs instructions pour eliminer bs risquesd'incendie,
choc ebctrique, dommages materiels et corporeb que pourrait
susciter une utflisation incorrecte de Fapparefl, Utfliser Fapparefl
uniquement pour bs fonctions prevues, decrites dans ce guide,
Pour une utilisation adequate et en sdcuritd, il faut que
[apparefl soit convenabbment installd par un technicien qudifid,
et relic a la terre, Ne pas regbr, r@arer ni remphcer un
composant, a moinsque cola nesoit sp@ifiquement recommandd
darts ce guide, Toute autre reparation doit 6tre effectuee par un
technicien qudifie,
Toujours debrancher Fapparefl avant d'y faire de Fentretien,
Pour 6viter un incendie eli des
dommages de fumee
• S'assurer que tousies materiaux de conditionnement sent
retires de i'appareii avant de ie mettre en marche,
• Garderlos materiaux combustibles, I'essence et autres matieres
et vapeurs inflammables bien eioignes de i'appareii, Ne pas
ranger de matdriaux inflammables darts un four,
, De nombreux types de plastique sent affectes par la chaleur,
Garder ies piastiques eioignds des pieces de i'appareii pouvant
devenir chaudes,
• Pour emp@her qu'un feu de graisse ne se declare, eviter toute
accumulation de graisse ou autres matieres inflammables clans
i'appareii ou au voisinage,
En cas d'incendie
Ne jamais utfliser d'eau pour 6teindre de la graisse
enfiammee. Utfliser du bicarbonate de soude ou un
extincteur a poudre chimique ou a mousse pour 6touffer
les flammes.
1, Interrompre I'alimentation electrique de I'appareil pour
minimiser la propagation des flammes,
2, NE JA_AJS saisir ou deplacer un ustensile de cuisine
enflamme,
3, Fermer la porte du four pour etouffer los flammes,
S c rit po r Jes e fa ts
POURRAIENTresuiter en des blessures mineures,
apga_eii des articles auxque!s !es enfants peuvent
suEla porte pour atte!ndre un objet, pourrait se b!esser
gravement.
23
NE JAMAIS laisser des enfants seuls ou sans supervision
Iorsque [apparefl est en service ou encore chaud, Ne jamais
laisser un enfant s'asseoir ou se tenir sur une pattie
quelconque de Fapparefl, II pourrait se blesser ou se brQler,
• II est important d'enseigner aux enfants que Fapparefl et les
ustensfles places dedans peuvent etre chauds, Laisser
refroidir les ustensiles en un lieu sQr, hors d'atteinte des
enfants, IIest important d'enseigner aux enfants qu'un
apparefl menager n'est pas un jouet, et qu'fls ne doivent
toucher aucune commande ou autre composant de
[apparefl,
Fa iliarisation avec l'appareil
porte et gravement blesser.
Ne pas utiiiser cet appareii pour chauffer ou pour garder
chaude une piece, sinon des dommages a i'appareii
pourraient s'ensuivre et ceia pourrait etre dangereux pour
i'utiiisateur. Aussi, ne pas utiiiser ie four pour ranger des
aliments ou des ustensiles de cuisine.
• Ne pas bloquer ou obstruer I'event du four.
• NE JAMAIS TOUCHER LES ELEMENTSDE CUISSON NI LES
PAROISINTERIEURESDU FOUR.Les elements de cuisson
peuvent etre bn_lants meme s'ils ne sont plus rouges. Les
surfaces interieures du four peuvent atteindre une
temperature suffisamment eievee pour infliger des bn3iures.
Pendant et apres usage, ne pas toucher les elements de
cuisson ni ies patois interieures du four et eviter ieur contact
avec des vetements ou autres materiaux inflammables avant
qu'ils n'aient eu le temps de refroidir suffisamment. D'autres
surfaces peuvent egalement atteindre une temperature
suffisamment eievee pour bn]ier : ies ouvertures d'event et
les surfaces avoisinantes, ainsi que les portes et les hublots
des fours.
Ne pas toucher I'ampoule du four brQlante avec un chiffon
humide car eiie pourrait se briser. Si tel est ie cas,
debrancher i'appareii avant de retirer i'ampouie pour eviter
On doit entendre le bruit du ventflateur de refroidissement
chaque foir que le four est en cours d'utflisation. Sinon,
appeler un reparateur autorise.
Ni: JAMAIS garnir la sole du four ou une grille du four avec
de la feuflle d'aluminium. Ceci pourrait susciter un risque de
choc electrique ou d'incendie, ou une deterioration de
Fapparefl. Utfliser de la feuflle d'aluminium uniquement
selon les instructions de ce guide.
Cuisson et s cutit
• NE JAMAIS faire chauffer un recipient non ouvert dens le
four. L'accumulation de pression darts le recipient pourrait
provoquer son edatement et de graves dommages materiels
ou corporels.
• Utfliser des maniques robustes et seches. Des maniques
humides peuvent provoquer la formation de vapeur brQlante.
Ne jamais utfliser un torchon a vaisselle ou autre article
textile ala place de maniques; un tel article pourrait trainer
sur un brQleur et s'enflammer, ou accrocher un ustensfle ou
un composant de Fapparefl.
. Porter un vetement approprie. Eviter de porter des
vetements amples ou a Iongues manches pendant
Futflisation de Fapparefl. IIs peuvent prendre feu si le
vetement entre en contact avec un element de cuisson
bn_[ant.
• Placer toujours [es grilles a [a position appropriee darts [e
four Iorsque le four est froid. Faire coulisser la grille vers
I'exterieur avant d'ajouter ou enlever un plat; utiliser pour
cela une manique robuste et seche. Eviter d'introduire la
main darts le four pour y placer ou retirer un plat. S'il est
necessaire de deplacer une grille Iorsqu'elle est chaude,
utiliser une manique seche. Ne pas toucher un element
chaud avec une manique.
. Ouvrir toujours la porte du four tres prudemment. Laisser
Fair chaud ou la vapeur s'echapper avant de retirer ou
d'introduire un plat.
• AVERTISSEMENT _METS PREPARItS :Respecterles
instructionsdu fabricant,Silecontenantou lecouverdeen
plastiqued'unmets surgelese ddorme ou estendommage
durantlacuisson,jeterimmediatementlerecipientetson
contenu,Lesalimentspourraientetrecontamines,
24
Ne pas permettre re contact de papier d'a[uminium ou de
sonde a viande avec les elements chauffants.
• Toujours eteindre toutes les commandes une lois la cuisson
terminee.
Ustensimes et s curit
• Appliquer les instructions du fabricant lots de I'emploi d'un
sachet pour cuisson au four.
• La securite de fonctionnement de cet appareil a ete testee
I'aide d'ustensiles de cuisine traditionnels. Ne pas utiliser un
ustensile ou accessoire qui n'est pas specifiquement
recommande dans ce guide. Ne pas utiliser de systeme de
convection additionnel. L'utilisation d'un dispositif ou
accessoire qui n'est pas expressement recommande darts ce
guide peut degrader la securite de I'appareil ousa perfor-
mance, ou reduire la Iongevite des composants.
. Seuls certains materiaux en verre, vitroceramique,
ceramique, terre cuite, ou certains ustensiles vitrifies/
emailles peuvent etre utilises darts le four sans risque de
bris sous I'effet du choc thermique. Observer les instructions
du fabricant lots de I'utilisation d'un ustensile en verre.
Nettoyage et s curit6
• Arreter toutes les commandes et attendre le refroidissement
de tous les composants avant de les toucher ou
d'entreprendre le nettoyage. Nettoyer I'appareil avec
precaution. Travai[[er prudemment pour eviter des brQ[ures
par la vapeur en cas d'utilisation d'un chiffon ou d'une
eponge humide lots de I'elimination d'un produit renverse
sur une surface chaude. Certains produits de nettoyage
peuvent generer des vapeurs nocives Iorsqu'on les applique
sur une surface chaude.
Nettoyer uniquement les pieces mentionnees darts ce guide,
Four autonettoyant
Ne laisser aucune nourriture, ustensile de cuisine, gri!l e o u
I_chefrite darts [e four [ors d'une operat!on
d[autonettoyage.
• Ne pas nettoyer re joint de porte; rejoint joue un rO[e
essentiel quanta I'etancheite. Ne pas frotter, endommager
ou deplacer le joint.
. Ne pas utiliser de produit de nettoyage ou enduits de four
dans le four autonettoyant ou sur les zones voisines.
• Avant d'executer une operation d'autonettoyage, retirer la
lechefrite, les grilles du four et les autres ustensiles, et
eliminer par essuyage tout exces de residus renverses pour
eviter la formation de fumee ou I'infiammation de ces
residus.
Avertissement et avis
important pour la s eurit
La Ioi califomienne <_SafeDrinking Water and Toxic Enforce-
ment Acb>de 1986 (proposition 65_ stipule la publication par le
gouvemeur de la Califomie d'une liste de substances que
I'etat de Califomie considere comme cancerigenes ou
dangereuses pour le systeme reproducteur, et impose aux
entreprises commerciales I'obligation de signaler aleurs
clients les risques d'exposition a de telles substances.
Nous informons les utilisateurs de cet appareil que lots d'une
operation d'autonettoyage, ils peuvent etre exposes a une
faible concentration de certaines substances figurant darts la
liste mentionnee ci-dessus, dont le monoxyde de carbone.
Pour minimiser [exposition, veiller ace que la piece o_ se
trouve le four soit convenablement aeree durant une operation
d'autonettoyage par I'ouverture d'une fenetre ou d'une porte.
AViS IMPORTANT _ OISEAUX FAMIMERS : Les oiseaux ont
un systeme respiratoire tres sensible. Ne pas garder un oiseau
familier darts la cuisine ou darts une piece oQ il pourrait etre
expose aux fumees. Les fumees emises durant une operation
d'autonettoyage peuvent etre dangereuses ou mortelles pour
un oiseau, de meme que les fumees emises lots du chauffage
excessif de graisse, huile, margarine, par exemple darts un
ustensile a revetement antiadhesif.
Remarque : Le fonctionnement en mode micro-ondes
(certains modelesl)est indique darts le guide d'utilisation et
d'entretien emballe avec le four a micro-ondes,
Conserver ces instructions pout consultation ult6tieute
25
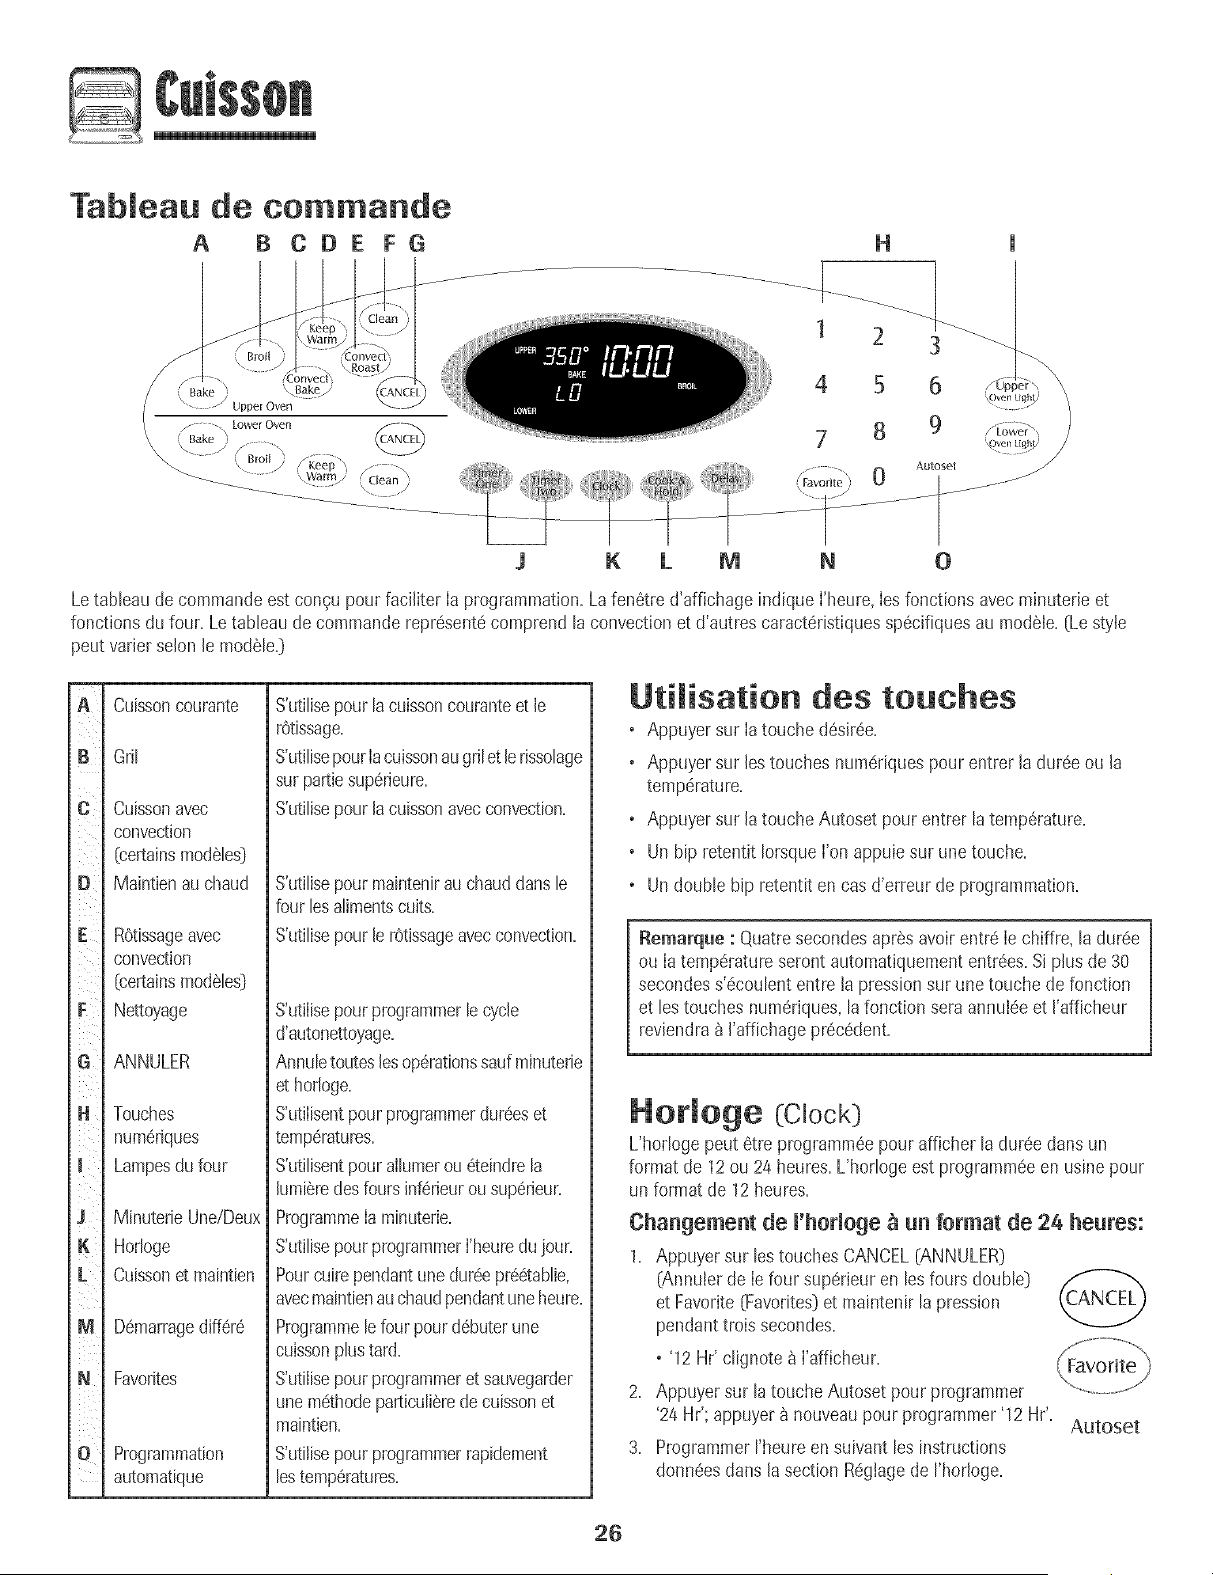
Tableau de commande
A B COE FG
'\ Bake /
\ ..........._/ Uppe[ Oven
\ ....../ / .... \ .....
....... _ _____
H
1 2 3
4 5 6
7 8 9
K L ff] N 0
Letableau de commandeest congu pour faciIiter la programmation.La fen6tred'affichage indique l'heure,les fonctionsavec minuterieet
fonctionsdu four. Le tableau de commanderepr6sent#comprend la convectionet d'autres caract6ristiquessp6cifiquesau modele.(Le style
peut varier selon le modele.)
C
iiiiii_i
iiii _
iiii_
G
H
K
L ¸
M
N
O
Cuissorl couraFite
Gril
Cuisso['l avec
convection
[certainsmodeIes]
Maintienauchaud
ROtissageavec
convection
[certainsmoda[es]
Nettoyage
ANNULER
Touches
num6riques
Lampesdu four
MinuterieUne/Deux
Hodoge
Cuissonet maintien
D6marragediff6r6
Favorites
Programmation
automatique
S'utilisepour[acuissoncouranteet le
r6tissage.
S'utilisepourIacuissonaugrilet le rissolage
sur pattiesup6rieure.
S'utilisepourlacuissonavecconvection.
S'utilise pour ma[ntenir au chaud dans le
four les ailments cults.
S'utilise pour le r6tissage avec convection.
S'utilisepourprogrammerle cycle
d'autonettoyage+
AnnuIetouteslesoperationssaufminuterie
et horIoge+
S'utiIisentpourprogrammerdur6eset
temp6ratures+
S'utilisentpourallumerou 6teindrela
lumi6redesfours inf6rieurousup6rieur+
ProgrammeIaminuterie+
S'utilisepourprogrammerI'heuredujour+
Pourcuirependantune dur6epr66tablie,
avecmaintienauchaudpendantuneheure+
Programmele four pourd6buterune
cuissonphs tard+
S'utilisepourprogrammeret sauvegarder
unem#thodeparticuli8rede cuissonet
maintien+
S'utilisepourprogrammerrapidement
[estemp6ratures+
Utilisation des touches
o Appuyersur Iatouche d6sir6e+
o Appuyersur lestouches num6riquespour entrer la dur6e ou la
temperature+
o Appuyersur latouche Autoset pour entrer latemp6rature+
o Un hip retentit IorsqueI'on appuiesur une touche.
o Undouble bip retentit en cas d'erreur de programmation+
Remarque : Quatresecondesaprasavoirentre le chiffre, [a dur6e
ou Ia temperatureserontautomatiquemententrees+Siplus de 30
secondess'_coulententre la pressionsur une touche de fonction
et lestouches num#riques,lafonction seraannu+6eet I'afficheur
reviendra_ ['affichagepr6c6dent+
Hor[oge (Clock]
L'hodoge peut 6tre programm6epour afficher la dur6edans un
format de 12ou 24 heures+L'horlogeest programm6een usinepour
un format de 12heures+
Changement de l'horloge _ un format de 24 heures:
1+ Appuyersur les touchesCANCEL[ANNULER)
(Annu+erde le four superieur en lesfours double)
et Favorite[Favorites]et maintenir la pression
pendanttrois secondes+
o'12 Hr' clignoteb i'afficheur+
2+ Appuyersur la toucheAutoset pour programmer
'24 Hr'; appuyerb nouveaupour programmer'12 Hr'+
Autoset
3+ Programmerrheure en suivantles instructions
donn#esdans la section R#glagede I'hodoge+
26
Regmagede ['hormoge:
1. Appuyersur latouche C[ock[Horbge}.
• Heuredu [our cHgnotent_ Fafficheur.
2. Appuyersur lestouchesnumeriquesappropri@spour programmer
Fheuredu [our.
• Deuxpointsdignotent {_I'afficheur.
3. Appuyer_ nouveausur B touche Clockou attendrequatre
secondes.
•Les deuxpoints restent.
Lorsqueb courant6[ectriquearriveou apresune interruptionde
courant,lademiereheure avant['interruptionde courantva cIignoter.
Pourrappebr ['heureduiour [orsqu'uneautre fonctionde dur@
s'affiche,appuyersur la toucheClock.
L'heurede I'horIogenepeut etre chang@[orsque[efour a ete
programmepour une cuissonou un nettoyagediffereou pour cuisson
et maintien.
Annumation de ['affichage de ['heure:
Si['on ne d@irepasI'affbhagede I'heurede[our:
Appuyersur lestouchesCANCEL{ANNULER}et Clock
(HorIoge}et [esmaintenirainsi pendanttrois secondes.
L'heuredu[our disparaitdeI'afficheur.
Lorsque['affichagede ['heureestannul6,appuyersur [a
touche Clockpourafficher b@vement['heuredu [our. ....
Quand['affichagede ['horlogeestannuIe,apres 15 minutes,[e regu-
[ateurdu four se meten mode d'attente pour economiserde
['@ergie.Uaffichageseraalorseffaceet [a[ampedu four ne fonction-
noraplus. PourreIancer[e reguIateur_ partir du moded'attente,
appuyersur ['unedestouches.Un doubb bip se fera entendre.
Reaffichage de ['heure :
Appuyersur bs touchesCANCELet Clocket[es maintenirainsi
pendanttroissecondes.L'heuredu [our r@pparatta I'affbheur.
Minuterie (TimeO
La minuteriepeut etre programmeede une minute(00:01}iusqu'_99
heureset 59secondes(99:59}.
La minuteriepeut etre utilis@ ind@endammentde toute autre activite
du four. EIiepeut etre aussiprogramm@alors qu'uneautre fonction
du four esten coursd'utiiisation.
La minuterb ne commandepasle four.ElIene sert qu'a 6mettredes
bips.
Programmation de [a minuterie :
1. Appuyersur latouche Timer{Minutede}.
• 00:00et ['icOneTIMERclignotent _I'affbheur.
2. Appuyersur [estouchesnumerk
I'heurejuste paraissea I'afficheur.
° Lesdeuxpointset I'icOneTIMERcontinuenta cIignoter.
3. Appuyera nouveausur latoucheTimerou attendrequatre
secondes.
•Les deuxpointss'arretentde clignoteret le d@omptede la
dureecommence.
• La dernJereminutedu d@ompteseraaffich@ sousformede
secondes.
4. A la fin de la dur@ programm@,un hip long retentitet lemot End
{Fin}sera affiche.
5. Appuyer sur la touche Timerpour degager I'afficheur.
Annumation de [a minuterie :
1. Appuyersur latouche Timeret la maintenirainsJ
pendanttroissecondes.
ou 0
2. Appuyersur [atouche Timeret '0' _ ['aidedes touches
numeriques.
Verroui[[age des commandos
et de [a porte du four
Laporte du four et[es touchespeuvent6tre verrouiII@spour des
raisonsdes@urite,nettoyageou pouremp@hertoute ut[iisat[onnon
souhaitee.Lestouchesne fonctionnerontpas si elIessontverrouiII@s.
Si[e four est en coumd'utiJisation,[estoucheset [a portene peuvent
etrevermuillees.
L'heureactuelleduiour restera_ ['affbheur Iorsquelostoucheset [a
porteserontverrouill@s.
Verrouillage :
1. Appuyersur bs touchesCANCELet Cook& Hold ('CANCEL)
[Cuissonet maintJen}et Jesmaintenirainsi pendant
trois secondes.
• OFF[ARRET}parait_ ['afficheur.
• L'icOneLOCK6/ERROUILLAGE}ciignoteJorsque
[aporte esten coursde verrouiJlage.
Deverroui[[age :
Appuyersur [estouchesCANCELet Cook& Holdet [es maJntenirainsi
pendanttrois secondes.OFFdisparaitde J'afficheur.
i
Nemarque : La porte du four et Iestouches ne peuvent6tre
verrouiJl@ss[ [a temperaturedu four est de @0° F (205° C} ou plus.
Codes d'anoma[ie
Los bones BAKE[CUiSSONCOURANTE}ou LOCK
07ERROUILLAGE}peuventciignoter rap[dement_ I'afficheur pour
preveniren casd'erreur ou de probIeme.Site[ est lecas, appuyer
sur latouche CANCEL.Siles icOnesBAKEou LOCKcontinuent
c%noter, debrancherI'appareiLAttendre quelquesminutes,puis
rebrancherI'appareiLSi ['icOnecontinue _ cIignoter,debrancher
I'appareiJet prendrecontact avec un r@arateurautorise.
27
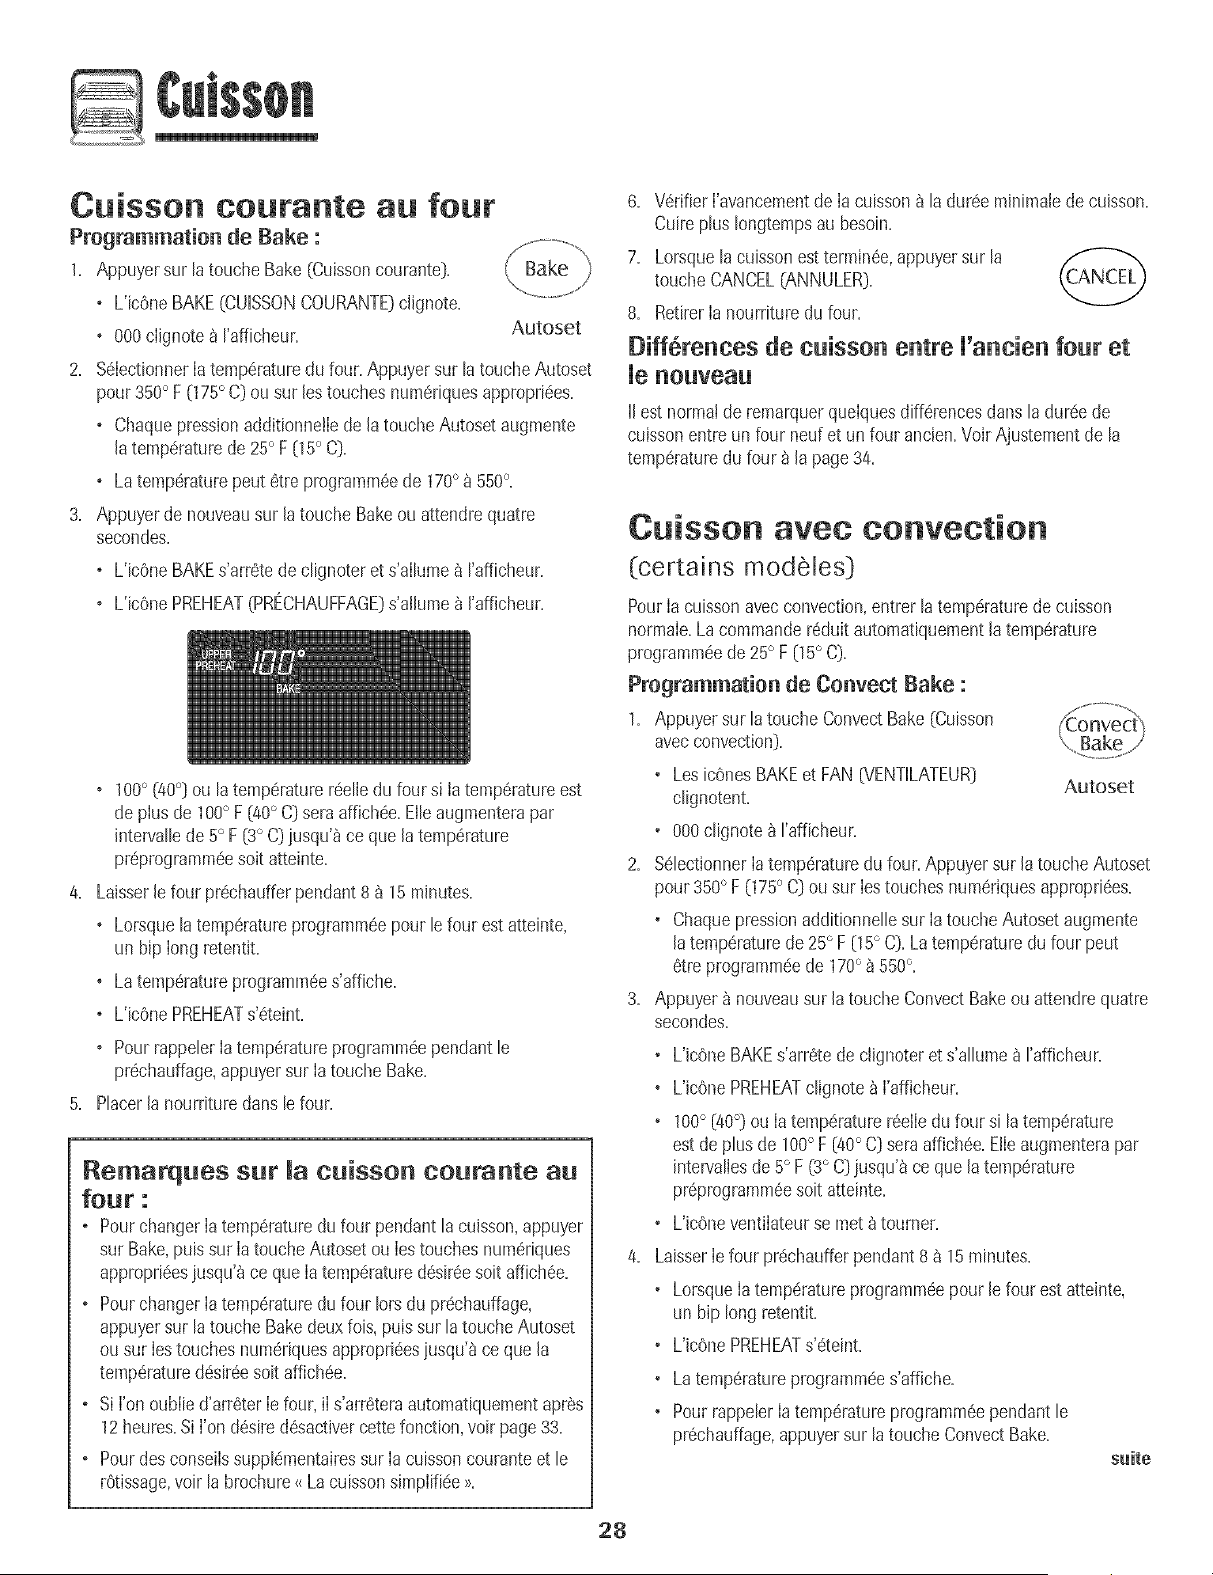
Cuisson coutante au four
Programmation de Bake :
1. Appuyersur la toucheBake(Cuissoncourante).
o L'ic0neBAKE(CUISSONCOURANTE)c@note.
o 000clJgnote_ Fafficheur. Autoset
2. %IectionnerIa temp6raturedu four. Appuyersur latouche Autoset
pour350° F (175° C) ou sur lestouchesnumeriquesappropri6es.
o Chaquepressionadditionne!Iede la toucheAutosetaugmente
latemp(!raturede 25° F [15° C[.
o Latemp6raturepout 6tre programm6ede 170° _ 550%
3. Appuyerdenouveausur latouche Bakeou attendrequatre
secondes.
o L'icOneBAKEs'arr6tedeclignoter et s'allume_ I'afficheur.
o L'icOnePREHEAT(PRECHAUFFAGE}s'allupae_ ['afficheur.
• 100° (/t0°] ou la temp6raturer6elJedu four sJtatemp6ratureest
de plusde 100° F [40° C] seraaffich6e.Elleaugmenterapar
intervallede5° F [3° C) jusqu'_ce quela temp6rature
pr6programm6esoit atteinte.
Laisserle four pr6chaufferpendant8 _ 15 minutes.
o Lorsquelatemperatureprogramm6epour le four estatteinte,
un bip long retentJt.
o Latemperatureprogramm6es'affiche.
o L'icOnePREHEATs'6teint.
o PourrappelerIatemp(!ratureprogrammeependantle
pr6chauffage,appuyersur Ia touche Rake.
PlacerJanourrituredanslefour.
Remarques sur Ja cuisson courante au
four :
o PourchangerIatemp6raturedu four pendantla cuJsson,appuyer
sur Rake,puis sur Ia toucheAutosetou Iestouchesnum6riques
appropri6es)usqu'_ce queIatemp6ratured6sir6esoit affich6e.
o PourchangerIatemperaturedu four lots du pr6chauffage,
appuyersur latouche Bakedeuxfois, puissur la toucheAutoset
ousur Iestouchesnum6riquesappropri6es)usqu'8ceque la
temp6ratured6sir6esoitaffich6e.
o SiI'onoublie d'arr6terIefour,iI s'arr6teraautomatiquementapres
12heures.Si l'on d6sired6sactJvercettefonction,voir page 33.
o Pourdesconseilssupplementairessur Ia cuissoncouranteet le
r6tissage,voir la brochure_ LacuissonsJmplifiee>_.
6.
7.
V6rifierI'avancementde Ia cuisson_ la dur6e mJnimaJede cuisson.
Cuireplus Iongtempsau besoin.
Lomquelacuissonest termin6e,appuyersur la
toucheCANCEL(ANNULER).
8. RetirerIa nourrituredu four.
Diff6rences de cuisson entre U'a cie fo r et
_e _o_vea_
iJestnormalde remarquerquelquesdifferencesdansla dur6ede
culssonentreun four neufet unfour ancien.Voir Ajustementde la
temperaturedu four _ la page34.
C isso avec convection
(certains modeJes)
PourIa cuissonavecconvection,entrer Jatemperaturedecuisson
normale.La commander6duitautomatiquementla temperature
programm_ede 25° F 05° C}.
Pregrammatio_ de Ce_vect Bake :
1. Appuyersur la toucheConvectBake (Cuisson
avecconvection}.
° LosicOnesBAKEet FAN{VENTILATEUR} Autoset
clignotent.
° 000clignotea I'afficheur.
2. S_lectJonnerIatemp6raturedu four. Appuyersur JatoucheAutoset
pour350° F 075° C} ou sur Iestouchesnum_riquesappropri6es.
• ChaquepressionadditionnelJesur Ia toucheAutosetaugmente
Jatemp6raturede 25° F (15° C}. Latemperaturedu four peut
etre programm_ede 170° _ 550%
3. Appuyer_ nouveausur Jatouche ConvectBakeou attendrequatre
secondes.
L'JcOneBAKEs'arr_tedeclignoter et s'allume_ I'affJcheur.
L'JcOnePREHEATclignote _ I'afficheur.
100° [40°) ou IatemperaturerSelIedu four si la temperature
estde plusde 100° F [40° C[ seraaffich_e.Etleaugmenterapar
intervaliesde 5° F (3° C)jusqu'_ ce quela temperature
pr_programmSesoit atteinte.
L'JcOneventilateurse met _ tourner.
Laisserle four pr(!chaufferpendant8 _ 15 minutes.
• LorsqueIa temperatureprogrammeepour le four est atteinte,
un hip long retentit.
• L'JcOnePREHEATs'_teint.
• Latemp6raturepmgramm@es'affiche.
• PourrappelerIatemperatureprogramm6ependantle
pr6chauffage,appuyersur la toucheConvectRake.
s_ite
28
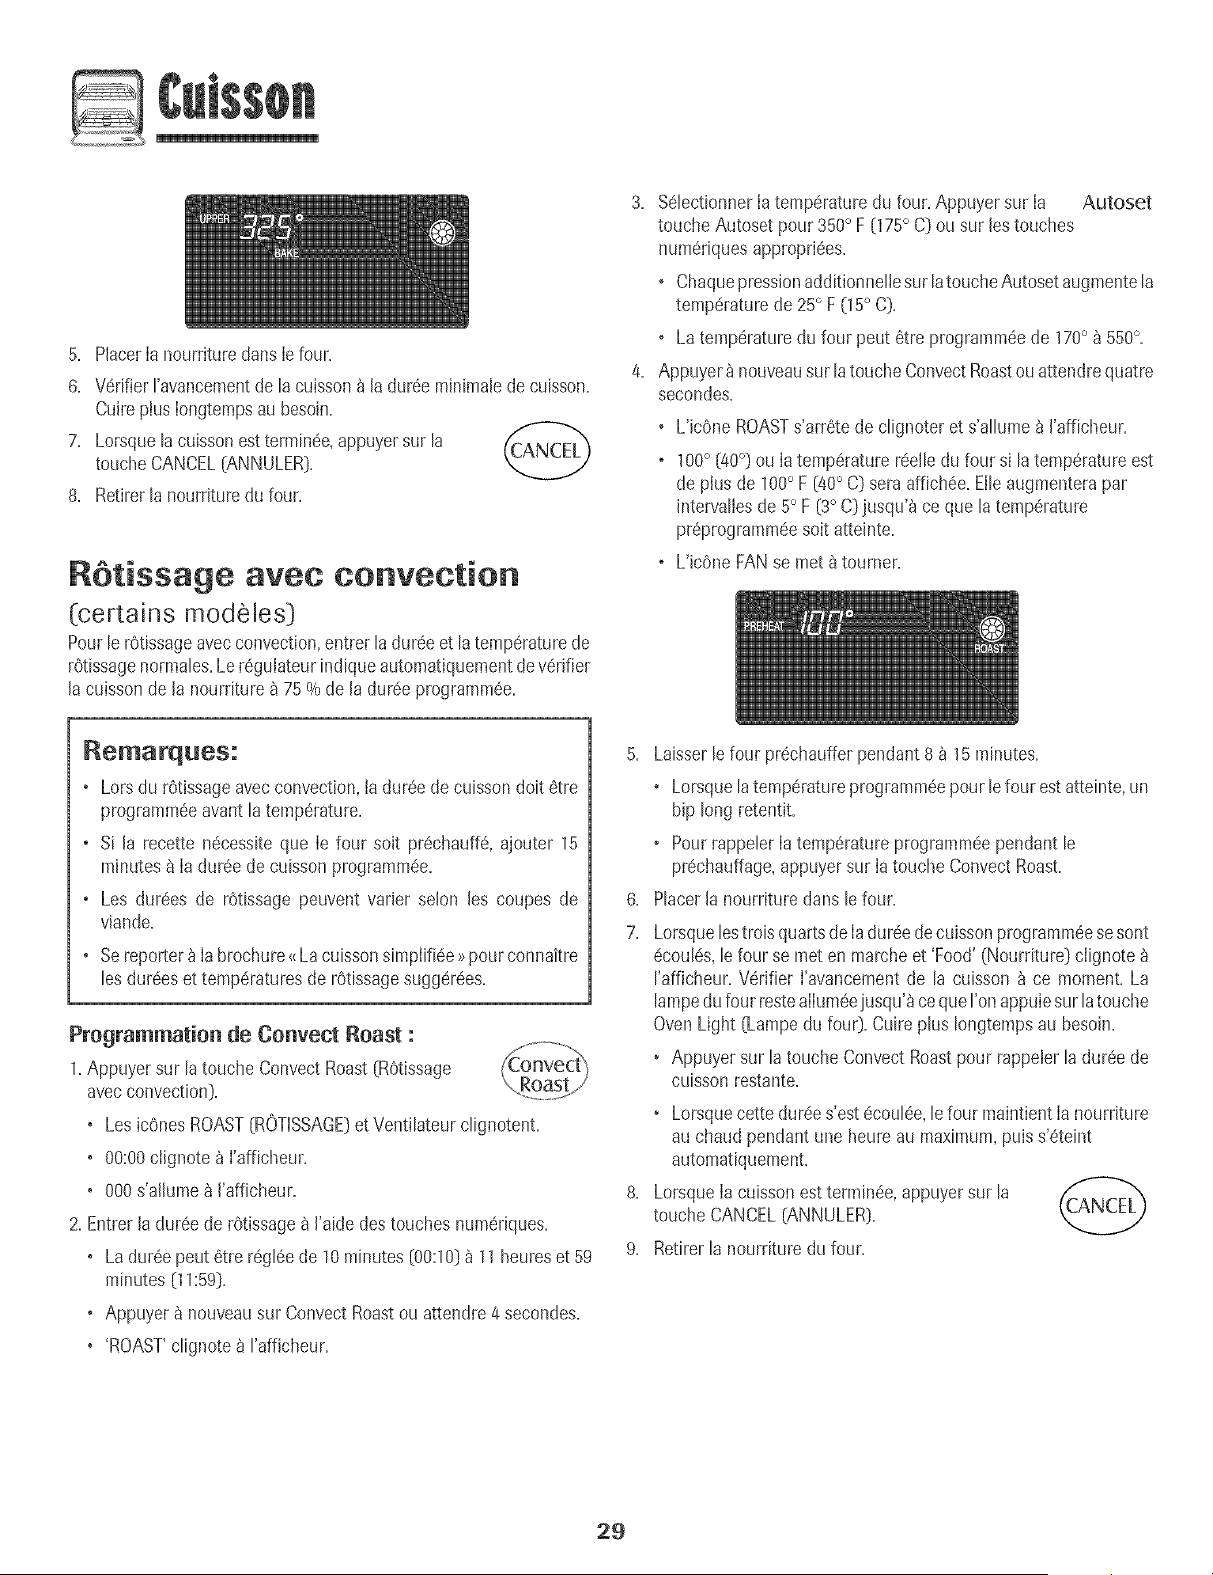
5. Placerla nourrituredans lefour.
6. V6rifierFavancementde la cuisson_ laduree minimab decuisson.
Cuireplus Iongtempsau besoin.
7. Lorsquelacuissonestterrain@,appuyersur la f_csm/rn'_'/
toucheCANCEL[ANNULER}.
8. Retirerlanourrituredu four.
RStissage avec convection
(certains modeles}
Pourb r6tissageavecconvection,entrer la dur@ et B temperaturede
rOtissagenormabs.LereguIateurindique automatiquementdeverifier
lacuisson de la nourriturea 75 % de la dureeprogrammee.
3. %bctionner la temperaturedu four. Appuyersur Ia Autoset
touche Autoset pour 350° F {175° C]ou sur Jestouches
numeriquesappropri@s.
o Chaquepressionadditionnelbsur latouche Autosetaugmentela
temperaturede 25° F 05 ° C].
o Latemperaturedu four peut etre programm@de 170° _ 550°.
4. Appuyer_ nouveausur latoucheConvectRoastouattendre quatre
secondes.
o L'bOne ROASTs'arrete de clignoteret s'allume_ J'afficheur.
o 100° {40°) ou Ia temperaturereelb du four si la temperatureest
de plus de 100° F [40° C] sera affichee.Elleaugmenterapar
intervalbs de 5° F {3° C}jusqu'_ ce que la temperature
preprogramm#esoit atteinte.
o L'bOne FANse met 8 tourner.
Remarque5:
. Lors du rOt+ssageavec convection,ta dureede cuisson doit etre
pregrammeeavantla temperature+
o Si la recette n@essiteque Ie four soit prechauff& ajouter 15
mhlutesa Ia dureede cuissonprogramm@.
o Les dur@s de rOtissagepeuvent varbr selon les coupes de
viande.
o Sereporter_ Iabrochure<<Lacuissonsimplifiee>>pour connaitre
les dureeset temperaturesde rOtissagesugger@s.
Programmation de Convect Roast :
1.Appuyer sur la toucheConvect Roast[ROtissage
avecconvection}.
• Los icenesROAST{ROTISSAGE}et Ventilateurclignotent.
• 00:00clignote_ I'afficheur.
• 000s'alhme a I'afficheur.
2. Entrerladuree de rOtissagea I'aidedes touches numeriques.
• La dur@ peut etre regleede 10 minutes{00:10]_ 11 heureset 59
minutes [11:59].
• Appuyera nouveausur ConvectRoastou attendre 4 secondes.
• 'ROAST'clignote _ rafficheur.
6.
7.
8.
9.
Laisserlefour pr@haufferpendant 8 _ 15 minutes.
• Lorsquela temperatureprogrammeepour b four est atteinte,un
bip long retentit.
• Pourrappebr Ia temperatureprogramm@pendant le
pr@hauffage,appuyersur Ia touche ConvectRoast.
Placerla nourriture dans le four.
Lorsquelostrois quartsde Iadur@ decuissonprogramm@sesont
ecoules,lefour se met en marcheet 'Food' (Nourriture} clignote
I'afficheur.Verifier I'avancementde la cuisson _ ce moment.La
lampedufour restealIum@jusqu'_cequeI'onappuiesurla touche
Oven Light [Lampedu fou0. Cuireplus Iongtempsau besoin.
• Appuyer sur la toucheConvectRoastpour rappelerla dur@ de
cuisson restante.
+ Lorsquecette dur@s'estecoulee,lefour maintientIa nourriture
au chaud pendant une heure au maximum,pub s'eteint
automatiquement.
LorsqueIacuisson estterrain@,appuyersur la
touche CANCEL(ANNULER].
Retirerla nourriture du four.
29
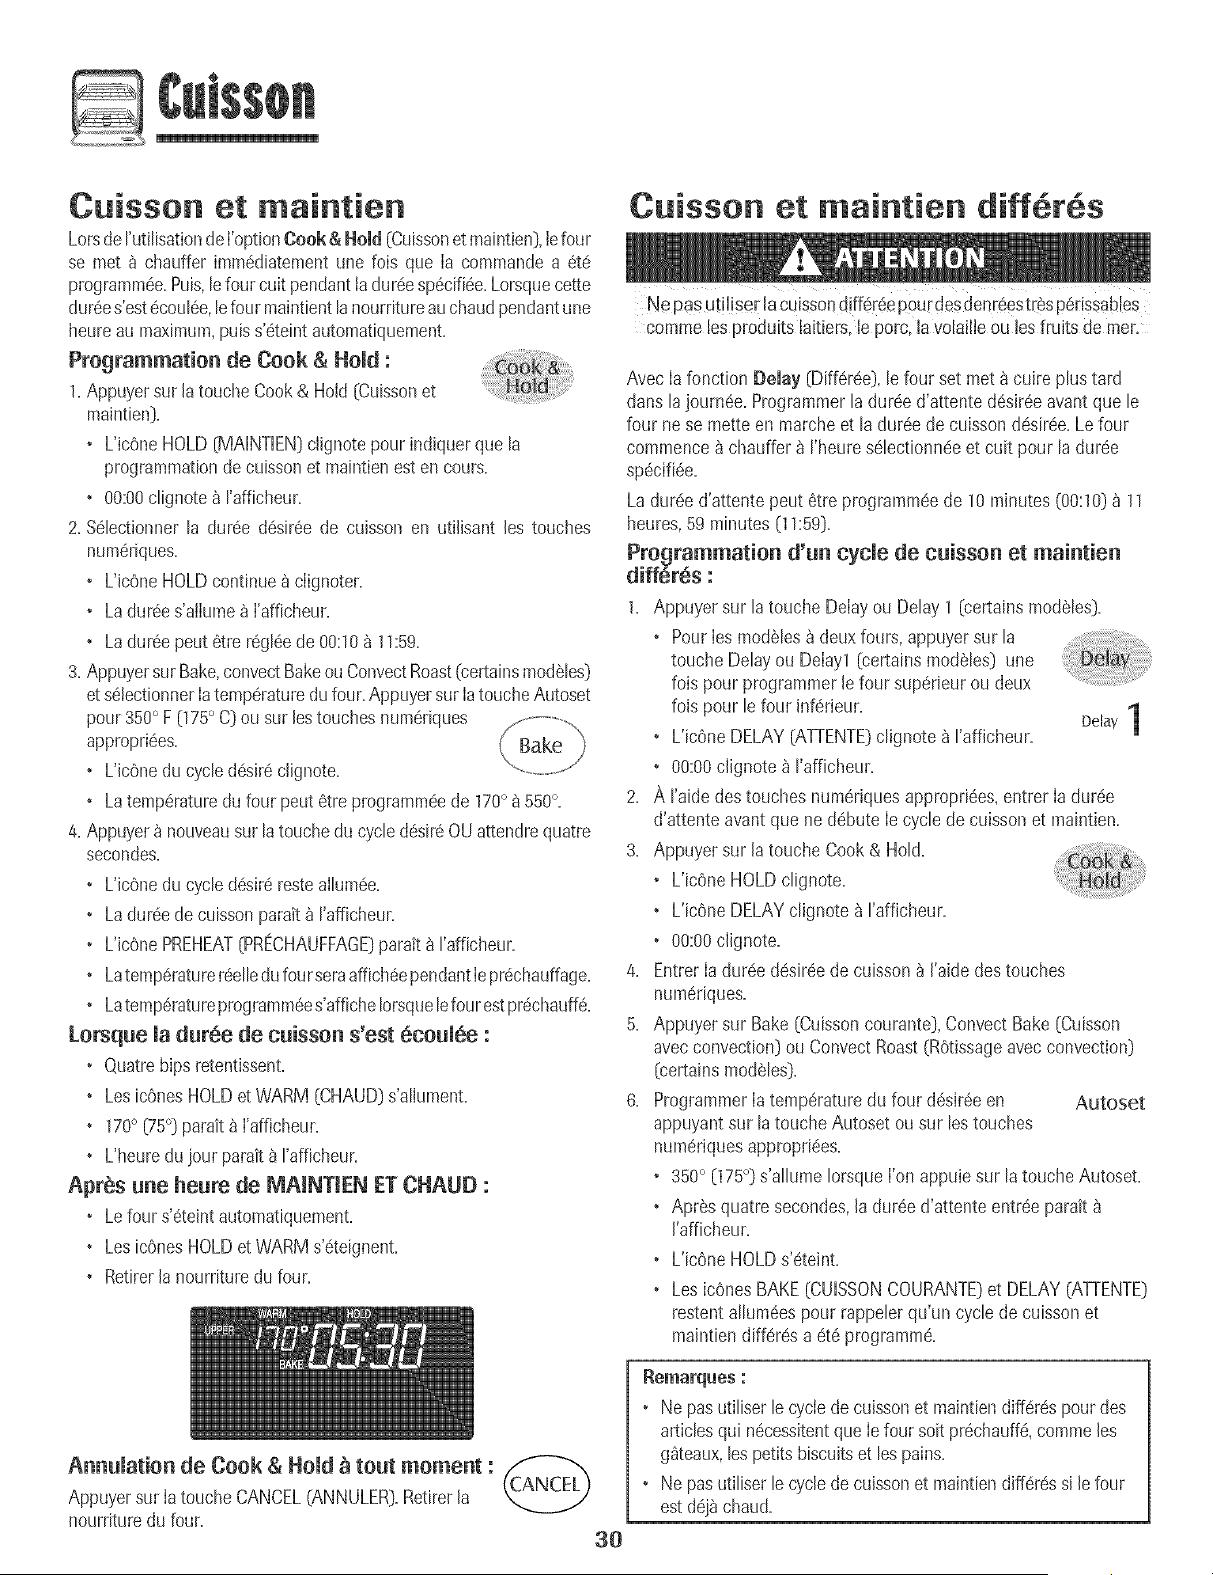
Cuisson et maintien
Lotsde['uti[isationde ['optionCook & Homd(Cuissonet maintien),[efour
se met _ chauffer imm6diatementune lois que [a commandea 6t6
programm6e+Puis,[efour cult pendanttadur6esp6cifi6e+Lorsquecette
dur_es'est6cout6e,tefour maintienttanourritureauchaudpendantune
heureau maximum,puiss'6teintautomatiquemenL
Programmation de Cook & Hold :
1+Appuyersur la toucheCook& Hold [Cuissonet
maintien).
+ L'icOneHOLD[MAiNTiEN)clignotepour indiquerque la
programmationde cuissonet maintienest encours.
+ 00:00clignotea I'afficheur.
2. %lectionner la dur6e desir6e de cuisson en utilisant [es touches
numeriques.
+ L'icOneHOLDcontinuea ciignoter.
• Ladur6es'ailume_ ['afficheur.
+ Ladur6epeut etre r6gl6ede 00:10_ 11:59.
3. AppuyersurBake,convectBakeou ConvectRoast[certainsmodSles)
et s6tectionner[atemperaturedufour.Appuyersur [atoucheAutoset
pour350° F (175° C) ou sur [estouchesnumeriques
appropri6es. Bake
+ L'JcOnedu cycled6sJrecJignote.
+ Latemp6raturedufour peut 6trepregrammeede 170° _ 550°+
4+Appuyer_ nouveausur la touchedu cycledesir60U attendrequatre
secondes+
+ UicOnedu cycled_sireresteailum6e+
+ Ladur6ede cuissonparak_ rafficheur+
+ UicOnePREHEAT[PRECHAUFFAGE)paratt_ I'afficheur+
+ Latemp6raturereelledufourseraaffich6ependant[epr6chauffage+
+ Latemp6raturepregrammees'afficheIorsquelefourest pr6chauff6+
Lorsque la duree de cuisson s'est 6coulee :
+ O.uatrehipsretentissenL
+Les icOnesHOLDet WARM (CHAUD)s'aliument+
+ 170° [75°) parait_ ['afficheur+
o L'heuredujour parait8 I'afficheur+
Apr@s une heure de MAINTIEN ET CHAUD :
+ Lefour s'6teintautomatiquemenL
+Les icOnesHOLDet WARMs'eteignent.
+ Retirer[a nourrituredu four.
Cuisson et maintien diff6r6s
Ne pas utiliser lacuissondiffer6epourdesdenreestr6sp6rissables
commelos produitslaitiers,le porc, lavolaille ou losfruits de mer.
AvecIa fonction Belay (Differee),le four set met8 cuire plus tard
dans lajourn6e. Programmerla duree d'attented6sir6eavantque le
four nese mette en marche et la dur6ede cuissondesiree.Le four
commence_ chauffer _ I'heureselectionn6eet cuit pour la duree
sp6ci%e.
La dur6e d'attentepeut 6tre programm6ede 10 minutes[00:10)_ 11
heures,59 minutes[11:59).
Programmation d'un cycle de cuisson et maintien
diff6r6s :
1. Appuyer sur la toucheDelay ou Delay1 [certains modeles).
+ PourIesmod61es_ deux fours,appuyersur la
touche Delayou Delayl [certains modeles) une
lois pour programmerle four superieur ou deux
fois pour [e four inferieur. Delay1
[
+ L'icOneDELAY[ATrENTE}clignote _ rafficheur.
+ %:00 c[ignote_ I'afficheur.
2. A raide destouches numeriquesappropri6es,entrer [a dur6e
d'attente avantque ne debute [e cyclede cuissonet maintien.
3. Appuyer sur [a touche Cook& Hold.
+ L'icOneHOLDclignote.
+ L'icOneDELAYclignote _ rafficheur.
+ 00:00c[ignote+
4+ Entrer[adur6e desireedecuisson_ ['aidedestouches
numeriques.
5+ Appuyer sur Bake (Cuissoncourante},Convect Bake(Cuisson
avecconvection}ou Convect Roast(ROtissageavec convection}
[certainsmodeles)+
6+ ProgrammerIatemperaturedu four d6s+r6een Autoset
appuyantsur la toucheAutoset ou sur lostouches
numeriquesappropri6es.
• 350° (175°) s'allume Iorsque ['onappuie sur latouche Autoset.
+ AprSsquatre secondes,[a dur6ed'attenteentr6e parait
['afficheur.
+ L'icOneHOLDs'eteint.
+Les icOnesBAKE(CUISSONCOURANTE)et DELAY(ATTENTE)
restentallum6espour rappelerqu'un cycle de cuissonet
maintiendifferes a et6 pregramm6.
Annulation de Cook & Hold _ tout moment :
Appuyersur IatoucheCANCEL(ANNULER).RetirerJa
nourrituredu four.
3O
• Ne pasutiliser le cyclede cuissonet maintiendiff6respourdes
articlesqu[ necessitentque Iefour soitptichauffe, commeles
g_teaux,lespetitsbiscuitset los pains.
• Ne pasutiliser le cyclede cuissonet maintiendiff6ressile four
estdej_ chaud.
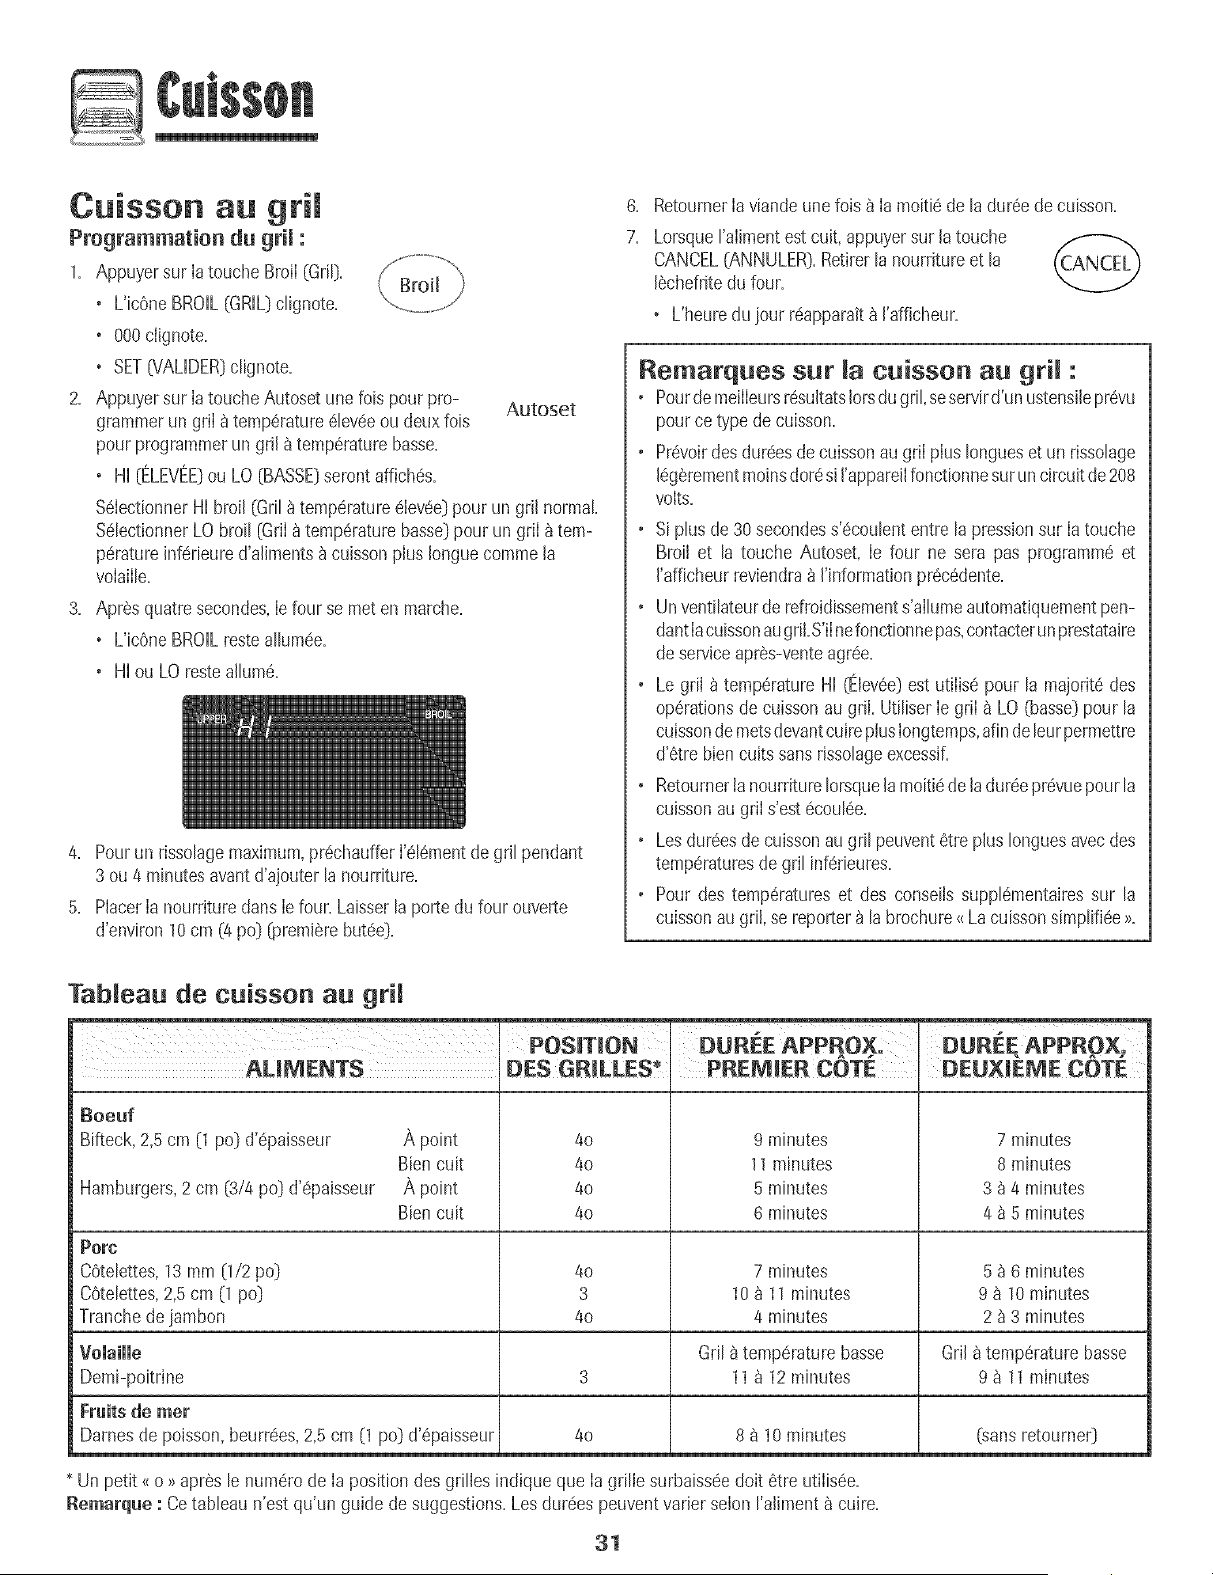
Cuisson au gril
Programmation du grii :
1. Appuyersur Iatouche BroiI(Gri[).
, Uic6neBROIL(GRILDclignote.
, 000clignote.
+ SET[VALIDER)c%note.
2. Appuyersur Iatouche Autoset unelois pour pro- Autoset
grammerun griI _temp6rature61ev6eou deux lois
pourprogrammerun gril _ temp6raturebasse.
, HI [ELEVEE:)ou LO [BASSE)serontaffiches.
%IectionnerHI broil (Gril _temperatureeleveeDpourun gril normal.
%lectionnerLO broil [GtiI _temperaturebasseDpour un griI _ tem-
peratureinferieured'aliments_ cuissonplus Ionguecommela
volaille.
3. Apresquatresecondes,Ie four se meten marche.
, UicOneBROILresteallumee.
+ HIou LO resteallure&
4. Pourun rissolagemaximum,prechaufferI'elementdegdl pendant
3 ou 4 minutesavantd'ajouterla nourriture.
5. PlacerIa nourritureclansIefour. Laisserlaporte du four ouverte
d'environ10cm (4 pc} (,oremi@rebutee}.
6.
7.
RetournerIaviandeune fois_ Ia moitiede la dureede cuisson.
Lorsqueralimentest cuit, appuyersur latouche
CANCEL[ANNULER).Retirerla nourritureet la
I_chefritedu four.
+ L'heuredu jour reapparait_ ['afficheur.
Remarques sur cuisson au gri :
+ PourdemeilIeursresultatslotsdu gril+seservird'un ustensileprevu
pource type decuisson.
+ Prevoirdesdur6esdecuissonau griI plusIongueset un rissolage
leg_,rementmoinsdoresi I'appareilfonctionnesuruncircuitde208
volts.
+ Siplus de30 secondess'6coulententre la pressionsur Ia touche
Broil et la touche Autoset+Ie four ne sera pas programmeet
I'afficheurreviendra_ I'informationprecedente.
+ Unventilateurderefroidissements'allumeautomatiquementpen-
dantlacuissonaugriI.S'iInefonctionnepas,contacterunprestataire
deserviceapres-venteagree.
+ Le griI _ temperatureHI (Elevee)est utilise pour la majoritedes
operationsde cuissonau griI. UtiliserIe griI _ LO [basse)pour la
cuissonde metsdevantcuireplusIongtemps,afindeleurpermettre
d'etrebiencuits sansrissolageexcessif.
+ Retournerla nourritureIorsquelamoiti6de ladur6epr6vuepour la
cuissonau griIs'est6coulee.
+ Lesdureesde cuissonaugril peuventetre plus Ionguesavecdes
temperaturesde gril inferieures.
+ Pour des temperatureset des conseilssupplementairessur la
cuissonaugriI, se reporter_ la brochure{<Lacuissonsimpli%e >_.
Tableau de cuisson au grH
POSiTiON + DUREE APPROX, DUREE APPROX.
AUMENTS DES GRILLES PREMIER CQTE DEUX_EME COTE
Boeuf
Bifteck,2,5cm [1 podd'epaisseur
,_,point
Bien cuit
A point
Bien cuit
4o
40
40
40
9 minutes
11 minutes
5 minutes
6 minutes
7 minutes
8 minutes
3 _ 4 minutes
4 _ 5 minutes
Hamburgers, 2 cm (3/4 pc} d'6paisseur
Porc
COtelettes, 13 mm [1/2 po_ 4o 7 minutes 5 _ 6 minutes
COtelettes, 2,5 cm 0 pc} 3 10 a 11 minutes 9 a 10 minutes
Tranche de jambon 4o 4 minutes 2 _ 3 minutes
Volaille Gall8 temperature basse Gril a temperature basse
Demi-poitrine 3 11 a 12 minutes 9 a 11 minutes
Fruits de mer
Dames de poisson, beurr6es, 2,5 cm [1 pc] d'epaisseur 4o 8 _ 10 minutes (sans retoumer)
* Un petit <_o >>apresle numerode Ia posit+ondesgrilles indique que Iag+illesurbaissQedolt etre utilisQe.
Remarq_e : Cetableau n'est qu'un guide de suggestions.Les dureespeuventvarier selon I'aliment8 cuire.
31
@
Maintien au ehaud
Pourmaintenirau chauddesalimentscuitset chaudsou pourr6chauffer
pains et assJettes.
Programmation dn gril :
1. Appuyer sur la touche KeepWarm(Maintien au
chaud].
• L'icOneWARM [CHAUD]clignote. Autoset
• 000ciignote _ I'afficheur.
2. %lectionner Iatemp6raturede maintien auchaud. Appuyersur la
touche Autosetou sur lestouches num6riquesappropri6es.
• 170° (75°] s'aIIumeIorsqueron appuie sur Ia toucheAutoset.
• Chaquepressionsur latoucheAutosetaugmentela temp6rature
de5° F (3°C].
Latemp6raturede maintienau chaud peut 6tre programm6ede
145et 190° F [63 et 90° C].
L'icOneWARM (CHAUD] et la temp6ratureserontaffichdes pen-
dant que la fonction estactive.
Annnlation dn maintien an chand :
1. Appuyersur la touche CANCEL(ANNULER).
2. Retirer la nourrkuredu four.
Remarques sur la fonction de
maintien au chaud :
• Pourobtenir desqualit6salimentaireset nutritives optimales,
les aiimentsnedoivent pas6tre gard6sau chaud plus de 1 ou
2 heures.
• Pouremp#cherIesalimentsde dess6cher,IesrecouvrJrde
papieraluminium,sansserrer, ou d'un couvercie.
• Pour r@chaufferdes petits pains :
- recouvrir Iespetits painsde papier aluminiumsansles serrer
et les placer au four.
- appuyersur les touchesKeep Warmet Autoset.
- r6chaufferpendant 12 _ 15minutes.
, Pour r6nhauffer des assiettes :
- placerdeux piles de quatreassiettesmaximumdans le four.
- appuyersur les touchesKeep Warmet Autoset.
- r6chaufferpendant 5 minutes,arrSterle four et laisserles
assJettesau four pendant encore 15mh]utes.
- n'utiliser que desassiettespouvantafterau four, _ v6rifier
avecIefabdcant.
- ne pasposer desassiettesti6des sur unesurfacefroide, les
changementsrapidesde temp6raturepouvantcasser
I'assietteou lafendiller.
32
Arr t autornatique/Mode
Lefour s'arr6teautomatiquementapr_s12heuress'il a 6t6
accidentellementlaissden marche.Cettecaract6rJstiquede s6curit6
peut 6tre arr6t6e.
Pour annuler rarr_t 12 heures et faire fonctionner le four en
continu pendant 72 heures:
1. Appuyer sur Ia toucheClock [Hodoge)et la
maintenirainsJpendant 3 secondes.
• SAb sera affiche et c@notera pendantcinq secondes.
• SAb sera ensuiteaffich6 en continujusqu'_ ce qdon I'arr6te
oujusqu'_ ce que la duree limite de 72heuressoit atteinte.
• L'icOneBAKE(CUISSONCOURANTE)sera aussiaffichee si un
cyciede cuissoncouranteest en coursalors que le four est en
modesabbat.
• ToutesIes touchessont inactivessaul CANCEL(ANNULER)et
CJock.ToutesIesautresfonctions sauf BAKE(Minuterie,
Maintienau chaud, Nettoyage,etc.}sont verrouill6espendant
le modesabbat.
• Un cyclede cuissonet maint[enpeut 6tre programm6durant
le modesabbat.Cependant,un cyclede cuissonet maintien
diff6r6sn'est pas possible.
Annulation du mode sabbat:
1. Appuyer sur JatoucheCLOCKpendanttrois
secondes.
OU
2. Apres 72 heums,le modesabbat setermine.
• 'SAb'clignote pendant5 secondes.
• L'heuredu jour revient_ I'afficheur.
Remarques sur le mode sabbat :
• Lemode sabbat peut 6tre misen marche_ tout moment,que
lefour soit en marche ou non.
• Lemode sabbat nepout pas 6tre mis en marchesi[es touches
sontverrouiiI6esou Ia porteverrouili6e.
• Lamajorit6des messageset tousles bJpssont d6sactiv6s
Iorsquele modesabbat est actif.
• Sile four esten mode cuissonIorsquele mode sabbatest
programm6,ricOneBAKE(CUISSONCOURANTE)s'6teint_ Ia
fin du cyclede cuisson. IIn'y aura aucun signal sonoreaudible.
• Sir6clairage du four est souhait6 pendantle mode sabbat,la
lampedevra6tre alhmee avantque le modesabbat ne d6bute.
• Lorsquele modesabbata d6marr6,rafficheur indique
imm6diatement[atemp6ratureprogramm6epiutOtque la
temp6rature r6eilede la cavit6du four. Aucun bJpde
pr6chauffagene retentit.
• Lecycle d'autonettoyageet leverrouillageautomatiquede la
porte nefonctionnent paspendant le modesabbat.
. Siton appuie sur Iatouche CANCEL,un cycle de cuisson
couranteau four seraannul@.Cependant,le r6gulateurrestera
en modesabbat.
• Apr6sune pannede courant,[e four revient en modesabbat
avec72 heuresrestanteset aucun cycle actiE
33
Ajustement de la temperature
du four
Laprecision destemperaturesdu four a6t6 soigneusementverifiee
I'usine.[Iest normal de remarquerquelquesdifferencesde cuisson
ou de Ia couleur du rissohge obtenu entre un four neuf et un four
ancien.Au fur et _ mesureque le four est moins neuf,sa
temperaturepout varier.
lI estposs+bled'ajuster Iatemperaturedu four s+I'onpenseque Ie
four ne cuit pas ou ne rissoIepas correctement.Pourdecider de
I'ajustement_ apporter+regler le four _ une temperaturede 15°C
(25OF)piuse+eveeou plus basseque la temperatureindiquee darts
larecette, puis faire core la preparation+Les resuItatsdu premier
essaide cuissondoiventdonner une idee du nombrede degres
duque[ latemperaturedoit 6tre ajustee.
Ajustement de la temperature du four :
1. Appuyer sur la touche Bake(Cuisson).
Bake
2. Entrer 550° F (285° C) en appuyant sur [es touches
numeriques appropri6es.
3. Appuyer sur la touche Bake et la maintenir ainsi pendant
phsieurs secondesou jusqu'_ ce que 00° paraisse_ l'afficheur.
Si la temperaturedu four a 6t6 precedemmentajustee,le
changementseraaffiche. Parexemple,si la temperaturedu four
a 6tOredultede 15° F (8° C),I'afficheur indiquera-15°F(-8° C).
4. Appuyer sur la touche Autoset pour ajuster latemperature.
#, chaquelois que I'onappuie sur la touche Autoset,Ia
temperaturechangede 5° F (3° C).La temperaturedu four peut
6tre augmenteeou diminuee de 5 _35° F(3 _ 20° C).
5. L'heuredu jour reapparaitautomatiquement8 rafficheur.
IIn'est pas necessairede reajusterla temperaturedu four en casde
panneou d'interruption decourant. L'ajustementde la temperature
s'appliqueseulementaux fonctlons de culsson,cuissonavec
convectionet rOtissageavecconvection {certainsmodeles).
La touche Favorite(Favorites)permetde sauvegarderIa duree et la
temperatured'un cycIede cuissonet maintiencuisson,cuissonavec
convectionou rOtissageavecconvection (certainsmodeIes).
Pourprogrammerun cycle Favorite,une fonction decuisson et
maintiendolt 6tre activeou tout juste programmee.
Programmation d'un nouveau cycle Favorite ou
sauvegarde d'une fonction en cours de cuisson et
maintien comme favorite :
1, Programmerun cyclede cuissonet ma[ntiencomme il est d_crit
lasection Cuissonet maintien _ la page 30,
2. Appuyersur [a touche Favoriteet [a maJntenirainsi vor+t
pendanttrois secondes. -- +.......
. Lecycie cuissonet maintiennouveliementprogrammeou en
cours de fonctionnementsera sauvegarde.
. Un bip se fera entendrepour indiquer que [e regulateura
accepte le reglage Favorite.
Demarrage d'un cycle programme darts Favorite :
1. Appuyersur [a touche Favorite.........................
:). Laduroc et la temperaturedu cycle programme avofite
de cuissonet maint[enseront affichees(siaucun ...................
cycle de cuissonet maintienn'a et6 programme,<{nonE >>sera
affiche).
2. Appuyersur la touche Bake,ConvectBakeou ConvectRoast
(certahs modeies).
. Lecycle Favoritecommenceimmediatement.
. L'icOnedu cycle selectionnes'aliumea ['afficheur.
. Laduroc de cuissons'ailume _ I'afficheur.
Lorsque la duroc de cuisson s'est ecoulee :
. L'Jcenedu cyc[ese[ect[onnes'eteint.
. L'icOneHOLDWARM (MAiNTiENAU CHAUD)s'allume.
. 170° (75°) parait _ rafficheur.
gnnulation d'un cycle Favorite en cours :
1. Appuyersur [a touche CANCEL(ANNULER]. ("CANCEL-'_
. Lecycle Favoritesauvegard6ne sera pas affect@.
2. Retirerla nourriture du four+
34
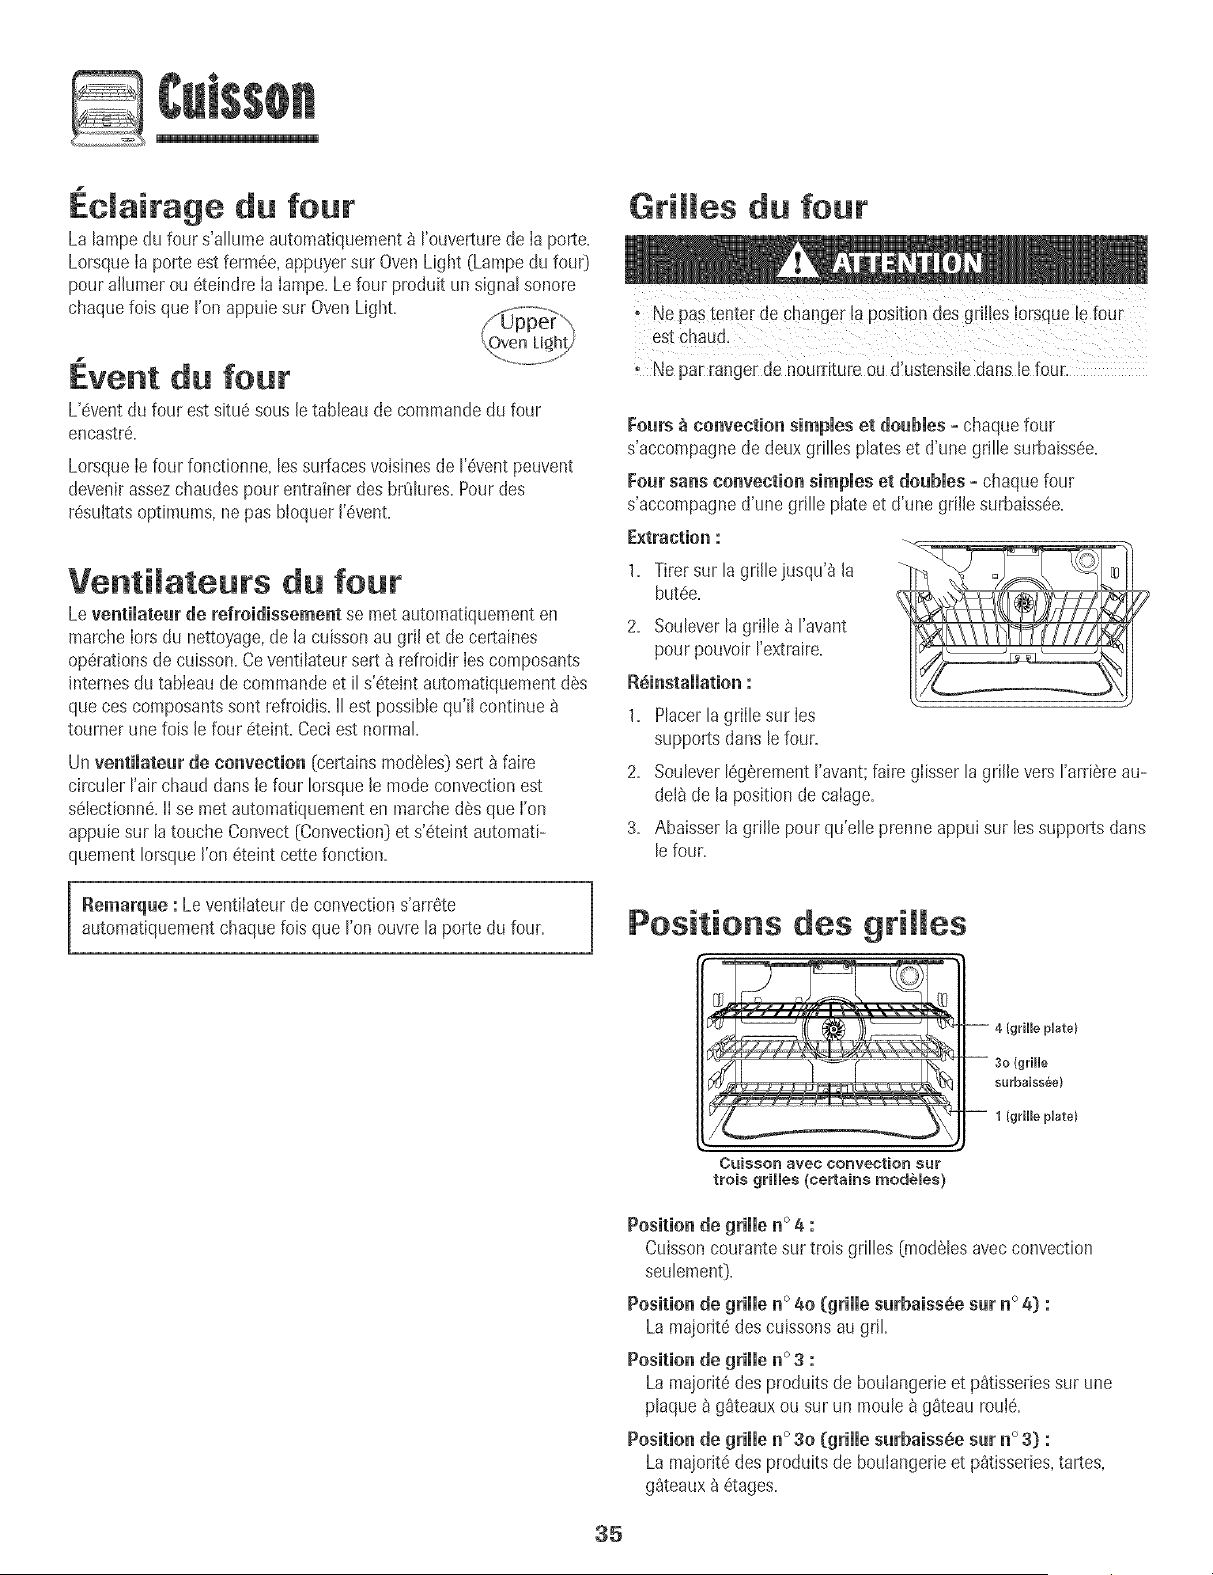
@
Edairage du four
La lampedu four s'allumeautomatiquement_ I'ouverturede Ia porte.
LorsqueIa porte estferm@, appuyersur OvenLight (Lampedu fouO
pour alhmer ou 6teindre Ia Iampe.Le four produit un signal sonore
chaquefob que I'on appuie sur OvenLight. //,_;i+jO_e+rO,.,.
1
Event du four
L'@entdu four est situe sousle tableaude commandedu four
encastre.
LorsqueIe four fonctionne,les surfacesvoisinesde I'@entpeuvent
devenirassezchaudespour entrainer des brOlures.Pour des
r@ultatsoptimums,ne pas bloquer I'@ent.
Ventimateurs du four
Leventilateur de refroidissement se met automa%uementen
marcheIors du nettoyage,de la cuissonau gril et de certaines
operationsde cuisson.Ceventilateursert 8 refroidir Ies composants
internesdu tableaude commandeet il s'ete+ntautomatiquementd@
queces composantssont refroidis.II est possiblequ'il continue
tourner unefob lefour eteint. Ceciest normal.
Un ventimateurde convection (certainsmo@les}sert _ faire
circuler Fairchaud dans le four Iorsquele mode convectionest
selectionne.II se met automatiquementen marche des que I'on
appuiesur la touche Convect(Convection)et s'eteintautomati-
quementIorsqueI'on eteint cettefonction.
Remarque : Leventilateur de convections'arrete
automatiquementchaquelois que I'onouvre la porte du four.
Grilles du four
, Ne pastenter de changer la position des gril!esIorsqueb four
estChaud.
Ne par rangerde nourriture ou dlustensitedans le four.
Fours _ convection simples et douMes - chaquefour
s'accompagnede deuxgrilles plates et d'une grille surbaiss@.
Four sans convection simples et doubles + chaquefour
s'accompagned'une grille plate et d'une grillesurbaiss@.
E×traction :
1. Tirersur la grille jusqu'_ la
butee.
2. Soubver [a grii[e _ ['avant
pour pouvoir ['extraire.
R_instammation :
1. Placerla grille sur Ies
supportsdans lefour.
2. Soubver legarementI'avant;faire glisserla grille vers I'arriereau-
delade la position de calage.
3. Abaisserla grille pour qu'elb prenneappui sur les supportsdans
le four.
OUiSSOr_ avec COnVection Su_"
trois gHHes (ce_ains modules)
Cuissoncourantesur trois grilles (mo@lesavecconvection
seulement}.
Positionde grille n° 4o (grille surbaissee sur _o_) :
Lamajorite des cuissonsaugriL
La majorite des produits de boulangerie et p_tisseries sur une
plaque a gSteaux ou sur un moule a g_teau roule.
Positio_ de grille _o 30 (grille s_baiss_.e s_ _o 3} :
La majorite des produits de boulangerb et p_tisserbs, tartes,
g_teaux _ etages.
35
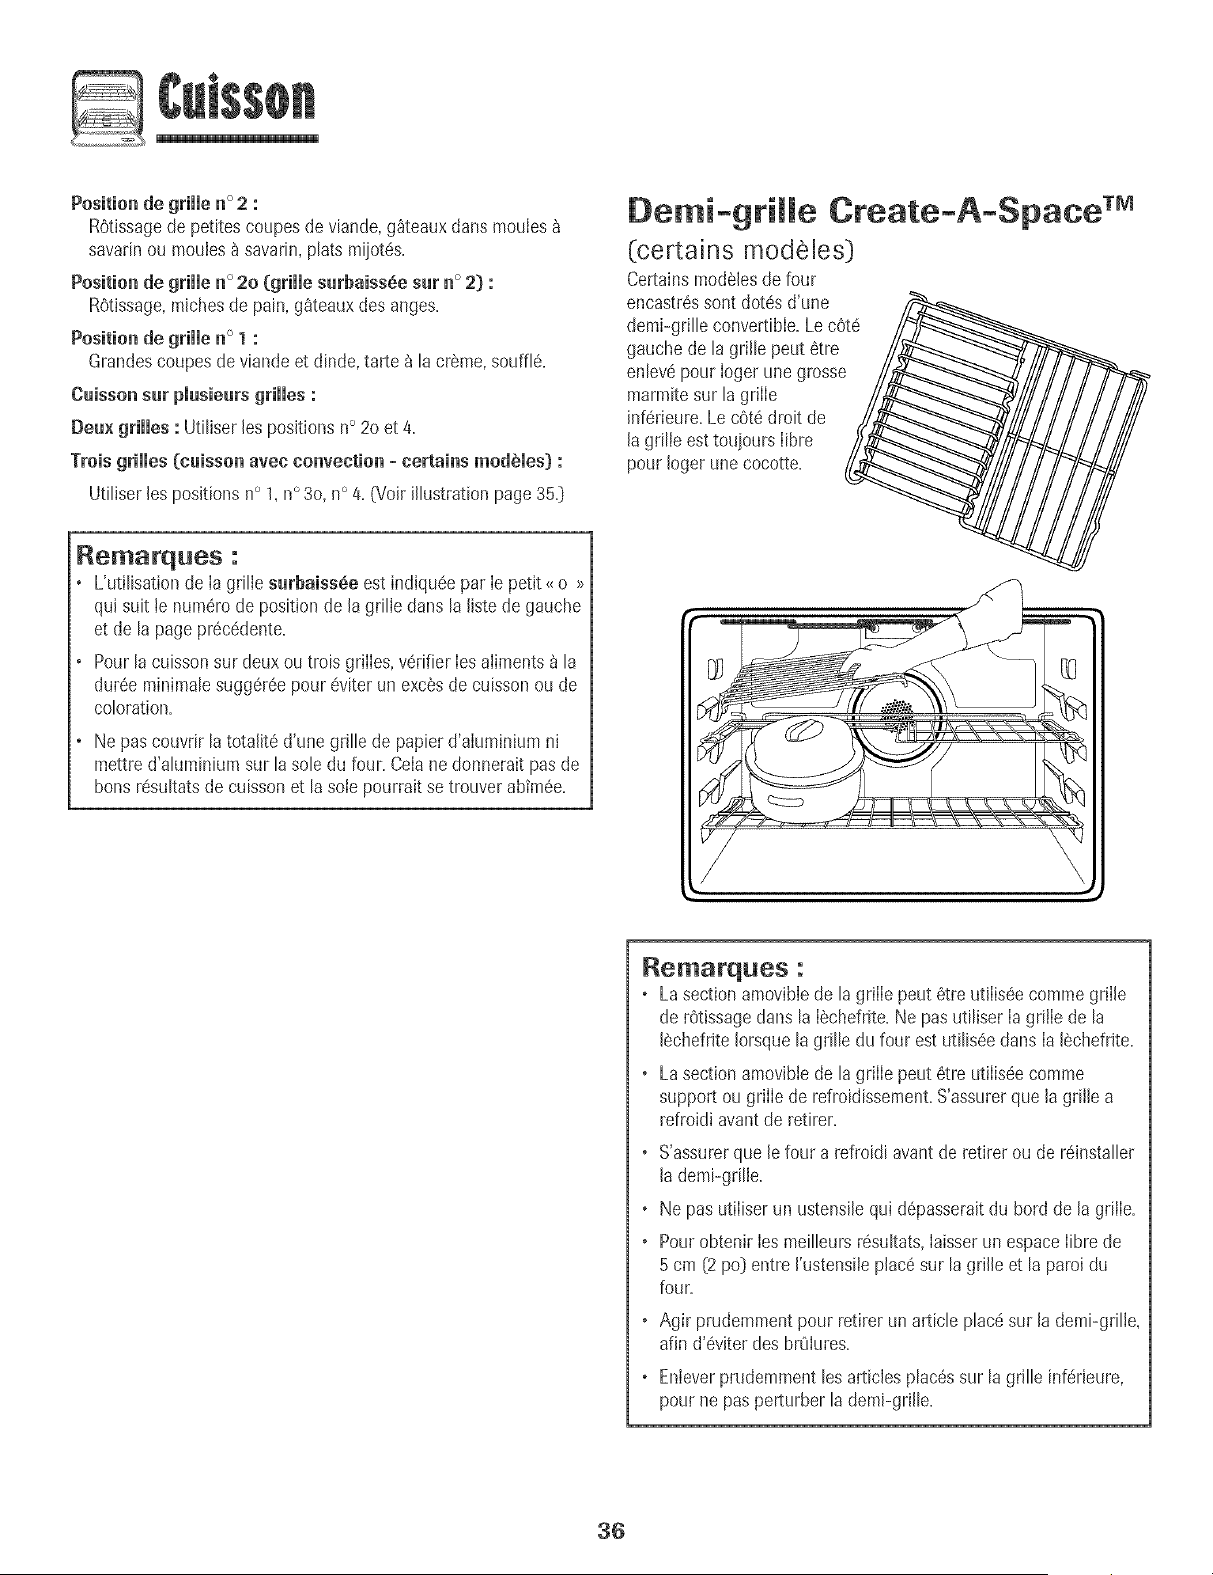
@
Position de grille n° 2 :
R6tissagede petitescoupes de viande,g_teauxdartsmouIes
savarinou mouies_ savarin,plats miiot6s.
Positionde grimmen ° 2o (grimmesarbaissde sat n° 2) :
R6tissage,michesde pain, g_teauxdes anges.
Positionde grimmen ° 1 :
Grandescoupesde viande et dinde, tarte _ la creme,souffl6.
Caissonsur piusieurs grilles :
Deux grilles : Ut[liserles positions n° 2o et 4.
Troisgrilles (caisson avee convection = eertains modules) :
Utiliser les positionsn° 1,n° 3o,n° 4. (Voir illustration page35.D
Remarque8 :
L'utilisationde Ia grille surbaissde est indiqu6epar Ie petit _ o >_
qu[ suit te num6rode positionde [a grille clansla fistede gauche
et de la pagepr6cddente.
Pour[a cuissonsur deuxou trois grilles, v6rifierIes aliments_ la
dur6eminimalesugg6r6epour 6viter un execsde cuissonou de
coloration.
Ne pas couvrirla totafit6 d'une grille de papierd'alumlnium ni
mettre d'aluminiumsur lasole du four. Celane donneraitpas de
bons r6sultatsde cuissonet [asole pourrait se trouverabim6e.
Oemi-grille
(certains modeles)
CertainsmodSlesde four
encastr6ssont dot6s d'une /_
demi-grille convertible.Lec6t6_._
gauchede [a grille peut 6tre
en[ev_pour [ogerune grosse
marmitesur [a grille
inf6rieure.Le c6t6 droit de
[a grille esttouiours [ibre
pour [oger une cocotte.
Create-A-Space TM
//
Remarques :
o Lasectionamovibiede [agriiie peut 6tre tJt[iis(!ecommegrii[e
de r6tissagedans la [_chefrite.Ne pas utiliser[a griiie de la
[_chefrite[orsquela grille du four est utilis6edans [a [_chefrite.
o Lasectionamovibie de lagriiie peut 6tre utiiis6e comme
support ou griiie de refroidissement.S'assurerque la grille a
refroidi avantde retirer.
o S'assurerque [e four a refroidi avant de retirer ou de r6installer
[ademi-grilie.
o Ne pas utiiiserun ustensilequi d6passeraitdu bord de [a griiie.
o Pourobtenir [esmeilleursr6sultats,hisser un espace[ibre de
5 cm (2po) entre ['ustensiiep[ac6sur la grille et la paroi du
four.
o Agir prudemmentpour retirer unarticle plac6sur [a demi-gdHe,
afin d'eviter des brOiures.
o Enieverprudemment[esarticies pJac6ssur [agdJJeinf6rieure,
pourne pas perturber la demFgriJle.
36
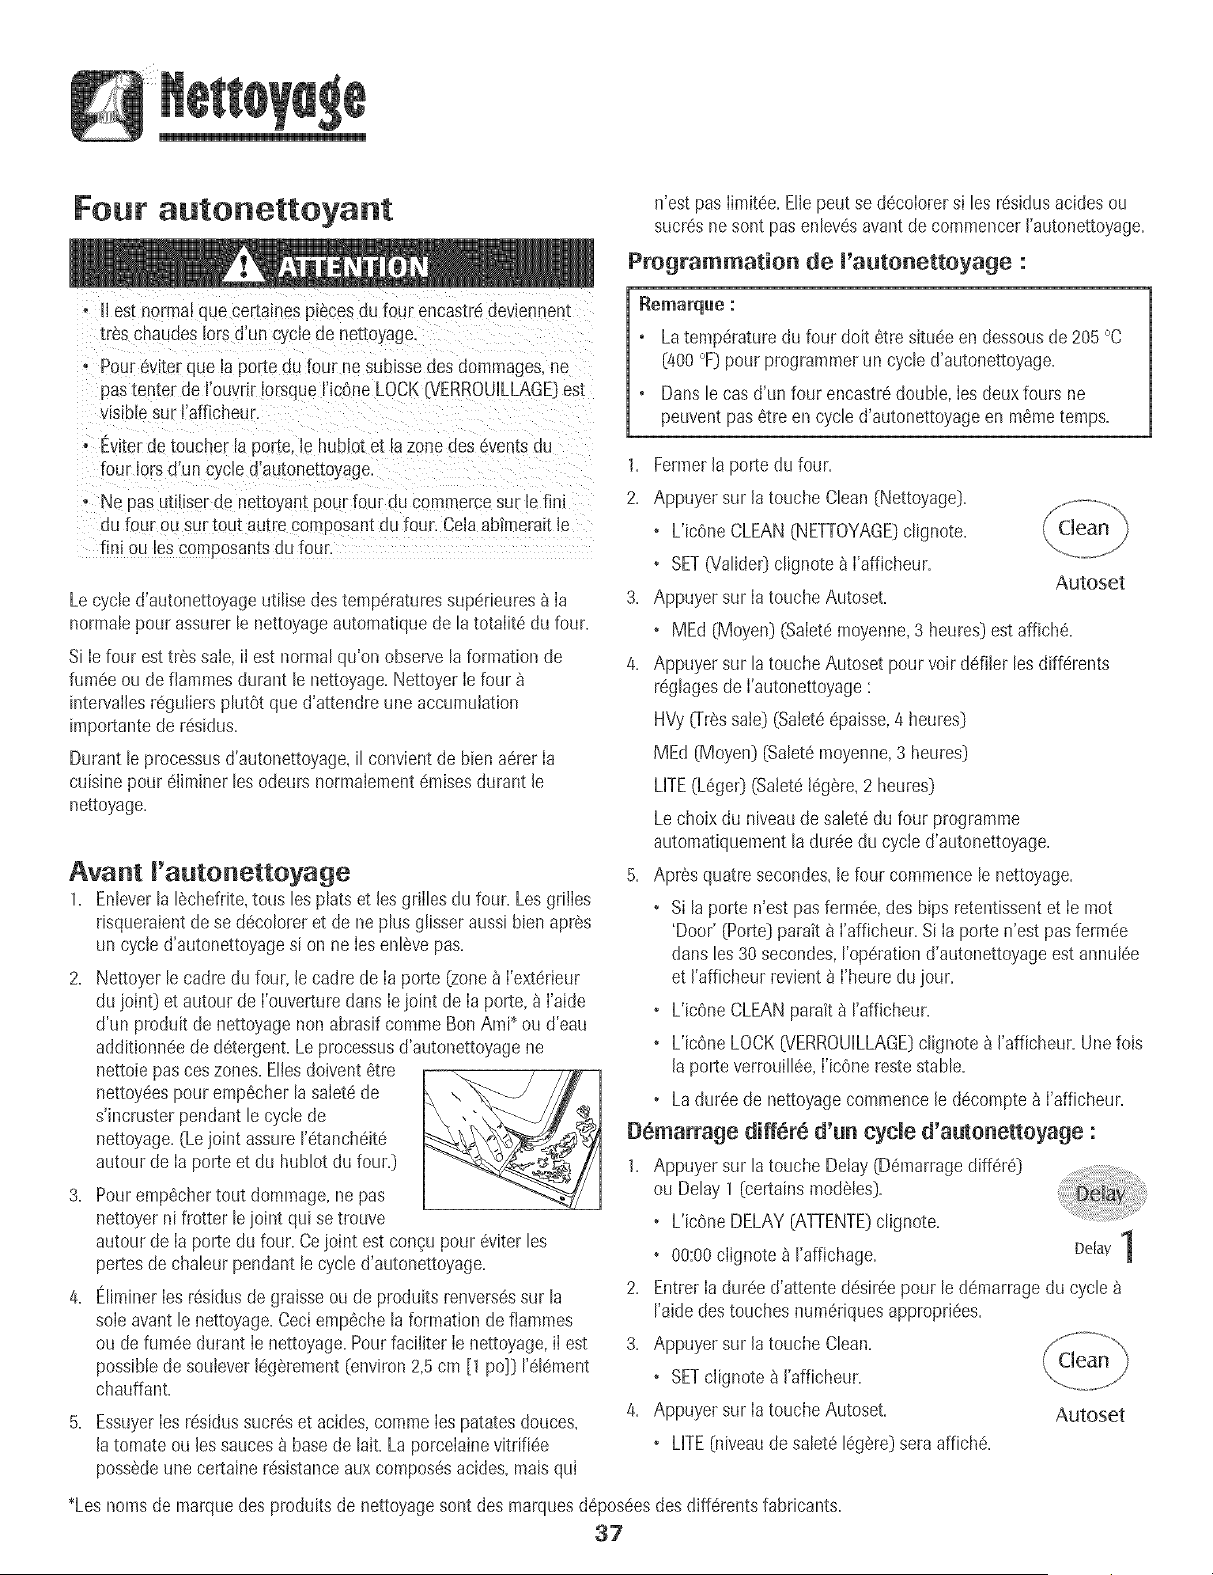
Four autonettoyant
n'est pas Iimit6e.Ble peut se d6colorersi les r6sidusacides ou
sucr6snesont pas enlev6savantde commencerI'autonettoyage.
Programmation de I'autonetteyage :
II est normalque certamespieces du four encastrddeviennen[
[res chaudeslots d'un cyclede nettoyage
Poureviter que ia porte du tour nesuuissedes dommages,ne
pastenter de I'ouvrir IorsqueI'icOneLOCK{VERROUILLAGE}est
visiblesur I'aff[cheur.
Eviterde toucher la porte. JehubJotet [azone des6velits au
four Iorsd'un cycled'autonettoyage.
Ne pas utilJserde nettoyantpour four du commercesur le fini
du tour ou surtout autre composantdu four. Celaabimeraitle
[inJou les comgosantsdu four.
Lecycled'autonettoyageutilisedes temp6raturessup#deures_ Ia
normalepour assurer le nettoyageautomatiquede la totaIit6 du four.
Si Iefour est tressaIe,iI est normalqu'on observela formationde
fum6eou de flammesdurant le nettoyage.Nettoyer Ie four
intervaIlesr6guIiersplutOtque d'attendre uneaccumulation
importantede r6sidus.
Durantle processusd'autonettoyage,il convientde bien a6rer Ia
cuisinepour 6,Iiminerles odeursnormalement6,raisesdurant le
nettoyage.
Avant R'autonettoyage
1= Enleverla 18chefrite,tousles plats et les griIlesdu four. LesgrilIes
risqueraientde se decoloreret de ne plus glisseraussi bienapres
un cycle d'autonettoyagesi on ne Ies enlSvepas=
2= Nettoyerlecadre du four, le cadrede Ia porte (zone_ I'ext6rieur
duioin0 et autour de I'ouverturedans Iejoint de Ia porte,_}_I'aide
d'un produit de nettoyagenonabrasifcomme Bon Ami_ou d'eau
additionn6eded6tergent=Le processusd'autonettoyagene
nettoiepas ces zones.ElIesdoivent6tre
nettoy6espour emp6cher lasaIet6de
s'incrusterpendant le cyclede
nettoyage=(Lejoint assurer6tanch6it6
autour de Ia porte et du hublot du four.}
3= Pouremp6chertout dommage,ne pas
nettoyerni frotter le ioint qui setrouve
autour de Ia porte du four. Ceioint estcongu pour 6viter les
pertesde chaleur pendant lecycle d'autonettoyage.
4. EliminerIesr6sidusde graisseou de produits renvers6ssur la
soIeavantle nettoyage.Ceci emp6chela formationde flammes
ou de fum6e durant Ie nettoyage.Pourfaciliter Ie nettoyage,iI est
possiblede soulever16gSrement(environ2,5cm [1 pc]] r61#ment
chauffant.
5. EssuyerIesr6sidussucr6set acides,commeIespatatesdouces,
la tomateou les sauces8 basede hit. LaporceIainevitrifi6e
possSdeune certainer6sistanceauxcomposesacides,mais qui
_emlrmarquG :
o La temp6raturedu four doit #tre situ#een dessousde 205 °C
[400°F] pour programmerun cycle d'autonettoyage.
o Dans le casd'un four encastr_doubIe,Ies deuxfours ne
peuventpas 6treen cycle d'autonettoyageen memetemps.
!. Fermer[a porte du four.
2. Appuyer sur [a touche Clean (Nettoyage}.
• L'icOneCLEAN(NETTOYAGE}clignote.
• SET(Valide0 clignotea ['afficheur.
Autoset
3. Appuyer sur [a touche Autoset.
• MEd [Moyen} [Salet_moyenne,3 heures}est affich6.
4. Appuyer sur la touche Autoset pourvoir ddi[er les diff6rents
r6glagesde ['autonettoyage:
HVy(Tr6ssale} [Saiet6#paisse,4 heures}
MEd (Moyen}[Salet6moyenne,3 heures}
UTE(L6ger] (Salet6[6g_re,2 heures}
Lechoix du niveaudesalet6 du four programme
automatiquementla duree du cycle d'autonettoyage.
5. Apr6s quatre secondes,le four commence lenettoyage.
• Si la porte n'est pas ferm6e,des bips retentissentet ie mot
'Door' (Porte}parak a ['afficheur.Si[a porte n'est pasferrule
dans [es30 secondes,I'op6rationd'autonettoyageest annul6e
et I'afficheur revient_ ['heuredujour.
• L'icOneCLEANparait_ rafficheur.
• L'icOneLOCK6/ERROUiLLAGE]clignotea ['afficheur.Unefois
[a porteverrouill6e,['icOnereste stable.
o Ladur6e de nettoyagecommence[e d6comptea ['afficheun
D_marrage diff_r_ d'u_ cycle d'auto_ettoyage :
1. Appuyer sur la toucheDelay (D_marragedifferS]
ou Delay1 [certainsmod61es].
• L'icOneDELAY[ATTENTE}clignote.
• 00:00ciignote_ ['affichage. Delay 1
2. Entrer[adur6e d'attented6sir6epour le d_marragedu cycle
raide destouches num6riquesappropriees.
3. Appuyer sur [a touche Clean.
° SETc[ignotea ['afficheur.
4. Appuyer sur [a touche Autoset. Autoset
° UTE (niveaude salet616gere}sera affich6.
_Lesnomsde marquedes produits de nettoyagesont des marquesd6pos#esdes diff6rents fabricants.
37
5. Appuyer sur la touche Autoset pourvoir d6filer les Autoset
diff6rentsr6gtagesde l'autonettoyage:
HVy{Tressale} [Satet66paisse,4 heures}
MEd [Moyen] [Satet6moyenne,3 heures]
UTE(L6ge0 (Salet6legere,2 heures}
Lecholx du niveaude saletedu four programme
automatiquementtaduree du cycled'autonettoyage.
6. Apres quatre secondes,tes icOnesCLEAN(NETTOYAGE}et
DELAY(ATTENTE}s'atlumerontet t'icOneLOCK
[VERROUiLLAGE}clignotera _ rafflcheur. Lorsqueta porte du
four se verrouitle,t'ic6ne LOCKs'arretede clignoter et reste
allumeeencontinu pour indiquer que le four estprogramm6
pourune op6rationde nettoyagediffere. Le delaid'attente sera
affiche.
Pendant cycle d'autonettoyage
LorsqueLOCKparatt_ I'afficheur,la porte ne peut 6tre ouverte+Pour
6viterd'endommagerla porte, ne pas forcer la portepour I'ouvrir
IorsqueLOCKest affiche+
FumSe et odeurs
La premierefois o_JIefour est nettoye,iJpeut y avoir production
d'odeur et de fum6e.Ceciest normalet disparaitra_ I'usage.
Si lefour est tr6s saleou si Ia IechefrJtea 6te Jaiss6edans Jefour, il
peut y avoirproduction de fum6e.
Pendantque Ie four chauffe, il peut se produire desbruits de m6taI
en dilatation ou en contraction.Ceciestnormal et n'indique pasque
le four s'abime.
Apr s cyde d'autonettoyage
Environuneheure apres la fin du cycle,ricOneLOCKs'6teint+A ce
moment,la porte peut 6tre ouverte.
La samet6peut aveir maiss6un r6sidu gris poudreu×. L'enlever
avecun linge humide+S'iI restede la salet_,cetaindique que le cycle
de nettoyagen'a pas 6t6 assezlong+Cettesalet6restantesera
enleveeau prochain cycled'autonettoyage+
Si les grilles du four ont _t_ laiss_es _ l'int_rieur pendant le
cycle d'autenetteyage et qu'eiies giissent real sur ieurs
supports, lesenduire, ainsique les supports,d'une fine couche
d'huile v6g_tale.
Be fines lignespeuvent apparaitre darts la porcelaine parce
qu'elle a subi chaleur et refroidissement. Ceciest normal et
n'affecterapas la performance+
Une d_comoratienblanche peut apparaitre apr_s menetteyage
si des aliments acides ou sucrSs n'ont pas 6t6 enmev_savant
que ne commence m'autonettoyage.La d_colorationest normale
et n'affecterapas la performancedu four+
Remarques :
• Si Ia porte du four n'est pas ferm6e,Ie mot <door >>[porte}
clignote_ I'afficheur et lefour emet des hips jusqu'_ ce que la
porte soitferm#e et que I'onappuiea nouveausur Clean.
• S'il s'ecouleplus de cinq secondesentre Ie momento(JI'on
appuiesur Cleanet celui o8 I'on appu+esur la touche Autoset,
rafficheur retourneautomatiquement_ I'affichageprecedent.
• Un ventilateurse met automatiquementen marchependant le
cycled'autonettoyageet s'6teintautomatiquementune fois le
cyclede nettoyagetermine et Ie four suffisammentrefroidi.Si
ce ventilateurnefonctionne pas, contacterun prestatairede
serviceapres-venteagree.
• Laporte du four se trouvera endommag6esi I'on forceson
ouverturealors que I'icOneLOCK07ERROUILLAGE}est encore
affich6e.
38

M thodes de nettoyage
° Pour 6V!ter!afo[mation detaches Ouun changementde CQuleur,nettoYerI'apparei!apr_schaque utHisati0n,
_R
PIECES NETTOYAGE
L_chefrite Ne jamais couvrir !a grille de papier d'aluminium; ceia emp_che la graisse de ceuler daiis la t_chefrite.
et sa griJJe , RecouvrirIa lechefriteet sa griIle d'un lingosavonneux;laissertremperpour detacher los res+dus.
, Laveravecde I'eausavonneusetiede.Ut+Iiserun tampon _ recurer pour6Hminerlossouillurestenaces.
• On pout placer los deuxcomposantsde IaIechefritedartsun lave-vaisseile.
TabJeaade , Pourutiliser Ia fonction <(Cont+olLock>>@'errouillagedes commandos)pour le nettoyage,voir page27.
eommande , Essuyeravecun Iinge humide.Biens_cher.
, On pout util+serun produit de nettoyagedu verre,pulveris6d'abord sur un chiffml. NEPASprejeterlepreduit
d_rectement sur les touches de commas;de ou sur I afficheur.
, Ne pas utiliser d'autres produits de nettoyage_ vaporiser,de nettoyantsabrasifs,ni degrandes quantitesd'eau.
Poignee de porte, . NE PAS UTIUSERBE PROBUffS BE NETTOYAGECONTENANTBU JAVELUSANT.
e×terieur du four • NE PAS UTILISERBE NETTOYANTS. ORANGE_ OUABRASIFS.
(certainsmodeles)= * TOUJOURSESSUYERBANS LESENSBE LA TEXTUREDE L'ACIERLORSBU NETTOYAGEo
, Nettoyage joumaJier/saJet6 l_g_re - EssuyeravecI'undesproduitssuivants:eausavonneuse,vinaigrebhnc/eau,
produit denettoyagepour verreet surface+Formula409 ou un produit sembhble pourverre - avecun Iingesouple
et une 6ponge.Rinceret secher.Pour polir et enteverIesmarquesde doigts,faire suivte par unevaporisationde
produ+tpour acier inoxydableMagic Spray(Piecen° 20000008)++.
, SaJet_ modSr_e/Spaisse +Essuyeravecrun des produ+tssuivants:BonAmi+,SmartCleanser+ouSoft Scrub+-
I'aided'un lingo soupleou d'une 6ponge humide.Rinceret secher.Lostaches rebellespeuvent6tre enteveesavec
un tampon Scotch-Brite humidi% FrotteruniformementdartsIesonsdu metal Rinceret secher.Pour redonnerdu
lustreet retirer les rayures,faire suivrepar une pulverisationde produit pour acier inoxydableMagic Spray.
, Eviterd'utiliser trop d'eau,qui risquerait des'infiltrer sous ou derrierele verre.
d_ four - verre , Laver_ I'eauet au savon.R+ncer_ I'eauclaire et secher.Un produit de nettoyagedu verre peut _tre utilis_ en le
vaporisantd'abord sur un lingo.
, Ne pas utiliser de nettoyantsabtasifscommetampons b r_curer,laine d'acierou nettoyantsen poudre qui
risqueraientde rayerle verre.
Garniture d_ four - , Laver_ I'eauet au savon,avec un nettoyant du verreou des produits doux_ vaporiser.Eviterd'utiliser trop d'eau.
finis m_talliq_es , Enleverlostaches rebelles_ I'aided'un nettoyantnonabrasif tel que BonAmi+ou d'une p_te de bicarbonatede
soude et d'eau; rincer et sScher.Ne pas ut+liserde nettoyantsabrasifs.
I_t_rie_r d_ four ,Voir page37 les renseignementssur le four autonettoyant.
, PourenteverIesIiquidesqui ont pu d_borderentre chaquenettoyage,utiliser un tampon _ recurer savonneuxen
plastique;bien rincer.
, Essuyerlosresidussucreset acides,commejusdecitron,saucetomatoou saucesbbasedelait. Laporcelainevitdfi_e
possedeunecertaineresistanceauxcomposesacides,maisqui n'estpas Iimitde.Ellepeutse decolorersi losr_sidus
sucresou acidesne sont pasenlev_savant de commencerrautonettoyage.
Grilles d_ four , Frotteravecune eponge/un Iingeet Funde ces nettoyants BonAmi+,SoftScrub*ou Comet+.Rincer et secher.
, Pourlasaletd rebelle,utiliserun tampon _ rdcurersavonneuxhumide. Rinceret secher.
, Si Iesgrilles sont taisseesdansle four pendant lecycled'autonettoyage,ellesse decolorentet peuvent neplus tres
bienglisser.Si cela se produit,enduire Iesgrilles et lossupportsintegresclansles paroisdu four d'une fine couche
d'huiie vegdtale,puis essuyerI'excddent.
+Lesnoms de marquesontdes marquesdeposeesdes differentsfabticants.
++Pour commanderdirectement,composerle 1-800-688-9900USAor 1-800-688-2002Canada.
39
Lampe du four
+ Avantde remplacer !iarnpoule,DEBRANCHERLEFOUR.
+ Ne paStouche[ unearnpoulechaude avecun 8ingehumide,
+iampouterisquede se bfiser.
Rempmacement de m'ampoumedu four :
1+ Porterune maniquesecheet d6vissertr_s soigneusementle
cabochonet I'ampou+e.
2. RemptacerI'ampouleparune ampoulepour four,de 40 watts, lI
est recommand6d'utiliser uneampouleavec un cuIot en laiton
pour 6viter la fusiondu culot darts la douiile.
3. Remettreen place le cabochonet rebrancherle four.
4. RemettreI'horloge_ I'heure.
Hubmot du four
Pour prot6ger mehubmotde maporte du four:
1+ Ne pas utiliserde produits nettoyantsabras+fscommedes
tampons_ r6curer en lained'aeierou des produits de nettoyage
en poudre qu+risqueraientde rayer leverre+
2. Ne pas heurter Ie hublot en verreavec un ustensile,un article de
mobilier,un jouet, etc.
3. Ne pas fermer Ia porte du four avantque lesgrilles ne soienten
place dartsIe four.
Touted6gradat+ondu hubIot de verre - rayure,choc,tens+on,etc. -
peut affaiblirsa structure et augmenterle risquede bris _ une date
ult6rieure.
40
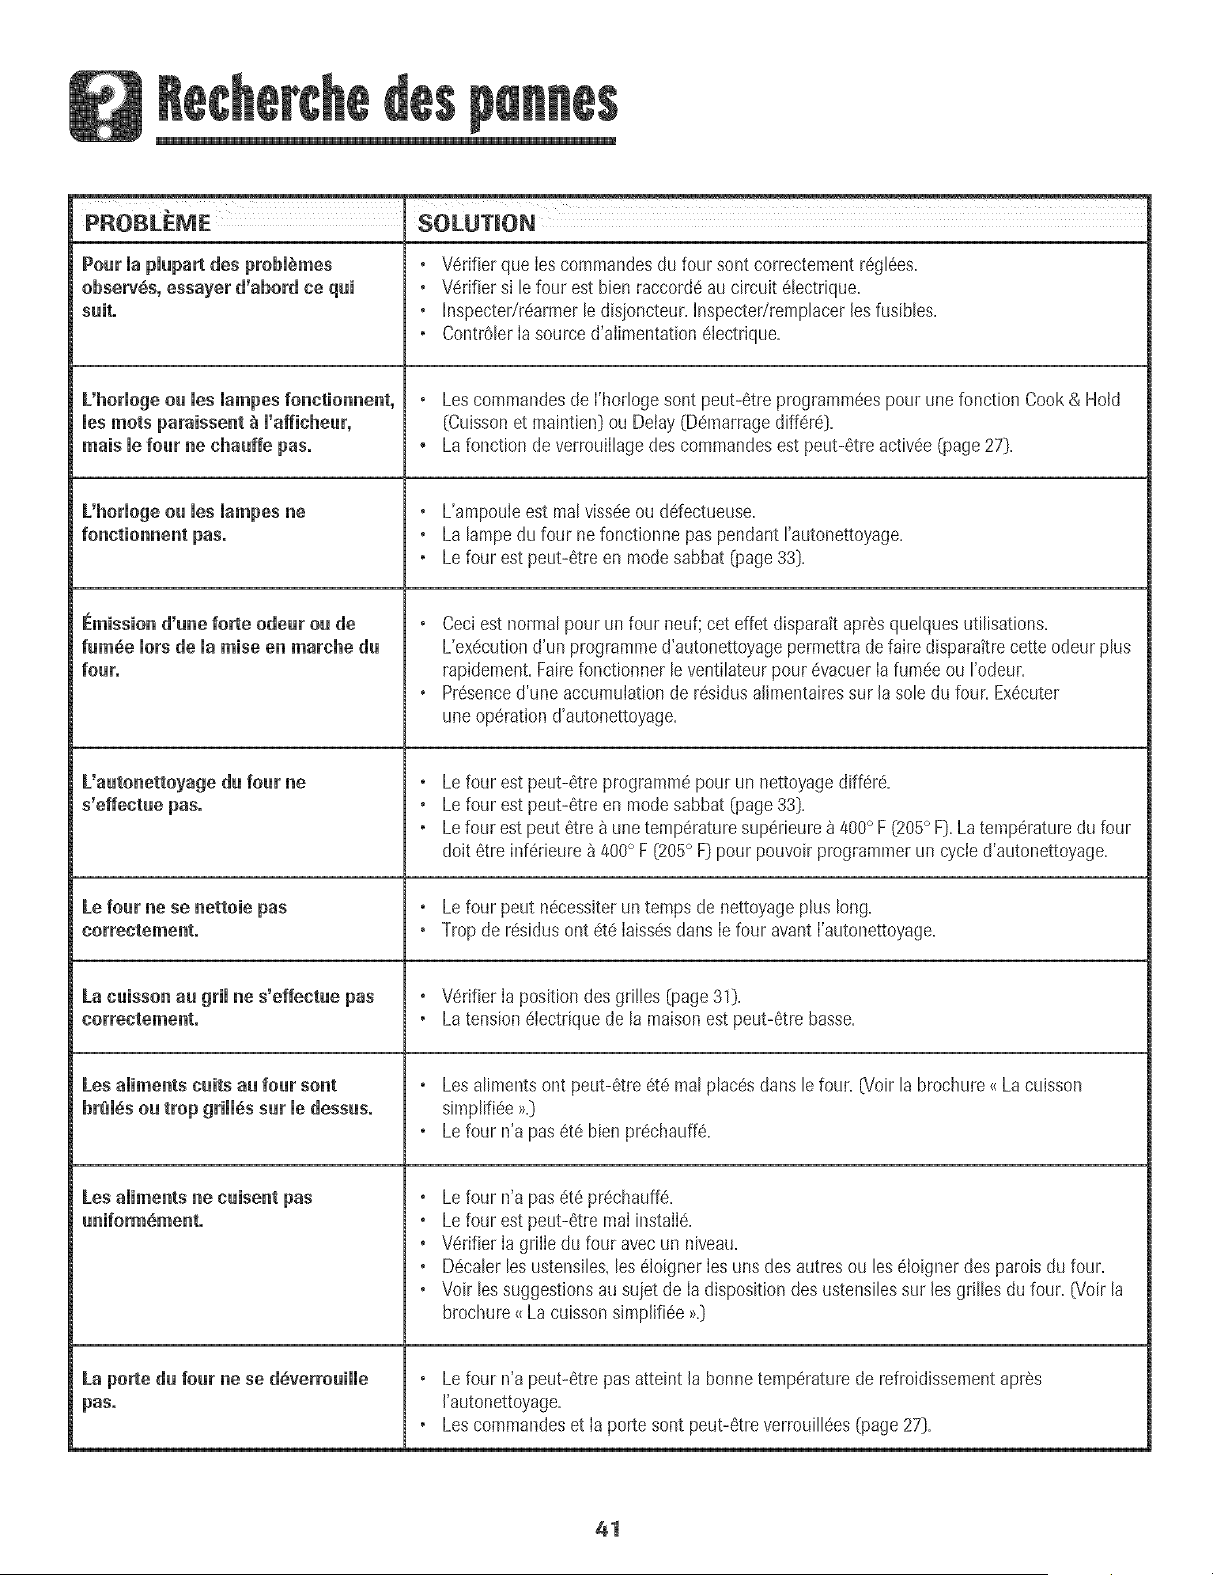
PROBLEME SOLUTION
Pourmapmpa desprobm mes
observes, essayer d'abord ce qui
suiL
L'hormogeou mesmampesfonctionnent,
mesroots paraissent _ m'afficheur,
mais mefour ne chauffe pas°
L'horiogeou ies iampes ne
Emission d'une forte odeur ou de
fm6e morsdemaraise en marche du
four.
L'autonettoyage du four ne
s'effectue pas.
Le four ne se nettoie pas
correctement,
La cuisson au grimne s'effectue pas
correctement°
Les amimentscults au four sont
brim,sou trop gHH6ssur medessus.
Les aliments ne cuisent pas
uniform_ment.
La porte du four ne se d_verrouiiie
pas°
o V6rifier que Ies commandesdu four sontcorrectementr6glaes.
o V6rifier si lefour est bien raccord6au circuit 61ectrique.
o hlspecter/r6armerle disioncteur,hlspecter/remplacerlesfusibles.
• Contr01erIa source d'aiimentation6iectrique.
o Lescommandesde I'horlogesont peut-6tre programm6espour une fonction Cook & Hold
(Cuissonet maintien] ou Delay (Do-narragediff6r6].
, Lafonction de verrouillagedes commandesest peut-6tre activ6e(page27].
o L'ampouleest real viss(!eou ddectueuse.
o La lampedu four ne fonctionne pas pendant rautonettoyage.
• Lefour est peut-6tre en modesabbat (page33].
o Ceci est normalpour un four neuf;cet effet disparak apr6squelquesutilisations.
L'ex_cutiond'un programmed'autonettoyagepermettrade faire disparakrecette odeurplus
rapidement.Fairefonctionner leventilateurpour 6vacuer Iafum6eou rodeur.
o Pr6senced'une accumulationde r6sidusalimentairessur la sole du four. Ex6cuter
uneop6ration d'autonettoyage.
o Le four est peut-6treprogrammepour un nettoyagediffere.
o Le four est peut-8treen modesabbat (page33].
• Lefour est peut 8tre _ une temperaturesuperieure8 400° F (205° F].La temperaturedu four
dolt 6tre inf_rieure_ 400° F [205° F] pour pouvoirprogrammerun cycled'autonettoyage.
o Le four peut nScessKerun temps de nettoyageplus long.
• Trop de residus ont _te Iaiss_sdarts Iefour avantI'autonettoya%
o V_rifier Ia position desgrilles (page31).
• Latension 6lectriquede la maison estpeut-Stre basse.
o Lesaliments ont peut-Stre _t_ realplacesdans le four. (Voir la brochure<_Lacuisson
simpli%e >_.]
o Le four n'a pas6t_ bienpr_chauff_.
o Le four n'a pas6t_ pr#chauff#.
o Le four est peut-6trereal installS.
o Wrifier Ia grille du four avecun niveau.
o D#caler lesustensiles,les _IoignerIesuns des autresou lesOoigner des patois du four.
o Voir lessuggestionsau suiet de Ia dispositiondes ustensilessur les grilles dufour. (Voir la
brochure<_La cuissonsimplifi6e>>.]
o Le four n'a peut-#tre pas atteint la bonne temperature de refroidissement apr6s
I'autonettoyage.
• Les commandes et Ia porte sont peut-#tre verrouill#es (page 27].
41
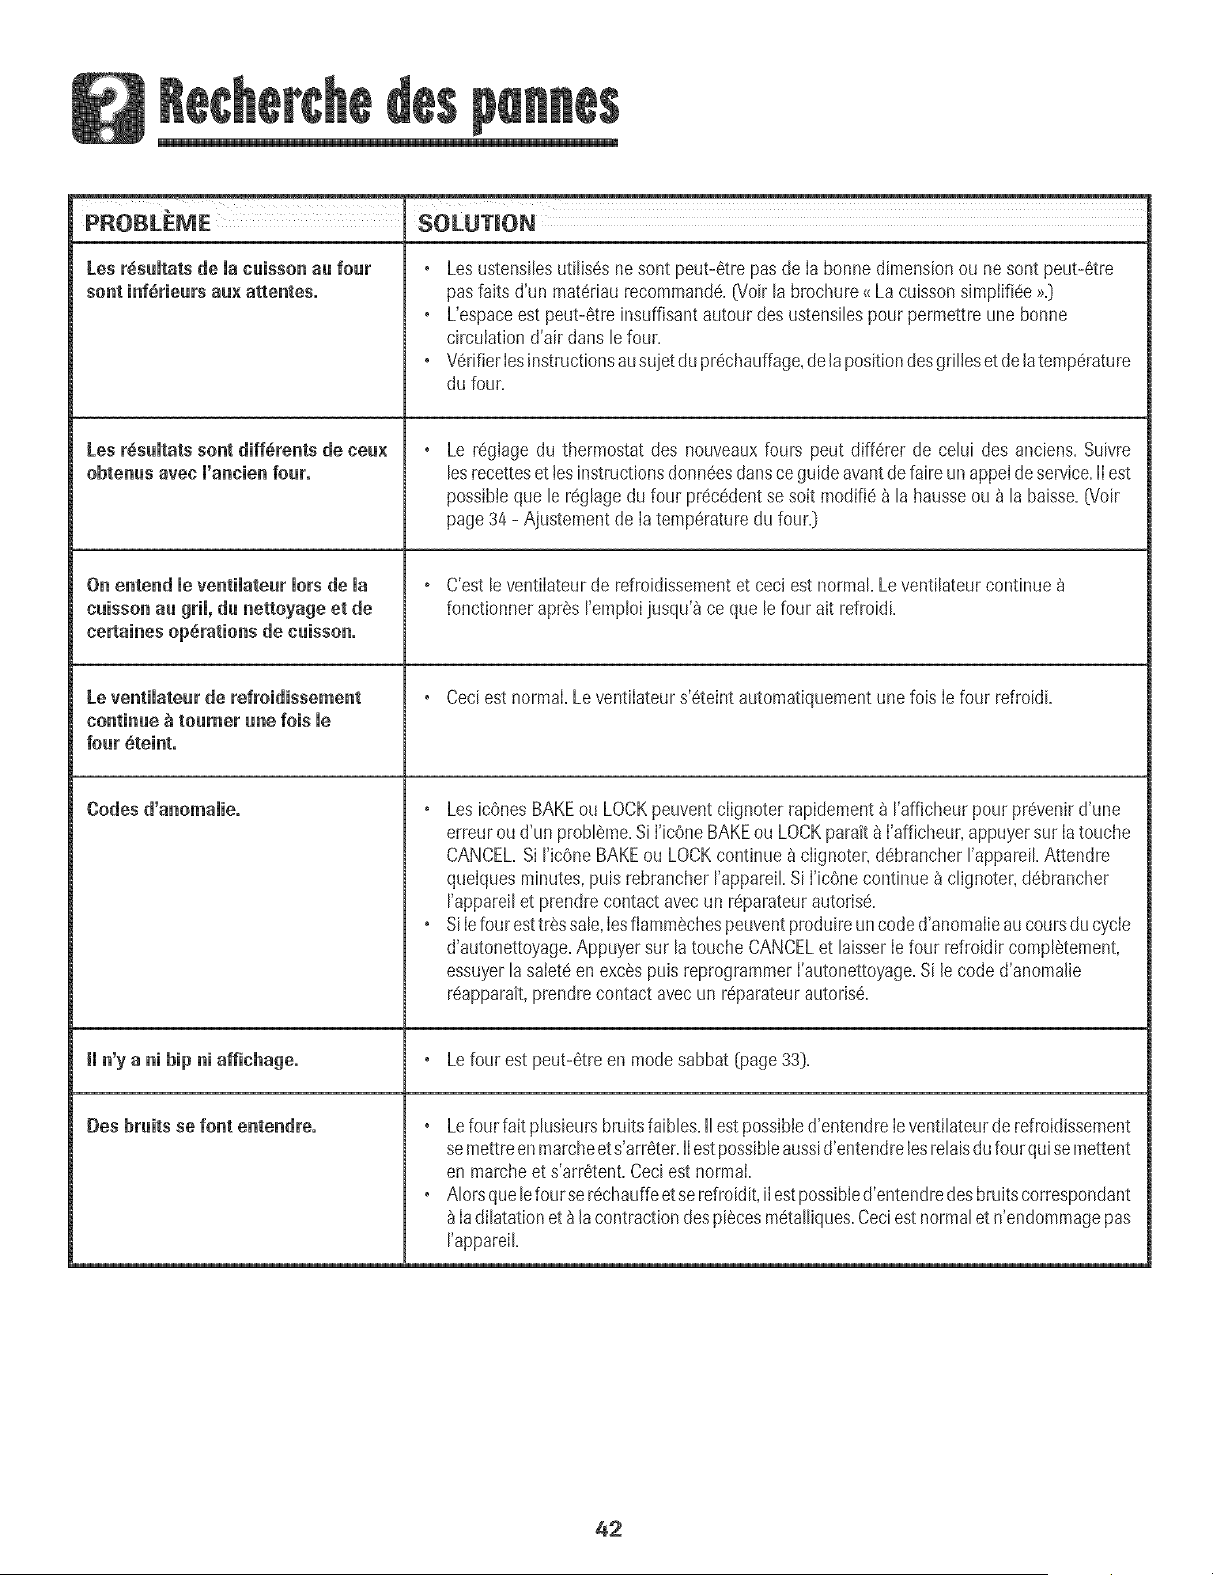
PROBLEME SOLUTION
Lee r_sultats de Jacuisson au four
sent inf(_rieurs au× attentes.
Les r_sultats sent diff#.rents de neu×
obtenus avert l'annien four.
On entend meventimateurmorede ma
nuisson au grim,du nettoyage et de
nertaines operations de cuisson.
Le ventimateur de refroidissement
continue _ toumer une lois me
four _teint°
Codes d'anomalie°
Les ustensilesutilises ne sunt peut-etre pasde Ia bunne dimensionou ne sentpeut-etre
pas faits d'un materiaurecommande.G/oirla bruchure_<La cuissunsimpiifiee>>.]
L'espaceest peut-etre insuffisantautour des ustensilespour permettre une bonne
circulatiun d'air dane le four.
• Wrifier Iesinstructionsausujetdu prechauffage,dela positimldesgdlIeset de latemperature
du four.
Le regIage du thermostat des nuuveauxfuurs peut differer de celui des anciens. Suivre
lesrecetteset teeinstructionsdonneesdansce guide avantdefaire un appeIdeservice,lI est
possibieque le reglage du four precedentse suit modi% _ la hausseou _ la baisse.[Voir
page34 - Ajustement de Ia temperaturedu fouQ
* C'estle ventilateurde refruidissementet cecJestnormal Leventilateurcontinue
fonctiunneraprSsremploi jusqu'_ ce que le four ait refruidi.
Ceciest normal.Le ventilateurs'eteint automatiquementunelois Ie four refroidi.
Leeic6nes BAKEuu LOCKpeuventclignuter rapidement_ I'afficheur pour prevenird'une
erreuruu d'un probleme.Si I'icOneBAKEuu LOCKparait 8 I'afficheur,appuyersur Iatouche
CANCEL.Si ricene BAKEou LOCKcontinue _ clignoter,debrancherI'appareiLAttendre
quelquesminutes,puis rebrancherI'appareiLSiI'icene continue_ clignuter,debrancher
I'appareilet prendrecontact avecun reparateurautorise.
• SiIefourest tr8ssale,IesflammSchespeuventpruduireun code d'anomalieauco_Jrsdu cycle
d'autonettoyage.Appuyersur latouche CANCELet hisser Ie four refroidir completement,
essuyerla saiete enexcSspuis reprogrammerI'autunettoya% Si le code d'anomalie
reapparait,prendrecontact avecun reparateurautorJse.
H n'y u ni hip ni uffichage. Le four est peut-etre en modesabbat [page33].
Des bruits se font entendre.
Lefour fait plusieumbruitsfaibles.II estpossibled'entendreIeventilateurde refmidissement
semettreenmarcheet s'arreter.IIest possibleaussid'entendre lesrelaisdufourquise mettent
en marcheet s'arretent.Ceciest normal.
• AIorsquelefourse rechauffeetse refruidit,iI estpossibled'entendredesbruitscorrespundant
Iadilatationet _ lacontractiondespiecesmetalliques.Ceciest normalet n'endommagepas
rappareiL
42
Garantie cempmbte d'une ann6e - Pibces at
main-d'_uvre
DurantBee p#riode d'ue (1) ae a comp[erde la date de
I'achatinitial auuetaiLtoute piece qui se revelerat
ddectueuse dartsdes conditions normabsd'usage
meeagerserar@ar@ ou rempla@egratuitement.
Garanties limit6es = Pibces seulement
De la deu×i_me _ la eiequibme aee_e - A corepter de
la date de I'achatinitial au detail bs pieces de la liste ci-
dessousqul se revebraient ddectueuses dans des
conditions normabsd'usagemenagersemn[ r@areesou
remp_aceesgratuttement(piecesseubment}; le
propdetairedevraassumertous lesautres frais,y compns
les fraisde main-d'ceuvre,de dep_acementet de trans-
port.
o Comrnaedes_mectroeiques
, Elemeets ehadffaets _leetriqdes: Elementsdegni et
de cuissonaufour sur appareilsde cuissonelectriques.
Residents canadiens
LesgarantLescbdessusCduvren[un appareil installeau
Canada.seubment s'il a ate agree par bs agencesdetest
habilitees(veriticationde la ccnformite _ une norme
nattonaledu Canada),saul si I'appareila ete introdultau
Ca tada8 !'occasiond'un changememHeresidencedes
Ctats_Unisvers le Canada.
Garantie limitee hers des Etats-Unis et du
Canada - Pi_ces seulement
Pendantdeux [2}ans a compeerHela date de I'achat
initial audetail, toute p_,cequ_se reveleraitddectueuse
dartsdesconditions normalesd'usagemenagersera
repareeou remplac@ gratuitement{pieceseuLemenu;le
predrietairedevraassumer_ousies autresfrais,y compns
les frab de main-d'ceuvre,de deplacementet de trans-
port.
Lesgaranties@_eifiquesfolmul@s ci-dessus_on_les
SEULESque le fabricantaccorde.CettEgarantievous
centaredes droitsjue'diquessp#cifiqueset vouspouvez
edalementjouird'autresdroits,vdriablesd'un #tdt _I_3utre.
Ne sent pas converts par ces
gara ties ."
1= Les dommagesou derangementsdus _:
a=Mise en service,livraisonou entretien effectuesincorrectement=
b=Touter@aration,modification,alteration et tout reglagenon autorises
par Iefabricant ou par un prestatairedeserviceapr_s-venteagree=
c=Accidents,mauvaiseutilisationou usageabusif ou deraisonnable=
d=Alimentationebctrique (tension,intensitd} incorrecte=
e. Reglageincorrectd'une commande=
2= Les garantbs ne peuvent@e honor@ssi les numerosdeserie d'odgine
ont ete enleves,modifiesoune sentpas facilement lisibles=
3. Ampoubs.
4. Appareilsachet@aux fins d'usagecommercialou industriel.
5. Les frais de visite d'un prestatairede serviceou de serviceapr@-vente
encouruspour bs raisonssuivantes:
a. Correctiond'erreursde raiseen service.
b. Initiationde I'utilisateur _ I'emploide I'appareiL
c. Transportde I'appareiiaux Iocauxdu prestatairede service.
6. Dommagessecondairesou indirectssubis par toute personnesuite au
non-respect deces garanties.Certainsetats ne permettent pas
I'exclusionou la limitation des dommagessecondairesou indirects;par
consequentles limitationsou exclusionsci-dessuspeuvent nepas
s'appliquer_ votre cas.
Si 'i terve tio r parate r
est cessaire
° ContacterIe detaillantchez qui rappareila ete achet& ou contacter
MaytagServicessMservice_ la clienteiede Maytag au 1-800-688-9900aux
E=-U=ou 1-800-¢88-2002au Canada,pour obtenir les coordonn@sd'une
agencede serviceagre@.
° VeilIer_ conserverla facture d'achat pouriustifier de la vaiidite de la
garantie.Pourd'autres informationsen ce qui concerne Iesresponsabilit@
du proprietaire_ I'egarddu servicesousgarantie,voir le texte de la
GARANTiE
Si b @taillant ou ['agencede serviceapres-ventene peut r@oudre[e
prdbleme,ecrire _ MaytagServicessM,attention CAIR:" Center,Re. Box
2370,Clevehnd,TN37320-2370ou te!@honerau 1-800-688-9900 aux
E.-U.ou 1-800-688-2002 au Canada.
° Lesguides de J'utiJisateur,Iesmanueisde serviceet Ies renseignements
des piecessent disponibbs aupresde MaytagServices sM,servicea Ja
clienteb de Maytag.
_e_arq_es :
Lots de tout contactconcemantun prob[eme,fournir ['information
suivante:
a. Nom,adresseet numerode tei@hone du client:
b. Numerode mo@b et numerode serie de rappareil;
c. Noraet adressedu detailIant oude I'agencede service;
d. Descriptionclaire du problemeobserve;
e. Preuved'achat (facturede vent@.
43
]M_&Y[&G
Cocinando en el Homo ....... 48-59
Horneado
Homeado por Convection
Cook&Hold' (Codnar3 MantenerCa[iente]
'Delay' (D[ferlO
'Broiling' (Asar a [a Parrllla)
'Keep Warm' (Mantener CaHentej
'FavorKe' (Favofito]
Parrillas del Homo
Cuidado y Limpieza ............. 80-62
Homo Autolhnpiante
Procedhnientos de Lhnpieza
Garantia y Servicio .................... 67
InstaladoRPerfavor dejeestaguia junto conel electrodomCstico.
Consumidar: Per favor lea y consewe estagula para referencta
futura. Conseweei recibodecomprayio elcnequecanceBdocome
pnJebade compra.
N0merode Modelu
NOmero de Serb
Fechade Compra
Sitiene preguntas,Hamea:
MaytagAppliancesSalesCompany
1-800-688-9900USA
1-800-688-2002Canada
{Lunesa Viemes,8:00a.m.a 8:00p.m.Heradel Este}
Internet:http:/!w\_Jv.may[ag.com
En nues_rocontinue af_n de mejorar la calidad) rendimiento de
nuea[rosebctrodom@tbos, puedequesea necesariomodificarel
elec[rouom@ticosin actuaJizarestagu[a.
Para infermaci6nsoflre servicie, vet pbgina 67.
INSTRUCCIONES
IM PORTANTES SOBRE
SEG U R i DAD
Las advertencias e instrucciones importantes sabre seguridad
qua aparecen en esta guia no estdn destinadas a cubrir todas
Bs posibbs circunstancias y situaciones que puedan ocurrir.
Se debe ejercer sentido comuJn,precauciCn y cuidado cuando
instab, realice mantenimiento o haga funcionar el artefacto.
Siempre pCngase en contacto con su distribuidor, agente de
servicio o fabricante si surgen probbmas o situaciones qua
usted no comprenda.
Reconozca Jos simbo[os, advertencias,
etiquetas de seguridad
PODRIAN causal lesion personal glare o mortal,
ATENCION - Peligros o pr_cticas no seguras qua PODRJAN
Lea y siga todas las instrucciones antes de usar este
eleetrodom_stico para evitar el riesgo potencial de incendio,
cheque el@trice, bsiCn personal o da_ioal ebctrodomCstico
come resultado de su use inapropiado. Utilice este
ebctrodomdstico sohmente para el propCsito qua ha side
destinado segLin se describe en esta guia.
Para asegurar funcionamiente correcto y seguro: El
ebctrodomestico debeser instaBdo debidamente y puesto a
tierra per un t@nico cdificado. No intente ajustar, reparar,
prestar servicio o reemplazar ninguna pieza de este producto
a manes qua sea espedficamente recomendado en esta guia.
Todas Bs reparaciones deben ser realizadas per un t@nico
calificado.
Siempre desenchufe el electrodomCstico antes de efectuar
alguna reparaciCn.
Pata Evitar Da e a Causa de
lncendie e Hume
, AseguJresede qua todos los materiabs de empaque hayan
side quitados del homo antes de ponerlo en
funcionamiento.
• No coloque materiales combustibles cerca del
electrodom6stico. No se deben guardar en el homo
materiales infiamables.
Muchos pl_sticos son afectados par el calor. Mantenga los
plasticos alejados de las piezas del electrodom6stico que se
pueden entibiar o calentar.
Para evitar incendios de grasa, no permita acumulaci6n de
grasa de cocinar o de otros materiales inflamables en el
homo o en su cercania.
En Case de lncendie
, Use un extinguidor con producto quimico seco o del tipo
espuma o bicarbonate de soda para apagar ei incendio o
ias llamas. Nunca use agua en un incendio de grasa.
1, Apague el homo para evitar que la llama se disperse,
2. NUNCA levante o mueva una sart6n en llamas.
3, Apague el fuego o la llama cerrando la puerta del homo,
Seguridad para Jes Ni es
armarios que est_n situados arriba del electrodomestico.
para aicanzar losart[cuios pueden lesiona[se gravemente,
45

, NUNCA deje a los ni_ios solos o sin supeMsi6n cuando el
homo estd en uso o cuando estd cdiente, No se debe nunca
permitir que los ni_os se sienten o se paren en ninguna
pieza del electrodom6stico pues se pueden lesionar o
quemar,
• Se les debe ensdiar a los ni_ios que el electrodomdstico y
los utensilios que est_n en dl pueden estar cdientes, Deje
enfriar los utensflios calientes en un lugar seguro, fuera del
alcance de los ni_os, Se les debe ensdiar a los ni_ios que
un electrodomdstico no es un juguete y que no deben jugar
con los controles u otras piezas del artefacto,
lnstrucciones Generates
NUNCA use un electrodomdst!co como un pelda_o para
a!canzar los armados superiores, El USOincorrecto de las
e!ectrodomdstico se vuelque, se rompa la puerta yse
causen lesiones graves,
• Para evitar posibies riesgos para ei usuario y da_io ai
electrodomestico, no use este producto como una estufa
para calentar o entibiar una habitaci6n, Adem_s no use el
homo como un iugar para guardar aiimentos o utensiiios de
cocina,
, No obstruya ia circuiaci6n dei aire bioqueando ei respiradero
dei homo,
, NO TOQUE LOS ELEMENTOSCALEF,ACTORESNI LAS
SUPERFICIESINTERIORESDEL HORNO, Los eiementos
calefactores pueden estar calientes aOncuando su color sea
obscuro, Las superficies interiores de cuaiquier homo se
calientan Io suficiente como para causar quemaduras,
Durante y despu6s dei uso, no toque ni permita que ias ropas
u otros materiales inflamables entrenen contacto con los
eiementos caiefactores o ias superficies interiores dei homo
hasta que no se hayan enfriado, Otras superficies dei
electrodomestico pueden estar Io suficientemente calientes
para causar quemaduras - entre estas superficies est_n las
aberturas dei respiradero dei homo y ias superficies cerca de
estas aberturas, ias puertas dei homo y ias ventanas de ias
puertas dei homo,
• No toque un foco caiiente dei homo con un paso hu]medo
pues ei foco se puede quebrar, Si ei foco se quiebra,
desenchufe el electrodom6stico antes de sacar el foco para
evitar sufrir un choque eidctrico,
Se debe oir el ruido de un ventflador cuando el homo est6
en funcionamiento, Si usted no oye el ruido del ventflador,
Ilame a un t6cnico autorizado,
NUNCA use papel de duminio para cubrir las parrfllas del
homo ni el panel inferior del homo, El uso incorrecto puede
resultar en un riesgo de choque eldctrico, incendio o da_io
al electrodom6stico, Use papel de duminio solamente
como se indica en esta guia,
Seguridad amCocinar
• Nunca caliente un contenedor de alimento cerrado en el
homo, La acumulaci6n de presi6n puede reventar el
contenedor causando una lesi6n personal grave o da_o al
electrodom6stico,
• Use tomaollas secos y gruesos, Los tomaollas humedos
pueden causar quemaduras por vapor, No se deben usar
toallas de secar los platos ni otros sustitutos en vez de los
tomaollas porque ellos pueden pasar sobre los elementos
calientes y prenderse fuego o pueden quedar atrapados en
las piezas del electrodomdstico,
o Usevestimentas apropiadas, Las ropas sueltas o ropas con
mangas largas sueltas no se deben usar cuando se est,1
cocinando, La ropa se puede prender fuego y causar
quemaduras si entra en contacto con los elementos
cdefactores,
Siempre coloque las parrfllas del homo en las posiciones
deseadas cuando el homo est6 frio, Deslice la parrflla del
homo hacia afuera para agregar o retirar alimento usando
tomaollas secos y gruesos, Siempre evite colocar o retirar
alimento del homo sin sacar la parrflla hacia afuera, Si una
parrflla debe ser movida cuando este caliente, use un
tomaollas seco, No deje que el tomaolla entre en contacto
con el elemento caliente del homo,
, Tenga cuidado cuando abra la puerta del homo, Primero
deje que sdga el aire o vapor cdiente antes de sacar o
volver a colocar el dimento en el homo,
ADVERTENCIA SOBRE ALIMENTOS PREPARADOS:
Siga las instrucciones del fabricante del alimento, Si un
contenedor de dimento congelado de pldstico y/o su tapa
se deform& comba o de otra manera se da_a durante la
cocci6n, inmediatamente descarte el dimento y su
contenedor, Elalimento puede estar contaminado,
46

° No permita que e[ pape[ de a[uminio o [a sonda de [a came
toque el elemento calefactor,
• Siempre apague todos los controles cuando haya terminado
de cocinar,
Seguridad sobre eJ Uso de
, Siga las instrucciones del fabricante cuando use bolsas para
cocinar en el homo,
, Se ha comprobado el rendimiento y funcionamiento seguro
de este electrodom6stico usando utensilios de cocina
tradicionales, No use ningLin dispositivo o accesorio que no
haya sido espedficamente recomendado en esta guia, No
use sistemas de convecci6n agregables a hornos, El uso de
dispositivos o accesorios que no sean expresamente
recomendados en esta guia puede crear peligros graves de
seguridad, afectar el rendimiento y reducir la vida 0til de los
componentes de este electrodom6stico,
, Solamente ciertos tipos de utensilios de vidrio,
vidrio/ceramico, ceramica, de gres u otros utensilios de vidrio
son convenientes para su uso en el homo sin quebrarse
debido al repentino cambio de temperatura, Siga las
instrucciones del fabricante del utensilio cuando use vidrio,
Seguridad en maLimpieza
• Apague todos los controles y espere que se enfrien las
piezas del electrodom6stico antes de tocarlas o limpiarlas,
Limpie con cuidado, Tenga cuidado para evitar quemaduras
de vapor si usa una esponja o un paffo mojado para limpiar
los derrames en una superficie caliente, Algunos
limpiadores pueden producir vapores nocivos cuando se
aplican a una superficie caliente,
, Limpie solamente las piezas indicadas en esta guia,
Homo AutoJimpiante
autol!mp!eza.
No limpie la junta de la puerta, Lajunta de la puerta es
esencial para obtener un buen sello, Se debe tenet cuidado
de no frotar, daffar ni mover la junta,
No use limpiadores de homo ni forros de homo de ninguJn
tipo alrededor ni en ninguna parte del homo autolimpiante,
Antes del ciclo de autolimpieza del homo, retire la asadera
las parrillas del homo y otros utensilios y limpie cualquier
derrame para evitar humo excesivo o Ilamaradas,
Aviso y Advertencia
l portante Sobre Seguridad
La Propuesta 65 de la Ley de 1986 del Estado de California
Sobre Seguridad y Contaminaci6n del Agua Potable [California
Safe Drinking Water and Toxic Enforcement Act of 1986] exige
que el Gobernador de California publique una lista de las
sustancias que segun el estado de California causan c_incer o
da_o al sistema reproductivo y exige que las empresas
adviertan a sus clientes sobre la exposici6n potencial a tales
sustancias,
Se advierte a los usuarios de este electrodomestico que
cuando el homo esta funcionando en el ciclo de autolimpieza,
puede haber exposici6n de bajo nivel a algunas de las
sustancias indicadas en la lista, incluyendo mon6xido de
carbono, La exposici6n a estas sustancias puede set reducida
a un minimo ventilando el homo al exterior en forma
adecuada, abriendo las ventanas y/o la puerta en la habitaci6n
en donde est,1ubicado el electrodomestico durante el ciclo de
auto[impieza,
AVISO mMPORTANTE RESPECTO A LOS PAJAROS
DOMESTICOS: Nunca mantenga los p_ijarosen la cocina o
en las habitaciones donde puedan Ilegar los humos de la
cocina, Los p_jaros tienen un sistema respiratorio muy
sensitivo, Los humos producidos durante el ciclo de
autolimpieza del homo pueden set periudiciales o mortales
para los pdjaros, Los humos que despide el aceite de cocina
recalentado, la grasa, margarina y los utensilios
antiadherentes recalentados pueden tambidn set periudiciales,
Nota: Parafuncionamiento de los Hornos de Microondas
[modelos selectos], consulte la guia de uso y cuidado
incluida con el homo de microondas,
Conserve estas instrucciones para referencia futura
47
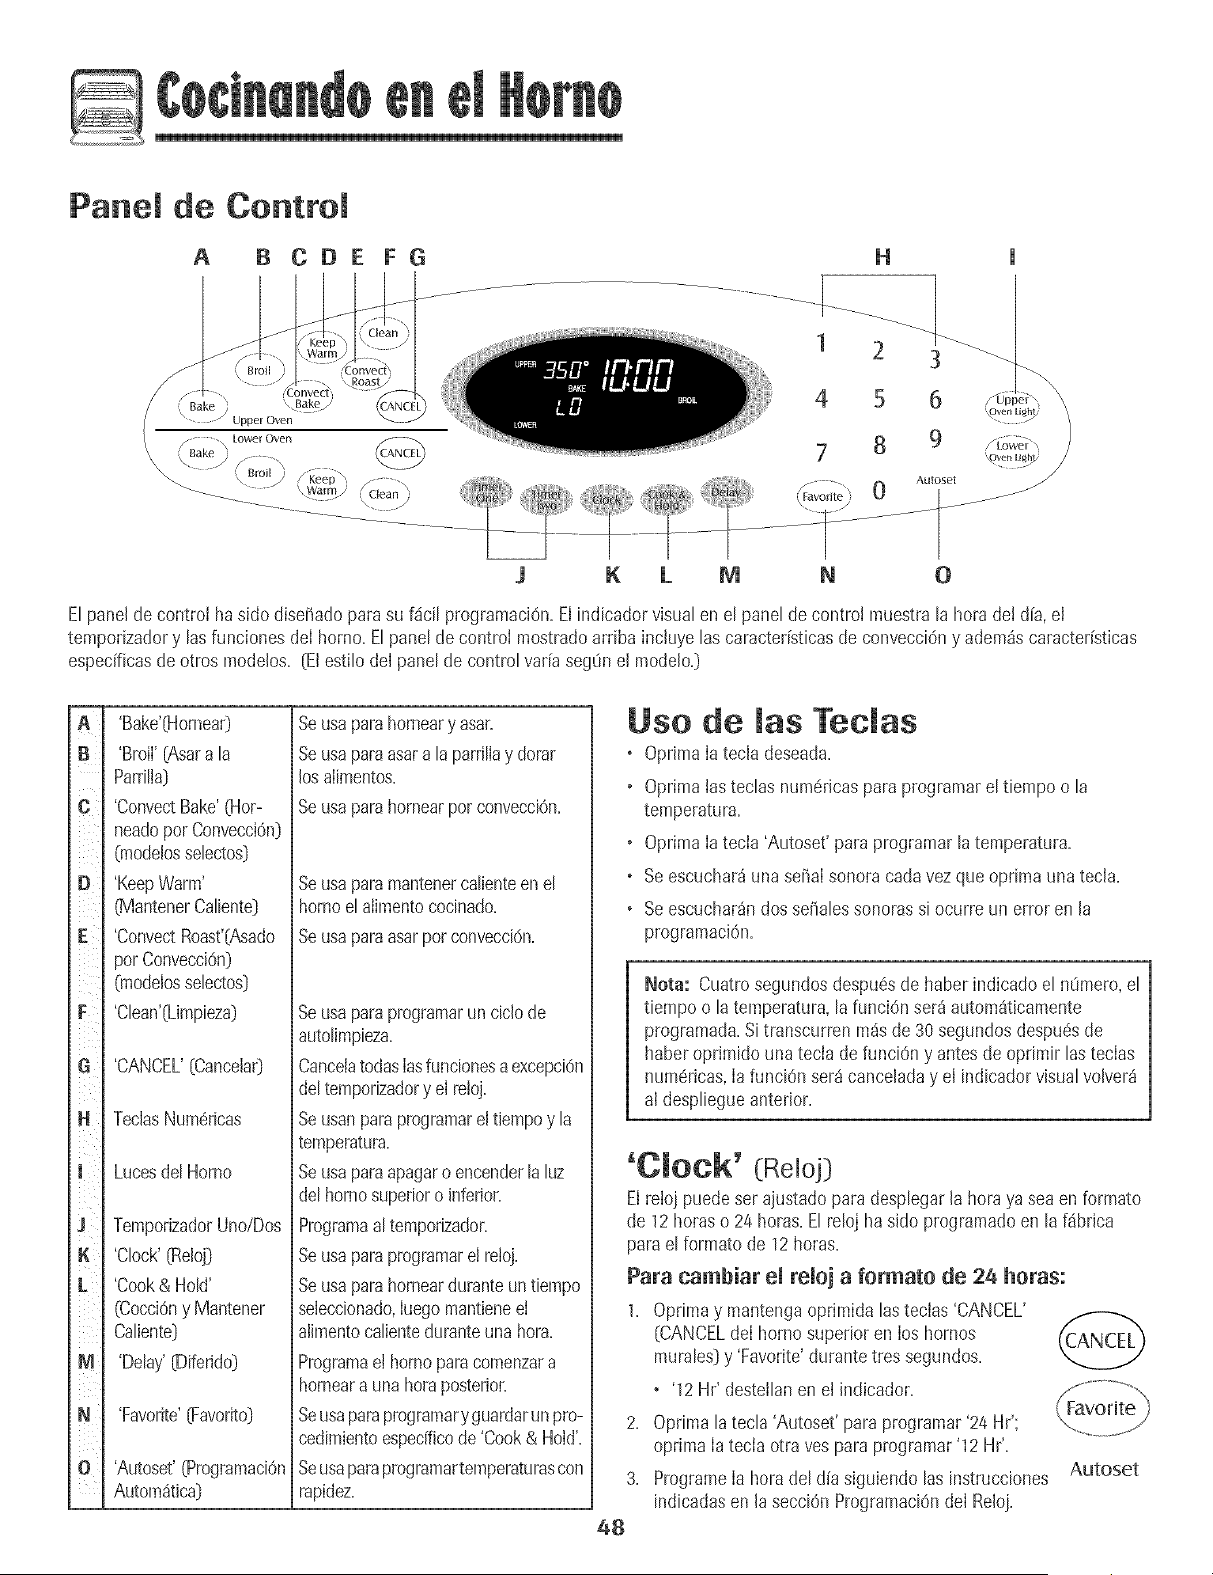
D
Panel de Control
A B CDE FG
H
1 2 3
4 5 6
7 8 9
Auloset
K L M N 0
Elpane[de control ha side diseffadoparasu f4ci[ programaciOn.El indicador visualen el panel de control muestra[a hera dei d[a,ei
tempodzadory [asfunciones de[ homo.E[pane[de control mostradoardba inc[uye[ascaracteffsticasde convecciOny adem_scaracteristicas
especfficasde otros mode[os. [El esti[ode[ panelde centre[ vaffaseg0n el mode[o.)
B
C
E
F
l
K
L
M
N
'Bake'04ornear)
'Broil'(Asara [a
Parri[ia}
'ConvectBake'(Hor-
neadoper Convecci6n]
(modelosseIectos}
'KeepWarm'
_![antenerCaIiente]
'ConvectRoast'[Asado
perConvecciOn)
(rnodelosseIectos}
'C[ean'(Limpieza)
'CANCEL' {Cancela0
TecJasNum6ricas
Lucesdel Horno
TemporizadorUno/Dos
'Clock'(Reloj]
'Cook& Hold'
(CocciOny Mantener
Caliente)
'Delay'(Diferido]
'Favorite'[Favorite)
'Autoset'(ProgramaciOn
Autom4tica)
Seusaparahomeary asar+
Seusaparaasara [aparriliay dorar
losaiimentos+
Seusaparahomearper convecci6n+
Se usa para mantener ca[iente en el
homo el aiimento cocinado+
Se usa para asar per conveccidn+
Seusaparaprogramarun cic[ode
autolimpieza.
Canceiatodaslasfuncionesaexcepci6n
de[temporizadory el reloj.
Seusanparaprogramarel tiempoy [a
temperatura.
Seusaparaapagaroencender [a[uz
de[homosuperioro inferior.
Programaa[temporizador.
Seusaparaprogramarel reloj.
Seusaparahomearduranteun tiempo
seieccionado,luegomantieneel
alimentocaIienteduranteunahera.
Programael homoparacomenzara
horneara una heraposterior.
Seusaparaprogramaryguardarun pro-
cedimientoespecfficode 'Cook& Hold'.
Seusaparaprogramartemperaturascon
rapidez.
Use de [as Teclas
o Oprima[a tecia deseada.
o Optima[as tec[asnumdncaspara programarel tiempo o [a
temperatura+
o Oprima[a tecia 'Autoset'paraprogramar[a temperatura.
o Seescuchar4una seffa[sonoracarlavez que oprima unatec[a.
o Seescuchar_ndossefialessonoras si ocurre un error en [a
programaciOn.
Nora: Cuatrosegundosdespu6sde haber indicadoel nOmero,el
tiempo o [atemperatura,[a funci6nser_iautom4ticamente
programada.Si transcurren m4sde 30 segundosdespu6sde
haberoprimido una tecia de funciOny antes de oprimir [astecias
num6ricas,[afunciOnser4canceladay el indicadorvisual vo[ver4
a[ despiiegueanterior.
'O[OCk' (Reioj)
Elreioj puede set ajustadopara despiegar[a hera ya sea en formate
de 12betas o 24 horas+Elreloj ha side programatic en [a f4brica
parae[ formate de 12 horas+
Para cambiar e[ reioj a formate de 24 betas:
1+ Oprimay mantengaoprimida [astecias 'CANCEL'
(CANCELde[ borne superioren los homes
muraIes]y 'Favorite'durantetres segundos+
+ '12 Hr' desteiIanen el indicador+
2+ Optima [atec[a 'Autoset' para programar'24 Hr';
optima [a tecia otra yespara programar'12 Hr'.
3+ Programe[a herade[ dia siguiendo [asinstrucciones
indicadasen [asecci6n ProgramaciOnde[ Reloj+
48
Autoset
Programaci6n demRemoj:
1. Opdmala tecia 'Clock'.
• Lahora del d[a desteilanen eI indicador.
2. Optimalasteclas num6ricasapropiadasparaprogramarla hora
deldFa.
• Losdos puntoscontin0andesteIhndo.
3. OpdmaIatecla 'Clock' nuevamenteo esperecuatro segundos.
• Losdos puntos permanecerin iIuminados.
Cuandose conectaenerg[ae!6ctricaaI hornoo despuesde una
interrupci6nde la energFaet6ctrica,Ia 01t[mahoradel reloj previaa
la interrupci6ndestelIari en el indicador.
Paradesplegarla hora deI dia cuando el indicadorest6 mostrando
otra funci6n de tiempo, optima latecla 'Clock'.
La hora deI reloj no puedeset cambiadacuandoel horno ha sido
programatic para'Delaycook' o 'clean'o 'Cook& HoW.
Para cancemar emdespmiegue demremoj:
Si nodeseaque el indicadorvisual muestre lahora del alia:
Oprimay mantengaoprimida lasteclas 'CANCEL'y
'Clock'durante tres segundos.Lahora del dFa
desaparecer_del indicador.
Cuandosecance adesp eguere oj,opr ma
tecla 'Clock'paradesplegarbrevementela horadeI dFa.
Cuandose cancelael desplieguedeJreloj,despu6sde 15 minutos,el
control del homo pasar4a modo 'Standby' paraahorrar energFa.El
indicadorvisualquedar4 en blancoy Ia IuzdeJhomo no funcionar&
Para"activar" el control y cancelar el modo 'Standby',optima
cualquiertecla. Seescuchar4ndosseBalessonoras.
Para restaurar el despmiegue demremoj:
Oprimay mantengaoprimida Iasteclas 'CANCEL'y 'Clock' durante
tres segundos.Lahora deJdFareaparecer4del indicador.
'Ti_er' (Tempodzador]
E!temporizadorpuedeser programatic de un minuto [00:01[}hasta
99 horasy 59segundos [99:59].
Eltemporizadorpuede set usado independientementedecualquier
otra actividaddel homo.Adem4s puedeser programadocuando otra
funci6n del homo est@en actividad.
Eltemporizadorno controla el homo.Solamentecontrola una seSal
sonora,
Para programar emtemporizador:
1, Oprima latecla 'Timer'.
• Enel indicadorvisualdesteiIar_00:00y eI [cono 'TIMER'.
2. Oprima Iasteclas numOricasapropiadashasta queel tiempo
correctoaparezcaen el indicadorvisual
• Losdos puntosy el icono 'TIMER'continuarandesteJlando.
3. Oprima nuevamenteIa tecla 'Timer'o esperecuatro segundos.
• Losdos puntos dejan dedestellar y el tiempo comienzala
cuenta regresiva.
• El 01timominutode la cuenta regresivadeltemporizadorse
desplegar_en segundos.
4. AI final del tiempo programado,se escuchar_unaseBalsonora
largay el [cono 'End' (Fin}se desplegar4en el indicadorvisuak
5. Oprima la tecla 'Timer'para quitar el indicador.
Para cancemar emtemporizador:
1. Oprimay mantengaoprimida la tecia'Timer'
durante tressegundos.
u 0
2. Optima la tecla 'Timer'y latecla '0' usandolas teclas num6ricas.
B oqueo de ruesContromes y de
Puerta dem Homo
Elteclado y Ia puertade! homo puedenser bloqueadospara
seguddad,Iimpiezao evitar el uso noautorizado.Lasteclas no
funcionancuando est4n bloqueadas.
Sise est4 usandouna funci6n del homo.eJcontrol y la puerta no
puedenser bloqueados.
La hora de! d[a continuar_nihminados en el indicadorcuando el
controly la puerta est_n blocueados.
Para bloquear:
1, Oprimay mantengaoprimidaslastecias 'CANCEL' t/¢CAklCH"'_
y 'Cook& HoW durantetres segundos,
, Enel indicadorvisual aparece'OFF'
, El [cono'LOCK'destella cuando la puertase esta
bloqueando.
Para desbJoquear:
Oprimay mantengaopdmidaslastecias 'CANCEL'y 'Cook & Hold'
durantetres segundos.El (cono'OFF'desaparecedel indicador
visual.
Nora: Lasteclasy Ia puerta deI homo no puede Noquearsesi la
temperaturadel horno es 400° F [205° C) o superior.
C6digos de Errores
'BAKE'y 'LOCK'puedendesteiJarr4pidamentepara adver_irieque
hay un error oun problem& Si'BAKE'y 'LOCK'continOan
destelIando,desconecteIa cordente e!Octricahaciae! artefacto.
Espereunos pocosminutosy vuelva a conectarIa corrienteelOctrica.
Si losdmbolos contin0andestellando,desconecteIa corriente
elOctricahacia el artefacto y lIamea un t0cnico de servicio
autorizado.
49

Para programar Homeado:
L Oprima h tecta 'Bake'+
o E[fcono'BAKE'deste[lar&
Autoset
o '000' destethr_en et indicador visual
2. Seteccioneta temperaturadeI horno.Optimata teda 'Autoset'
para350° F 075° C] o hs tecias num_ricasapropiadas.
o Carlavezque optima tatecla 'Autoset' la temperaturase
aumentar_en25° F 05° C].
o Latemperaturadel homo puede ser programadade 170°
a 550°,
3. Oprimala tecla 'Bake' nuevamenteo esperecuatro segundos.
o El[cono 'BAKE'dejar_de destellary se iluminar_ enel
indicadorvisual.
o El[cono 'PREHEAT'se iluminar_ enel indicadorvisual.
• Enet indicadorvisualse desplegar_100° (40°] o Iatempera-
tura real deI homo si es que essuperior a 100° F (40° C]. La
temperaturaaumentar_en incrementosde 5° F [3° C] hasta
Ilegara Iatemperatura programada.
4. Espereaque el homo se precalientedurante 8-15 minutos.
• Cuandoe! hornollega a latemperaturapregramadase
escuchar_unaseffal sonoraIarga.
• Latemperaturaprogramadase desplegaraen el indicador
visual
+ El[cono'PREHEAT'se apagar&
• Paravedficar[a temperaturaprogramadadurante e[
precalentamientodel horno,optima la tecla 'Bake'.
5. Coloqueel alimentoen el homo.
Notas sobre Homeado:
o Paracambiarla temperaturadel homo durantee[ pmcesode
cocci6n,oprimalatecla 'Bake',[uegooprima'Autoset'o las
teciasnum6ricasapropiadashastaque se despliegue[a
temperaturadeseada.
o Paracambiarla temperaturadel homo durante'Preheat',optima
dosveces[atecia 'Bake',luegooprima'Autoset'o lastecias
num6ricasapropiadashastaque sedesplieguela temperatura
deseada.
o S[oividaapagare[ horno,seapagaraautom_ticamentedespu6s
detranscurrir 12 horas.SideseadesactivarestacaracterBtica,
veala p_gina55.
o Parasugerenciasadicionalessobre horneadoy asado,consulte
el folleto"La CocinaF_cil".
50
6. Verifique el progresode la cocci6n cuando hayatranscurrido e!
tiempo minimo recomendado.ContinOeIa cocciOnsi es necesario.
7. A! t6rmino de Ia cocciOn,optima la tecla 'CANCEL'.
8. Retireel alimentodel horno.
Difecencias del homeado entre su homo
ant+guo y su homo nuevo
Esnormal observaralgunas diferenciasen el tiempo de horneadode
su homo antiguoy su hornonuevo+Vea "Ajustede laTemperaturadel
Homo" en [a p_gina57,
Homeado per Conveeei6n
(modelos selectos]
Cuandohorneepot convecciOn,programeIatemperaturanormal de
horneado.E[controI reducir_ autom_ticamentela temperatura
programadaen 25° F 05 ° C].
Para programar Homeado por convecci6m
1. Optima [atec[a 'ConvectBake'.
• El [cono'BAKE'y elsimbolo'FAN' destellar_n.
+ '000'destellar_en el indicadorvisual.
Autoset
2. Seleccionela temperaturadei homo. Oprima Iatecla
'Autoset'para 350° F 075° C} o lastecias num6ricasapropiadas.
• Carlavez que oprima latecla 'Autoset' Ia temperaturase
aumentar_en 25° F 05 ° C}.La temperaturadel horno puede
set programadade 170° a 550°.
3. Optima la tecIa 'ConvectBake'nuevamenteo esperecuatro
segundos.
+ El[cono 'BAKE'dejar_de destellar.
• El [cono'PREHEAT'se ihminara en el indicadorvisual
+ Enel indicadorvisualse desplegar_i100+(40°} o Ia temperatura
realdel horno si es quees superiora 1000F (40° C}. Latem-
peraturaaumentar8en incrementosde 5° F (3° C} hasta
Ilegara latemperaturaprogramada.
• Elsimbolo 'FAN' comenzar8a girar.
4. Esperea que el homo se precalientedurante8-15 minutos.
+ Cuandoel horno Ilegaa Ia temperaturaprogramadase
escuchar8unase_aIsonora Iarga.
• El [cono'PREHEAT'se apagara.
+ Sedesplegar_Ia temperaturapregramada.
• Paravedficar la temperaturaprogramadadurante el
precalentamientodel horno,oprima la tecla 'ConvectBake'.
conto
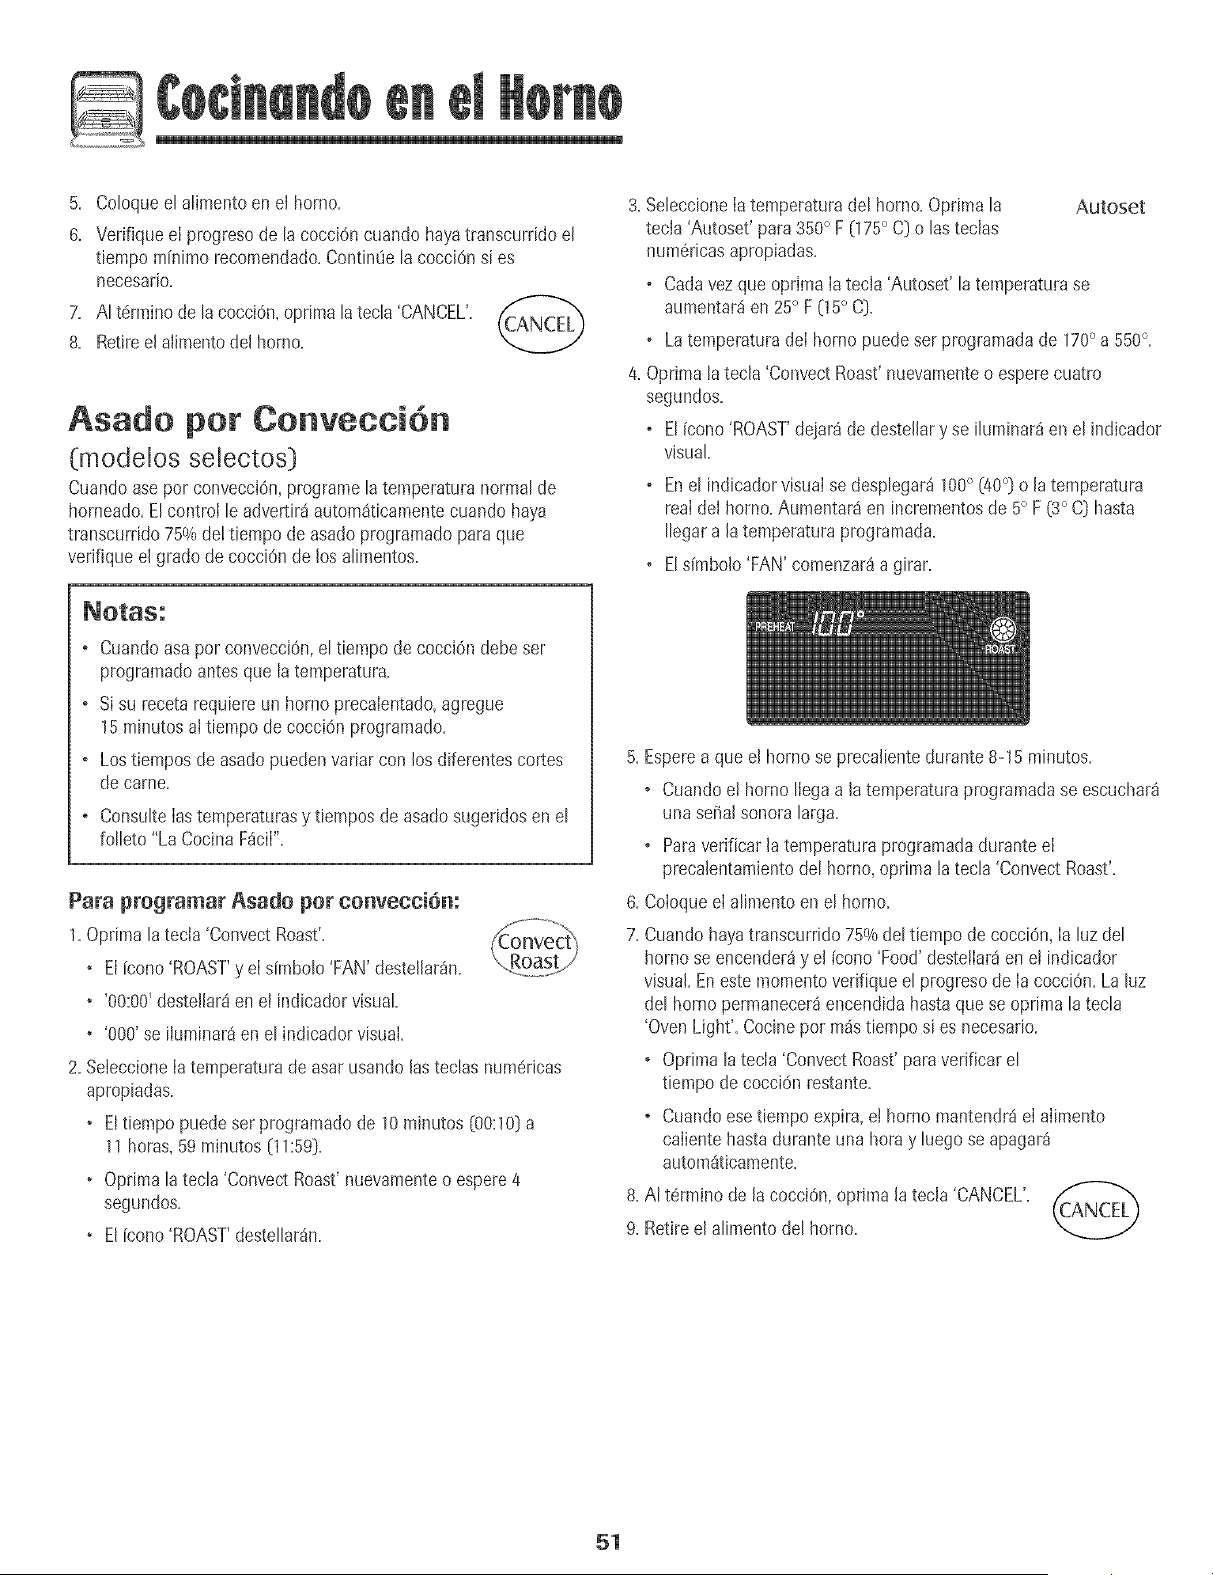
5+ Co[oquee[ atimentoen e[ homo+
8+ Ver+fiqueel progresode [a cocc[6n cuandohayatranscurrido el
tiempominimo recomendado+Contin_e [acocciOnsi es
necesario.
7. At t#rminode [a cocci6n+oprima [atecta'CANCEL'.
8. Retireelalimentodel homo.
Asado per Cenveeei6n
(modeios seiectos]
Cuandoasepor convecciOn,programe[a temperaturanormalde
horneado=EIcontro[ le advertir_autom_ticamentecuando haya
transcurrido 75%de!tiempo de asadoprogramadopara que
verifique el grado de cocciOnde los aIimentos=
3=SeIeccione[atemperaturadel homo=Optima la Autoset
tecia 'Autoset' para350° F (175° C) o las teclas
num6ricasapropiadas=
o Cadavezque oprima [atecla 'Autoset' la temperaturase
aumentar_en 25° F05 ° C)=
o Latemperaturade[ horno puedeser programadade 170° a550°=
4=Oprima[a tecla 'ConvectRoast'nuevamenteo esperecuatro
segundos=
o EIicono 'ROAST'dejar_de destellary se iIuminar_en el indicador
visual
o Ene[ indicadorvisua[se desp[egar_100° (40°] o [a temperatura
re,a[ de[ homo=Aumentaraen incrementosde 5° F (3° C) hasta
[[egara [a temperaturaprogramada=
o E[s[mbo[o'FAN'comenzar_a girar=
o Cuandoasapor convecciOn,e[ t[empode cocc[6n debeser
programadoantesque [a temperatura.
o Sisu receta requ[ereun homo precaientado,agregue
15minutos a[ t[empode cocci6n programado.
o Lostiempos de asadopuedenvariar con los diferentescortes
decame.
o ConsuIte[astemperaturasy tiempos de asadosugeridosen e[
foIIeto"La CocinaF_ci[".
Para programar Asado per convecci6n:
1+Oprima latecla 'Co+wectRoast'+
+ E[icono 'ROAST'y e[simbo[o 'FAN'deste[[ar_n+
• '00:00'destel[ar8en el indicadorvisual
• '000' se iiuminar_en e[ indicadorvisual
2. Seieccione[a temperaturade asar usando[astecIas num#ricas
apropiadas.
• Eltiempo puedeset programadode 10 minutos [00:10)a
11 horas,59 minutos (11:59].
• Optima[a tecIa 'ConvectRoast'nuevamenteo espere4
segundos.
• El{cono'ROAST'desteIIar_n.
5. Esperea que el horno se precaJientedurante 8-15 minutos.
• Cuandoel horno [[egaa latemperaturaprogramadase escuchar_
unase_a[ sonora[arga.
o Paraverificar [atemperaturaprogramadaduranteel
preca[entamientode[ homo, optima [a tecIa'Convect Roast'.
6. Co[oqueel aIimentoen e[ homo.
7. Cuandohayatranscurrido75%de[tiempo de cocci6n, [a [uzde[
homo se encender_y e[ {cono'Food'deste[lar_en et indicador
visual Eneste momentovedfique e[ progresode [acocciOn.La [uz
de[ hornopermanecer_encendida hastaque se oprima [atecIa
'OvenLight'. Cocinepot m_stiempo si es necesario.
o Oprima [atecla 'ConvectRoast'paraverificar e[
tiempode cocci6n restante.
o Cuandoesetiempoexpira, e[ homo mantendr_el alimento
calientehasta duranteuna hora y [uegose apagar_
automSticamente.
8. A[ t6rmino de [acocciOn,optima [atec[a 'CANCEL'.
9. Retireel aIimentode[ homo.
51

Mantener Ca iente (Cook& Hold)
Cuandoseusa+aopc+0n+Cook&Hemal',e+bornecomienzaa calentar
inmediatamentedespu6sde queer controtha s+doprogramatic+Luego,
et homo cocinaduranteun per[odede tiempoespecificado+Cuando
esetiempoexpira,et homo mantendraet aiimentocalientehasta
duranteuna heray Iuegose apagar_autom_ticamente+
Para programar 'Cook & Hemal':
10 OptimaIatecla 'Cook& Hold'+
• El[cone 'HOLD'destellar_paraind+carleque ustedest_
programando'Cook& HoW+
+'00:00'destellar_ien el indicadorvisual+
2. Seleccionela cant+dadde tiempoque usteddeseacocinar usando
lasteclasnum6ricas.
• ElFcono'HOLD'contint_adestellando.
• Eltiempo se iluminar_en el indicadorvisual
+ Eltiempopuedeprogramarsede 00:10a 11:59.
............. ++o......
3. Optima'Rake','ConvectBake'o 'Convect ( _
Roast'(modelosselectos)y seteccionela temperatura \, Bake
./
.......++ +++_s
dothomo.Oprimala tecla'Autoset' para350° F
[175° C) o lasteclasnum6ricasapropiadas.
• Enel indicadorvisual destellar_el simbolodel ciclodeseado.
• LatemperaturadeI horno puedeser programadade 170° a 550°.
4. Optimanuevamentelatech del ciclo deseadoOesperecuatro
segundos.
+ Eldmboio del ciclodeseadopermanecer_iluminado
• Enel indicadorvisual sedesplegar_el tiempo decocciOn.
• ElFcono'PREHEAT'sedesplegar_en et indicadorvisual
+ Latemperaturarealdel homo sedesplegar_duranteel
precalentamiento.
+ Latemperaturaprogramadase desplegar_cuandoel homo se
hayaprecalentado.
Cuando haya expirado emtiempo de cecci6n:
Seescuchar_ncuatrose_alessonoras+
'HOLD'y 'WARM'se iluminar_n.
Enel indicadorse desplegar_75° [170°).
Sedesplegar8la hera deldFa.
Despues de una hera en 'HOLD WARM'
(Mantener Camiente}:
Elhomose apagaautom_iticamente+
'HOLD'y 'WARM'se apagan+
RetireeI alimentodel homo+
Para cancemar'Cook & Hemal'en cuamquier memento:
Oprimalatecla 'CANCEL'+Retireel alimentodel homo+ _f_A.,.--r,_
52
Mantener Caliente Oiferido
(Delay Cook & Hold)
No use homeadodiferide paraal+mentosde c0rta dura¢i6nta!es
comoproductos]_cteos,cerdo,came de aveo mariscosl
Cuandousa 'Belay', el homo comienzaa cocinar rosstarde enel d[a.
PmgrameIa cantidadde tiempoque usteddeseadiferirantes queel
homo se encienday cuantotiempo deseacocinarel alimento.El
homo comienzaa calentaren la horaseleccionaday cocinaduranteel
tiempo especificado.
Eltiempo diferidopuede pmgramarsede 10minutos(00:10[hasta 11
horas,59m[nutos(11:59).
Para programar un cido de 'Cook & Hold' diferido:
1. OptimaIatecla 'DeIay'o 'Delay 1' 0nodelosselectos).
Enlos modelosde homos muralesdobles,opr+ma
unavezla tecla 'Delay'o 'Delay 1' (modelosselectos)
paraprogramarei hornosuperioro dosvecespara t
programarel homo inferior. Delay/
+ El[cono'DELAY'comienzaa destetlar.
° '00:00'apareceenel indicadorvisual
2. Usandolas teclasnum6ricasaprapiadas,programeIacant+dadde
tiempoque usteddeseadiferir el comienzodel ciclo 'Cook& HoW.
3. OptimaIatecla 'Cook& HoW.
+ El[cono'HOLD'destellaen el indicador.
+ El[cono'DELAY'destellaen el indicador.
+ '00:00'comienzaa destellar.
4. PmgmmeIacantidaddetiempo queusted deseacocinarusando
lasteclasnum6ricas.
5. Oprima'Bake','ConvectBake'o 'ConvectRoast'(modelosselectos[.
6. ProgrameIatemperaturadel hornodeseadaoprimiendolatecla
'Autoset'o lasteclasnum6ricasapropiadas. Autoset
+ 175° (3500)se iluminar_cuandose oprime 'Autoset'.
• Despu6sdecuatro segundos,el tiempo diferidoprogramado
aparecer_en el indicadorvisual
+ El[cono'HOLD'se apaga.
• Laspalabras'BAKE'y 'DELAY'permanecenencendidaspara re-
cordarlequese ha programaticun ciclode 'Cook& Hold'
diferido.
Nora:
+ No use'Cook& HoW diferidoparaart[culosque requierenun
homo precalentado,talescomo pasteles,galletasy panes.
• No use'Cook& Hold'diferidosi el horno yaest_caliente.
53
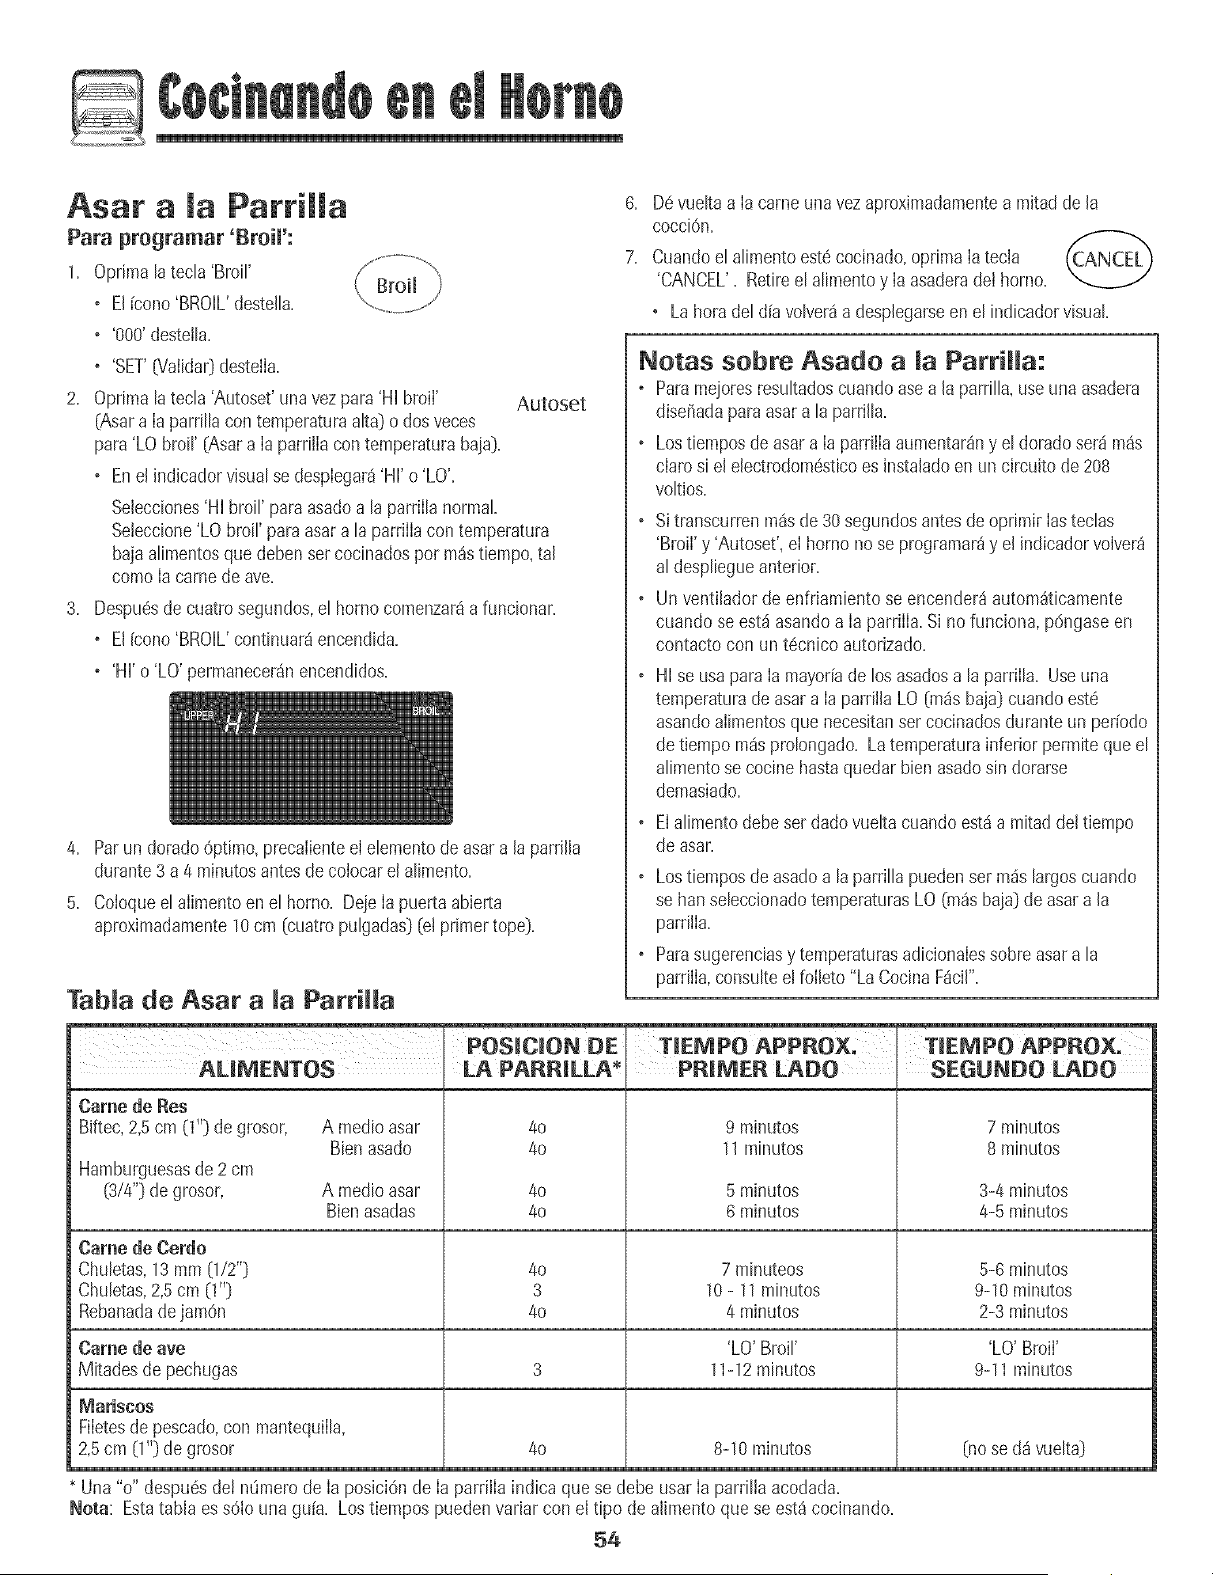
i
Asar a maParrilla
Para programar 'Broim':
1. Opr[mala tecB 'Broil'
o El[cono'BROIL'destelB.
o 'OO0'desteiB.
o 'SET'04alida0destelIa.
Optima[atecB 'Autoset'una vezpara'Hi broi['
(Asara IaparriIB con temperaturaalta} o dosveces
para'LO broil' {Asara Ia parrillacon temperaturabaia}.
o Enel indicadorvisualse despIegar_i'Hi' o 'LO'.
Sebcciones'Hi broil' paraasadoa B parriIB normal
6. D6vueltaa Ia carneunavezaproximadapaentea mitad dela
cocciOn.
7. Cuandoel alimentoest6cocinado,opnmaIa tecla (CANCEL")
'CANCEL'. Retireel alimentoy Ia asaderadet horno.
• Lahorndel dia volver_adespbgarseen el indicadorvisual
Autoset
Netas sebre Asade a ParriHa:
o Paramejoresresultadoscuandoasea la parrilla,useuna asadera
dis@ariaparaasara la parrilla.
o Lostbmpos de asara Ia parriIIaaumentar_ny el doradoser_ rnSs
clarosi el electrodom6sticoes instaladoen un circuito de208
voltios.
®
Seleccione'LO broil' paraasara la parriiiacon temperatura
bajaalimentosque debenset cocinadospor m_stiepapo,tal
comoIacarnede ave.
®
Despu@de cuatrasegundos,el hornocomenzar8a funcionar.
o El[cono'BROIL'continuar_encendida.
. 'Hi' o 'LO'permanecer_nencendidos.
4. Parun dorado6ptlmo,precalienteel ebmento deasara la parrilla
durante3a 4 minutosantesde colocarel alimento.
5. Coloqueelalimentoen el horno. De}eIa pue_a abierta
aproximadapaente10cm (cuatrapulgadas}(el primertope).
Tabla de Asar a la ParriHa
AUMENTOS LA PAP,P,ILLA _'
Came de Res
Biftec, 2,5 cm (1"} de grosor,
Hamburguesasde 2 cm
(3/4"}de grosor,
A medioasar
Bbn asado
4o
4o
®
®
Sitranscurrenm4sde 30 segundosantesde oprimir Iasteclas
'Broil'y 'Autoset',el horno nose prograpaar_y el indicadorvolver_
aldespliegueanterior.
Un ventiladorde enfriamientose encender_autom_ticamente
cuandose est_asandoa Ia parrilIa.Si no funciona, p6ngaseen
contactocon un t@nico autorizado.
HIse usapara Ia mayoriade los asadosa la parrilla. Useuna
temperaturade asara Iaparrilla LO {m_sbaja}cuandoest6
asandoalimentosquenecesitansercocinadosduranteun perfodo
detiempo m_sprolongado. Latemperaturainferior permiteque el
alimentosecocinehastaquedar bienasadosin dorarse
demasiado.
Elalimentodebeset dadovuelta cuandoest_a mitaddel tiempo
deasar.
Lostiemposde asadoa la parrillapuedenser m_s largoscuando
sebanseleccionadotemperaturasLO (m_sbaja}de asara la
parrilla.
Parasugerenciasy temperaturasadicionalessobreasara la
parrilIa,consulteel falleto "LaCocinaFScil".
PPJMER LADO . SEGUNDO LADO
9 minutos
11minutos
7 minutos
8 minutos
A medicasar 40 5 minutos 3-4 minutos
Bienasadas 4o 6 minutos 4-5 minutos
Came de Cerdo
Chubtas,13 mm0/2"} 40 7 minuteos 5-8 minutos
Chubtas,2,5cm (! "} 3 10- 11minutos 9-10 minutos
Rebanadadejam6n 40 4 minutos 2-3 minutos
Came de ave 'LO' Broil' 'LO' Broil'
Mitadesde pechugas 3 11-12minutos 9-11minutos
Mariscos
Filetes de pescado, con mantequilla,
2,5 cm {1"} de grasor
4o 8-10 minutos
(no se d_ vuelta}
Una "o" despu@det nqmerode Ia posiciOnde Ia parrilIaindica que se debe usar Ia parrilIaacodada.
Nora: Estatabla es s61ouna gu[a. Lostiepapospuedenvariar con el tipo de alimento quese est_ cocinando.
54

Mantenet camiente
Paramantenercatientesen forma seguraalimentoscalie_teso para
calentarpanesy phtos.
Para pregramar 'Keep Warm':
1+ Optima latecia 'Keep Warm'+
• El[cono'WARM' destella.
Autoset
• '000'desteilaen eI indicadorvisuat.
2. SeieccioneIatemperaturade 'KeepWarm'. Optimala tecia
'Autoset'o [as teciasnumOricasapropiadas.
+ 170° (75°) se ihminar_ cuando se oprima tatecta 'Autoset'.
+ Cadavezque optima Iatecla 'Autoset',la temperatura
aumentar_en 5° F (3° C).
Latemperaturade 'KeepWarm' puedeser programadade 145° a
190° F (63° a 90° C).
El[cono 'WARM'y Ia temperaturase desplegar_nenel indicador
cuandola funci0n estd activa.
Para oa_oemar 'Keep Warm':
1. Oprimala tecla 'CANCEL'.
2. Retireel alimentodel homo.
Notas sobre 'Keep Warm':
+ ParacalidadOptimade losalimentos,Ios aiimentoscocinados
en el hornodeben set mantenidoscalientespot no pa_sde 1 a
2 horas.
• Paraevitar que los alimentosse sequen,c0braloslevemente
con papelde aluminioo una tapa.
+ Para calentar panecillos:
- cubra IevementeIos panecilIoscon papelde aluminio y
colOquelosen el homo+
- optima las tecias'KeepWarm' y 'Autoset'+
- caliente durante 12a 15 minutos+
+ Para calentar plates:
- coIoque 2fi+asde cuatro platos cadauna en eI homo+
- optima las teclas'KeepWarm' y 'Autoset'+
- caliente los pIatosdurante cinco minutos,apagueel horno y
deje los piatosen eI homo durante 15 minutosm_s+
- use solamenteplatos resistentesal horno,verifique con el
fabricante+
- no co[oque los platoscalientessobreuna supefficie fr[a
pues e[ cambior_pido de temperaturapuedecausarfisuras
superficialeso rotura.
55
Mode de Cierre Aute tice/
E[hornose apagar4 autom4tJcamentedespu6sde 12 horassi usted
Io dejaaccidentalmenteencendido. Estacaracter[sticade seguridad
puedeset desactivada.
Para cancelar el cierre autom_tiee de 12 betas y dejar que el
homo funcione continuamentedurante 72 betas:
1. Optimay mantengaoprJmida[a tecla 'Clock'
durantetressegundos.
• 'SAb'se desplegar_y destellar4 durantecinco
segundos.
• 'SAb'se desplegar_continuamentehastaque se desactiveo
hastaque transcurrael I[mite de 72horas.
• El[cono'BAKE'tambi6n set4 desplegadasi se est_ usandoun
ciclode homeado cuandoel horno est4en Modo Sab4tico.
• Todas Iasteclas est4nJnactJvasexcepto'CANCEL'y 'Clock'.
TodasIasotras funciones EXCEPTO'BAKE'('Timer','Keep
%_rm', 'Clean',etc.] est4nbloqueadasdurante el Modo
Sab4tico.
• Se puede programar'Cook& HoWdurante et Modo Sab4tico,
sin embargono se puedeprogramar'DeJayCook & Hold'.
Para canceJar eJ Mode Sab_tico:
1. Optima JatecJa'CLOCK'durantetres segundos.
O
2. Despuesde 72horas,eI Modo Sab_ticoterminar&
• 'SAb'destellar4durante 5 segundos.
• Lahora de[d[a reaparecer4en el indicadorvisual
Notas sobre eJ Modo Sab tico:
o ElModo Sab4tJcopuede ser activadoen cualquier momento,
est6o no et homo encendido.
o ElModo Sab4ticono puede set activadosi IastecJasest4n
bloqueadaso cuando la puerta est4bloqueada.
o Lamayor[ade las advertenciasy mensajesy todas lasse_ales
sonorasest4ndesactivadascuando el Modo Sab_ticoest_
activo.
o Si el homo est4horneando cuandoeI Modo Sab_ticoes
programado,e! [cono'BAKE'se apagar_a[ final de[ cic[o de
horneado. No se emitir_nse_alessonoras.
o Si se deseala Iuzde! horno duranteel Modo Sab4tico,6sta
debeser encendidaantes de que comienceel Modo Sab_tico.
o Cuandocomienzael Modo Sab4tico,Ia temperaturaque se
despliegaset4Ia temperaturaprogramadaen vez de Ia
temperaturarealde la cavidaddel homo. No se emitir_ la
se_aIsonorade precalentamiento.
o Elciclo de autolimpiezay bloqueo autom_ticode la puerta no
funcionar_durante el Modo Sab4tico.
o Si oprime latecla 'CANCEL'se cancelar4un ciclo 'Bake',sin
embargoel control permanecer4en Modo Sab4tico.
o Si falla ta corrienteel6ctrica,cuandovuelva ta energfaet homo
se activar_en Modo Sab_ticocon 72horas restantesy ning_]n
ciclo activo.
56
Ajuste de mate peratura
Laexactitud de hs temperaturasdeI homo es cuidadosamente
probadaen lafabrica. Esnormal notar algunadiferencia entre Ia
temperaturade horneado o en eIdorado,entre un bornenuevoy un
borneantiguo. A medidaque el borne se usa,la temperaturadel
bornepuede cambiar.
Ustedpuedeajustar la temperaturadot homo,si considera quesu
borne no est_horneandoo dorandoenforma correcta. Paradecidir
cuantodebe cambiarIa temperatura,programe Iatemperaturadel
homo a 25° F (15° CDrossalta o m_sbaja que Iatemperatura
indicadaen sus recetas,luego borneo. Los resultadosenet primer
horneadole dar_n una ideade cuanto debe aiustarla temperatura.
Ajuste de matemperatura dem homo:
1. Oprima Iatecla 'Bake'.
2. Programe550° F (285° C) oprimiendo lasteclas numSricas
apropiadas.
3. Oprimay mantengaoprimida la tecla 'Bake' durantevaries
segundoso hasta que O0° aparezcaen el indicadorvisual
Si latemperaturadot borne ha side previamenteajustada,el
cambioaparecer_en et indicadorvisual Perejemplo,si Ia
temperaturadel borne rue reducidaen 15° F [80C) el indicador
mostrar_- 15° (-8°}.
4. Oprima Iatecia 'Autoset' paraajustar la temperatura.
Cadavezque se optima la tecla'Autoset', latemperaturacambia
en 5° F (3° C}. Latemperaturade! homo puede ser aumentadao
disminuidaen 5° a 35° F( 3° a 20° F}.
5. La hera del d[a reaparecer_autom_ticamenteen el indicador
visual.
No necesitareajustarla temperaturadeI bornesi hay una falla o
interrupci6nde energiaeldctrica. El ajustede Ia temperaturaes
v_lido para 'Bake','ConvectBake'y 'ConvectRoast'(modelos
selectos}solamente.
'Favorite' (Favorite)
Latecla 'Favorite'le permite guardaren memoriael tiempo y Ia
temperaturade un ciclo 'Cook & Hold Bake','ConvectBake'o
'ConvectRoast'[modelosselectos).
Paraprogramarun ciclo favorite,debeestar activa o recientemente
programadaunafunciOnde 'Cook & HoW.
Para programar un nuevo cicmo Favorite o para
guardar come Favorite un cido 'Cook & Hemal' que
est_ en progreso:
1, Programeun ciclo de 'Cook & Hokl' comese describeen la
secciOn'Cook & Hold' en la p%ina 52.
2. Oprimay mantengaoprimida la tecla 'Favorite'
durantetres segundos.
o Elcic[o "Cook& HoW recientementeprogramadoo en
progresoseraguardadoen memoria.
o Seescuchar_una sofia[sonorapara indicar que el control
ha aceptadoe[ aiuste 'Favorites'.
Para comenzar un tide programado come Favorite:
1. Oprima [atec[a 'Favorite'.
o Sedespiegar8el tiempo y [atemperaturapara el cic[o 'Cook&
Hold' programatic (si no hay ciclo 'Cook& HoW programado,
en el indicadorvisualse desplegar_'nonE'.}
2. Oprima la tecla 'Bake','ConvectBake'o 'ConvectRoast'{mode[os
se[ectos}.
o Elcic[o Favoritecomenzar_inmediatamente.
o Elsimbolo de[ cic[o seleccionadose iluminar_en el indicador
visual
o Eltiempo de cocciOnse i[uminar_en e[ indicadorvisual
Cuando ha expirado el tiempo de cocci6n:
o Seapagar8eI ciclo seIeccionado.
o Seencender_el s[mbolo'HOLDWARM'.
o Enel indicador se desplegar_170° (75°).
Para cancelar un cido favorite en progreso:_
1. Optima la tecla 'CANCEL'.
o ElcicIo favorite guardadoen memoriano ser_
afectado.
2. Retire el alimentodel homo.
5?
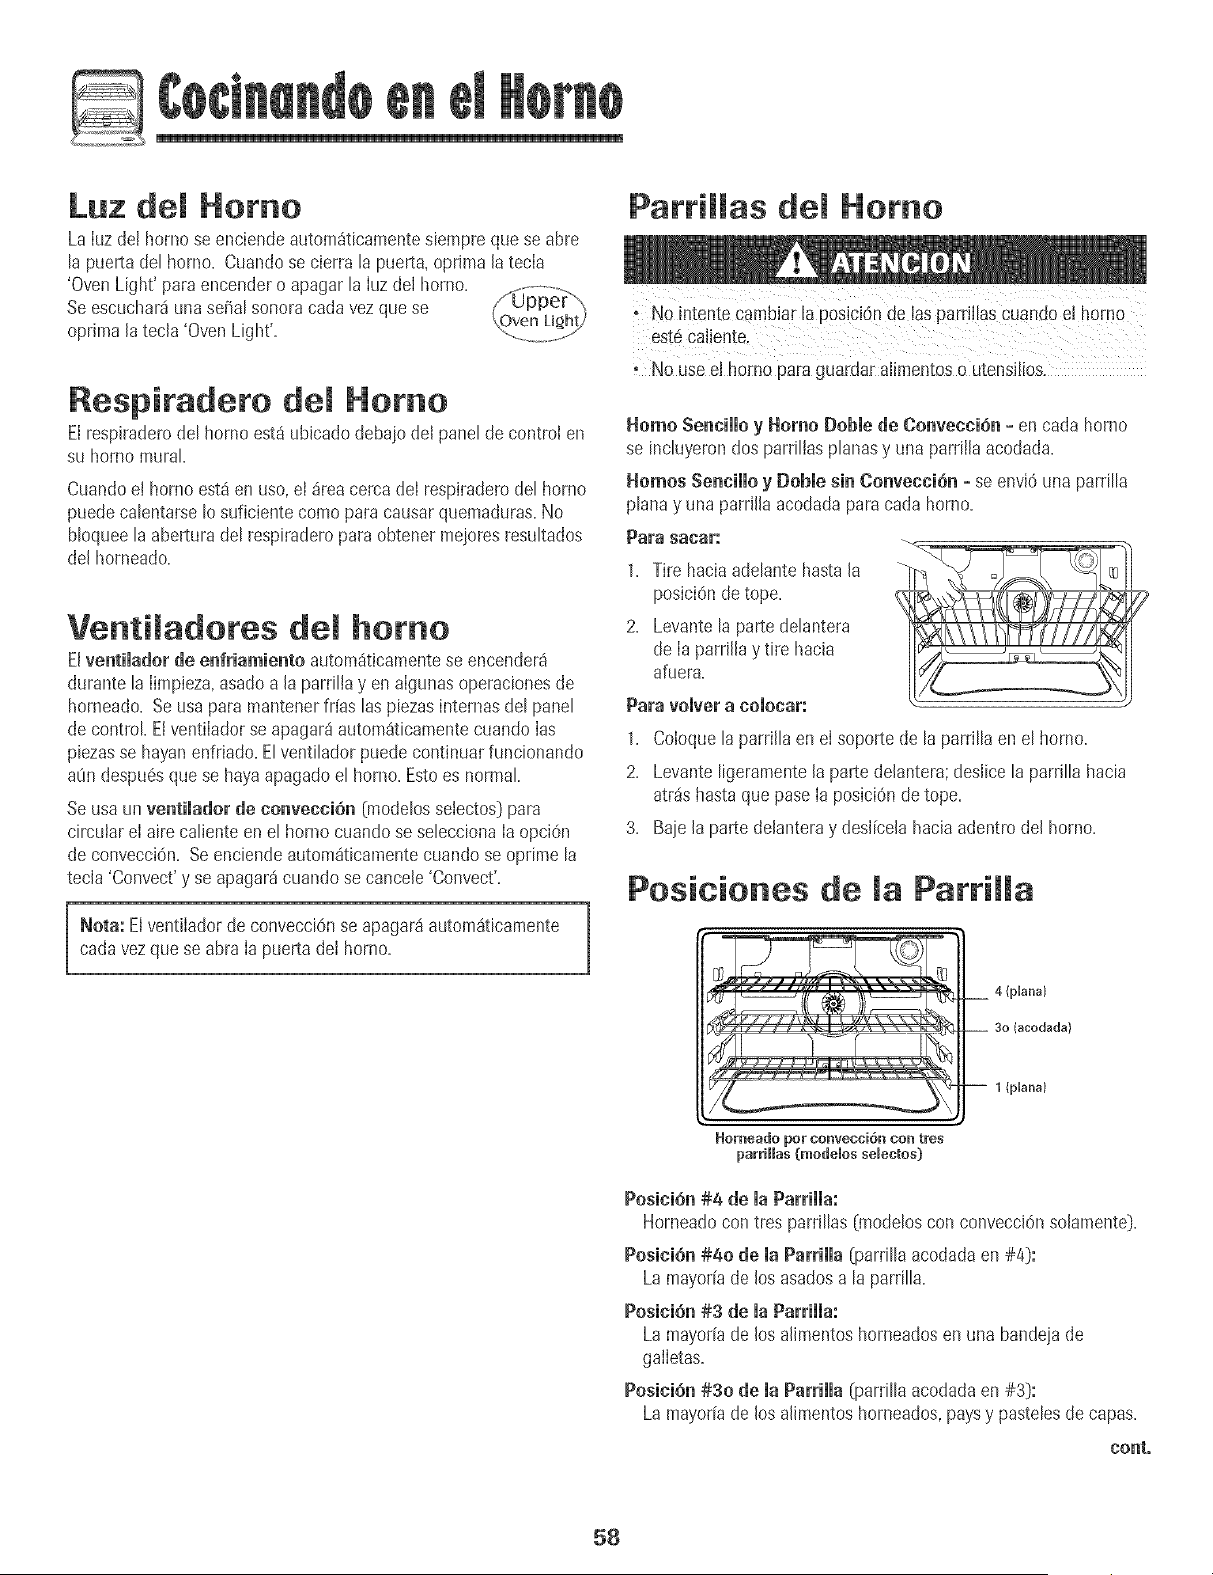
Luz del Homo
LaIuz del homo seenciendeautom_ticamentesiempre quese abre
ta puertaderhomo. Cuandose cierra Eapuerta,oprima la tecIa
'OvenUght'paraenoenderoapagartaIozdelhomo.
Seescuchar_una serialsonora cadavezque se / upper__,,OvenLig2hy
oprima la tecla 'OvenLight'. ...........................
Respiradeto del Homo
Elrespiraderodel horno est_ ubicadodebaiodel panel de control en
su hornomural
CuandoeI hornoest_ en uso,el areacerca deI respiraderodel homo
puedecalentarseIo suficiente comopara causarquemaduras.No
bloqueela abertura del respiraderoparaobtener meioresresultados
del horneado.
Venti adores dem homo
Elventimadorde enfriamiento autom_ticamentese encender_
durante la Iimpieza,asadoa la pardlIayen aIgunasoperacionesde
horneado. Seusa para mantenerif[as las piezasinternasdel panel
de control EtventiIadorse apagar8 autom_ticamentecuandoIas
piezasse hayanenfriado.El ventiladorpuede continuarfuncionando
aOndespu6sque se hayaapagadoel homo. Estoes normal
Seusa un ventilador de convecci6n (modelossetectos}para
circular eI airecaliente en el horno cuandose seleccionaIaopciOn
de convecci6n. Seenciendeautom_ticamentecuando se oprime la
tecla 'Convect'y se apagar_cuandose cancele 'Convect'.
Neta: Elventilador de convecciOnse apagar_autom_ticamente
cadavezque se abra Ia puerta deI homo.
ParriHas Homo
;No intente C_mbiarla posici6n de lasparriHasCuandoel herno
est6Caliente.
No use el hornopara guardar alimentoso utensilios.
Homo Sencillo y Home Dobmede Convecci6n= en cada homo
se incluyerondos parrilIasplanasy una parrilla acodada.
Homes Sencillo y [}oble sin Convecci6n - se envi6 unaparrilla
planay una parrilla acodadaparacada homo.
Para sacar:
1. Tire hacia adelante hasta la
posici6n de tope.
2. Levante la parte delantera
de Ia parrilla y tire hacia
afuera.
Para vomver a comocar:
1. Co[oque[a parri[[a enel soporte de [a parri[[aen e[ horno.
2. Levante ligeramente[a partede[antera;des[icela parrilla hacia
atr_shasta que pase[a posici6nde tope.
3. Baie la parte de[anteray des[[celahaciaadentro de[ homo.
Posiciones de maPattiHa
4 (plana)
(acodada)
1 {plana}
_ornea_o _om"ConveocioI]_ COn t_S
parriHas (modelos seBectos)
Posici6n#4 de ia Parriiia:
Horneadocon tres parri[[as(mode[oscon convecci6nso[amente].
Posici6n#40 de la Parrilla (parri[laacodadaen #4]:
La mayor[ade los asadosa la parrilla=
PosiciSn#3 de ia Parriiia:
La mayodade los a[h_aentoshorneadosen una bandeiade
galietas=
Posici6_ #30 de maParHmma(parrillaacodadaen #3]:
La mayor[ade los a[imentoshorneados,paysy pastelesde capas=
co_t°
58
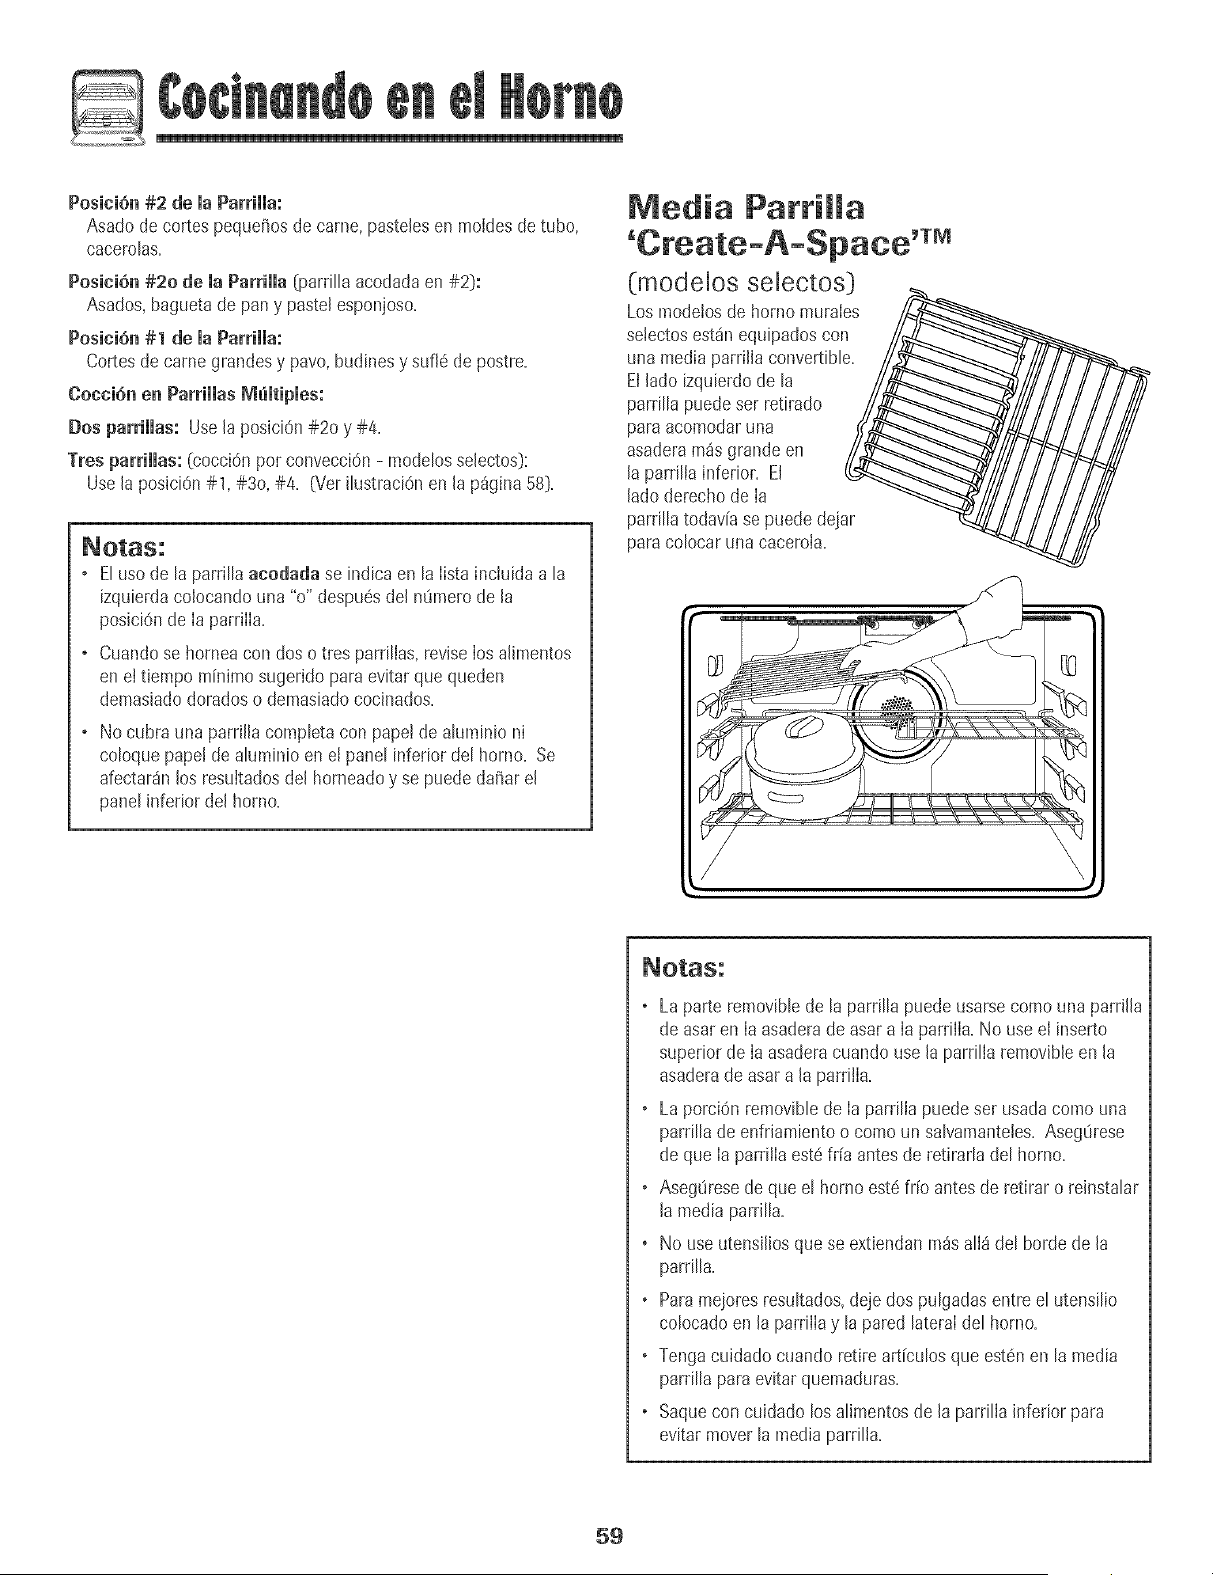
Posicidn#2 de la Parrilla:
Asadode cortes peque_osde came, pastelesen moldesde tuba,
cacerolas.
PositiOn#20 de ia Parrilla {parri[[aacodadaen #2}:
Asados,baguetade pan y paste[esponjoso.
Pesi¢ian #1 de ia Parriiia:
Cortesde camegrandesy pavo,budinesy sufl6 de postre.
Coccian en ParriHas Memtipmea:
Dos parrillas: Use[a posJciOn#20 y #4.
Tres parrillas: (cocci@ pot conveccidn- modebs selectos}:
Usela posJcidn#1, #3o, #4. (VerHustracidnen [a p_gina 58}.
, Eluso de la parrillaaeodada se indica en la lista incluida a la
izqubrda co[ocandouna "o" despuesde[ m_merode [a
posicidnde la parrilla.
, Cuandose horneacon dos o tres parrillas+reviselos alimentos
enel tiempo minimo sugerido paraevitar quequeden
demasiadodoradoso demasiadococlnados.
, No cubra una parril[acompbta con pape!de a[uminio ni
coloquepape[de aluminio en e[ pane[inferior de[ homo. Se
afectaran[asresuitadosdel horneadoy se puede da_are[
pane[inferior del homo.
Media Parrimma
(mode[os se[ectos]
Los modelosde homo murales
selectosest_nequipadoscon
una mediaparri[la convertibb.
El[ado izquierdode la
parrilla puedeser retirado
paraacomodaruna
asaderam_sgrande en
[a parrilla inferior. El
[ado derechode [a
parrillatodavia se puede@jar
para oolocar una cacero[a.
, La parte removibb de [a parri[[a puede usarse coma una parri[[a
de asar en [a asadera de asar a [a parrilia. No use e[ inserto
superior de [a asadera cuando use [a parrilia removible en [a
asadera de asar a [a parriiia.
, La porcidn removib[e de [a parrilla puede ser usada coma una
parrilla de enfriambnto o coma un salvamanteles. Aseg0rese
de que [a parriiia est6 fr[a antes de retirarla del homo.
, AsegOrese de que el horno est_ fr[o antes de retirar o reinstalar
[a media parrilla.
+ No use utensilios que se extiendan m_s alI8 del bar@ de la
parrilla.
+ Para mejores resultados, deje dos pulgadas entre el utensilio
colocado en la parri[Ia y la pared lateraI del homo.
+ Tenga cuidado cuando retire articulos que estdn en la media
parrilla para evitar quemaduras.
+ Saque con cuidado los alimentos de la parrilIa inferior para
evitar mover la media parrilIa.
59
L
Homo Autoiimpiante
To set Self+Clean:
, Esnormal que [asp+ezasde [a es[ufase caiienten duran[e e_
ciclo de autol_mp_eza,
, Paraevitardar_oa la puerta, no Ententeabrirla cuando la pa[abra
"Lock" aparezcaen e! indicador visual,
, Evitetocar ia puerta,lacubierta. [aventanao el _ireade
ventilaci0nde[ homo durame un ddo de [imDeza.
, No use[impiadoresde hornos comercialesen e_acabadode[
norno ni atrededorde ninguna Dezade[ homo puespuede
da_are[ acabadoo las p_ezas
EIcic[o de autoiimpiezausatemperaturasde cocciOnsupedoresalas
normaiespara [impiarautom_ticamentetodo e[ interior del homo.
Esnormal queocurran IIamaradas,humoo [[amasdurante la limpieza
si e[ homo est_demasiadosucio+Esmeior limpiar e[ homo
regularmenteenvez de esperarhastaque se hayaacumuiado
demasiadasuciedad+
Duranteel procesode limpieza,la cocina debeestar bienventilada
paraeiiminar los oloresnormalesasociadoscon la limpieza.
Antes de [a AutoRimpieza
1. Retirela asadera,todos los utens[iiosy [asparriIIasde[ homo.Las
parriiiasdel homo se descoIorar_ny no se deslizar_nf_ciImente
despu6sde un ciclo de autoIimpiezasi no son retiradasde[ homo.
2. Limpieel marco dei horno, el marco de la puerta (el_rea fuera de
lajunta de [a puerta)y aIrededorde [a aberturaen la junta de [a
puertacon un agentede limpieza noabrasivota[ como 'Bon Ami'*
o con detergentey agua. Elprocesode autoiimpiezano limpia
est_s_reas. Eliasdebenser limpiadas paraevitar que la suciedad
se horneedurante el ciclo de autoIimpieza. (Lajunta es e[ se[Io
alrededorde [a puertay ventana de[ homo).
3, Paraevitardaffo no limpie ni frote [a
junta situadaalrededorde la puerta del \
homo.La junta est4diseBadapara
seJJarherm6ticamenteeJcaJordurante
e[ cicJode Jimpieza+
4+ LimpieeJexcesode grasa o derrames
de Japarte inferior de[ homo. Esto
evitahumo excesivoo [Jamaradasdurante el cicJode Jimpieza+
Parafacilitar [a Jimpieza,eJeJementocalefactordebeset
JevantadoJevemente[aproximadamente2,5cm [1 puigada]i}+
5. Limpie losderramesazucaradoso 4cidostaies como papaduice
(camote),tomates o saisasa basede [eche+La porceJana
esmaltadaes resistenteaJ_cidopero no a prueba de4cidos+EI
acabadode porcelanapuede descolorarsesi los derrames4cidos
o azucaradosno son Jimpiadosantesde un cicJode autoJimpieza+
_OtaS:
, Latemperaturade[ homo debe set inferior a 400° F (205° C)
paraprogramarun cic[ode [impieza.
, Amboshornos no puedenser autoiimpiadosa[ mismotiempo
en los modelosde hornosmuralesdobles.
1. Cierre[a puerta del homo.
2. OprJma[a tecJa'Clean'.
, EI[cono'CLEAN'desteJJaen el indicadorvisual
, EI[cono'SEt'destetlaen e[ indicadorvisual
Autoset
3. OprimaJatecJa'Autoset'.
,'MEd' (Suciedadmediana,3 horas}se despJiegaen e[ indicador.
4. OprimaJatecJa'Autoset'paradespJegarlos ajustesde
autoJJmpieza.
'HVy' (Suciedadintensa,4 horas}
'MEd' (Suciedadmedian&3 horas}
'LifE' (SuciedadJeve,2 horas}
AI seleccionarel nivel de suciedaddeJhornose programa
autom_tJcamenteeltiempo de JJmpJeza.
5. Despu6sde cuatrosegundos,eJhomo comenzar4a Jimpiar.
, SiJapuerta no se cierra,se oir_iuna serialsonorayet [cono
'Door'se desplegar_en eJindicador visual. Si Iapuerta no
es cerradadentro de 30segundos,la operaci6nde auto-
[JmpJezaseracanceladay eJindicadorvoJver_a desplegar
[a horade[ d[a.
, El[cono'CLEAN'aparecer4enel [ndicadorvisual.
, EI[cono'LOCK'desteJJar4en el indicadorvisual Unavez que
[a puertase bloquea,eJ[conopermanecer4Jluminadasin
desteJlar+
, EItiempode Jimpiezacomenzar4[a cuentaregresivaen e[
Jndicador+
Para diferir an cic[o de autoiimpieza:
1+ Oprima'Delay'o latecIa 'Delay 1' (modeiosseIectos)+
, EI[cono'DELAY'desteII&
, '00:00'destei[ar_en el indicadorvisual. Delay 1
2. Programe[a cantidad detiempo que usted deseadiferir e[ cicio
usando[astecias numericasapropiadas+
3+ Oprima[a tecia 'Clean'.
, E[[cono'SET'deste[[ar&
4. Oprimala tecIa 'Autoset'+
, 'LifE' [Nivelde suciedad level se despIegar&
Autoset
coat,
*Loshombresde los productosson marcasregistradasde sus respectiw_sfabricantes.
6O
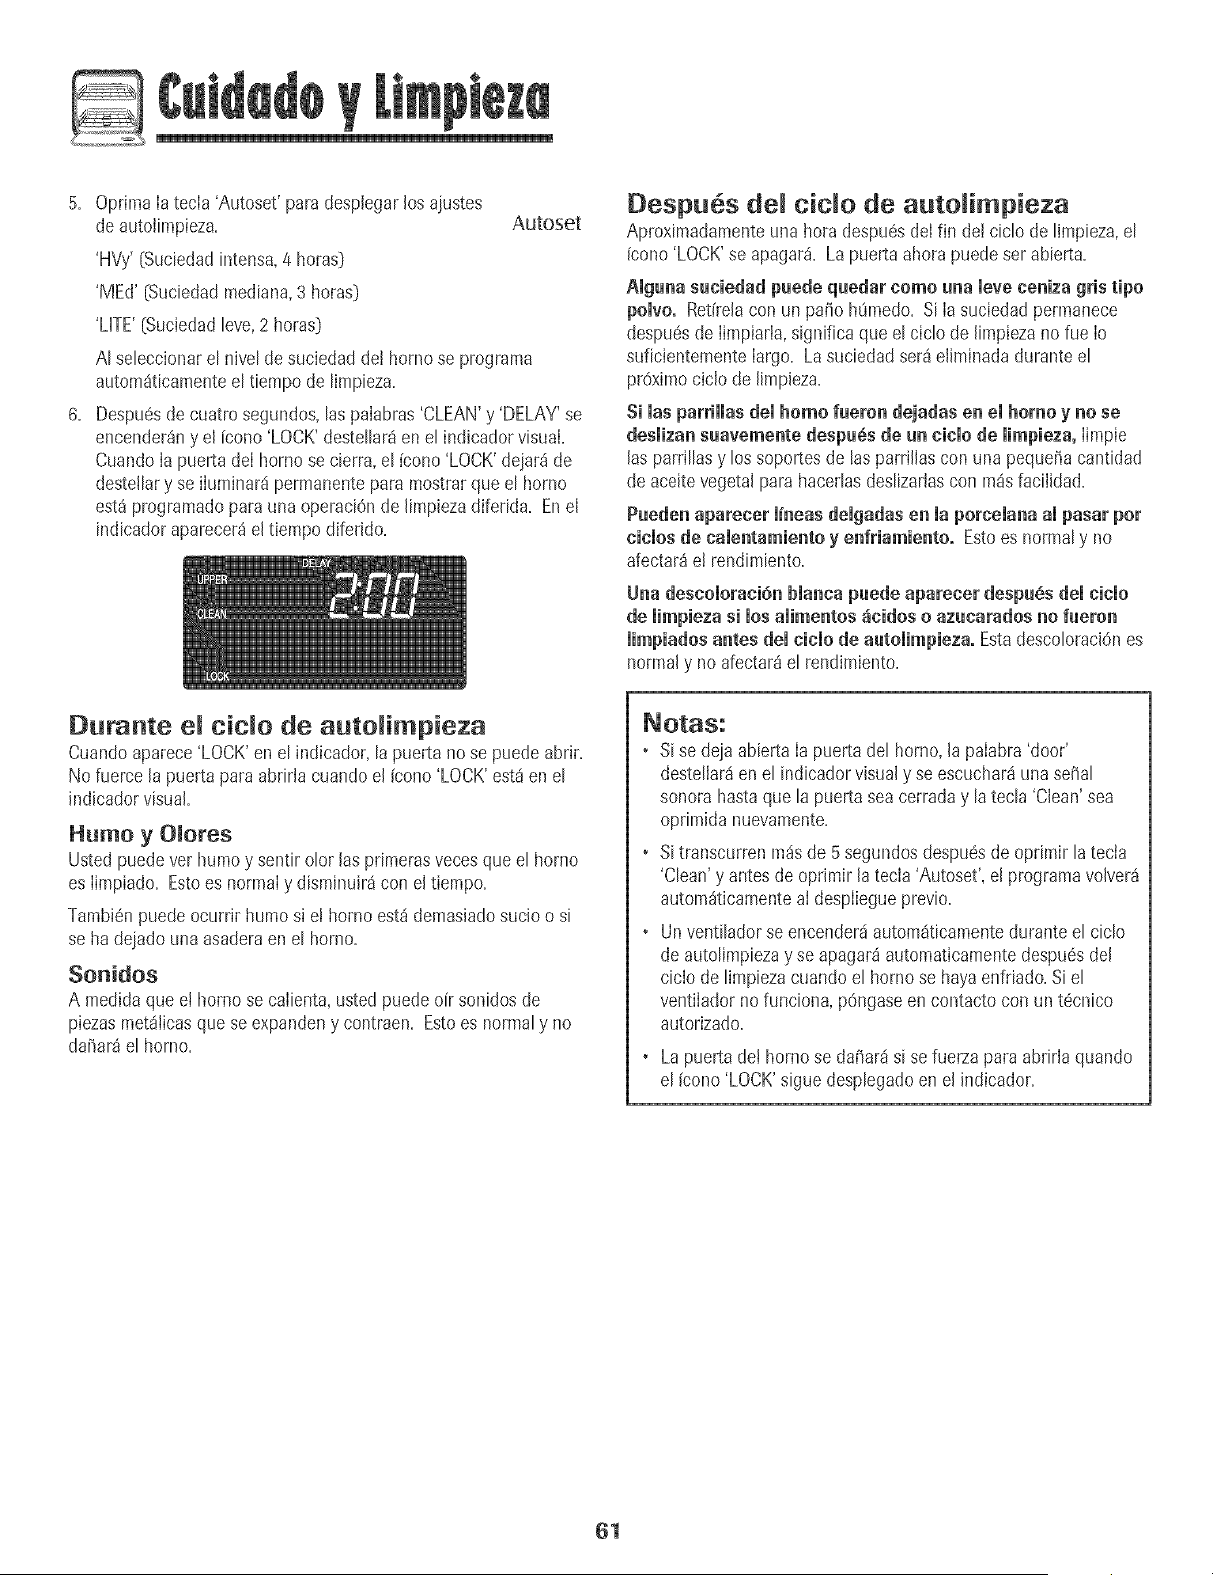
L
5+ OptimaIatecIa 'Autoset' paradesplegarlos ajustes
deautolimpieza+
'HVy'[Suciedadintensa+4 horasD
6=
Autoset
'MEd' [Suciedadmediana,3 horas)
'LHTE'[Suciedadteve,2 horas)
At seteccionaret nivet de suciedadde! homo se programa
autom_ticamenteel tiempo de limpieza.
Despuesde cuatro segundos,taspaiabras'CLEAN'y 'DELAY'se
encender_ny el [cono 'LOCK'destet[ar8en et indicadorvisual.
Cuando[apuerta de[ horno se cierra,e[ [cono'LOCK'dejard de
destellary se iiuminard permanenteparamostrarque el horno
est_programaticpara una operaciOnde [impiezadiferida. Ene[
indicadoraparecer_e[ tiempo diferido.
Despues cido de auto imp+eza
Aproximadamenteuna hora despu6sdeIfin de! ciclo de limpieza,el
(cono'LOCK'se apagar_. Lapuerta ahora puedeser abierta.
giguna suciedad puede quedar homo una ieve ceniza gris tipo
polvo. Ret[relacon un patio hOmedo.Si Ia suciedadpermanece
despu6sde Iimpiarla,significa que el ciclo de limpiezano rueIo
suficientementelargo. Lasuciedadset8eliminada duranteel
proximociclo de limpieza.
Si las parriHas dei homo fueron dejadas en el homo y no se
desmizansuavnmente despu_s de un cicmode mimpieza,Iimpie
las parrillasy los soportesde [asparrillas con una peque5acantidad
de aceitevegetal para hacedasdeslizadascon pa_sfacilidad.
Pueden aparecnr m+neasdemgadasen maporcemanaampasar per
cicmosde camentamientoy enfriamiento. Estoes normaly no
afectar_e! rendimiento+
Una descomomni6nbmancapuede apareeer despu6s demcicmo
de mimpiezasi mosamimentos_cidos o azucaradosno fueron
limpiados antes demcicmode automimpieza.Estadescoloraci6nes
normaly no afectar8el rendimiento+
Durante cido de auto impieza
Cuandoaparece'LOCK'enel indicador,la puerta no se puede abrir+
No fuerce la puerta paraabrirtacuando el (cono'LOCK'est8en el
indicadorvisual+
Humo y OIores
Usted puedever humoy sentirolor las pdmerasvecesque el horno
es Iimpiado. Estoes normaly dispainuir_con el tiempo.
Tambi6npuede ocurrir humo si e! homo est_demasiadosucio o si
se ha dejadouna asaderaen el homo+
Sonidos
A med+daqueet homo se caIienta,ustedpuede oir sonidosde
piezasmet_Iicasque se expandeny contraen+Estoes normaly no
da_ar_e[ horno.
• Sise deja abierta [a puerta del horno,[a paiabra'door'
desteliar_en el indicadorvisual y se escuchar8unasepal
sonorahastaque [a puertasea cerraday la tecla 'Clean'sea
oprimida nuevamente.
• Sitranscurrenm_sde 5 segundosdespu6sde oprimir la tecia
'Clean'y antesde oprimir la tecla 'Autoset', el programavolver_
autom_ticamenteai despIiegueprevio.
• Un ventiladorseencenderdautom_ticamenteduranteel ciclo
de autolimpiezay se apagar_automaticamentedespu6sdel
ciclo de Hmpiezacuandoel homo se hayaenfdado.Si el
ventiIadornofunciona, pOngaseen contacto con un t6cnico
autorizado.
La puertade[ hornose dafiar_isi sefuerzapara abriria quando
el (cono'LOCK'sigue desplegadoen el indicador.
61
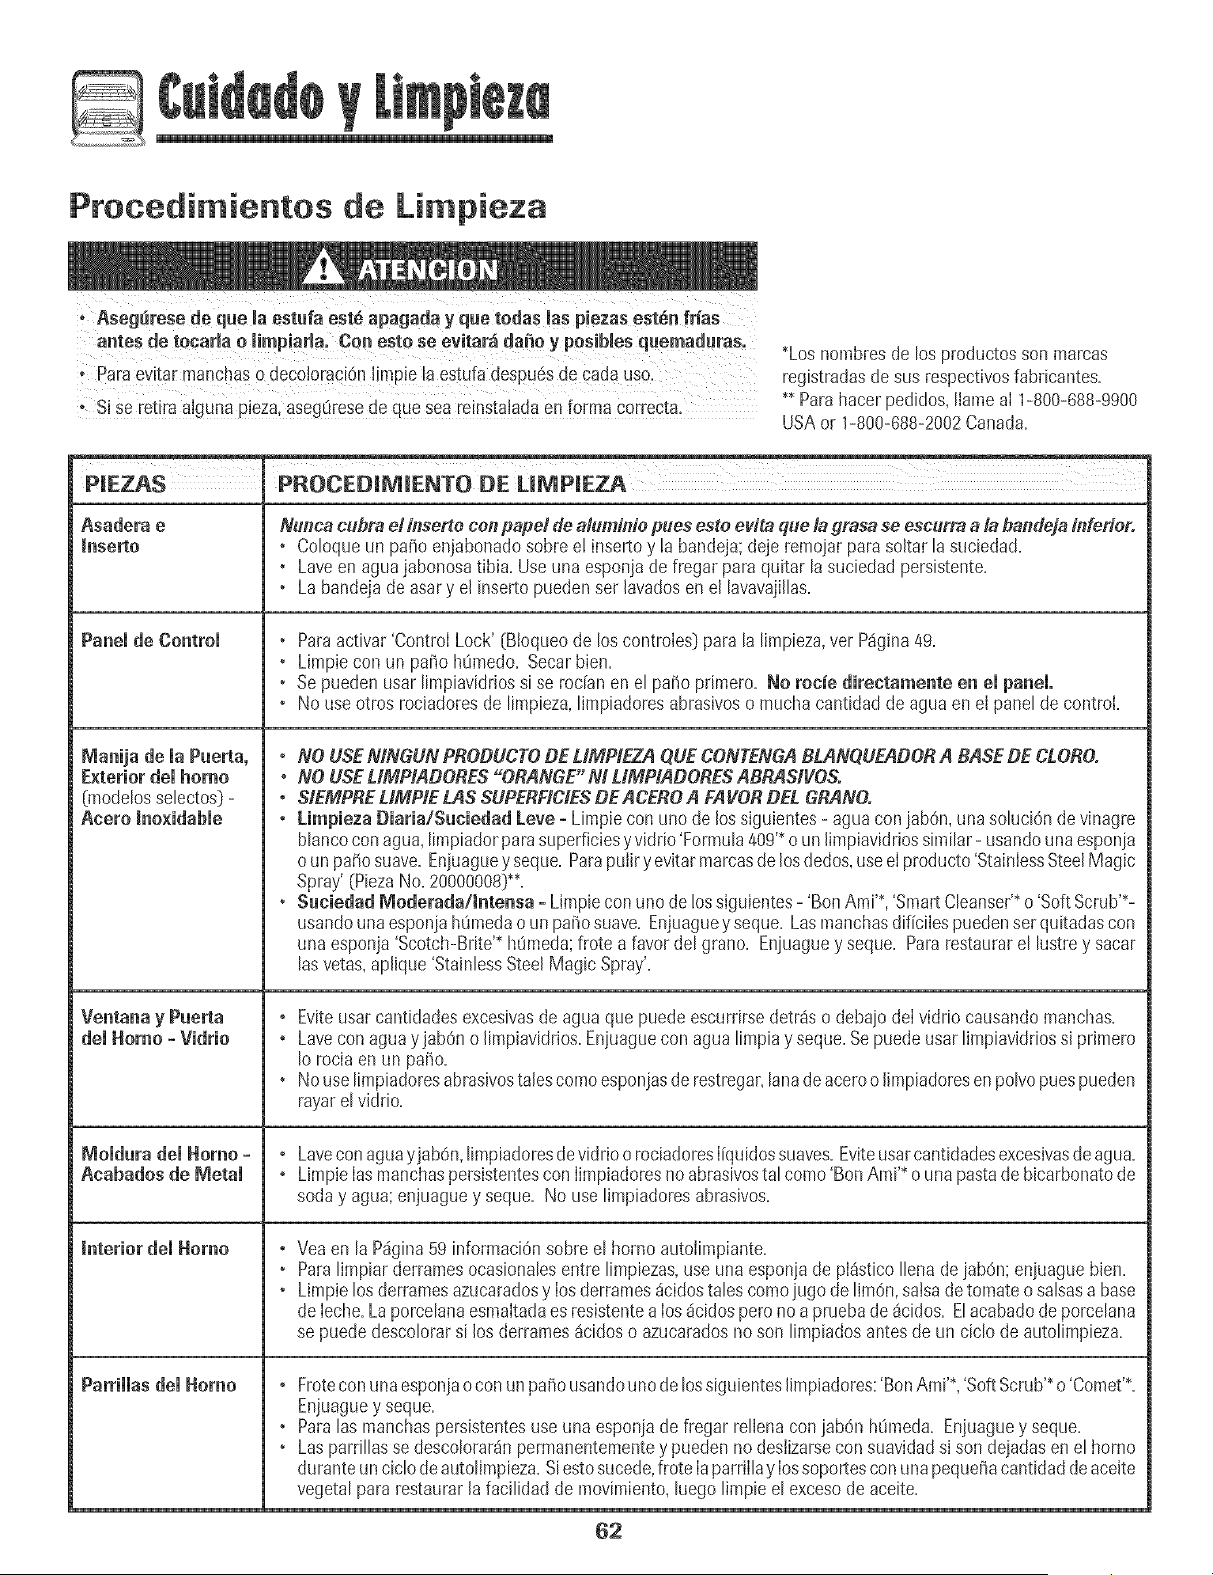
L
Procedimientos de Li pieza
antes de tecarla o impiarla_ Cen estO se evitar_ da_e y posibles quen!aduras.
o %ra evitar manc!as 0 decol0radOn[[mpiela estufadespu6sde cadauso.
* Si se retira a!gunapieza,asegtiresede quesea re!nstaladaenforma correcta_
*Loshombresde los productosson marcas
registradasdesus respectivosfabricantes.
** Parahacerpedidos,llameai 1-800-688-9900
USAor 1-800-688-2002Canada.
Panemde Controm
Manija de ia Puerta,
Exterior demhomo
{modelos selectos} -
Aeero _noxidabie
dei Homo =VidHo °
MomdurademHomoo °
Aeabados de Metam ,
Interior del Homo
ParrimmasdemHomo ,
Nunca cubra e! inserte con papet de aluminie pues este evita que la grasa se escurra a la bandeja inferior.
• Coloqueun patio enjabonadosobre e! insertoy la bandeja;deje remoiarpara soltar la suciedad=
• Laveen aguajabonosatibia. Useuna esponjade fregar para quitar lasuciedad persistente=
• La bandejade asary el insertopueden set lavadosen el lavavajillas=
• Paraactivar'Control Lock' (Bioqueode los controles] para la limpieza,vet P4gina49=
• Limpiecon un patio h0medo=Secarbien=
• Sepuedenusar limpiaviddossi se redan en el patio primero=No rocie direetamente en el panel,
• No useotros rociadoresde limpieza,limpiadoresabrasiveso mucha cantidadde agua en el panel de control
° NO USEMNGUN PBODUCTODE UMPIEZA QUECONTENGABLANQUEADOBA BASE DE CLOBO.
• NO USEUMPIADORES "ORANGE" M LIMPIADOBES ABRAStVOS.
° SIEMPBEUMPIE LAS SUPERFICIESDEACE_O A FAVOR DEL GRANO.
° Limpieza Diaria/S_ciedad Leve =Limpie con uno de lossiguientes- agua coniabOn,_masoluciOnde vinagre
blancocon agua,limpiadorparasuperficiesy vk_rio'Formula409'*oun limpiavidriossimilar- usandounaesponja
o unpa5o suave.Enjuagueyseque=ParapuIiry evitarmarcasde losdedos,useeIproducto'StainIessSteelMagic
Spray'(PiezaNo=20000008)**=
• Sacie_ad _ederada/_te_sa o Limpieconuno de !ossiguientes- 'Ben Ami'*,'Sn_artCleanser'*o 'Soft Scrub'*-
usandounaesponiahOmedao un patiosuave. Enjuaguey seque=Lasmanchasdificilespuedenserquitadascon
una esponja'Scotch-Brite'* h0meda;frote a favordel grano=Eniuaguey seque=Pararestaurarel lustrey sacar
lasvetas,aplique'StainlessSteelMagic Spray'.
Eviteusarcantidadesexcesivasde agua que puedeescurdrsedetr4s o debaiodeI vidrio causandomanchas=
Lavecon aguayjab6n oJimpiavidrios=Eniuaguecon agua limpiay seque=Sepuedeusar limpiaviddossi primero
[o rocia enun patio.
Nouselimpiadoresabrasivestalescomeesponjasde restregar,lanadeaceroo [impiadoresenpolvopuespueden
rayarelviddo.
Lavecon aguayjabOn,limpiadoresdevidrio orociadoresl[quidossuaves.Eviteusarcantidadesexcesivasdeagua.
Limpie[asmanchaspersistentescon [impiadoresno abrasivestal come 'BenAmi'* o una pastadebicarbonatede
soda y agua; enjuaguey seque. No use limpiadoresabrasives.
Veaen la P_gina59 informaciOnsobreel borne autolimpiante.
Paralimpiar derramesocasiona[esentre limpiezas,use una esponjade pl_sticoI[ena dejabOn;enjuaguebien.
Limpielosderramesazucaradosy los derrames_cidostales comejugo delim6n, salsadetomateo salsasa base
de [eche.La porcelanaesmaitadaesresistentealos _cidospero noa pruebade _cidos. Elacabadode porce[ana
se puededescolorarsi losderrames_cidoso azucaradosno son limpiados antesde un ciclo de autolimpieza.
Froteconuna esponjaocon un patiousandounode lossiguienteslimpiadores:'BenAmi'*,'SoftScrub'*o'Comet'*.
Enjuaguey seque.
Paralas manchaspersistentesuse una esponjade fregar re[ienacon jab6n h_meda. Enjuaguey seque.
Laspardllasse descolorar_npermanentementey puedenno deslizarsecon suavidadsi son dejadasen el homo
duranteunciclo deautolimpieza.Siestosucede,frote [aparrilla y lossoportescon unapequefiacantidadde aceite
vegetalpara restaurar[afacilidad de movimiento,luego limpie el excesodeaceite.
62
Luz del Homo
; NOtoque Unfoco caliente con un paiio hOmedopuesel foco
puedequebrarse_
Para cambiar la luz dei homo:
1. Use un tomaoIhs secoy con mucho cuidadodestolnitie la
cubiertadei foco yet foco.
2. Reempiacecon un foco para hornode electrodom6st+code 40
wats. SerecomiendanIos focos con basede latdn paraevitar
fusidn del foco en el casquilio.
3. ReempIacela cubierta del foco y vuelvaa conectarla corriente
elQctricaai homo+
4, Vuelva a programar el reloj,
Ventana dem Homo
Para proteger la ventana dei homo:
1. No use agentes de limpieza abrasivos tales como esponjas
de lana de acero o limpiadores en polvo pues puedenrayarel
vidrio,
2. No golpee el vidrio con oflas,sartenes,muebles,juguetes u otros
objetos.
3. No cierre la puerta del horno hastaque las parrillasdel horno no
est6nen su lugar.
AI golpear,rayar,hacervibrar o esforzarelvidrio puede debilitar su
estructuracausandoun mayor riesgode rotura en una fecha
posterior.
63

B
PROBLEMA SOLUCION
Paramamayor_ademosprobmemas,
verifique primero mosiguiente.
Emremoj,m_spamabrasenemindicador
visuamV/o masmutesfuncionan pero
emhomo no se camientao
La muzdei homo y/o el reioj no
funcionan.
Hayunomorfuerte o humo meve
cuandoseenciendeemhomo.
Emhomono actiw emproceso de
Elhomono limpiaen forma debidao
Losamimentosno se asan a maparrimma
en forma debida.
Losamimentoshomeados se queman
o se doran demasiado.
Losaiimentos se homean de
manera irregular.
La puertademhomonose
° Revisesi[os controlesde[ homo est_n debidamenteajustados=
° Verifiquesi el homo est_debidamenteenchufadoen un tomacordenteetdctrico=
• Verifiqueo wJeivaa reponerel disyuntor=Verifiqueo reempiaceel fusible=
• Verifiqueel suministro deenerg[aelectrica=
, Los controlespuedenestar programadospara 'Cook& HoW o 'Deiay'=
, Puedeestaractivadala caracteffsticade bioqueo de [os controles=(VerP%ina 49=:)
° Elfoco puede estarsueito o defectuoso=
° La luz de! hornono funciona durante un cicio de autolimpieza=
° Elhorno puede estaren Modo Sab4tico=[Ver p%ina 56=]
° Estoesnormalenun hornomuraJnuevoydesaparecer4despu6sde unospocosusos=A[ iniciar
un ciclo de autolimpiezase "quemaran"JosoJoresm4sr4pidamente=Si se enciendeeJ
ventiiadorayudaraia eiiminar eJhumoy/o eJoJor=
• Suciedadexcesivade aJimentosen eJpanelinferior de[ homo=Useun ciclo de autolimpieza=
° EIhorno puedeestar pmgramadopara una[[mpiezadiferida.
° Elhomo puedeestaren Modo Sab_tico. [Vet p%ina 56.)
• Elhomo puede estara m_s de205° C (400° F). La temperaturadel horno debe set inferior
a 205° C (400° F) paraprogramarun cic[o de limpieza.
° Elhomo puedenecesitaruntiempo de Nmpiezam_s pro[ongado.
° No se limpiaronlos derramesexcesivosantesde[ procesode autolimpieza.
° Verifiquela posici6nde la parriiIa. 07erP%ina 54.)
° Elvoitaiedel hogar puedeset bajo.
° ElaHmentopuedeestar co[ocadoen forma incorrectaen e[ horno. 07erelfofleto "La Cocina
F_cir'=)
• Elhomo no fue precalentadoenforma debida=
° EIhorno nofue precalentado.
° Elhomo puedeestarhsstaladoen forma indebida.
• Verifiquela parrilia de[ horno con un niveL
• Coloquelosutensiiiosdehornearaiternadamenteysin quesetoquenentresi osin quetoquen
la pareddel homo.
• Verifiquelasinstruccionesparalacorrectaco[ocaci6ndelosutensiliosen laparrilla de[homo.
07erel folleto "La CocinaF_ci[".}
° EIhornopuedequenose hayaenfriado Iosuficientedespuesde un procesode autolimpieza.
° Elcontroly la puerta puedenestarbloqueados. _v_erp%ina 49.)
cent,
64
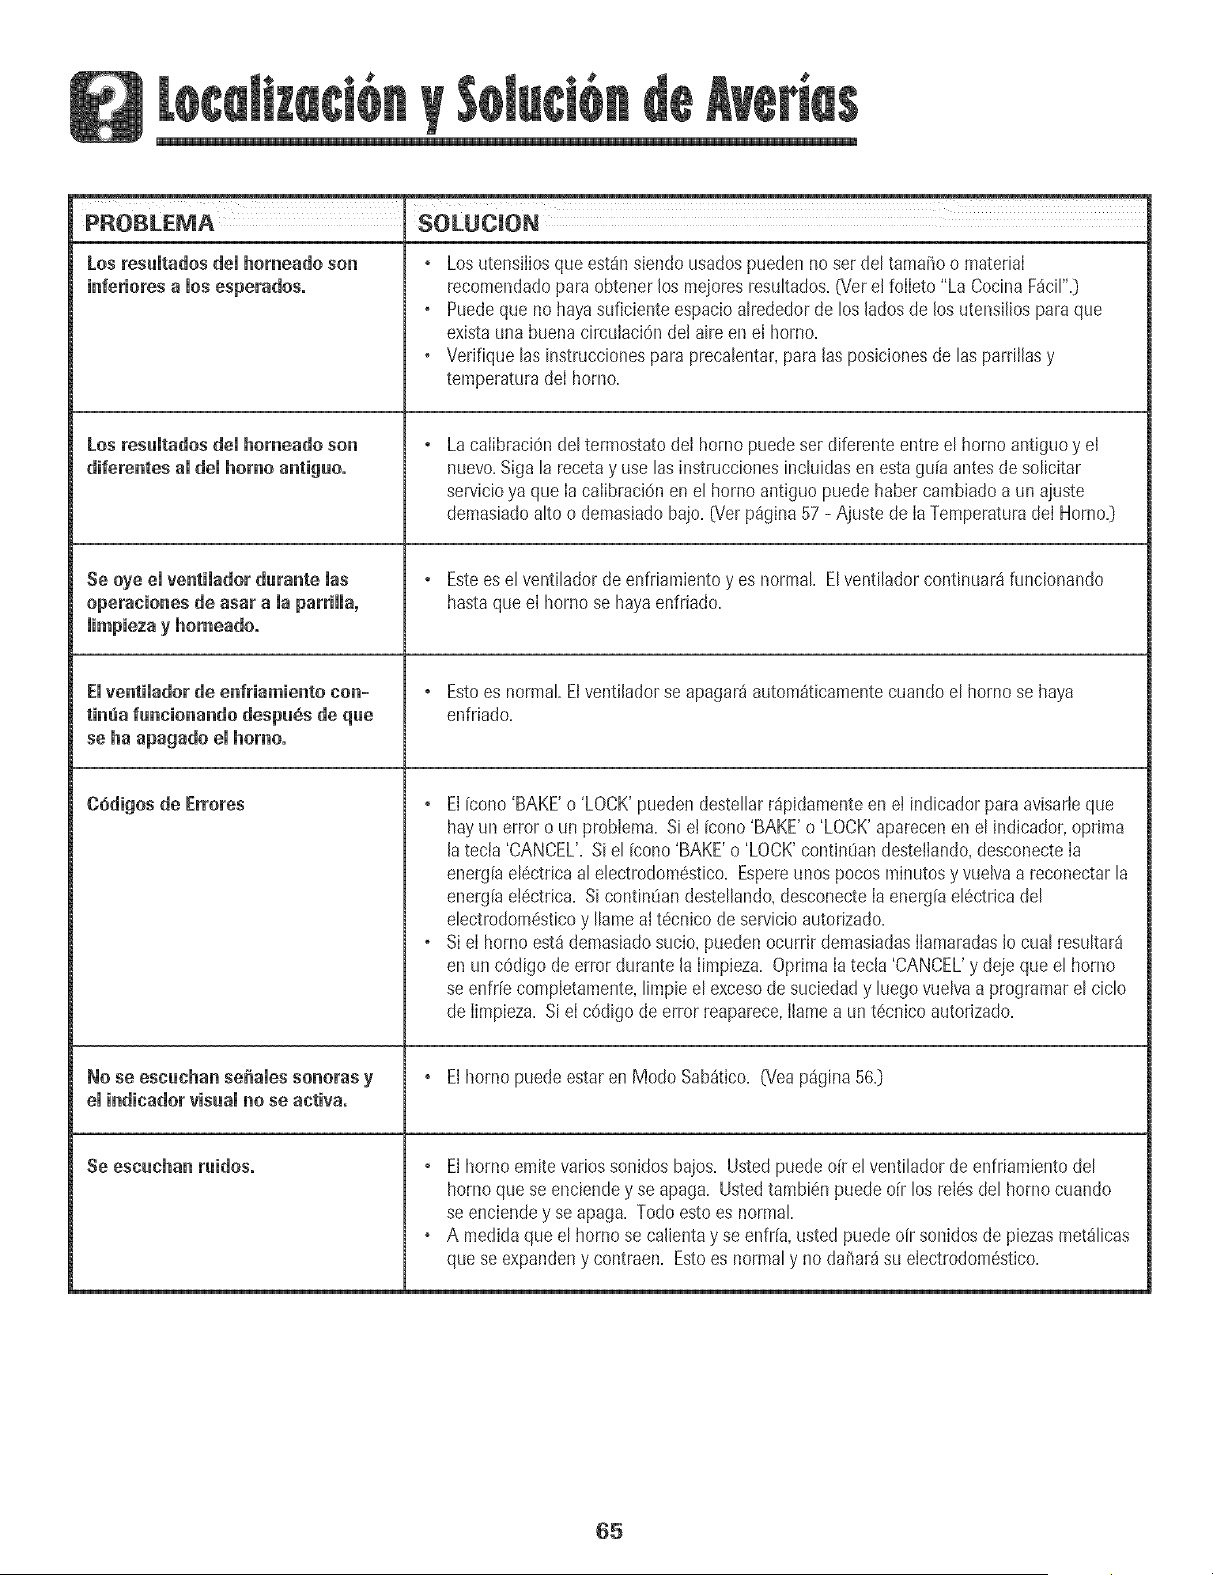
PROBLEMA SOLUCION
Losresumtadosdemhomeadoson
inferiores a mosesperados.
Losresuitados demhomeadoson
diferentes amdemhomo antiguo.
se oye emventimadordurante mas
operaciones de asar a maparrimma,
mimpiezay homeadoo
Emventimadorde enfriamiento con-
timia funcionando despu_s de que
se ha apagado el homo.
C6digos de Errores
No se escuchan seiiaies sonoras y
el indicadorvisual no se activao
Se escuchan ruidos.
° Los utensiIiosque estans[endousadospueden no set de[ tamaSoo matedaI
recomendadopara obtenerlos mejoresresultados,(Vet el foIIeto "La CocinaF_cil",)
o 9uede que no hayasuficienteespacioalrededor de los ladosde los utensiliosparaque
existauna buena circulaci6nde! aire enel homo,
o Verifique las instruccionespara precalentar,paralas posicionesde las parriilasy
temperaturadeI homo,
La calibraciOndel termostatodeI horno puedeser diferente entre el homo antiguoy el
nuevo,Sigala receta y use las instruccionesincluidasen estagu[a antes desolicitar
servicioya que Iacaiibraci6nen el homo antigtJopuede habercambiadoa un aiuste
demasiadoalto o demasiadobajo, [Verp%ina 57 - Ajuste de IaTemperaturadeI Homo,D
° Estees el ventihdor de enfriamientoyes normal Elventilador continuar8funcionando
hastaque el homo se hayaenfriado,
° Estoes normal ElventiJadorse apagar4autom4ticamentecuandoel horno se haya
enfriado,
° El[cono 'BAKE'o 'LOCK'pueden deste[[arr4pidamenteenel indicadorpara avisarleque
hay un error o un probiema, Si e! [cono'BAKE'o 'LOCK'aparecenen el indicador,optima
Jatecia 'CANCEL',Siel [cono'BAKE'o 'LOCK'contin0andestelIando,desconecteIa
energ[ael6ctricaal electrodom6stico, Espereunos pocos minutosy wJeJvaa reconectarla
energ[aeJ_ctrica,Si contin_iandestellando,desconecteIaenerg[ael6ctricadel
electrodom6sticoy Ilarneal t6cnico de servicioautorizado,
o Si eI homo est4demasiadosucio, pueden ocurrir demasiadasIlamaradasIo cual resultar4
en un c6digo de error durante JaIimpieza, OptimaIa tecJa'CANCEL'y dejeque el homo
se enfr[ecompletamente,limpie el excesode suciedady luego vuelvaa programarel ciclo
de Iimpieza, Si eI c6digo de error reaparece,Ilame a un t6cnico autodzado,
° Elhomo puedeestaren Modo Sab4tico, _ea p4gina 56,)
° Elhorno emite vadossonidosbajos, Ustedpuede o[r el ventilador de enfriamientodel
hornoque se enciendey se apaga, Ustedtarnbi6n puedeo[r los rel6s del homo cuando
se enciendey se apaga, Todoestoes normal
• A medidaqueel homo se calientay se enfr[a,usted puedeoir sonidos de piezasmet41icas
que se expandeny contraen, Estoes normaly no daSar4su electrodom6stico,
65

66

Garant_a Compieta de Ua Afro - Piezas y
Mano de Obra
Dumnteun(1} a_o desdela fechaoNgina[de compm
al pot menor,se repararao reemplazar_gratuitamen[e
cualquierpiezaquetulle duranteusonormalen el
hoaar
Garant[as Umitadas - Piezas Selamente
Desde elSegundo basra el QuintoA_o =A partlrde
lafechaoriginalde compra,se repamrauo
rsemplazarangrawitamentelas p_ezasindicadasa
con_inuac[onque fallen duranteuso normalen el hoga_
en !oquerespecEaa laspiezasy el prop[etafiodeber_
pagartodosloso_roscos-Eosincluyenoomano(_eopts
kilometrajeytransporLe
Controles Electr6niees
EmementesCalefacteresD4ctrices: el etemen-[ode
asara laparrilla,de conveccl6ny de hornearen los
artefactosde cocinar d6ctficos.
Lo que No Cubren Estas Garantfas
1= Situacionesy darios resultantesde cualquierade las siguientes
eventualidades:
a=Instaiaci6n,entregao mantenimientoinapropiados=
b=CuaiquierreparaciOn,modificaci6n,alteraciOno aiusteno autor[zadopor
el fabricanteo por un centro de servicioautorizado=
c= Mal uso,abuso,accidenteso uso irrazonable=
d=Corrienteei6ctrica,voitaje o suministroincorrecto=
e=Programaci6nincorrectade cualquierade los controles=
2= Las garantias quedan hulassi ios n8merosde serieoriginales hun sido
retirados,alteradoso noson f_cilmente legibles=
3= Focos=
4= Productoscompradosparauso comerciaio industrial
5= EIcosto delsewicio o Ilamadade sewicio para:
a=Corregirerroresde instalaci6n=
b=Instruir al usuadosobre el uso correctodel artefacto=
c= Transportedel artefactoai estabiecimientode servicio=
6= Los dai_osconsecuenteso incidentalessufridos porcualquier personacomo
resultadodel incumplimiento de estasgarant[as=En aigunosestadosnose
permiteia exclusiOno limitaci6n de dai_osconsecuenteso incidentales,pot
Io tanto la limitaciOno exclusi6nanterior puede no aplicarseen su caso=
Residentes Canadienses
Lasgarantiasantenorescubrensolamenteaquei_os
eiectrodom6sticosinstaiadosen Canadaque/_ansido
cert[ficadoso aprobadospot lasagenciasde prueDas
correspondientesparacumpllmlentocon [aNorma
Nacio_alde Canadaa menosque elelectrodomest[co
hayasidotrddo a Canad_desdelosEE.UU.debldoa un
cambiode residencia.
Garant_a Limitada Fuera de los Estades
Unidos y Canad$ = Piezas Solamente
Durancec_os(2}aSosdesdeJafecha decornpraonginaJ
aJpot menor,cualquierpiezaquefaJJeduran[euso
normaleneJhogarserareemplazadao reparaaa
g"atultan_enteen Ioque respectaa [apiezaye[
proptetanodeberapagar[odos losotroscostos
mc[uyendomanode obra,kilometrajey transporte
Lasgarant/asespedficasexpresadasanteflom?en[eson
!asUMCAS cjarantiasprovtstaspor d fabricante.Esras
darant/asle otorcjandereehoslegatesespecfficosy usted
,gueaeTeneradem4sotrosderechosquew;riandeun
estadoa otto
Si Necesita Servicio
• Llameat distribuidordondecompr6su etectrodom6sticoo Ilame a Maytag
ServicessM,Maytag CustomerAssistanceal 1-800-688-9900en EEUU=o al
1-800-688-2002en Canadapara ubicara un t6cnico autorizado=
• Asegtiresede conservarei comprobantede comprapara vedficar ei estadode
la garantfa=Consultela secciOnsobre ia 6ARANTIApara mayorinformaci6n
sobre las responsabiiidadesde! propietario paraserviciobajo la garant(a=
• Si el distdbuidor o lacompafifa deservicio no pueden resoivere! problema,
escribaa Maytag ServicessM,Attn: CAIR®Center,RO=Box2370,Clevehnd,TN
37320-2370o Ilame al l_8eo_688_99ee en EE=UU=o al 1_80e_688_2002 en
Canad&
• Lasgufasdel usuario,manuaiesde servicioe informaciOnsobre Iaspiezas
puedensolicitarsea MaytagServicess_*,Ma}¢agCustomerAssistance.
CuandoIhme o escdba acercadeun pmblemadeservicio, pot favor
incluyala siguiente informaciOn.
a. Su nombre,direcci6n y n8merodeteldono;
b. N8mero de modeloy n8merode serie;
c. Nombre y direcciOndesu distribuidor o t6cnico de servicio;
d. Una descripciOnclara del problemaque est_ experimentando;
e. Comprobantede compra (recibo decompra}.
Form No. A/04/03 Part No, 8112P217-60 _)2003 Maytag Appliances Sales Co. Litho U,S,A,