Loading ...
Loading ...
Loading ...
Unpacking
1. Remove ait screws and staples from the crate.
2. Holding sides of the crate firmly, lift top of the crate
up and set it aside. Avoid tire punctures.
3. Remove and discard plastic bag covering the unit.
4. Lift the rear of the mower and clear the bottom of
the crate. Repeat for the front.
5. Be sure the parking brake isdisengaged. See
Figure 6 for location of the parking brake.
6. Roll unit out of the crate.
Loose Parts
Remove loose parts from the grass catcher and/or the
crate very carefully. Compare with list and illustration
(Figure 1) below.
i. Mulching plug & side-discharge chute
iL Oil drain sleeve
iii. Ignition keys (not shown)
iv. Operator's manual (not shown)
Side-Discharge z_
Mulching
plug
Oil Drain Sleeve
Figure 1
NOTE: Reference to RIGHT or LEFT side of the tractor
in this manual is observed from operator's position.
• Your riding mower is shipped with motor oil in the
engine. However, you must check the oil level
before operating. Be careful not to overfill.
Attaching Battery Cables
The battery is located under the hood assembly above
the left rear wheel. Refer to Figure 3.
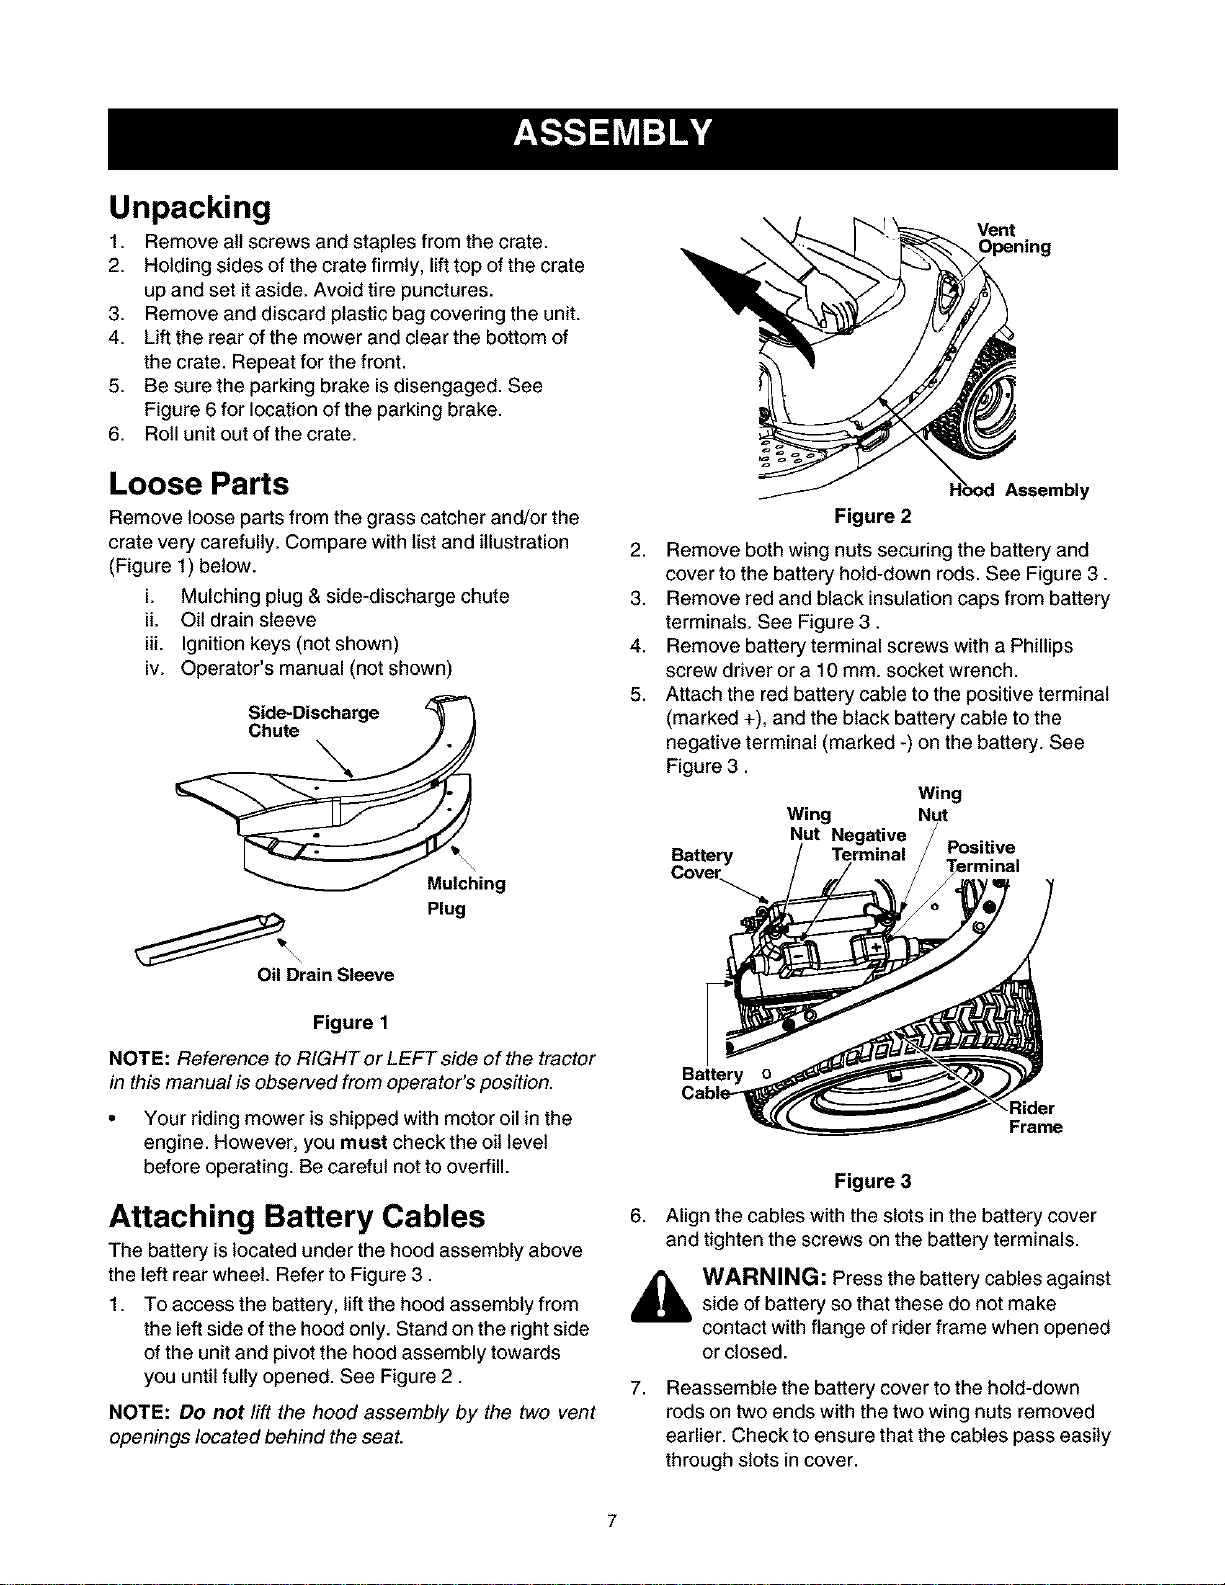
1. To access the battery, lift the hood assembly from
the left side of the hood only. Stand on the right side
of the unit and pivot the hood assembly towards
you until fully opened. See Figure 2.
NOTE: Do not lift the hood assembly by the two vent
openings located behind the seat.
Vent
Assembly
Figure 2
2. Remove both wing nuts securing the battery and
cover to the battery hold-down rods. See Figure 3.
3. Remove red and black insulationcaps from battery
terminals. See Figure 3.
4. Remove battery terminal screws with a Phillips
screw driver or a 10 mm. socket wrench.
5. Attach the red battery cable to the positive terminal
(marked +), and the black battery cable to the
negative terminal (marked -) on the battery. See
Figure 3.
Battery
Cove_
Wing
Wing Nut
Nut Negative
Terminal Positive
Battery
Rider
Frame
Figure 3
6. Align the cables with the slots in the battery cover
and tighten the screws on the battery terminals.
WARNING: Press the battery cables against
side of battery so that these do not make
contact with flange of rider frame when opened
or closed.
7,
Reassemble the battery cover to the hold-down
rods on two ends with the two wing nuts removed
earlier. Check to ensure that the cables pass easily
through slots incover.
Loading ...
Loading ...
Loading ...