Loading ...
Loading ...
Loading ...
VARIABLE SPEED
See Figure 5.
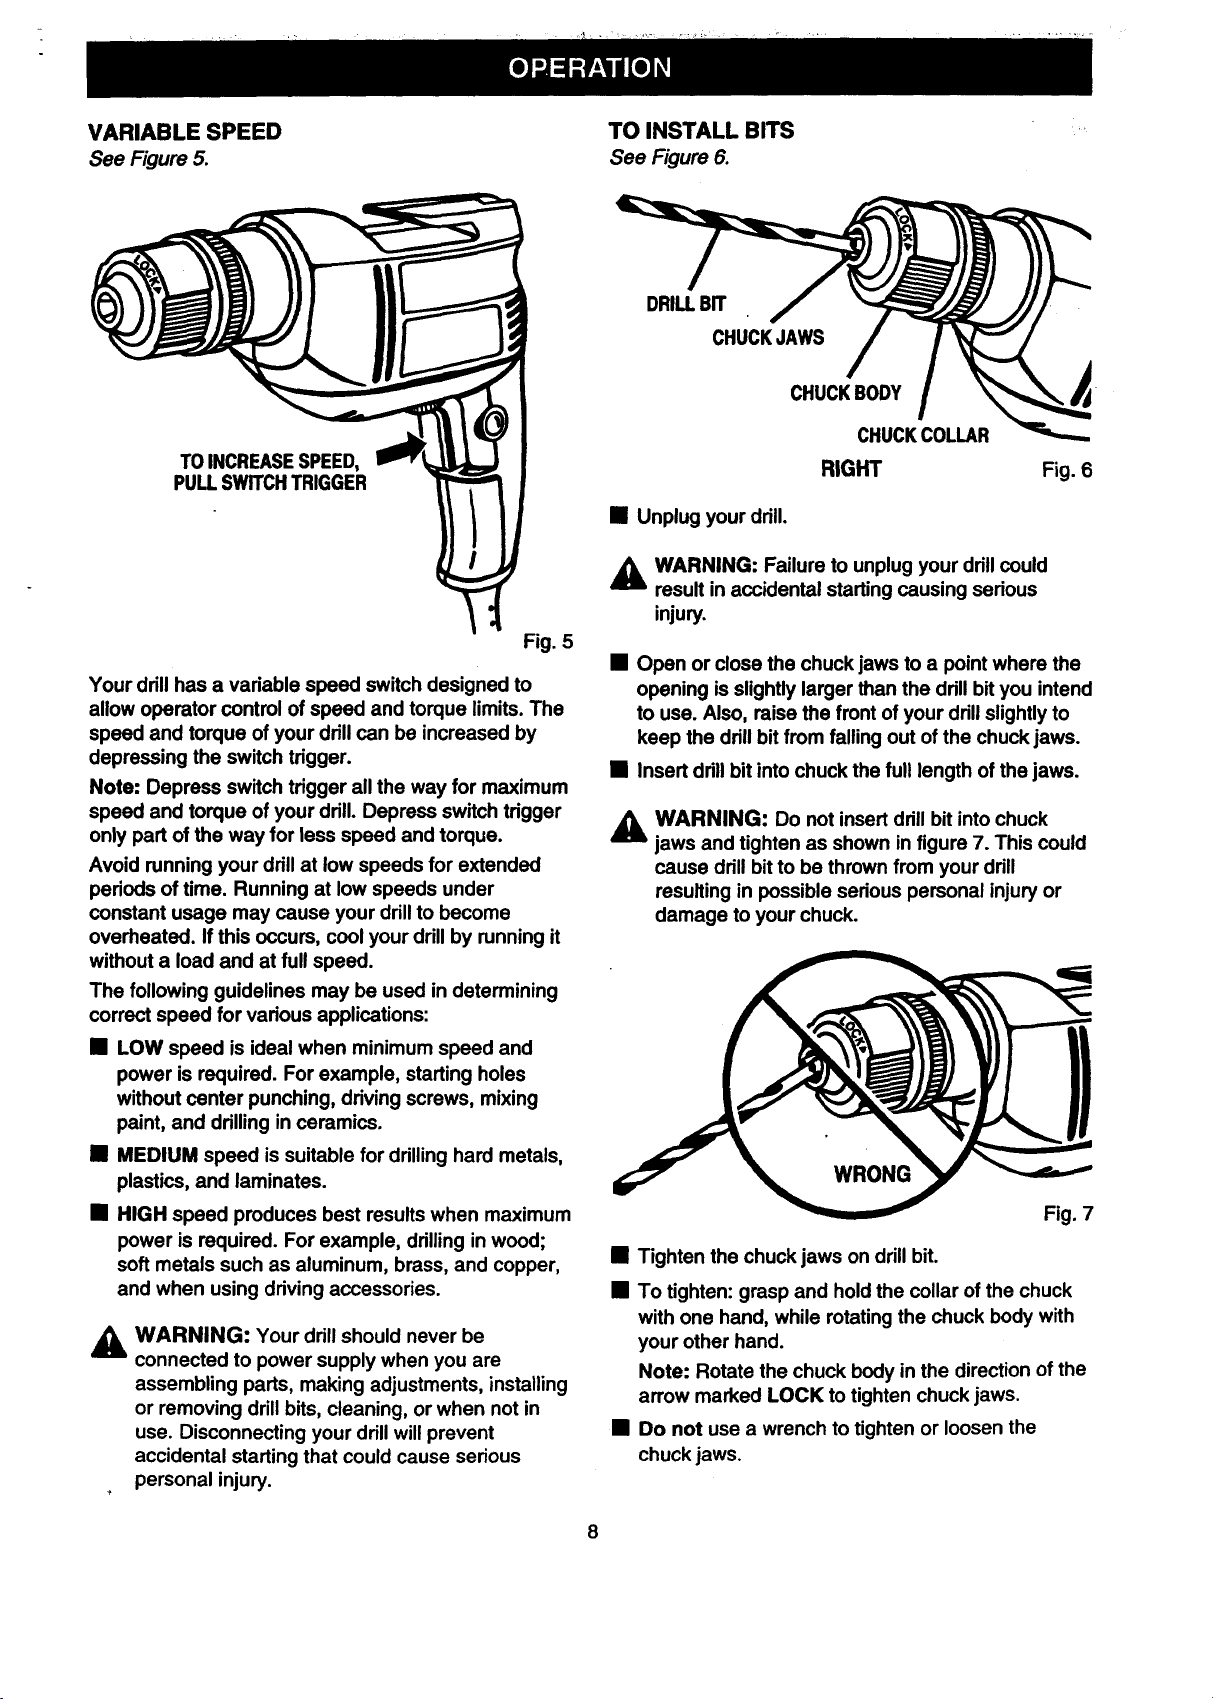
TO INSTALL BITS
See Figure 6.
DRILLBIT
CHUCKJAWS
TOINCREASESPEED,
PULLSWITCHTRIGGER
Fig. 5
Your drill has a variable speed switch designed to
allow operator control of speed and torque limits. The
speed and torque of your drill can be increased by
depressing the switch trigger.
Note: Depress switch trigger all the way for maximum
speed and torque of your drill. Depress switch trigger
only part of the way for less speed and torque.
Avoid running your drill at low speeds for extended
periods of time. Running at low speeds under
constant usage may cause your drillto become
overheated. Ifthis occurs, cool your drill by running it
without a load and at full speed.
The following guidelines may be used in determining
correct speed for various applications:
• LOW speed is ideal when minimum speed and
power is required. For example, starting holes
without center punching, driving screws, mixing
paint, and drilling in ceramics.
• MEDIUM speed is suitable for drilling hard metals,
plastics, and laminates.
• HIGH speed produces best results when maximum
power is required. For example, drilling in wood;
soft metals such as aluminum, brass, and copper,
and when using driving accessories.
,_ WARNING: Your drillshould never be
connected to power supply when you are
assembling pads, making adjustments, installing
or removing drill bits, cleaning, or when not in
use. Disconnecting your drillwill prevent
accidental starting that could cause serious
personal injury.
CHUCKBODY
CHUCKCOLLAR
RIGHT
Fig. 6
• Unplug your drill.
_IL ARNING: Failure to unplug your drillcould
result in accidental starting causing serious
injury.
• Open or close the chuck jaws to a point where the
opening isslightly larger than the drill bit you intend
to use. Also, raise the front of your drillslightlyto
keep the drill bit from falling out of the chuck jaws.
• Insert drill bit into chuck the full length of the jaws.
_ WARNING: Do not insert drill bit into chuck
jaws and tighten as shown in figure 7. This could
cause drill bit to be thrown from your drill
resulting in possible serious personal injury or
damage to your chuck.
WRONG
Fig. 7
• Tighten the chuck jaws on drill bit.
• To tighten: grasp and hold the collar of the chuck
with one hand, while rotatingthe chuck body with
your other hand.
Note: Rotate the chuck body in the direction of the
arrow marked LOCK to tighten chuck jaws.
• Do not use a wrench to tighten or loosen the
chuck jaws.
Loading ...
Loading ...
Loading ...