Loading ...
Loading ...
Loading ...
ASSEMBLY
INSTALL BATTERY (See Figs. 4 & 5)
CAUTION: Do not short battery termF
rials. Before installing battery, remove
metal bracelets, wristwatch bands,
rings, etc.
Positive terminal must be connected
first to prevent sparking from acciden-
tal grounding.
Lift seat to raised position.
• Open battery box door.
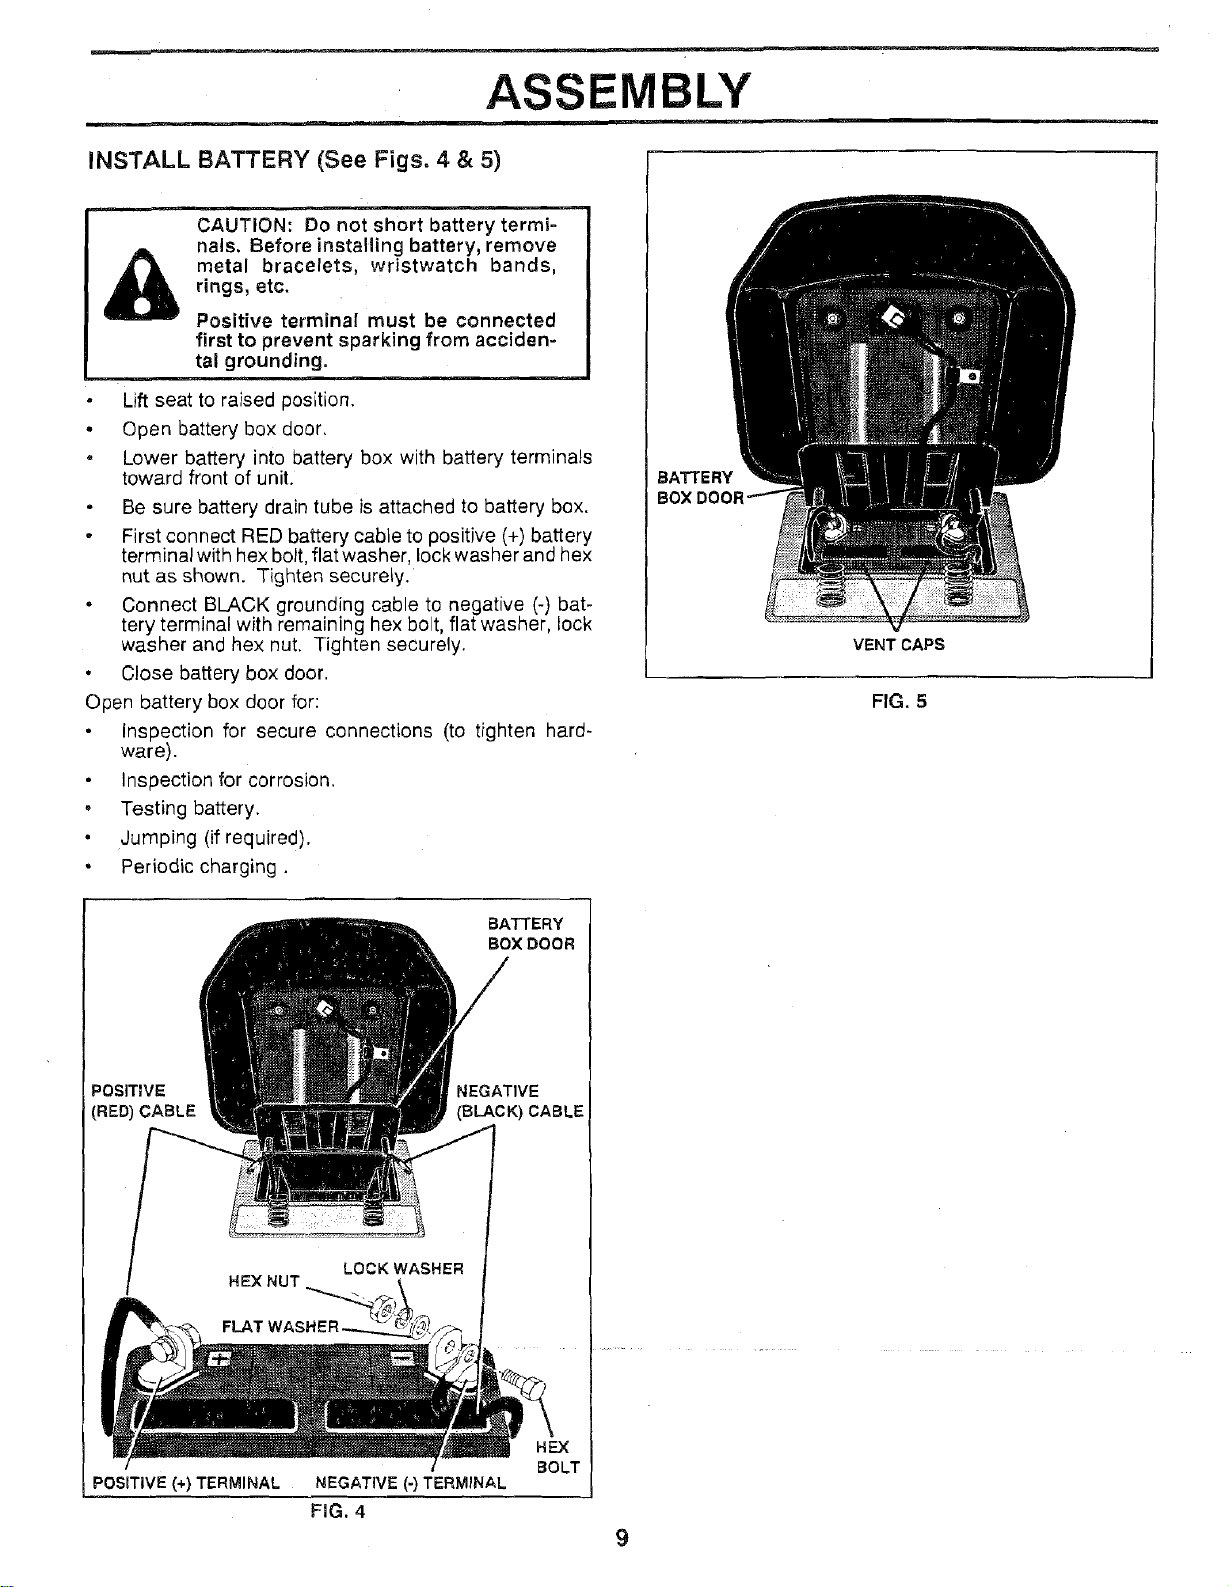
• Lower battery into battery box with battery terminals
toward front of unit.
Be sure battery drain tube is attached to battery box.
First connect RED battery cable to positive (+) battery
terminal with hex bolt, flat washer, lock washer and hex
nut as shown. Tighten securely.
. Connect BLACK grounding cable to negative (-) bat-
tery terminal with remaining hex bolt, flat washer, lock
washer and hex nut. Tighten securely.
• Close battery box door.
Open battery box door for:
Inspection for secure connections (to tighten hard-
ware).
Inspection for corrosion.
• Testing battery.
• Jumping (if required).
• Periodic charging.
BATTERY
BOX DOO_
VENT CAPS
FIG. 5
BATTERY
BOX DOOR
POSITIVE NEGATIVE
(RED) CABLE (BLACK) CABLE
POSITIVE (+) TERMINAL NEGATIVE (-) TERMINAL
FiG. 4
HF_X
BOLT
9
Loading ...
Loading ...
Loading ...