Amana AFI2538AEB4 Refrigerator
Product's Documents
Below are documents related to this product, you can read online or download:
- Owner's manual - (English) Read Online | Download pdf

User Gudie Amana AFI2538AEB4 Refrigerator
Table of contents
IMPORTANT SAFETY INSTRUCTIONS WARNING:
To reduce the risk of fire. electric shock. or injury when using your refrigerator. follow these basic precautions:
• Plug into a grounded 3 prong outlet.
• Do not remove ground prong.
• Do not use an adapter.
• Do not use an extension cord.
• Disconnect power before servicing.
• Replace all parts and panels before operating.
• Remove doors from your old refrigerator.
• Use nonflammable cleaner.
• Keep flammable materials and vapors. such as gasoline. away from refrigerator.
• Use two or more people to move and install refrigerator.
• Disconnect power before installing ice maker (on ice maker kit ready models only).
• Use a sturdy glass when dispensing ice (on some models).
IMPORTANT:
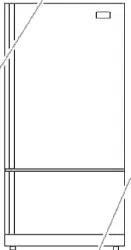
INSTALLATION INSTRUCTIONS
Clean Before Using
Explosion Hazard
NOTE:
Electrical Shock Hazard
NOTE:
IMPORTANT:
Water Pressure
Replace the filter if necessary.
IMPORTANT:
A. Cold water pipe B. Pipe clamp C. Copper tubing D. Compression nut
E. Compression sleeve F. Shutoff valve
G. Packing nut
Connect to Refrigerator
A. Brass nut
B. Compression sleeve
5. Attachthecoppertubingtotherefrigerator witha"P"clamp.
NOTE:
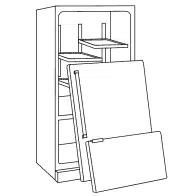
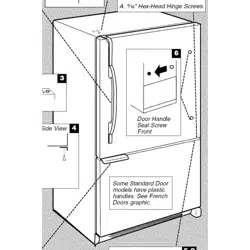
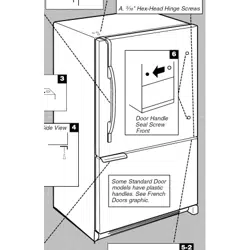
Style 1 - Metal Handles
To Replace Handles:
IMPORTANT:
NOTE:
TOOLS NEEDED:
See Connections graphic.
NOTE:
Style 1 - Front and rear leveling
NOTE:
Leveling screw
NOTE:
NOTE:
Freezer Refrigerator
IMPORTANT:
NOTE:
To Turn Off/On: IMPORTANT:
NOTE:
Max Cool
NOTE:
Humidity Control (on some Models)
User Preferences
F - Temperature in degrees Fahrenheit
C - Temperature in degrees Celsius
NOTE:
NOTE:
To Access the User Preferences Menu:
Turning the Ice Maker On/Off
To Remove the Ice Storage Bin:
IMPORTANT
Press the switch to the ON position
Ice Production Rate
Remember
IMPORTANT:
NOTE:
IMPORTANT:
To Dispense Water or Ice Cubes:
To Dispense Water and Ice Cubes Together:
IMPORTANT:
NOTES:
Auto On
DispenserLock
To Lock and Unlock Dispenser:
Water Filter Status Lights
Replacing the Water Filter
NOTE:
To Clean Your Refrigerator:
IMPORTANT:
Remove the base grille.
NOTE:
Explosion Hazard
NOTE:
Water from the dispenser is warm
LIM ITED WARRANTY
ITEMS EXCLUDED FROM WARRANTY