Loading ...
Loading ...
Loading ...
_hb ARNING: Always wear
safety glasses or eye shields
while assembling snow
thrower.
TOOLS REQUIRED FOR
ASSEMBLY
1 - Knife to cut carton
2 - 1/2 inch wrenches
(or adjustable wrenches)
2 - 9/1 6 inch wrenches
(or adjustable wrenches)
2 - 3/4 inch wrenches
(or adjustable wrenches)
1 - Pliers (to spread cotter pin)
1 - Screwdriver
1 - Measuring tape or ruler
/---'4
o
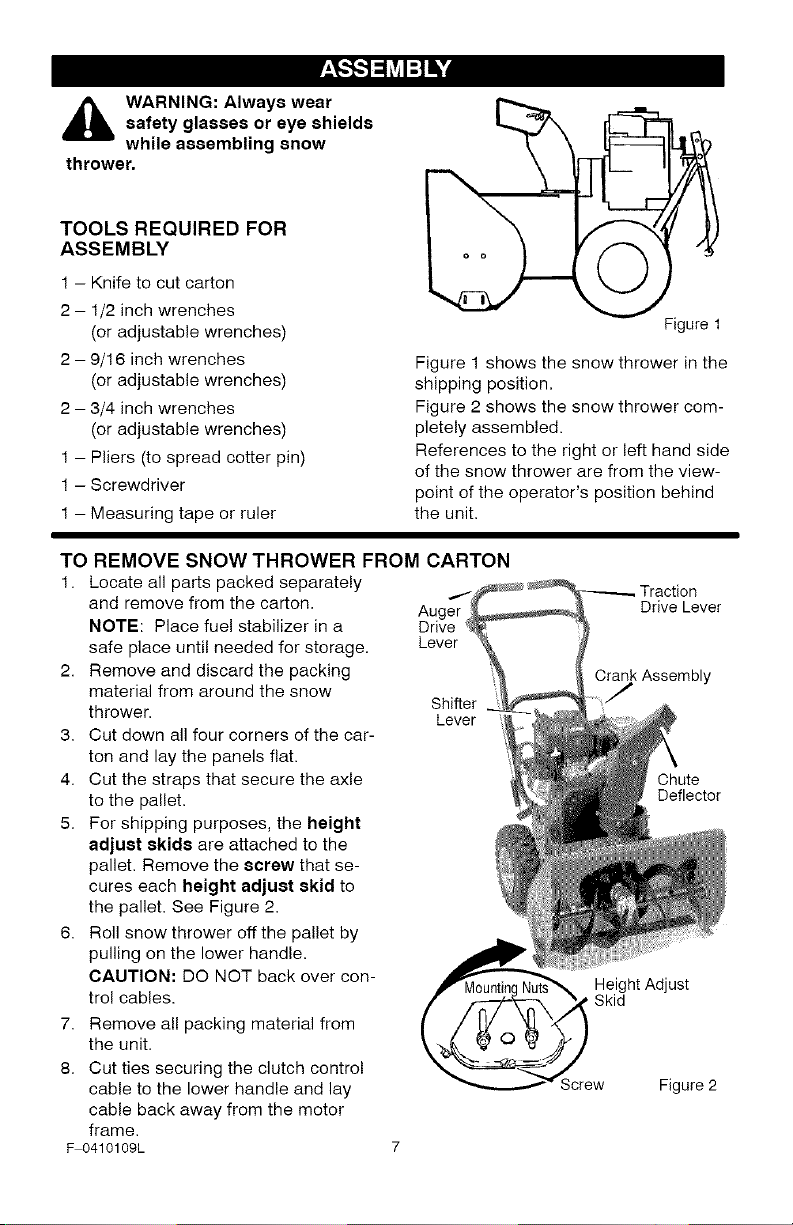
Figure 1
Figure 1 shows the snow thrower in the
shipping position.
Figure 2 shows the snow thrower com-
pletely assembled.
References to the right or left hand side
of the snow thrower are from the view-
point of the operator's position behind
the unit.
TO REMOVE SNOW THROWER FROM CARTON
1. Locate all parts packed separately
and remove from the carton. Auger
NOTE: Place fuel stabilizer in a Drive
safe place until needed for storage. Lever
2. Remove and discard the packing
material from around the snow
thrower. Shifter
Lever
3. Cut down all four corners of the car-
ton and lay the panels flat.
4. Cut the straps that secure the axle
to the pallet.
5. For shipping purposes, the height
adjust skids are attached to the
pallet. Remove the screw that se-
cures each height adjust skid to
the pallet. See Figure 2.
6. Roll snow thrower off the pallet by
pulling on the lower handle.
CAUTION: DO NOT back over con-
trol cables.
7. Remove all packing material from
the unit.
8. Cut ties securing the clutch contro!
cable to the lower handle and lay
cable back away from the motor
frame.
F 0410109L 7
Drive Lever
Crank Assembly
Chute
Deflector
Height Adjust
Skid
Screw Figure 2
Loading ...
Loading ...
Loading ...