Loading ...
Loading ...
Loading ...
Cleaning the air filter:
A dirty air filter decreases engine per-
formance and increases fuel consump-
tion and harmful emissions. Always
clean after every 5 hours of operation.
1. Clean the cover and the area
around it to keep debris from falling
into the carburetor chamber when
the cover is removed.
2. Remove parts as illustrated.
NOTE: Do not clean filter in gasoline
or other flammable solvent. Doing so
can create a fire hazard or produce
harmful evaporative emissions.
3. Wash the filter in soap and water.
4. Allow filter to dry.
5. Add a few drops of oil to the filter;
squeeze filter to distribute oil.
6. Replace parts.
REPLACE SPARK PLUG
Replace spark plug each year to en-
sure the engine starts easier and runs
better. Set spark plug gap at 0.025 in.
Ignition timing is fixed, nonadjustable.
1. Twist, then pull off spark plug boot.
2. Remove spark plug from cylinder
and discard.
3. Replace with Champion RCJ-8Y
spark plug and tighten with a 3/4 in.
socket wrench (10-12 ft.-Ibs).
4. Reinstall the spark plug boot.
REPLACE FUEL FILTER
To replace fuel filter, drain unit by run-
ning it dry of fuel, then remove fuel cap
and its connected retainer from tank.
Pull filter from tank and remove it from
the fuel line. Install new fuel filter on
fuel line; reinstall parts.
We recommend all service and adjust- 2.
ments not listed in this manual be per-
formed by your Sears Service Center.
3.
CARBURETOR ADJUSTMENT
Carburetor adjustment is critical and if
done improperly can permanently dam-
age the engine as well as the carburetor.
If you require further assistance or are
unsure about performing this procedure,
call our customer assistance help line at
1-800-285-5878.
Old fuel, a dirty air filter, a dirty fuel filter,
or flooding may give the impression of
an improperly adjusted carburetor. Check
these conditions before adjusting the
carburetor.
The carburetor has been carefully set at
the factory. Adjustments may be neces-
sary if you notice any of the following
conditions:
• Engine will not idle. See IDLE SPEED
and MIXTURE under adjusting
procedure.
• Engine dies or hesitates instead of
accelerating. See ACCELERATION
CHECK under adjusting procedure.
• Loss of power. See MIXTURE under
adjusting procedure.
ADJUSTING PROCEDURE
CAUTION: Do not force plastic limiter
caps on screws beyond the built-in
stops or damage will occur.
Initial Settings
1. Turn both mixture screws (L and H)
counterclockwise until they stop.
Turn the idle speed screw clockwise
until it stops. Now turn counterclock-
wise 4 1/2 turns.
Start motor and let it run for 3 min-
utes, then proceed to the adjust
screws according to the instructions
below. If engine performance at ini-
tial settings is acceptable, no further
adjustments are necessary. If en-
gine does not start, refer to TROU-
BLESHOOTING TABLE. If still unable
to remedy situation, call
1-800-235-5878.
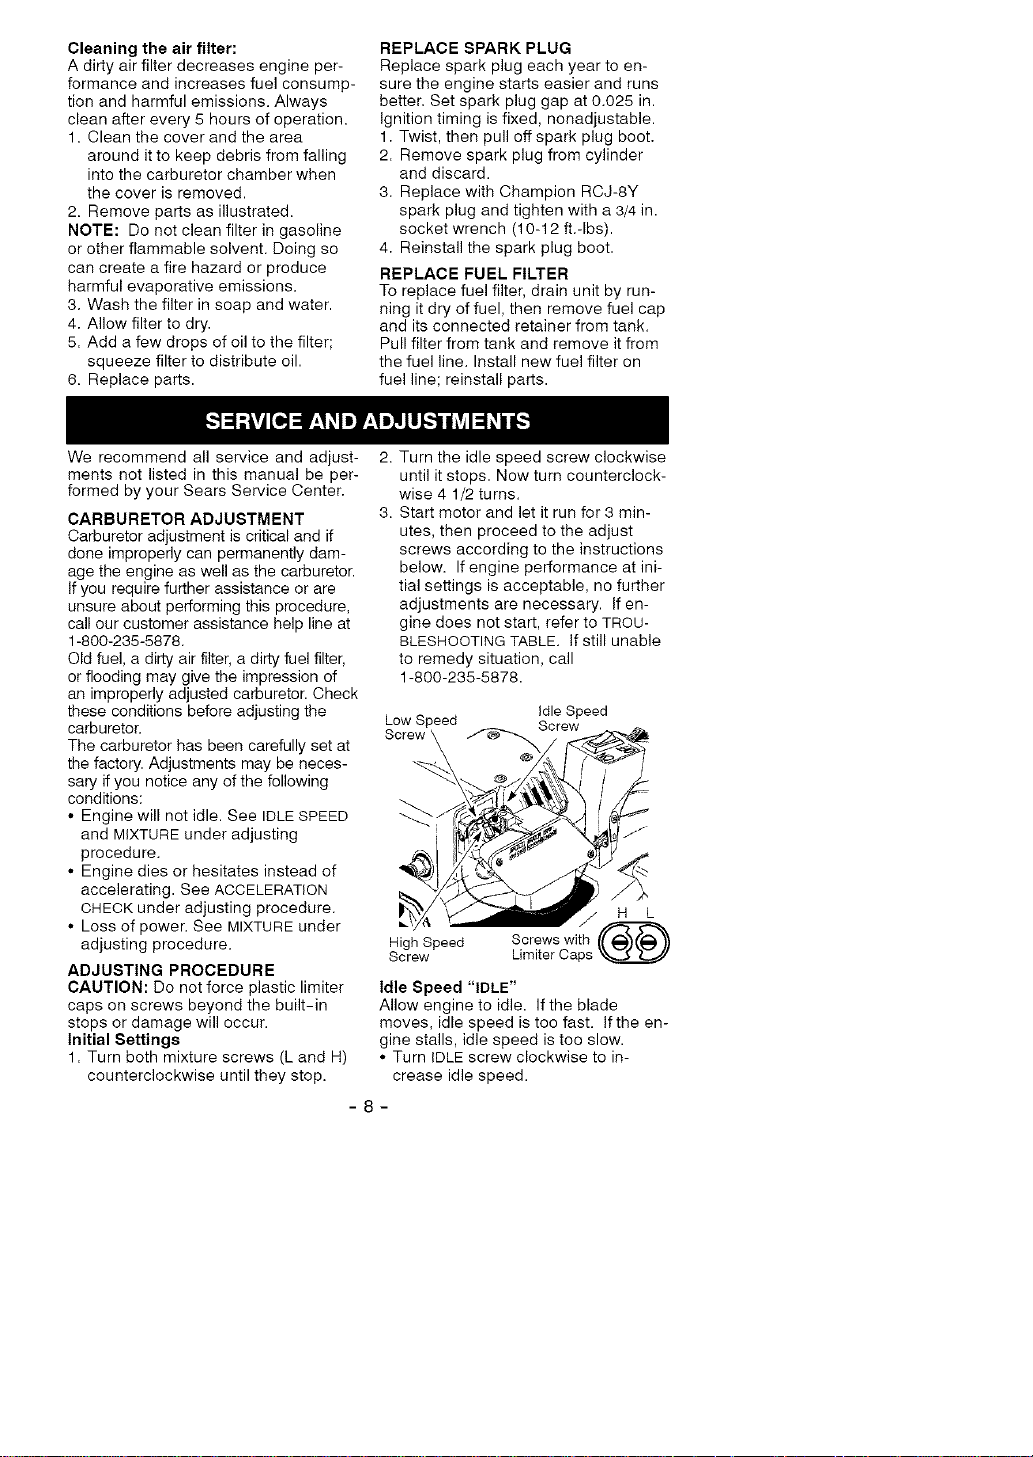
Low Speed
Idle Speed
Screw
High Speed
Screw
H L
Screws with
Idle Speed "IDLE"
Allow engine to idle. If the blade
moves, idle speed is too fast. If the en-
gine stalls, idle speed is too slow.
• Turn IDLE screw clockwise to in-
crease idle speed.
-8-
Loading ...
Loading ...
Loading ...