Loading ...

June 2017
WARNINGS
• Do not touch any hot surfaces
• Plug only into a 3-hole grounded electrical outlet of the appropriate voltage
• Do not immerse unit, cord or plug in liquid at any time
• Unplug cord from outlet when not in use and before cleaning
• Do not operate unattended
• Do not use this unit for anything other than intended use
• Do not use outdoors
• Always use on a rm, dry and level surface
• Do not use if unit has a damaged cord or plug, in the event the appliance malfunctions, or has been
damaged in any manner
• Keep children and animals away from unit
• Any incorrect installation, alterations, adjustments and/or improper maintenance can lead to property
loss and injury. All repairs should be done by authorized professionals only.
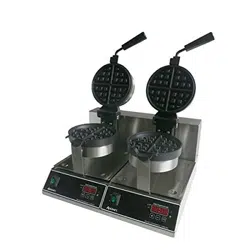
TO USE
1. Turn on power switch. Three beeps will sound indicating that the machine has power and the heating
process has been initiated.
2. After this the LED display will show a time in minutes and seconds. Before you set the time you must
set the heating temperature that you would like to cook your wafes at. In order to do this hold the
“SET” button and then press the “START/STOP” button. This will then display the temperature that
the unit is currently set to. Use the “+ and –“ buttons in order to change the displayed temperature to
the one desired and then press “SET” to nalize this parameter. The unit will then continue heating to
this set temperature and will continue to maintain this temperature for the remainder of the cooking
process and the whole time the unit’s power switch is turned on.
3. In order to begin the time feature press and hold the “START/STOP” button and use the “+ and –“
buttons in order to change the minutes and seconds displayed on the LED display. Once you have set
your desired time press the “START/STOP” button once to begin the time countdown. Once the time on
the display has reached “00:00” an alarm will sound indicating the timer has ran out of time.
NOTE: The timer feature has NO AFFECT on the heating process. It is just a timer for your convenience
to help you keep track of your cooking times. The unit will always maintain the set temperature you have
input as long the power switch is turned on, regardless if the timer has run out or not.
Loading ...
Loading ...
Loading ...