
Loading ...
Loading ...
Loading ...
b. Clean areas around O!L FILL and OIL DRAIN PLUGS, to prevent dirt
from entering engine.
c. Remove OIL FILL PLUG.
d. Remove OIL DRAIN PLUG and drain oil completely into a suitable
container.
e. When al! oil has drained, install OIL DRAIN PLUG. Tighten to !0
foot-pounds (1.4 kg-m).
f. Refill with recommended oi! through the OIL FILL PLUG opening. Pour
slowly. Oil level is correct when oil reaches point of overflowing the
OIL FILL PLUG opening. See ENGINE SPECIFICATIONS CHART at front of
Manual for recommended oils.
g. Install and tighten OIL FILL PLUG.
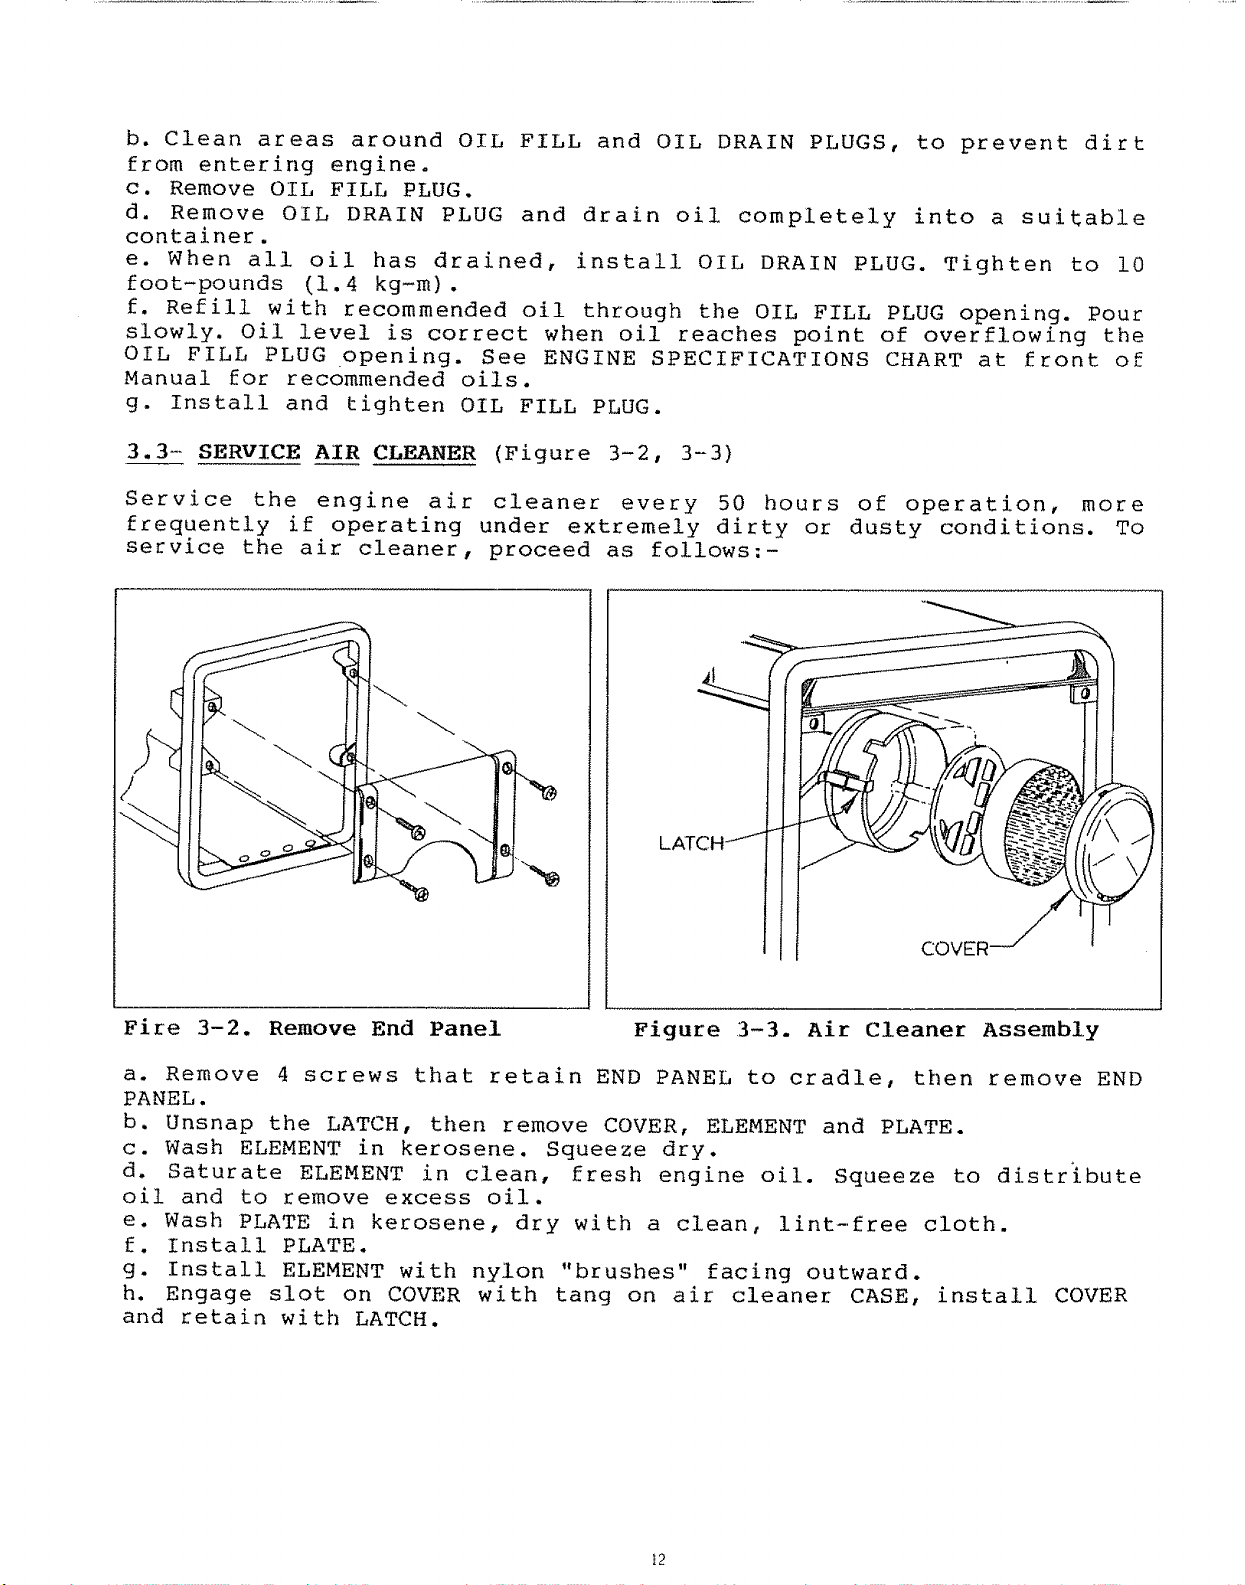
3.3- SERVICE AIR CLEANER (Figure 3-2, 3-3)
Service the engine air cleaner every 50 hours of operation, more
frequently if operating under extremely dirty or dusty conditions. To
service the air cleaner, proceed as follows:-
COVER
Fire 3-2. Remove End Panel
.................i
Figure 3-3. Air Cleaner Assembly
a. Remove 4 screws that retain END PANEL to cradle, then remove END
PANEL.
b. Unsnap the LATCH, then remove COVER, ELEMENT and PLATE.
c. Wash ELEMENT in kerosene. Squeeze dry.
d. Saturate ELEMENT in clean, fresh engine oil. Squeeze to distribute
oil and to remove excess oil.
e. Wash PLATE in kerosene, dry with a clean, lint-free cloth.
f. Install PLATE.
g. Install ELEMENT with nylon "brushes" facing outward.
h. Engage slot on COVER with tang on air cleaner CASE, install COVER
and retain with LATCH.
12
Loading ...
Loading ...
Loading ...