Use and
Care Manual
Cigar storage unit
XS 200
7082 643-00

Optimum humidity and temperature are key.
The very best humidors keep cigars at an even and constant relative humidity.
Experts put the ideal level at 68-75% at an interior temperature of between 61
and 68°F. These climatic conditions allow the characteristic flavours of the cigar
to unfold, the cigar will burn evenly and your enjoyment of the cigar and its taste
will be enhanced. With the Liebherr cigar storage unit you can ensure constant
humidity and a constant temperature - and control each one individually.
Naturally Spanish cedarwood.
The interior fittings of the Liebherr cigar storage unit are made of Spanish
cedarwood. This top quality wood is used for the shelves and presentation boxes.
Spanish cedarwood is used because it ensures an even climate inside the
appliance, it helps the cigars to mature and its aroma enhances the unique flavour
of exclusive cigars.
Additional benefits
• CFC-free
• Energy-optimizedrefrigerantcircuit
• Energy-efficientinsulation
• Lowenergyconsumption
• User-friendlyelectroniccontrols
• Displayoffunctionsswitchedon
• Temperaturecanbecontrolledwithinclimaterating
range, regardless of room temperature
• Audibledooropenalarm
• Easytoclean
Thank you for your trust
Congratulationsonyourpurchaseofthiscigarstorageunit.Inbuyingthisproduct,
which is distinguished by its perfect user-friendliness, impeccable reliability and
high quality, you have chosen a top class appliance. We hope that you enjoy your
new cigar storage unit - and that you get a lot of pleasure from your exclusive
cigars.
The features on your appliance have been designed to ensure maximum convenience
- day in, day out.
This appliance has been manufactured with recyclable materials using an environ-
mentally friendly process, so together we’re making an active contribution to the
preservation of our environment.
Please read the information in the operating instructions carefully to become famil-
iar with all the benefits of your new appliance.
We know you will be pleased with your new appliance.

3
IMPORTANT
All types and models are subject to continuous improvement. The manufacturer reserves the right to
make modifications in the shape, equipment and technology.
Table of ConTenTs
Keep these operating instructions in a safe place and pass them on to the
next owner, where applicable.
Contents Page
Safety .......................................................................................................... 4
DisposalofOldAppliance .................................................................... 4
Electrical Safety .................................................................................... 5
ImportantSafetyInformation ................................................................ 5
Safety Regulations ................................................................................. 6
Unpacking ................................................................................................... 6
SafetyInstructionsandWarnings ......................................................... 6
DisposalofCarton ................................................................................ 6
Wall mounting ....................................................................................... 6
Features ....................................................................................................... 7
Dimensions ............................................................................................ 7
Leveling the appliance ........................................................................... 7
DescriptionofApplianceandEquipment .............................................. 7
Operation...................................................................................................... 8
OperatingandControlElements ........................................................... 8
Switching on for the first time ................................................................ 8
Setting the Temperature......................................................................... 9
Adjustingthehumidity ............................................................................ 9
Lighting ................................................................................................... 9
AudibleWarningSignal .......................................................................... 9
Setup mode .....................................................................................10-11
Equipment .................................................................................................. 12
Equipment ............................................................................................ 12
Alternativeinteriorlayouts ................................................................... 13
Cleaning ..................................................................................................... 14
Troubleshooting .......................................................................................... 15
CustomerService ................................................................................ 15
Warranty ..................................................................................................... 16
ApplianceInformation .......................................................................... 16
IMPORTANT INFORMATION
After starting the appliance for the first time, allow it to reach the set temperature and humidity points
before adding any cigars. It may take up to 24 hours to reach the set points.

4
Please read and follow these
instructions
TheseinstructionscontainWarningandCaution
statements. This information is important for safe
and efficient installation and operation.
AlwaysreadandfollowallWarningandCaution
statements!
DANGER
Danger indicates a hazard which
will cause serious injury or death if
precautions are not followed.
WARNING
Warning indicates a potentially hazardous
situation which, if not avoided, could
result in death or serious injury.
CAUTION
Caution indicates a potentially hazardous
situation which, if not avoided, may result
in minor or moderate injury.
IMPORTANT
This highlights information that is especially
relevant to a problem-free installation and
operation.
Make sure incoming voltage is the same as the
appliance rating.
To reduce the risk of fire, electric shock, or
personal injury, installation work and electrical
wiring must be done by a qualified electrician
in accordance with all applicable codes and
standards, including fire-rated construction.
safeTy
Disposal of Old Appliance
DANGER
Risk of child entrapment. Before you
discard your old refrigerator or freezer:
• Besuretofollowyourlocalrequire-
ments for disposal of appliances. Dis-
carded appliances can be dangerous.
• Removethedoors.
• Leavetheshelvesinplacesothat
children may not easily climb inside.
• Cutoffthepowercablefromthe
discarded refrigerator. Discard
separately from the refrigerator.
Following these instructions reduces the
possibility of causing personal injury,
especially to children playing.
Contact the trash collection agency in
your area for additional information.
Electrical Safety
Connectthisappliancetoa110-120VAC,15amp
circuit that is controlled by a circuit breaker or
fuse. This appliance should have its own separate
groundedcircuit.Donotuseanextensioncord.
The power cord is equipped with a three-prong
(grounding) plug for your protection against
possibleshockhazards.Tomaintainthisprotection:
• Donotmodifytheplugbyremovingtheround
grounding prong.
• Donotuseatwo-prongadapter.Whereatwo-
prong wall receptacle is encountered, contact
a qualified electrician and have it replaced with
a three-prong receptacle in accordance with all
local codes and ordinances.
• Donotuseapowercordthatisfrayedor
damaged.

5
• Toprotecttheappliancefrompossibledam-
age, allow the appliance to stand 1/2 to 1 hour
in place before turning the electricity on. This
allows the refrigerant and system lubrication to
reach equilibrium.
Safety Regulations
Theapplianceisdesignedforstoringcigarsonly.It
is designed as a household appliance.
The appliance is set to operate within specific
ambient temperature limits according to its climate
rating. These temperature limits should not be
exceeded. The correct climate rating for your appli-
ance is indicated on the model plate.
Thisisexplainedasfollows:
Climate
Rating Set for Ambient Temperatures of
SN 50°Fto90°F(10°Cto32°C)
N 61°Fto90°F(16°Cto32°C)
ST 61°Fto100°F(16°Cto38°C)
SN-ST 50°Fto100°F(10°Cto38°C)
SN-T 50°Fto109°F(10°Cto43°C)
T 61°Fto109°F(16°Cto43°C)
- The refrigerant circuit has been tested for leaks.
- The appliance complies with current safety regu-
lationsUL250andCSAC22.2#63.
We recommend cleaning the appliance before turn-
ing it on for the first time. See Cleaning.
WARNING
Do not allow children to play with the
appliance. Children must not climb, sit or
stand on the racks or door.
Failure to follow these instructions may
result in death or serious injury.
safeTy
Important Safety Information
Follow the cautions and safety warnings throughout
thisinstructionmanualincludingthefollowing:
• Topreventinjurytoyouordamagetotheunit,
the appliance should be unpacked and set up by
two people.
• Iftheapplianceisdamagedondelivery,contact
the supplier immediately before connecting to
the power source.
• Toguaranteesafeoperation,ensurethatappli-
ance is set up and connected as described in
these operating instructions.
• Disconnecttheappliancefromthepowersource
if a fault occurs. Pull out the plug, turn off or dis-
able the power source.
• Whendisconnectingtheappliance,usetheplug.
Donotpullonthecord.
• Anyrepairsandworkontheapplianceshould
only be performed by the customer service
department.Unauthorizedworkmaybedan-
geroustotheuser.Changingthepowersource
cable should only be done by the customer ser-
vice department.
• Donotstoreexplosivesorspraysusingcom-
bustible propellants such as butane, propane,
pentane, etc. in the appliance. Electrical compo-
nents might cause leaking gas to ignite. You may
identify such sprays by the printed contents or a
flame symbol.
• Donotuseelectricalappliancesinsidetheappli-
ance.
• Donotallowchildrentoplaywiththeappliance.
Childrenmustnotclimb,sitorstandontheracks
or door.
• Topreventpossibleinjuryduetoanelectrical
shock, be sure to disconnect the power cord or
turn off the circuit breaker before cleaning the
appliance.
• Toavoidinjuryordamagetotheappliance,do
not use steam cleaning equipment to clean the
appliance.
• Donotoperatetheapplianceinthepresenceof
explosive fumes.
• Intheeventofapoweroutage,minimizeopen-
ing the door.
6
UnpaCking
Safety Instructions and Warnings
Avoidplacingtheapplianceindirectsunlightor
near the stove, range top, radiators and similar heat
sources.Donotplacemicrowaveovens,toaster
ovens or other heat-emitting appliances on top of
this unit.
Keep the appliance out of the weather. The
ventilationgrillesshouldnotbeobstructed.Always
ensure there is good ventilation all around the
appliance.
Assoonasyouuncratetheunit:
• Examinetheunitandpackagingforshipping
damage.Contactthecarrierimmediatelyifyou
suspect there is any damage.
• Notethetype(modelnumber),servicenumber,
serial number, date of purchase and where
purchased on the spaces provided in the back of
this manual.
Disposal of Carton
The packaging is designed to protect the appliance
and individual components during moving and is
made of recyclable materials.
• Corrugatedboard/cardboard
• Moldedpolystyrene(foamed,CFC-freepolysty-
rene)
• Polythenebagsandsheets
• Polypropylenestraps
WARNING
Keep packaging materials away from
children. Polythene sheets and bags can
cause suffocation!
• Pleasetakethepackagingmaterialtoyourlocal
recycling facility.
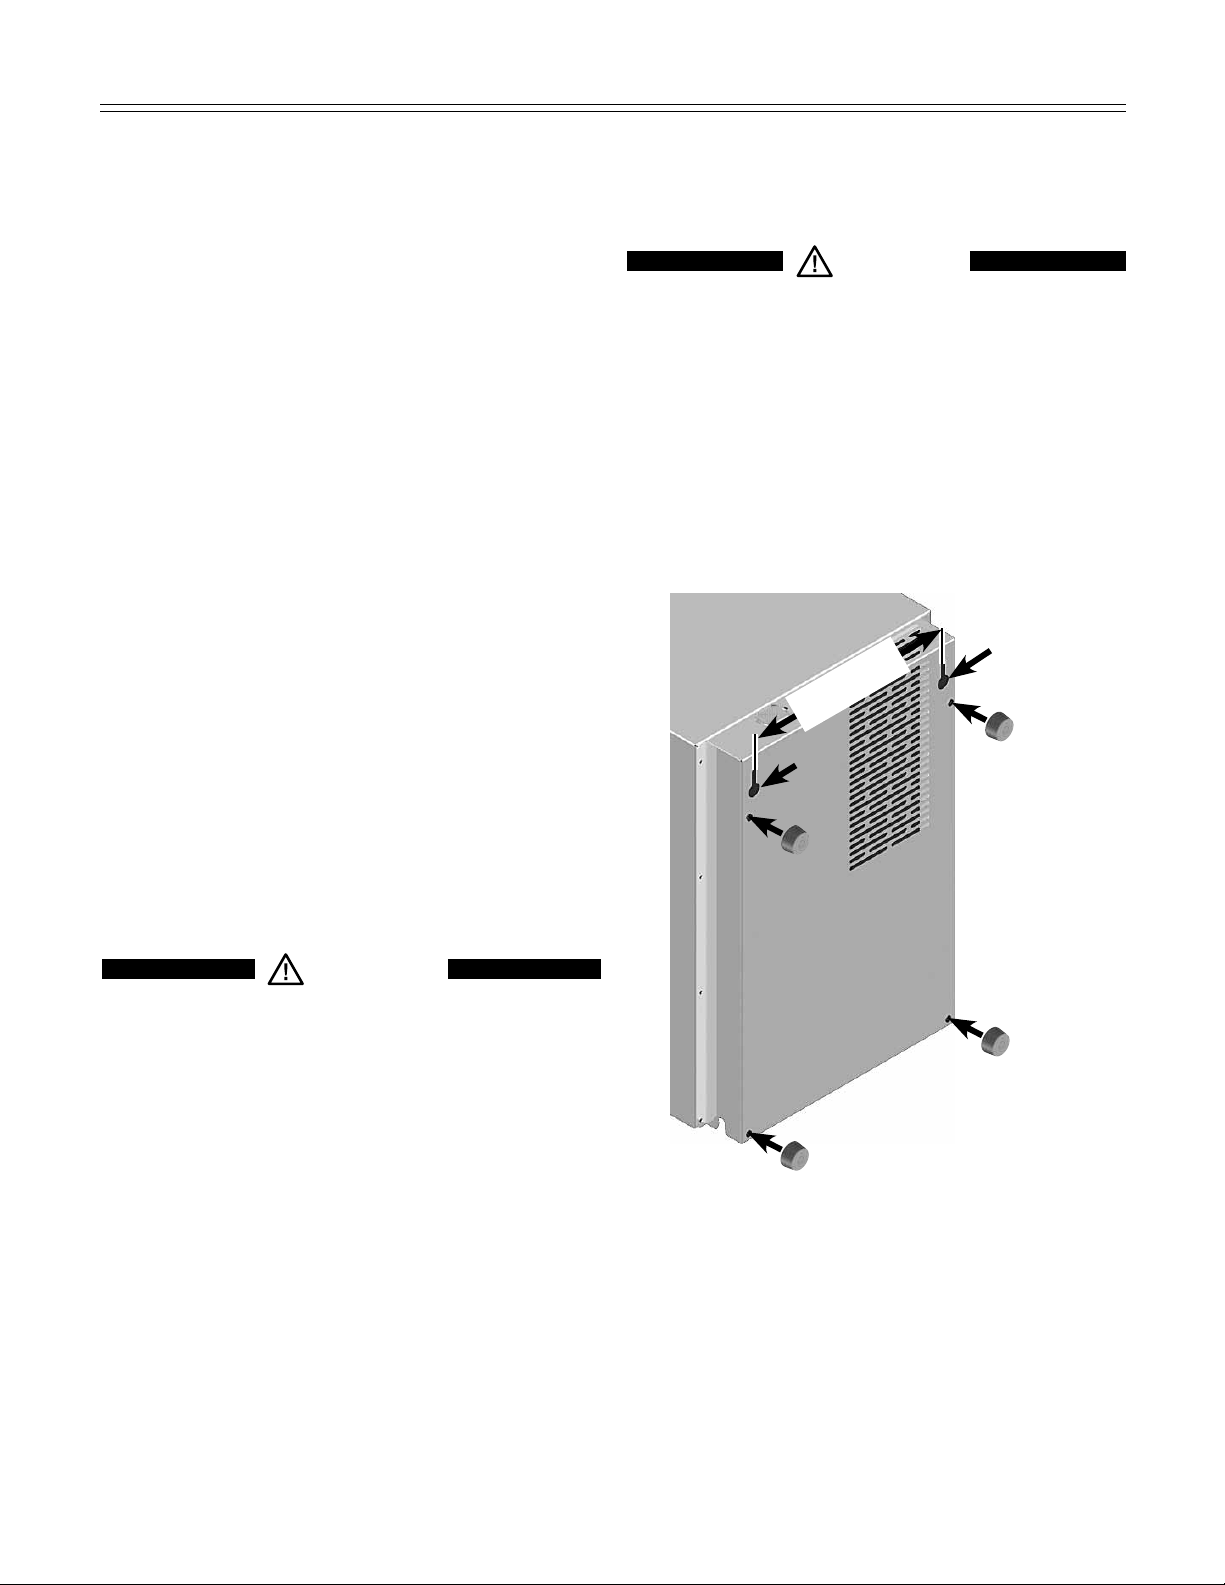
Wall mounting - Figure 1
The appliance can be wall-mounted. There are two
mounting holes
1 at the back of the appliance.
CAUTION
Make sure the wall and fastenings can with-
stand the weight of the appliance when fully
loaded. The empty appliance weighs 68.4 lbs.
IMPORTANT
To ensure sufficient ventilation through the ventila-
tion slots, the four wall spacers
2 must always be
inserted, regardless of whether the appliance is
wall-mounted or standing on the floor against a wall.
Simply insert the spacers in the openings provided.
1
2
1
13 - 3/8"
Figure 1
2
2
2

7
feaTUres
Description of appliance and equipment - Figure 4
Figure 4
Dimensions - Figure 2
Figure 2
Operatingandcontrolelements
Pull-out shelves for storing cigars
in containers
Water tank behind front flap
Leveling the appliance - Figure 3
The floor should be level and even. You can
compensate for an uneven floor surface by turning
the adjustable feet.
Figure 3
Presentation boxes for individual
cigar storage
Note
The type plate is located on the
rear of the appliance.
8
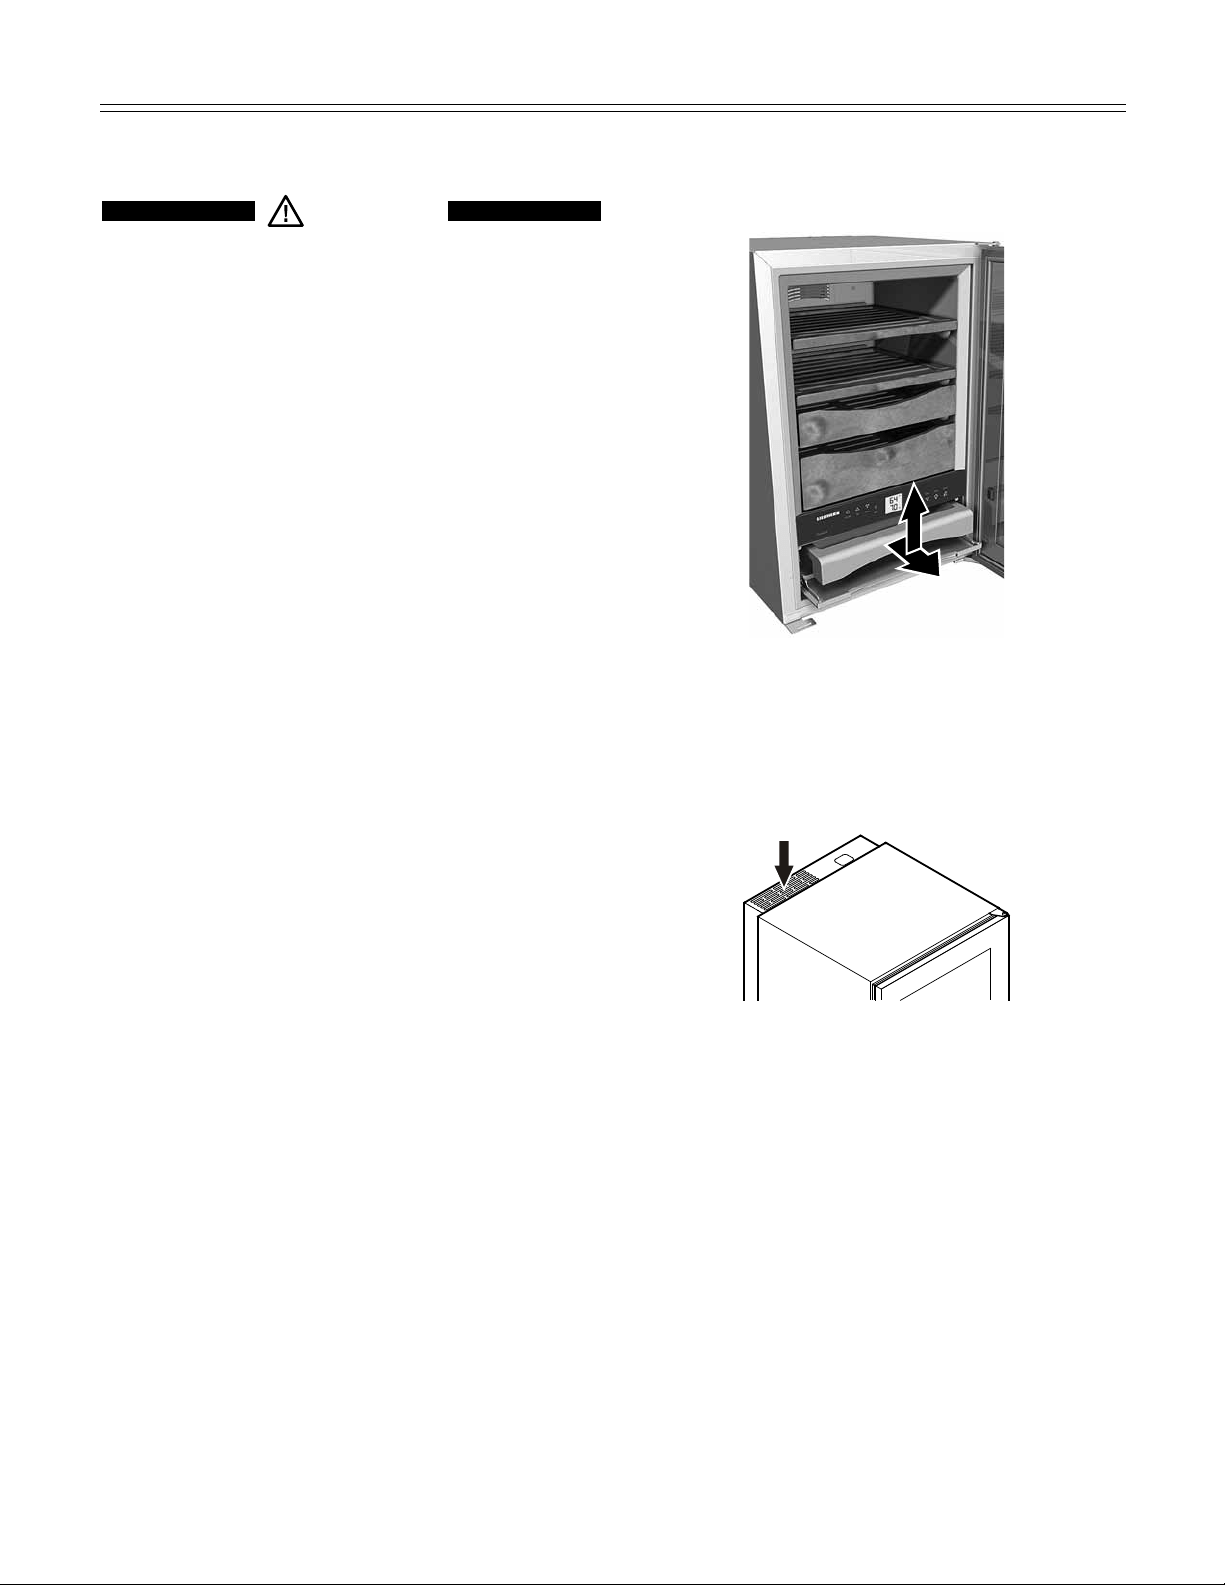
Switching on for the first time
Before switching on
the appliance, fill the
watertankwith32oz
of distilled water.
Use distilled water
only!
Fold down the front
flap completely and if
necessary slide it into
the appliance as far as
it will go (Figure 6).
Lift the water tank
slightly, remove and fill
with water (Figure 7).
Replace the water
tank, sliding it in as
far as it will go. Pull
out the front flap
completely and fold
upwards at a 90°
angle.
To switch on: Press the On/Off button. The display
will flash.
The appliance will take 24 hours to reach the
correct level for storing cigars (temperature,
humidity).
The factory setting is 64°F and 70% humidity.
To switch off: Press the On/Off button for 3
seconds until the display goes dark.
operaTion
Operating and Control Elements
-
Figure 5
The electronic control panel has the new “Touch
capacitance technology”.Anyfunctioncanbe
activated by a fingertip on the symbol of the operat-
ing icons.
The exact contact point is between the
Symbol and its label .
Figure 5
Figure 6
ApplianceON/OFF
Temperature setting buttons (for setting the
interior temperature)
Humidity setting buttons (for setting the interior
humidity)
InteriorlightON/OFF
Mute alarm
InteriorlightOnLED
Temperature display
AlarmLED(flashestoindicateamalfunction)
ChildlockLED
Humidity display
bm
Top up water tank
4
21
7
8
5
6
3
9 bl bm
Figure 7
LEDlightsupwhenthelightingisswitchedon.
LEDlightsupwhenthechildlockisactive.
LEDflasheswhenthetemperatureorhumidity
inside the appliance is too high or too low.
LEDlightsupwhenthewatertankneeds
topping up.
Important!
This alarm will activate when the water level drops
to13oz(sufficienttoallowtheappliancetorun
properly for another 6 weeks). When topping up the
water, always remove any impurities such as cigar
leaves.Ifthewatertankisverydirty,cleanitand
refill.
9
operaTion
Setting the Temperature - Figure 8
Toreducethetemperature:Pressthe
Down button.
Toincreasethetemperature:PresstheUp button.
- While you are entering the temperature, the set
temperature will flash on the display.
- The electronic controls will switch over
automatically about 5 seconds after the last
time you pressed the button, and the actual
temperature will be displayed.
The temperature can be set at between 61°F and
68°F.
Figure 8
Audible Warning Signal - Figure 12
The audible warning signal sounds in the event of a
malfunction.
Itsoundswhenthedoorhasbeenleftopenfor
longer than 60 seconds.
Itwillalsosoundiftheinteriorbecomestoocold
or too warm or if the humidity is too high or too
low. The corresponding display will also flash.
The
symbol lights up.
The audible warning device is switched off by
pressing the Alarm button.
Lighting
The light is integrated into the door frame and can
be switched on and off by pressing the Light button
(Figure 10).
The
symbol lights up when the light is switched
on (Figure 10).
Figure 10
Furthermore, the brightness of the lighting can be
adjusted (Figure 11).
Press and hold the Light button
and at the same time press the
humidity setting buttons to increase
or decrease the brightness.
Down = darker , Up = brighter
Figure 11
Figure 12
Adjusting the humidity - Figure 9
Toreducethehumidity:PresstheDown button.
Toincreasethehumidity:PresstheUp button.
- While you are setting the humidity, the display will
flash.
-About5secondsafterthebuttonwaslast
pressed, the actual interior humidity will be
displayed.
The humidity can be adjusted between 68% and
75%.
Figure 9
10
operaTion
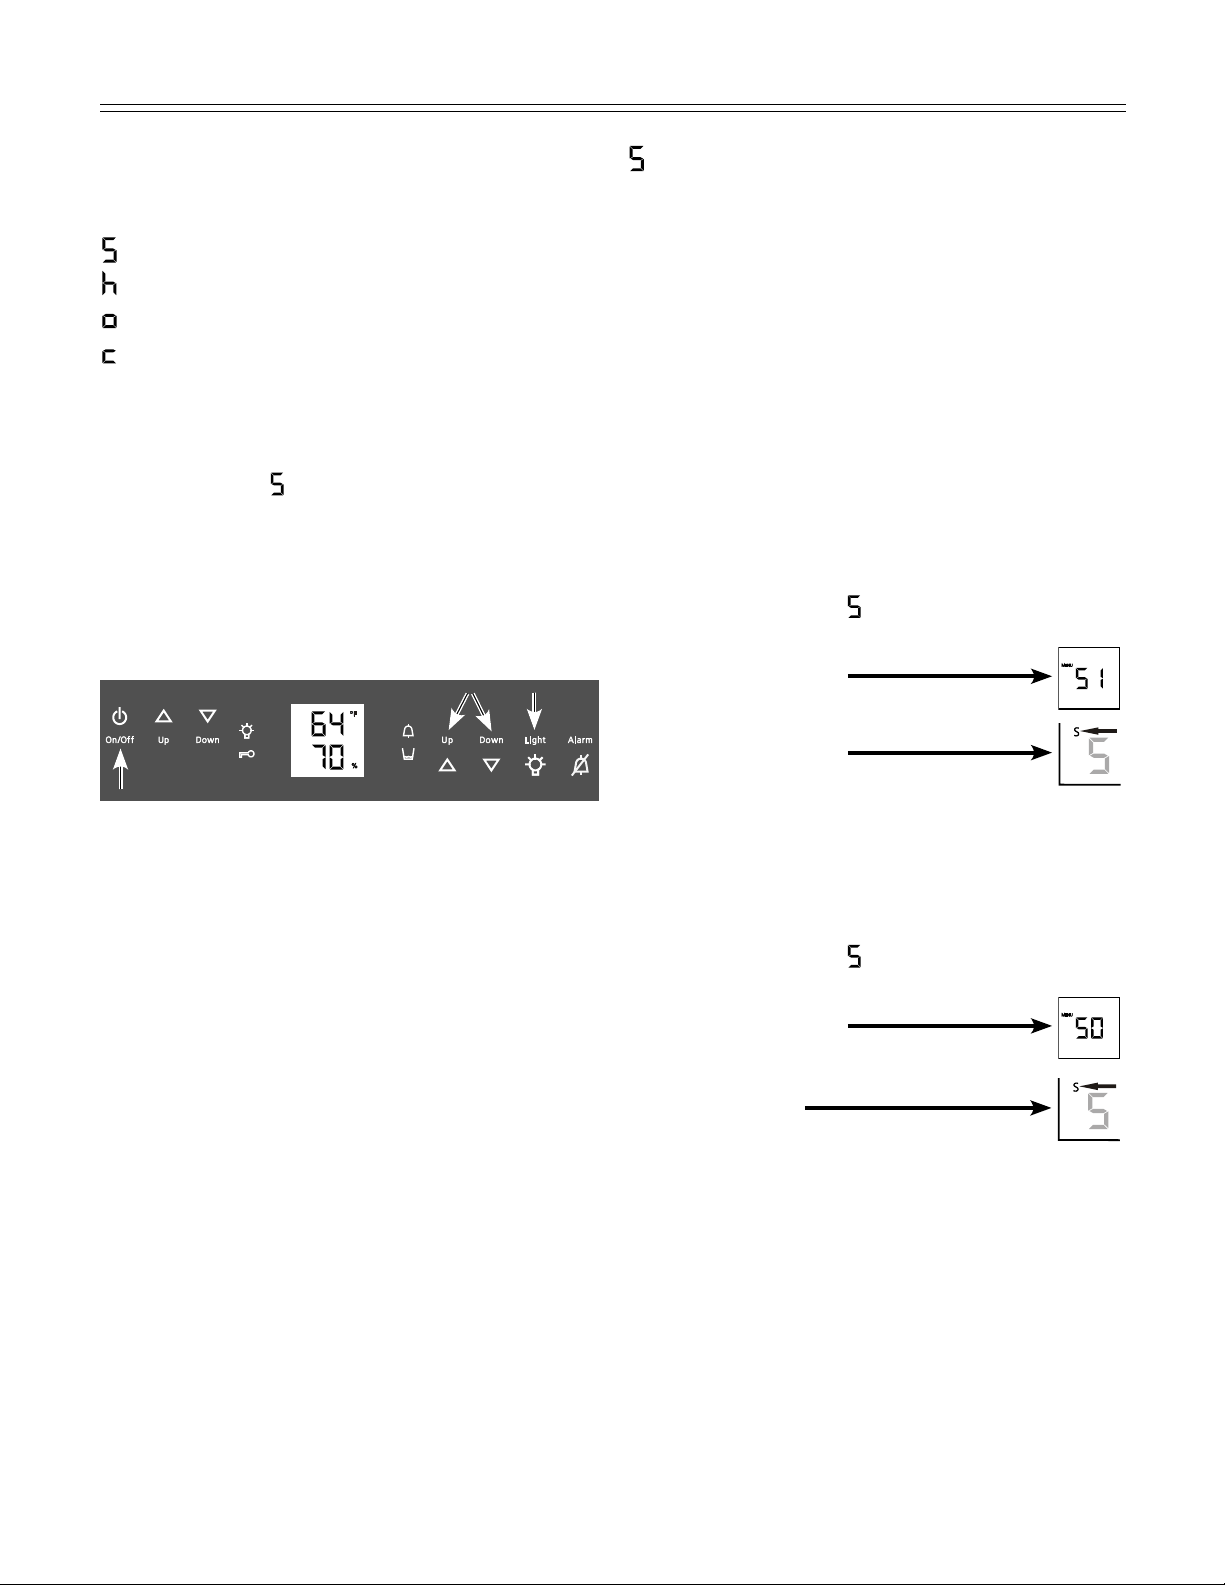
Setup Mode - Figure 13
Inthesetupmodeyoucanactivatethefollowing
functions:
= Sabbath mode
=Displaybrightness
= Temperature display mode
=Childlock
How to activate the setup mode
• PresstheLight button for approximately five sec-
onds
- after 5 seconds
will flash in the display.
You can select the setup mode functions by
pressing the Up/Down buttons.
Exit setup mode
• PresstheOn/Off button. The appliance will
change back to normal operation.
= Sabbath Mode
This feature considers the Religious requirements
on Sabbath or Holidays. When the Sabbath Mode
is active some functions of the electronic controls
are switched off.
The door can be opened and closed at any time.
• Thelightingremainsoff.
• Thecoolingfanremainsinitsactualstate:Ifitis
on it remains on, if it is off it remains off.
• Thereisnodooralarm.
• Thereisnotemperaturealarm.
• TheunitwillreturnintoSabbathModeaftera
power failure.
How to activate the Sabbath Mode
• ActivatethesetupmodebypressingtheLight
button for 5 seconds.
- the display shows
• PresstheLight button
- the display shows
• PresstheLight button again
- the display shows
- the Sabbath mode is activated.
• ExitsetupmodebypressingtheOn/Off button.
How to deactivate the Sabbath Mode
• ActivatethesetupmodebypressingtheLight
button for 5 seconds.
- the display shows
• PresstheLight button
- the display shows
• PresstheLight button again
- the S symbol
intheDisplaydisappears,
the Sabbath mode is deactivated.
• ExitsetupmodebypressingtheOn/Off button.
Figure 13
11
operaTion
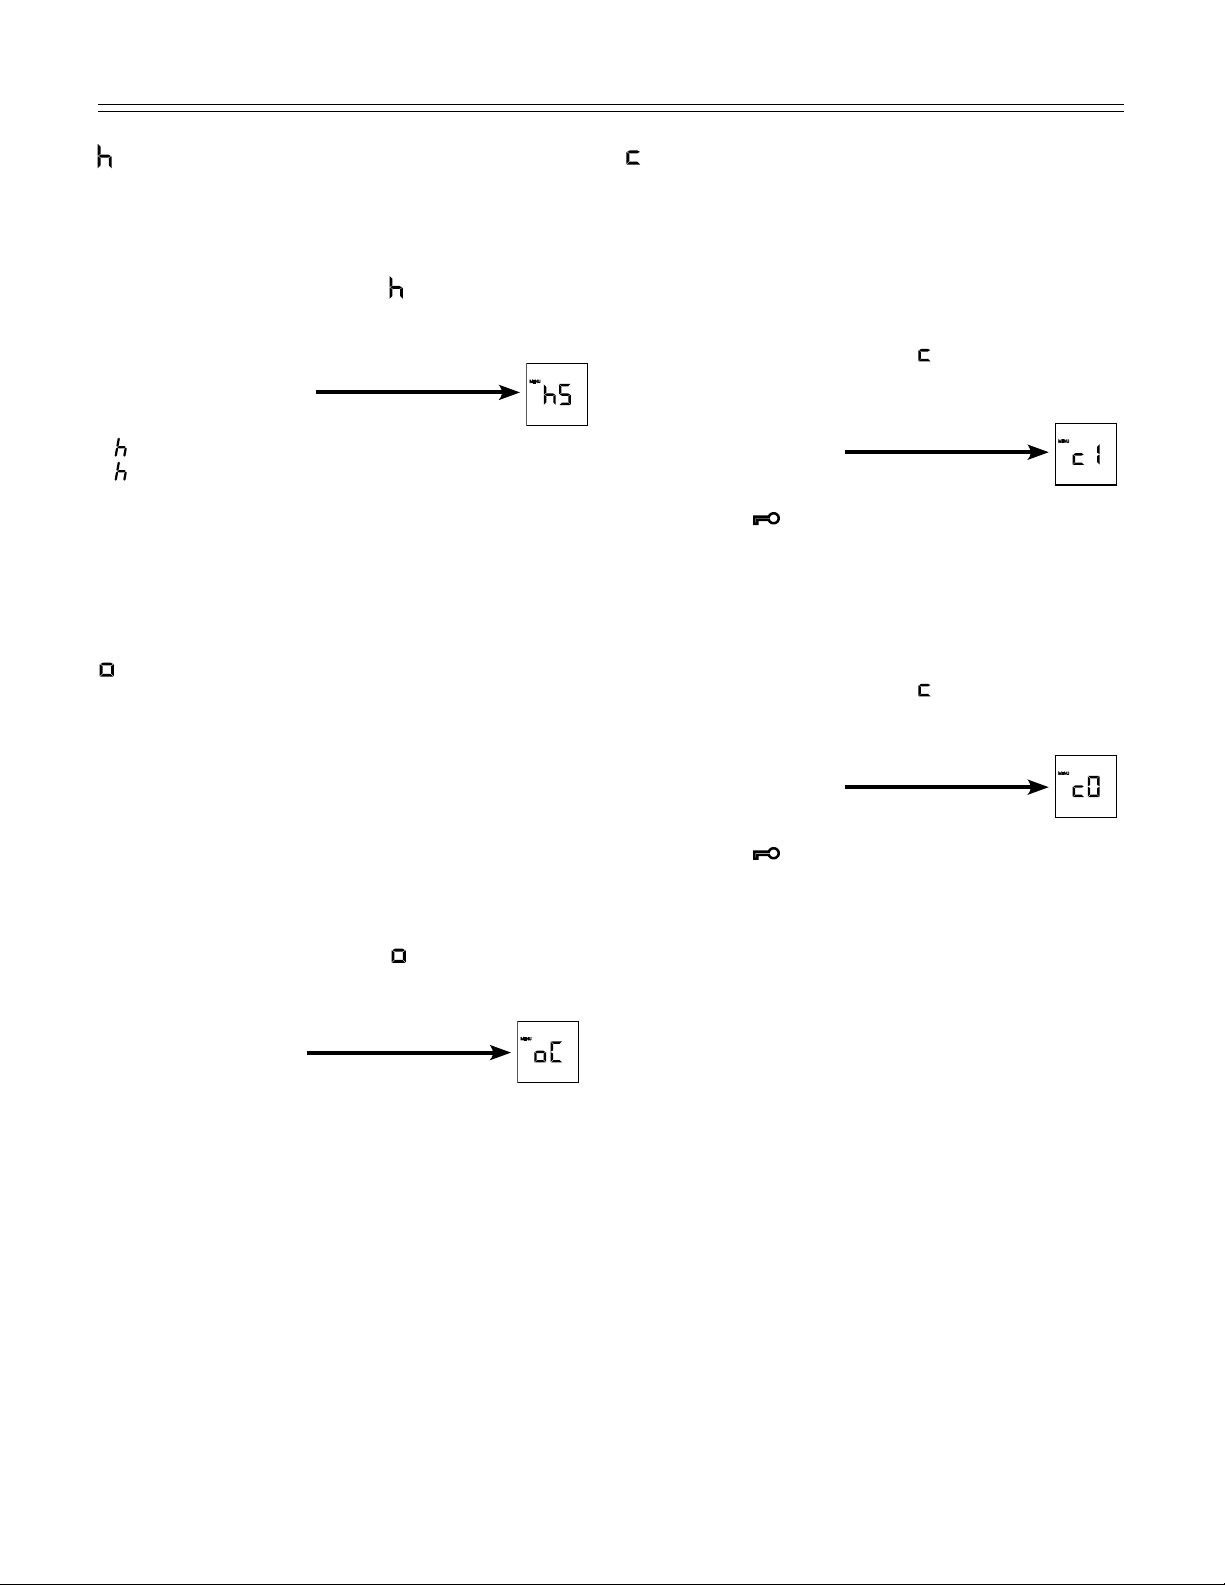
= Display brightness
How to adjust the display brightness
• ActivatethesetupmodebypressingtheLight
button for 5 seconds.
• Press the Down button until
appears in the dis-
play.
• PresstheLight button
- the display shows
• PressUp/Down buttons to select
0 = minimum to
5 = maximum brightness
• PresstheLight button at the desired value.
• ExitsetupmodebypressingtheOn/Off button.
• Closethedoor.Thenewsettingwillactivateafter
about 1 minute.
= Temperature display mode
You can choose the unit of temperature for the
displayindegreesFahrenheitordegreesCelsius.
Note
The factory setting is degrees Fahrenheit.
How to change the temperature display to
degrees Celsius
• ActivatethesetupmodebypressingtheLight
button for 5 seconds.
• PresstheDown button until
appears in the dis-
play.
• PresstheLight button
- the display shows
• PresstheLight button again
- the temperature reading is now displayed in
degreeCelsius.
• ExitsetupmodebypressingtheOn/Off button.
Note
To change the temperature display back to degrees
Fahrenheit, follow the steps above.
= Child lock
The child lock is designed to protect the appliance
frombeingturnedOFFaccidentally.
How to activate the child lock
• ActivatethesetupmodebypressingtheLight
button for 5 seconds
• Press the Down button until
appears in the dis-
play.
• PresstheLight button
- the display shows
• PresstheLight button again
-theLED
is lit and the child lock is activated.
• ExitsetupmodebypressingtheOn/Off button.
How to deactivate the child lock
• ActivatethesetupmodebypressingtheLight
button for 5 seconds.
• Press the Down button until
appears in the dis-
play.
• PresstheLight button
- the display shows
• PresstheLight button again
-theLED
goes out. The child lock is deacti-
vated.
• ExitsetupmodebypressingtheOn/Off button.
12
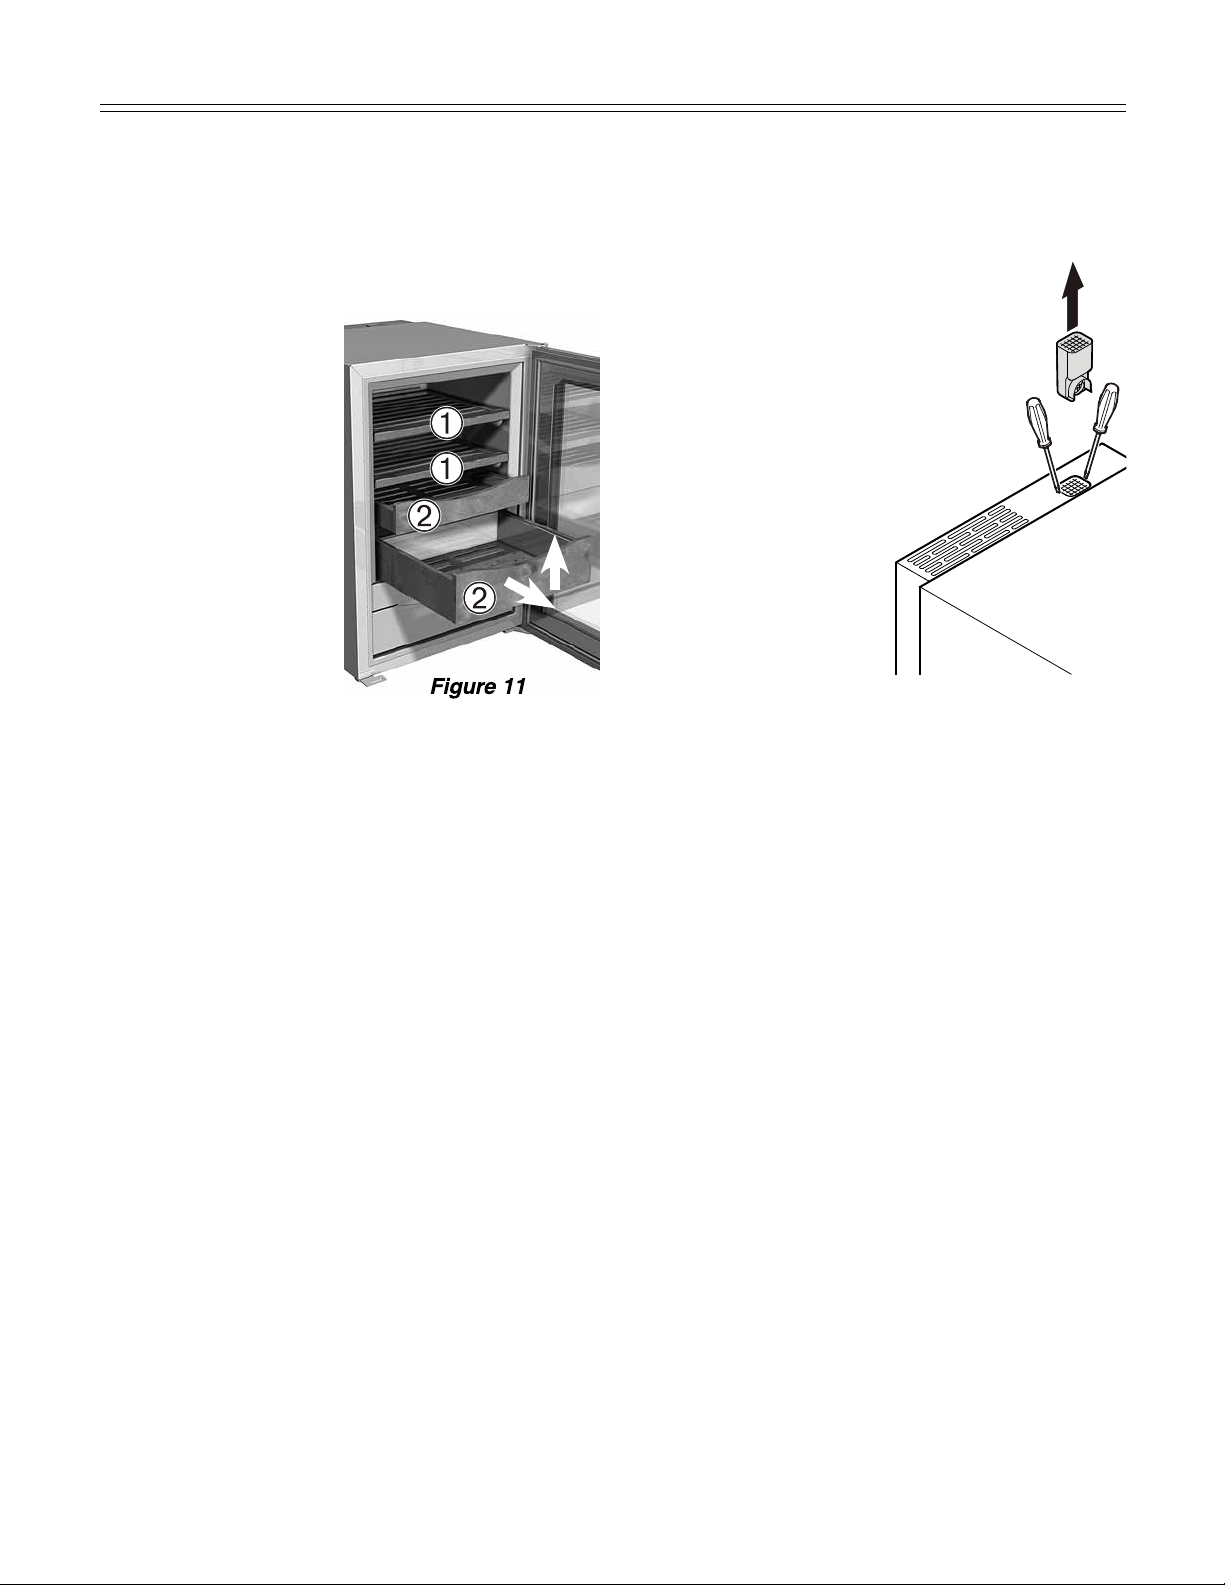
Air exchange with activated charcoal filter
-
Figure 12
To guarantee optimum air throughput,
the appliance is fitted with an activated
charcoal filter at the top of the rear wall.
We recommend that you replace the
illustrated filter once a year. Filters can
be obtained from your dealer.
Changing the filter:
The filter can be removed by
depressing the recesses
on the left and right with a
small screwdriver.
Equipment
Spanish cedarwood shelves - Figure 11
The presentation boxes
2
are designed for storing
cigars individually.
The other shelves
1
are for storing cigars in
various containers or
boxes.
Allshelvesarefitted
with a pull-out stop and
can be pulled out by 4"
(100 mm).
To remove completely,
pull the shelf out as far
as it will go, lift slightly
at the front and remove.
The door must be open
at an angle of at least
90°.
Note
To ensure optimum operation, there must
always be at least two cedarwood shelves or
boxes inside the appliance, one of which must
always be inserted immediately above the
control panel.
eqUipmenT
Figure 12
12
13
eqUipmenT
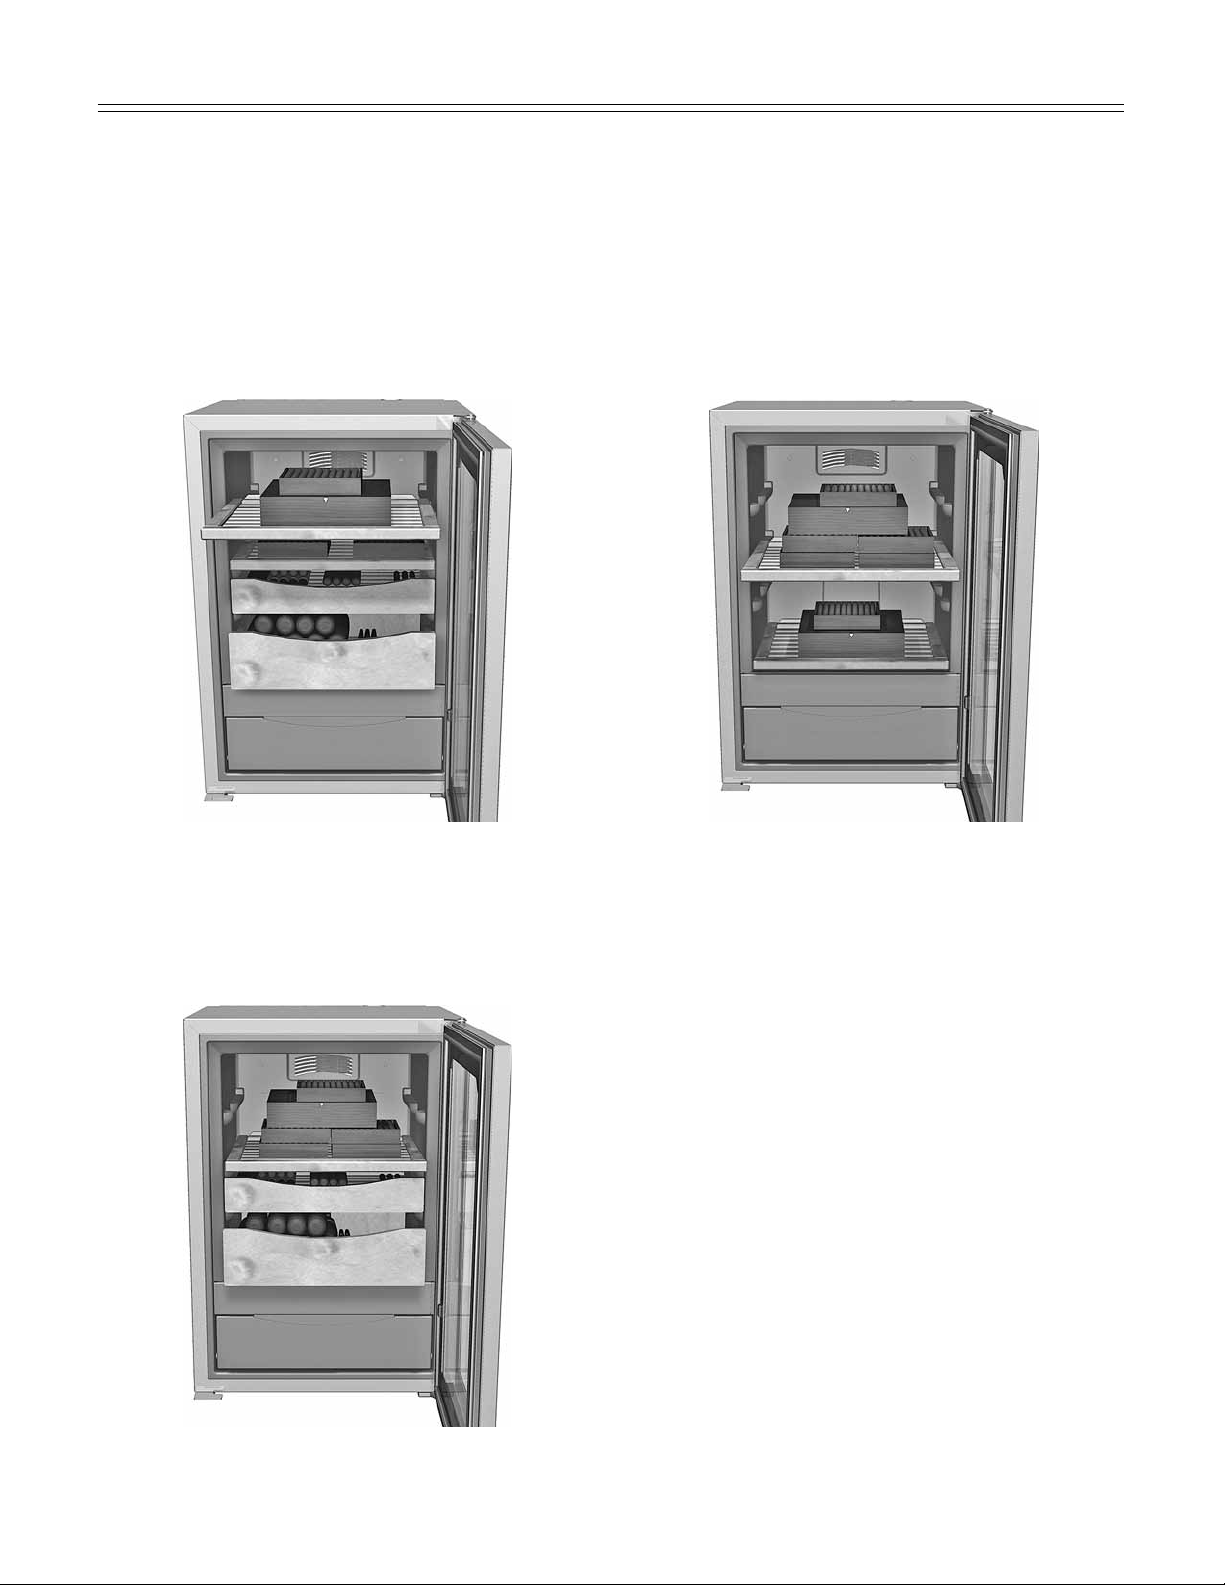
Alternative interior layouts
The different fitting layouts for optimum cigar storage are illustrated and described below.
Figure 13
Figure 14
Figure 15
Alternative 1 (as supplied) - Figure 13
Usethislayouttostorelargenumbersofcigars
individually in the presentation boxes and small
cigar boxes on the shelves.
Alternative 2 (with top shelf removed) - Figure 14
Usethislayouttostorelargecigarboxes.
Alternative 3 (with both presentation boxes
removed)
- Figure 15
This layout is only suitable for storing large cigar
boxes (see figure).
Important
1. To ensure constant humidity, there must be at
least two pull-out shelves or presentation boxes
in the appliance at all times.
2. To ensure adequate air circulation there
must always be a shelf or presentation box
immediately above the control panel.
3. The pull-out shelves should only be used for
storingcigarboxes.Donotusethemforstoring
individual cigars!
13
14
Cleaning
Remove any dust from the outside of the ventilation
grille (Figure 17) with a vacuum cleaner.
Cleaning
WARNING
• To prevent possible injury due to an electrical
shock, be sure to disconnect the power cord
or turn off the circuit breaker before cleaning
the appliance.
• To avoid injury or damage, do not use steam
cleaningequipmenttocleantheappliance.
•
To avoid short-circuits, ensure no cleaning
water penetrates into the electrical
components when cleaning the appliance. Do
not use a sponge or cloth that is overly wet.
Do not use abrasive or scouring sponges. Do not
use concentrated cleaning agents. Never use abra-
sive or acid cleaners or chemical solvents or steam
cleaners.
• Removeallcigarsfromtheapplianceandstore
them in a suitable place.
• Removeallshelvesandpresentationboxes.
• Cleantheinside,thedoorsealandtheinsideof
the glass with a clean, damp cloth.
Important
Never use detergents or other substances
that emit odours.
• Alwayskeepthedoorclosedwhencleaningthe
outside of the appliance. Make sure no detergent
odours penetrate into the appliance.
• Cleanthesidepanelsanddoorsurfaceswitha
cleanandsoftcloth.Ifnecessary,useamoist
cloth(water+detergent).Alternatively,usea
microfibre cloth.
• Folddownthefrontflap,liftthewatertankslightly
and remove, as illustrated (Figure 16).
This tray can be washed with water and detergent
eithermanuallyorinadishwasher.Aftercleaning,
always make sure the tray is thoroughly rinsed
with clean water before replacing.
• Drytheinteriorandthewatertankthoroughly
with a clean cloth and replace the water tank.
• Switchtheappliancebackonandreplacethe
cigars.
• Donotdamagethetypeplateonthebackof
theappliance.Itisveryimportantforservicing
purposes.
Figure 17
Figure 16
15
TroUbleshooTing
Customer Service - Figure 19
Ifnoneoftheabovepossiblecausesapply,andyou
can not rectify the fault yourself, contact your near-
estcustomerservicerepresentative.Indicatethe
type (1) of appliance, service number (2) and the
appliance / serial number (3) as indicated on the
model plate. The model plate is located on the left-
hand inside wall.
Problem Possible Cause and Remedy
Your appliance is designed and manufactured for a long life and reliable operation.
Ifaproblemoccursduringoperation,checkwhetheritisduetoanoperatingerror.Pleasenotethateven
during the warranty period, some repair costs may be your responsibility.
Youmaybeabletocorrectthefollowingfaultsbycheckingthepossiblecausesyourself:
The temperature
inside the appliance is
too high
F8 appears in the
display
Appliancedoesnot
work, display is off
Loud running noise
Theappliancehasafault.Contactyournearestcustomerservicerepresen-
tative, indicate the type of appliance, service number and appliance / serial
number.
- Istheapplianceturnedonproperly?
- Isthepowercordproperlyinsertedintheoutlet?
- Isthecircuitbreakerorfuseinoperatingcondition?
- Isthetemperaturesettingcorrect?SeeSetting The Temperature.
- Istheventilationsystemworkingproperly?
- Istheappliancesetuptooclosetoaheatsource?
- Istheapplianceplacedfirmlyonthefloor.Please note that noises caused by
the refrigerant circuit and fan noise cannot be avoided. The interior fan runs
constantly.
The humidity inside the
appliance is too low
- Istheresufcientwaterinthewatertank?
The humidity inside the
appliance is too high
- Isthewatertankinsertedasfarasitwillgo?
- Isthesealseatedproperlyagainstthewatertray?Youcancheckthisvisu-
allyfromthefrontoftheappliance.Ifthesealisnotseatedproperly,remove
the water tank and slide it back into the appliance.
- Ifthehumidityistoohigh,thiscouldindicateatechnicalfault.Contactthecustomer
service department and, as an interim measure, leave the door of the appliance
open until the display returns to a normal value.
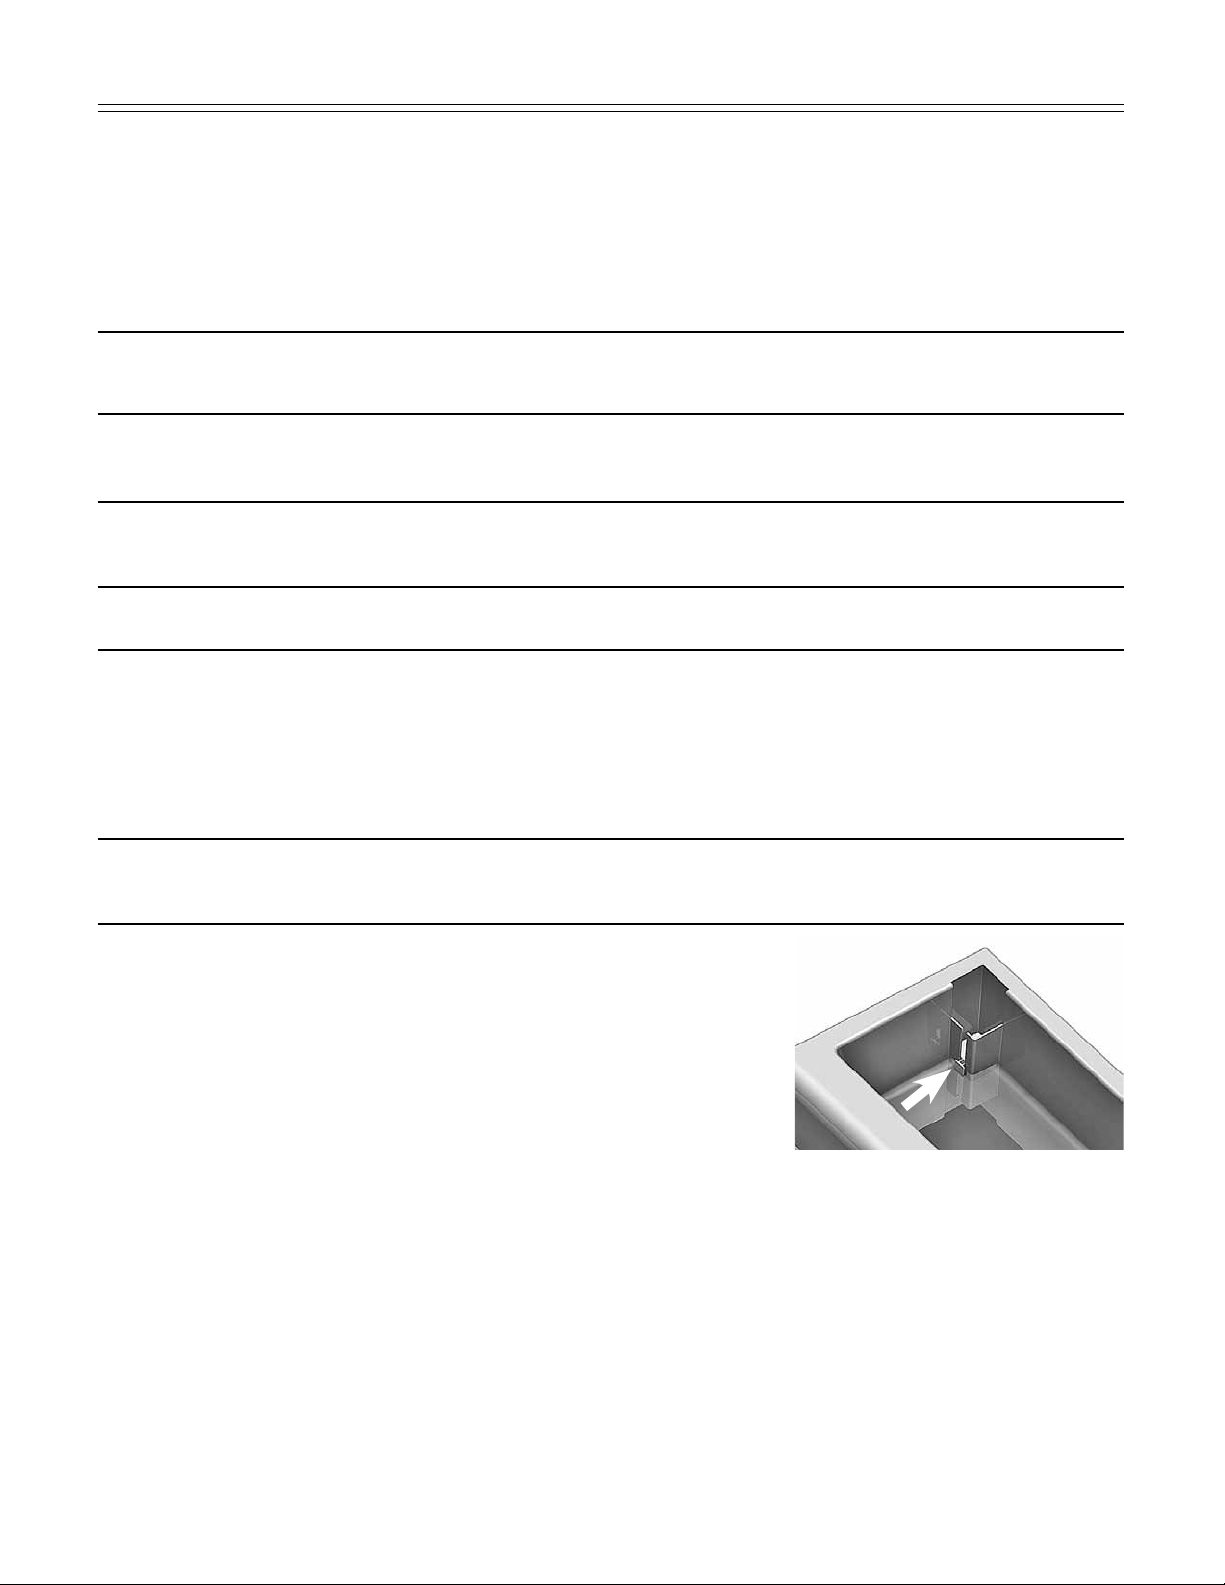
Water level alarm lights
up despite full water
tank
- Istheoatgaugeinthewatertank
stuck?Moveitwithapointedobject
(Figure 18).
Figure 18
Figure 19

16
WarranTy
Appliance Information
Record this information when the appliance is
installed.
TypeDesignation: _________________________
ServiceNumber: __________________________
Appliance/serialnumber: ___________________
DateofPurchase: _________________________
WherePurchased: _________________________
LIEBHERR WARRANTY PLAN
FULLTWOYEARWARRANTY
For two years from the date of original purchase, your Liebherr warranty covers all parts and labor to
repair or replace any part of the product which proves to be defective in materials or workmanship.
FULLFIVEYEARWARRANTY
For five years from the date of original purchase, your Liebherr warranty covers all parts and labor to repair
or replace any components that prove to be defective in materials or workmanship in the sealed system.
The “Sealed System” means only the compressor, condenser, evaporator, drier and all connecting tubing.
LIMITED6THTHROUGH12THYEARWARRANTY
From the 6th through 12th year from the date of original purchase, your Liebherr warranty covers all parts
that prove to be defective in materials or workmanship in the Sealed System (parts only).
TERMSAPPLICABLETOEACHWARRANTY
AllserviceprovidedbyLiebherrunderthewarrantymustbeperformedbyauthorizedLiebherrservice
representatives, unless otherwise specified by Liebherr. Service will be provided in the home during
normalbusinesshours.Thiswarrantyappliesonlytoproductsinstalledfornormalresidentialuse.Details
regarding a non-residential warranty are available on request.
ThewarrantyappliesonlytoproductsinstalledinCanadaandanyoneofthefiftystatesoftheUnited
StatesortheDistrictofColumbia.Thiswarrantydoesnotcoveranypartsorlabortocorrectanydefect
caused by negligence, accident or improper use, maintenance, installation, service or repair, including but
not limited to improper removal and reinstallation of the condensing unit.
THEWARRANTIESDESCRIBEDABOVEAREMADEEXPRESSLYINLIEUOFANYOTHERWARRANTIES,
EXPRESSEDORIMPLIED,INCLUDINGANYIMPLIEDWARRANTYOFMERCHANTABILITYORFITNESS
FORAPARTICULARPURPOSE,ANDOFANYOTHEROBLIGATIONORLIABILITYONTHEPARTOF
LIEBHERR.INNOEVENTSHALLLIEBHERRBELIABLEFORSPECIAL,INCIDENTALORCONSEQUENTIAL
DAMAGESARISINGFROMTHEBREACHOFTHESEWARRANTIESORANYOTHERWARRANTIES,
WHETHEREXPRESS,IMPLIEDORSTATUTORY.
Some States do not allow the exclusion or limitation of incidental or consequential damages so the above
limitation or exclusion may not apply to you. This warranty gives you specific legal rights and you may also
have other rights which vary from State to State.
Toreceivepartsand/orserviceandthenameoftheLiebherrauthorizedservicerepresentativenearest
you, contact your Liebherr dealer or distributor or contact the Liebherr designated national service
provider:
intheUS:Service-appliances.us@liebherr.com,orcall1-866-LIEBHERor1-866-543-2437
inCanada:www.euro-parts.ca,orcall1-888-LIEBHER,1-888-543-2437.
16

For Service in the U.S.
LiebherrServiceCenter
TollFree:1-866-LIEBHERor1-866-543-2437
Email:Service-appliances.us@liebherr.com
PlusOne Solutions, Inc.
3501 Quadrangle Blvd, Suite 120
Orlando,FL32817
For Service in Canada
LiebherrServiceCenter
TollFree:1-888-LIEBHERor1-888-543-2437
www.euro-parts.ca
EURO-PARTS CANADA
39822 Belgrave Road
Belgrave,Ontario,N0G1E0
Phone:(519)357-3320
Fax:(519)357-1326