Loading ...
Loading ...
¢
Place
liquid
filter
dryer
near
ID
unit
to
reduce
the
risk
of
debris
clogging
the
valve.
¢
Make
sure
TXV
bulb
is
securely
fastened
and
wrapped
in
the
indentation
on
vapor
line
tube.
ENH4X
Models:
These
coils
have
a
factory-installed
hard-shutoff
TXV
designed
only
for
use
with
R-410A
refrigerant.
Use
only
with
outdoor
units
designed
for
R-410A.
NOTE:
All
TXV’S
have
preset
superheat
settings
and
are
not
field-
adjustable.
Cabinet
Sweating
lf
this
unit
is
installed
in
a
garage,
attic,
or
other
unconditioned
space,
special
attention
needs
to
be
given
to
the
potential
of
cabinet
sweating.
A
6
inch
(152
mm)
wide
piece
of
insulation
should
be
wrapped
around
the
coil
casing
and
supply
duct
connection
point.
Condensate
Management
With
proper
installation,
these
coils
will
manage
the
condensate
without
blow-off
into
the
duct
work.
The
60
size
coil
requires
the
addition
of
a
pan
extension
for
both
horizontal
left
and
horizontal
right
position,
which
is
supplied
with
the
coils.
See
detailed
instructions
for
more
info.
Also,
refer
to
Connect
Condensate
Drain
Line
section
of
this
instruction.
4&
CAUTION
PROPERTY
DAMAGE
HAZARD
Failure
to
follow
this
caution
may
result
in
property
damage.
When
installing
over
a
finished
ceiling
and/or
living
area,
install
a
field-fabricated
secondary
condensate
pan
under
the
entire
unit.
HORIZONTAL-RIGHT
AND
HORIZONTAL-LEFT
WITH
PAN
EXTENSION
(5
Ton
Size
Only)
1.
There
are
two
separate
pan
extensions shipped
with
the
unit.
For
horizontal
left
installations,
use
the
pan
attached
to
the
left
shipping
bracket.
For
horizontal
right
installations,
use
the
pan
attached
to
the
right
shipping
bracket.
Be
sure
to
use
the
correct
pan
extension
for
the
application.
There
should
not
be
any
gaps
between
the
plastic
condensate
pan
and
the
pan
extension.
All
condensate
should
flow
from
the
pan
extension
to
the
plastic
condensate
pan
and
not
leak
into
the
coil
cabinet
or
duct.
NOTE:
Discard
the
pan
not
used
along
with
both
shipping
brackets.
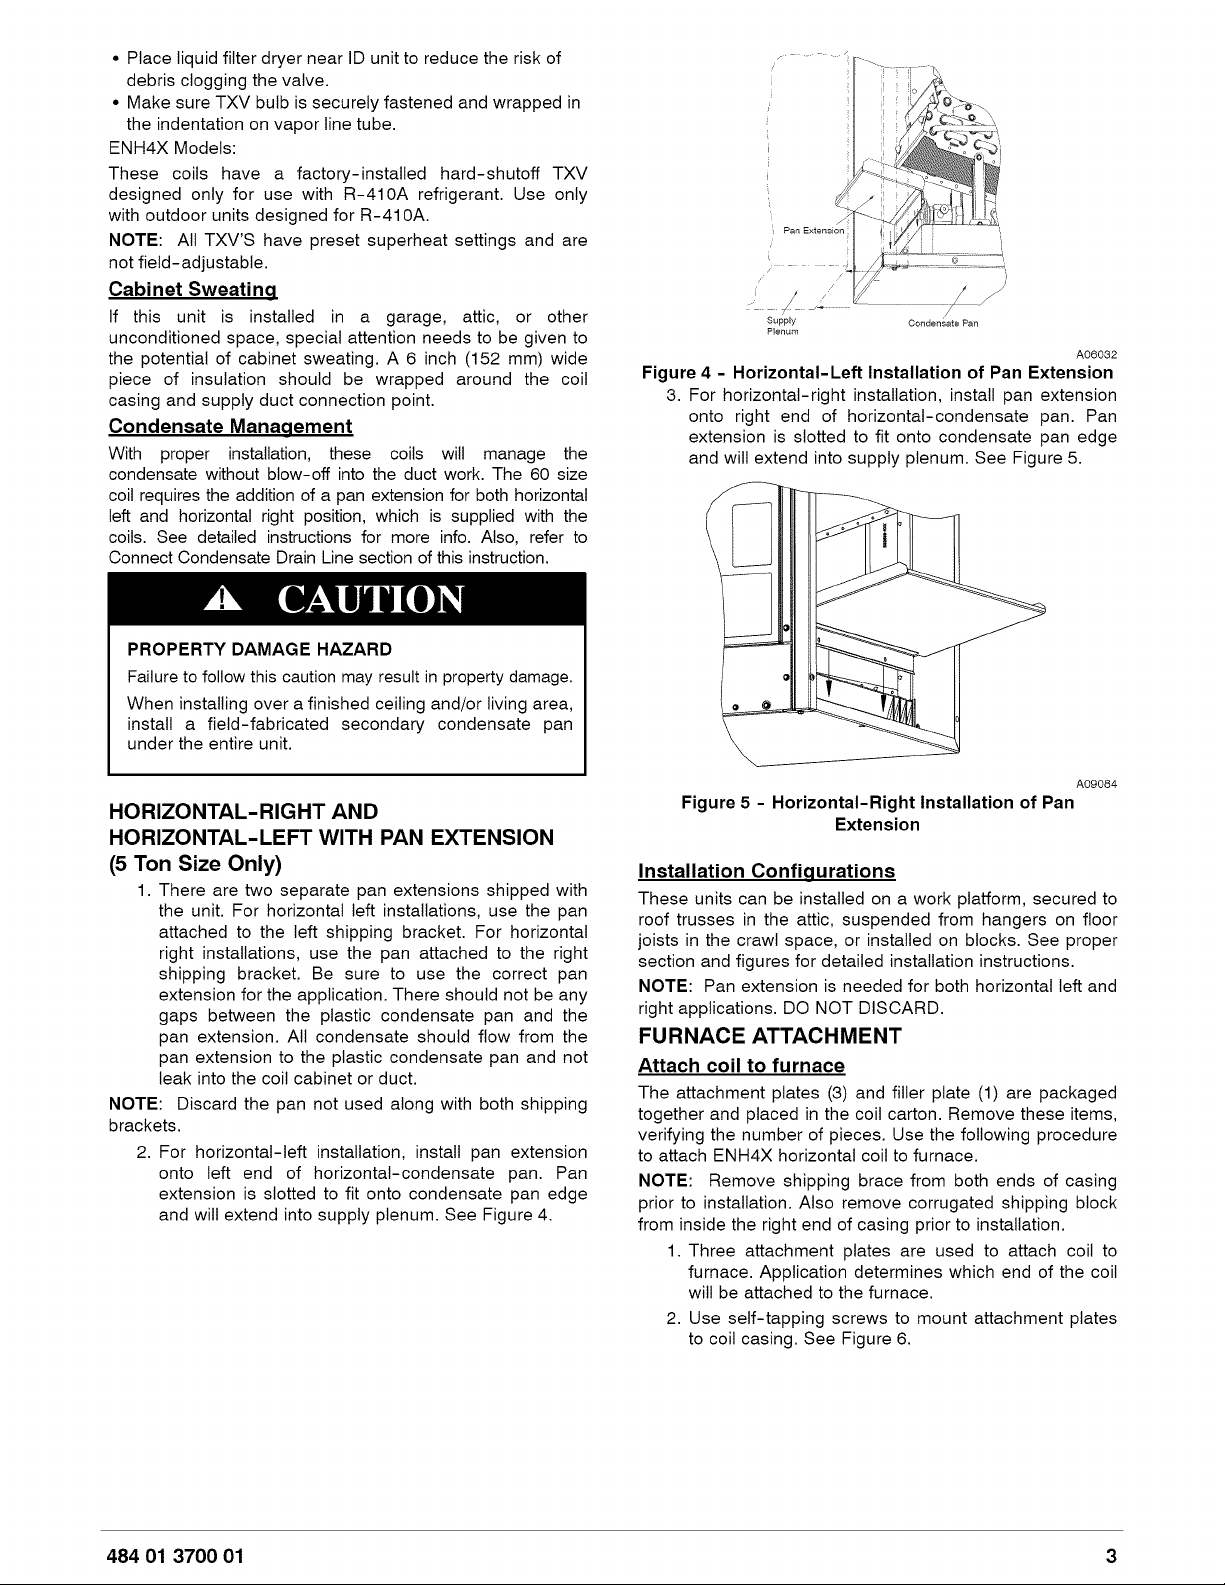
2.
For
horizontal-left
installation,
install
pan
extension
onto
left
end
of
horizontal-condensate
pan.
Pan
extension
is
slotted
to
fit
onto
condensate
pan
edge
and
will
extend
into
supply
plenum.
See
Figure
4.
)
Pan
Extension
:
Supply
Condensate
Pan
Plenum
A06032
Figure
4
-
Horizontai-Left
Installation
of
Pan
Extension
8.
For
horizontal-right
installation,
install
pan
extension
onto
right
end
of
horizontal-condensate
pan.
Pan
extension
is
slotted
to
fit
onto
condensate
pan
edge
and
will
extend
into
supply
plenum.
See
Figure
5.
A09084
Figure
5
-
Horizontal-Right
Installation
of
Pan
Extension
Installation
Configurations
These
units
can
be
installed
on
a
work
platform,
secured
to
roof
trusses
in
the
attic,
suspended
from
hangers
on
floor
joists
in
the
crawl
space,
or
installed
on
blocks.
See
proper
section
and
figures
for
detailed
installation
instructions.
NOTE:
Pan
extension
is
needed
for
both
horizontal
left
and
right
applications.
DO
NOT
DISCARD.
FURNACE
ATTACHMENT
Attach
coil
to
furnace
The
attachment
plates
(3)
and
filler
plate
(1)
are
packaged
together
and
placed
in
the
coil
carton.
Remove
these
items,
verifying
the
number
of
pieces.
Use
the
following
procedure
to
attach
ENH4X
horizontal
coil
to
furnace.
NOTE:
Remove
shipping
brace
from
both
ends
of
casing
prior
to
installation.
Also
remove
corrugated
shipping
block
from
inside
the
right
end
of
casing
prior
to
installation.
1.
Three
attachment
plates
are
used
to
attach
coil
to
furnace.
Application
determines
which
end
of
the
coil
will
be
attached
to
the
furnace.
2.
Use
self-tapping
screws
to
mount
attachment
plates
to
coil
casing.
See
Figure
6.
484
01
3700
01
Loading ...
Loading ...
Loading ...