Loading ...
Loading ...
Loading ...
24 | Page
Fuel Conversion of Main Burners:
1- Determine the existing gas type. (LP or Natural gas) Changing the gas type
and orifice change out is the same for both gases.
2- You must remove all grates and burner covers to expose the main burners in
the grill.
3- On the bottom rear of each burner is a cotter pin. Remove pin.
4- Slide burner to the rear of the grill and up. Repeat for each burner.
5- Where the burner was located going through a hole in the basin and
connecting to the valve is now evacuated space.
6- Inside the space you will find the end of the valve (front of grill), with an orifice
(brass fitting), screwed into the end of the valve stem.
7- Remove the orifice with a socket set and extension. (These are extremely
fragile when turning. Be extremely gentle when removing).
8- Replace new change out orifice, (repeat for all burners). When re-installing
orifice do not over tighten or you will strip the brass fitting. Little pressure is
needed!!!
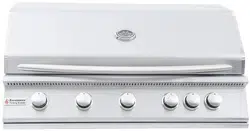
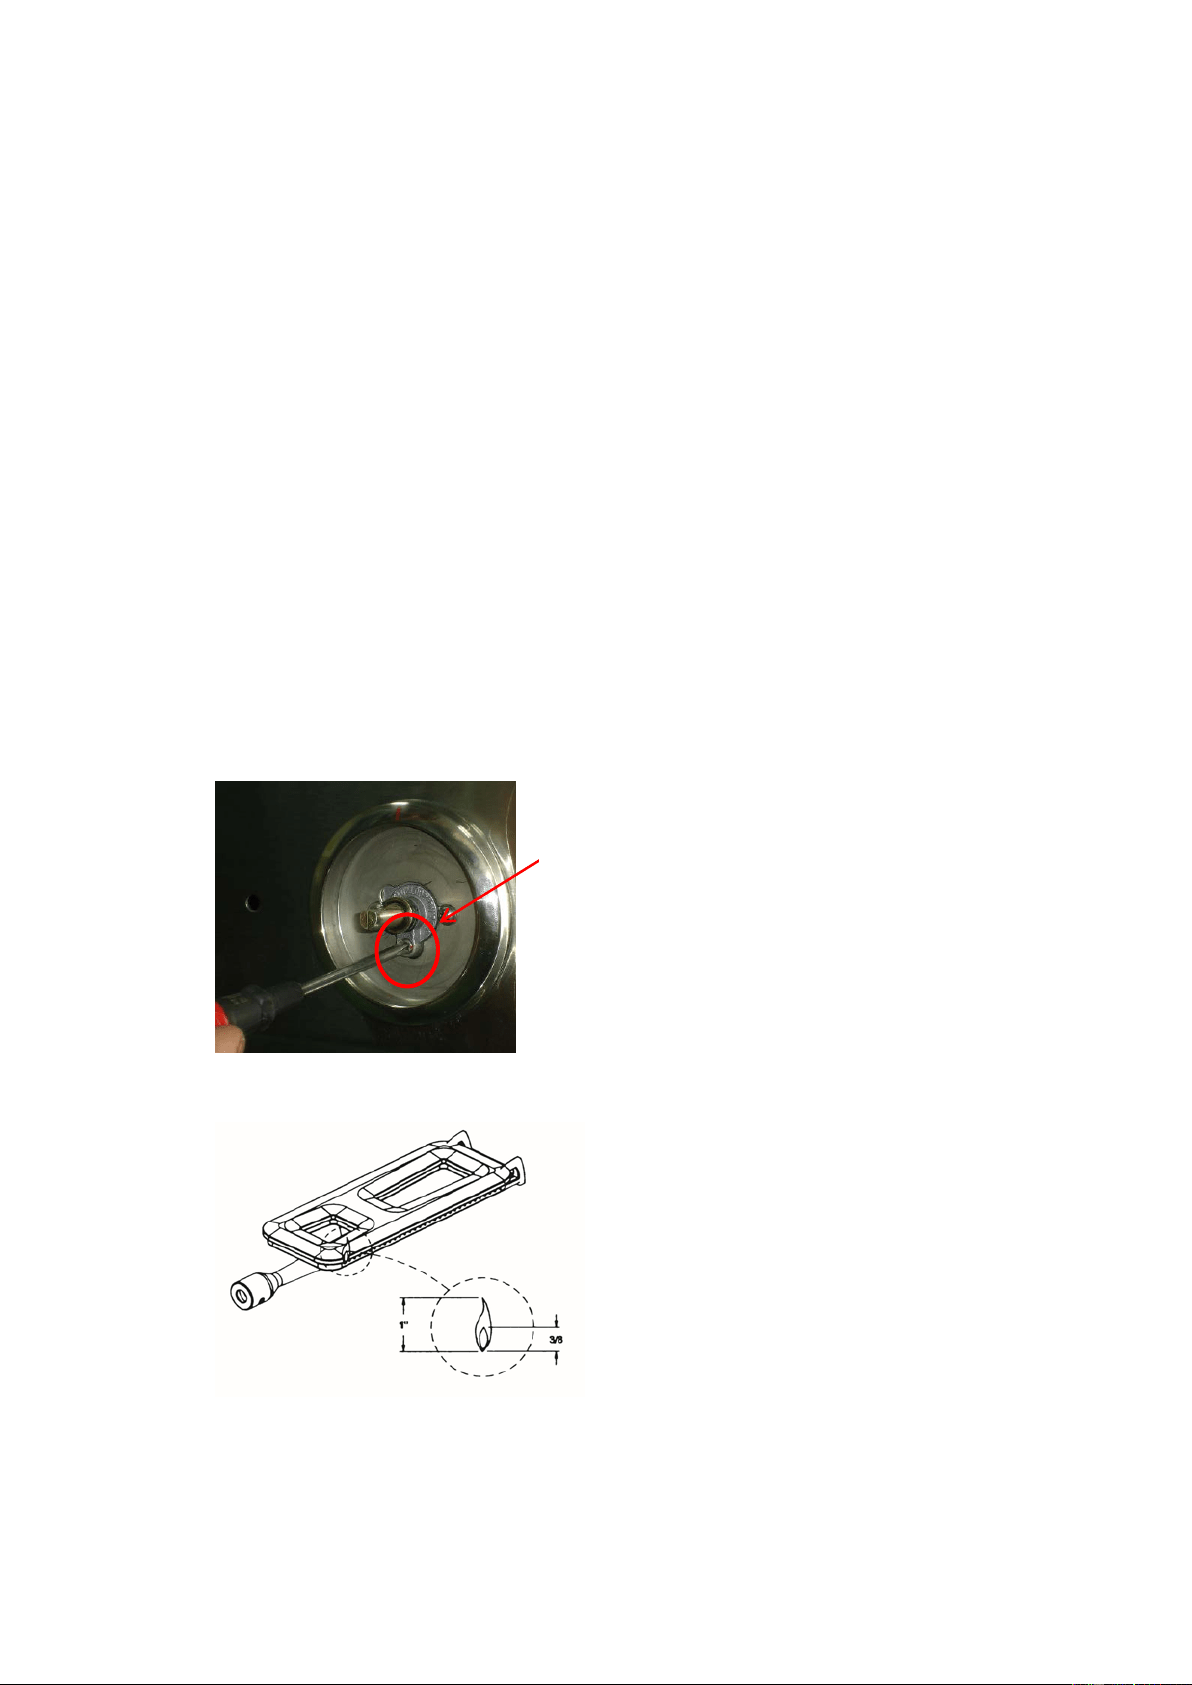
9- Replace burners and test for proper flame height. Flame should stand at ½” to
1” on low and 1.5” to 2” on high. (to adjust the low flame setting simply light the
grill on the low setting and adjust the screw which is located under the knob on
the front of the valve as per diagram below.)
10- Replace burner covers and grates.
11-If necessary, adjust the low flame setting screw located under the knobs on the
front of the valve.
Note: It may be necessary to adjust the air mixture on each burner after a
conversion. Typically LP gas requires more primary air so open the air mixers to at
least half open. The opposite is true for natural gas. In some cases close these air
mixer adjusters completely. (n/a on cast burners)
Low flame setting
screw
Loading ...
Loading ...
Loading ...