Loading ...
Loading ...
Loading ...
INSTRUCTIONS FOR THE INS
T
ALLER
Adjacent walls cupboards and combustible
materials protection.
Ensure that the appliance is installed in
accordance with clauses 6.2.5 and 6.10.1.1 of AS/
NZS 5601.1, or clauses 6.9.1 and 6.9.5 of
AS/NZS 5601.2 with regard to clearances
to combustible surfaces and materials, and
clearances to rangehoods and exhaust fans.
Clearance of 200mm from the periphery of burners
to vertical combustible surfaces is required.
Clearances to combustible surfaces may be
reduced only if combustible surfaces are protected
in accordance with clause 6.10.1.2 of AS/NZS
5601.1, or clause 6.9.2 of AS/NZS 5601.2.
The equipment must not be installed near
inflammable materials, such as curtains, cloths, etc.
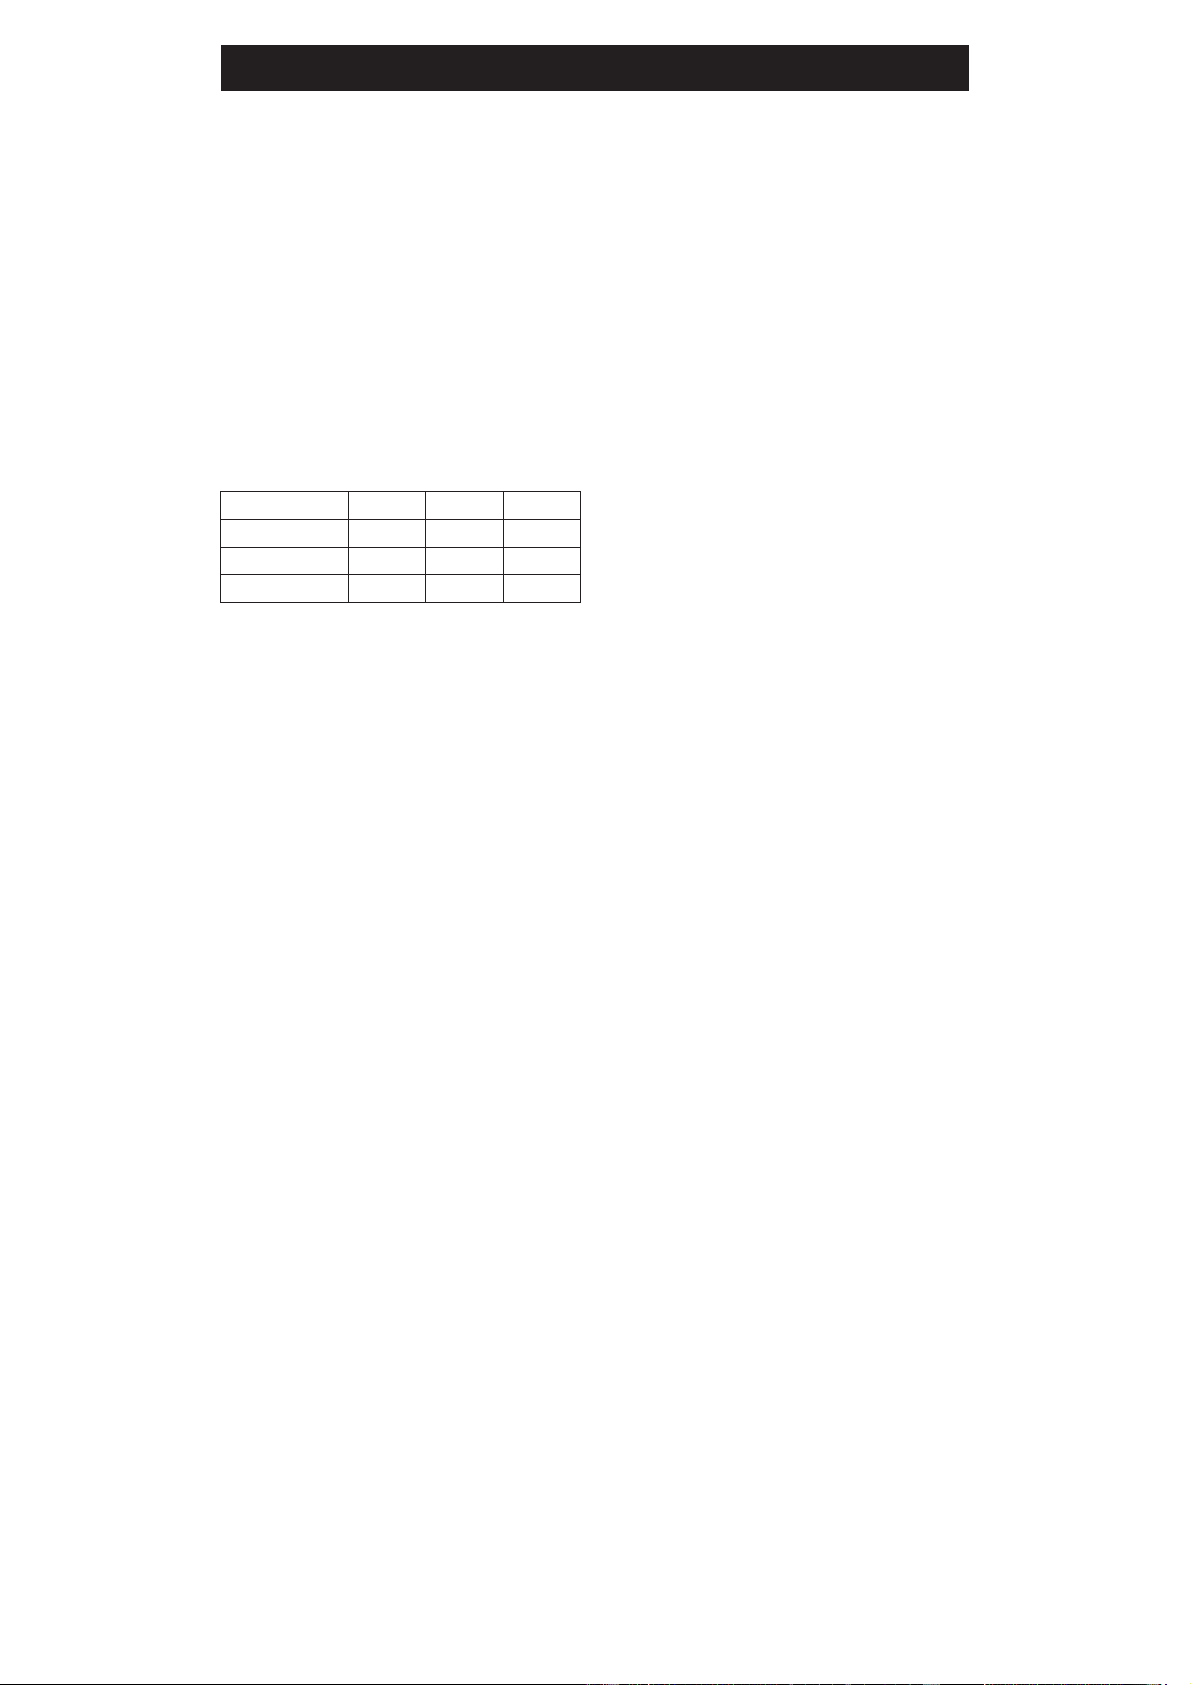
Make a cut out in the benchtop, with the dimensions
indicated in fig.3, at a distance of
at least 50 mm
from the appliance border to the adjacent walls.
MODEL L (mm) P (mm) D (mm)
60
560 480 55
75
625 480 55
90
805 480 55
Any possible wall unit over the cook-top must be
placed at a distance of at least 760 mm from the
top.
IMPORTANT:
A separation panel at least 10mm from the
bottom of the cooktop must be included during
installation to prevent access to the underside
of the appliance. This panel can be made of any
non-combustible rigid material, refer (fig. 4).
If the hob is going to be installed on the top of an
oven, precautions must be taken to guarantee an
installation in accordance with current accident
prevention standards. Pay particular attention to
the position of the electric cable and gas pipe: they
must not touch any hot parts of the oven. Moreover,
if the hob is going to be installed on the top of
a built- in oven without forced cooling ventilation,
proper air vents must be installed to guarantee
an adequate ventilation, with the lower air entering
with a cross section of at least 200cm
2
,
and the
higher air exiting with a cross section of at
least 60
cm
2
.
Fastening the top
Every cook-top is equipped with a special washer.
A
set of hooks is also supplied for mounting the
cook-top.
Depending on the type of mounting surface, the
suitable type of mounting hook is supplied (hook A
or hook B).
For the installation proceed as follows:
– Remove all loose components from the top.
– Turn the appliance upside down, lay its edges on
foam packaging blocks to prevent damage to the
ignition spark plugs and lay the seal S along the
external border (fig. 5).
– Introduce and place the cooktop in the hole
made in the piece of furniture, then fasten it
with the screws and fastening brackets supplied
(fig.6).
WARNING: Failure to fix the cooktop to the bench
could result in loosening of the gas connection
through movement of the cooktop and a gas leak
may result.
A duplicate rating label is included with these
instructions. Ensure this is attached to a readily
accessible surface, so that the cooktop can be
easily identified in the case of a service call.
INSTALLATION ROOM
This appliance is not provided with a device for
exhausting the products of combustion.
Therefore, it is necessary to discharge these
outside.
The room where this appliance is installed
must have a natural air inflow, so as to ensure
regular gas combustion and room ventilation: the
necessary air volume must not be lower than
20m
3
.
Air must come from permanent openings made on
the room walls that communicate with the outside.
The section of these openings shall correspond to
at least 200 cm
2
.
Loading ...
Loading ...
Loading ...