Loading ...
Loading ...
Loading ...
• Pull the line and make sure the line is
against the hub and extended fully
through the positioning tunnels.
• Correctly installed line will be the same
length on both ends.
REPLACING THE LINE IN THE
OPTIONAL TRIMMER HEAD
• Remove the spool by firmly pulling
on the tap button.
• Clean entire surface of hub and
spool.
• Replace with a pre-wound spool, or
cut two 12.5 foot (3.8 m) lengths of
.080" (2 mm) diameter Craftsman
brand line. Never use wire, rope,
string, etc., which can break off and
become a dangerous missile.
• Insert ends of line about 1/2 inch (1
cm) into the small holes inside spool.
Spool /_ Small
.............._// Holes
• Wind the line evenly and tightly onto
the spool. Wind in the direction of the
arrows found on the spool.
• Push the line into the notches,
leaving 3 to 5 inches (7 - 12 cm)
unwound.
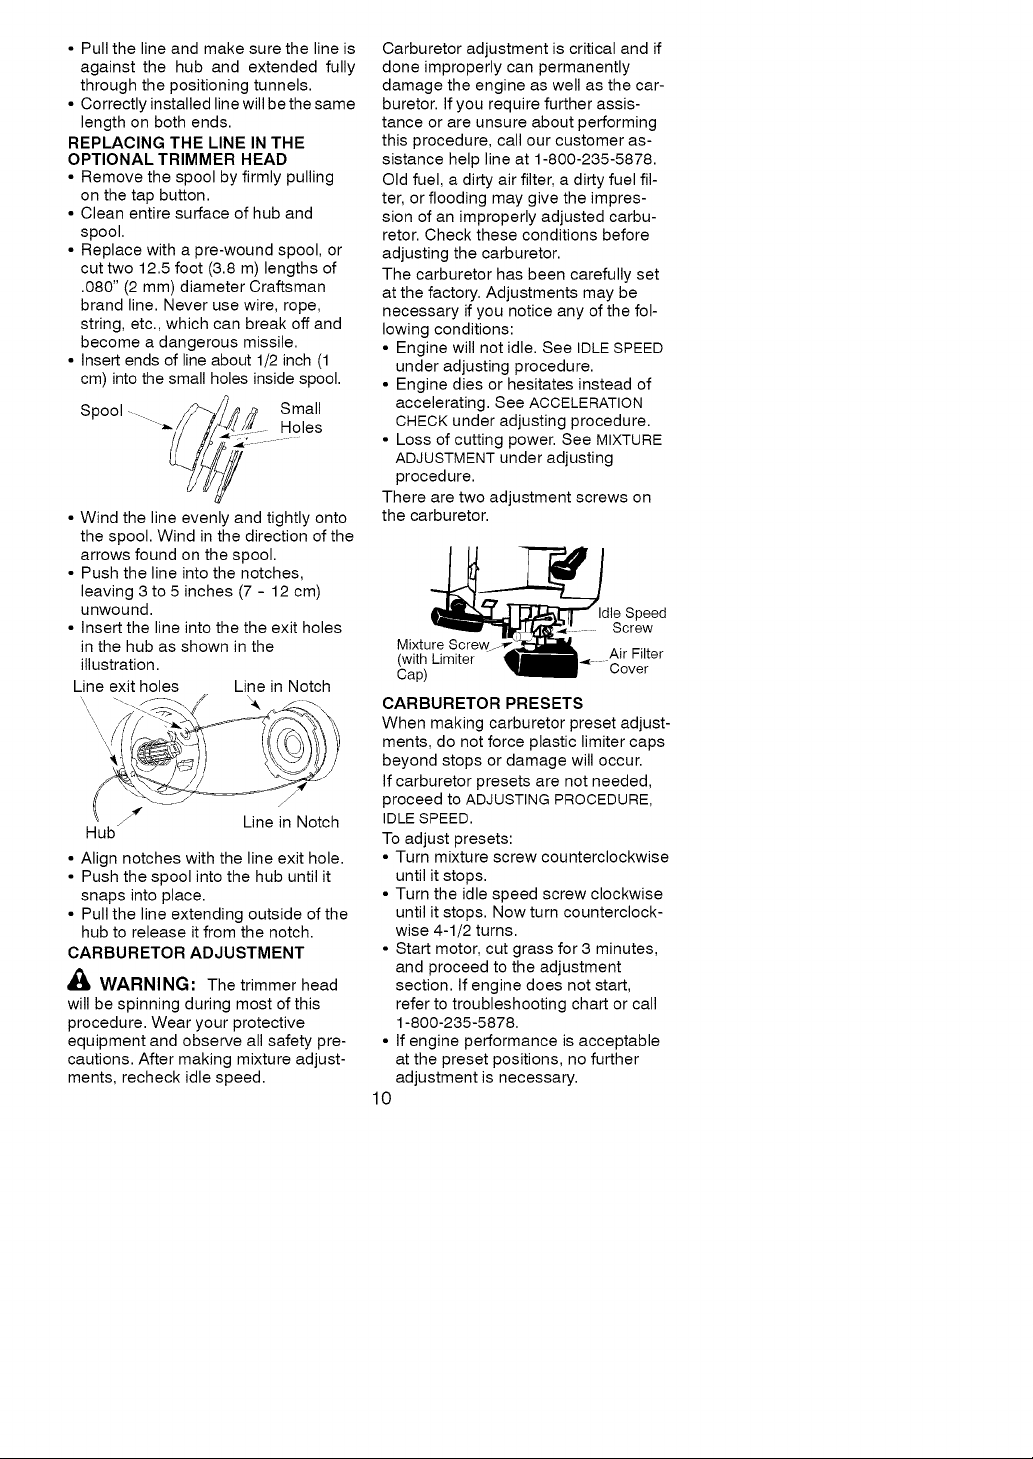
• Insert the line into the the exit holes
in the hub as shown in the
illustration.
Line exit holes Line in Notch
\
\
f Line in Notch
Hub
• Align notches with the line exit hole.
• Push the spool into the hub until it
snaps into place.
• Pull the line extending outside of the
hub to release it from the notch.
CARBURETOR ADJUSTMENT
'_ WARNING: The trimmer head
will be spinning during most of this
procedure. Wear your protective
equipment and observe all safety pre-
cautions. After making mixture adjust-
ments, recheck idle speed.
Carburetor adjustment is critical and if
done improperly can permanently
damage the engine as well as the car-
buretor. If you require further assis-
tance or are unsure about performing
this procedure, call our customer as-
sistance help line at 1-800-235-5878.
Old fuel, a dirty air filter, a dirty fuel fil-
ter, or flooding may give the impres-
sion of an improperly adjusted carbu-
retor. Check these conditions before
adjusting the carburetor.
The carburetor has been carefully set
at the factory. Adjustments may be
necessary if you notice any of the fol-
lowing conditions:
• Engine will not idle. See IDLE SPEED
under adjusting procedure.
• Engine dies or hesitates instead of
accelerating. See ACCELERATION
CHECK under adjusting procedure.
• Loss of cutting power. See MIXTURE
ADJUSTMENT under adjusting
procedure.
There are two adjustment screws on
the carburetor.
Screw
Air Filter
(with Limiter
Cap) "_ Cover
CARBURETOR PRESETS
When making carburetor preset adjust-
ments, do not force plastic limiter caps
beyond stops or damage will occur.
If carburetor presets are not needed,
proceed to ADJUSTING PROCEDURE,
IDLE SPEED.
To adjust presets:
• Turn mixture screw counterclockwise
until it stops.
• Turn the idle speed screw clockwise
until it stops. Now turn counterclock-
wise 4-1/2 turns.
• Start motor, cut grass for 3 minutes,
and proceed to the adjustment
section. If engine does not start,
refer to troubleshooting chart or call
1-800-235-5878.
• If engine performance is acceptable
at the preset positions, no further
adjustment is necessary.
10
Loading ...
Loading ...
Loading ...