Loading ...
Loading ...
Loading ...
17
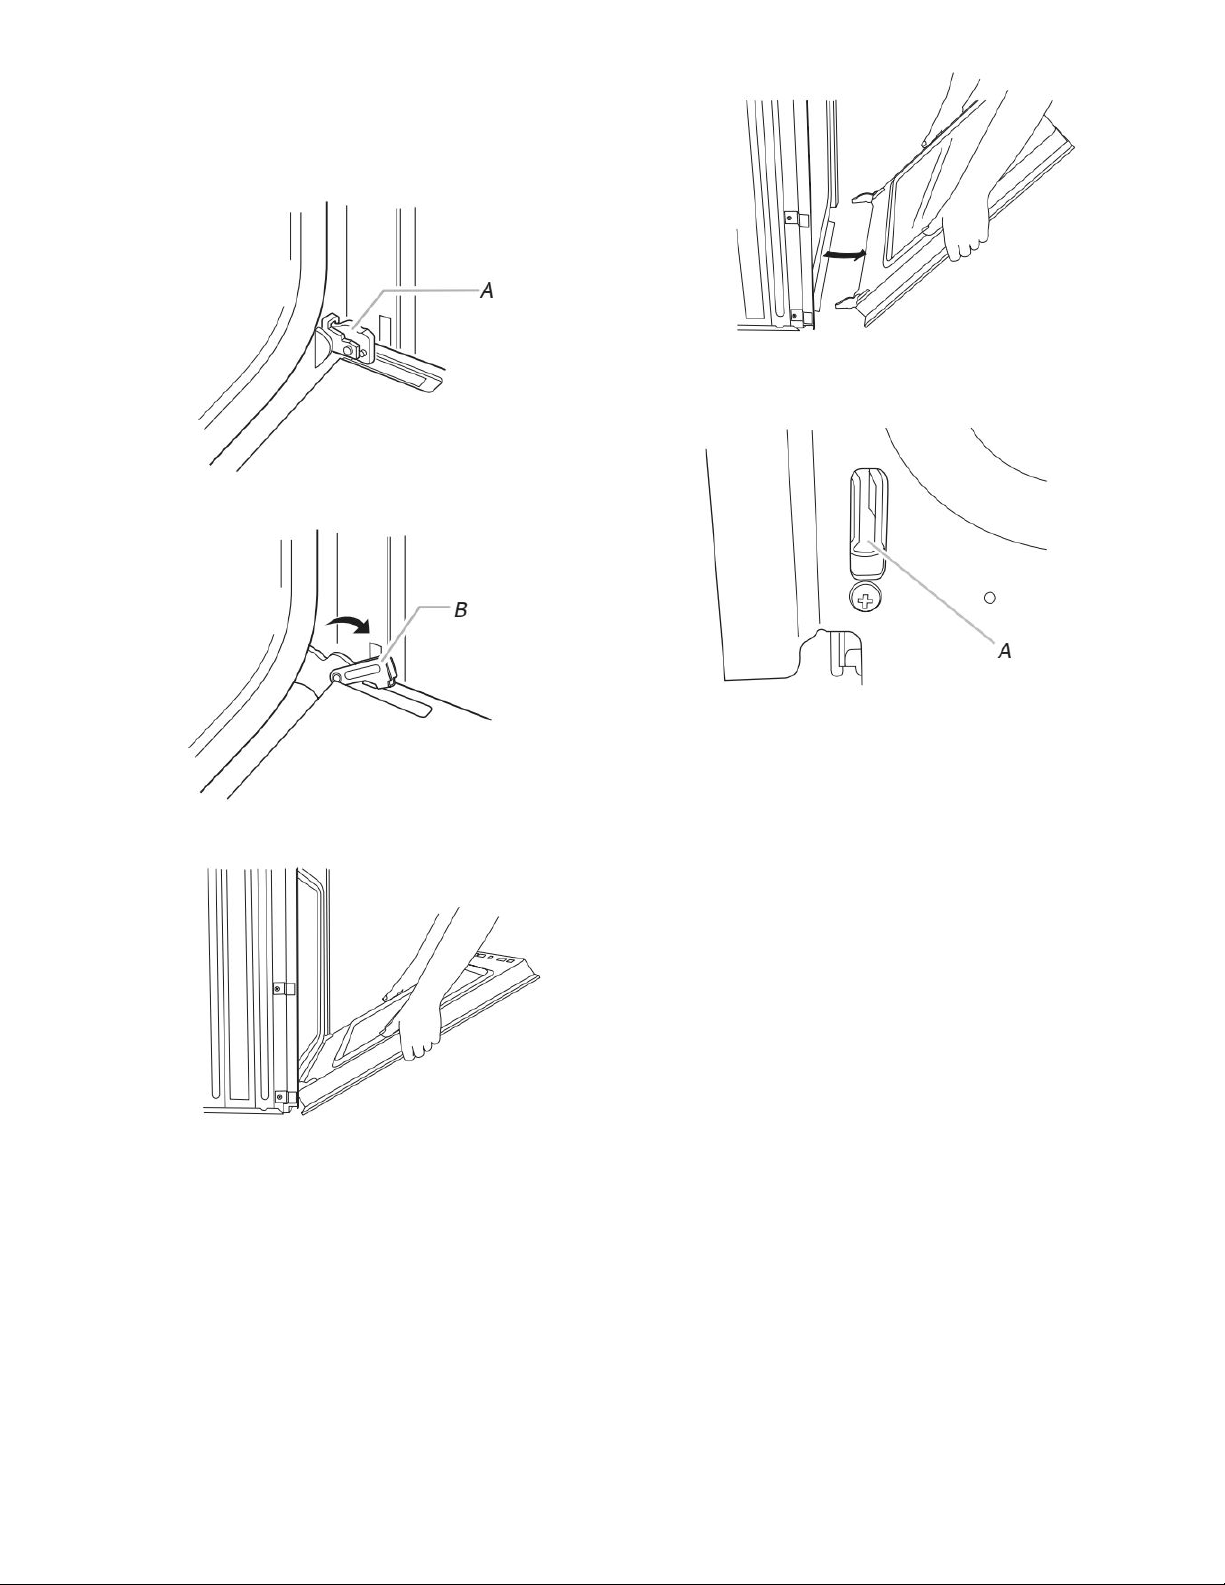
Remove Oven Doors
■ Do not lift or move the range by the door handle(s).
■ Prepare a surface where you will place the door(s). This
surface should be flat and covered with a soft blanket, or use
the corner posts from the packaging material.
A. Oven door hinge in the locked position
A. Oven door hinge in the unlocked position
Partially close the door to engage the door latch locks. The door will
stop at this point.
Use two hands to remove and replace the oven door(s). It may be
necessary to gently shift door from side to side.
A. Slot in the oven frame for the door hinge lock
■ To replace the oven door(s), locate the slots in the oven cavity
for the hinge locks and repeat the steps above in reverse
order. Make sure the door closes properly and there is no
interference from the door latch. If necessary, remove the door
and repeat the steps above. If power is connected to the
range, open and close the door to make sure the oven light
comes on and goes off appropriately.
Adjust Leveling Legs
1. If range height adjustment is necessary, use a wrench or pliers
to loosen the 4 leveling legs. This may be done with the range
on its back or with the range supported on 2 legs after the
range has been placed back to a standing position.
NOTE: To place range back up into a standing position, put a
sheet of cardboard or hardboard in front of range. Using 2 or
more people, stand range back up onto the cardboard or
hardboard.
2. Adjust the leveling legs to the correct height. Leveling legs can
be loosened to add up to a maximum of 1" (2.5 cm). A
minimum of 3/16" (5.0 mm) is needed to engage the anti-tip
bracket.
NOTE: If height adjustment is made when range is standing,
tilt the range back to adjust the front legs, then tilt forward to
adjust the rear legs.
3. When the range is at the correct height, check that there is
adequate clearance under the range for the anti-tip bracket.
Before sliding range into its final location, check that the anti
tip bracket will slide under the range and onto the rear leveling
leg prior to anti-tip bracket installation.
Loading ...
Loading ...
Loading ...