V-Series
User Manual
Model:
V705x-J01

2
Table of Contents
Getting to Know Your TV........................... 7
Front Panel..................................................7
Rear Panel ..................................................8
Wall-mounting the TV ........................................9
Using the Remote ............................................10
Completing the First-Time Setup ................... 11
Using the On-Screen Menu ......................... 12
Changing the Input Source ....................................12
Navigating the On-Screen Menu ...............................12
Adjusting the Picture Settings .................................13
Adjusting the Color Temperature...........................13
Changing the Picture Aspect Ratio .........................14
Adjusting Advanced Picture Settings .......................14
Adjusting Picture Input Settings ...........................17
Adjusting the Picture Mode Edit Settings....................17
Adjusting the Audio Settings ..................................19
Sound Bar settings...........................................19
Adjusting the Network Settings ................................20
Setting Up TV Channels.......................................21
Scanning for TV Channels.................................21
Skipping Channels .......................................21
Changing the Analog Audio Language ......................22
Using Parental Controls. . . . . . . . . . . . . . . . . . . . . . . . . . . . . . . . . . . 23
Accessibility Settings.........................................24
Setting Up Closed Captioning .............................24
Changing the Appearance of Digital Closed Captions ......... 25
Changing the System Settings .................................26
Changing the On-Screen Menu Language ...................26
Setting the Time ........................................26
Changing the TV Name ...................................27
Renaming Devices on the Input Menu.......................27
Adjusting the Power Mode ................................27
Using the USB Power Feature..............................28
Turning the Power Indicator On or Off.......................28
Setting Timers ..........................................28
Setting a System PIN Code................................29
Adjusting the CEC Settings................................29
Managing Mobile Devices .................................29
Using the Admin & Privacy Menu ...............................30
Performing a Reboot .....................................30
Viewing System Information...............................30
Accessing the Support Code ..............................30
Checking for System Updates .............................30
Restoring the TV to Factory Default Settings.................30
Viewing Data ............................................31
Managing Advertising Settings ............................31
View VIZIO Privacy Policy .................................31
Store Demo .............................................31
User Manual ............................................31
Using the Info Window ........................................32
VIZIO Smart TV Platform .......................... 33
What is the VIZIO Smart TV Platform? ......................33
Launching the VIZIO Smart TV Platform ....................33
What you can do with the VIZIO Smart TV Platform ...........33
Controlling your TV with the VIZIO Mobile App ...............33
WatchFree+ ...................................... 34
What is WatchFree+? .....................................34
What you can do with WatchFree+..........................34
How to Launch WatchFree+ ...............................34
Playing USB Media................................ 35
Preparing Your USB Drive to Play USB Media ................35
Displaying USB Media ....................................35
Removing the USB Drive from the TV .......................35
Product Registration and Technical Support.......... 39
Help Topics ...................................... 40
Help Topics ...................................... 41
Specications .................................... 42
Regulatory Information............................ 43
Limited Warranty ................................. 44
Legal Information................................. 46
3
Safety & Certication
THANK YOU FOR CHOOSING VIZIO
AndcongratulationsonyournewVIZIOTV!
TogetthemostoutofyournewVIZIOproduct,readtheseinstructionsbeforeusing
yourproductandretainthemforfuturereference.Besuretoinspectthepackage
contentstoensuretherearenomissingordamagedparts.
PRODUCT REGISTRATION
TopurchaseorinquireaboutaccessoriesandinstallationservicesforyourVIZIO
product,visitourwebsiteat
vizio.com.
WerecommendthatyouregisteryourVIZIOproductat
vizio.com/productregistration.
WHEN READING THIS MANUAL
Color Text — This is the TV menu feature you should be selecting.
Grey Text — This is an action for you to complete, such as entering in a name.
> — The arrow sign shows the flow of the steps you should take.
1. Listsadditionalstepsyou
cantakeforeachsetting.
• Bulletsgivemoredetailedinformationabouteachfeature.
TIP: Whenyouseethissymbol,pleasereadtheaccompanying
helpfultip.
WARNING: Whenyouseethissymbol,pleasereadthe
accompanyingimportantwarningornotice.Itisintendedtoalert
youtothepresenceofimportantoperatinginstructions.
IMPORTANT SAFETY INSTRUCTIONS
YourTVisdesignedandmanufacturedtooperatewithindefineddesignlimits.
Misusemayresultinelectricshockorfire.TopreventyourTVfrombeingdamaged,
thefollowinginstructionsshouldbeobservedfortheinstallation,use,and
maintenanceofyourTV.Readthefollowingsafetyinstructionsbeforeoperatingyour
TV.Keeptheseinstructionsinasafeplaceforfuturereference.
• Toreducetheriskofelectricshockorcomponentdamage,switchoffthepower
beforeconnectingothercomponentstoyourTV.
• Readtheseinstructions.
• Keeptheseinstructions.
• Heedallwarnings.
• Followallinstructions.
• Donotusethisapparatusnearwater.
• Cleanonlywithdrycloth.
• Donotblockanyventilationopenings.Installinaccordancewiththe
manufacturer’sinstructions.
• Donotinstallnearanyheatsourcessuchasradiators,heatregisters,stoves,or
otherapparatus(includingamplifiers)thatproduceheat.
• Donotdefeatthesafetypurposeofthepolarizedorgroundingtypeplug.A
polarizedplughastwobladeswithonewiderthantheother.
•Agroundingtypeplughastwobladesandathirdgroundingprong.Thewide
bladeorthethirdprongareprovidedforyoursafety.
•Iftheprovidedplugdoesnotfitintoyouroutlet,consultanelectricianfor
replacementoftheobsoleteoutlet.
• Protectthepowercordfrombeingwalkedonorpinchedparticularlyatplugs,
conveniencereceptacles,andthepointwheretheyexitfromtheapparatus.
• Onlyuseattachments/accessoriesspecifiedbythemanufacturer.
• Useonlywiththecart,stand,tripod,bracket,ortablespecified
bythemanufacturer,orsoldwiththeapparatus.Whenacartis
used,usecautionwhenmovingthecart/apparatuscombination
toavoidinjuryfromtipover.
• SomelargerTVsmayrequiretwopersonoperationformovingand/orinstalling
theTV.
• Referallservicingtoqualifiedservicepersonnel.Servicingisrequiredwhenthe
apparatushasbeendamagedinanyway,suchaspowersupplycordorplugis
damaged,liquidhasbeenspilledorobjectshavefallenintotheapparatus,the
apparatushasbeenexposedtorainormoisture,doesnotoperatenormally,or
hasbeendropped.
• CAUTION: Alwaysuseapoweroutletthatisproperlygrounded.
• UnplugthisTVduringlightningstormsorwhenunusedforlongperiodsoftime.
• WhenmovingyourTVfromanareaoflowtemperaturetoanareaofhigh
temperature,condensationmayforminthehousing.Waitbeforeturningonyour
TVtoavoidcausingfire,electricshock,orcomponentdamage.
• AdistanceofatleastthreefeetshouldbemaintainedbetweenyourTVandany
heatsource,suchasaradiator,heater,oven,amplifier,etc.DonotinstallyourTV
closetosmoke.OperatingyourTVclosetosmokeormoisturemaycausefireor
electricshock.
• SlotsandopeningsinthebackandbottomoftheTVareprovidedforventilation.
ToensurereliableoperationofyourTVandtoprotectitfromoverheating,
besuretheseopeningsarenotblockedorcovered.DonotplaceyourTVina
bookcaseorcabinetunlessproperventilationisprovided.
• NeverpushanyobjectintotheslotsandopeningsonyourTV.Donotplaceany
objectsonthetopofyourTV.Doingsocouldshortcircuitpartscausingafireor
electricshock.NeverspillliquidsonyourTV.
• YourTVshouldbeoperatedonlyfromthetypeofpowersourceindicatedon
thelabel.Ifyouarenotsureofthetypeofpowersuppliedtoyourhome,consult
yourdealerorlocalpowercompany.
• DonotapplypressureorthrowobjectsatyourTV.Thismaycompromisethe
integrityoftheTV.Themanufacturer’swarrantydoesnotcoveruserabuseor
improperinstallations.
• Thepowercordmustbereplacedwhenusingdifferentvoltagethanthevoltage
specified.Formoreinformation,contactyourdealer.
• Whenconnectedtoapoweroutlet,powerisalwaysflowingintoyour
TV.Tototallydisconnectpower,unplugthepowercord.
• Thelightningflashwitharrowheadsymbolwithinanequilateraltriangleis
intendedtoalerttheusertothepresenceofunisolated,dangerousvoltage
withintheinsideofyourTVthatmaybeofsufficientmagnitudetoconstitutea
riskofelectricshocktopersons.
• Donotoverloadpowerstripsandextensioncords.Overloadingcanresultinfire
orelectricshock.
• ThewallsocketshouldbeinstallednearyourTVandeasilyaccessible.
• OnlypowerofthemarkedvoltagecanbeusedforyourTV.Anyothervoltage
thanthespecifiedvoltagemaycausefireorelectricshock.

4
• Donottouchthepowercordduringlightning.Toavoidelectricshock,avoid
handlingthepowercordduringelectricalstorms.
• UnplugyourTVduringalightningstormorwhenitwillnotbeusedforlong
periodoftime.ThiswillprotectyourTVfromdamageduetopowersurges.
• DonotattempttorepairorserviceyourTVyourself.Openingorremovingthe
backcovermayexposeyoutohighvoltages,electricshock,andotherhazards.If
repairisrequired,contactyourdealerandreferallservicingtoqualifiedservice
personnel.
• WARNING:KeepyourTVawayfrommoisture.DonotexposeyourTVtorainor
moisture.IfwaterpenetratesintoyourTV,unplugthepowercordandcontact
yourdealer.Continuoususeinthiscasemayresultinfireorelectricshock.
• DonotuseyourTVifanyabnormalityoccurs.Ifanysmokeorodorbecomes
apparent,unplugthepowercordandcontactyourdealerimmediately.Donot
trytorepairyourTVyourself.
• Avoidusingdroppedordamagedappliances.IfyourTVisdroppedandthe
housingisdamaged,theinternalcomponentsmayfunctionabnormally.Unplug
thepowercordimmediatelyandcontactyourdealerforrepair.Continueduseof
yourTVmaycausefireorelectricshock.
• DonotinstallyourTVinanareawithheavydustorhighhumidity.Operating
yourTVinenvironmentswithheavydustorhighhumiditymaycausefireor
electricshock.
• FollowinstructionsformovingyourTV.Ensurethatthepowercordandany
othercablesareunpluggedbeforemovingyourTV.
• Topreventinjury,thisapparatusmustbesecurelyattachedtothefurniture/wall
inaccordancewiththeinstallationinstructions.
• Insertbatteriesinaccordancewithinstructions.Incorrectpolaritiesmaycause
thebatteriestoleakwhichcandamagetheremotecontrolorinjuretheoperator.
Donotexposebatteriestoexcessiveheatsuchassunlight,fire,etc.
• WhenunpluggingyourTV,grabtheheadofthepowerplug,notthecord.Pulling
onthepowercordmaydamagethewiresinsidethecordandcausefireor
electricshock.WhenyourTVwillnotbeusedforanextendedperiodoftime,
unplugthepowercord.
• Toreduceriskofelectricshock,donottouchtheconnectorwithwethands.
• DonotexposeTVtoliquids,includingdrippingorsplashing.
• Donotplaceobjectsfilledwithliquid,suchasvases,ontheTV.
• If the main wall plug or the appliance coupler is disconnected, the
disconnected device will remain readily operable upon reconnection to
an appropriate power source. If any of the following occurs, contact the
dealer:
− Thepowercordfailsorfrays.
− LiquidspraysoranyobjectdropsintoyourTV.
− YourTVisexposedtorainorothermoisture.
− YourTVisdroppedordamagedinanyway.
− TheperformanceofyourTVchangessubstantially.
• CAUTION: Theseservicinginstructionsareforusebyqualifiedservice
personnelonly.Toreducetheriskofelectricshock,donotperformanyservicing
otherthanthatcontainedintheoperatinginstructionsunlessyouarequalified
todoso.
• Thelightningflashwitharrowheadsymbolwithinanequilateraltriangleis
intendedtoalerttheusertothepresenceofuninsulatedDANGEROUSVOLTAGE
withintheproduct’senclosurethatmaybeofsufficientmagnitudetoconstitute
ariskofelectricalshocktopersons.
• WARNING:Exposuretoloudsoundscandamageyourhearingcausinghearing
lossandtinnitus(ringingorbuzzingintheears).Withcontinuedexposureto
loudnoises,earsmaybecomeaccustomedtothesoundlevel,whichmayresult
inpermanentdamagetohearingwithoutanynoticeablediscomfort.
• InstalltheTVwhereitcannotbepulled,pushedorknockedover.
• Donotallowchildrentohangontotheproduct.
• Storetheaccessories(remote,batteries,etc.)inalocationsafelyoutofthe
reachofchildren.
• TheAmericanAcademyofPediatricsdiscouragesuseofscreenmediafor
childrenyoungerthaneighteenmonthsofage.
• WARNING — Stability Hazard: Atelevisionsetmayfall,causingserious
personalinjuryordeath.Manyinjuries,particularlytochildren,canbeavoided
bytakingsimpleprecautionssuchas:
• ALWAYSusecabinetsorstandsormountingmethodsrecommendedbythe
manufacturerofthetelevisionset.
• ALWAYSusefurniturethatcansafelysupportthetelevisionset.
• ALWAYSensurethetelevisionsetisnotoverhangingtheedgeofthesupporting
furniture.
• ALWAYSeducatechildrenaboutthedangersofclimbingonfurnituretoreach
thetelevisionsetoritscontrols.
• ALWAYSroutecordsandcablesconnectedtoyourtelevisionsotheycannotbe
trippedover,pulledorgrabbed.
• NEVERplaceatelevisionsetinanunstablelocation.
• NEVERplacethetelevisionsetontallfurniture(forexample,cupboardsor
bookcases)withoutanchoringboththefurnitureandthetelevisionsettoa
suitablesupport.
• NEVERplacethetelevisionsetonclothorothermaterialsthatmaybelocated
betweenthetelevisionsetandsupportingfurniture.
• NEVERplaceitemsthatmighttemptchildrentoclimb,suchastoysandremote
controls,onthetopofthetelevisionorfurnitureonwhichthetelevisionis
placed.
• Iftheexistingtelevisionsetisgoingtoberetainedandrelocated,thesame
considerationsasaboveshouldbeapplied.
• Disposalofabatteryintofireorahotoven,ormechanicallycrushingorcutting
ofabatterycanresultinanexplosion.
• Leavingabatteryinanextremelyhightemperaturecanresultinanexplosionor
theleakageofflammableliquidorgas.
• Abatterysubjectedtoextremelylowairpressuremayresultinanexplosionor
theleakageofflammableliquidorgas.
• CAUTION:Riskofexplosionifthebatteryisreplacedbyanincorrecttype.
• Useconsumergrade,nonrechargeable'AAA'carbonzincoralkalinebatteries.
• WARNING: Topreventinjury,thisapparatusmustbesecurelyattachedtothe
furniture/wallinaccordancewiththeinstallationinstructions.
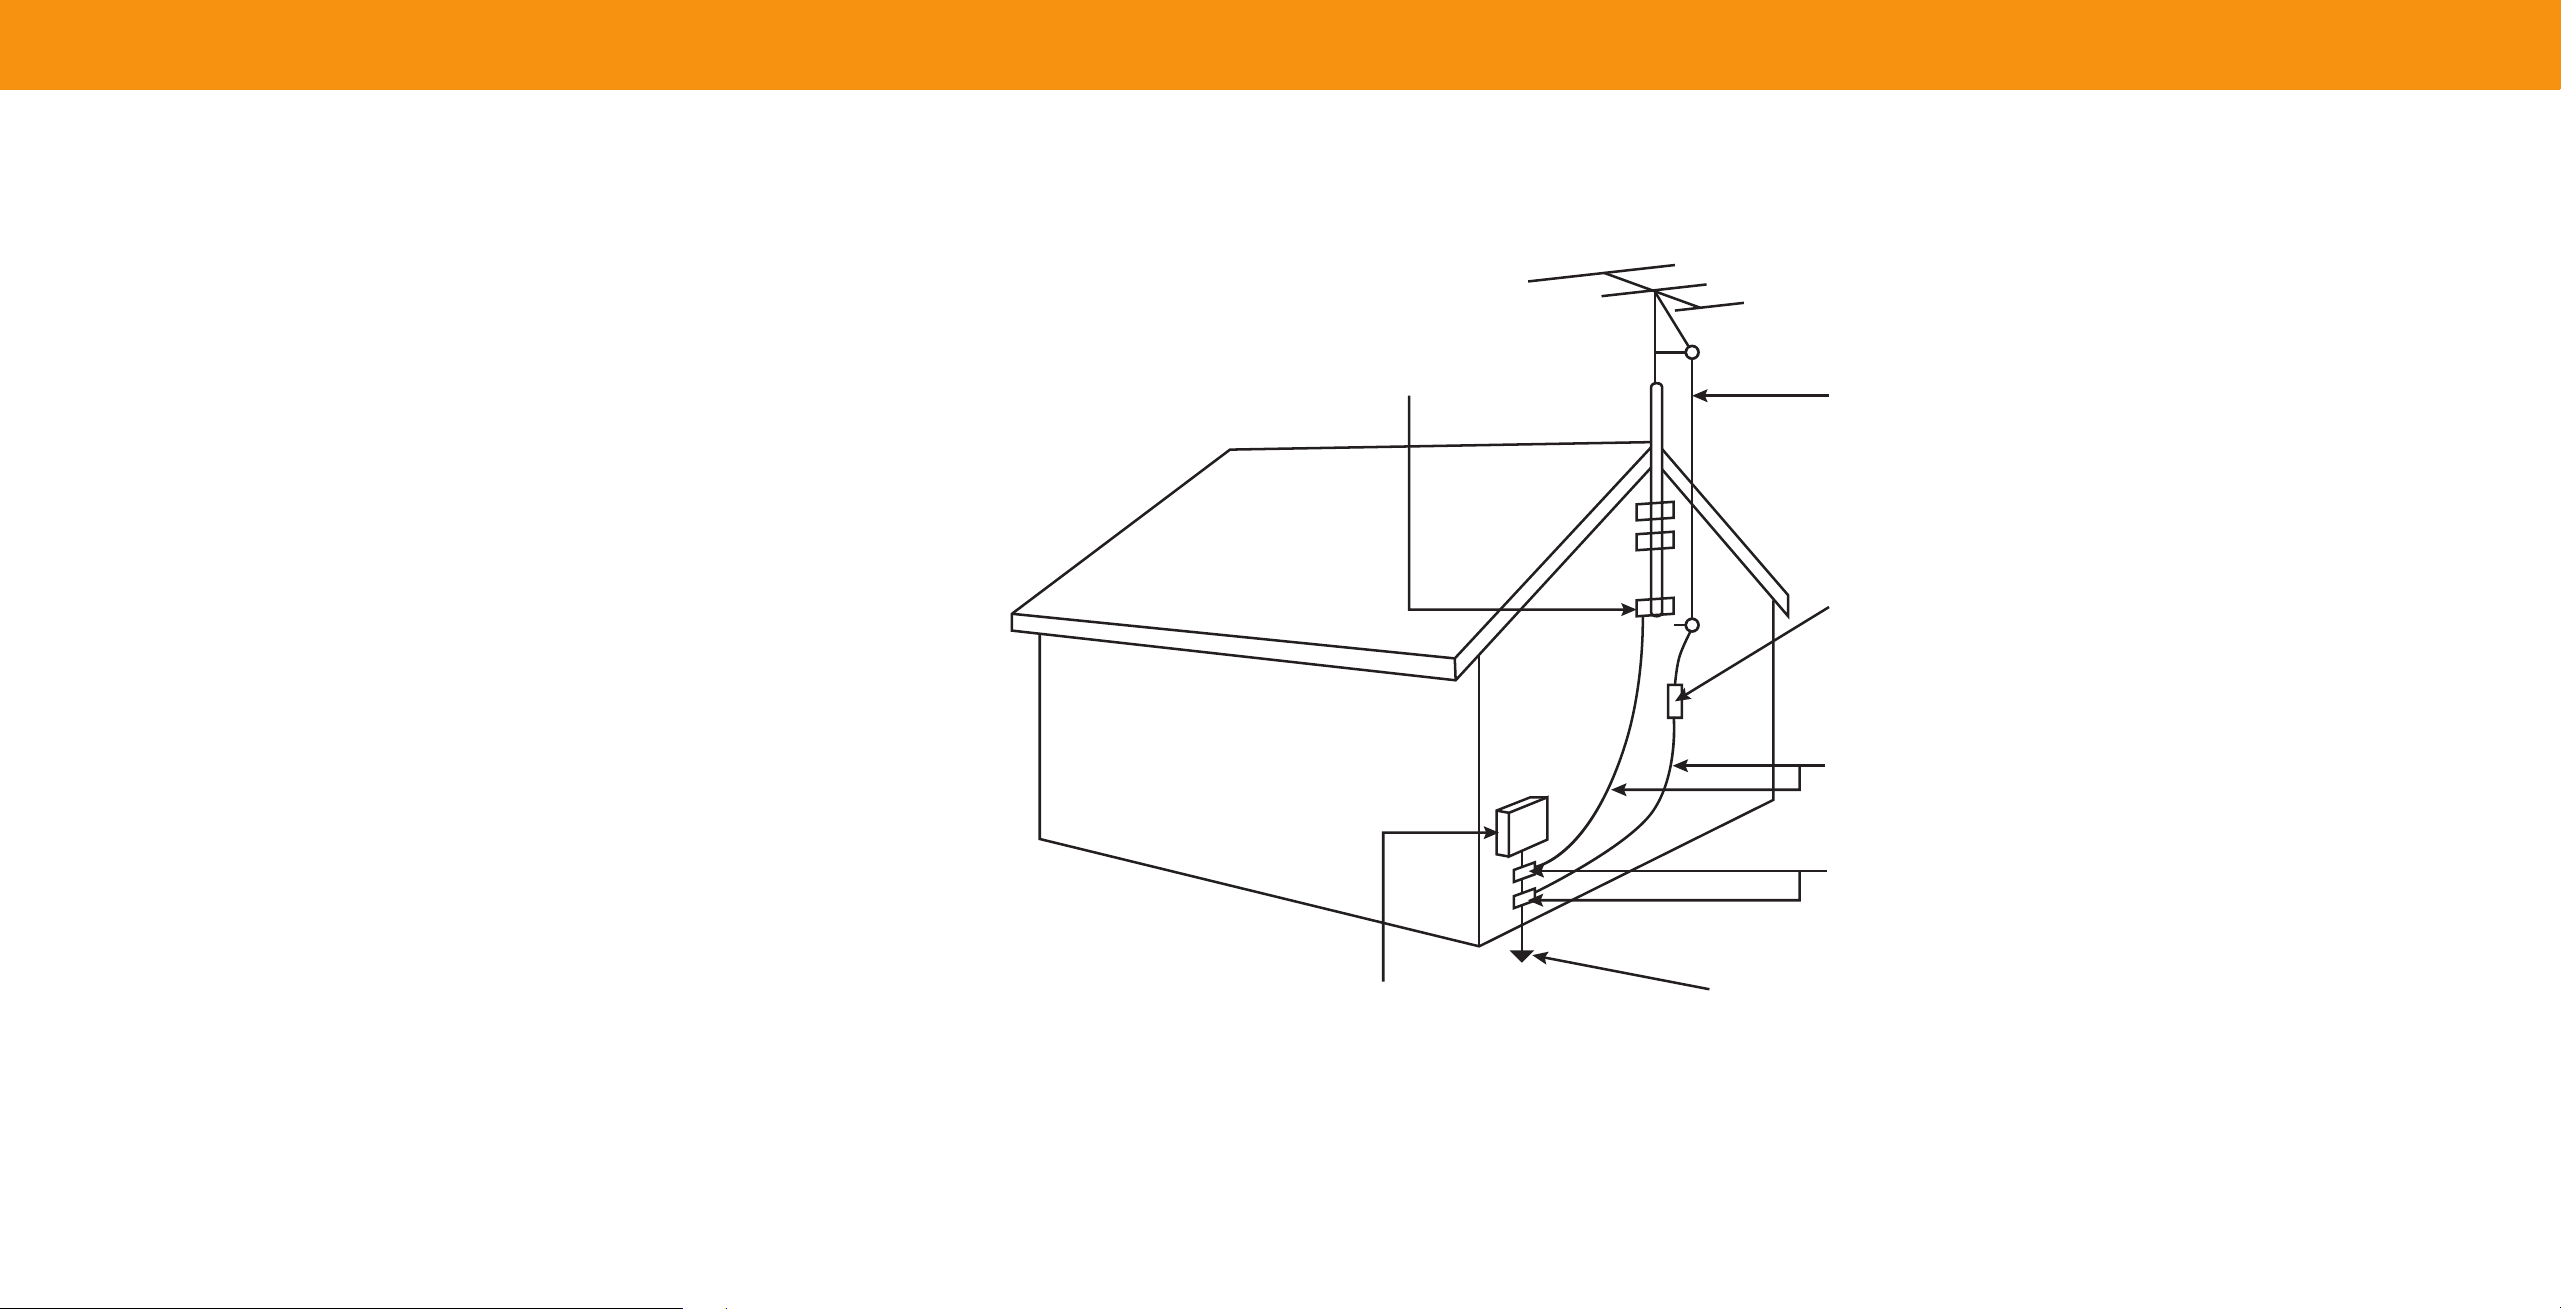
TELEVISION ANTENNA CONNECTION PROTECTION
TheTVshallbeinstalledinaccordancewiththeapplicableprovisionsofArticle810
andArticle820.
Ifanoutsideantenna/satellitedishorcablesystemistobeconnectedtotheTV,
makesurethattheantennaorcablesystemiselectricallygroundedtoprovidesome
protectionagainstvoltagesurgesandstaticcharges.
Article810oftheNationalElectricalCode,ANSI/NFPSA70,providesinformation
withregardtopropergroundingofthemastandsupportingstructure,grounding
oftheleadinwiretoanantennadischargeunit,sizeofthegroundingconductors,
locationofantennadischargeunit,connectiontogroundingelectrodes,and
requirementsofthegroundingelectrode.
Lightning Protection
ForaddedprotectionoftheTVduringalightningstormorwhenitisleftunattended
orunusedforlongperiodsoftime,unplugtheTVfromthewalloutletanddisconnect
theantennaorcablesystem.
Power Lines
Donotlocatetheantennanearoverheadlightorpowercircuits,orwhereitcould
fallintosuchpowerlinesorcircuits.Remember,thescreenofthecoaxialcableis
intendedtobeconnectedtoearthinthebuildinginstallation.
Installation of CATV
Theinstallationinstructionsstatesthecabledistributionsystemshouldbegrounded
(earthed)inaccordancewithANSI/NFPA70.theNationalElectricalCode(NEC),in
particularSection820.93,GroundingofOuterConductiveShieldofaCoaxialCable.
Installation of Antenna
Theinstallationinstructionsstatesthecabledistributionsystemusedforconnection
toantennasanddishesshouldbegrounded(earthed)inaccordancewithANSI/
NFPA70.theNationalElectricalCode(NEC),inparticularSection810.21,Bonding
ConductorsandGroundingElectrodeConductors—ReceivingStations.
GroundClamp
ElectricServiceEquipment
AntennaLeadInWire
AntennaDischargeUnit
(NECSection81020)
GroundingConductors
(NECSection81021)
GroundClamps
PowerServiceGroundingElectrodeSystem
(NECART250,partH)
5
6
®
DTS:X
®
Cinema Quality DTS
®
Virtual:X
™
Immersive Audio
Virtualized 3D Sound
Dolby,DolbyVision,DolbyAudio,andthedoubleDsymbolare
ThetermsHDMI,HDMIHighDefinitionMultimediaInterface,andthe
ForDTSpatents,see
http://patents.dts.com.
trademarksofDolbyLaboratoriesLicensingCorporation.Manufactured
HDMILogoaretrademarksorregisteredtrademarksofHDMILicensing
ManufacturedunderlicensefromDTS,Inc.DTS,DTS:X,Virtual:X,the
underlicensefromDolbyLaboratories.Confidentialunpublishedworks.
Administrator,Inc.
DTS:XlogoareregisteredtrademarksortrademarksofDTS,Inc.inthe
Copyright©19922021DolbyLaboratories.Allrightsreserved.
UnitedStatesandothercountries.©2021DTS,Inc.
ALLRIGHTSRESERVED.
7
Getting to Know Your TV
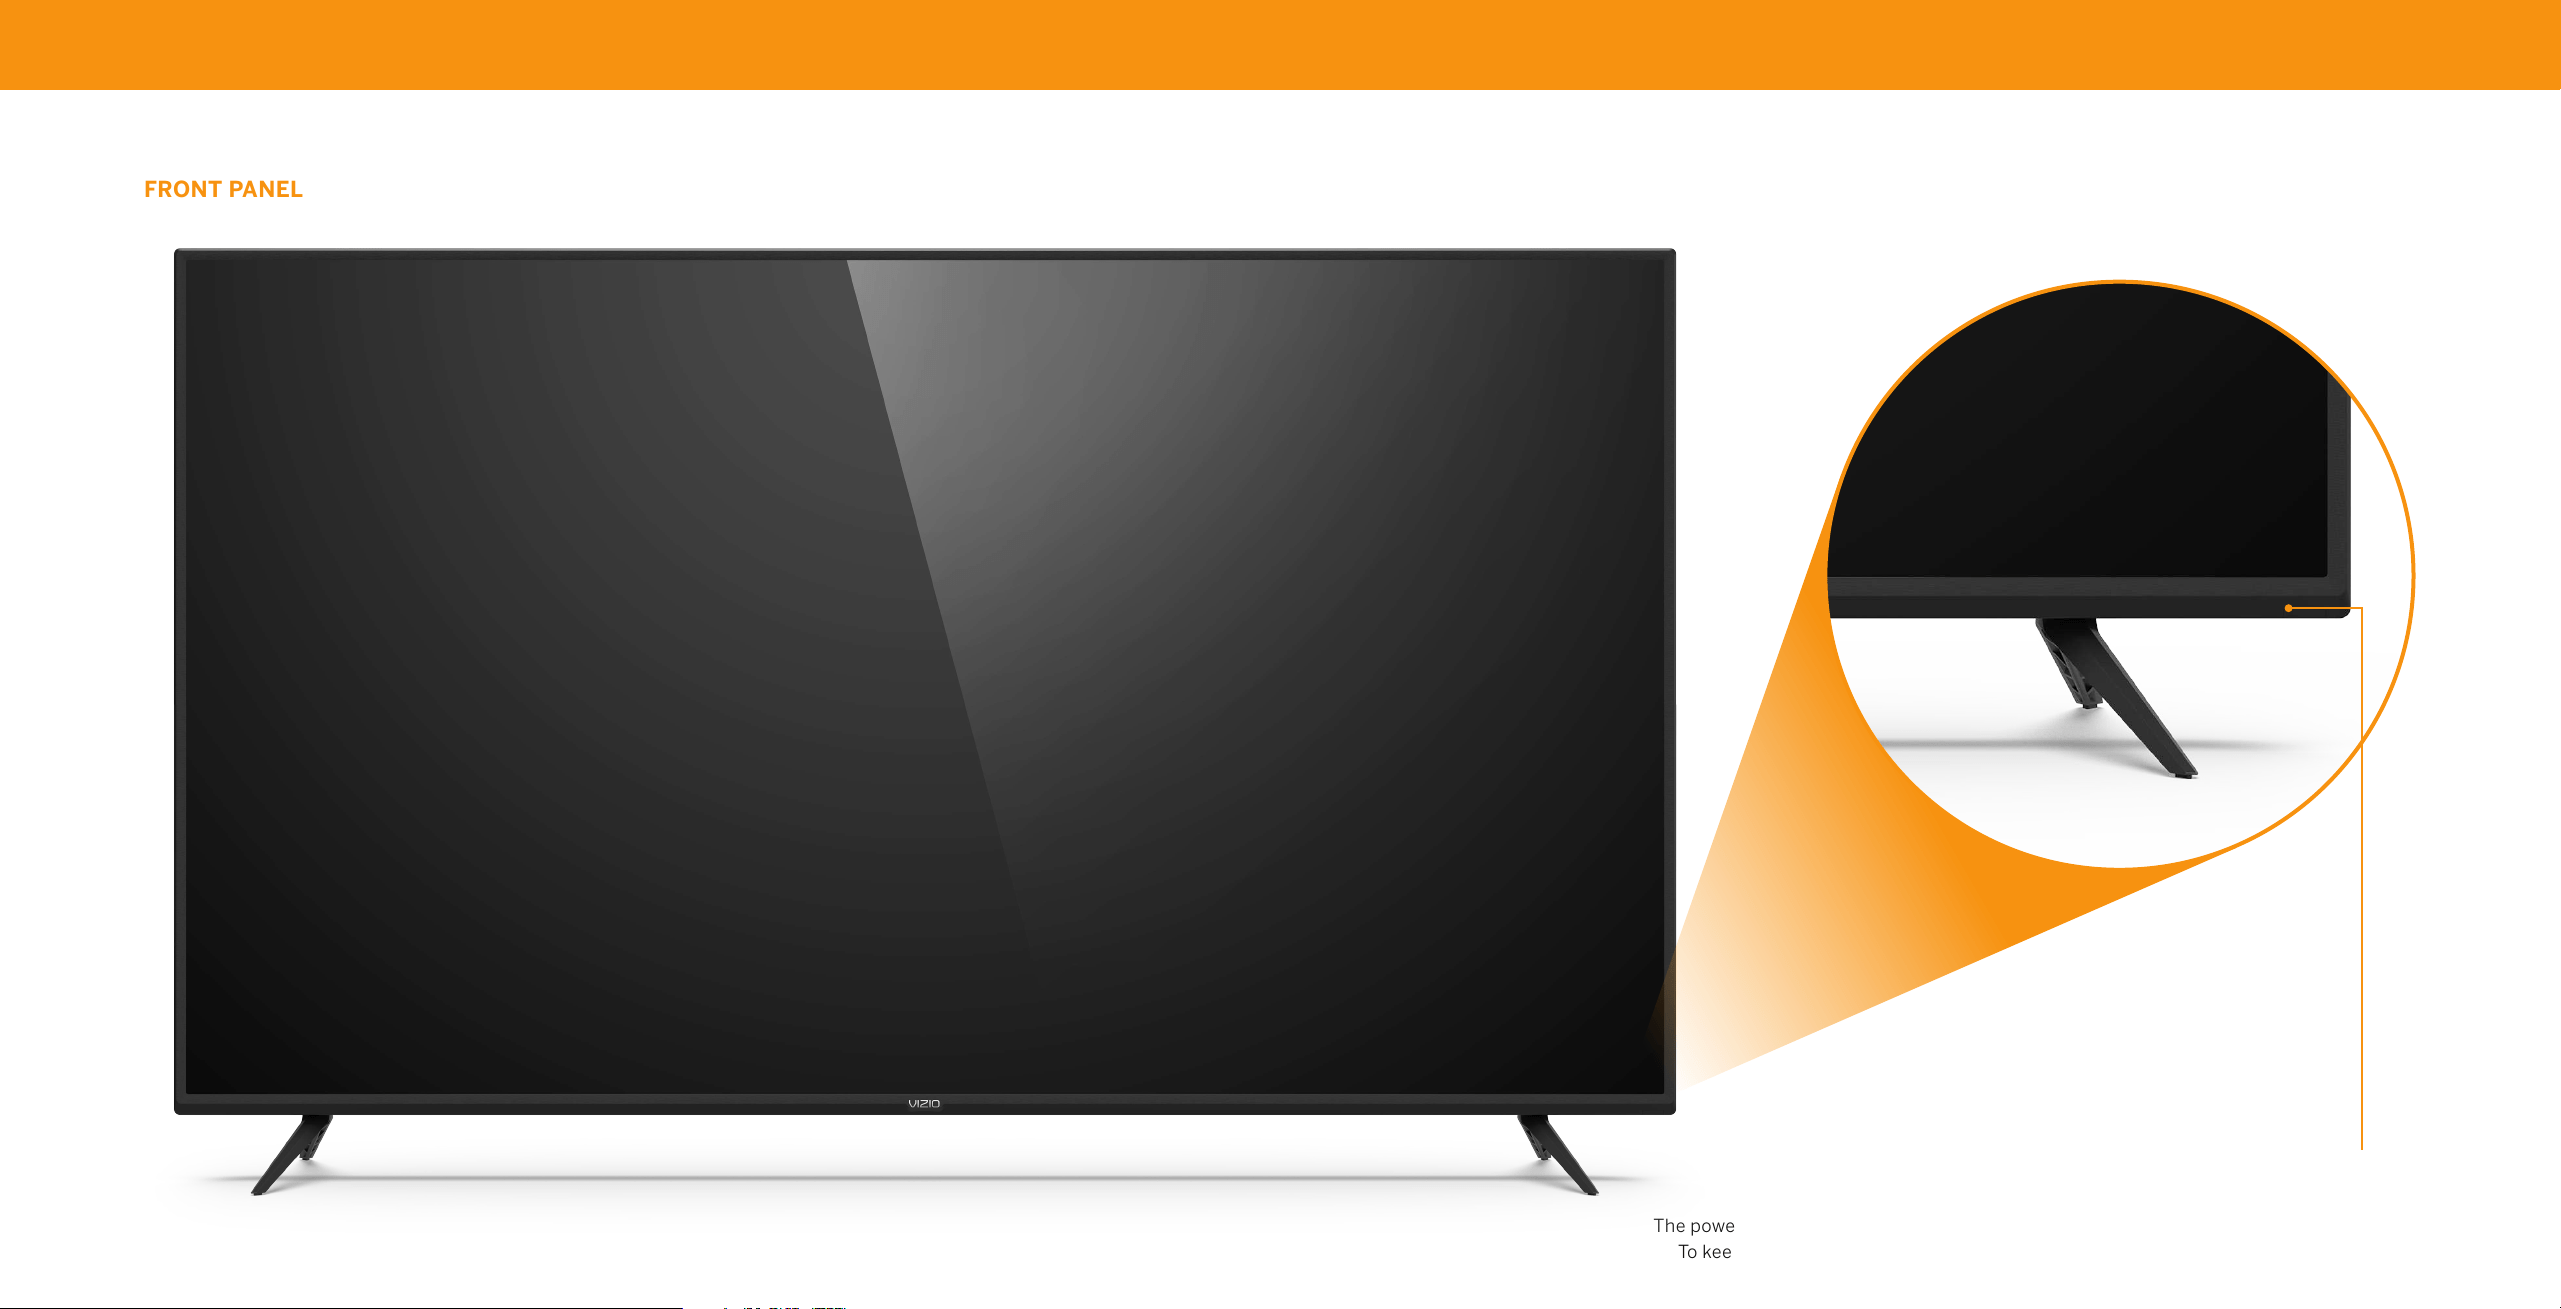
Remote Sensor and Power Indicator
Whenusingtheremote,aimitdirectlyatthissensor.
ThepowerindicatorflashesonwhentheTVturnson,thengoesoutafterseveralseconds.
Tokeepthepowerindicatoron,seeTurning the Power Indicator On or O on page 28.
FRONT PANEL

8
REAR PANEL
Power
PresstoturnontheTV.
PressandholdtoturntheTVoff.
Volume
PresstoincreaseordecreasetheTVvolumelevel.
Input
Presstoaccesstheinputmenu.
Note: The image shown here is for illustrative purposes only and may be subject to change.
The actual number of ports and their locations may vary, depending on the model.
INPUT
VOL
HDMI
Stereo Audio Out
Optical Audio Out Ethernet USB
Coaxial
ConnectanHDMIdevice
ConnecttoanRCAdevice,
Connectanoptical/SPDIFaudio ConnectanEthernetcable ConnectaUSBthumbdriveto
Connectacoaxialcablefrom
suchassoundbar
device,suchasahomeaudio toamodem/router playmusicorvideo,ordisplay
cable,satellite,orantenna
receiver photos
9
-
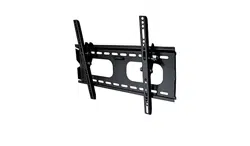
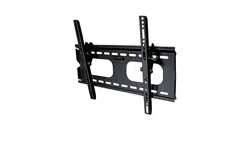
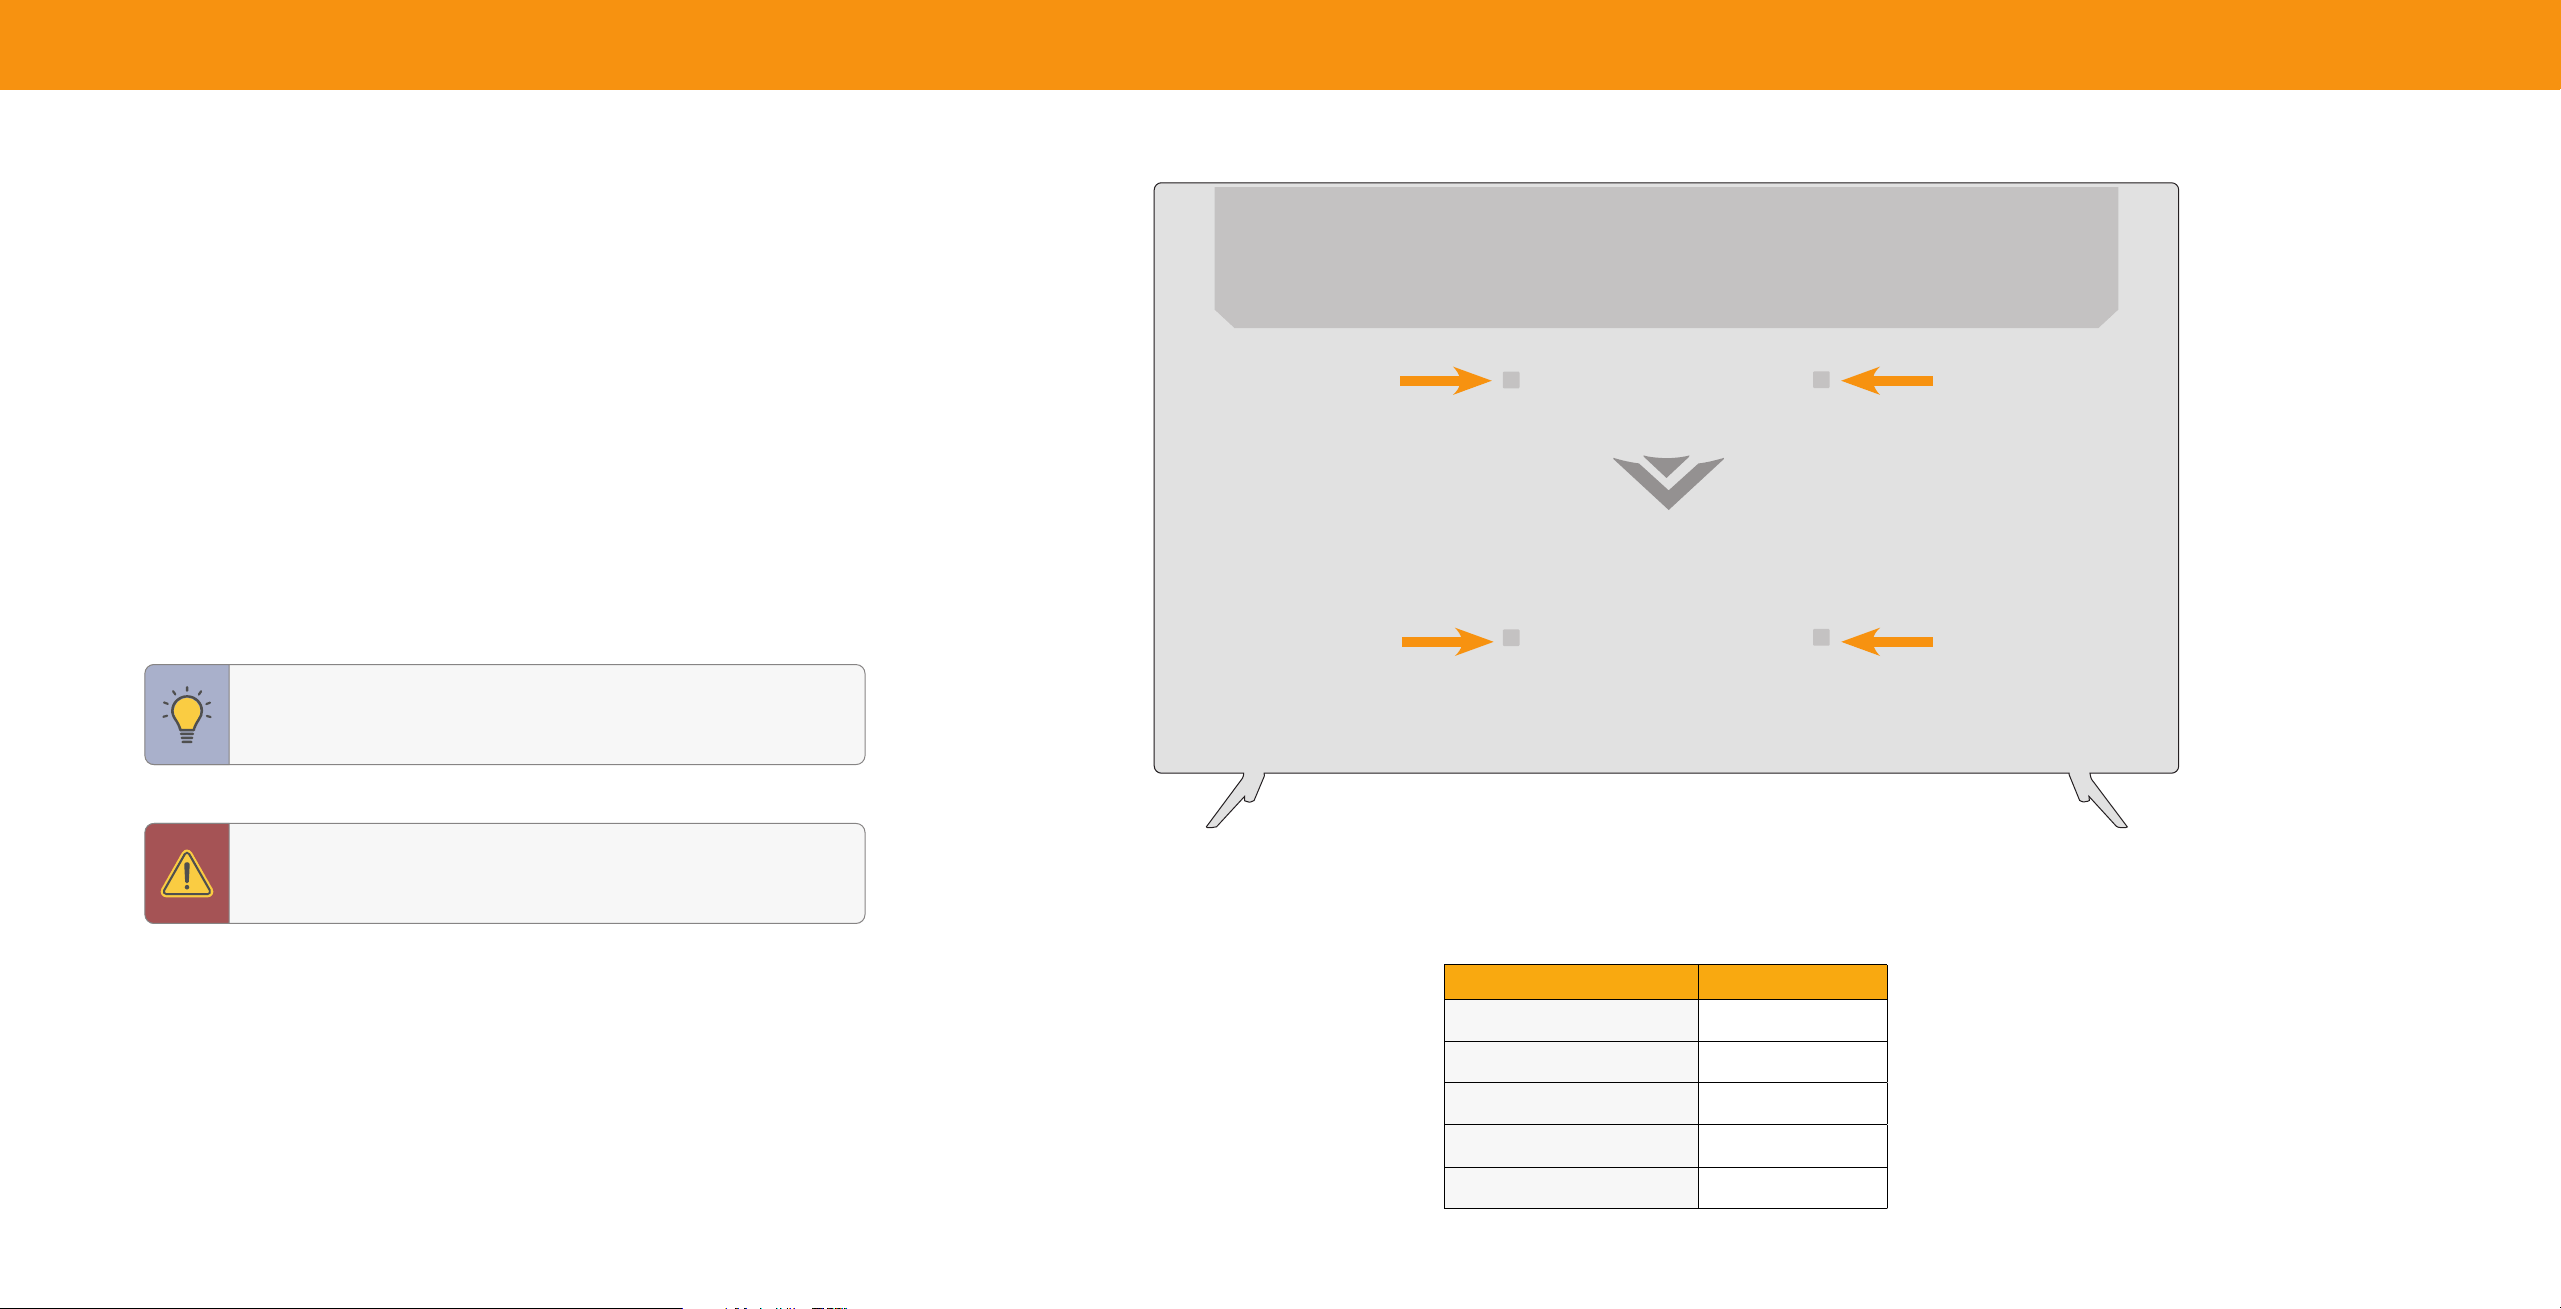
WALLMOUNTING THE TV
Firstyouwillneedawallmount.Consulttheprovidedtablebelowtofindthe
appropriatemountforyourTV.
BesurethemountyouchooseiscapableofsupportingtheweightoftheTV.
To install your TV on a wall:
1. DisconnectanycablesconnectedtoyourTV.
2. PlacetheTVfacedownonaclean,flat,stablesurface.Besurethesurfaceis
clearofdebristhatcanscratchordamagetheTV.
3. Ifattached,removethestandsbylooseningandremovingthescrews.
4. AttachyourTVandwallmounttothewallbycarefullyfollowingtheinstructions
thatcamewithyourmount.UseonlywithaULlistedwallmountbracketrated
fortheweight/loadofyourTV.
TIP:InstallingaTVonawallrequireslifting.Topreventinjuryor
damagetotheTV,asksomeonetohelpyou.
WARNING:Donotusethescrewsthatareincludedinsidethewall
mountholestomountTV.
Note: The image shown here is for illustrative purposes only and may be subject to change. The actual screws
and their locations may vary, depending on the model. See the table of mounting specifications by model on
the following page.
V705x-J01
Screw Size M8x12mm
# of Screws (not included) 4
Hole Depth 12mm
Hole Pattern 400mmx200mm
Weight w/o Stand 49.3lb(22.36kg)
10
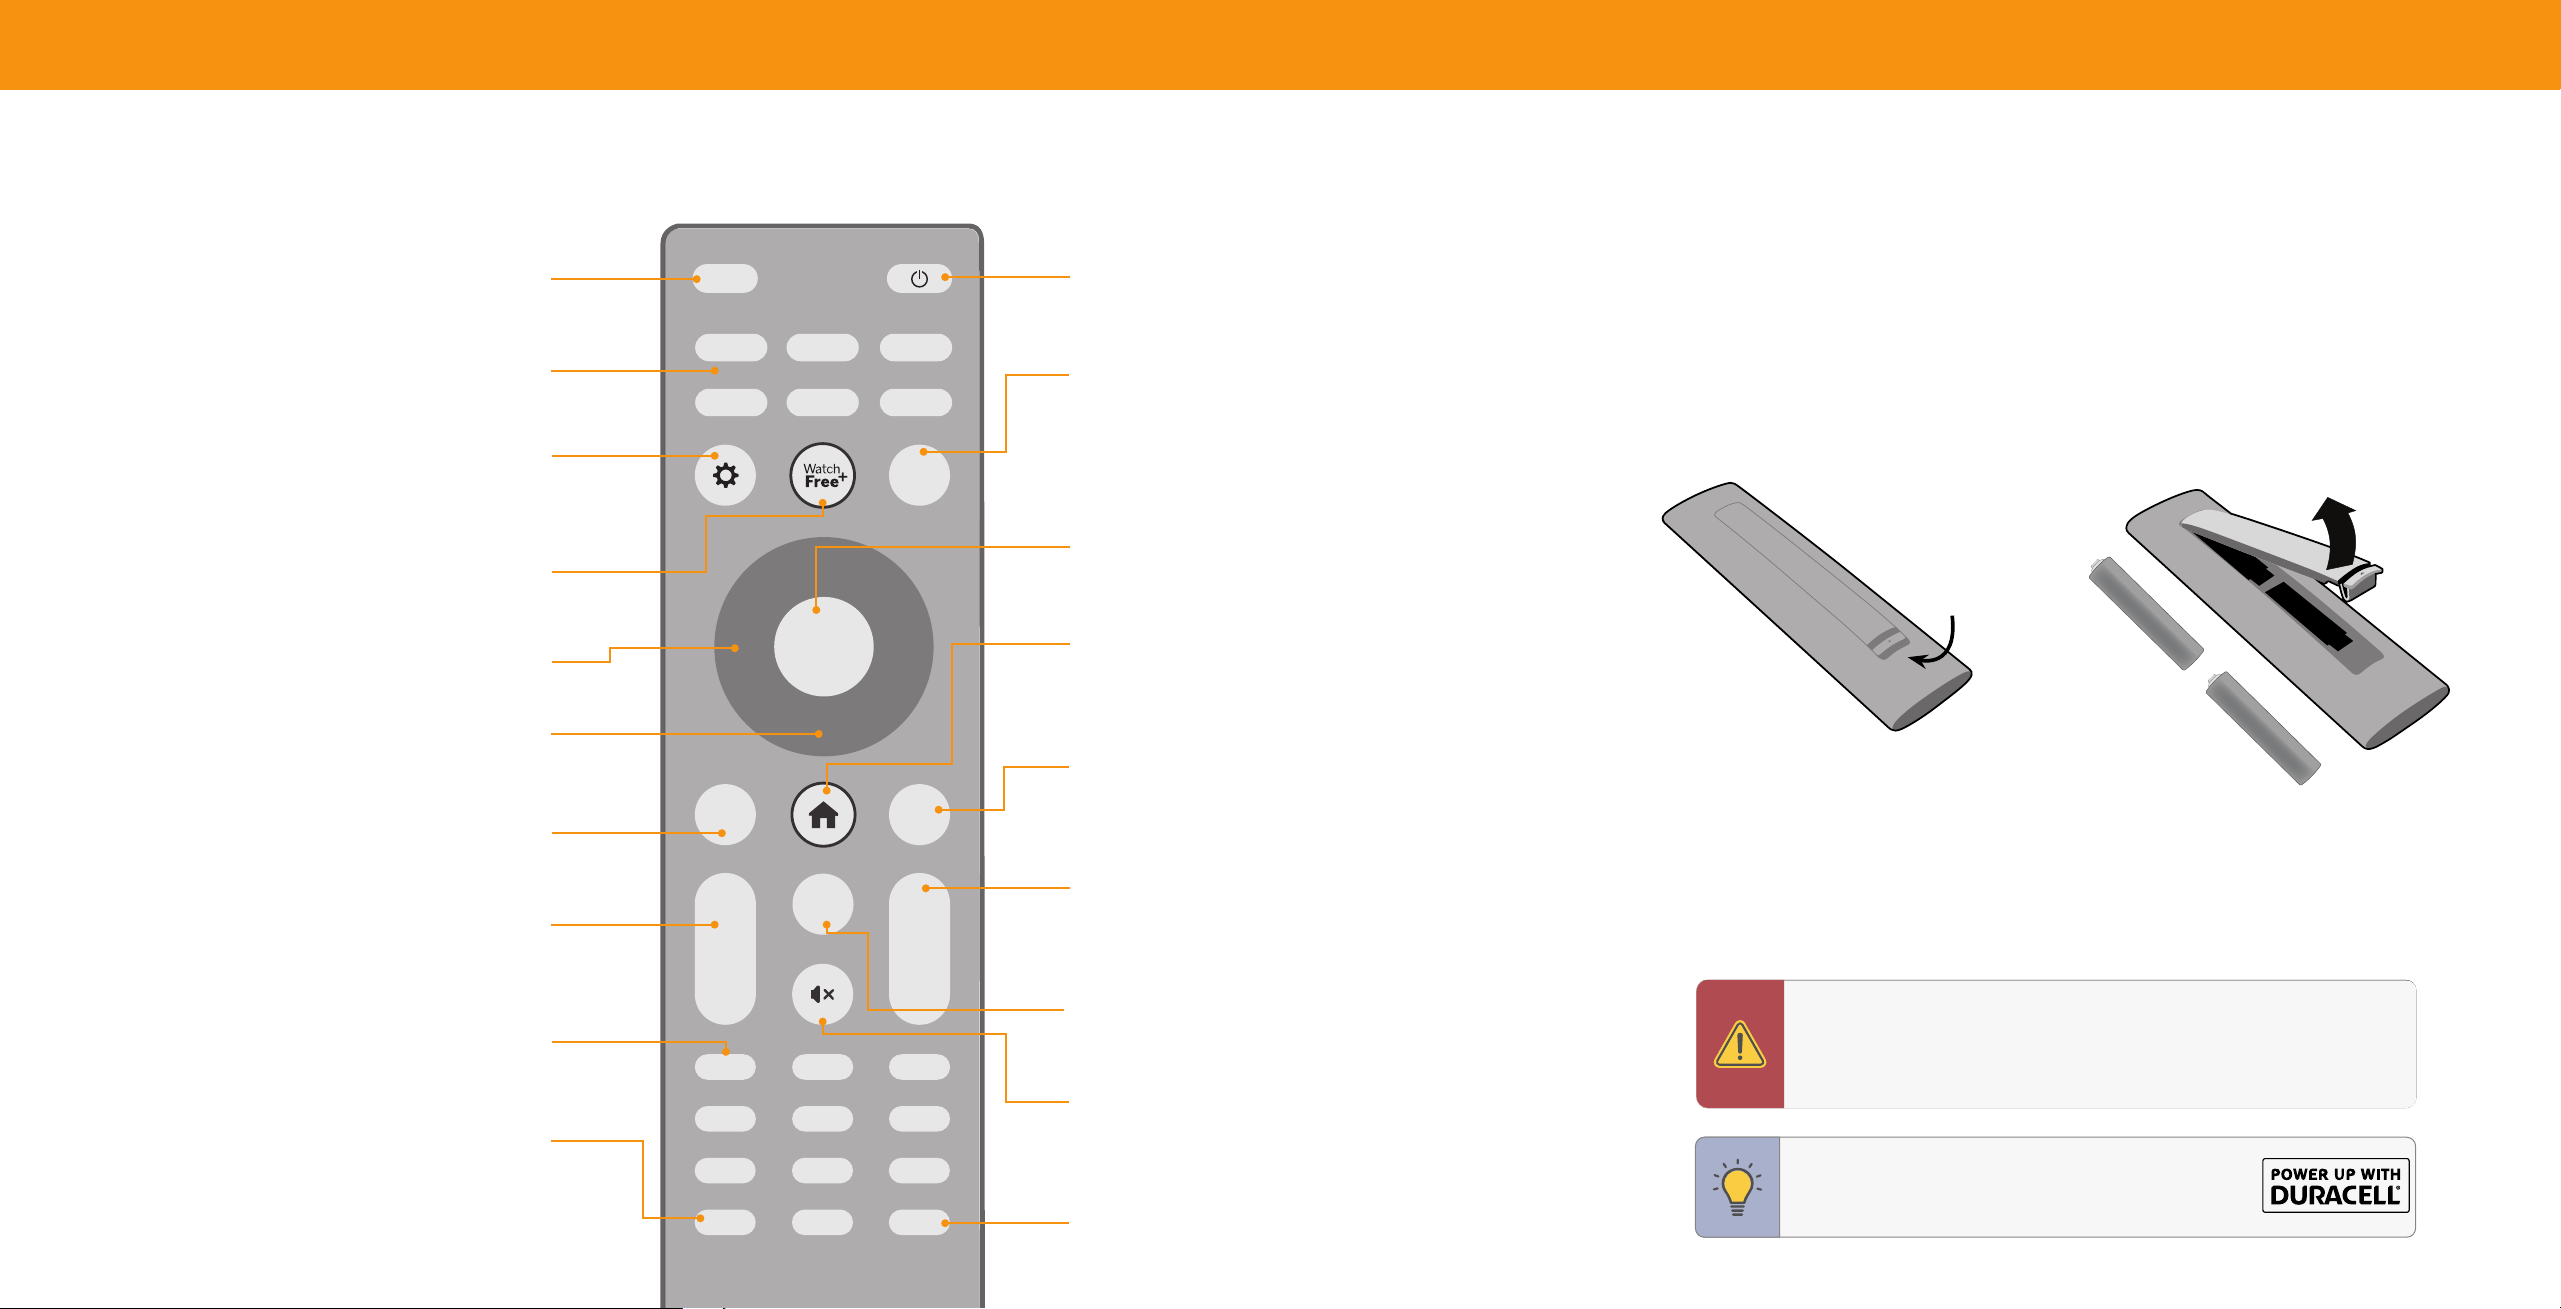
USING THE REMOTE
Input
Change the currently displayed input
App Launcher
Quickly launch the pictured app
Menu
Display the settings menu
WatchFree+
TM
Access WatchFree channels
(not available in Canada)
Navigation Buttons — Left / Right
Navigate the on-screen menus
Navigation Buttons — Up / Down
Navigate the on-screen menus
Back
Go to the previous on-screen menu
Volume Up/Down
Increase or decrease the loudness
of the audio
Number Pad
Manually enter a channel
Pic
Cycle through the different picture setting modes
Long press to enabled/disable talk back feature
INPUT
INFO
BACK CC
OK
VOL
PIC
CH
1 2 3
4 5 6
7 8
0
9
—
+
_
+
_
PREV
Power
Turn television on or off
Info
Display the info window
OK/Play/Pause
Select the highlighted menu option and
play or pause content
SmartCast Home
TM
Button
Launch or return to the SmartCast Home screen
Closed Caption
Enable or disable Closed Captions
Long press to open Accessibility menu featuring captions, talk
back, speech rate, and zoom mode
Channel Up/Down
Change the channel
Last
Return to the channel last viewed
Mute
Turn the audio on or off
Dash
Use with number pad to manually enter a digital sub-
channel (for example, 18-4 or 18-5)
Replacing the Batteries
1. Pushthebottomofthebatterycompartmentandliftbatterycovertoopen.
2. Inserttwobatteriesintotheremotecontrol.Makesurethatthe(+)and()
symbolsonthebatteriesmatchthe(+)and()symbolsinsidethebattery
compartment.
3. Replacethebatterycoverandclicktoclose.
Lift
Push
+
AAA
+
AAA
In many places batteries cannot be thrown away or discarded with household waste. Please ensure you
properly dispose of your batteries consistent with the laws and/or regulations where you live. For more
information please visit: www.vizio.com/environment
TIP: Whenneeded,VIZIOrecommendsreplacingthe
batteriesthatcamewiththisremotewithtwo,new
Duracell‘AAA’alkalinebatteries.
WARNING: Keeptheremotecontrolbatteriesawayfromchildren.Itmay
causechokingand/orleadtoareorchemicalburnifmishandled.Donot
disposeofbatteriesinre.Replaceonlywithbatteriesofthecorrecttype.
Riskofreorexplosionifthebatteryisreplacedbyanincorrecttype.
11
Français
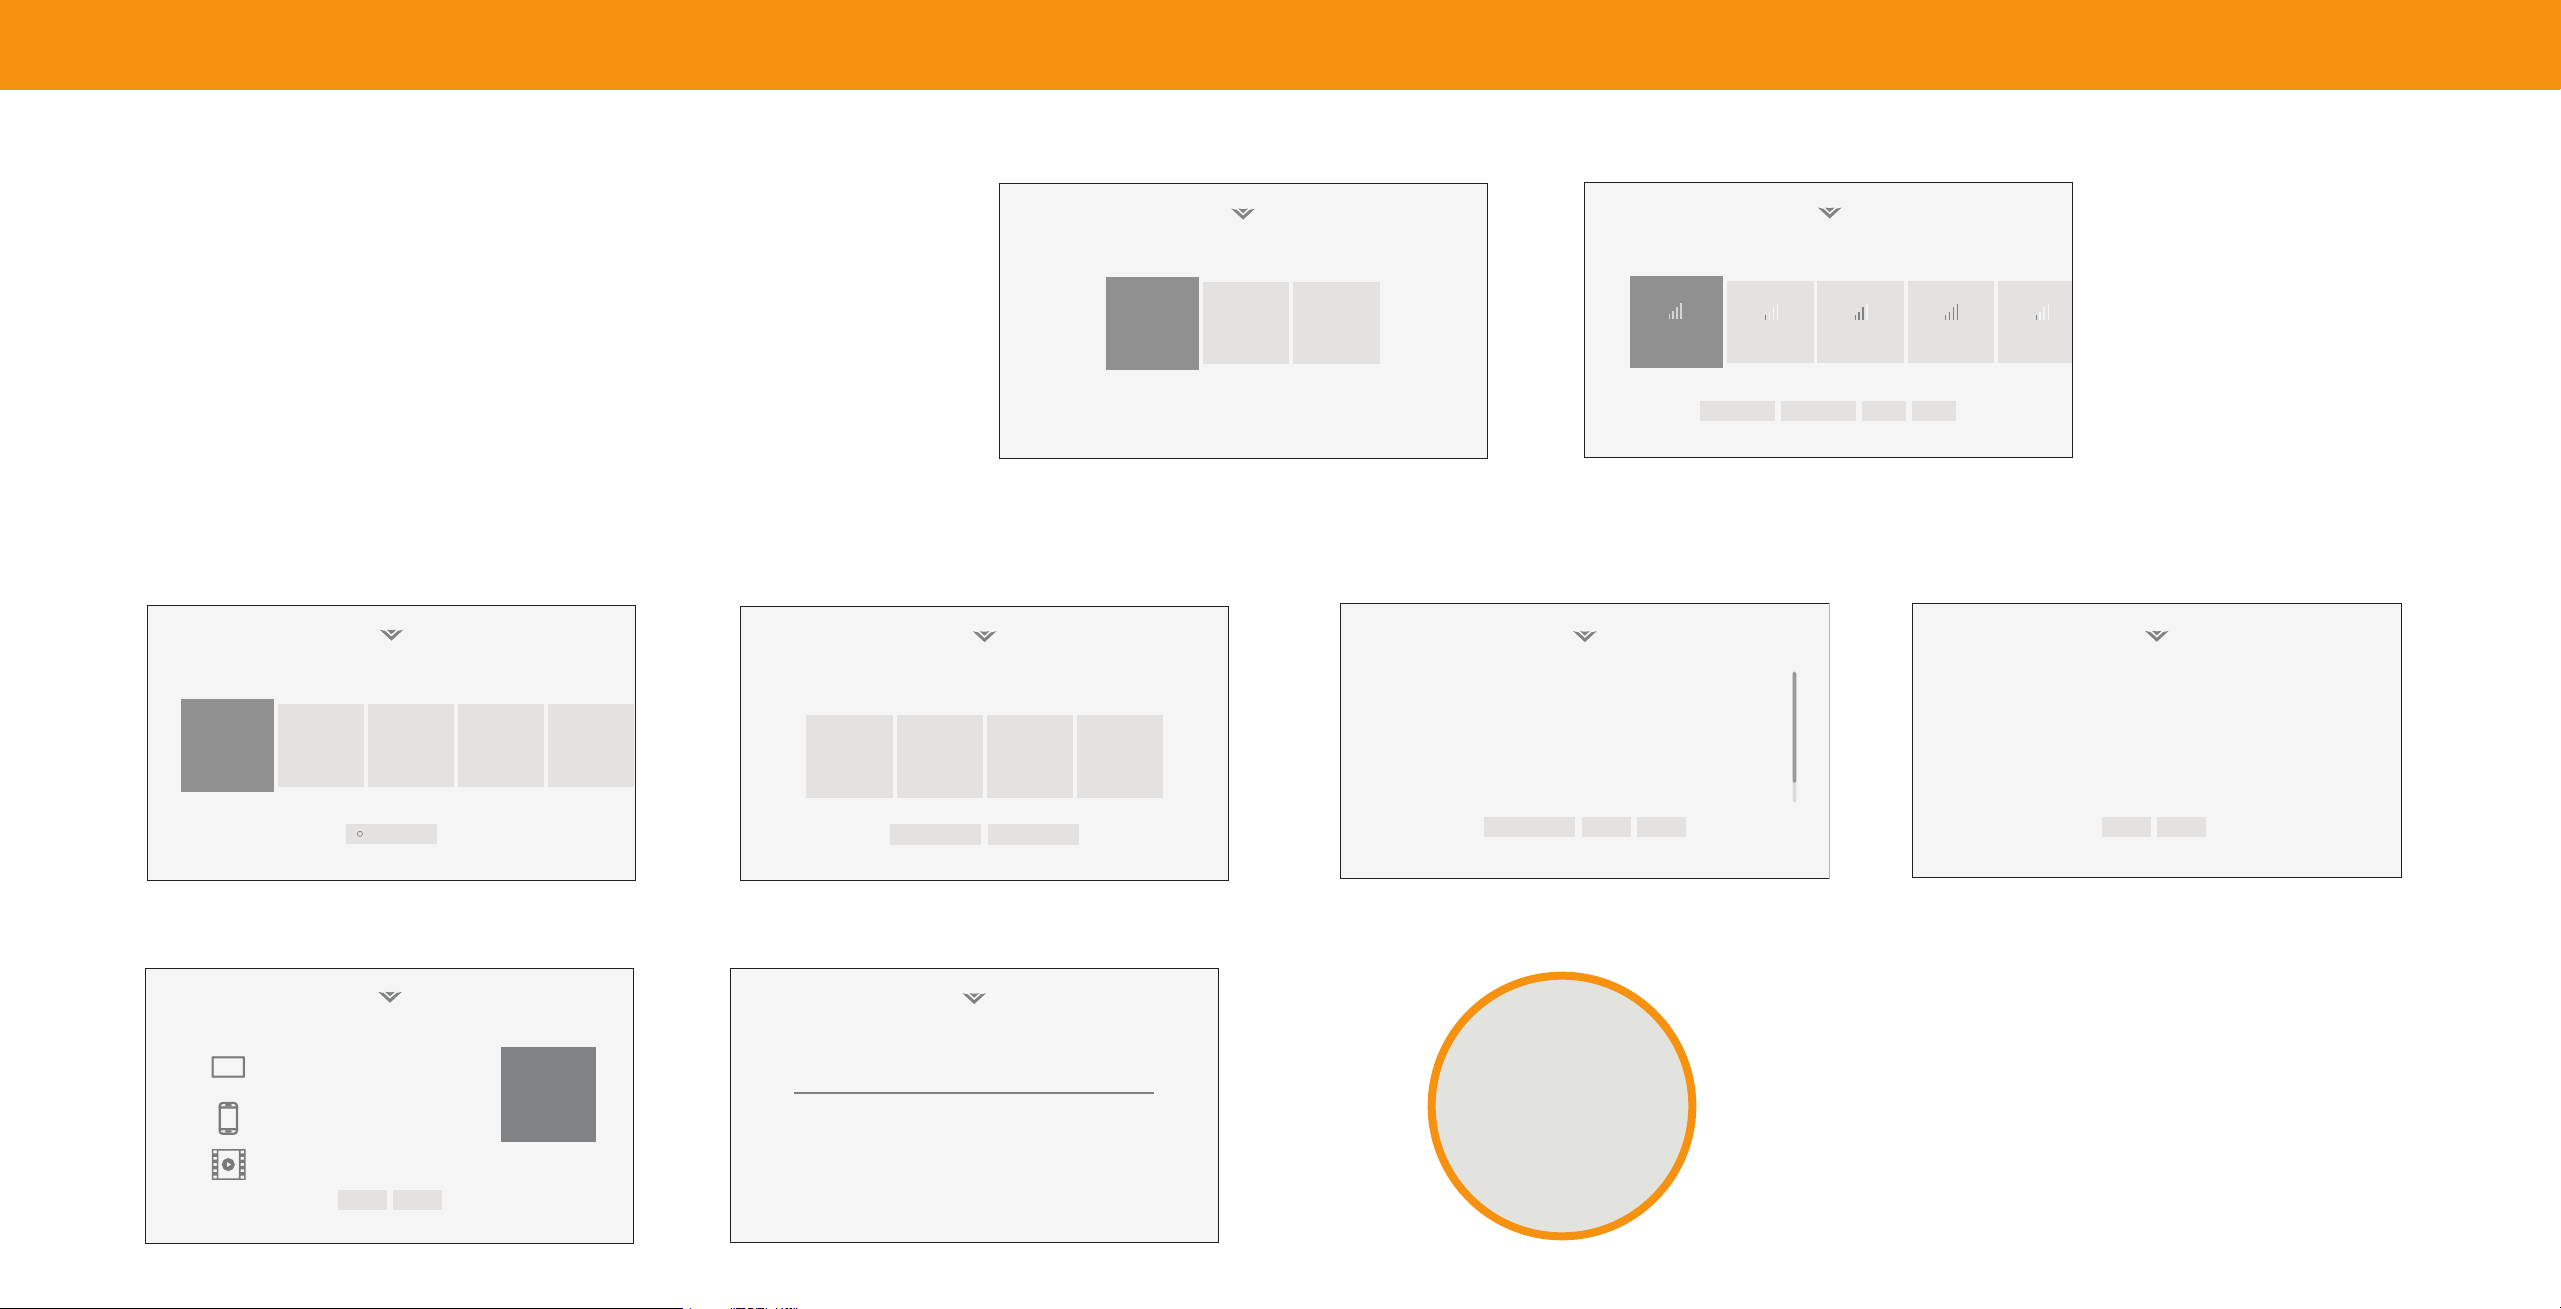
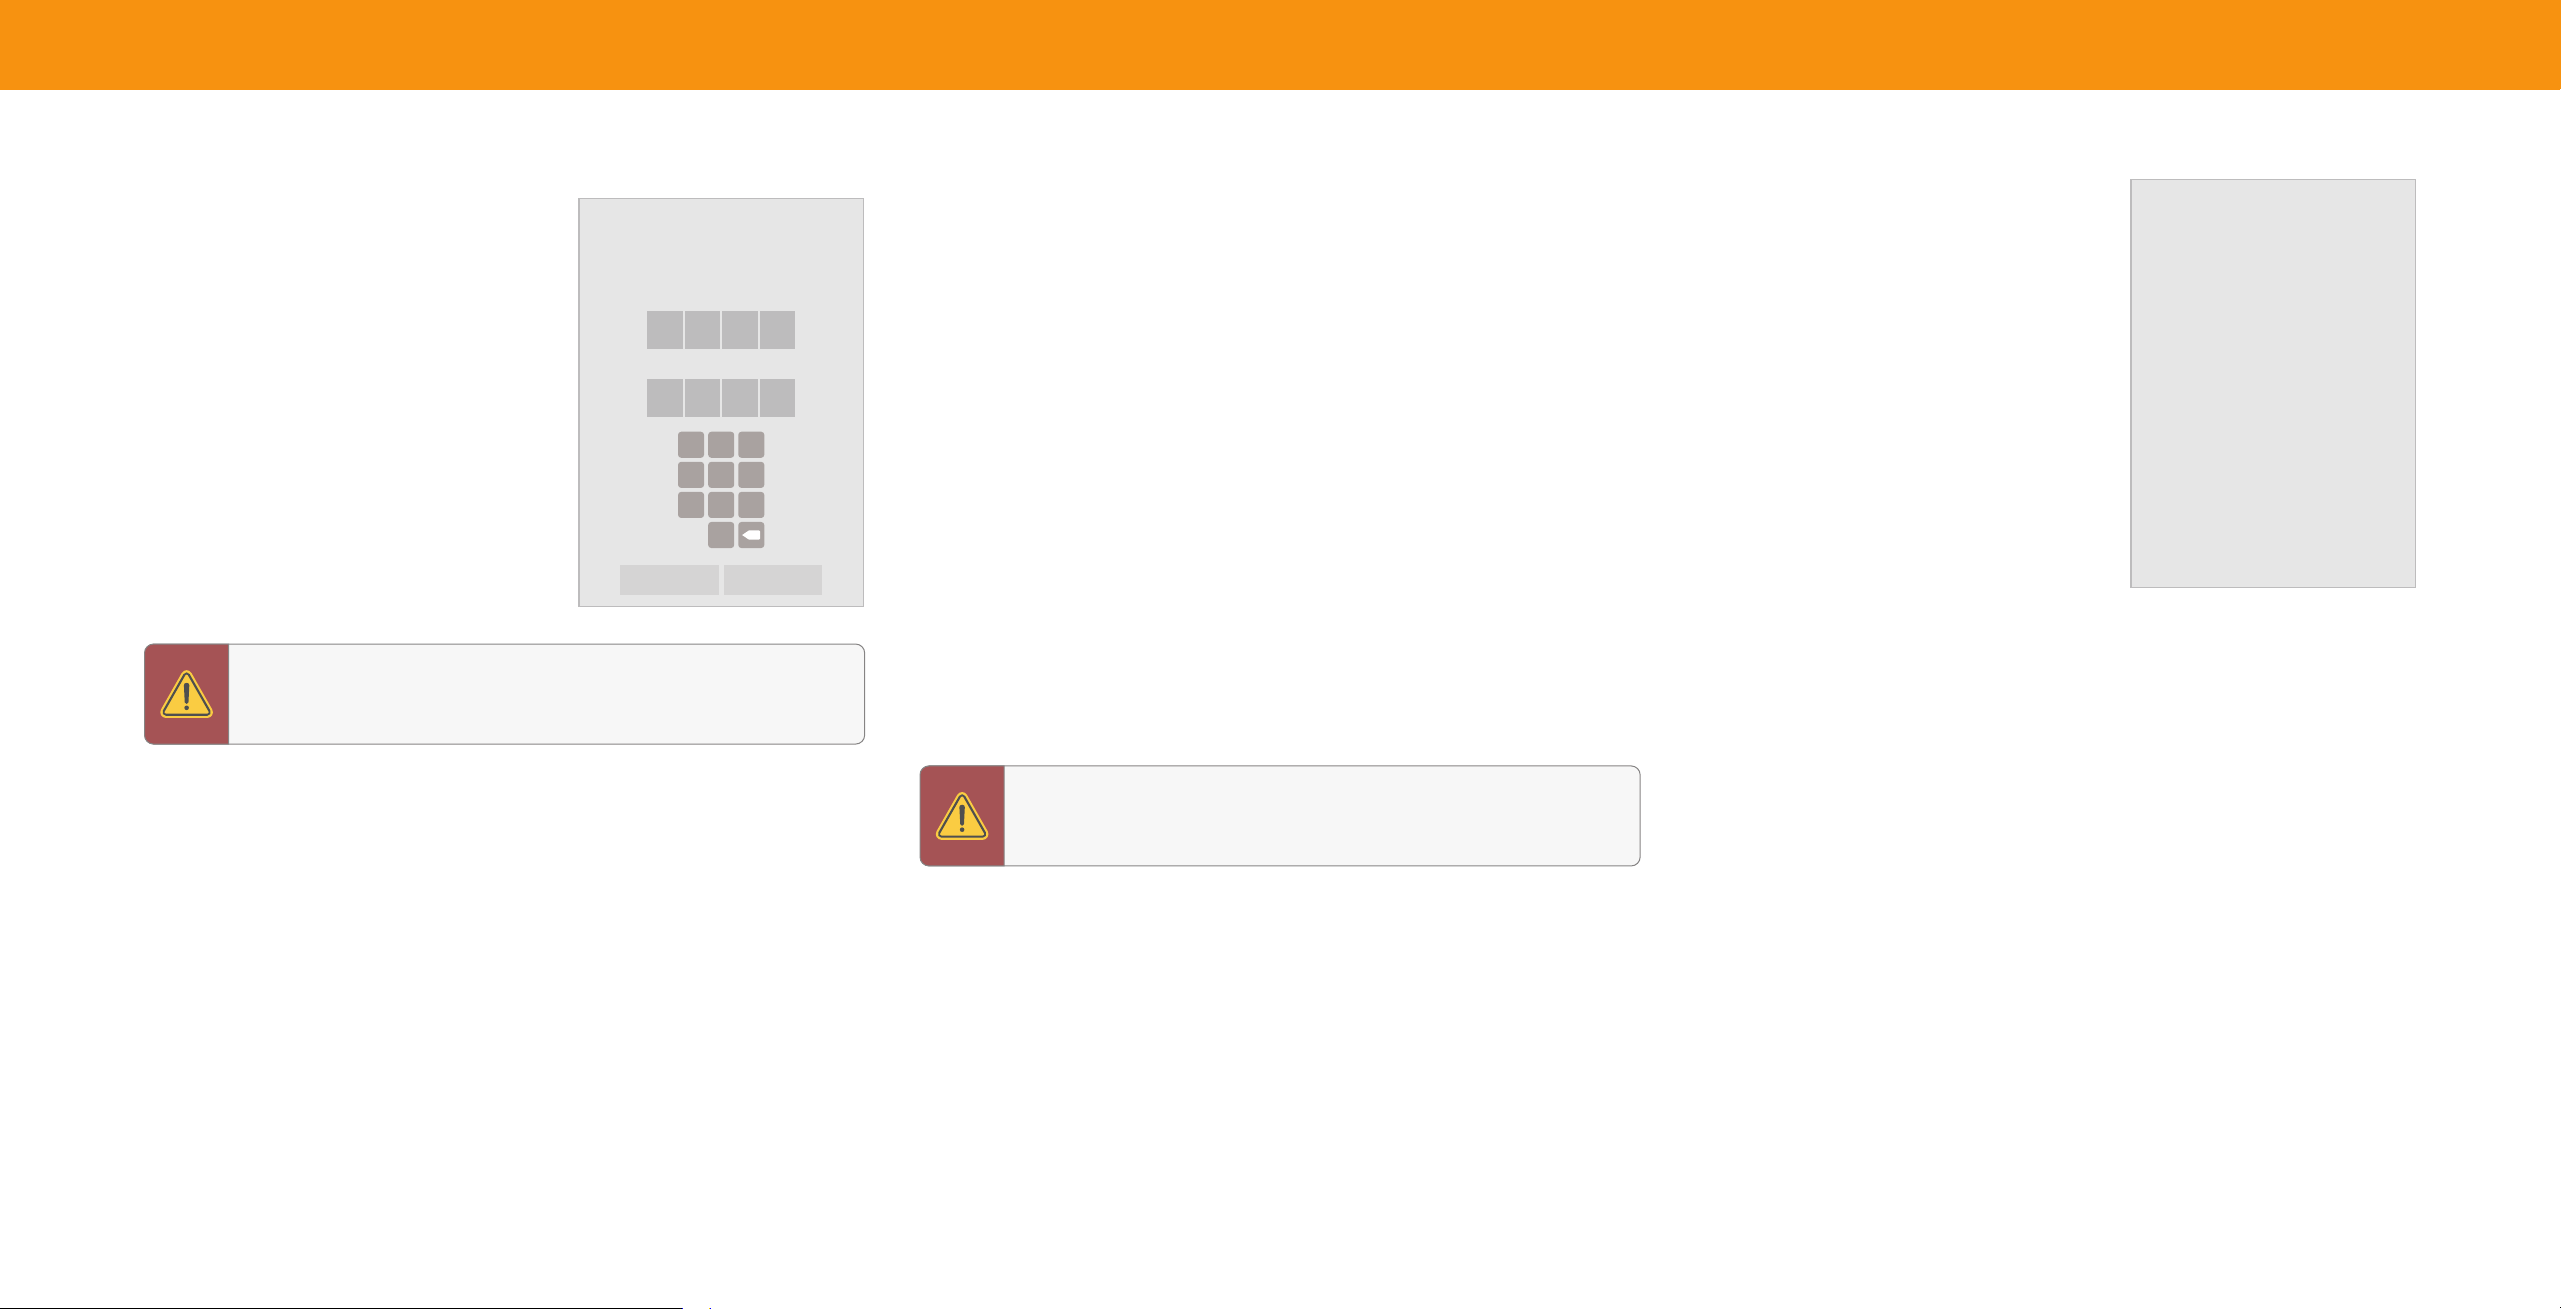
Completing the First-Time Setup
Before you begin the rst-time setup:
• YourTVshouldbeinstalledandthepowercordshouldbeconnectedtoan
Choose a language for your TV.
Choose a Wi-Fi Network.
electricaloutlet.
• Ifyouhaveawirelessnetwork,havethenetworkpasswordready.
English
Español Français
• IfyouareconnectingtoyournetworkwithanEthernetcable,connectoneendof
thecabletotheEthernetportontheTV.
Home Network
Public Wi-Fi John’s Network Ana’s Network Encrypted
ThefirsttimeyouturnontheTV,theonscreeninstructionswillguideyouthrough
Rescan Networks Hidden Netwok Help Skip
eachofthestepsnecessarytogetyourTVreadyforuse:
Press CC for TTS
Press Down for Store Demo
2. ChooseyourWiFinetworkandenterthepassword.
1. Chooseyourlanguage. PressingtheCCbuttonwill
Family Room
enableTTS(texttospeech)functionality.Pressing
theDown NavigationbuttonwillenableStoreDemo
mode.
Which room is your VIZIO TV Located?
Living Room
Master
Bedroom Game Room
Terms & Conditions.
Your use of this device and software functionality are covered by VIZIO and Google ‘s respective Terms of Service and Privacy Policies.
By pressing “Accept All”, you agree to be bound by the (i) VIZIO Terms of Service and Privacy Policy and (ii) the Google Terms of Service and
Privacy Policy. NOTE: Accepting the terms and policiesis a condition of using the Cast functionality of this device.
VIZIO Terms &
VIZIO Privacy
Google Privacy Google Terms &
Conditions
Policy
Policy Conditons
Skip For Now Accept All
Viewing Data
This unit is equipped with Automated Content Recognition (”ARC”) Technology also known as Viewing Data.
WHAT DATA DOES ACR TECHNOLOGY COLLECT? WHAT DO WE DO WITH VIEWING DATA?
When enabled, ACR technology will collect information about the audio and video VIZIO or its authorized data partners may combine Viewing Data with household
programing content playing on this internet-connected display unit including demographic data, or other data about your digital actions, like smartphone
broadcast television, advertisements and other commercially available content. We location, web histories or offline purchases, in order to determine the effectiveness
associate this Viewing Data with the IP address for the unit, and a unique device of a particular ad, or choose which ads are likely to be useful or timely, including
number we assign. You may change your Viewing Data settings at any time within during broadcast, cable, satellite, or internet based television programming. VIZIO
the Settings Menu of your TV. Declining Viewing Data collection will not change the and its authorized data partners also use the information to generate summary
functionality of your device. analysis and reports of how users engage with content on their TVs and other
devices.
WHO DO WE SHARE VIEWING DATA WITH?
When enabled, we share Viewing Data with authorized data partners. We license WHAT ELSE DOES VIEWING DATA SHARING MEAN FOR YOU?
Viewing Data to analytics companies, media companies, advertisers, ad agencies, Viewing Data is also used to help content publishers, broadcasters or content
and other ad tech companies who measure ad effectiveness or aid personalization distribution services create or recommend more relevant entertainment based on
of ads. Our authorized cloud service providers may also store this data on and summary insights. For example, if devices sharing your IP address suggest an
solely on our behalf, and for no other purposes. interest in music, fitness, or sports related topics, advertisers might deliver tailored
Viewing Data Policy Decline Accept
Add Custom Location+
Activity Data
You have purchased a “SmartTV,” which is an internet-connected display unit that offers a range of online features, including access to subscription streaming
services and free (ad-supported) Apps such as WatchFree Plus. To deliver the service, the device automatically sends back clicks and impressions as you navigate
and interact with the SmartCast Platform and Apps.
Impressions and click data are used to suggest relevant content, and to inform relevant ad placements in some of the Apps. This activity data is associated with a
unique ID stored separately within third-party analytics and is not paired with your name and contact information. We may share impressions and click data in
summary reports with select partners with whom we have a relationship.
If you change your mind about accepting this notice, you can reset factory settings. To learn more, please read the SmartCast Privacy Policy at vizio.com/privacy.
Decline Accept
3. NameyourTV.
4. AccepttheTerms&Conditions.
5. ViewandaccepttheVIZIOViewingDataPolicy.
6. ViewandaccepttheActivityDataPolicy.
Use the VIZIO Mobile App to Add
Your New TV to Your Account
Set up later Web setup
Register TV for More Benefits
Control Your TV with Your SmartPhone
Coming Soon - Purchase on Your TV
Setup code B1H9PX
Register your VIZIO TV.
Get VIP access to exclusive deals & offers, recieve first-to-know updates on new
product releases and get the latest VIZIO technology and product news.
Enter Email
1/3
Now you're all set.
Enjoy!
7. AddyourTVtoyouraccount.
8. RegisteryourVIZIOTV.
12
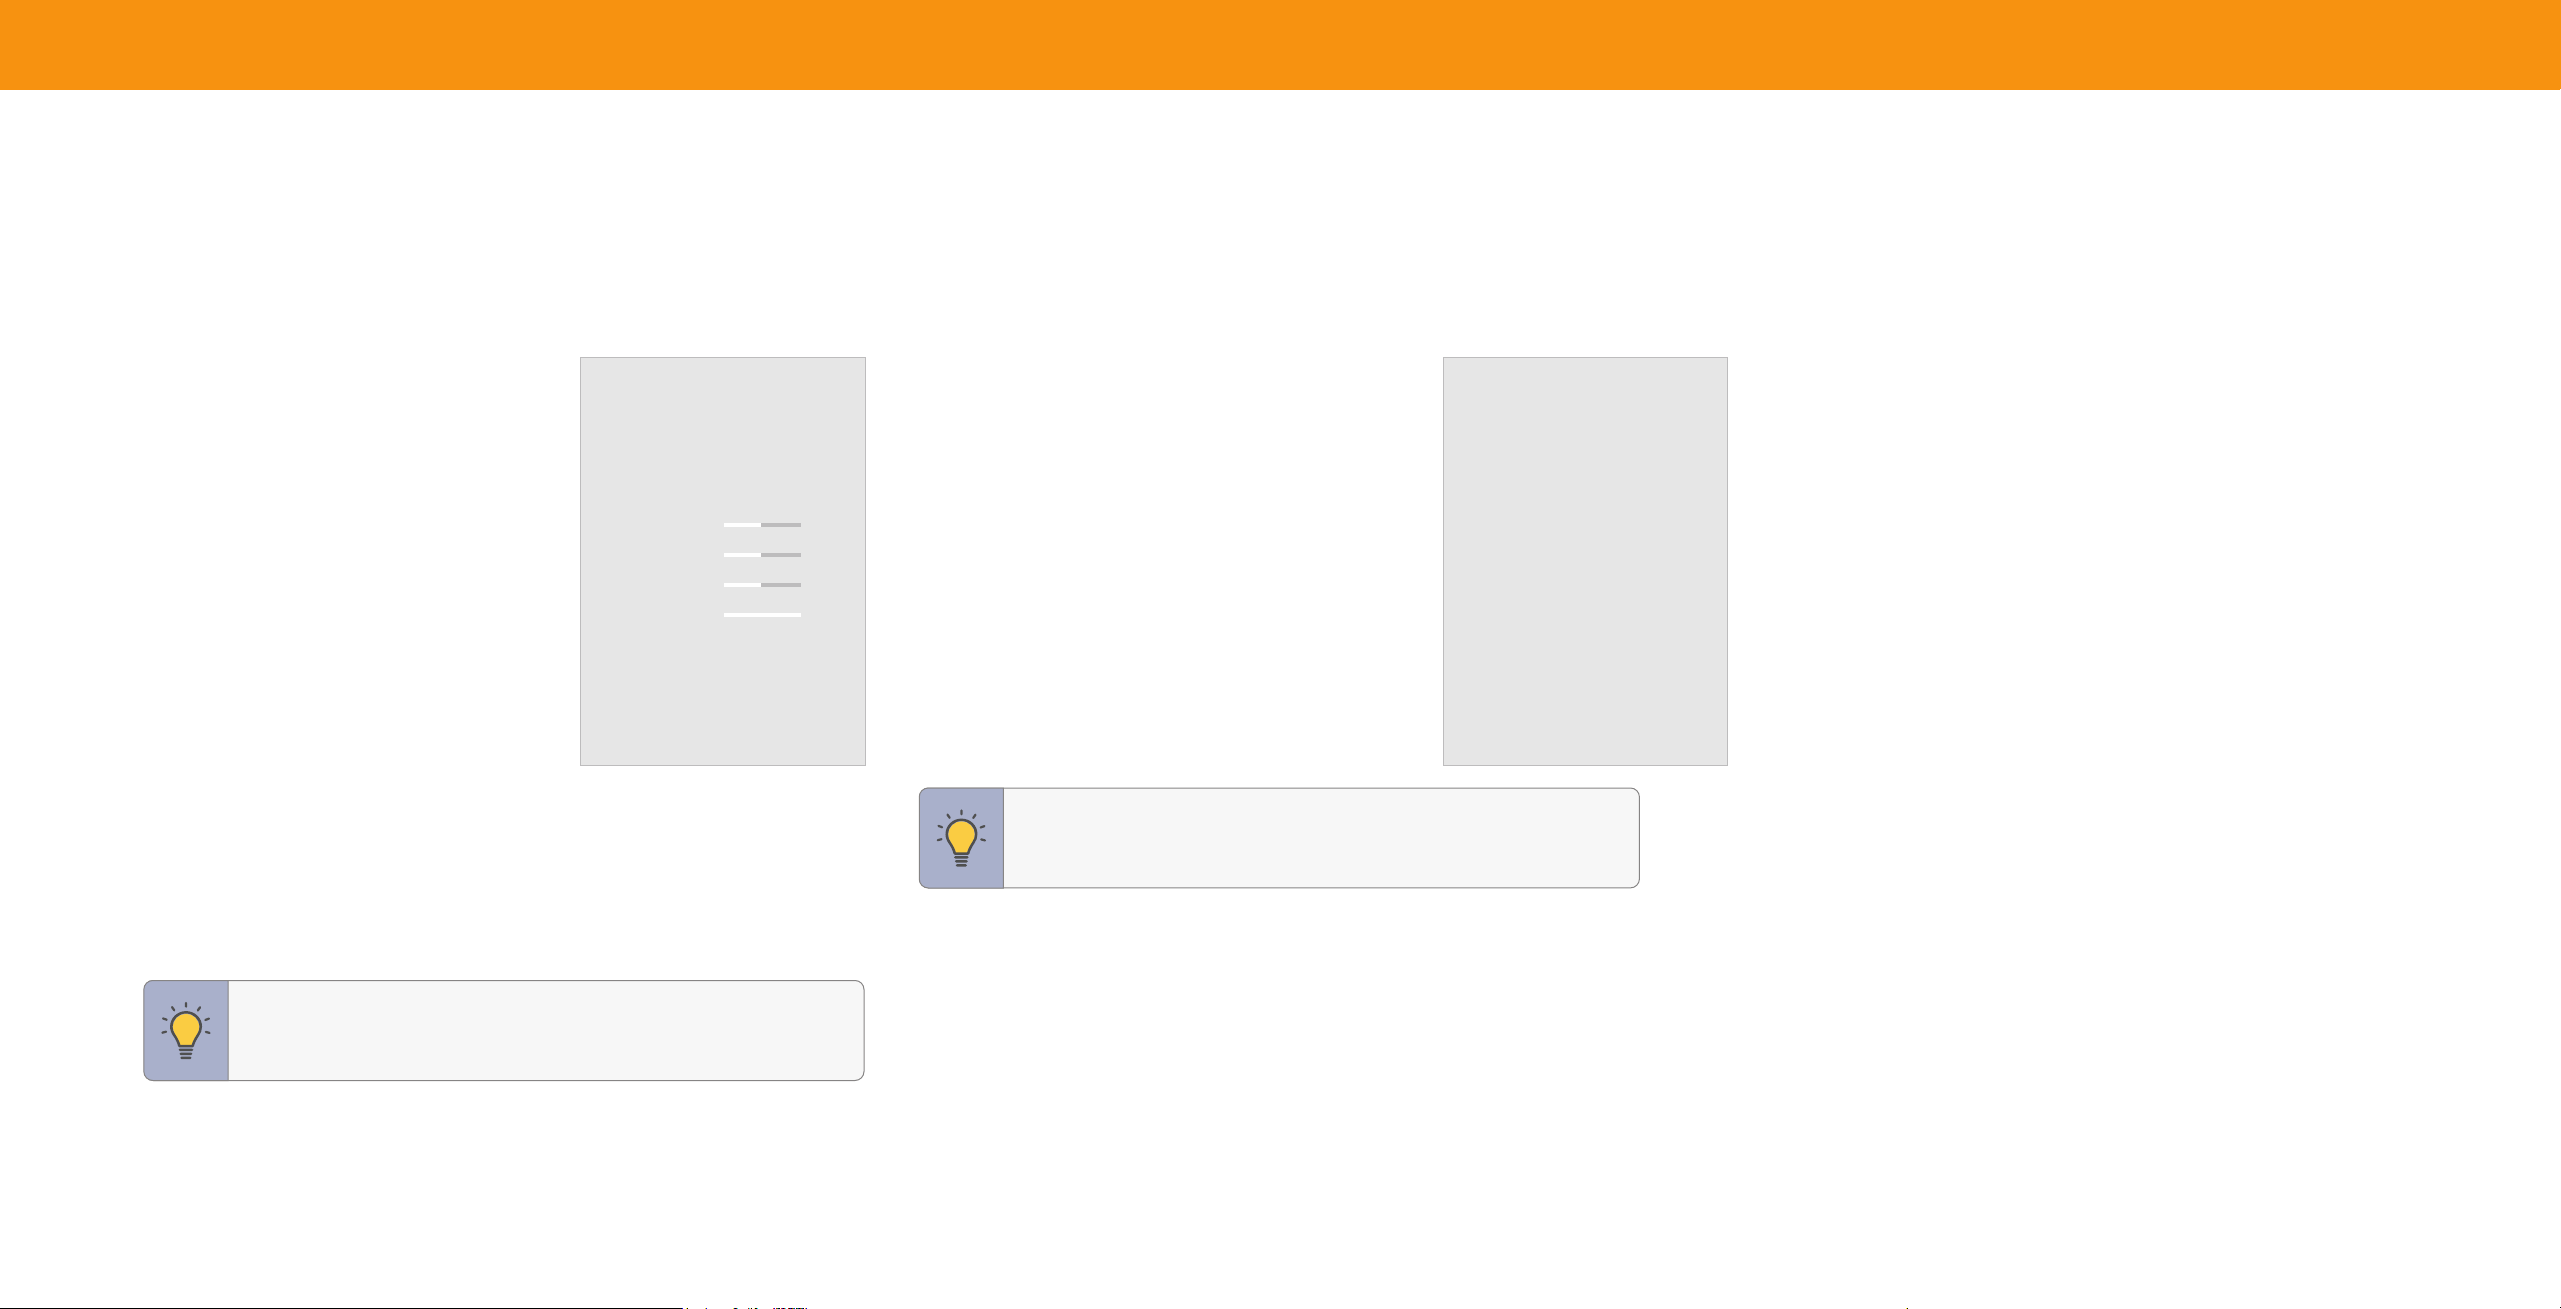
Using the On-Screen Menu
CHANGING THE INPUT SOURCE
Externaldevices,suchasDVDplayers,Blurayplayers,andvideogameconsoles,
canbeconnectedtoyourTV.TouseoneofthesedeviceswithyourTV,youmustfirst
changetheinputsourceusingtheinputmenu.
To change the input source:
1. PresstheINPUTbuttonontheremote.
Theinputmenuisdisplayedontheleftof
thescreen.
2. UsetheNavigationbuttonsortheINPUT
buttonontheremotetohighlightthe
inputyouwishtoview.Thecorresponding
inputsarenamedonthebackofyourTV.
3. PressOK.Theselectedinputisdisplayed.
Input Name
Input
SMARTCAST
AirPlay
WatchFree+
HDMI-1
HDMI-2
HDMI-3
TV
Theinputwiththecheckmarktotherightofitisthecurrentinputselected.Inputs
mayvarybyTV.
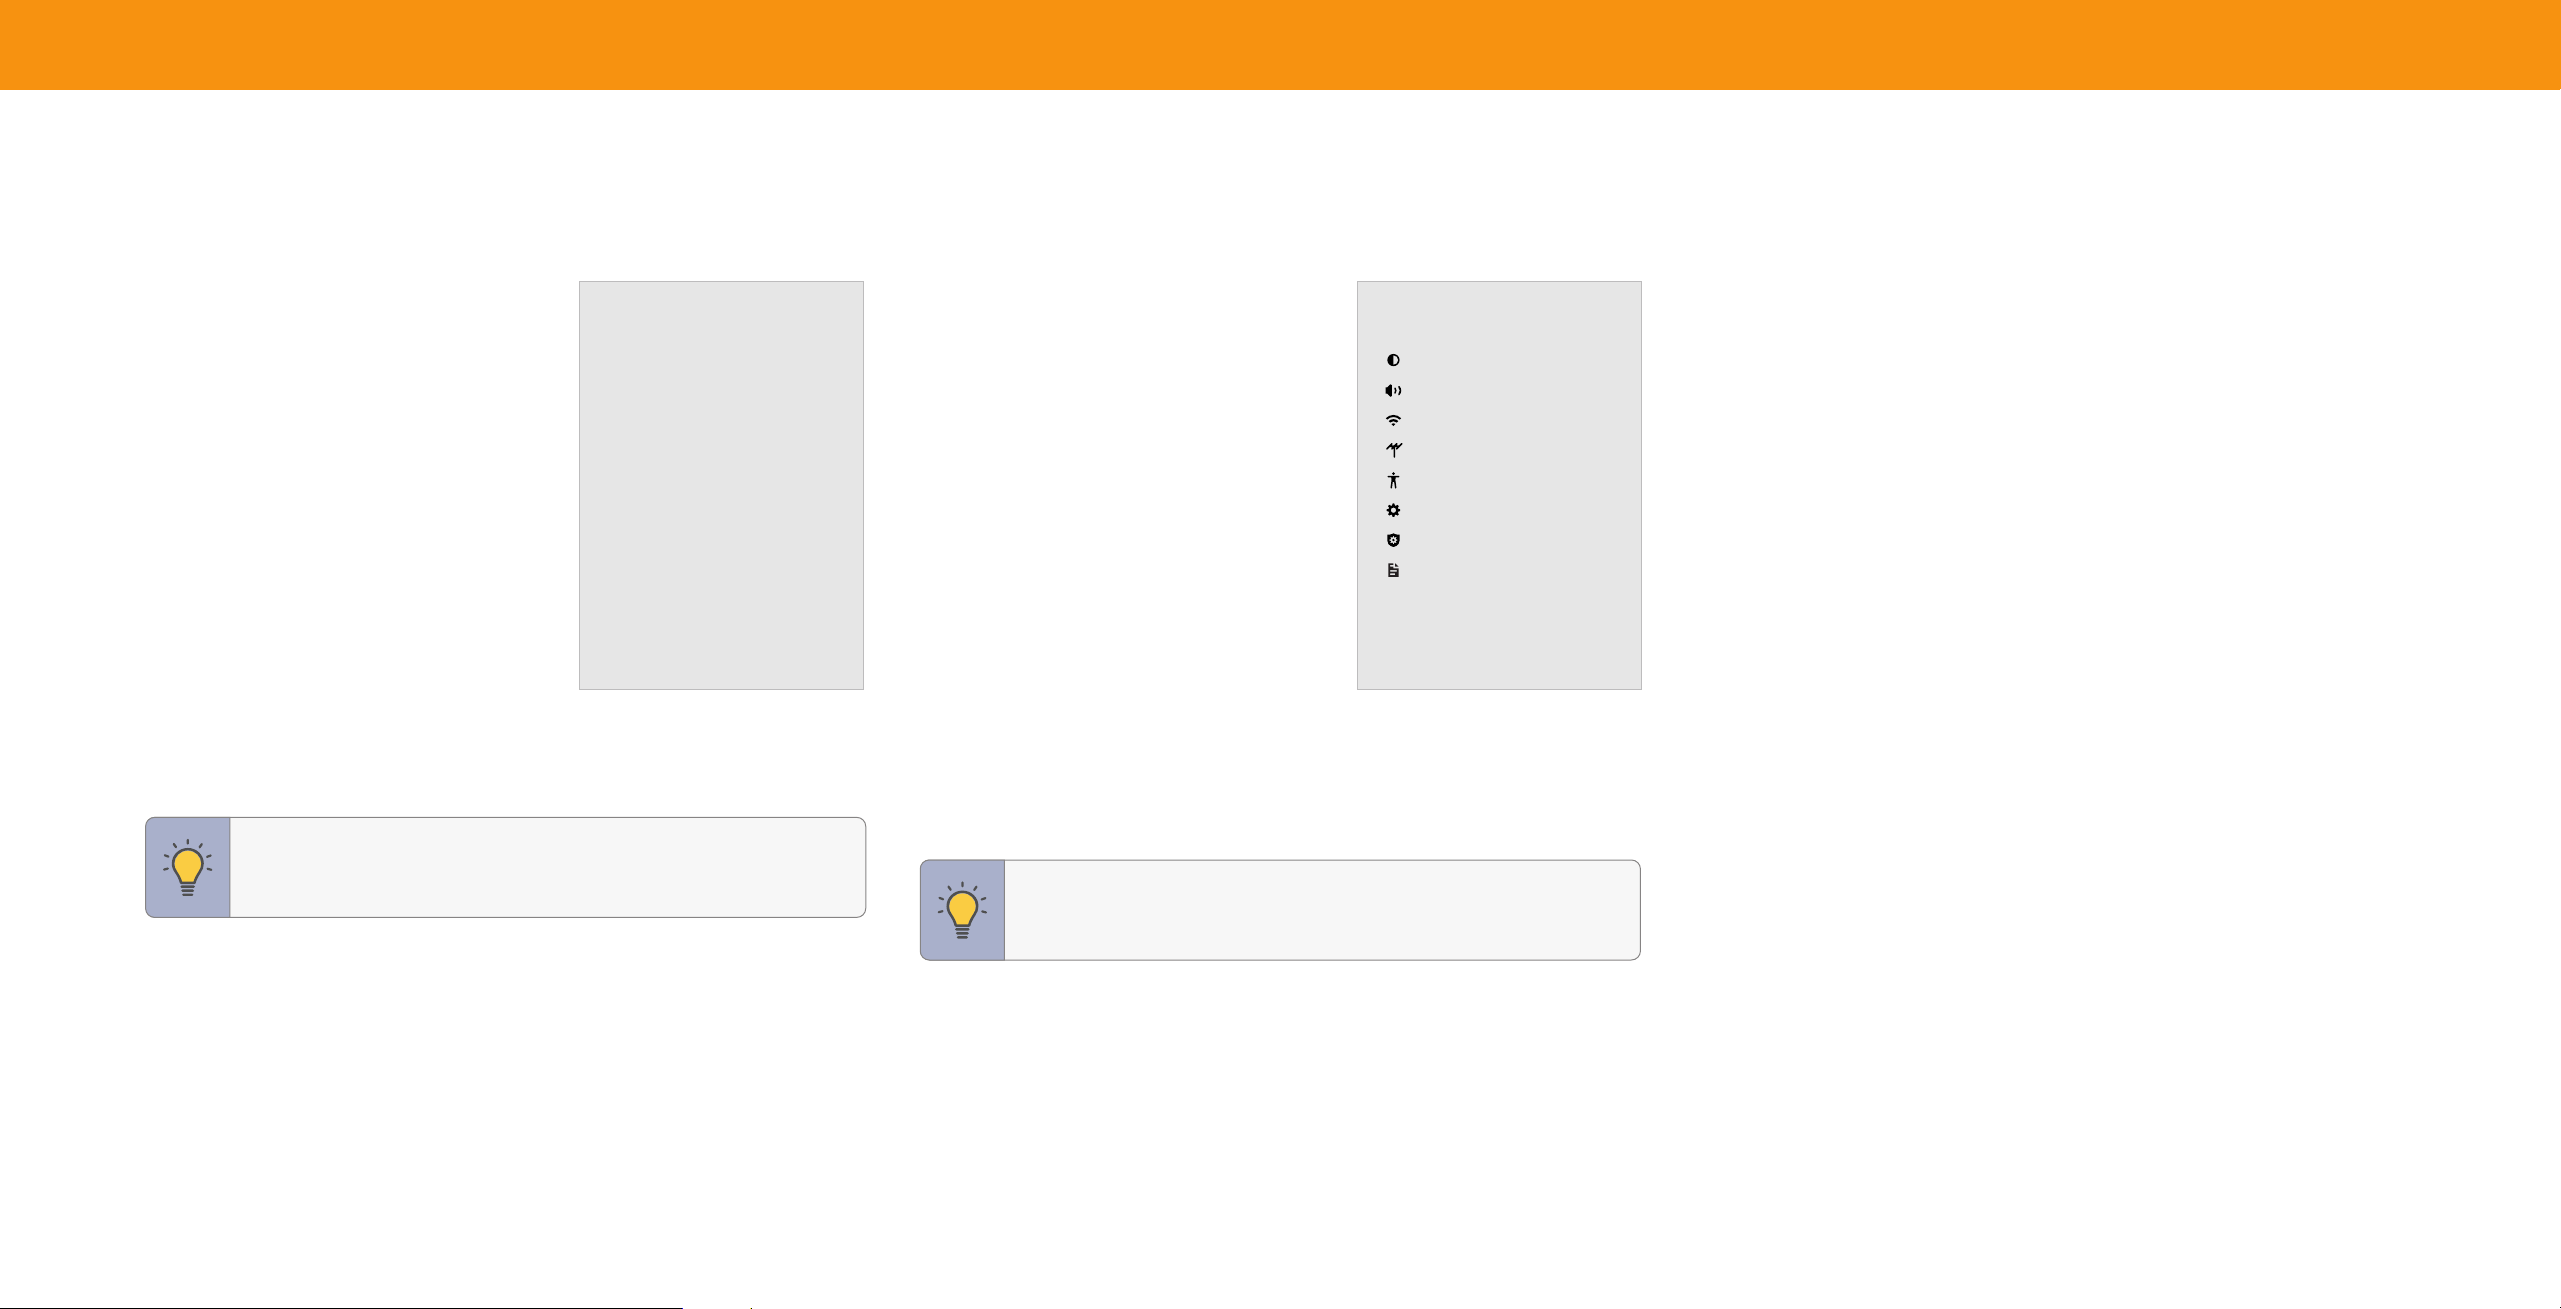
NAVIGATING THE ONSCREEN MENU
To open the on-screen menu:
1. PresstheMENUbuttonontheremote.
2. UsetheNavigationbuttonstohighlighta
menuoption,andpressthe OKbuttonto
selectthatoption.
Fromthismenu,youcan:
• Adjustpicturesettings
• Adjustaudiosettings
• Adjustnetworksettings
• AdjustTVchannelsettings
• Adjustaccessibilitysettings
• AdjustTVsystemsettings
• Accessadminandprivacysettings
• Viewtheusermanual
TV Settings
Picture
Audio
Network
TV Channels
Accessibility
System
Admin & Privacy
User Manual
TIP: Whilenavigatingtheonscreenmenu,youcanpressthe
BACKbuttonatanytimetoreturntothepreviousmenuscreen.
TIP: YoucanchangetheinputnamesthatappearontheInput
menutomakeyourdeviceseasytorecognize.See
Renaming
Devices on the Input Menu on page 27
.
13
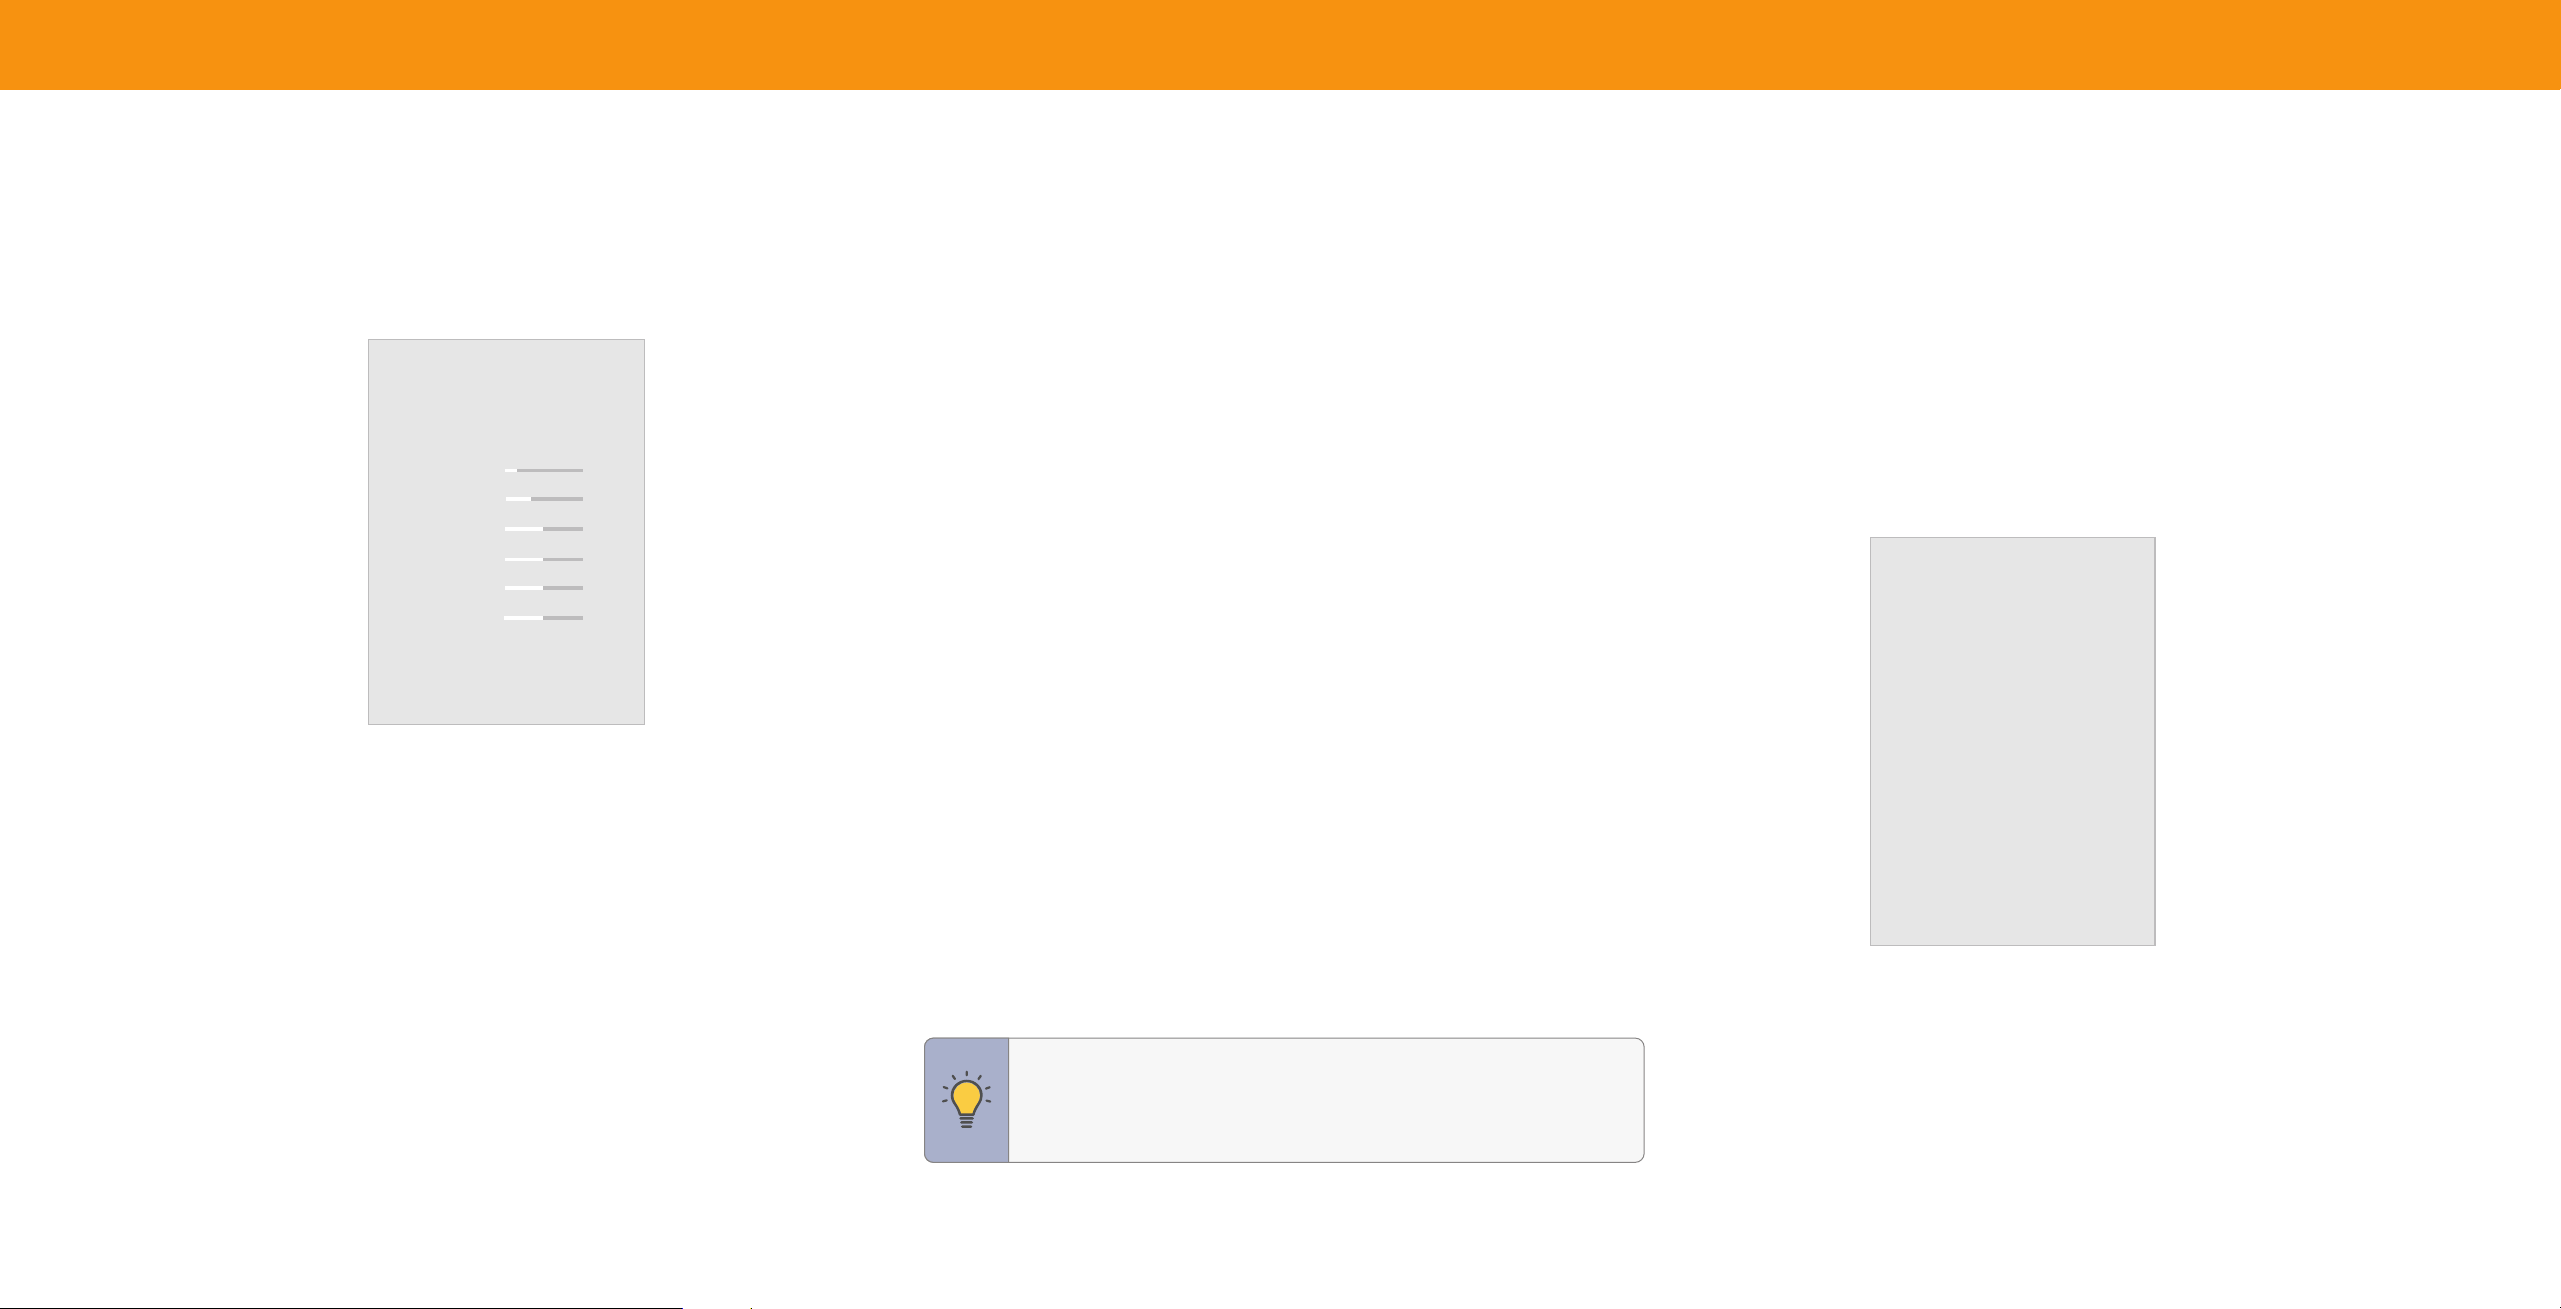
ADJUSTING THE PICTURE SETTINGS
YourTVcanbeadjustedtosuityourpreferencesandviewingconditions.
To adjust the picture mode settings:
Menu > Picture > Picture Mode
Picture
Picture Mode
Calibrated
Gaming Mode
Backlight
15
Brightness
25
Contrast
50
Color
50
Tint
50
Sharpness
50
Color Temperature
Normal
Aspect Ratio
Normal
Advanced Picture
1. UsetheNavigationbuttonsontheremotetohighlightPicture Mode, thenuse
theLeft/Right Navigationbuttonstochangethepicturemode:
• Vivid — Setsthepicturesettingstovaluesthatproduceabrighter,more
vividpicture.
• Bright — GreatforviewingeverydayTV,suchasnewsandTVshows,that
requiresabrighterimagewithmotionenhancements.
• Calibrated — Accuratecolorsintendedforcinemacontentviewingina
brightroom.
• Calibrated Dark — Accuratecolorsintendedforcinemacontentviewingina
darkroomoratnighttime.
• Game — Reducesthroughputdelaysandoptimizesthepicturesettingsfor
displayinggameconsoleoutput.Alsothepreferredpicturemodeforcomputer
mode.
• Sports — Setsthepicturesettingstovaluesidealforwatchingsportingevents
withmotioncontrolsetting.
2. SelectGamingModeforaccesstogamingrelatedinformationandsettings:
• Game Low Latency — Whenenabled,reducesvideodelaylag.
• Variable Refresh Rate (VRR) — Whenenabled,adjuststherefreshrateofthe
screenbasedonthecontent.
• Game HDR — Whenenabled,optimizesthepicturequalityforHDRgames.
• HDMI Mode — Adjuststhepicturetocorrectlysupportdisplayoutputofolder
devices.
3. Tomanuallychangeeachofthepicturesettings,usetheUp/Down Navigation
buttonsontheremotetohighlightapicturesetting,thenusetheLeft/Right
Navigationbuttonstoadjustthesetting:
• Backlight (SDR content) — AdjuststheLEDbrightnesstoaffecttheoverall
brillianceofthepicture.
• Brightness — Adjuststheblacklevelofthepicture.Whenthissettingistoolow,
thepicturemaybetoodarktodistinguishdetails.Whenthissettingistoohigh,
thepicturemayappearfadedorwashedout.
• Contrast — Adjuststhewhitelevelofthepicture.Whenthissettingistoolow,
thepicturemayappeardark.Whenthissettingistoohigh,thepicturemay
appearfadedorwashedout.Ifthesettingistoohighortoolow,detailmaybe
difficulttodistinguishindarkorbrightareasofthepicture.
• Color — Adjuststheintensityofthepicturecolors.
• Tint — Adjuststhehueofthepicture.Thissettingisusefulinadjustingtheflesh
tonesinthepicture.Iffleshappearstooorange,reducethelevelofcolorbefore
adjustingtint.
• Sharpness — Adjuststheedgesharpnessofpictureelements.Itcanbeusedto
sharpennonHD(highdefinition)content;however,itwillnotproducedetailthat
doesnototherwiseexist.
TIP:Ifyousavechangestothesettingforapicturemode,an
asteriskwillappearafteritsname.See
Saving a Custom Picture
Mode on page 17
.
Adjusting the Color Temperature
Adjustingthecolortemperaturechangesthewhitebalanceofthepicture.
To adjust the color temperature:
Menu > Picture > Color Temperature
UsetheNavigationbuttonsontheremotetohighlightacolortemperaturepreset,
thenpressOK.
• Warm — Producesanorangehuedpicture.
• Cool — Producesabluehuedpicture.
• Normal — Optimizedfortelevisionviewing.
Color Temperature
Warm
Cool
Normal

14
Changing the Picture Aspect Ratio
To change the screen aspect ratio:
Menu > Picture > Aspect Ratio
UsetheNavigationbuttonstohighlighttheaspectratioyouwishtoapply.
YourTVcandisplayimagesindifferentmodes:
• Normal (default) — Nochangetoaspect
ratio.
• Stretch
*
— When the 16:9 signal is a4:3
imagewithblackbarsontheleftandright,
theimagewillbestretchedtofillthescreen.
• Panoramic
*
— Stretches a 4:3 imagetofilla
16:9screenwithanalgorithmsothecenter
doesn’tlookstretched.
• Wide — Stretches a 4:3 aspectratiotofilla
16:9screen.Ifthesignalisa16:9image,black
barsareaddedtothetopandbottom.
• Zoom — Expandsimagebothhorizontally
andverticallyby14%.
Aspect Ratio
Normal
Panoramic
Wide
Zoom
Someprogramshaveblackbarsonthetopandbottomorsidesofthescreensothe
picturekeepsitsoriginalshape.ExamplesincludewidescreenmoviesandolderTV
programs.
TIP: TheaspectratiocannotbechangedforUltraHDcontentor
HDRcontent.
Adjusting Advanced Picture Settings
To adjust advanced picture settings:
Menu > Picture > Advanced Picture
UsetheNavigationbuttonstohighlightthesettingyouwishtoadjust,thenpress
theLeft/Right Navigationbuttonstochangethesetting:
• Black Detail — Adjuststheaverage
brightnessofthepicturetocompensatefor
largeareasofbrightness.
• Super Resolution — Configuresthe
resolutiontoenhancedimandblurred
picturesresultinginasharperimage.
• Edge Enhancement — Increasesthe
smoothnessofedges.
• Local Contrast — Adjustthecontrastof
thepicturelocally.
• Backlight Control — Dynamically
improvesthecontrastratioofthepicture
byadjustingthebacklight.
• Reduce Noise:
Advanced Picture
Black Detail
Super Resolution
Edge Enhancement
Local Contrast
Backlight Control
Reduce Noise
Gaming Engine
Film Mode
Gamma
Enhanced Viewing Angle
Color Calibration
Off
Medium
Low
Low
On
On
2.1 - Normal
Off
− Signal Noise: Reduces background picture noise when viewing analog
sources.Thisfunctionhelpstocorrect"speckle"noisewithaslightreduction
insharpness.
− Block Noise: Reduces the side effects of digital compression such as
"blocking" and noise on sharp edges.The High setting will cause a slight
reductioninsharpness.
− Contour Smoothing: Removes visible contour noise without loss of the
complexdetail.
• Film Mode — Optimizesthepictureforwatchinglms.SelectOnorO.
• Gamma — SettheshapeoftheGammacurve.UselowerGammavaluesforbright
roomconditions,andhighervalueswhenit’sdark.
• Color Calibration — CalibratecolorsusingHSB,gain,oset,and20pointwhite
balanceandtestorresetcolorstodefaults.
*
Available aspect ratio settings may vary by input source. Panoramic mode is only available for standard
definition TV (480i/480p) and Stretch mode is only available for high definition TV (720p/1080i/1080p).
15
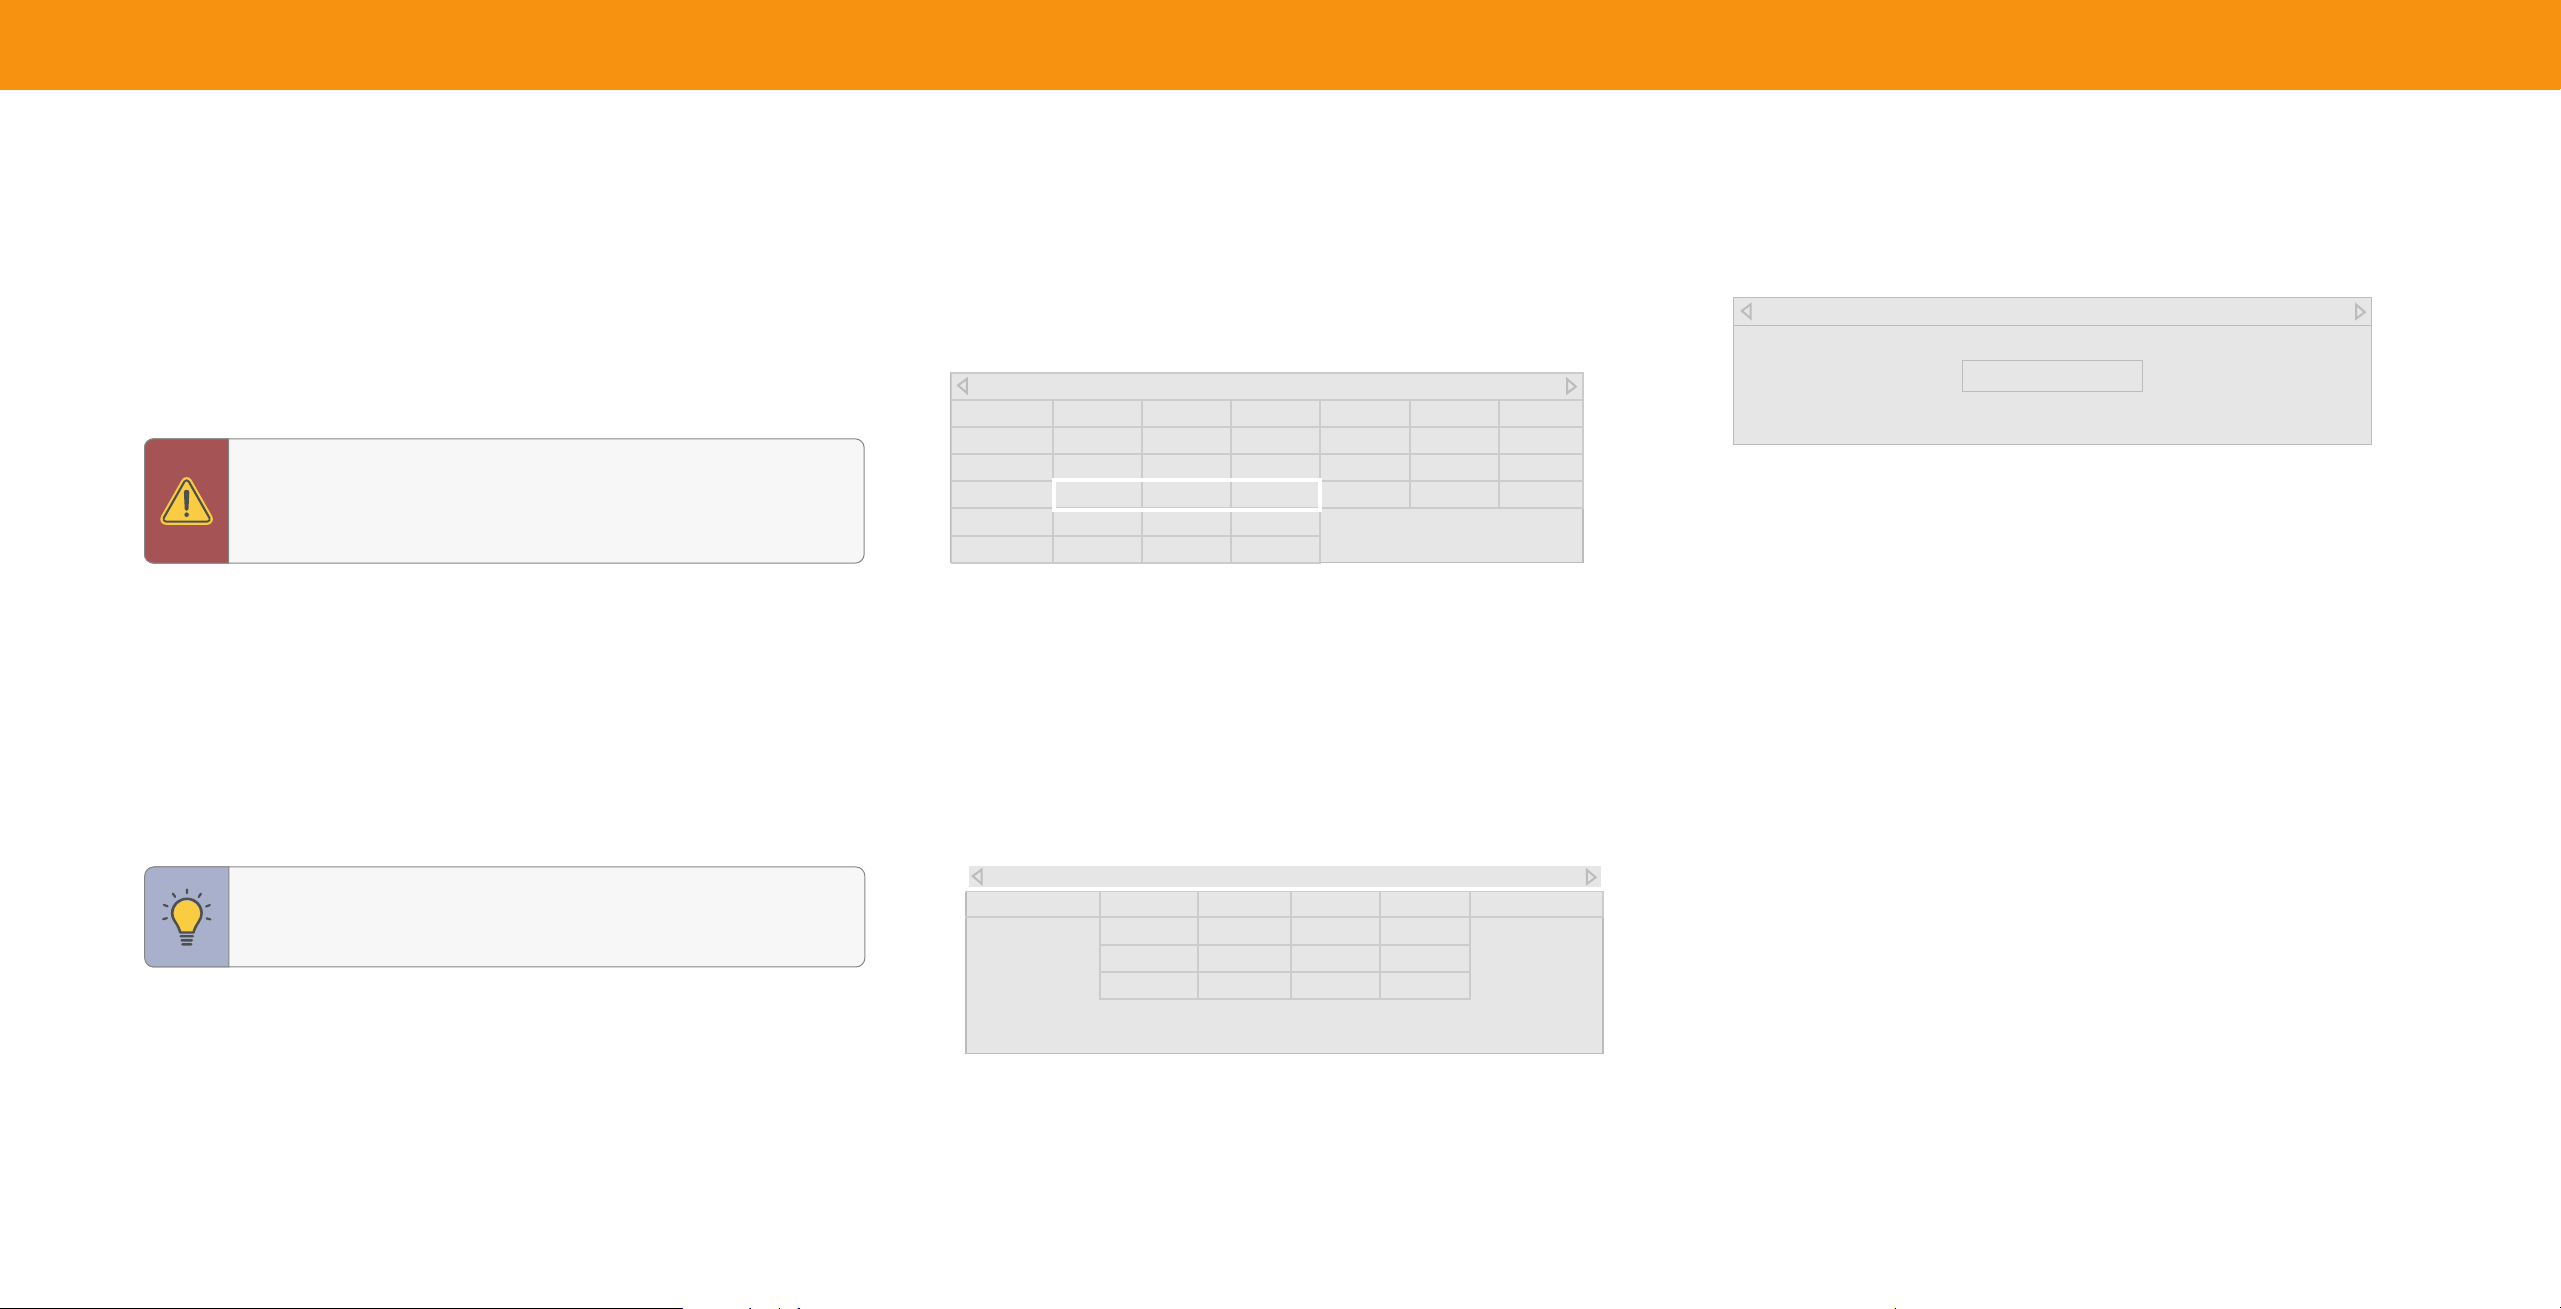
Adjusting the Color Tuner Settings
The Color Tuner settings allow you to adjust the color management system, 20
point white balance, turn color channels off for testing, and display SMPTE, flat,
ramp, and uniformity analyzer test patterns.
To access the color tuner table:
Menu > Picture > Advanced Picture > Color Calibration > Color
Tuner
WARNING: TheColorTuner,WhiteBalance,andtestpatterns
allowtechnicianstomanuallycalibratetheTV.Calibrationrequires
specializedtraining,aninputwithpreciselysetcolors,anda
specializedlightmeter.
To turn color channels o and on:
1. UsetheNavigation buttonsontheremotetohighlightRed,Green,orBlue.
2. PresstheOKbuttontoturnthecolorchannelofforon.AnXappearsovera
colorchannelthathasbeenturnedoff.
3. Onlytwocolorchannelscanbeturnedoffatthesametime.
TIP: Anychangesmadeaffectthecolortemperaturesetting.
Selectthepreferredcolortemperaturesettingfirst.See
Adjusting
the Color Temperature on page 13
.
To adjust the color management system settings:
1. UsetheNavigationbuttonsontheremotetohighlighttheHue,Saturation,
Brightness,Offset,orGainofthecoloryouwishtoadjust.PresstheOKbutton.
2. UsetheLeft/Right Navigationbuttonstoadjustthevalue.Whenyouare
finishedpresstheOKbuttontosavethesetting.
Color Tuner
Red Green Blue Cyan Magenta Yellow
Hue 0 0 0 0 25 -14
Saturation -1 5 -4 0 -2 0
Brightness -24 0 -22 0 0 0
To adjust the White Balance Tuner settings:
Menu > Picture > Advanced Picture > Color Calibration > White
Balance Tuner
1. UsetheNavigation buttonsontheremotetohighlighttheGainandColorvalues
youwishtoadjust.PresstheOKbuttonandusetheLeft/Right Navigation
buttonstoadjustthevalue.Whenyouarefinished,presstheOK buttontosave
thesetting.
White Balance Tuner
Red Green Blue
IRE% 5 0 0 0
Oset 0 0 0
Gain 0 0 0
To show or hide the SMPTE Test Pattern:
Menu > Picture > Advanced Picture > Color Calibration >
Calibration Test > SMPTE Test Pattern
SMPTE Test Pattern
O
1. UsetheNavigationbuttonsontheremotetohighlightOff.UsetheLeft/Right
NavigationbuttonstoselectOntoshowtheSMPTEPattern.
—or—
2. TohidetheSMPTETestPattern,usetheLeft/Right Navigationbuttonsto
selectOff.
To reset the 20 point white balance, oset, and gain to the defaults:
Menu > Picture > Advanced Picture > Color Calibration > Reset
Color Temperature

16
To show or hide the Flat Test Pattern:
Menu > Picture > Advanced Picture > Color Calibration >
Calibration Test > Flat Test Pattern
To show or hide the Ramp Test Pattern:
Menu > Picture > Advanced Picture > Color Calibration >
Calibration Test > Ramp Test Pattern
To show or hide the Uniformity Analyzer Test Pattern:
Menu > Picture > Advanced Picture > Color Calibration >
Calibration Test > Uniformity Analyzer Test Pattern
FlatTestPattern
Off
RampTestPattern
Off
UniformityAnalyzerTestPattern
Off
1. UsetheNavigationbuttonsontheremotetohighlightOff.UsetheLeft/Right 1. UsetheNavigationbuttonsontheremotetohighlightOff.UsetheLeft/Right 1. UsetheNavigationbuttonsontheremotetohighlightOff.UsetheLeft/Right
Navigationbuttonstoselectthepercentagebrightnessfortheflattestpattern. Navigationbuttonstoselectthecolorfortheramptestpattern.Selectinga NavigationbuttonstoselectOntoshowtheUniformityAnalyzerTestPattern.
Selectingapercentageimmediatelyshowstheflatpatternatthatbrightness. colorimmediatelyshowsthatcolorramp.
—or—
—or— —or—
2. TohidetheUniformityAnalyzerTestPattern,usetheLeft/Right Navigation
2. TodisabletheFlatTestPattern,usetheLeft/Right Navigationbuttonsto 2. TohidetheRampTestPattern,usetheLeft/Right Navigationbuttonsto buttonstoselectO.
selectO. selectO.

17
Adjusting Picture Input Settings
EnableHDMIMode,FullColor4:4:4,andadjustpicturesizeandposition.
To adjust the Input settings:
Menu > Picture > Input Picture Settings
UsetheNavigationbuttonstohighlightthesettingyouwishtoadjust.
• Picture Size and Position
*
— configurethedisplaysizeandpositionofthe
picturetothescreen.
• HDMI Mode
*
— Ifnecessary,tosupportcorrectpictureofolderdevices,override
theautomaticsettingtouselegacyHDMImode.
• Full Color 4:4:4
*
— Maintainsfullcolordatawith4:4:4content.Somepicture
settingswillnotbeavailablewhenthissettingisOn.Onlyavailableforan
HDMIinput.
• Color Space Range — SelectColorSpaceforthesource.Videosourcesuses
YCbCr,butPCusesRGB.
Adjusting the Picture Mode Edit Settings
Managecustompicturemodesandresetpresetpicturemodes.
To adjust the Picture Mode Edit settings:
Menu > Picture > Picture Mode Edit
UsetheNavigationbuttonstohighlightthesettingyouwishtoadjust,thenpress
OKtochangethesetting:
• Save Picture Mode — Saveacustompicture
Picture Mode Edit
mode.
Save Picture Mode
• Copy Picture Mode — Copythesettingsfora
Copy Picture Mode
custompicturemode.
Lock Picture Mode Off
• Lock Picture Mode — Preventchangesto
Reset Picture Mode - Bright*
custompicturemodes.
• Reset Picture Mode —Resetthepicture
modesettingstofactorydefaultvalues.Only
availableoncustomizedpresetmodes.
• Delete Picture Mode —Deleteacustom
picturemode.Inputsassignedtothecustom
picturemodewillusetheCalibratedpicture
mode.
Saving a Custom Picture Mode
Custompicturemodesallowyoutosaveagroupofcustomsettingsforvarious
viewingconditionsandvideosources.
To save a custom picture mode:
Menu > Picture > Picture Mode Edit > Save Picture Mode > Enter
a Name >Save
Custompicturemodesallowyoutosaveagroupof
customsettingsforvariousviewingconditionsand
videosources.
• Changesmadewhileonanypresetpicture
modewilladdanasteriskonthetopright
cornerofthepresetmode.
• The custom picture mode is not automatically
saved.
Save Picture Mode
*
Only available if there is an input source. Not available for WatchFree+.
Menu items will be grayed out if not available.
18
Copy a Picture Mode
Custompicturemodesettingscanbecopiedtobeappliedtootherinputs.
1. Completethedesiredchangesfortheselectedpicturemode.
• SelectSave Picture Modetosavepicturemodeforallinputs.
2. Selecttheinputyouwanttocopyyoursavedpicturemodeeditsto.
3. Changethepicturemodetoyourcustomsavedmode:Menu > Picture >
Picture Mode > select saved custom picture mode
4. Copyyourcustompicturemode:Menu > Picture > Picture Mode Edit > Copy
Picture Mode
5. Selectwhatpicturemodeyouwouldliketocopyover.
6. Anotificationdisplaysafterthecopytoyourselectedpicturemodeis
completed.Nowthispicturemodewillhaveyourcustomsettingssavedoverit
fortheselectedinput.
7. Repeatasneededtocustomizeadditionalinputs.
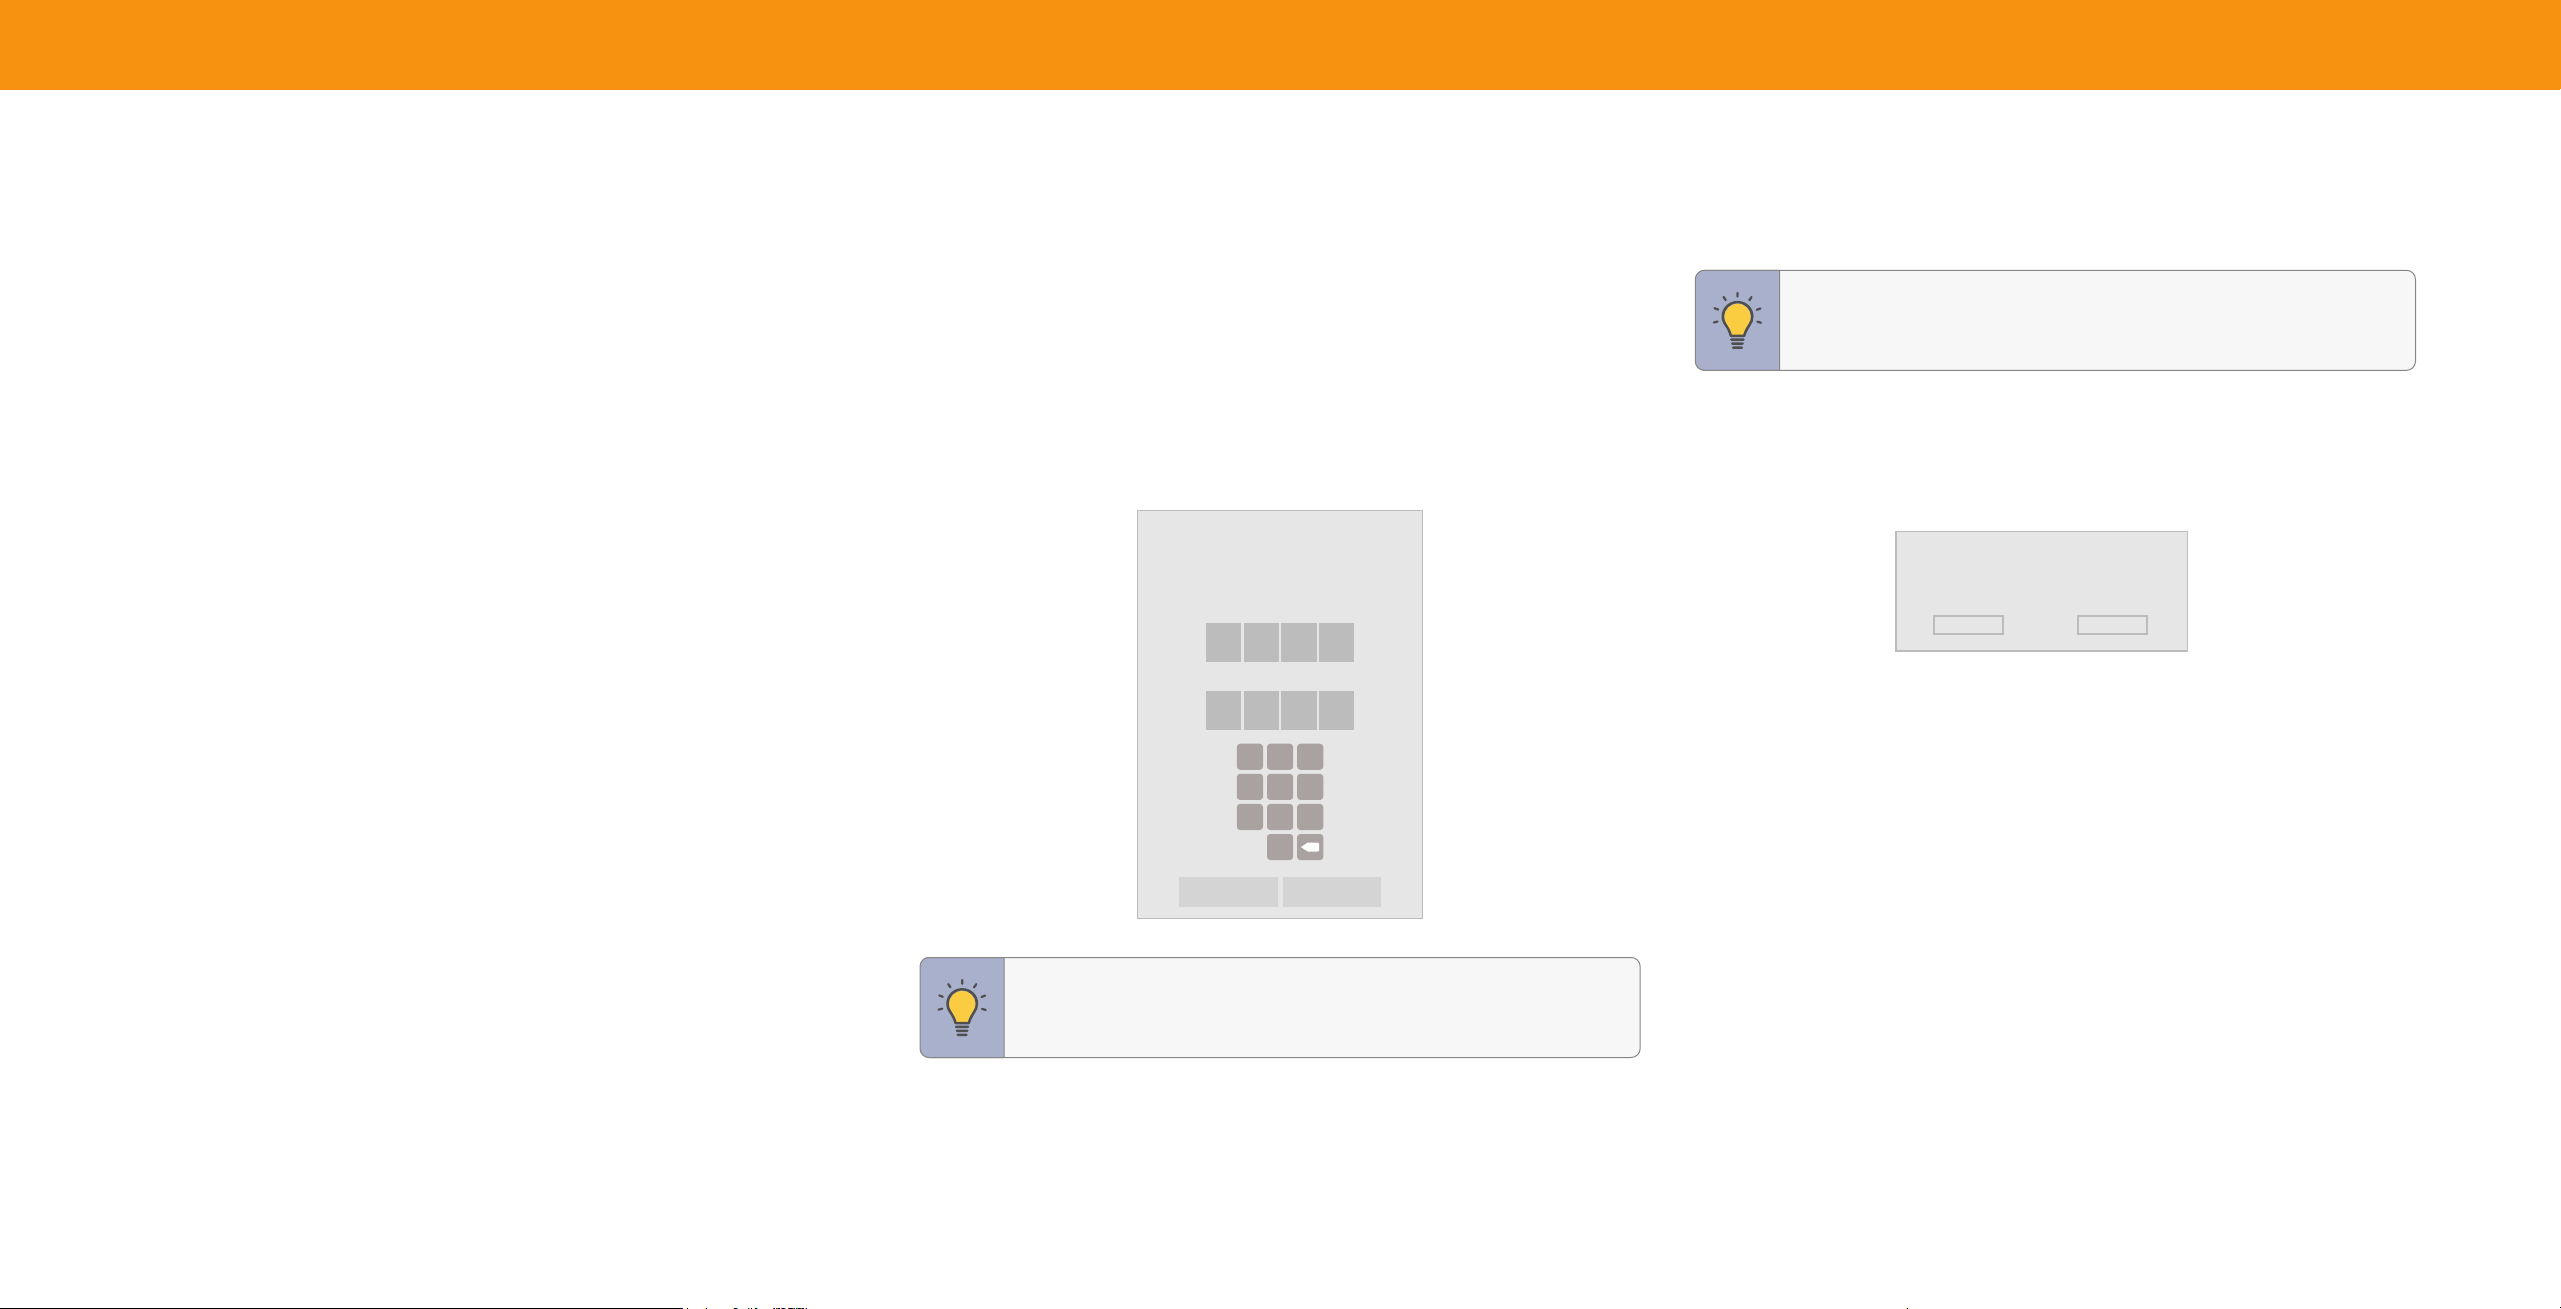
Lock a Picture Mode
Custompicturemodescanbelocked/unlockedwithauniquePINtoprevent
accidentalchangestotheirsettings.Ifnotpreviouslyset,youcansetupyoursystem
PINcodehere.
To lock all custom picture modes:
Menu > Picture > Picture Mode Edit > Lock Picture Mode > On >
Enter Your PIN > Save
To unlock all custom picture modes:
Menu > Picture > Picture Mode Edit > Lock Picture Mode > O >
Enter Your PIN
Lock Picture Mode
Create a picture control PIN to prevent
changes to all custom picture modes.
NewPIN
ConfirmPIN
1
4
7
2
5
8
0
3
6
9
X
Cancel Save
Deleting a Picture Mode
Custompicturemodesthatarenolongerneededcanbedeleted.
TIP:Inputsassignedtodeletedcustompicturemodesbecome
assignedtotheCalibrationpicturemode.
To delete a custom picture mode:
Menu > Picture > Picture Mode Edit > Delete Picture Mode >
Delete
To delete the user created Custom 1
picture mode, select the Delete button.
Delete
Cancel
Resetting a Picture Mode
Apresetpicturemodethathasbeeneditedcanberestoredtothefactory
defaultsettings.
To reset a customized preset picture mode:
Menu > Picture > Picture Mode Edit > Reset Picture Mode >
Reset
TIP: TosetacustomPINcode,see
Setting a System PIN Code on
page 29
.
19
ADJUSTING THE AUDIO SETTINGS
To adjust the audio settings:
Menu > Audio
UsetheNavigationbuttonstohighlightthesettingyouwishtoadjust,thenpress
Left/Right Navigationbuttonstochangethesetting:
• TV Speakers — TurnthebuiltinspeakersOnor
O.Thebuiltinspeakersautomaticallyturno
Audio
ifasoundbarisdiscovered.
TV Speakers Auto
• Surround Sound — WhensettoOn,
Surround Sound On
enablessurroundsoundsuitableforsports
Volume Leveling On
andTVshows.Virtual:X
™
addsvirtualized
Balance 0
heightbestformovies.
Bass 0
• Volume Leveling — WhensettoOn,
Treble 0
DTSTruVolume
™
audiosolutionlevelstheTV
Lip Sync 0
speakervolume.
Digital Audio Out Auto
• Balance — Balancetheaudioloudnessbetween
Analog Audio Out Fixed
theleftandrightTVspeakers.
Dialogue Enhancer Off
• Bass — Increaseordecreasethebasslevel.
• Treble — Increaseordecreasethetreblelevel.
• Lip Sync — Synchronizethedisplayimagewiththeaudiotrack.
• Digital Audio Out — Selectthedigitalaudiooutputformatforboththeopticaland
HDMIARCaudiodevices.
ToheartalkbackwhenTalk Backfunctionisenabled,digitalaudiooutmustbeset
toPCM.
SOUND BAR SETTINGS
IfaVIZIOsoundbarisdetectedandconnectedviaCEC(HDMIARC/eARC),sound
barsettingswillappearintheAudiomenu.See
Adjusting the CEC Settings on page
29
toenableCECundertheSystemsettings.
To adjust the sound bar settings:
Menu > Audio > Sound Bar Settings
UsetheNavigationbuttonstohighlight
Audio
thesettingyouwishtoadjust,thenpress
Sound Bar Settings
Left/Right Navigationbuttonstochangethesetting.
EQ Mode Movie
Seeyoursoundbarmanualfordetailsonavailablesettings.
Bass Medium
Treble Medium
Night Mode Off
Virtual:X Off
Speaker Test
Info
TIP: Availablesoundbarmenusettingswillbespecifictothetype
ofVIZIOsoundbarconnected.
TIP: YoumustselectDigitalforaudiowithmorethantwo
channels(e.g.,3.0,5.0,etc.).
• Analog Audio Out — SelectVariableifyouarecontrollingthevolumewiththe
TVremote.SelectFixedifanexternalaudiodevice(soundbarorAVreceiver)will
controlthevolume.
• Dialogue Enhancer — IfenabledandthesignalsourceincludesDolby5.1AC4
audio,thenclarityofdialogueisenhanced.

20
ADJUSTING THE NETWORK SETTINGS
Changing the Manual Setup Settings
To nd the TV’s MAC address:
YourTVisInternetready,featuringabuiltinhighspeedwirelessinternetadapter.
AdvanceduserscanfinetunethenetworksettingsusingtheManualSetupfeature.
Menu > Network > Manual Setup
Manual Setup
Connecting to a Wireless Network
ThesecuritysettingsonyourroutermayrequireyoutoentertheTV'sMACaddress.
YoucanfindyourTV'sMACaddressatthe
DHCP Off
Toconnecttoawirelessnetworkwhosenetworkname(SSID)isbeingbroadcast:
Menu > Network > Choose your network >
Enter in the password > Connect
To forget a saved network:
Highlight a saved wireless access point > OK > Forget
If you do not see your wireless network
displayed, click on:
More Access Points > Highlight
your wireless network
> Enter in the
password
> Connect
Testing Your Network Connection
Totestyournetworkconnection:
Menu > Network > Test Connection
Connecting to a Hidden Network
Toconnecttoawirelessnetworkwhose
networkname(SSID)isnotbeingbroadcast:
Menu > Network > Hidden Network
> Enter the Access Point Name >
Connect > Enter in the password
Network
Wireless Access Points
Test Connection
Hidden Networks
Manual Setup
Network Information
To change advanced network settings:
Menu > Network > Manual Setup
> DHCP > O
1. UsetheNavigationandOKbuttonsto
adjusteachsetting:
• IP Address — TheIPaddressassigned
totheTV.
• Subnet Mask — Thesubnetaddress.
• Default Gateway — Yournetwork’s
defaultgatewayaddress.
• Pref. DNS Server — Yourpreferred
domainnameserveraddress.
• Alt. DNS Server — Youralternate
domainnameserveraddress.
Enter Access Point Name
Enter your access point name. This is used
to connect to an access point with a hidden
SSID.
2. UsetheNavigationbuttonsontheremotetohighlightSaveandpressOK.
bottomofthelist.TheMACaddressesforthe
connectionsinusearedisplayed:
• RJ45 MAC — TheEthernetorRJ45MAC
addressmaybeneededtosetupyour
networkwhenyouhaveconnectedtheTV
withanEthernet(Cat5)cable.
• Wireless MAC — TheWireless(WiFi)MAC
addressmaybeneededtoconnectyourTV
toyourWiFinetwork.
To view network information
Menu > Network > Network Information
IP Address
Subnet Mask
Default Gateway
Pref. DNS Server
Alt DNS Server
Wireless Mac
__. __.__.__
__. __.__.__
__. __.__.__
__. __.__.__
__. __.__.__
0:0:0:0:0:0

21
SETTING UP TV CHANNELS
You can use the TV’s Channels menu to:
• Findchannels
• Findnewchannels
• Selectchannelstoskip
• Selectanalogaudiomode
• Selectthelanguagefordigitalaudio
• Setparentalcontrols
TV Channels
Find Channels
Find New Channels
Skip Channel
Analog Audio
Digital Audio
Parental Controls
Stereo
English
Scanning for TV Channels
TheTVmayneedtoscanforchannelsbeforeitcandisplayprogramsandtheir
associatedinformation.Achannelscanisrequiredforfreeovertheairchannels
(usinganantenna)andcablechannelsfromanoutofthewallconnection(withouta
cablebox).MovingtheTVtoanareawithdifferentchannelsrequirestheTVtoscan
forchannelsagain.
To perform an Auto Channel Scan:
Find Channels
Menu > TV Channels > Find Channels
Channels Found
Waituntilthechannelscanis100%complete.
HighlightDoneandpressOK.
Digital
Analog
8
12
Skipping Channels
Afterachannelscaniscompleted,youmayfindthatsomechannelsaretooweakto
watchcomfortably.Theremayalsobesomechannelsyoudonotwanttoview.You
canremovethesechannelsfromtheTV’smemorywiththeSkip Channelfeature.
WARNING:ChannelsthathavebeenremovedwiththeSkip
Channelfeaturecanstillbeviewedifthechannelisenteredusing
thenumberpad.
Ifyouwishtocompletelyblockachannelfrombeingviewed,use
see Locking and Unlocking Channels on page 23.
Ifthechannelscaniscanceled,thechannelsthat
werealreadydiscoveredareretained.
To perform a New Channel Scan:
Menu > TV Channels > Find New
Channels
ANew Channel Scansavesthecurrentchannel
mapandscansforadditionalchannels.
45% Complete
To remove a channel:
1. FromtheTV Channelsmenu,highlight
Skip Channel,andpressOK.
2. Foreachchannelyouwishtoremove,use
theUp/Down Navigationbuttonson
theremotetohighlightthechanneland
pressOK.A
appearstotherightofeach
channelyouselect.
Skip Channel
0 Test 0
1 Test 1
2 Test 2
3 Test 3
4 Test 4

22
Changing the Analog Audio Language
To use the Digital Language feature:
Someanalogovertheair(free)andcablechannelsbroadcastprogramsinmore
Menu > TV Channels > Digital Audio
thanonelanguage.TheTV’sAnalogAudiofeatureallowsyoutolistentoaudioinan
Selectthepreferredaudiolanguage.Available
alternatelanguageusingSecondaryAudioProgramming(SAP).
languagesorvideodescriptiondependonthe
Digital Audio
broadcastcontent.
To use the Analog Audio feature:
English
Menu > TV Channels > Analog Audio
Spanish / Video Description
French
WARNING:NotallprogramsarebroadcastinSAP.TheAnalog
AudioLanguagefeatureonlyworkswhentheprogrambeing
viewedisbeingbroadcastwithSecondaryAudioProgramming.
• Stereo — Morethanonespeakerchannelis
beingused.Soundsmaybedispersedthrough
Analog Audio
differentspeakersdependingonhowtheaudio
isprogrammed.
Stereo
SAP
• SAP (Secondary Audio Program) — Typically
usedforaudioinadifferentlanguageotherthan
Mono
thenativeoneusedintheprogram.
• Mono — Allspeakersareproducingthesame
sound;thereisnodistinctionbetweenleftor
rightsounds.
23
Using Parental Controls
TheTV’sparentalcontrolsallowyoutopreventtheTVfromdisplayingcertain
channelsorprogramsunlessaPINisused.
Accessing the Parental Controls Menu
ToaccesstheParental ControlsmenuyoumustfirstsetupasystemPIN:
TIP:tosetacustomPINcode,see
Setting a System PIN Code on
page 29
Menu > TV Channels > Parental Controls > Enter in PIN
TheParentalControlsmenuonlyappearswhen:
• YouareusingthetunertoreceiveyourTVsignals,suchaswhenyouareusingan
antennaforOvertheAirsignalsorwhenconnectedtocableTVdirectlyfromthe
wall(nocablebox).
• Youhaveadeviceconnectedusingacompositevideocableoracoaxialcable,
suchasaVCR,satelliteorcablebox,orDVR.
TIP:Otherdeviceshavetheirownparentalcontrolsettings.
Enabling or Disabling Program Ratings
Tomanageprogramcontentaccordingtoitsrating,youmustfirstenablethe
ProgramRatingfeature.
To enable or disable the Program Rating feature:
Menu > TV Channels > Parental Controls > Locks > O/On
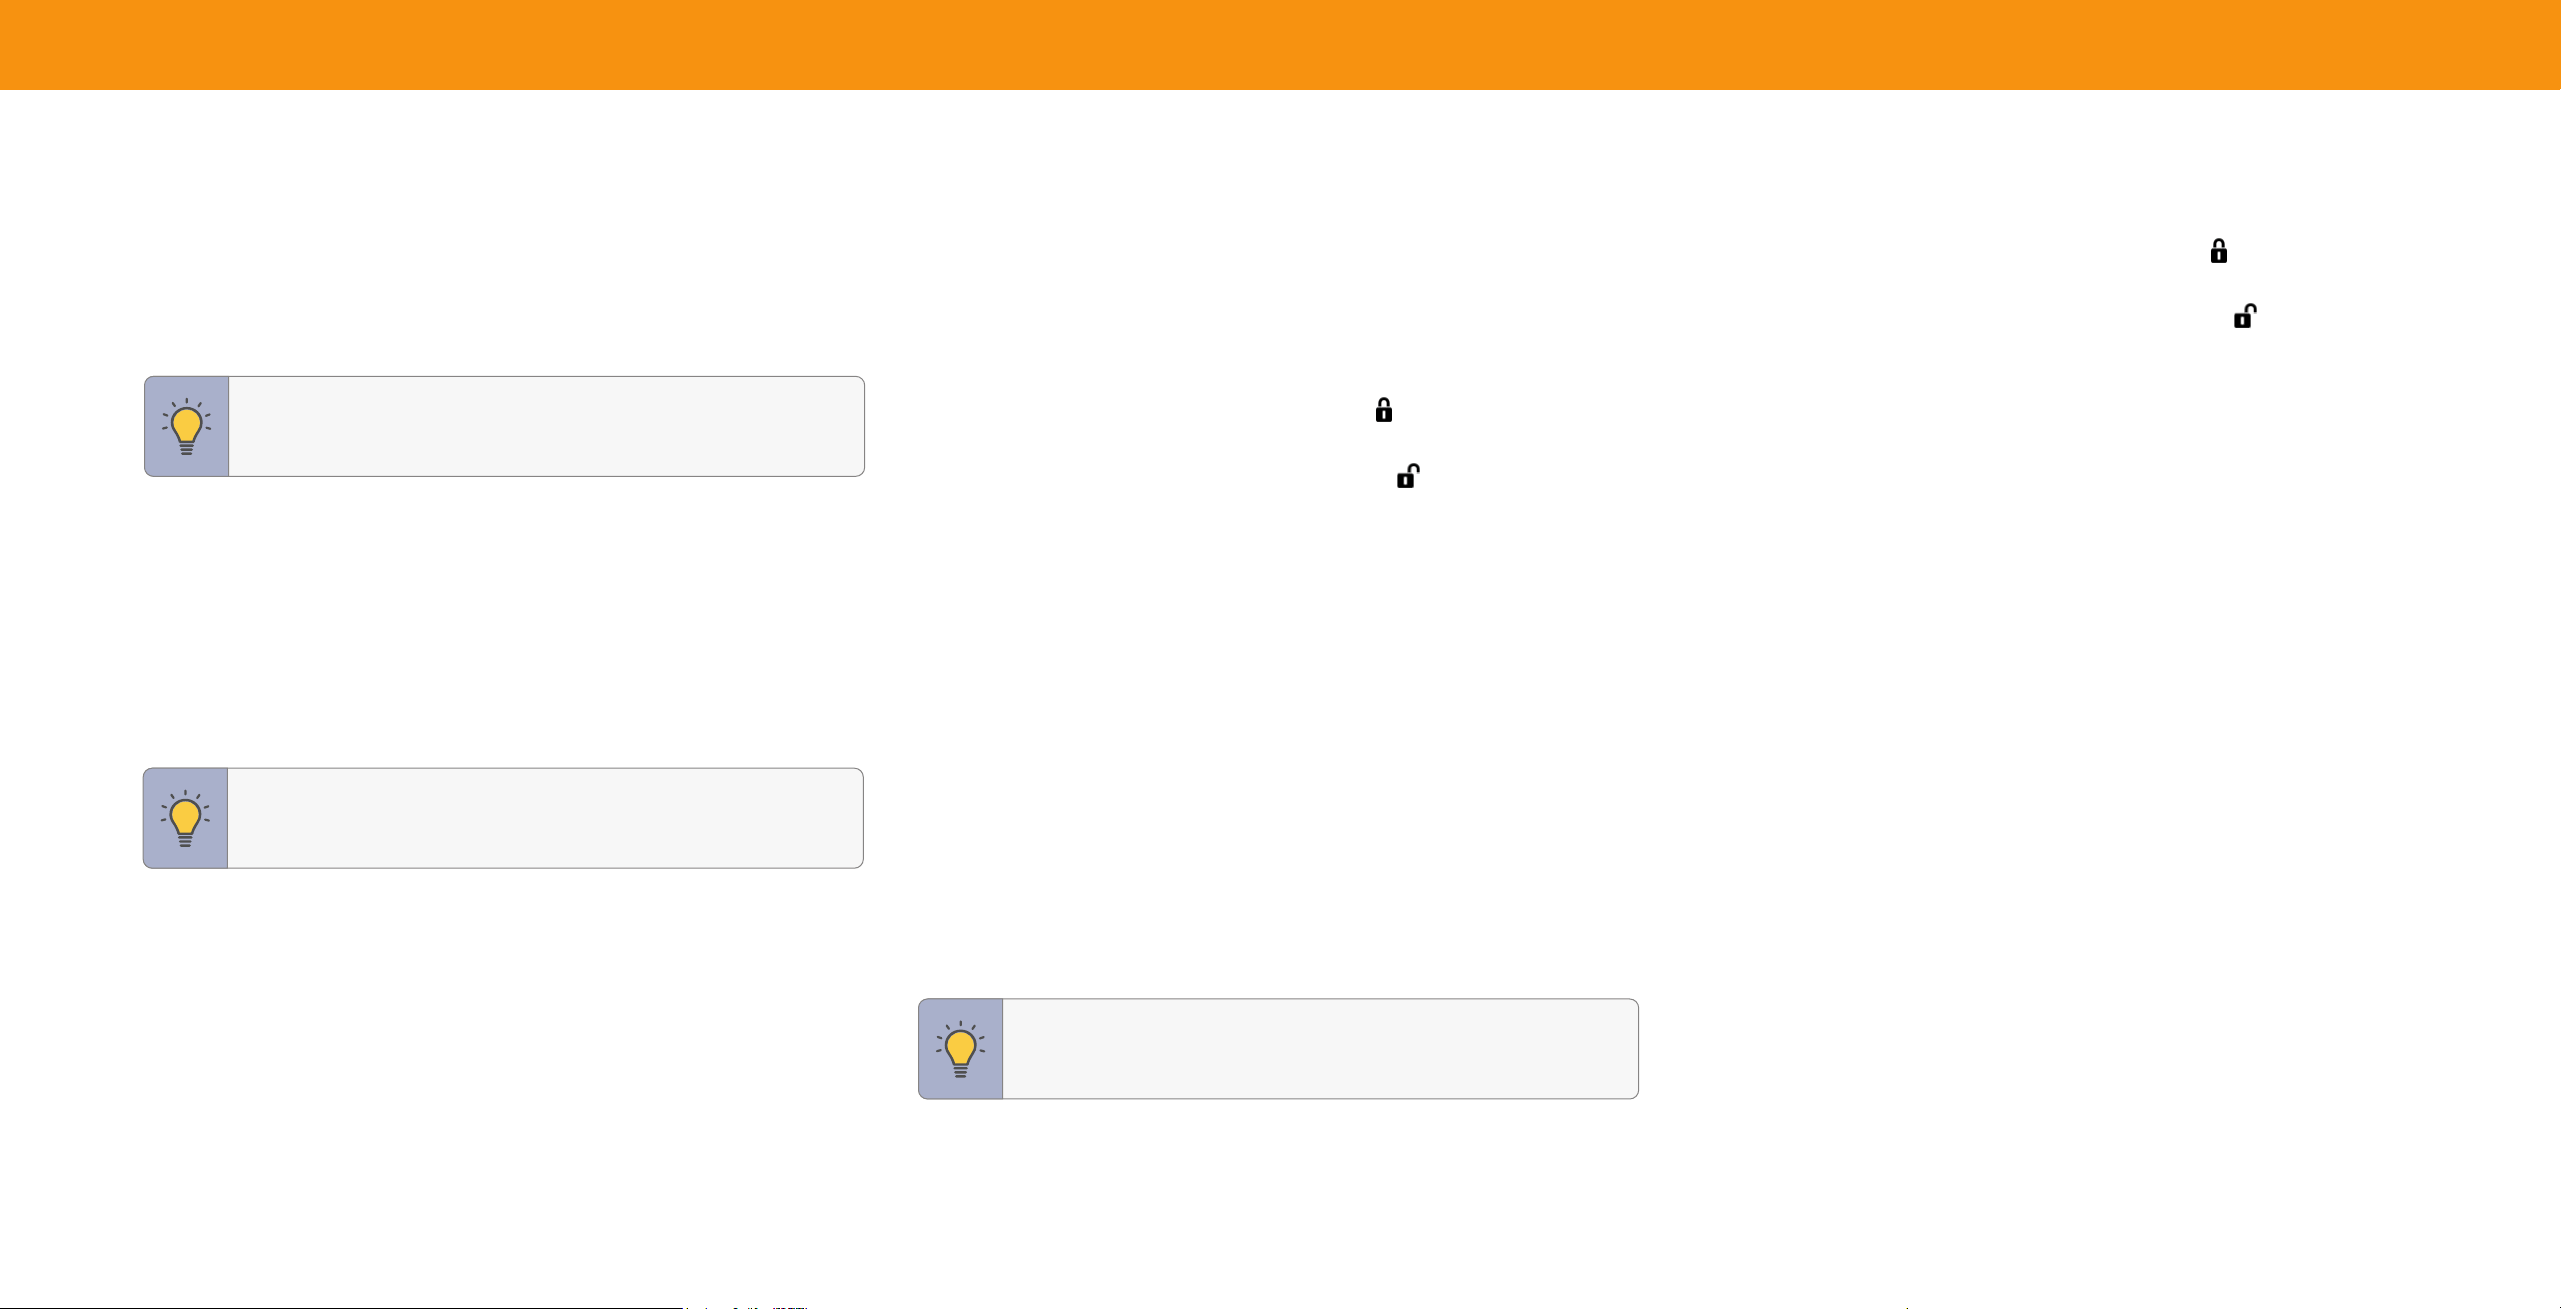
Locking and Unlocking Channels
Whenachannelislocked,itcannotbeaccessed.Lockingachannelisagoodwayto
preventchildrenfromviewinginappropriatematerial.
To lock or unlock a channel:
Menu > TV Channels > Parental Controls > Channel Locks
HighlightthechannelyouwanttolockorunlockandpressOK.
• Whenachannelislocked,theLockiconappears
locked.Thechannelisnot
accessibleunlessthesystemPINisentered.
• Whenachannelisunlocked,theLockiconappears
unlocked.
Blocking and Unblocking Content by Rating
Achannelmaysometimesbroadcastprogramsthataremeantforavarietyof
audiences(someforchildrenandsomeforadults).Youmightnotwanttoblockthe
channelcompletelyusingachannellock,butyoucanblockcertainprogramsfrom
beingviewed.
YoucanusetheTV’sRating Blockfeaturetoblockcontentbasedonitsrating.
To block or unblock content by its rating:
1. FromtheParentalControlsmenu,highlightthecontenttypeyouwanttoadjust
andpressOK:
• USA TV — USAtelevisionprogrambroadcasts.
• USA Movie — USAmoviebroadcasts.
• Canadian English — CanadianEnglishtelevisionprogrambroadcasts.
• Canadian French — CanadianFrenchtelevisionprogrambroadcasts.
TIP:Foralistofcontentratingsandtheirdefinitions,pleasevisit:
www.tvguidelines.org.
2. Foreachratingtypeyouwanttoblockorunblock,usetheNavigationbuttons
tohighlighttheratingtypeandpressOK.
• Whentheratingtypeisblocked,theLockiconappears
locked.Content
withthisratingandallhigherratingscannotbeviewed.
• Whentheratingtypeisunblocked,theLockiconappears
unlocked.
Contentwiththisratingandalllowerratingscanbeviewed.
• Ifyouwanttoblockallunratedcontent,highlightBlock Unrated Showsand
usetheNavigationbuttonsontheremotetoselectOn.
To enable or disable the Block Unrated Shows setting:
Menu > TV Channels > Parental Controls > Block Unrated Shows
> O/On
Reset Locks
Resetalllockstodefaultandclearallchannelorratingslockstotheunlockedstate.
To reset locks:
Menu > TV Channels > Parental Controls > Reset Locks
24
ACCESSIBILITY SETTINGS
VIZIOiscommittedtoprovidingintuitive,userfriendlyproducts.YournewVIZIOTV
offersseveralaccessibilityfeaturesthatcanhelpyouwitheasynavigation.
To access the Accessibility menu:
Menu > Accessibility
Accessibility
1. Captions — Activateandcustomize
Captions
analoganddigitalclosedcaptions.
Video Description Off
2. Video Description — Ifincludedby
Talk Back Off
thebroadcaster,providesanarrated
Speech Rate Normal
descriptionoftheactionforthecontent.
Zoom Mode Off
3. Talk Back
*
— EnablesyourTVtospeakall
settingschangesandadjustmentsusing
theremoteinEnglish.
4. Speech Rate — Adjuststherateinwhich
TexttoSpeechisspoken.SelectSlow,
Normal(default),orFast.
5. Zoom Mode — Enlargesasectionofthe
screenbyapproximately200%.
To access the Video Description menu:
Menu > Accessibility > Video Description > O/On
Setting Up Closed Captioning
YourTVcandisplayclosedcaptionsforprogramsthatincludethem.ClosedCaptions
displayatranscriptionofaprogram’sdialogue.
TIP:ClosedCaptioningisavailablefortunerandstreaming
content(ifsupportedbytheapp).Notethatmostappswill
supporttheirownCCfromwithintheapp.
To activate or deactivate Closed Captions for current content:
Menu > Accessibility > Captions > Closed Captions > O/On
—or—
Push the CC
CC
button on the remote.
1. UsetheNavigationbuttonsontheremote
tohighlighteitherAnalogorDigital Closed
Captions.
2. UsetheLeft/Right Navigation buttonson
theremotetoselectthecaptionchannel
youwishtodisplay.
Closed Captions
Closed Captions
Analog Closed Captions
Digital Closed Captions
Digital Style
Off
CC1
CS1
TIP: Youcanalsoenable/disableaccessibilityfeaturesusingthe
includedremote.See
Using the Remote on page 10
*
Available only in English.
TIP: TheClosedCaptionsmenudoesnotappearwhenanHDMI
inputisselected.ClosedCaptionsareavailablewhenusingthe
tuneroracompositevideocable.

25
Changing the Appearance of Digital Closed Captions
Digitalclosedcaptionscanbedisplayedaccordingtoyourpreference.Seethe
diagramtotherightforanexplanationofthepartsoftheclosedcaptionarea.
Digital Style
To change the appearance of digital
Text Style
As Broadcast
closed captions:
Text Size
Large
Menu > Accessibility > Captions >
Text Color
Digital Style
Blue
Text Opacity
As Broadcast
Text Edges
As Broadcast
Use the Up/Down Navigation buttons on the
remote to highlight the setting you wish to
Text Edges Color As Broadcast
change, then use the Left/Right Navigation
Background Color As Broadcast
buttons to change the settings (choose
Background Opacity As Broadcast
"As Broadcast" to keep default settings):
Window Color As Broadcast
• Text Style — Changethefontusedforthe
Window Opacity As Broadcast
closedcaptioningtext.
• Text Size — Makethetextlargerorsmaller.
• Text Color — Changethecolorofthetext.
• Text Opacity — Changethetransparencyofthetext.
• Text Edges — Changetheeffectsattheedgesofthetext,suchasraisingthe
edgesoraddingdropshadows.
• Text Edges Color — Changethecolorofthetextedgeeffects.
• Background Color — Changethecolorofthebackgrounddirectlybehind
thetext.
• Background Opacity — Changethetransparencyofthebackgrounddirectly
behindthetext.
• Window Color — Changethecoloroftheclosedcaptioningbox.
• Window Opacity — Changetheopacityoftheclosedcaptioningbox.
Typical choices include:
• Opaque background, transparent window — Onlyastripofbackgroundappearsbehindthetext,expandingasthetextappears.
Thisisthetypical"AsBroadcast"mode.
• Opaque background and window in the same color — Whentextappears,theentirelinefillswithcoloratonce.
Intheexamplebelow,theclosedcaptiontextisgreen,thebackgroundisblack,andthewindowisred.
Tex t Background Window
CLOSEDCAPTIONTEXTSAMPLE

26
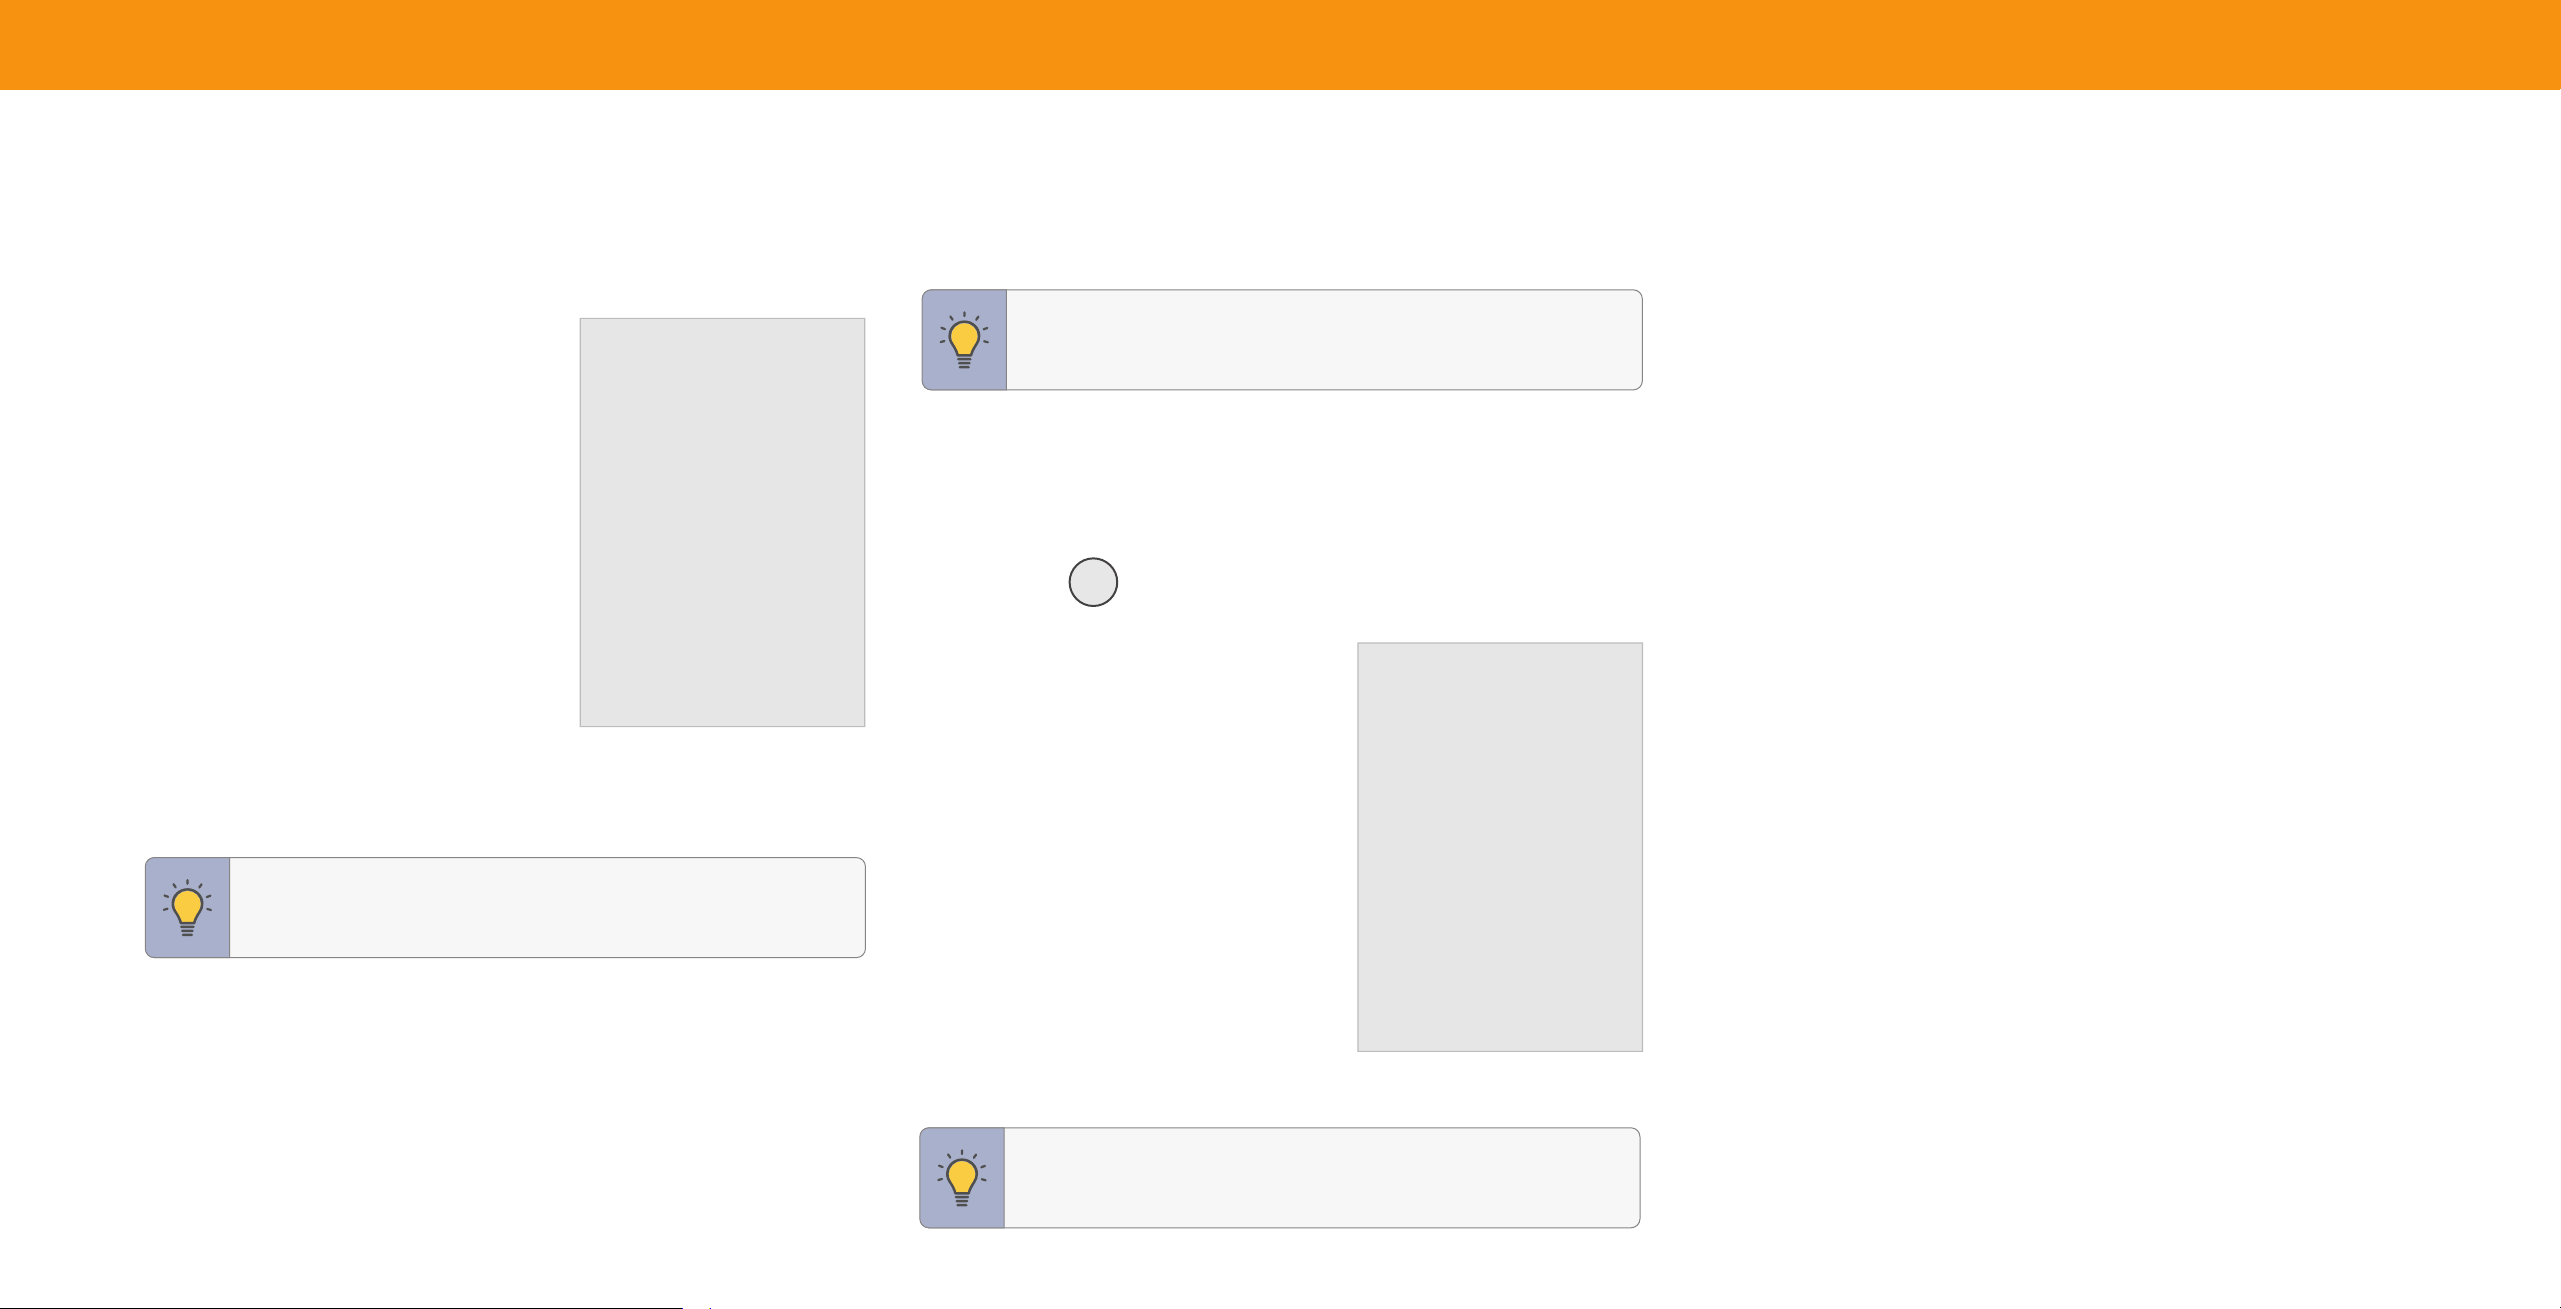
CHANGING THE SYSTEM SETTINGS
UsingtheSystemmenu,youcan:
• Changetheonscreenmenulanguage
• Setthetimezoneandlocalsettings
• NametheTV
• Nameaninput
• Hideinputsnotinuse
• Choosetheinputselectedatpoweron
• Adjustthepowermodesettings
• SettheUSBpowermode
• Turnthepowerindicatoronoroff
• Setuptimers
• SetasystemPINcode
• AdjustCECsettings
• Managepaireddevices
System
Menu Language
Time
TV Name
Input Name
Hide from Input List
Input at Power On
Power Mode
USB Power
Power Indicator
Timers
System PIN Code
English
Living Room TV
Automatic
Eco Mode
Always On
Off
Changing the On-Screen Menu Language
YourTVcandisplaytheonscreenmenuindifferentlanguages.
To change the on-screen menu language:
Menu Language
Menu > System > Menu Language
English
Highlightyourpreferredlanguage(English,
Español
Español,orFrançais)andpressOK.
Français
Setting the Time
ToensurethecorrecttimeisdisplayedwhenyoupresstheINFObutton,settheTV’s
timezone:
Menu > System > Time > Time Zone
To turn Daylight Saving Time on or o:
1. HighlightDaylightSavingTimeandpressOK.TheDaylight Saving Timemenu
isdisplayed.
2. ChooseOnifitiscurrentlyDaylightSavingsTime,OifitisStandardTime,or
AutotohavethesystemautomaticallydetectDaylightSavingsSettings.
To change Time Format:
HighlightTime FormatandusetheLeft/Right Navigationbuttonstochange
betweena12hourformator24hourformat.
27
Changing the TV Name
NamingyourTVhelpsdifferentiateitfromothercastdevicesyoumayhave
inyourhome.
To edit your TV name:
Menu > System > TV Name > Enter a Name
TV Name
Living Room TV
Renaming Devices on the Input Menu
Youcanrenametheinputstomakethemeasiertorecognize.Forexample,ifyou
haveaDVDplayerconnectedtotheHDMI1input,youcanrenamethatinputto
display“DVDPlayer.”
See
Changing the Input Source on page 12
.
To change the name of an input:
Menu > System > Input Name
To enter a custom name:
• HighlighttheName Input rowandpressOK.
• Enter your custom label using the on-screenkeyboardandpressOK.
TIP: Thecurrentinputyouareonwillbetheinputnameyouare
changing.Youcannotchangeeveryinput(i.e.WatchFree+and
SmartCastinputs).
To Hide an Input from the List:
Menu > System > Hide from Input List
• Highlighttheinputnameyouwouldliketohide.Hiddeninputswillnotbe
displayedintheinputlist.
• Use the Left/Right Navigation buttons to toggle from visible and hidden
(not all inputs can be hidden).
To Choose the Input selected at power on:
Menu > System > Input at Power On
• Highlighttheinputnameyouwouldliketohaveselectedatpoweron.
• SmartCast is the default setting.
Adjusting the Power Mode
YourTVissettoEco Modebydefault.WhentheTVispoweredoff,theEco Mode
settinguseslessthan0.5Wofpower.Quick Start Modeenablesyourdisplayto
poweronfasterandalsototurnonwhenpoweredfromanotherdevice(suchas
whenyouarecastingontotheTV).
WARNING:Pleasenotethatbychangingthissetting,theenergy
consumptionsrequiredtooperatethisdevicewillchange.
To switch between Eco Mode and Quick Start Mode:
Menu > System > Power Mode
HighlighteitherEco ModeorQuick Start ModeandpressOK.
TIP:IfyouwanttouseavoiceassistanttoturnyourTVon,make
sureQuick Start Modeisturnedon.

28
Using the USB Power Feature
USB Power
TheUSBportcanbeusedtochargedevices.
Always On
Thetwooptionsforthisfeatureare:
Off When TV Off
• Always On — Powerisalwaysavailable.
• O When TV O — Powerisonlyavailable
withtheTVison.
Turning the Power Indicator On or O
ThepowerindicatoronthefrontofyourTVnormallydoesnotglowwhentheTVis
on.Youcanchangethissettingifyoupreferthelighttobeon.
To turn the Power Indicator Light On or O:
Menu > System > Power Indicator > O/On
Setting Timers
Whenactivated,theTV’stimerwillturntheTV
Timers
offafterasetperiodoftime.
Sleep Timer Off
To setup a sleep timer:
Menu > System > Timers >
Sleep Timer
Auto Power Off
Blank Screen
10 Minutes
Usethe Left/Right Navigationbuttonson
theremotetohighlighttheperiodoftimeafter
whichyouwanttheTVtogotosleep:30,60,
90,120,or180minutes.Ifyoudon’twantthe
sleeptimertoactivate,changethesetting
toOff.
Setting the Auto Power O Feature
Tohelpsaveenergy,yourTVissetbydefaulttoturnoffafter10minuteswithouta
videooraudiosignal.Thisfeaturecanbedeactivated.
To set the Auto Power O feature:
Menu > System > Timers > Auto Power O > O
Using the Blank Screen Feature
TohelpsaveLEDlife,yourTVscreencanturnonoroffwhileaudioisstreaming.
To use the Blank Screen feature:
Menu > System > Timers > Blank Screen
To exitBlankScreen,pressanybuttonontheremote(excepttheVOLUMEand
MUTEbuttons).
29
Setting a System PIN Code
Youcansetasystempintolockcontentand
picturemodes,aswellaspreventaccidental
systemresets.ThefirsttimeyouselectSystem
PINcode,youwillneedtocreateaPIN.
To create a PIN:
Menu > System > System PIN Code >
Enter Your PIN > Save
System Pin Code
Change the PIN used for the System PIN.
NewPIN
ConfirmPIN
1
4
7
2
5
8
0
3
6
9
X
Cancel Save
WARNING: YouwillneedtoenteryourcurrentPINcodethenext
timeyouaccessthismenuorifyou'dliketochangeyourPIN.
Adjusting the CEC Settings
TheCECfunctiononyourTVenablesyoutocontroldevicesconnectedtoanHDMI
inputwiththeVIZIOTVremote,withoutanyprogramming
Menu > System > CEC
SelectasettingandthenpressOK.
• CEC — TouseCEC,youmustselectEnable.
• Device Discovery — TodetermineifyourdeviceisconnectedandsupportsCEC,
selectDeviceDiscoveryandthenpressOK.
CEC Audio Setup
ConnectyouraudiodevicetotheHDMI1(HDMIARC)inputontheTV.Onyouraudio
device,selecttheHDMIARCinput.
Using CEC, your VIZIO TV remote can control such features including
(depending on specic device):
• PowerOn/Off
• Volumeandmute
• Playandpause
Managing Mobile Devices
YourTVcanbepairedwithamobiledevice
soyoucaneasilycontrolyourTVacross
multipledevices.
To see a list of paired devices or unpair
a device:
Menu > System > Mobile Devices
Highlightadevicenametodeleteitand
pressOK.
Mobile Devices
Tom's Tablet
Frank's Phone
Work iPad
WARNING:NotallHDMIdevicessupportCEC.Seeyourdevice's
usermanualfordetails.

30
USING THE ADMIN & PRIVACY MENU
YoucanusetheTV’sAdmin & PrivacymenutorestoretheTVtoitsfactorydefault
settingsaswellasaccessotheradministrativesettings.
Using the ADMIN & PRIVACY menu, you can:
• Forcethesystemtopoweroffandon
Admin & Privacy
• Viewsysteminformation
Reboot TV
• Viewacustomerservicesupportcode
System Information
• Checkforsystemupdates
Support Code
Check for Updates
• ResettheTVtofactorysettings
Reset to Factory Settings
• Enableordisableviewingdata
Viewing Data On
• Personalizeadvertisingchoices
Advertising
VIZIO Privacy Policy
• ViewtheVIZIOPrivacyPolicy
Store Demo
Off
• Startorstopthestoredemomode
Performing a Reboot
ArebootforcestheTVtoturnoffthenonagain.
To retrieve your reboot the TV:
Menu > Admin & Privacy > Reboot TV
Viewing System Information
To view technical data and status information about your TV and network
connection:
Menu > Admin & Privacy > System Information
Accessing the Support Code
Retrieveacustomerservicesupportcode/PINoraccessbasicTVinformationto
assistinacustomerserviceinteraction.
To retrieve your support code:
Menu > Admin & Privacy > Support Code
Checking for System Updates
To check for a system update:
Menu > Admin & Privacy > Check for Updates
Ifanupdateisfound,theTVwillasktoconfirmtheupdate.Ifnoupdateisfound,the
screenwillnote"TheTVisuptodate."
Restoring the TV to Factory Default Settings
Alloftheonscreenmenusettingscanberesettothefactorydefaults.
WARNING:IfyourestoretheTVtothefactorydefaultsettings,all
changeyouhavemadetothesettingswillbelost.Thisincludes
anywirelessorpicturesettings.
To restore the TV to its factory default settings:
Menu > Admin & Privacy > Reset to Factory Settings
1. IfyousetasystemPINcode,enteritnow.
2. TheTVdisplays,“SelectResettorestoreallTVsettingstofactorydefaults."
3. HighlightResetandpressOK.
4. WaitfortheTVtoturnoff.TheTVwillturnbackonshortlyafterwardandthe
setupprocesswillbegin.

31
Viewing Data
To turn viewing data on or o:
Menu > Admin & Privacy > Viewing Data
UsetheLeft/Right NavigationbuttonstotogglefromOnorO
About Viewing Data
WHAT IS VIEWING DATA AND HOW IS IT COLLECTED?
VIZIOSmartTVshavebuiltinAutomatedContentRecognitiontechnologythatcan
understandviewingbehaviorandusageincludingaudioandvideoprogramming,
ads,gamingcontentandOTTappsinrealtime
ViewingDataisassociatedwithIPaddressfortheunitandauniquedevicenumber
weassign.Ifavailable,wemayassociateViewingDatawiththeVIZIOAccount
associatedwiththedevice,andemailorothercontactinformation(suchashashed/
encryptedversionsofyouremailaddressorotheridentifier).
WemayuseViewingDataalongwithinformationfromdatabrokersoradvertisers,
suchasdemographicdata,smartphonelocation,webhistory,andpurchasing
history,andusageinformationsuchashowmuchtimewasspentviewingcontent.
WHO DO WE SHARE VIEWING DATA WITH?
WeshareViewingDatawithauthorizeddatapartners,bylicensingViewingDatato
analyticscompanies,mediacompanies,advertisers,adagencies,andotheradtech
companieswhomeasureadeffectivenessoraidpersonalizationofads.
Ourauthorizedcloudserviceprovidersmayalsostorethisdataonandsolelyonour
behalfandfornootherpurpose.
HOW IS VIEWING DATA USED?
CreateorrecommendmorerelevantprogrammingonVIZIOservices,channels,and
onthirdpartywebsites,mobileapps,platformsanddevices.Improveourproducts
andservices. TailortheadvertisingyouseeonyourSmartTVoracrossvarious
VIZIOandthirdpartyplatformsordevices,includingotherdevicesassociatedwith
yourIPAddress,deviceID,emailaddressorVIZIOaccountonthebasisofyour
ViewingData.Measureandunderstandthereach,viewership,andeffectivenessof
advertising,andprovideadvertisinganalyticsandreporting.Helpouradpartners
reachthedesiredaudienceandunderstandandimprovetheiradcampaigns.
Forothermarketingpurposes,includingsendingyouemailsandtextmessages
aboutproducts,events,promotionsandoffersfromVIZIO,partnersoradvertisers
(whereyouhavegivenyourseparateconsenttoreceiveemailsandtextmessages).
WHAT DOES THIS MEAN TO ME?
YoucanchoosewhethertoenablethecollectionandusageofViewingDataforthese
purposesnoworatanytimeonyourDevicebydirectingyourremoteto:
Settings > Menu > Admin & Privacy > Viewing Data
YoucanturnofforresetvariousinterestbasedAdvertisingsettingsat:
Settings > Menu > Admin & Privacy > Advertising
MoreinformationaboutourViewingDataandAdvertisingpracticesisavailable
below,inourPrivacyPolicy,at
vizio.com,oralsoavailableunder:
Settings > Menu > Admin & Privacy
Managing Advertising Settings
Youradvertisingchoicescanbepersonalized.
Limited Ad Tracking
Whenenabled,TVAdIDwillnotbepassedorusedforpersonalizedadson
thisdevice.
To turn on or o:
Menu > Admin & Privacy > Advertising > Limited Ad Tracking
UsetheLeft/Right NavigationbuttonstotogglefromOnorO.
Reset TV Advertiser ID
AnIdentifierforAdvertising—canberesettoanewidentifieratanytime.
To reset the TV Advertiser ID:
Menu > Admin & Privacy > Advertising > Reset TV Advertiser ID
> OK
Ad Replacement
ReplacesStandardAdswithPersonalizedAdsinLinearTV.
To turn Ad Replacement on or o:
Menu > Admin & Privacy > Advertising > Ad Replacement
UsetheLeft/Right NavigationbuttonstotogglefromOnorO.
View VIZIO Privacy Policy
To view VIZIO Privacy Policy:
Menu > Admin & Privacy > VIZIO Privacy Policy > OK
Store Demo
To set to O, Demo 1, or Demo 2:
Menu > Admin & Privacy > Store Demo
User Manual
To display the User Manual on the screen:
Menu > Admin & Privacy > User Manual

32
USING THE INFO WINDOW
Afterswitchinginputsorchangingchannels
onthetuner,theInfowindowwilldisplay.
WhenusingtheTuner,youcanalsoaccess
thewindowbypressingtheOKbuttononthe
Current input or
remoteandthenselectingtheINFObuttonon
tuner channel Resolution Picture Aspect Audio Type
*
Network Name
thevirtualnumberpad.
TheInfowindowdisplays:
• TVname
• Currentinputorcurrenttunerchannel
TV Name
• Pictureresolution
• Pictureaspect
• Audiotype
• Networkname
• Time
Time
Living Room
5:00 PMStereo HDMI-1 Normal1080p
HomeWiFi
*When TV speakers are off and Dolby Atmos content is passed through the TV to a sound bar or other audio
device, the Dolby Atmos icon
will display with "Audio Out."

33
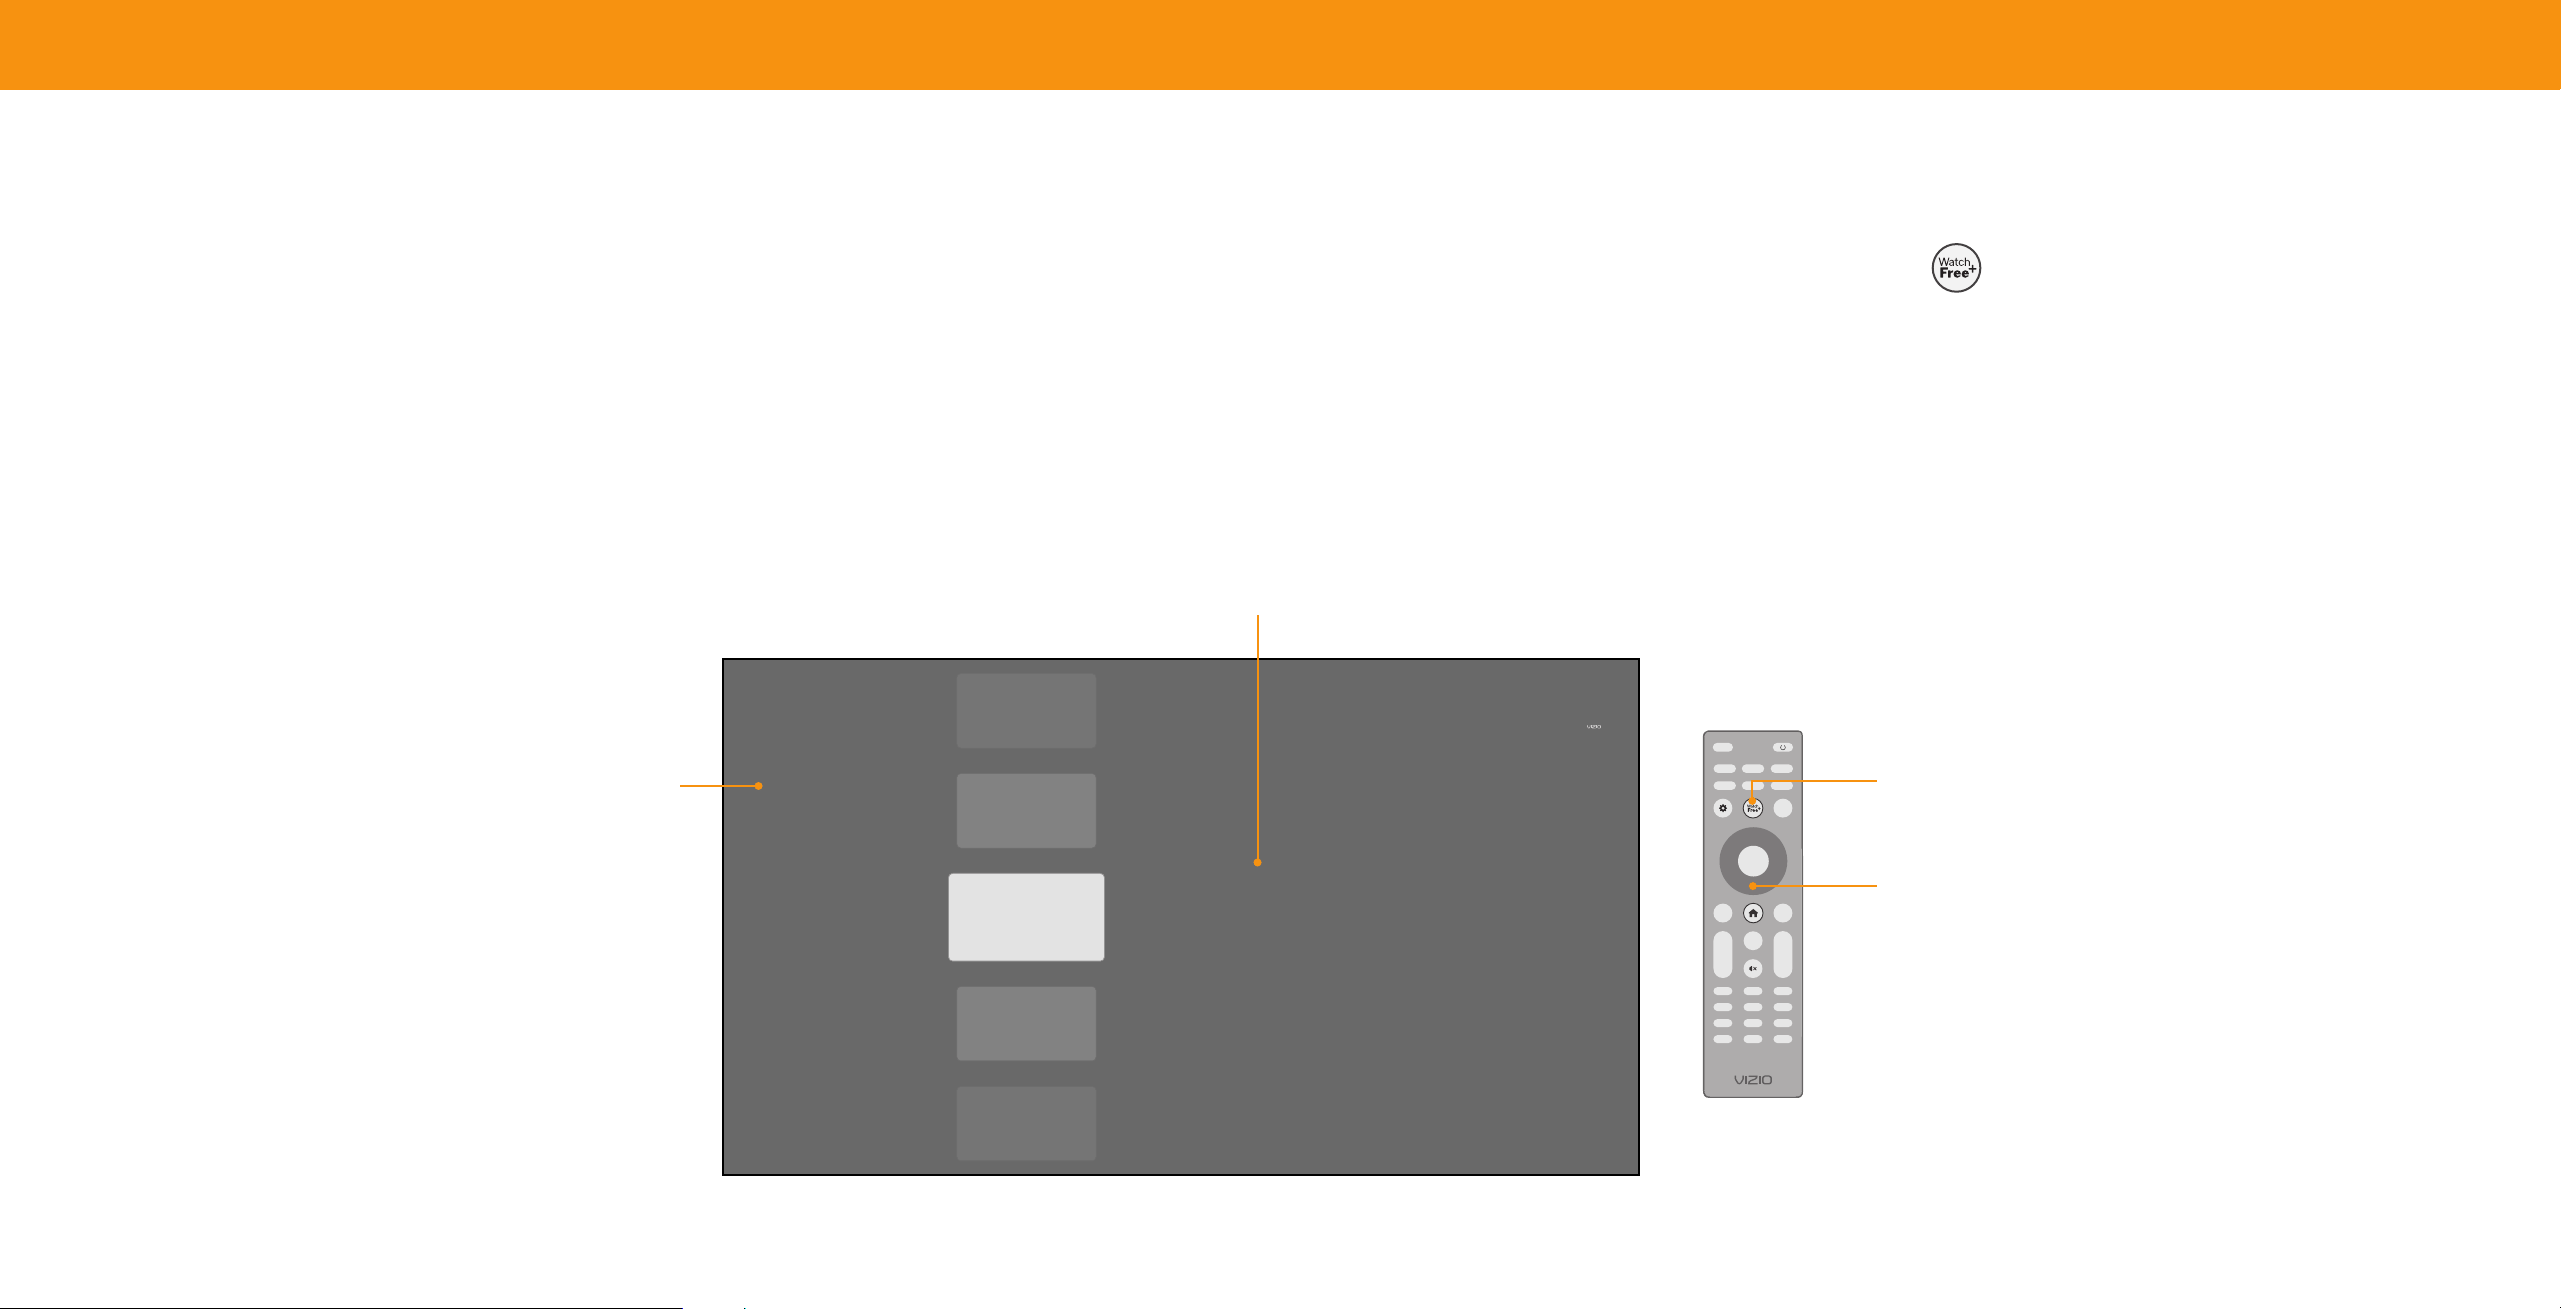
VIZIO Smart TV Platform
What is the VIZIO Smart TV Platform? What you can do with the VIZIO Smart TV Platform Controlling your TV with the VIZIO Mobile App
TheVIZIOSmartTVPlatformletsyoudiscover,stream,andcontrolyourcontentlike
neverbefore!Accesstopapps,likeNetflix,Disney+,andHulu,byusingtheremote
toeasilybrowseandlaunchcontentdirectlyfromthehomescreen.TheVIZIOSmart
TVhomescreenmakesfindingsomethingtowatcheasyandfun.
Launching the VIZIO Smart TV Platform
TobeginstreamingwiththeVIZIOSmartTVPlatform:
• Pressthe Home
buttononyourremote.
—or—
• SelectSmartCastfromthelistofinputs.
• Streamhighqualityentertainment.
• Launchtoptierappsdirectlyfromthehomescreen.
• AccessfreechannelstowatchwithoutasubscriptionthroughWatchFree+.
• Rearrangeappsonyourhomescreentomakeitjustthewayyoulikeit.
• MirroryourlaptopormobiledeviceontoyourTVthroughAppleAirplayor
Chromecastbuiltin.
• UseGoogleAssistant,Siri,andAlexaenableddevicesforhandsfreevoicecontrol.
KIDS CORNER
New Episodes Added
MOVIES
FREE CHANNELS
SHOWS
APPS
LEARN
EXTRAS
Marquee Content
Launchcontentwithoneclick
Search
FindTVshows,movies,andmore
Discover
Streaming Apps on your TV
INPUT
INFO
BACK CC
OK
VOL
PIC
CH
1 2 3
4 5 6
7 8
0
9
—
+
_
+
_
PREV
Quick Access to Popular Apps
SmartCast Home Button
New or popular content across multiple apps
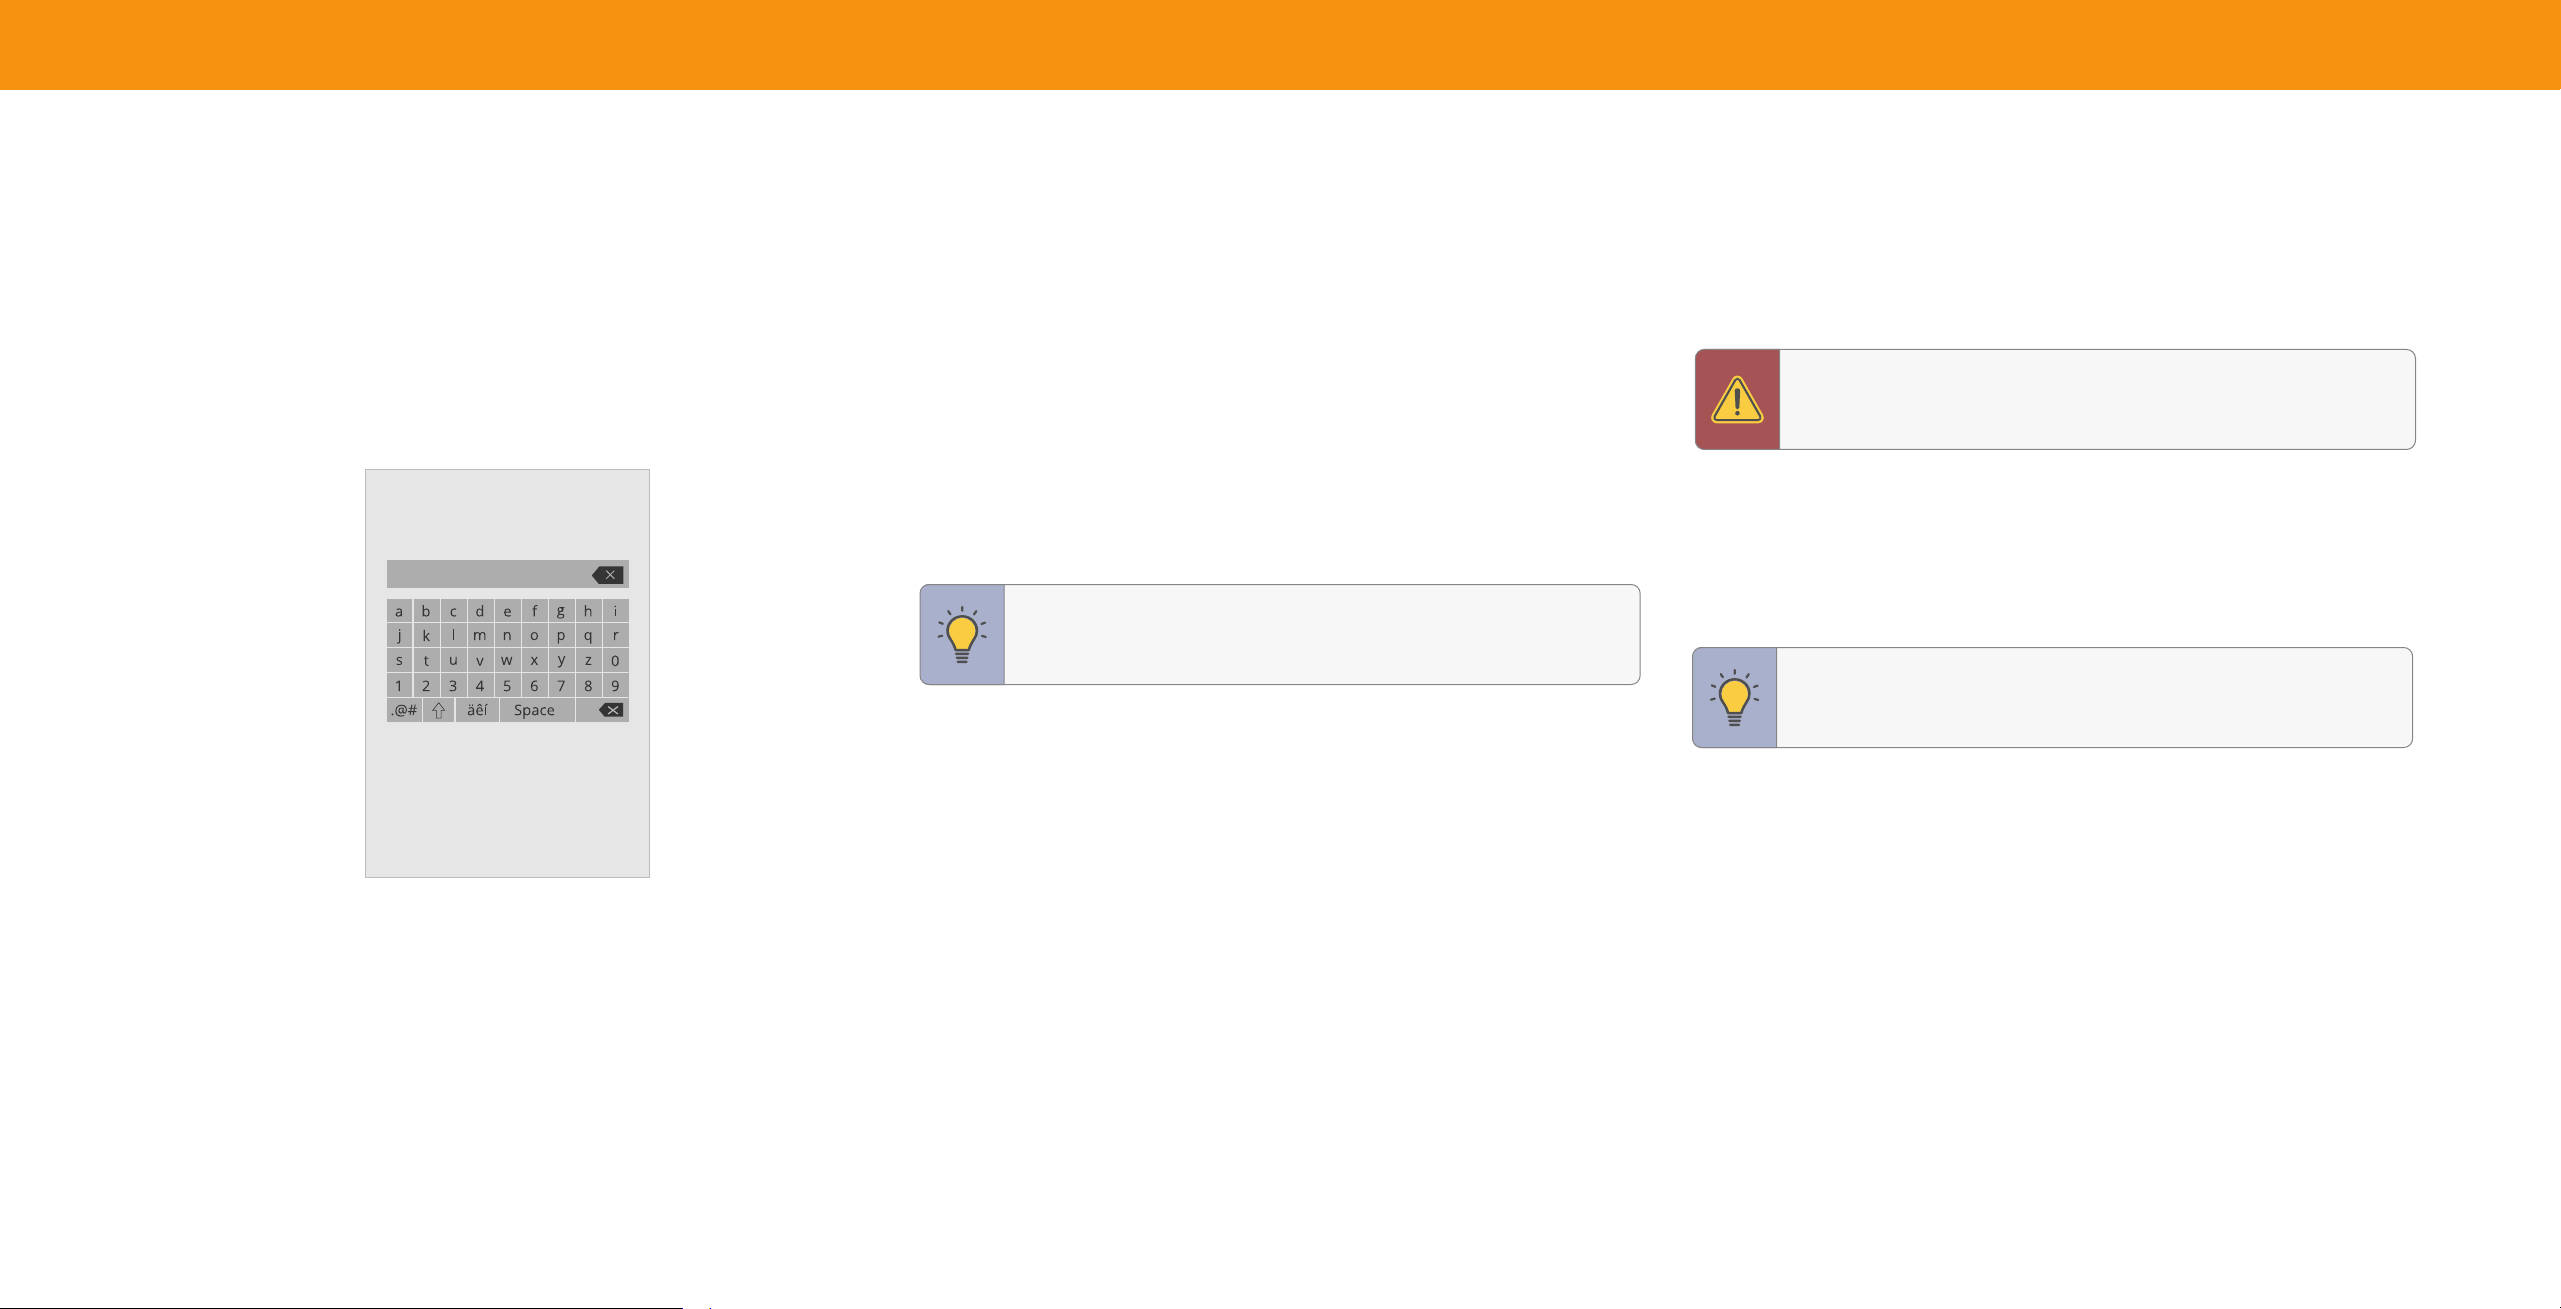
DownloadtheVIZIOMobileAppandturnyoursmartphoneintoaremotetocontrol
andconfigureyourTV.
With the VIZIO Mobile App, you can:
• Poweron/offdevices,play/pausecontent,andmodifyadvancedsettings,all
fromthepalmofyourhand.
• EasilyentertextontoyourTV/displayfromyourmobiledeviceusinga
fullkeyboard.
• Browseanddiscovermovies,TVshows,music,livestreams,andmore,across
multipleappsatonce.
• Accessaquicklookatshowratings,synopsis,cast,crew,clips,andotherdetails.
Scan to download.
ScanwithyourphonecameraorQRreader.
vizio.com/smartcastapp
Visit www.vizio.com/smartcastapp for minimum requirements.
34
.
WatchFree+
What is WatchFree+?
VIZIOWatchFree+takesyourcordcuttingentertainmentexperienceonestep
further!Withthesimplepressofabutton,enjoyfreestreamingTVwithhundredsof
liveTVchannelstochoosefrom–news,movies,sports,comedy,musicandmore.A
builtinonscreenguidemakesfindingsomethingtowatcheasierthanever.
And it’s all FREE—no fees, no subscriptions, or logins.
What you can do with WatchFree+
• StreamhundredsofliveTVchannelsabsolutelyfree–news,movies,sports,
comedy,musicandmore.
• Navigatethroughchannels,organizedbygenre,withanintuitiveonscreenguide.
• WatchthebestofinternetTV.
• Nologins,subscriptionsortransactionsfees.
Show Details
Find out show information.
On-Screen Guide
HundredsofliveTVandaudiochannelsorganizedbygenre.
RECENT
FAVORITES
FEATURED
MOVIES + TV
NEWS + OPINION
SPORTS
CRIME
HOME + DIY
GAME SHOWS +
REALIT Y
INTERE STS +
LIFESTYLE
KIDS + FAMILY
CHANNEL
250
Content Title, 2021
Lorem ipsum dolor sit amet, consectetuer adipiscing elit, sed diam nonummy nibh
euismod tincidunt ut laoreet dolore magna aliquam erat volutpat Ut wisi enim adis... .
30m
NOW • Program
NEXT in 22m • Program
NOW • Program
NOW • Program
NOW • Program
WatchFree+
How to Launch WatchFree+
TolaunchandbeginwatchingentertainmentofferedonWatchFree+:
• PresstheWatchFree+
buttononyourremote.
—or—
• SelectWatchFree+fromthelistofinputsorapprow.
INPUT
INFO
BACK CC
OK
VOL
PIC
CH
1 2 3
4 5 6
7 8
0
9
—
+
_
+
_
PREV
WatchFree+ Button
OK Button
Press the OK button to return to the
WatchFree+ on-screen guide. Use the up/down
Navigation buttons to scroll through the guide.

35
Playing USB Media
TheUSBMediaPlayerallowsyoutoconnectaUSBflashdrivetoyourTVandplay
music,video,orphotos.
Preparing Your USB Drive to Play USB Media
TodisplayUSBmedia,youmustfirstsaveyourvideosontoaUSBflashdrive:
• TheUSBflashdrivemustbeformattedasFAT32.
• FilesontheUSBflashdrivemustendinasupportedfileextension(.mp3,.jpg,
etc).
• Theplayerisnotdesignedtoplaymediafromexternalharddrives,MP3players,
cameras,orsmartphones.
Displaying USB Media
TodisplayyourUSBmedia:
1. ConnectyourUSBflashdrivetotheUSBportonthesideoftheTV.
2. TheTVwillrecognizetheUSB.UsetheNavigationKeysontheremotetoselect
thecontentyouwanttoplay.
—or—
3. SelectUSBfromthebottomstreamingiconsontheSmartCastHome page.
TIP: YoucandisplayyourphotosinFullscreen.Selectthephoto,
pressOK,thenhighlightFullscreenandpressOK.
Removing the USB Drive from the TV
TosafelyremoveyourUSBflashdrivefromtheTV:
1. TurntheTVo.
2. DisconnectyourUSBflashdrivefromtheUSBportonthesideoftheTV.
WARNING:DonotremovetheUSBdrivewhiletheTVison.Doing
somaydamagethedrive.
Note: The image shown here is for illustrative purposes only and may be subject to change. The actual
number of ports and their locations may vary, depending on the model.
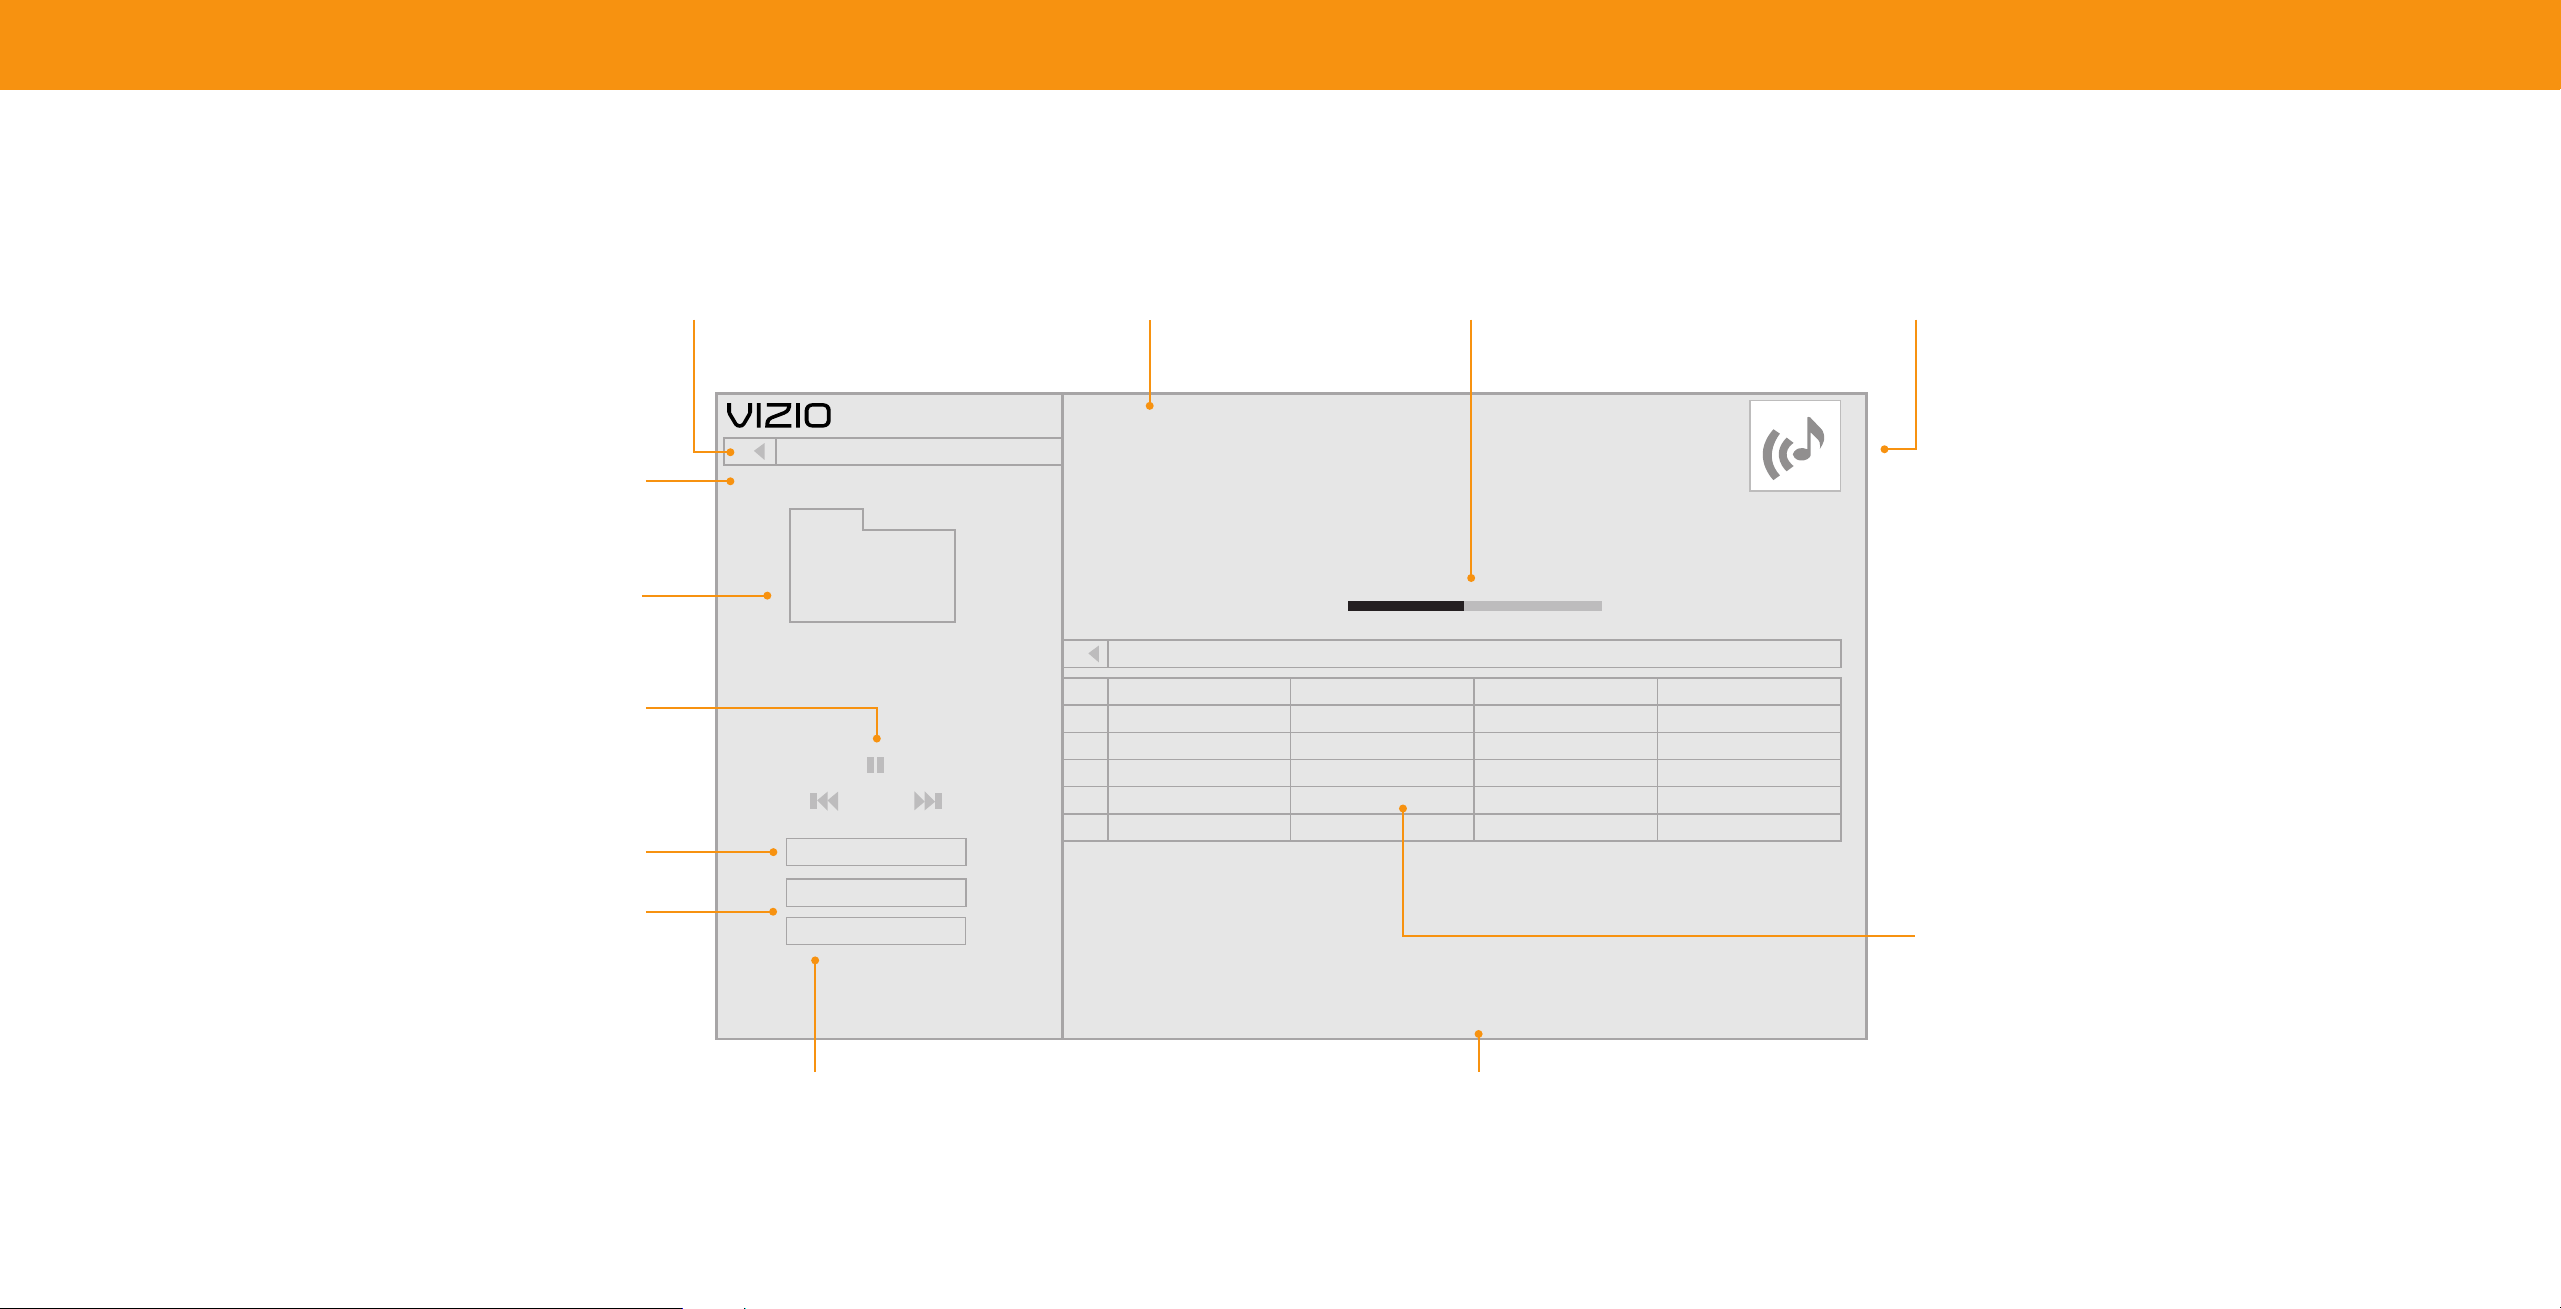
36
Playing USB Media: Music
Back Button
HighlightthisbuttonandpressOKto
returntothepreviousscreen.
Now Playing Information
Displayssongtitle,albumtitle,and
otherinformation.
Progress Bar
Displaysthedurationofthecurrently
playingsong.Thebarwilllengthenas
thesongprogresses.
Album Art
IfincludedontheUSBthumbdriveand
associatedwithyourmusic,thealbumart
willdisplayhere.
Connected Sources
DisplaysconnectedUSBdevices.
Current Folder
Playback Control
Toggle Music/Photos
Browse Photos
Artist A-Z
Music
All
#
1
2
3
4
5
MyFlashDrive\Audio\root\My Music
Name:
Title:
Artist:
Album:
Duration:
Director:
Genre:
Year:
Protected:
File Size:
02 Summer Nights
Summer Nights
DJ Sunset
Summer
00:03:11
-
Electro
Summer Nights DJ Sunset 3:11Summer
Artist: A - Z
View:
Sort:
Copyright:
2020
-
No
8.3M
1:50 3:11
Track
Album Artist Duration
Starry Summer Summer JCheesy 2:42
Mango Dream Ana Banana 8:46
Crystal Waters The Dash 4:21
Smooth Waves Rio Steve 7:58
Beach Mix
Beach Mix
Breezy Mix
USB1: MyFlashDrive
My Music
Folders
Page 1 of 1
Folder Contents/Playlist
Sort by Album/Artist/Track
Thisareadisplaysthecontentsofthecurrently
selectedfolder.Youcanbrowseamongfilesusing
theArrowandOKbuttonsontheremote.
View All or View Folders Page Information
Togglebetweenviewingallcontent IfyourUSBthumbdrivehasmorefilesthan
andonlyviewingfolders. canbedisplayedonasinglescreen,thepage
numberisdisplayedhere.
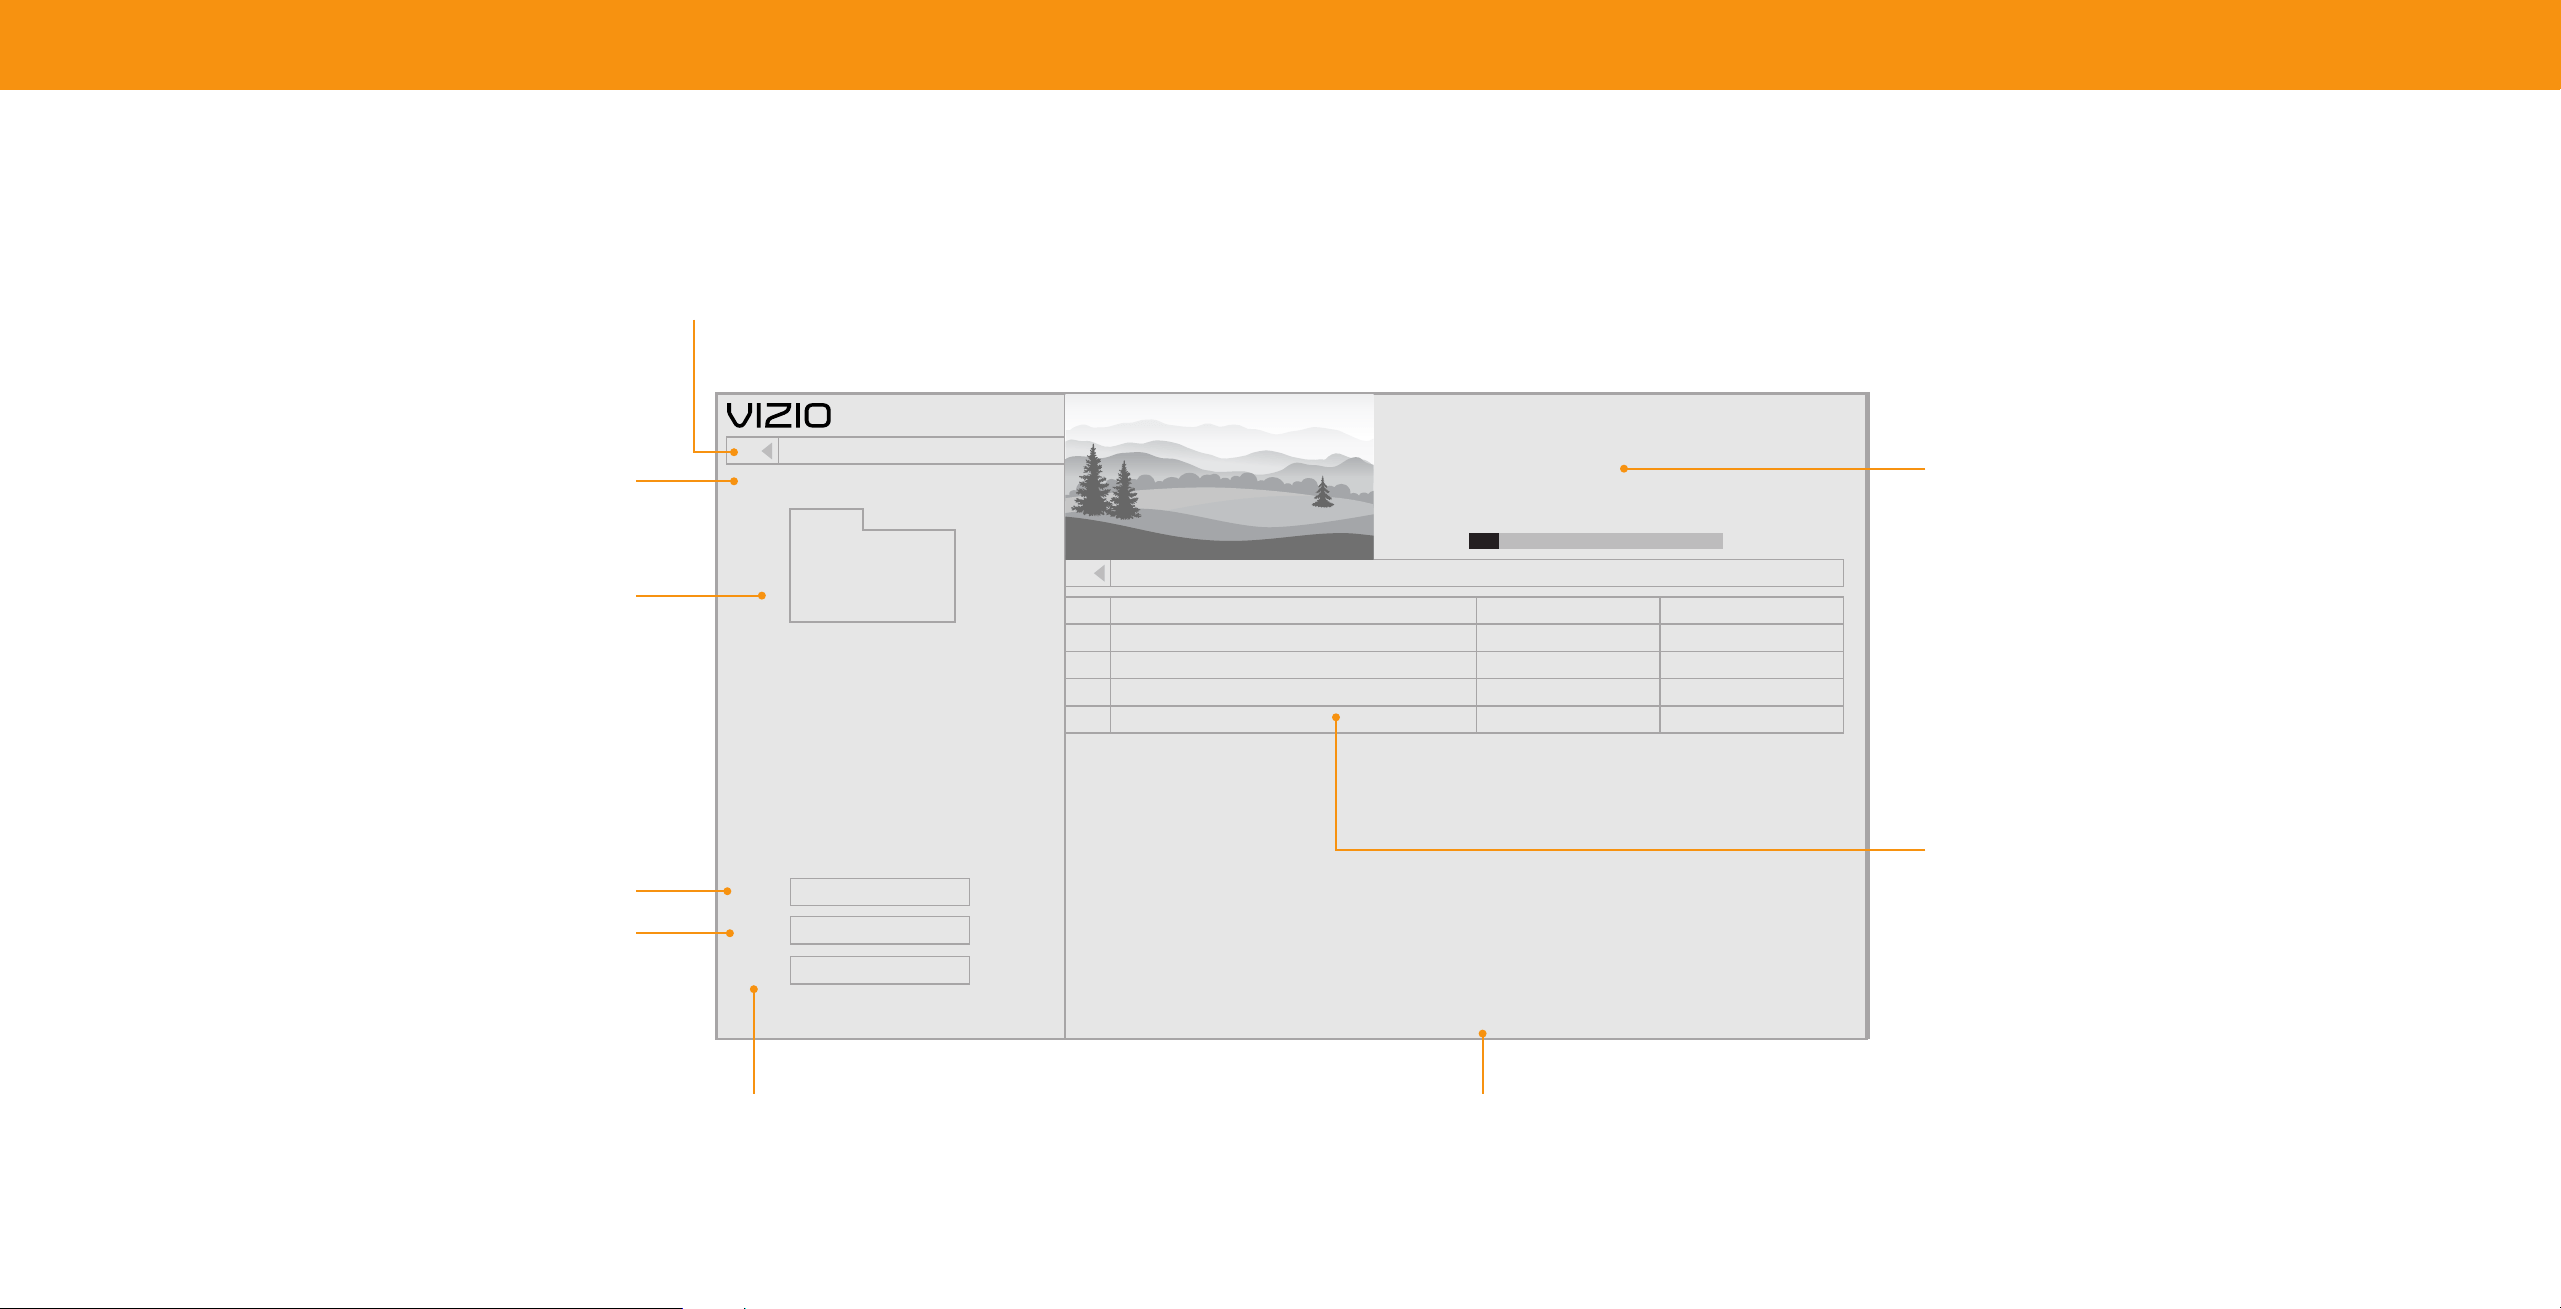
37
Playing USB Media: Video
Back Button
HighlightthisbuttonandpressOKto
returntothepreviousscreen.
Connected Sources
DisplaysconnectedUSBdevices.
Current Folder
Sort by Date or File Name
View All or View Folders
Togglebetweenviewingallcontent
andonlyviewingfolders.
Date New-Old
View:
Play
Sort:
Video
MyFlashDrive\Video\root\My Videos
Folders
Once
File
Date Duration
#
FamilyVacationCalifornia
PressOKforfullscreen.
FileName: Family Vacation - California
Resolution: 3840 x 2160
Audio: AAC
00:23:43
1
28thBirthdayParty
00:38:18
2
Korea2019
00:41:08
3
Sunny’sGraduation
00:25:32
4
Page 1 of 1
USB1: MyFlashDrive
My Videos
00:03:22 00:23:43
Preview Window
Folder Contents/Playlist
Thisareadisplaysthecontentsofthecurrently
selectedfolder.Youcanbrowseamongfilesusing
theArrowandOKbuttonsontheremote.
Play once or continuously Page Information
IfyourUSBthumbdrivehasmorefilesthan
canbedisplayedonasinglescreen,thepage
numberisdisplayedhere.
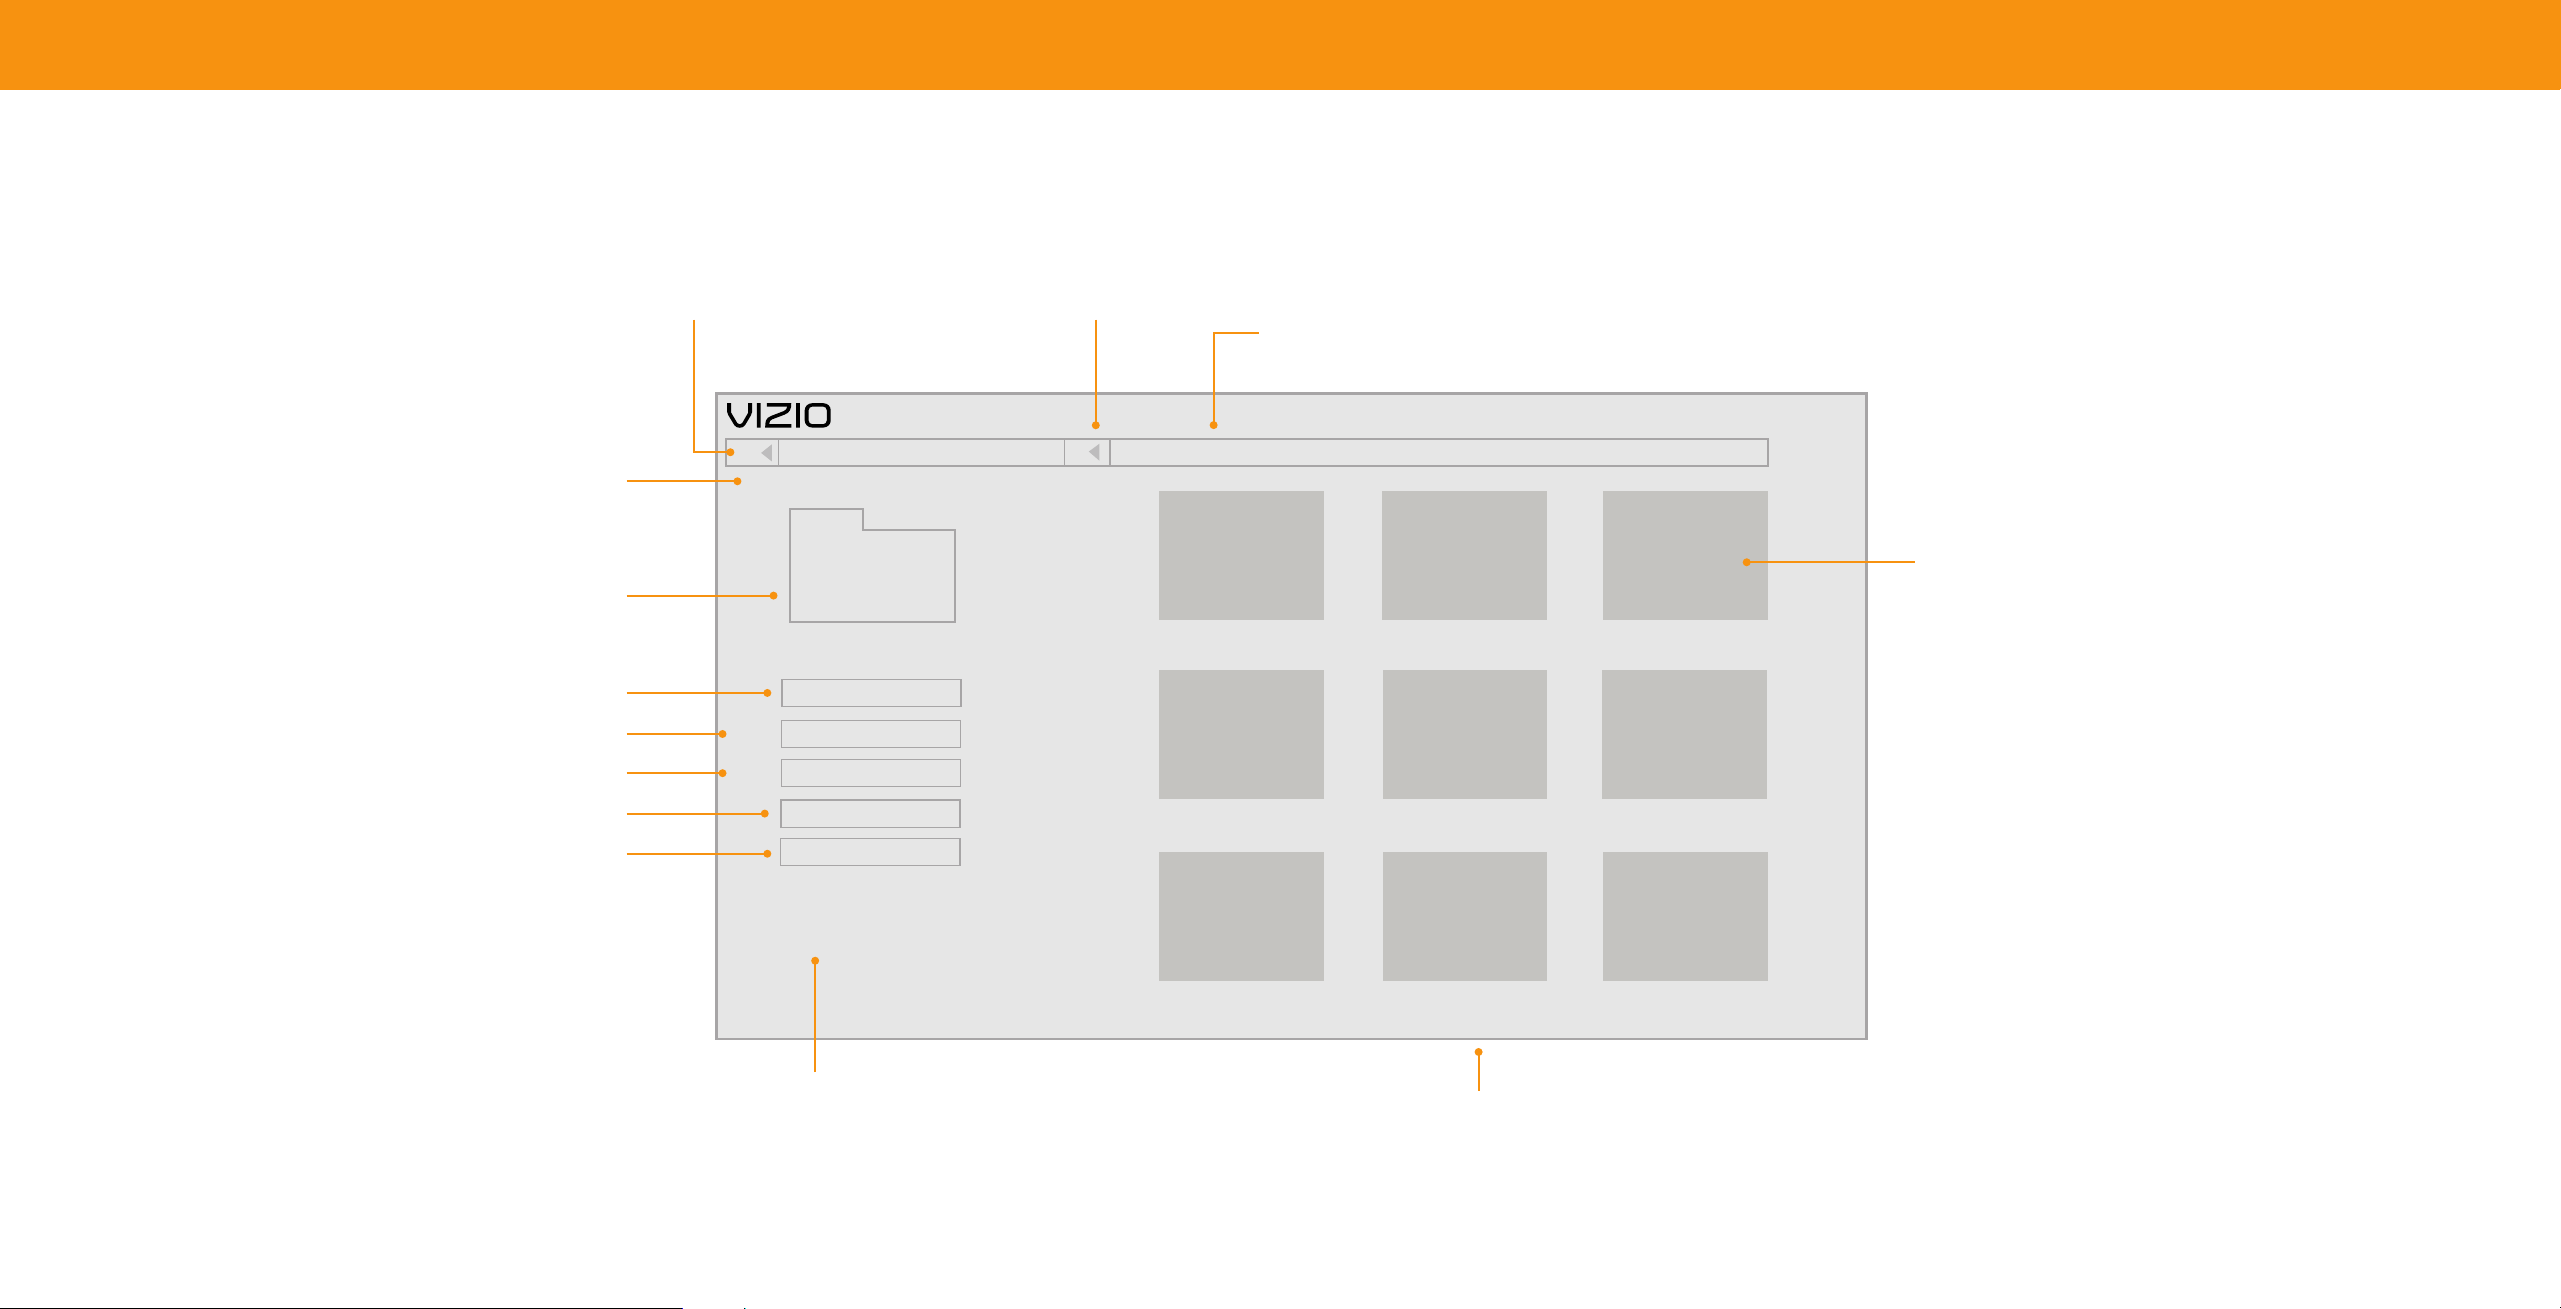
38
Playing USB Media: Photo
Back Button Back Button
HighlightthisbuttonandpressOKto HighlightandpressOKtoreturn
returntothepreviousscreen. toleftcolumn.
Current Folder
Displaysthefolderpath.
Connected Sources
DisplaysconnectedUSBdevices.
Current Folder
Start Fullscreen Slideshow
Sort by Date or File Name
View Thumbnails/Folders
Adjust Slideshow Settings
View Music Files
VIZIO_2GB\Photo\root
Photo
USB1: MyFlashDrive
root
A.jpg
Start Slideshow
Sort:
Name A-Z
View:
Thumbnails
Settings
D.jpg
Browse Music
File Name: D 1920x1080
Resolution: 1920x1080
Size:
1607270KB
G.jpg
Photo Information
Displaysthename,resolution,andfile
sizeoftheselectedphoto.
Folder Contents/Playlist
Thisareadisplaysthecontentsofthecurrently
selectedfolder.Youcanbrowseamongfilesusing
theArrowandOKbuttonsontheremote.
B.jpg C.jpg
E.jpg F.jpg
H.jpg I.jpg
Page 1 of 1
Page Information
IfyourUSBthumbdrivehasmorefilesthancan
bedisplayedonasinglescreen,thepagenumber
isdisplayedhere.
39
Product Registration and Technical Support
Get helpful tips and register your TV.
Scan with your phone camera or QR reader.
Customized Support
Get live assistance quickly with your information on hand.
Updates and Enhancements
Stay up-to-date with important product updates and notications.
News and Oers
Take advantage of the latest news and special oers from VIZIO.
More questions? Find answers at:
SUPPORT.VIZIO.COM

40
Help Topics
The remote is not responding.
• Make sure the batteries are properly inserted matching the -and+symbols.
• Replacethebatterieswithfreshones.
The TV displays “No Signal.”
• LookbehindyourTVtoseewhereyourdeviceisconnected.Therewillbeaname
nexttotheportyouareusing.
− Makesureyourdeviceispoweredon.
− PresstheINPUTbuttonontheTVremotecontrolandchoosetheportyour
deviceisconnectedtoo.
• IfyouareusingcableTVorantennaconnecteddirectlytotheTV,scanfor
channels.See
Scanning for TV Channels on page 21
.
There is no power..
• EnsurethepowercableissecurelyattachedtotheTVandoutlet.(Somemodels
donothaveadetachablepowercable).
• EnsuretheoutlettheTVisconnectedtoisworking.Youmaywanttoconnect
anotherdevicetotheoutlettoensurethedevicesarereceivingpower.
• PressthePower/StandbybuttonontheremoteoronthebottomoftheTVto
turntheTVon.
The power is on, but there is no image on the screen.
• Ensurealldevicesareconnectedsecurelyandcorrectly.Seeyourdevice’suser
manualfordetails.
• EnsureyourTVispoweringon.WhenyourTVpowerson,alightontheremote
sensorwillturnon.See
Front Panel on page 7
.
• PresstheMENUkeyonyourremotecontrol.Ifyoucanseethemenu,tryto
adjustBrightness,Contrast,orBacklight.See
Adjusting the Picture Settings on
page 13
.
• PresstheINPUTbuttonontheremotetoselectadifferentinputsource.
The sound is at or dialog is not audible.
• TurnoffVolumeLeveling.See
Adjusting the Audio Settings on page 19.
Where do I nd information on the accessibility features of this product
and other VIZIO products?
• Please visit vizio.com/accessibility,
• Email us at: Accessibility@vizio.com, or
• Give us a call at 1-877-698-4746.
How do I stream apps like Netix to my VIZIO SmartCast TV?
• PopularappsarelocatedontheSmartCastHomescreen,soyoucansimply
navigatetotheapprowonyourSmartCastTVtostartstreaming.
• YoucanalsouseAppleAirPlay2orChromecastbuiltin
™
tostreamcontentfrom
yourdevicedirectlytoyourSmartCastTV.Formoreinformation,
pleasevisit
:
− VIZIO.com/Apple
− VIZIO.com/Google
The colors on the TV don’t look right.
• AdjusttheColorandTintsettingsinthePicturemenu.See
Adjusting the
Picture Settings on page 13.
• Selectapresetpicturemode.VIZIOrecommendsselectingCalibrated.
• Checkallcablestoensuretheyaresecurelyattached.
The image quality is not good.
• Imagequalitycanverydependingonpersonalpreferenceandenvironmental
factorslikehowmuchlightisinaroom.YourTVincludesavarietyofpicture
settingsandpresetpicturemodesthatcanbeadjustedtocalibratethisTVto
yourpreference.See
Adjusting the Picture Settings on page 13.
• Imagequalitycanvarydependingonwhatprogramyouarewatching,and
whatdeviceorappyouareusingtowatchit.Forthebestpicturequality,
VIZIOrecommendswatchingHDorUHDcontent.Youcancontactyourdevice
manufacturerorappproviderformoreinformationabouttheirvideoplayback
quality.
• Forthebestimagequality,viewhighdefinitionprogramsusingdigitalsources.
ConnectyourdeviceswithHDMIcables.
• Ifyouareusinganantenna,thesignalstrengthofthechannelmaybelow.
EnsureyourantennaisconnectedsecurelytotheTVandmovetheantenna
aroundtheroomorclosetoawindowforthebestsignal.
The picture is distorted.
• MovetheTVawayfromelectricalappliances,cars,andfluorescentlights.
• Ensureallcablesaresecurelyattached.
The TV image does not cover the entire screen.
• IfyouareusingTV,AV,orComponentwith480iinput,gotoMenu > Picture >
Picture Aspect to adjust the Aspect Ratio.
The TV has pixels (dots) that are always dark.
• YourHDTVisprecisionmanufacturedusinganextremelyhighlevelof
technology.However,sometimespixelsmaynotdisplaycorrectly.Thesetypes
ofoccurrencesareinherenttothistypeofproductanddonotconstitutea
defectiveproduct.
The buttons on the remote aren’t working.
• Ensureyouareonlypressingonebuttonatatime.
• PointtheremotedirectlyattheTVwhenpressingabutton.
• Replacetheremotebatterieswithnewones.See
Replacing the Batteries on
page 10
.
• RemoveanyobstaclesthatmaybeblockingtheremotesensorontheTV.

41
Help Topics
There is no sound. How do I exit Demo Mode?
• PressVolumeUpontheremotecontrol.
• PresstheMUTEbuttonontheremotetoensuremuteisoff.
• ChecktheaudiosettingstoensureyourTVspeakersaresettoOn.
See
Adjusting the Audio Settings on page 19
.
• Checktheaudioconnectionsofexternaldevices(Blurayplayer,gameconsole,
cable/satellitebox)thatareconnectedtotheTV.
• Ifyouareusinganantenna,thesignalstrengthofthechannelmaybelow.
EnsureyourantennaisconnectedsecurelytotheTVandmovetheantenna
aroundtheroomorclosetoawindowforthebestsignal.
• SeteARCtoOffanduseARCmode.
How do I download the VIZIO Mobile App?
• MakesureyourphoneortabletisconnectedtoaWiFinetwork.Openabrowser
onyourphoneortablet.
• Navigateto
vizio.com/smartcastappandfollowtheonscreeninstructionsto
downloadtheVIZIOMobileApp.
How do I change the Inputs?
• PresstheINPUTbuttononthebackoftheTVtocyclethroughtheInputs.
• PresstheINPUTbuttononthebasicremotetocyclethroughtheInputs.
• MakesuretheVIZIOSmartCastMobileappisinstalledonyourphoneortablet.
OpentheVIZIOSmartCastMobileapp.TapontheDevicelistandselectyourTV.
TapontheInputkeyandselecttheInputofyourchoice.
How do I connect to my Wi-Fi network?
• OnyourTVremote,presstheMENUbuttonthengotoNetwork>Selectyour
WiFiname>Enterpassword
• PressandholdtheINPUTbuttononthebackoftheTVtoexitthedemomode.
How do I watch Cable/Antenna TV channels?
• Ifyousubscribetocableorsatellite,simplyconnectanHDMIcable(not
included)tothereceiver.
• Ifyouuseexternalantennastowatchlocalbroadcastchannels,useacoaxial
cabletoconnect.
Some of my Channels are missing.
• PresstheMENUbuttononyourTVremoteandselectthechannelsoption.Then
selectFind Channels.
• OpentheVIZIOMobileapponyourphoneortablet.
• Click on:MenuTab>SmartCastDevices>YourTV/DeviceName>Channels>
FindChannels.
How do I disable/enable Viewing Data?
• PresstheMENUbuttononyourremoteandselectAdmin&Privacy.Thenselect
ViewingDatatoturnthefeatureOnorO.
The television will not turn on using Alexa or Google Assistant.
• EnsurethetelevisionisinQuickStartMode.
• TaponMenu>System>PowerMode>QuickStart.
How do I know I am getting 4K resolution or HDR content such as Dolby
Vision?
• Asyouarewatchingcontentonthetelevision,presstheINFObuttononthe
remoteorVIZIOSmartCastMobileapp.Youwillseethecurrentresolutionbeing
displayedalongwiththeversionofvideo.
• HDRwillshowasaDolbyVisionicon,HDR10orHLG.

42
-
Specications
V705x J01
Size 70"
Viewable Area 69.5"
PRODUCT DIMENSIONS
Dimensions w/ Stand
62.54"Wx37.76"Hx13.04"D
1588.6x959x331.2mm
Dimensions w/o Stand
62.54"Wx35.04"Hx3.46"D
1588.6x890x87.9mm
Weight w/ Stand 50.27lb(22.8kg)
Weight w/o Stand 49.3lb(22.36kg)
Mounting Screw Size M8x12mm
Hole Pattern 400mmx200mm
# of Screws (not included) 4
PICTURE QUALITY
Maximum Resolution 3840x2160(UHD)
LCD Backlight FullArrayLED
INPUTS / OUTPUTS
HDMI Inputs 3
Ethernet Input 1
RF Antenna Input 1
USB 1
Audio Output
HDMIeARC,AnalogStereoOut,
DigitalOptical
OTHER
Remote Control Type IRRemote
Power Consumption 132.22W
Standby Power <0.5W
Voltage 120V
OSD Language English,French,Spanish
UL,FCCClassB,HDMI(CEC,
Certication ARC),DTS:X,DTSVirtual:X,
DolbyAudio,DolbyVision

43
Regulatory Information
FCC Class B Radio Interference Statement
ThisdevicecomplieswithPart15oftheFCCRules.Operationissubjecttothe
followingtwoconditions:(1)thisdevicemaynotcauseharmfulinterference,and(2)
thisdevicemustacceptanyinterferencereceived,includinginterferencethatmay
causeundesiredoperation.
NOTE:Thisequipmenthasbeentestedandfoundtocomplywiththelimitsfora
ClassBdigitaldevice,pursuanttoPart15oftheFCCRules.Theselimitsaredesigned
toprovidereasonableprotectionagainstharmfulinterferenceinaresidential
installation.Thisequipmentgenerates,usesandcanradiateradiofrequency
energy,andifnotinstalledandusedinaccordancewiththeinstructions,maycause
harmfulinterferencetoradiocommunications.However,thereisnoguaranteethat
interferencewillnotoccurinaparticularinstallation.Ifthisequipmentdoescause
harmfulinterferencetoradioortelevisionreception,whichcanbedetermined
byturningtheequipmentoffandon,theuserisencouragedtotrytocorrectthe
interferencebyoneormoreofthefollowingmeasures:
• Reorientorrelocatethereceivingantenna.
• Increasetheseparationbetweentheequipmentandreceiver.
• Connecttheequipmentintoanoutletonacircuitdifferentfromthattowhich
thereceiverisconnected.
• Consultthedealeroranexperiencedradio/TVtechnicianforhelp.
FCC Caution
Changesormodificationsnotexpresslyapprovedbythepartyresponsiblefor
compliancecouldvoidtheuser’sauthoritytooperatethisequipment.
Notice
Thechangesormodificationsnotexpresslyapprovedbythepartyresponsiblefor
compliancecouldvoidtheuser’sauthoritytooperatetheequipment.
ShieldedinterfacecablesandACpowercord,ifany,mustbeusedinordertocomply
withtheemissionlimits.
ThemanufacturerisnotresponsibleforanyradioorTVinterferencecausedby
unauthorizedmodificationtothisequipment.Itistheresponsibilitiesoftheuserto
correctsuchinterference.
Thistransmittermustnotbecolocatedoroperatinginconjunctionwithanyother
antennaortransmitter.
Operationsinthe5GHzproductsarerestrictedtoindoorusageonly.
ThisequipmentcomplieswithFCC/ISEDradiationexposurelimitssetforthforan
uncontrolledenvironment.Thisequipmentshouldbeinstalledandoperatedwith
minimumdistance20cmbetweentheradiator&yourbody.
Canada Notice for License-Exempt Radio Apparatus
ThisdevicecomplieswithIndustryCanada’slicenseexemptRSSs.Operationis
subjecttothefollowingtwoconditions:(1)Thisdevicemaynotcauseharmful
interference,and(2)thisdevicemustacceptanyinterferencereceived,including
interferencethatmaycauseundesiredoperation.
Thisdeviceoperatesonanoprotectionnointerferencebasis.Shouldtheuserseek
toobtainprotectionfromotherradioservicesoperatinginthesameTVbands,a
radiolicenseisrequired.PleaseconsultIndustryCanada’sdocumentCPC2128,
OptionalLicensingforLowPowerRadioApparatusintheTVBands,fordetails.
CetappareilestconformeauxCNR exemptsdelicenced’IndustrieCanada.Son
fonctionnementestsujetauxdeuxconditionssuivantes:
1. ledispositifnedoitpasproduiredebrouillagepréjudiciable,et
2. cedispositifdoitacceptertoutbrouillagereçu,ycomprisunbrouillage
susceptibledeprovoquerunfonctionnementindésirable
Cetappareilfonctionnesurunebasesansprotectionetsansinterférence.Dans
lecasoùl’utilisateurchercheàobtenirdelaprotectiondesautresservicesde
radiofonctionnantsurlesmêmesbandesTV,aucunelicenseestrequise.Veuillez
consulterledocumentCPC2128d’IndustrieCanada,Licenseoptionnellepourles
appareilsradiodefaiblepuissance,pourplusdedétails.
IndustryCanadaClassBemissioncompliancestatement
ThisClassBdigitalapparatuscomplieswithCanadianICES003.Cetappareil
numériquedelaclasseBestconformeàlanormeNMB003duCanada.

44
Limited Warranty
UNITED STATES AND CANADA
By using this VIZIO product, you accept all VIZIO Terms and Conditions,
including all the Terms of Warranty, BINDING ARBITRATION AGREEMENT
(for U.S. Residents Only), and Class Action Waiver.Ifyoudonotagreetothe
termsofthiswarranty,donotusetheVIZIOproductand,withinthirty(30)days
ofthedateofpurchase,returnitforarefundtotheauthorizedretailerwhere
youpurchasedit.
If you live in the U.S., you have the right to opt out of the
Arbitration Agreement and Class Action Waiver within 60 calendar days of
your purchase. Pleaserefertothefullsection"BindingArbitrationAgreement;
ClassActionWaiver"belowformoredetailsandinstructionsforoptout.Full
TermsandConditionsmaybeviewedatv
izio.com/en/terms/termsofservice.
How Long This Warranty Lasts
Fornoncommercialuse,VIZIOwarrantstheproductonthetermssetforth
belowforone(1)yearfromthedateoforiginalpurchase.Forcommercialuse,
VIZIOwarrantsthisproductonthetermssetforthbelowforninety(90)days
fromthedateoforiginalpurchase.
What This Warranty Covers
VIZIOwarrantstheproductagainstdefectsinmaterialsandworkmanship
whentheproductisusednormallyinaccordancewithVIZIO’suserguidesand
manuals.
Exceptwhererestrictedbylaw,thiswarrantyappliesonlytotheoriginal
purchaserofanewproduct.Thepurchasemusthavebeenmadefroman
authorizedretailerintheUnitedStates(includingPuertoRico)orCanada.The
productmustalsobelocatedinthecountrywhereitwaspurchasedatthetime
ofwarrantyservice.
Zero Bright Pixel Defect Guarantee (Displays Only)
Yourproductmayqualifyforawarrantyagainst“zerobrightpixel”defectsfor
thedurationofthewarrantyonselectnewproductpurchases.Todetermineif
thisguaranteeappliestoyourproduct,refertothemodel’sproductinformation
pageat
www.vizio.com,lookforthe“zerobrightpixel”guaranteeonthe
box,orcontactVIZIOTechnicalSupportattheemailaddressortelephone
numberbelow.
How to Get Service
Beforeobtainingwarrantyservice,youmayvisitwww.vizio.comforadditional
helpandtroubleshooting.Toobtainwarrantyservice,contactVIZIOCustomer
Supportbygoingto
support.vizio.comandselectingContact Us.
Your Obligations Before Service
YoumustobtainpreauthorizationbeforesendingyourproducttoaVIZIO
servicecenter. Youmayberequiredtosupplyapurchasereceipt(orcopy)to
showthattheproductiswithinthewarrantyperiod.Whenyoureturnaproduct
toaVIZIOservicecenter,youmustshiptheproductinitsoriginalpackagingor
inpackagingthataordsanequaldegreeofprotection.VIZIOTechnicalSupport
willprovideinstructionsforpackingandshippingtheproducttotheVIZIO
servicecenter.ALL USER DATA AND DOWNLOADED APPLICATIONS STORED
ON A PRODUCT WILL BE DELETED IN THE COURSE OF SOME INHOME AND
ALLSHIPINWARRANTYSERVICE.Ifthisoccurs,yourproductwillberestored
toitsoriginalstate.Youwillberesponsibleforrestoringallapplicableuserdata
anddownloadedapplications.Recoveryandreinstallationofuserdataand
downloadedapplicationsisnotcoveredunderthiswarranty.Inordertoprotect
yourpersonalinformation,VIZIOrecommendsthatyoualwaysclearallpersonal
informationfromtheproductbeforeitisserviced,regardlessoftheservicer.
VIZIO’s Responsibilities
IfVIZIOdeterminesthataproductiscoveredbythiswarranty,VIZIOwill(atits
option)repairorreplaceit,orrefundthepurchasepricetoyou.Therewillbeno
chargeforpartsorlaborduringthewarrantyperiod.Replacementpartsmaybe
neworrecertiedatVIZIO’soptionandsolediscretion.Replacementpartsand
VIZIO’slaborarewarrantedfortheremainingportionoftheoriginalwarrantyor
forninety(90)daysfromwarrantyservice,whicheverislonger.
Types of Service
TVsthatare32inchesorlargerwillusuallybeservicedinhome.Inhome
servicerequirescompleteandeasyaccesstotheproductanddoesnotinclude
deinstallationorreinstallationoftheproduct.Inhomeserviceissubjectto
availability.VIZIOwillprovideotherserviceoptionswheninhomeserviceis
notavailable.AllotherVIZIOproductsmustbesenttoaVIZIOservicecenterto
obtainwarrantyservice.VIZIOisnotresponsiblefortransportationcoststothe
servicecenter,butVIZIOwillcoverreturnshippingtothecustomer.
What This Warranty Does Not Cover
Thiswarrantydoesnotcover:(a)cosmeticdamage;(b)normalwearand
tear;(c)improperoperation;(d)impropervoltagesupplyorpowersurges;
(e)signalissues;(f)damagefromshipping;(g)actsofGod;(h)customer
misuse,modicationsoradjustments;(i)installation,setup,orrepairs
attemptedbyanyoneotherthanbyaVIZIOauthorizedservicecenter;(j)
productswithunreadableorremovedserialnumbers;(k)productsrequiring
routinemaintenance;or(l)productssold“ASIS”, “CLEARANCE”, “FACTORY
RECERTIFIED”,orbyanonauthorizedreseller.
What to Do If You Are Not Satised With Service
IfyoufeelVIZIOhasnotmetitsobligationsunderthiswarranty,youmay
attempttoresolvetheissueinformallywithVIZIO.Ifyouareunabletoresolve
theissueinformallyandwishtoleaformalclaimagainstVIZIO,andifyouarea
residentoftheUnitedStates,youmustsubmityourclaimtobindingarbitration
accordingtotheproceduresdescribedbelow,unlessanexceptionapplies.
Submittingaclaimtobindingarbitrationmeansthatyoudonothavetheright
tohaveyourclaimheardbyajudgeorjury.Insteadyourclaimwillbeheardbya
neutralarbitrator.
Binding Arbitration Agreement; Class Action Waiver (U.S. Residents Only)
UNLESS YOU HAVE BROUGHT AN ELIGIBLE CLAIM IN SMALL CLAIMS
COURT OR HAVE OPTED OUT AS DESCRIBED BELOW, ANY CONTROVERSY
OR CLAIM RELATING IN ANY WAY TO YOUR VIZIO PRODUCT, INCLUDING
ANY CONTROVERSY OR CLAIM ARISING OUT OF OR RELATING TO THIS
WARRANTY, A BREACH OF THIS WARRANTY, OR THE VIZIO PRODUCT’S
SALE, CONDITION OR PERFORMANCE, WILL BE SETTLED BY BINDING
ARBITRATION ADMINISTERED BY THE AMERICAN ARBITRATION
ASSOCIATION AND CONDUCTED BY A SINGLE ARBITRATOR APPOINTED
BY THE AMERICAN ARBITRATION ASSOCIATION, IN ACCORDANCE WITH
ITS COMMERCIAL ARBITRATION RULES AND ITS SUPPLEMENTARY
PROCEDURES FOR CONSUMER-RELATED DISPUTES. Youmaylearnmore
abouttheAmericanArbitrationAssociationanditsrulesforarbitrationby
visitingwww.adr.org.Sincethiswarrantyconcernsatransactionininterstateor
internationalcommerce,theFederalArbitrationActwillapply.
Thelingfeestobeginandcarryoutarbitrationwillbesharedbetweenyouand
VIZIO,butinnoeventwillyourfeeseverexceedtheamountallowablebythe
AmericanArbitrationAssociation,atwhichpointVIZIOwillcoveralladditional
administrativefeesandexpenses.VIZIOwaivesitsrighttorecoverattorneys’
feesinconnectionwithanyarbitrationunderthiswarranty.Ifyouarethe
prevailingpartyinanarbitrationtowhichtheSupplementaryProceduresfor
ConsumerRelatedDisputesapplies,thenyouareentitledtorecoverattorneys’
feesasthearbitratormaydetermine.
Thedisputewillbegovernedbythelawsofthestateorterritoryinwhich
youresidedatthetimeofyourpurchase(ifintheUnitedStates). Theplace
ofarbitrationwillbeIrvine,California,oryourcountyofresidence(ifinthe
UnitedStates). Thearbitratorwillhavenoauthoritytoawardpunitiveorother
damagesnotmeasuredbytheprevailingparty’sactualdamages,except
asmayberequiredbystatute.Thearbitratorwillnotawardconsequential
damages,andanyawardwillbelimitedtomonetarydamagesandwillinclude
noequitablerelief,injunction,ordirectiontoanypartyotherthanthedirection
topayamonetaryamount. Judgmentontheawardrenderedbythearbitrator

45
willbebindingandnal,exceptforanyrightofappealprovidedbytheFederal
ArbitrationAct,andmaybeenteredinanycourthavingjurisdiction.Exceptas
mayberequiredbylaw,neitheryounorVIZIOnoranarbitratormaydisclosethe
existence,content,orresultsofanyarbitrationunderthiswarrantywithoutthe
priorwrittenconsentofyouandVIZIO.
ANYDISPUTE,WHETHERINARBITRATION,INCOURT,OROTHERWISE,WILL
BECONDUCTEDSOLELYONANINDIVIDUALBASIS.VIZIOANDYOUAGREE
THATNOPARTYWILLHAVETHERIGHTORAUTHORITYFORANYDISPUTE
TOBEARBITRATEDASACLASSACTION,APRIVATEATTORNEYGENERAL
ACTION,ORINANYOTHERPROCEEDINGINWHICHEITHERPARTYACTS
ORPROPOSESTOACTINAREPRESENTATIVECAPACITY.NOARBITRATION
ORPROCEEDINGWILLBEJOINED,CONSOLIDATED,ORCOMBINEDWITH
ANOTHERARBITRATIONORPROCEEDINGWITHOUTTHEPRIORWRITTEN
CONSENTOFALLPARTIESTOANYSUCHARBITRATIONORPROCEEDING.
Opt-Out Instructions
IFYOUDONOTWISHTOBEBOUNDBYTHEBINDINGARBITRATION
AGREEMENTANDCLASSACTIONWAIVER,THEN:(1)youmustnotifyVIZIOin
writingwithinsixty(60)daysofthedatethatyoupurchasedtheproduct;(2)
yourwrittennoticationmustbemailedtoVIZIOat39Tesla,Irvine,CA92618,
Attn:LegalDepartment;and(3)yourwrittennoticationmustinclude(a)your
name,(b)youraddress,(c)thedateyoupurchasedtheproduct,and(d)aclear
statementthatyouwishtooptoutofthebindingarbitrationagreementand
classactionwaiver.
Inaddition,youmaypursueaclaiminsmallclaimscourtinyourcountyof
residence(ifintheUnitedStates)orinOrangeCounty,California.Insuchcase
theprovisionsofthesectiontitled“BindingArbitrationAgreement;ClassAction
Waiver(U.S.Residents)”willnotapply.
Exclusions and Limitations
TOTHEGREATESTEXTENTPERMITTEDBYAPPLICABLELAW,THEREARE
NOEXPRESSWARRANTIESOTHERTHANTHOSEDESCRIBEDABOVE.
ANYIMPLIEDWARRANTIES,INCLUDINGANYIMPLIEDWARRANTYOF
MERCHANTABILITY ANDFITNESSFORAPARTICULARPURPOSE, WILLBE
LIMITEDINDURATIONTOTHEWARRANTYPERIODSETFORTHABOVE.SOME
STATESANDPROVINCESDONOTALLOWLIMITATIONSONHOWLONGAN
IMPLIEDWARRANTY LASTS, SOTHEABOVELIMITATIONMAY NOTAPPLYTO
YOU.
VIZIOWILLNOTBERESPONSIBLEFORLOSSOFUSE,LOSSOFINFORMATION
ORDATA,COMMERCIALLOSS,LOSTREVENUEORLOSTPROFITS,OROTHER
INDIRECT,SPECIAL,INCIDENTALORCONSEQUENTIALDAMAGES,EVENIF
VIZIOHASBEENADVISEDOFTHEPOSSIBILITYOFSUCHDAMAGES,AND
EVENIFTHEREMEDYFAILSOFITSESSENTIALPURPOSE.SOMESTATESAND
PROVINCESDONOTALLOWTHEEXCLUSIONORLIMITATIONOFINCIDENTAL
ORCONSEQUENTIALDAMAGES,SOTHEABOVELIMITATIONOREXCLUSION
MAYNOTAPPLYTOYOU.
INLIEUOFANYOTHERREMEDYFORANYANDALLLOSSESANDDAMAGES
RESULTINGFROMANYCAUSEWHATSOEVER(INCLUDINGVIZIO’S
NEGLIGENCE,ALLEGEDDAMAGE,ORDEFECTIVEGOODS,NOMATTER
WHETHERSUCHDEFECTSAREDISCOVERABLEORLATENT),VIZIOMAY,
ATITSSOLEANDEXCLUSIVEOPTIONANDINITSDISCRETION,REPAIROR
REPLACEYOURPRODUCT,ORREFUNDITSPURCHASEPRICE.ASNOTED,
SOMESTATESANDPROVINCESDONOTALLOWTHEEXCLUSIONOR
LIMITATIONOFINCIDENTALORCONSEQUENTIALDAMAGES,SOTHEABOVE
LIMITATIONOREXCLUSIONMAYNOTAPPLYTOYOU.
How the Law Applies
Thiswarrantygivesyouspeciclegalrights,andyoumayalsohaveotherrights,
whichvaryfromstatetostateandprovincetoprovince.Thiswarrantyappliesto
thegreatestextentpermittedbyapplicablelaw.
General
NoemployeeoragentofVIZIOmaymodifythiswarranty.Ifanytermofthis
warranty,otherthantheclassactionwaiver,isfoundtobeunenforceable,
thattermwillbeseveredfromthiswarrantyandallothertermswillremain
ineect.Iftheclassactionwaiverisfoundtobeunenforceable,thenthe
entiresectiontitled“BindingArbitrationAgreement;ClassActionWaiver(U.S.
ResidentsOnly)”willnotapply.Thiswarrantyappliestothemaximumextentnot
prohibitedbylaw.
Changes to Warranty
Thiswarrantymaychangewithoutnotice,butanychangewillnotaectyour
originalwarranty.Check
www.vizio.comforthemostcurrentversion.

46
Legal Information
Software Licenses
Allsoftwareisprovidedsubjecttoasoftwarelicenseagreement(s)andyouagree
thatyouwillbeboundbysuchlicenseagreement(s)inadditiontotheseterms.
YouruseofthisproductissubjecttoVIZIO’sprivacypolicy,whichmaybeupdated
fromtimetotime,andisavailabletoviewatvizio.com/privacy.
Export Regulations
CustomeracknowledgesthattheVIZIOproducts,whichincludetechnologyand
software,aresubjecttocustomsandexportcontrollawsintheUnitedStates
(“US”).Theproductsmayalsobesubjecttothecustomsandexportcontrollaws
andregulationsofthecountryinwhichtheproductsaremanufacturedand/or
received.
Internet Connectivity and App Availability
Networkconditions,environmentalandotherfactorsmaynegativelyaffect
connectivityandtheresultingvideoquality,ifany.Theapplicationsandcontent
oftheapplicationspicturedhereinordescribedinaccompanyingdocumentation
mayonlybeavailableincertaincountriesorlanguages,mayrequireadditionalfees
orsubscriptioncharges,andmaybesubjecttofutureupdates,modificationsor
discontinuationwithoutnotice.VIZIOhasnocontroloverthirdpartyapplications
orcontentandassumesnoresponsibilityfortheavailabilityorinterruption
ofsuchapplicationsorcontent.Additionalthirdpartyterms,conditionsand
restrictionsapply.
© 2022 VIZIO, Inc. All Rights Reserved.
ThisUserManualmaynotbecopiedinwholeorinpartwithoutthewritten
permissionofVIZIO,Inc.VIZIO,Inc.hasmadereasonableeffortstoensure
theaccuracyoftheinformationprovidedherein.Allproductspecifications,
functionality,features,configurations,performance,designandotherproduct
informationdescribedhereinaresubjecttochangewithoutnotice.VIZIO,Inc.isnot
responsiblefortypographical,technical,ordescriptiveerrors.Toreviewthemost
updatedversionofthisUserManualandtheassociatedQuickStartGuide,goto
vizio.com.
VIZIO,theVIZIOlogo,theVlogo,VIZIOSmartCast,andothertermsandphrases
aretrademarksorregisteredtrademarksofVIZIO,Inc.
ThetermsHDMI,HDMIHighDefinitionMultimediaInterface,andtheHDMILogo
aretrademarksorregisteredtrademarksofHDMILicensingAdministrator,Inc.
ForDTSpatents,seehttp://patents.dts.com.ManufacturedunderlicensefromDTS,
Inc.DTS,DTS:X,Virtual:X,theDTS:Xlogoareregisteredtrademarksortrademarksof
DTS,Inc.intheUnitedStatesandothercountries.©2021DTS,Inc.
ALLRIGHTSRESERVED.
Dolby,DolbyVision,DolbyAudio,andthedoubleDsymbolaretrademarksof
DolbyLaboratoriesLicensingCorporation.ManufacturedunderlicensefromDolby
Laboratories.Confidentialunpublishedworks.
Copyright©19922021DolbyLaboratories.Allrightsreserved.
Google,GooglePlay,andChromecastBuiltinaretrademarksofGoogleLLC.
Amazon,AlexaandallrelatedlogosaretrademarksofAmazon.com,Inc.orits
affiliates.
Othernamesofcompanies,products,andservicesusedinthisUserManualmay
betrademarks,tradenamesorservicemarksofothersandVIZIO,Inc.disclaims
anyinterestintrademarks,tradenamesorservicemarksotherthanitsown.
MentionofnonVIZIOproductsisforinformationalpurposesonly.
AppservicesfeaturedontheincludedIRremotemayvaryandmaynotbeavailable
inallregions.
4KorHDRavailabilityvariesbyappandmaybesubjecttosubscriptionfees,
internetservice,anddevicecapabilities.
Battery Disposal
Caution: Thisproductmaybeshippedwithbatteries.Donotdispose
ofbatteriesinafireorwithordinaryhouseholdwaste.Batteriesmay
explodeandcancausedamage.Replacebatteriesonlywiththesame
orequivalenttypeofbatteryrecommendedbyVIZIO.Thedisposal
ofbatteriesmayberegulatedbyyourstate.Formoreinformationonrecycling
orproperlydisposingofyourbatteries,pleasecheckwithyourstateorgo
to
vizio.com/environment.
Product Recycling
Thedisposalandrecyclingofconsumerelectronicproductsmayberegulated
byyourstate.AlwaysproperlydisposeofyourVIZIOproductsinaccordance
withlocallawsandregulations.VIZIOsupportstheproperrecyclingofour
products.ForinformationonhowtoproperlyrecycleyourVIZIOproducts
andtolearnmoreaboutconsumerelectronicsrecyclinglaws,pleasegoto
vizio.com/environmentorcall(800)3743473.
Packaging Disposal
VIZIOencouragestherecyclingofthepackagingusedforthisproduct.Pleasebreak
downallboxesandrecycleeligiblematerialsaccordingtolocallawsand
regulations.
Formoreinformationpleasegotovizio.com/environmentorcall(800)3743473.
© 2022 VIZIO INC. All rights reserved.
220831BT