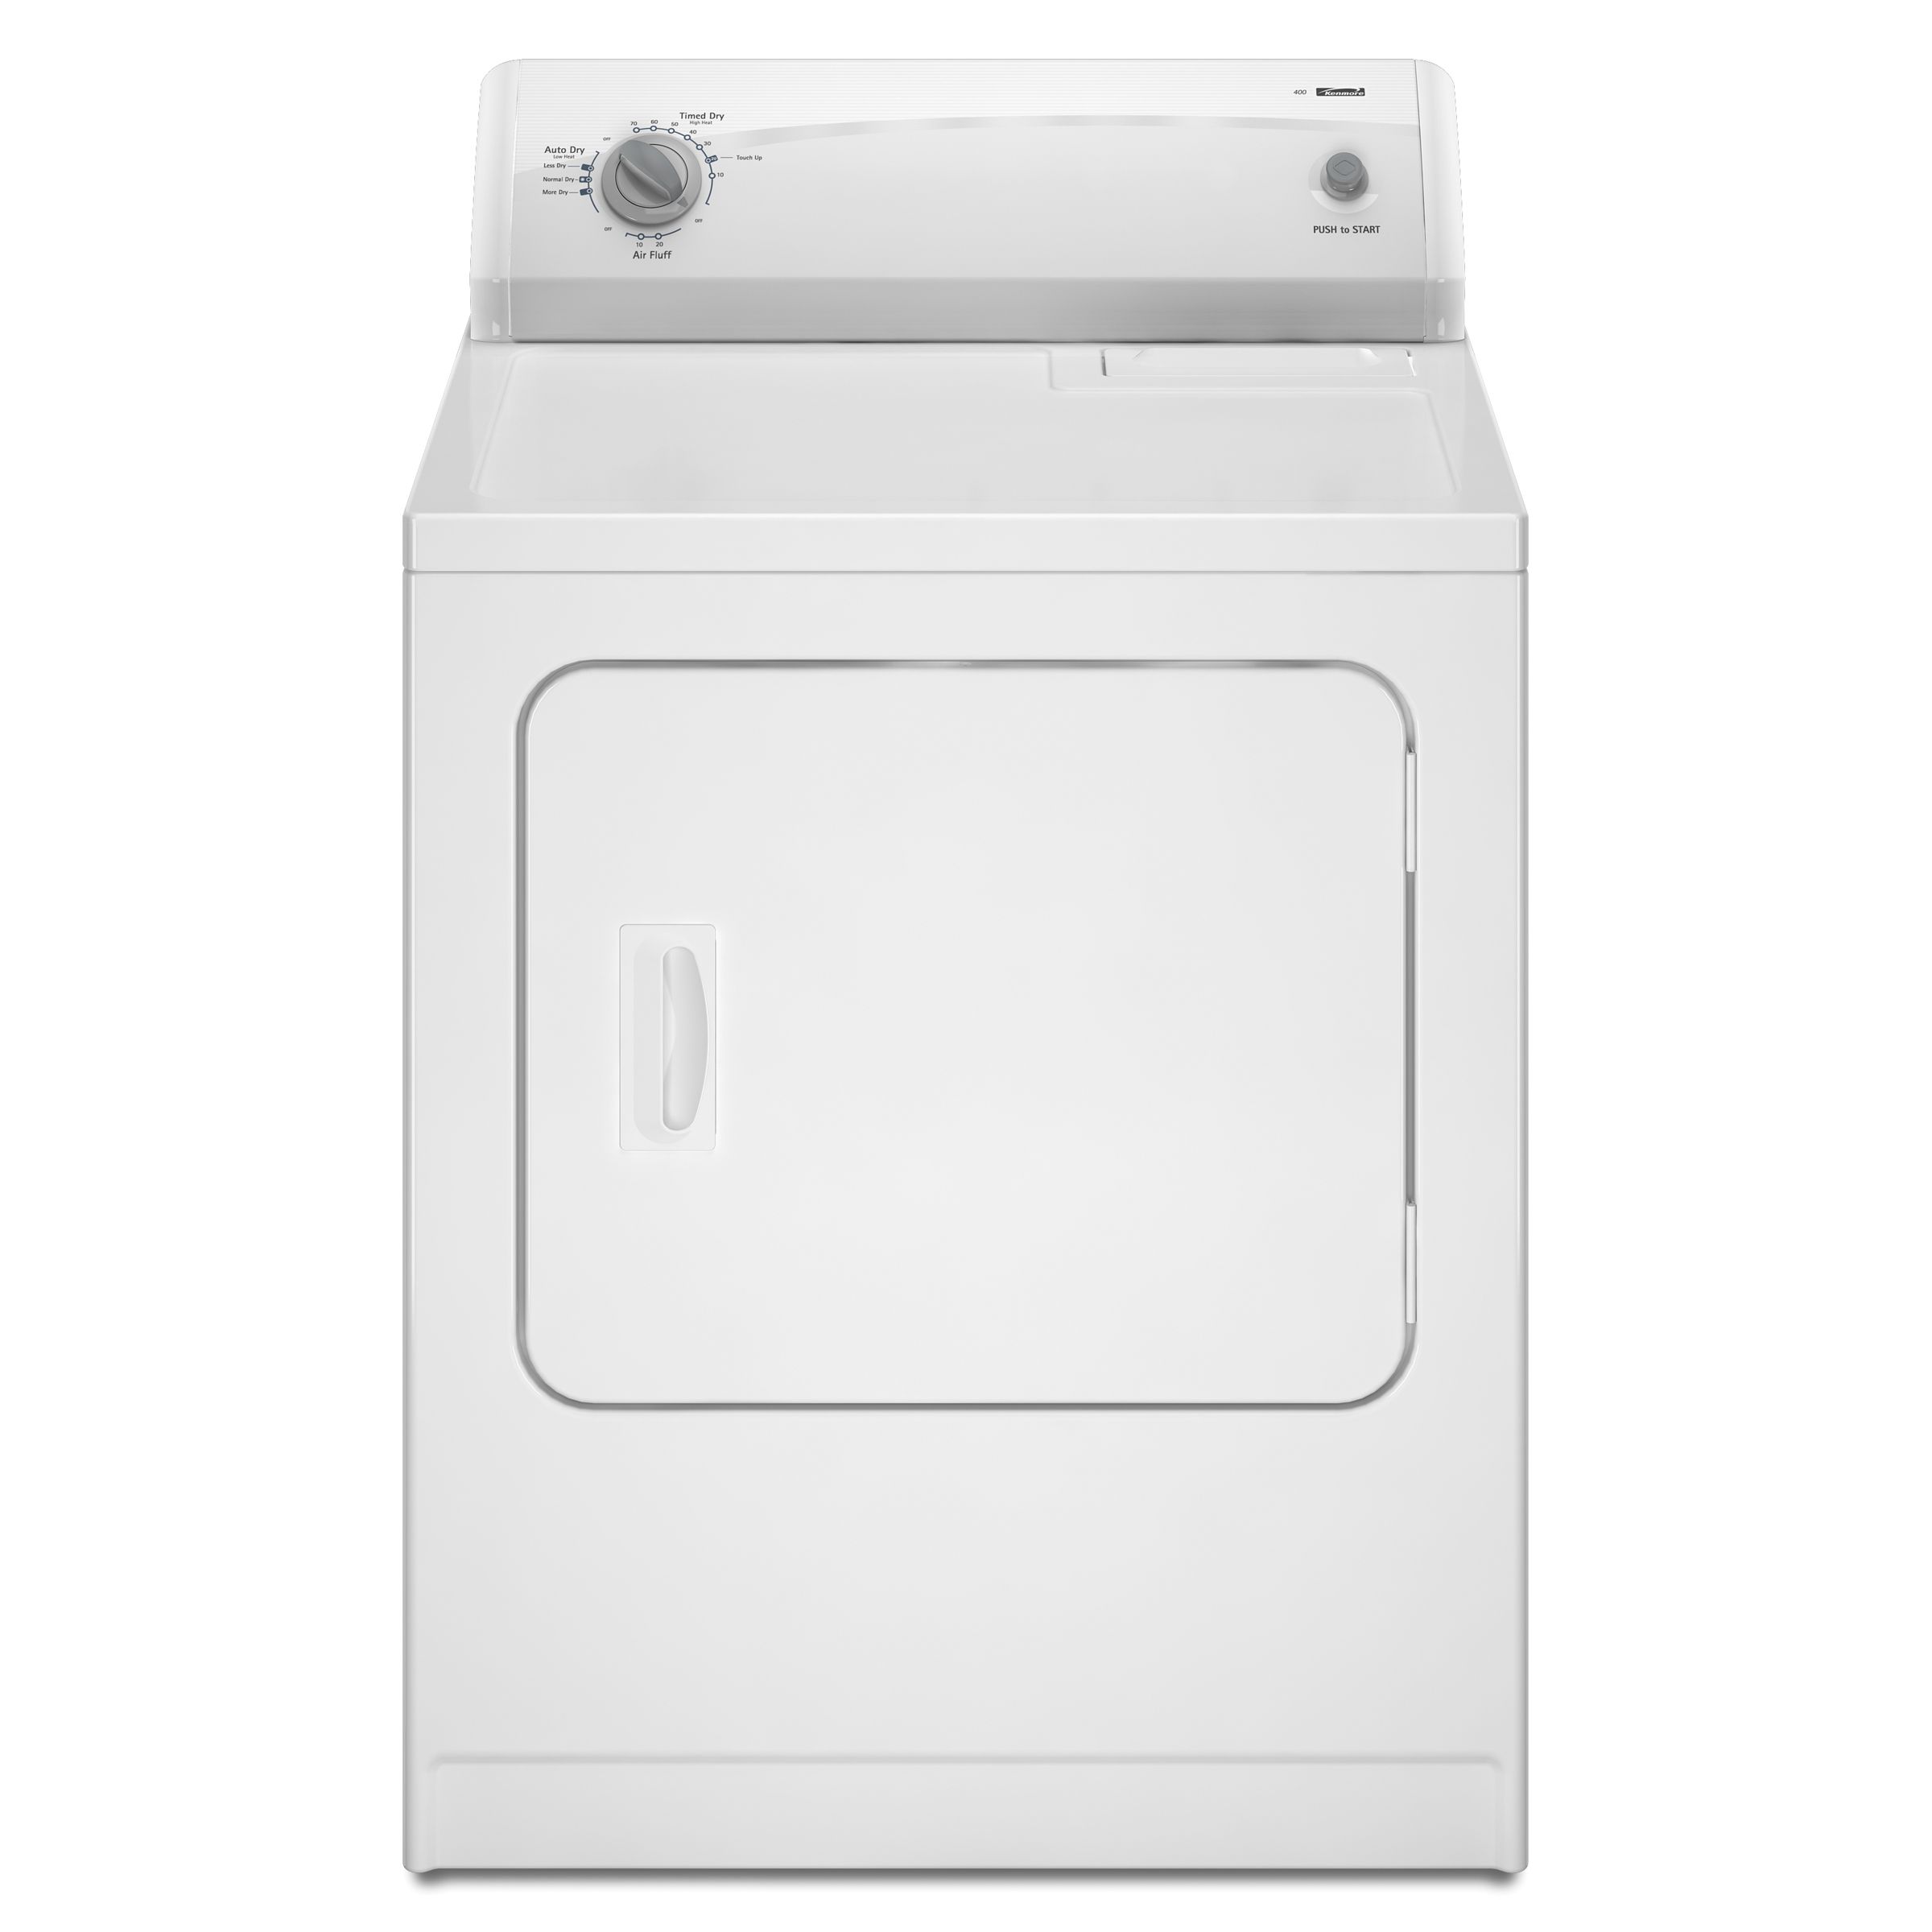
Loading ...
Loading ...
Loading ...
4.
Tighten
strain
relief
screws.
5.
Insert
tab
of
terminal
block
cover
into slot
of
dryer
rear
panel.
Secure
cover
with
hold-down
screw.
6.
Connect
a
separate
copper
ground
wire
from
the
external
ground
conductor
screw
to
an
adequate
ground.
Clee
dae,
C3
man
cere
rune
pie
Venting
Requirements
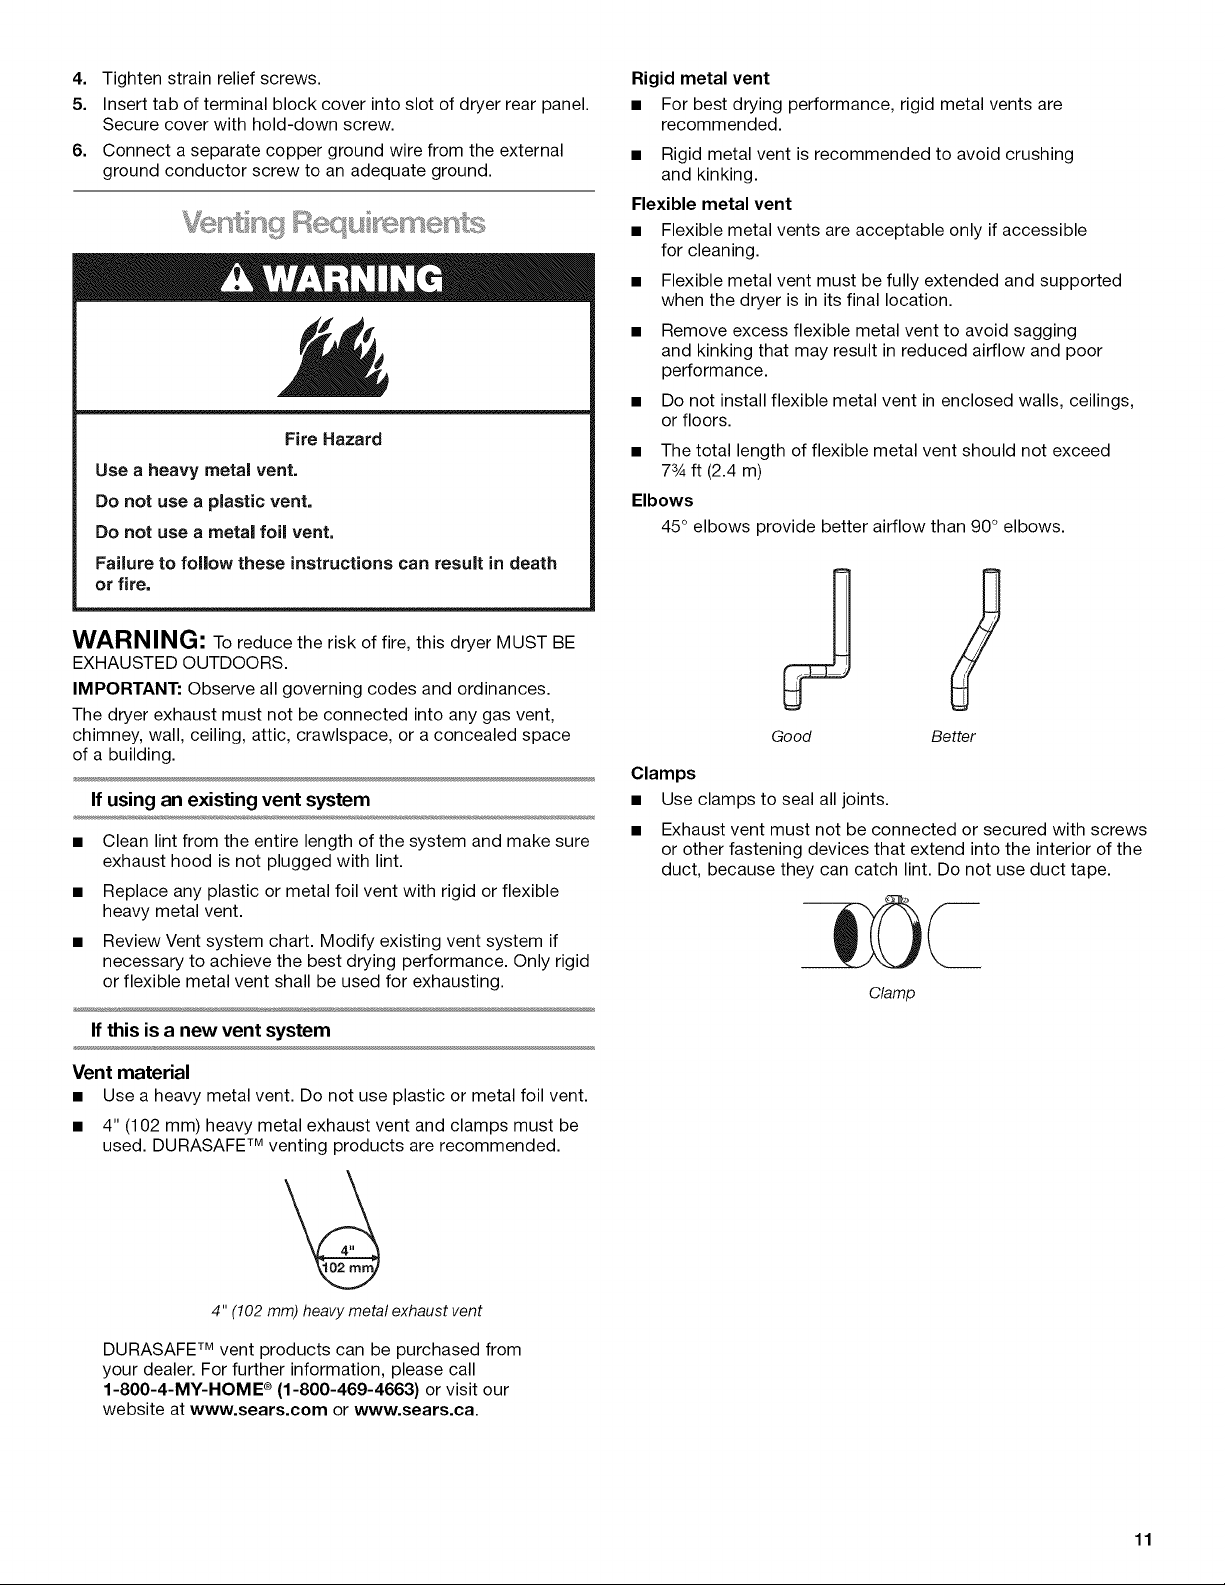
Rigid
metal
vent
mg
For
best
drying
performance,
rigid
metal
vents
are
recommended.
gm
Rigid
metal
vent
is
recommended
to
avoid
crushing
and
kinking.
Flexible
metal
vent
mg
Flexible
metal
vents
are
acceptable
only
if
accessible
for
cleaning.
Flexible
metal
vent
must
be
fully
extended
and
supported
A
WARNING
. ent
must
,
when
the
dryer
is
in
its
final
location.
Gh
é
Fire
Hazard
Use
a
heavy
metal
vent.
Do
not
use
a
plastic
vent.
Do
not
use
a
metal
foil
vent.
Failure
to
follow
these
instructions
can
result
in
death
or
fire.
WARNING:
To
reduce
the
risk
of
fire,
this
dryer
MUST
BE
EXHAUSTED
OUTDOORS.
IMPORTANT:
Observe
all
governing
codes
and
ordinances.
The
dryer
exhaust
must
not
be
connected
into
any
gas
vent,
chimney,
wall,
ceiling,
attic,
crawlspace,
or
a
concealed
space
of
a
building.
If
using
an
existing
vent
system
m=
Clean
lint
from
the
entire
length
of
the
system
and
make
sure
exhaust
hood
is
not
plugged
with
lint.
m
Replace
any
plastic
or
metal
foil
vent
with
rigid
or
flexible
heavy
metal
vent.
m
Review
Vent
system
chart.
Modify
existing
vent
system
if
necessary
to
achieve
the
best
drying
performance.
Only
rigid
or
flexible
metal
vent
shall
be
used
for
exhausting.
If
this
is
a
new
vent
system
Vent
material
m
Usea
heavy
metal
vent.
Do
not
use
plastic
or
metal
foil
vent.
gm
4"
(102
mm)
heavy
metal
exhaust
vent
and
clamps
must
be
used.
DURASAFE™
venting
products
are
recommended.
Cw
wey
4"
(102
mm)
heavy
metal
exhaust
vent
DURASAFE™
vent
products
can
be
purchased
from
your
dealer.
For
further
information,
please
call
1-800-4-MY-HOME®
(1-800-469-4663)
or
visit
our
website
at
Www.sears.com
or
WWW.sears.ca.
m
Remove
excess
flexible
metal
vent
to
avoid
sagging
and
kinking
that
may
result
in
reduced
airflow
and
poor
performance.
m
Do
not
install
flexible
metal
vent
in
enclosed
walls,
ceilings,
or
floors.
gm
The
total
length
of
flexible
metal
vent
should
not
exceed
7%
ft
(2.4
m)
Elbows
45°
elbows
provide
better
airflow
than
90°
elbows.
Clamps
m
Use
clamps
to
seal
all
joints.
m
Exhaust
vent
must
not
be
connected
or
secured
with
screws
or
other
fastening
devices
that
extend
into
the
interior
of
the
duct,
because
they
can
catch
lint.
Do
not
use
duct
tape.
Clamp
11
Loading ...
Loading ...
Loading ...