700 Watts
Model: JES0736
Microwave Oven
Owner's Manual
[]
2
6
Operating Instructions
F_a_res of Yu_' M;c_'owav_'J
7k_ C_nmM o_ Y_H"Mmmw_v_
77m_÷C_okh_g
1I
I2
15
_8
22
[]
Helpful Information
zuz
m
m
If SomethingGoes Wrong
[]
_QISIIIII@Y _I, *H
ge.com
READ ALL SAA_2TY
INFORMATION BEFORE USING
A
_Pt_CA UIYONS
TO AVOID
EXPOSUI_
TO EXCESSIVE
MI CR 0 WAVE
;Y
For your safiqy/he in[bnllation in lifts manual
mus/be lollowed _ominimize tile risk of fire
or explosion or re prevent property damage,
personal illj uW or loss of life.
DoNot Attempt
/o operaW this oven
wi/h lhe door open
since open<leer
o] _eradoll Call restll!
ill hannful exposm'( .....................
_o 1Hicrowave energ T.
1_is important no//o
defeat or lamper wi/h
tim saf_tv imerlocks.
Do Not Place ally objec_
be[weeIl /he o_11 _I'Oll/
tace and tile door or
allow soil or cleaneI
residue _o acctltHtllale
DoNot Operatedie oven
if it is damaged. I/is
particularly impor_am
ttla|/he oven door close
properly and lha_ there
I door bern).
2 hinges and lalches
broken or loosened .
3 door seals mid sealing
SllI't_ ces.
The OvenShouldNot
be adjusted or repaired
by anyone excepl !
properly qualified

Start Here!... Before using your Microwave
Write down the model
and serial numbers here.
| Thc'_ arc on a label inside
the ()x(!n.
|
\
m
Model number
Serial number
Date ofpurchase
Staple your receipt to the
back cover of this manual.
You will need it to make
a warranty claim.
Read this manual.
I| (Oll|iZil/S illS|l;llC|ions 1o
help you use and maintain
y)ur mi(row_ve properly.
If you received a damaged
oven,..imm(.di_z|(qv cont:a,.t
th,: d,:_der (or build,.'r)
that sold vou the o*,('n.
Save time and money.
Check the sc(tion titled
"If Something (;oes
Wrong." This section
helps you solve COlIllIÂOn
problems that might occm_
READ ALL SAA 2TY
INFORMATION BEFORE USING
• Read and tollow tile
spe(ific "Pre(azltions to
A_oid Possibh' Exposure
to Excessive Microwave
Energy" on page 2.
• This appliance must be
grounded. C(mnect onlv
to properly groml(led
omlet. See (;roml(ting
Instru(tions section on
t)age 9.
• Do not mount this
at)t)lian(e over a sink.
• Install or locate this
appliance only in
accordance with the
provided Installation
hlstl?llCtiOl/S.
• Be certain to place the
fi'ont sm:/i_ce of die door
three inches or more
ba(k fi'om the (omltertop
edge to avoid ac(i(h'mal
upping ot die appliance
in normal usage.
• DO not l//Ollllt tile
microwave oven over
or near any t)ortion of
a t'LeatiDg or (()()king
at)pliam e.
• I)o not store an?dhing
dire(tly on top of the
mi(rowave oven sm:L_(e
wbeD tl'm oven is in
ot)erat]Oll.
• [)O llOt ot)eFate _tl/y
heating or cooking
appliance beneath
this mi(rowave.
• Use this at)t)liance only
/or its linen(led use as
described in this mmmal.
Do not use corrosive
(hemi(als or vat)ors in
this al)plian(e. This
mi(rowave o_en is
sl)e(ifi( ally designed to
heal dl_ ' or cook/ood,
and is not intended
/i)r laboratory or
industrial use.
I!1
• Do not operate this
appliance if it has a
dan/aged power cord or
plug, if it is not working
properly or if it has been
dan/aged or dropped.
• 1)o not cover or block
any openings on the
appliance.
• Do not store this
appliance outdoors.
Do not use this product
near watel--/br example,
in a wet baselnem, near
a swimming pool, near
a sink or in similar
locations.
• Keep power cord away
trom heated surthces.
• Do not il/ll//erse power
cord or plug in water.
• Do not Metpower (ord
hang over edge of table
or COtlllteF.
• To reduce the risk of fire
in the oveu, cavity:
-- Do not overtook tood.
Carefifllv attend
appliance when paper,
plastic or other
combustible mamrials
are placed inside file
oven while cooking.
-- Remove wire twist-ties
and metal handles
trom paper or plastk
containers before
placing them in the
()Veil.
-- Do not use the o_en
tor storage purposes.
Do not Heave paper
prodttcts, cooking
utensils or tood in the
oven when not in use.
-- If materials inside oven
ignite, keep the oven
door closed, turn the
OVell 011 and dis€OlllleCt
the power cord, or shut
off power at the fllse or
circuit breaker panel.
If the door is opeiled,
the tire may spread.
• See door sur/hce
clealJ, ing instructions in
the Care and Cleaning
secti(m(s) of this manual.
• (',E does not support
any servicing of the
microwave. \re strongly
recomlnelld that you do
not attempt to set+_ice
the microwaw' voursel/_
• As with any applim/ce,
close supervision is
ne(essar_ when used
bv children.
SA THESE INSTRUCTIONS
SPECIAL NOTI+2SABOUF MICRO WAVING
Arcing is tile microwave
term tor sparks in tile
oven. Arcing is caused by:
• Metal or/oil touching
tile side of tile oven.
• Foil not molded to tood
(upturned edges act like
amemlas).
• Metal, such as twist-ties,
pouhry pins, or gold-
rimmed dishes, in
tile microwave.
• Recycled paper towels
containing small metal
pieces being used in
the llliCrowave.
Do not t+op popcorn in
your nlicrowave oven
mlless ill a special
microwave popcorn
accessory or unless you
use popcorn labeled tor
use in microwave ovens.
• Sortie products such as
whole eggs and sealed
eo+/t_ti+/ers /()+? ex_tlllllle ,
ch)sed jars--are able to
explode and should not
be heated in this
microwave o_en. Stlch use
of tile nlicrowa_ e oven
could resuh in i+_jury.
• Do not boil eggs ill a
microwave oven. Pressure
will build up inside egg
yolk and will cause it to
burst, possibly resuhing
• ()perating tile microwave
with no tood inside/or
more fllan a minme or
tWO Ilia}' eat+se (l_tl//age to
tile o_e+l and CO/lid start a
fire. It increases tile heat
around tile nmgnetron
and can shorten tile liib
of tile oven.
• Foods with mlbroken
outer "skin" S/lOll _tS
potatoes, hot dogs,
s?ltls?lges, t OIIl_tt oes,
apples, chicken liw'rs
and ()tile+" gibh'ts, and
egg yolks should be
pier(ed to allow steam
to escape dm:ing
cooking.
I'.1
SAFETYFACT
SUPERHEATED WATER
Liquids, such as water,
coffee or tea are able to
he overheated beyond
the boiling point without
appearing to he boiling.
Visible bubbling or boiling
when the container is
removed from the microwave
oven is not always present.
THIS COULD RESULT
IN VERYHOT LIQUIDS
SUDDENLY BOILING OVER
WHEN THE CONTAINER IS
DISTURBED OR A SPOON
OR OTHER UTENSIL IS
INSERTED INTO THE LIQUID.
To red me the risk ot iniury
to persons:
-- I)o not o_erheat tile
liquid.
-- Stir tile liquid both
]>eli)re and hall'way
through heating it.
-- Do not use straight-sided
containers with narrow
necks.
-- Atter heating, allow tile
container to stand in
tile n/icrowa_e oven ti)r
a short time beli)re
rel//OVil/g +tile COl/tailleL
-- Use extrel//e care whel/
illsertillg +a Sl)OOll or
other utensil into tile
container.
• A\ old heating baby fl)od
in glass jars, even with
tile lid off. Make sure all
in/hnt ti)od is thoroughly
cooked. Stir/i)od to
distribute tile heat evenly.
Be careful to pre_ent
scalding when warn/ing
ti)rnlula. The container
him ti'el cooler than tile
ti)rlnula really is. Alwms
test tile ti)rnmla beli)re
ti'eding tile baby.
• Don't deI_'ost t_'ozen
beverages ill I/arrow-
necked bottles (especially
carbonated beverages).
Even if tile container is
opelled, t)ress/lre Call
build nil. This can cause
tile COlltail/er to btlrst,
possibly resulting in
i_/jul+}.
• t lot t_)ods and steam
call cause burns. Be
careflll when o])ening
am' containers of hot
ti)od, inchlding pop(orn
bag+s, cooking pouches
and boxes. To prevem
possible il_im:}, direct
stean/ awm'/i'on/ hands
and/hce.
• I)o not overcook
potatoes. They could
dehydrate and cat(h
fire, (ausing damage
to your o_en.
• Cook meat and poultr}
thoroughly-meat to
at least an IN'IERNAI,
tenll)erature of ] 60'F
and poultry to at least an
INTERNAl, teml)erature
of 180°F. Cooking to these
tenlperat m:es usually
t)rotects ag_fiHst t_)o(tborlle
ilh/ess.
SPECIAL N07 2S ABOUF MICRO WAVING
Make sure all cookware
used in your microwave
oven is suitable tor
n/icrowaving. Most glass
casseroles, cooking dishes,
l//easllring Cilt)S , Cllstar(t
Clll)S, potter} or china
dimlevware which does not
have metallic u:im or glaze
with a metallic sheen Call
be/lsed. Sol//e cook_are
is labeled "suitaMe tor
microwaving."
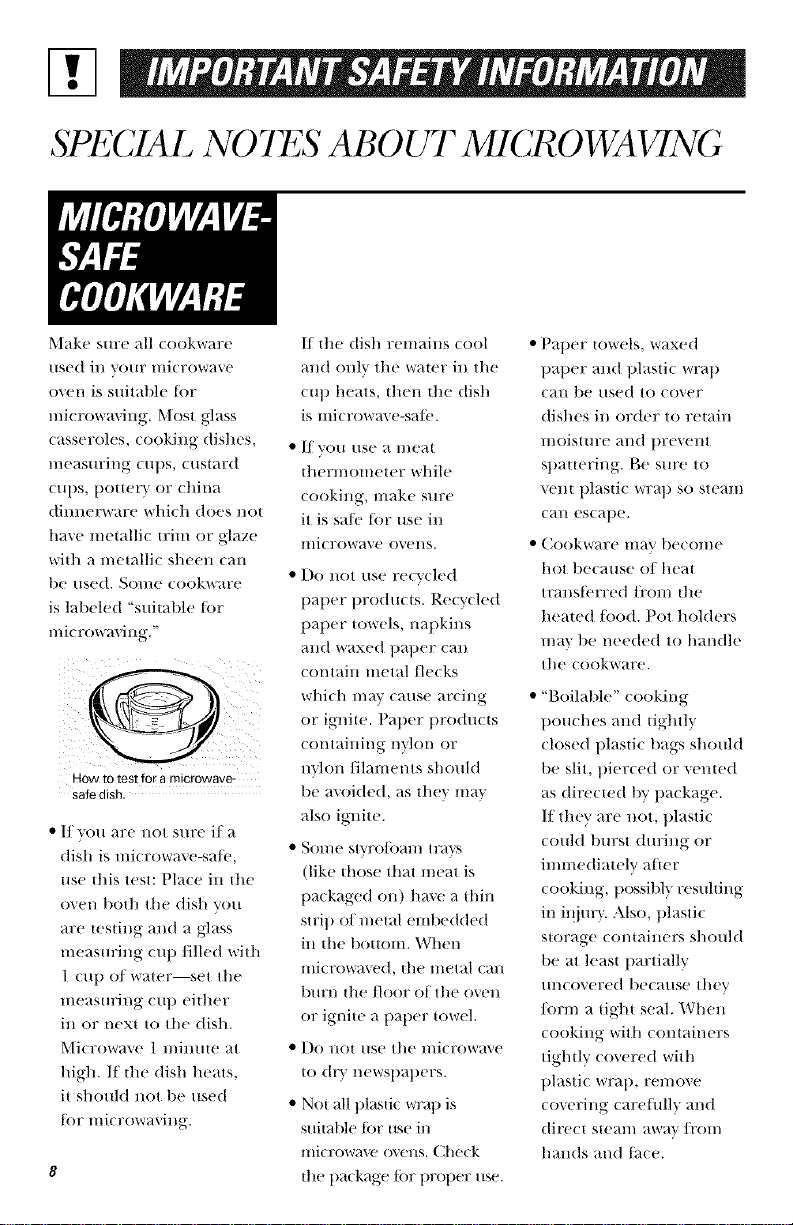
How to test for a microwave-
safe dish.
• If you are not sure if a
dish is microwave-sale,
use this test: Place ill the
oven both tile dish you
are testing and a glass
measuring cup filled with
1 cup of water--set the
measuring cup either
in or next to tile dish.
Microwave 1 mimlte at
high. If the dish heats,
it should not be used
tor microwaving.
If the dish remains cool
and only the water ill the
cup heats, then the dish
is microwa_ e-satb.
• If VO/l /Ise a i/lear
thermometer while
cooking, make sm:e
it is sale tor use in
microwave ovens.
• Do not use recycled
paper products. Reoaled
paper towels, napkins
and waxed paper Call
contain metal flecks
which may cause arcing
or ignite. Paper products
contailling nvlon or
m'hm filaments should
be avoided, as they him
also ignite.
• Sol//e stvro/oal// tlT_l_is
(like those that n/eat is
t)ackaged on) haxe a thin
strip of metal elnbedded
ill tile bottom. Wl/en
lIliCrowave(I, tile lIletal Call
burn tile floor of tile oven
or ignite a t)aper towel.
• Do not use tile microwaxe
to (tr} newsl)al)ers.
• Not all plastic wrap is
suitable ti)r use in
microwave o\ ens. Check
the t)ackage tor proper use.
• Paper towels, waxed
paper and plastic wrap
Call t)e used to cover
dishes ill order to retain
moistHre and 1)lTevent
spattering. Be sure to
vent plastic wrap so stealll
Call escape.
• Cookware lilav becolile
hot because of heat
transterred/i'om the
heated/ood. Pot holders
n/m be needed to handle
tile (ookware.
• "Boilable" cooking
pouches and tightly
closed plastic bags should
be slit, pierced or vetoed
as directed by package.
If they are not, plastic
Co/lld t)llrst during or
inunediatelv atter
cooking, 1)ossibly resulting
in il_jur}. Also, plastic
storage containers should
be at least partially
uncovered because thev
/orn/ a tight seal. When
cooking with containers
tightly covered with
plastic wrap, remove
covering carehlllv and
direct steam away/i'om
hands and tace.

[!l.
• Use/oil only as directed
in this manual. TV dinners
may be microwa\ ed in/oil
trays less than 3/4" high;
remove tile top/oil cover
all(| l'e|/lrll the tr+lv to the
box. When using tbil ill
tile lllicrow_l_l' ovel/, kee t)
tile loll at least 1" awm
ti'om the sides of the ow'n.
GR 0 UNDING
• Plastic cookware--Plastic
cookware designed tbr
lnicrowa',v cooking is vet+}"
useflfl, but should be used
(arefllll}. E_en n/icrowa\ e-
sale plastic may not be as
tolerant of overcooking
conditions as are glass or
ceramic materials and nlav
soften or char if sut!iected
to short periods of
o_vrcooking, hi longer
exposllres tO oveFcookillg-,
tile/ood al/d cookwm:e
couM ignhe.
Follow these guidelines:
I Use mio:owa\e-sa/_'
plastics only and use
then/in strict c()mpliance
with the cookware
l//al//ll_tCt/lrer's
recol//lllel/d at)oils.
Do I/Ot II/icrowave el//ptv
COl/tail lers.
3 Do not permit children
to use plastic cookware
without con/plete
supervision.
INS T"RUC770NS
PREFERRED
METHQD
Ensureproperground
existsbeforeuse.
A WARNING
Improper use of the
grounding plug can result
in a risk of electric shock.
This applian(e must be
grotmded. In the event ot
all electrical short circuit,
gr(mnding reduces the
risk of electri( sho(k l)_
providing all es(ape wire
tor the electric currem.
This appliance is e(luipped
with a ]lower (ord having
a grom/ding wire with a
grom/ding plug. The plug
nmst 1)e plugged into an
outlet that is properly
installed and grom]ded.
Consuh a qualitied electdcian
or serdce technician il the
g_x)unding instructions are
not completely understood,
or il doubt exists as to
whether the al)l)lian(e is
properly gTom/ded.
If tile outlet is a standard
2-prong wall outlet, it is
your personal responsibility
and obligation to have it
replaced with a properly
grom/ded 3-prong wall
outlet.
Do l]ot under any
circumstaHces cut or
remove the third
(ground) prong/ir)m
tile power lord.
For best operation,
plug this appliance into
its owH electrical outlet to
prevent flickering of lights,
blowing of fllse or tripping
of cir( uit breaker.
GR 0 UNDING INS TR UC TIONS
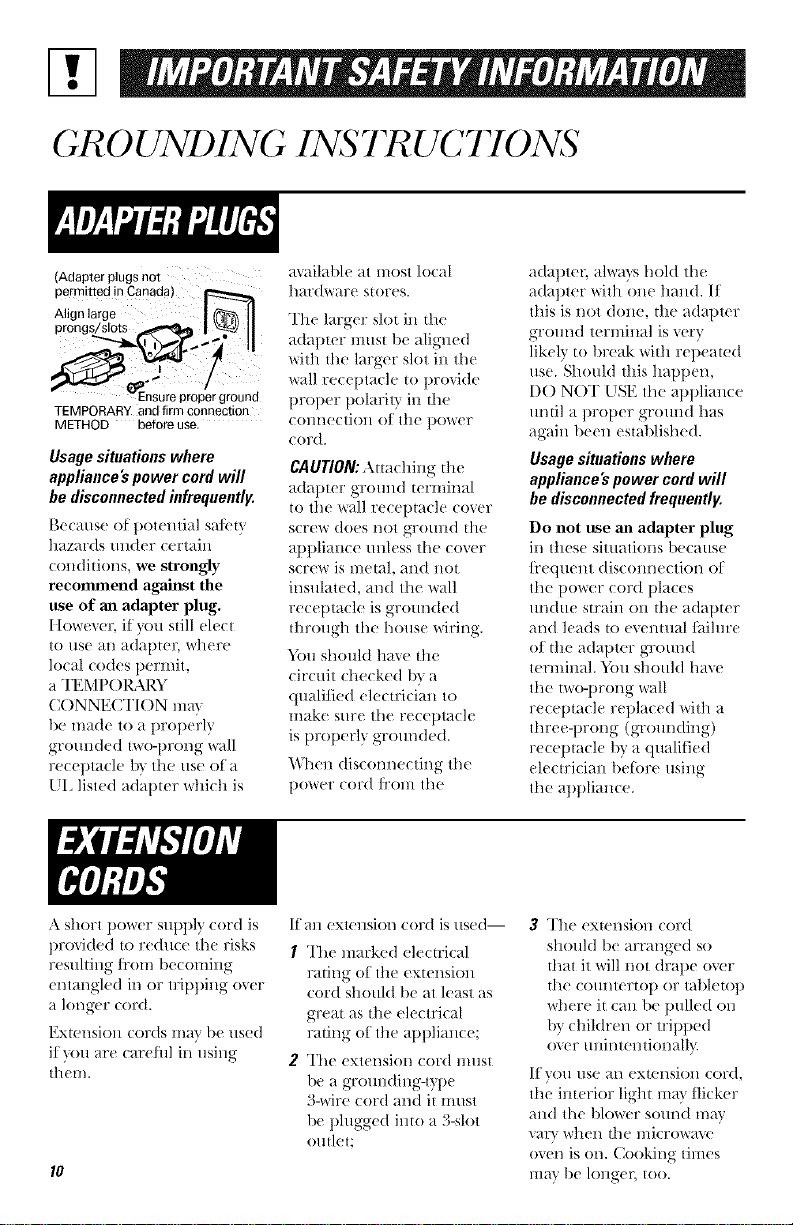
(Adapter plugs not
permittedincanada)
Alignlarge I _-_ II
prongs/slots _ I _ II
Ensure proper ground
TEMPORARY and firm connection
METHOD before use.
Usage situations where
appliance's power cord will
be disconnected hlfrequently.
I}etatlse of potelltia] sa/t'f}'
hazards under certain
conditions, we strongly
reconunend against the
use of aJl adapter plug.
Itowever, if?ou still elect
to use an adapter, _dlere
local codes permit,
a "IE MPObLM/Y
CONNECI'ION nlav
be made to a properly
grotmded t_o-prong wall
receptacle t)x the use of a
UI listed adapter which is
a',ailable at most local
har(/wart' S[Oles.
The larger slot ill tile
adapter must be aligned
with tile larger slot ill the
wall receptacle m provide
proper polarity in the
COllIlectioll of tile power
cord.
CAUTION: MtachiIlg the
adapter gro/md terminal
to the wall receptacle cover
screw does I/Of gyotllld file
appliallce tmless the cover
screw is luetal, and IlOt
insulated, and the wall
receptacle is grounded
through the house wiring.
}ira should ha_e tile
circttit checked 1)\ a
qualified elecu:icial_ to
make s/_re the receptacle
is properly grounded.
When disconnecting the
l)ower cord Jrol/l the
adapte_; alwa}s hold the
adapter with (me halid. If
this is not d(me, tile adapter
grom/d terminal is very
likely to break with repeated
use. Should this happen,
D() NOT USE the appliance
until a proper gr(mnd has
again been established.
Usagesituations where
appliance's power cord will
be disconnected frequently.
Do not use an adapter plug
in these situations becattse
fl etluelu discom_ection of
the power cord places
undtu.! strain on the adapter
and leads to eventual tailure
of the adapter grotmd
terminal. "_2)u should ha_e
tile t_xo-prong wall
receptacle replaced with a
three-prong (grounding)
receptacle l)}' a qualified
electriciall betore using
tile appliance.
A short power supply cord is
pro\ided t_) reduce the risks
resultillg trom becoming
entangled in or tripping over
a longer cord.
l(xmnsion cords Ina} be used
it )ou are careflfl in using
them.
If an extension cord is used--
1 The marked electrical
ra ring of the extension
cord should be at least as
great as the electrical
rating of tile appliance;
2 The extension cord must
be a grotmding-fype
3-_xire cord and it intlst
be plugged into a 3-slot
outlet;
3 The extension cord
shouhl be arranged so
that it will not drape owr
the c(mntertop or tallletop
where it can be pulled on
1U children or tripped
o_er tmintentionall};
If you use an exmnsion cord,
tile imerior light ma} tlicker
alld tile blower sOttl/d Ilia}'
vat\ when the l/lJoI'()wa_% _
oven is on. Cooking times
Ilia} be longeL too.
|
--0
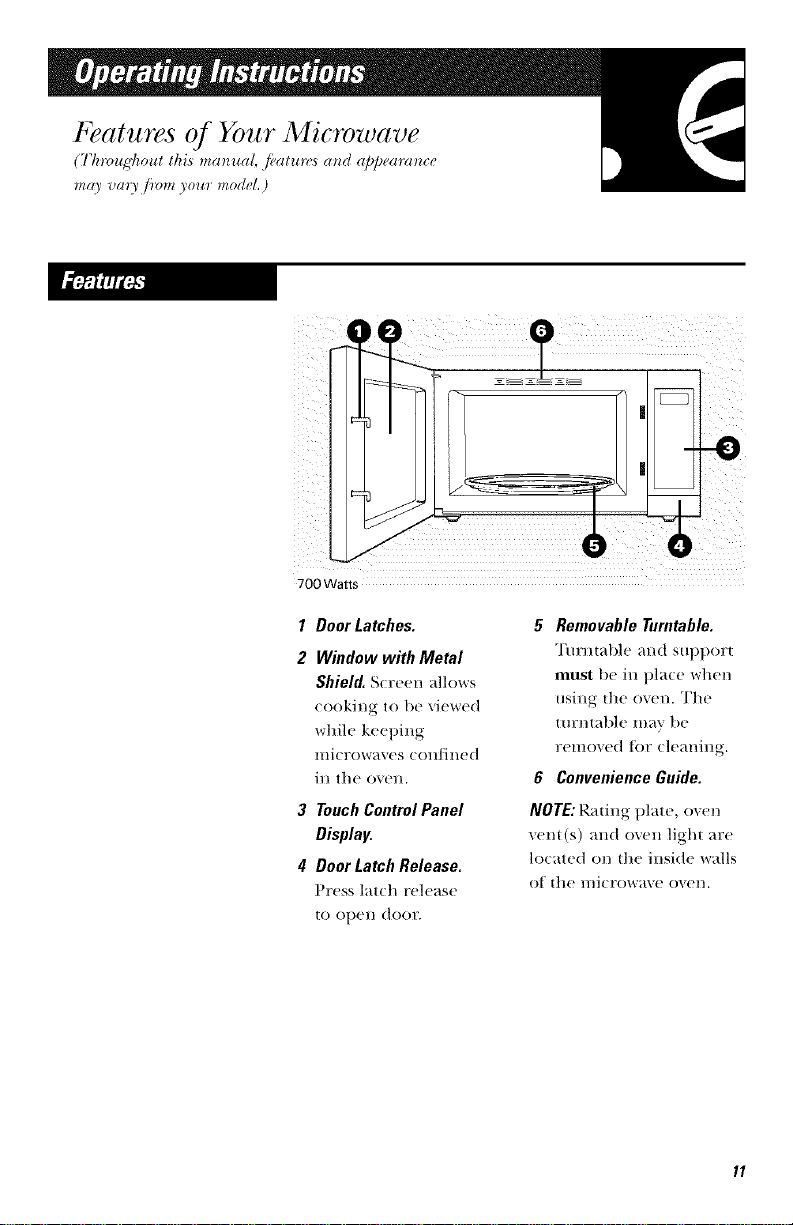
700Watts
1 Door Latches.
2 Window with Metal
Shield. S€reen allows
cooking to be viewed
while keeping
microwaves confined
in the o_en.
3 Touch Control Panel
Display.
4 Door Latch Release.
Press latch r('h'_sc
to open door.
5 Removable Turntable.
Turntable _md support
must be in ])lace when
using the o_en. The
ttlrl/table iilav be
removed tbr cleaning.
6 Convenience Guide.
NOTE: R_lting plate, oven
vent(s) and oven light are
located on file inside walls
of die microwave oven.

The Controls on Your Microwave Oven
(Tlnvugl_oul thL_ ma_ual, .llalur_ and a/)/)earance ma) va_3 ._i_mz)our model.)
You can
microwave by
time or with the
convenience
features,
Time l
Cook ]
Add Power
30sec Level
A TimeFeatures
Press Enter
Time Cook (Press once, twice or three times) An_oullt of ( ookillg time.
Add 30 Sec Starts autom;,,i< ;,11_!
Power Level Power ]e',el 1-9
(autom;_tk;dly set at [/i).
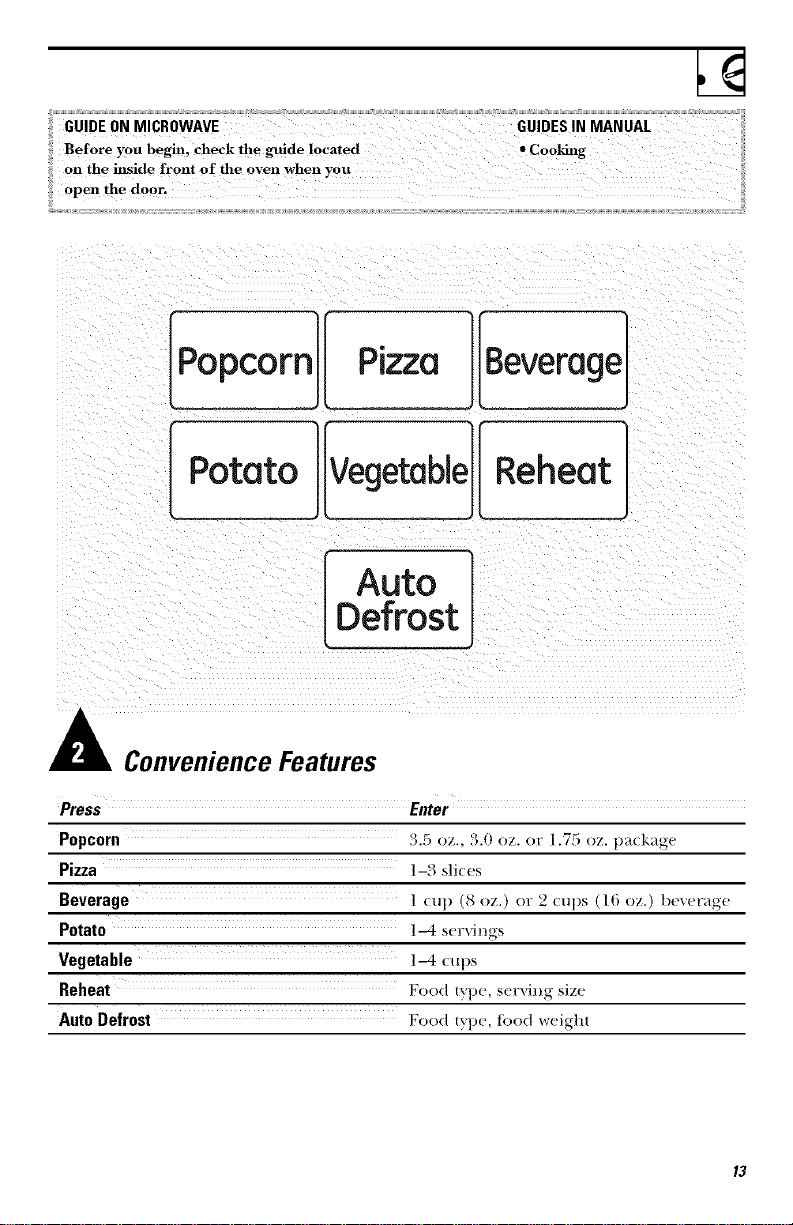
ConvenienceFeatures
Press Enter
Popcorn 3.5 oz., 3.0 oz. or 1.75 oz. pa(kage
Pizza 1-3 slkes
• S
Beverage 1 (up (8 oz.) or2 (up,_ (16 oz.) bexerage
Potato 1M servings
Vegetable 1M (ups
Reheat Food tyl)e, ser'vil_,g size
Auto Defrost Food |Vp(!, {()od '¢vr(!ig'ht
Power
Lever
I 23
4 5 6
7 89
0
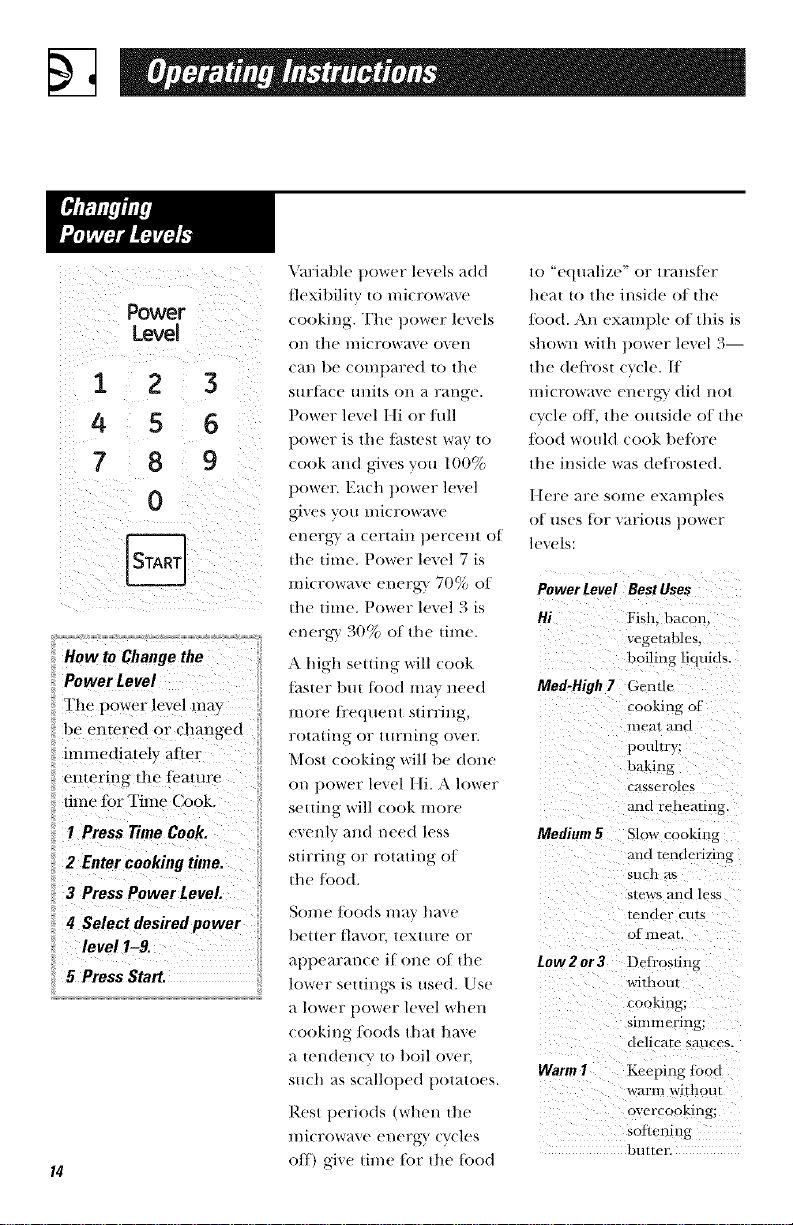
be entered or changed
immediately af)er
entering the fbature.
time tbr Time Cook,
2 Entercookingtime.
# Select desiredpower
level I-9.
5 Press Start.
Variat)le t)ower levels add
flexibility t() microwave
cooking. The tlower levels
on the mi( rowave oven
can be compared to the
surlace ulfits on a range.
Power level Ill or fltll
power is tile thstest way to
cook and gives you 100%
ttower. Each power level
gives you microwave
( n( 1 o-_ - •
? _b, a (erlalll tier(ellt of
the tiltle. Power lexel 7 is
illicrovvrave energy 70% ot
tlte time. Povvrerlexel 3 is
energ-y 30% of the time.
A high setting will cook
thster 1)ut toed may need
more/t'equent stirring,
rotating or ttlrning over.
Most cooking will be done
on power level Ill. A lower
setting will cook more
evenly and need less
to 'equalize" or lrallst;t'r
heat to 11/e inside o| tile
ood. All exallll)le el this is
sllovnl vdtl power level 3--
tile de|rest +-_('le. [t
l//iCFOW;lt, e ellOF_"v did rio1
(v(-le o11. lhe till|side el Ill('
ood wouM (-ookt)elbre
the inside was delrosted
Ilere are sou_e exal/ll dos
ot uses [iir \arious power
low'Is:
PowerLevel BestUses
Hi Fish. b_,con.
vc_elnbles.
boiling liquids.
Me&High7 Gcnlle
cooking oI
lIleal and
pouhry;
baking
casscroh,s
and reheating.
Medium5 Slowcooking
stirring or rotating el + and tenderizing
the lood. such as
slews alld less
Nellie t(_o(]s Ill;IV ha\e lellder eLliS
lieller tla\or, lexlllFe (ir of meaL
aliltearml(-e it olie el the tow2og3 Deh+osung
lo\,,er settings is tlsed. Us(+ without
;| |()\_'er iitix_rer |e_'el whell cooking;
sltnlilering:
cooking foods that have
a ten(ten(-v to boil ()vet,
such as scalloped t)otatoes.
Rest tteriods (when the
microwave energy cycles
el1) give time tor the toed
d,,licare S_lllCes.
Warm1 K<'epingIbod
\VD FIll wirllou 1
overcooking;
sofwning
btllteL
Time Features ___
1 2 3
4 5 6
7 8 9
0
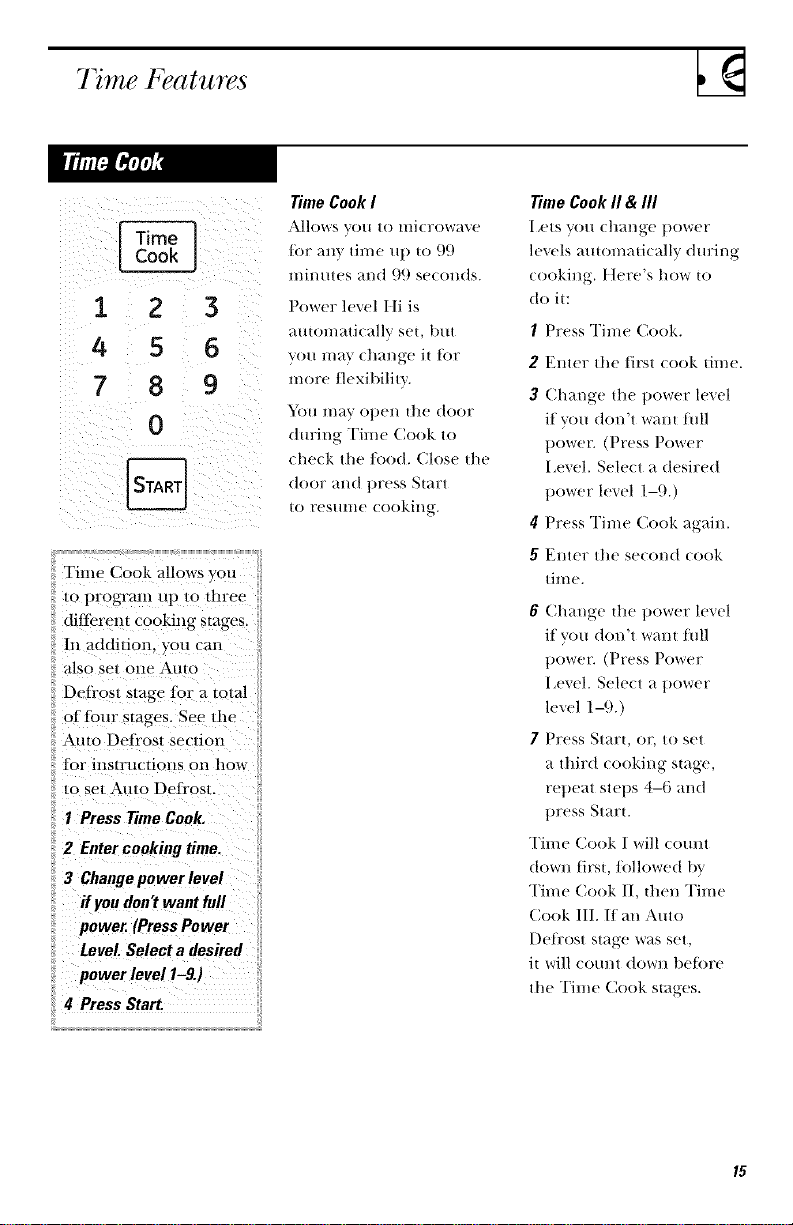
4
gime Cook Mlows you
/o program up lo three
diftbrem cooking stages.
In addi/ion, yOtl Call
: also se,o.e A.to
Defl'ost slage tor a ro|al
offbur stages. See tile
Auto Defl'o_l secdon
tar instructions oi1 ho_
/o se_ Au/o Defi'osL
I Press Time Cook,
Enter cooking time.
3 Changepowerlevel
if you don't want full
power. (Press Power
Level Select a desired
power level 1-9.)
14 Press Start.
Time Cook I
Jkll()ws VO/I tO lIli(rowHve
{br any time up to 99
minutes and 9{) secoHds.
Power level Hi is
automatically set, but
you 1ha} change it tor
more/lexibilitv.
You may open tile door
d m:ing Time Cook to
check the/ood. Close the
door and press Start
to resmne cooking.
TimeCookII & III
Ix'ts you dlange [)()_r('_"
levels amomatically dm:ing
cooking. Here's how to
1t11it:
1 Press Time Cook.
2 Enter the first cook time.
3 Change ille power level
if you don't want full
power. (Press Power
I,evel. Select a desired
power level 1-9.)
4 Press Time Cook again.
5 Enter tile second cook
time.
6 Change tile power level
if you don't want full
pc)wet: (Press Power
I,evel. Select a t)ower
level 1-9.)
7 Press Start, el, to set
a third cooking stage,
repeat steps 4-6 and
press Start.
Time Cook I will comu
down firsL/ollowed by
Time Cook 1I, then Time
Cook III. If an Auto
Defl:ost stage was set,
it will c(mnt down betore
the Time Cook stages.
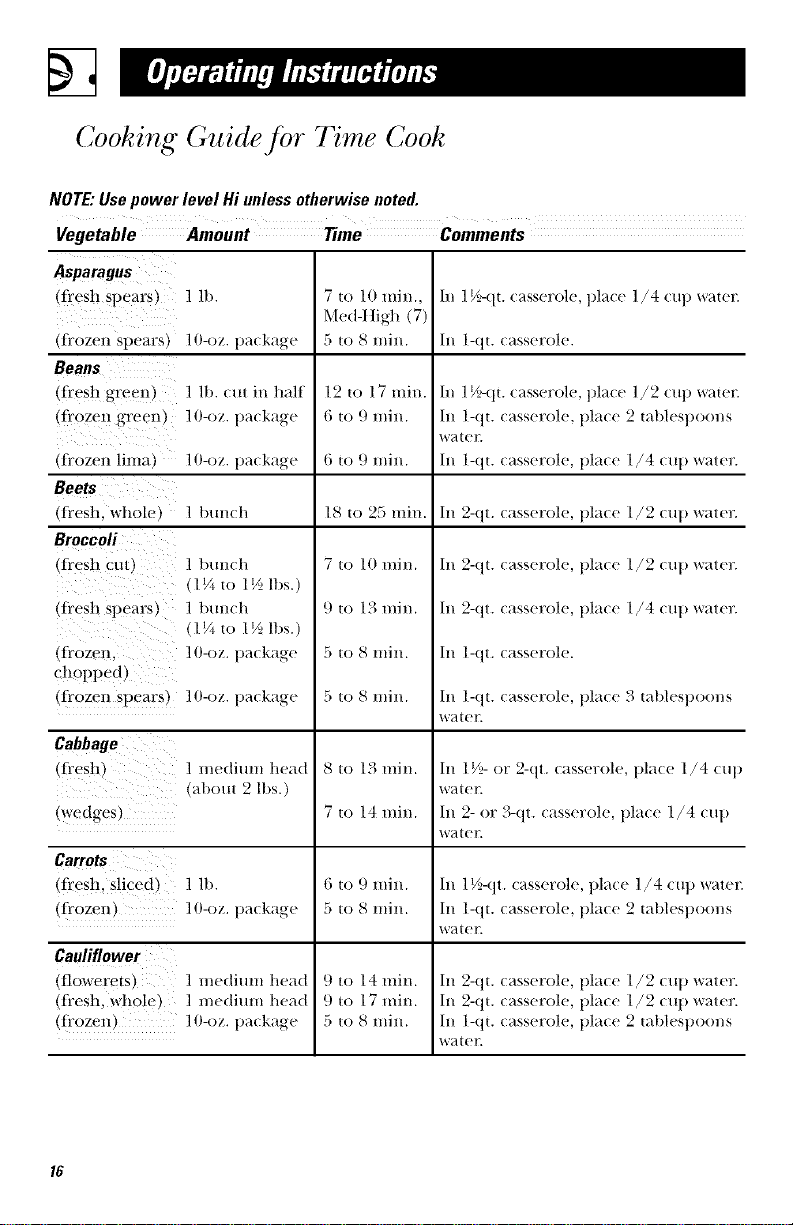
Cooking Guide for 77me Cook
NOTE:Usepower level Hi unlessotherwise noted.
Vegetable Amount Time Comments
Asparagus
(fresh spearsl ] lb.
(frozen spearsl lO-oz, package
8eans
(fi'esh green) I]b xut in halt
(frozen a-reenl ]O-oz. paxkage
7 to 10 rain.,
Med-I tigh (7)
5 to 8 min.
12to 17rain.
6 to 9 rain.
In 1_/>qt.casserole, place 1/4 cup water.
In 1-qt. casserole.
In 1 V_>-qt.( asserole, place 1./2 (up water.
In 1-qt. (asserole, plaxe 2 tablespoons
W_lt er.
,frozen lima, lO-oz, package
Beets
tll"esh, whole) ] Im))ch
Broccoli
(Ii'esh cut 1 bunch
11/+to 1½ lbs.)
(fi'esh spears) ] bu)wh
11/+to 1½ lbs.)
,frozen. ]O-oz. package
chopped)
(frozen spearsl ]O-oz. package
6 to 9 min.
18 to 25 min.
7 to 10 min.
9 to 13 min.
5 to 8 min.
5 tO 8 lllilX.
In 1-qt. casserole, place 1/4 cut> water.
In 2-qt. casserole, place 1/2 cup water.
In 2-qt. casserole, place 1/2 cup water.
In 2-qt. casserole, place 1/4 cup water.
In 1-qt. casserole.
In 1-qt. casserole, place 3 tablespoons
water.
Cabbage
(li'esh)
(wedges,
1 m('dilm) head
M)out 2 lbs.)
Carrots
(fresh. sliced) 1 lb.
(fi'ozen ]O-oz. t)a_ kage
Cauliflower
(ilowerets, ] m('(lium head
(fresh. whole, ] mediu))) head
(li*ozen ]O-oz. package
8 to 13 min.
7 to 14 min.
6 to 9 min.
5 to 8 min.
9 to 14 min.
9 to 17 min.
5 to 8 min.
In 1½- or 2-qt. casserole, place I/4 cup
W_lt er.
In 2- or 3-qt. (asserole, pla(e 1/4 (up
water.
In 1 t/2-qt, xasserole, place 1/4 (up water.
In 1-qt. xasserole, pla(e 2 tablespoons
W+lt er.
In 2-qt. casserole, l>lace 1/2 cup water.
In 2-qt. (asserole, pla(e 1/2 (ul> water.
In l-qt. (asserole, pla(e 2 tablespoons
W_lt er.
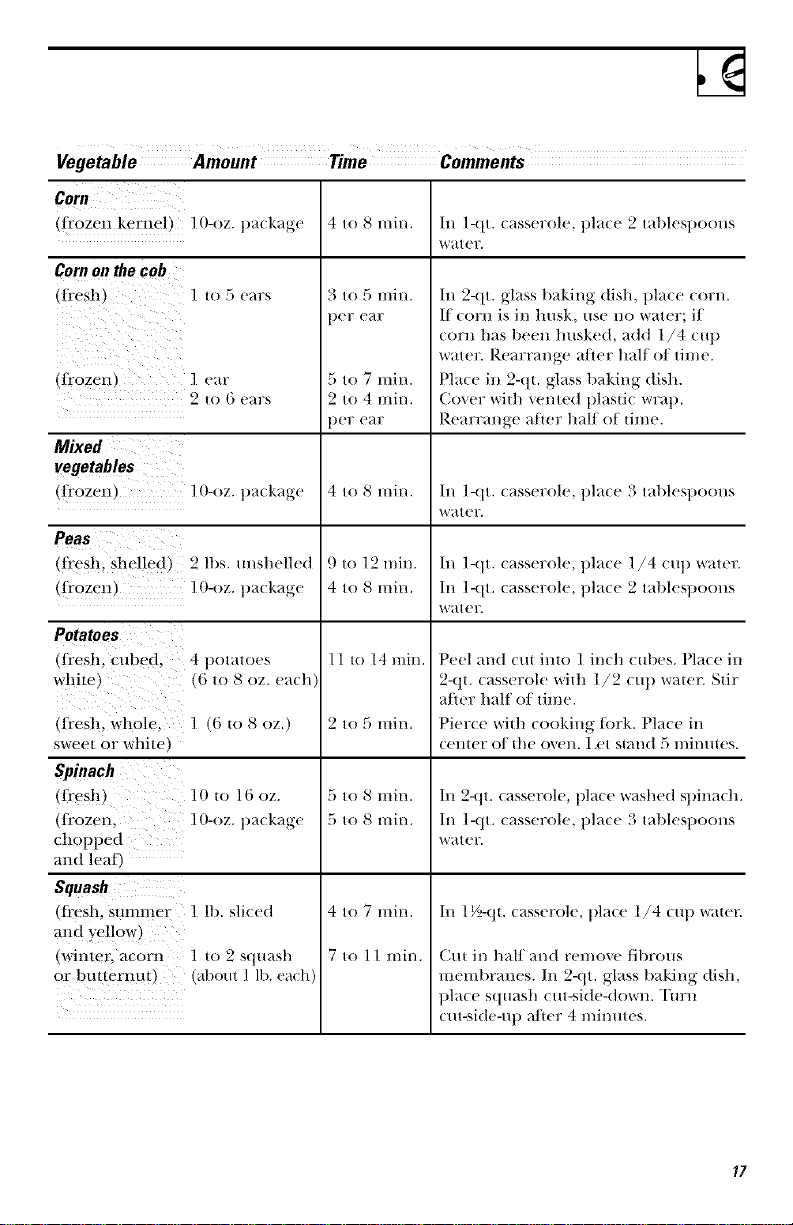
z
Vegetable AmountTimeComments
(frozen kernel) ] O-oz. pa(kage 4 to 8 rain. In l-qt. (assero]e, plate 2 tal)]espoons
water.
CoN on the cob
(tiesh) 1 to 5 ears
(frozen) ] ear
2 to 6 ears
Mixed
vegetables
(frozen) ] O-oz. pa(kage
Peas
(fles!L slml!ed) 2 ]bs. unshelled
(frozen) ] O-oz. pa(kage
Potatoes
(fl'esh, cubed,
wffite)
4 ])otatoes
(6 to 8 oz. each
3 to 5 rain.
)er e_lr
5 to 7 rain.
2 to 4 rain.
)er (N4r
4 to 8 rain.
9 to 12 rain.
4 to 8 rain.
11 to 14 )]fin.
In 2-qt. glass baking dis]], ])lace corn.
If corn is in husk, use no water; if
corn has bee]] husked, add 1/4 CUl)
water. Rearrange after half of time.
Place ill 2-qt. glass baking dish.
Cover widl vented plastic wrap.
Rearrange a]ier half of time.
In 1-qt. casserole, place 3 tal)]espoons
water,
In K-Kit.casserole, place 1,/4 cu]) _ater.
In 1-(it. casserole, ])]ace 2 tal)les])oolls
water.
Peel and cm into 1 inch cubes. Place ill
2-qt. casserole wid] 1/2 cut) water2 Stir
after half of time.
Pierce wid] cooking ]brk. ['lace in
cemer of tile ovell. I,et stand 5 l//il//ltes.
(fresh, _I!ole, ] (6 t() 8 oz.)
sweet or white)
Spinach
(ti-gsh) 10 to 16 oz.
(Ii'ozen, lO-oz. ])a( kage
chopped
and lea 0
Squash
(fi'esh, summer ] lb. s]i(ed
and yellow)
(winteL acor n ] to 2 squash
or butteI-!ltK ) (about 1 1t1.each)
2 to 5 rain.
5 to 8 rain.
5 to 8 rain.
In 2-qt. casserole, ])]ace washed s])illac]l.
In 1-(It. (asserole, ])]a(e 3 tal)]es])oolls
W_!I er.
4 to 7 rain.
7 to 11 rain.
In ] ½-(It. casserole, ])]ace ]/4 ctq) water.
Cut in half and remove fibrous
menff)ranes. In 2-qt. glass baking dis]l,
place squash cut-side-down. "I'mPn
cut-side-up alter 4 nlinutes.
17
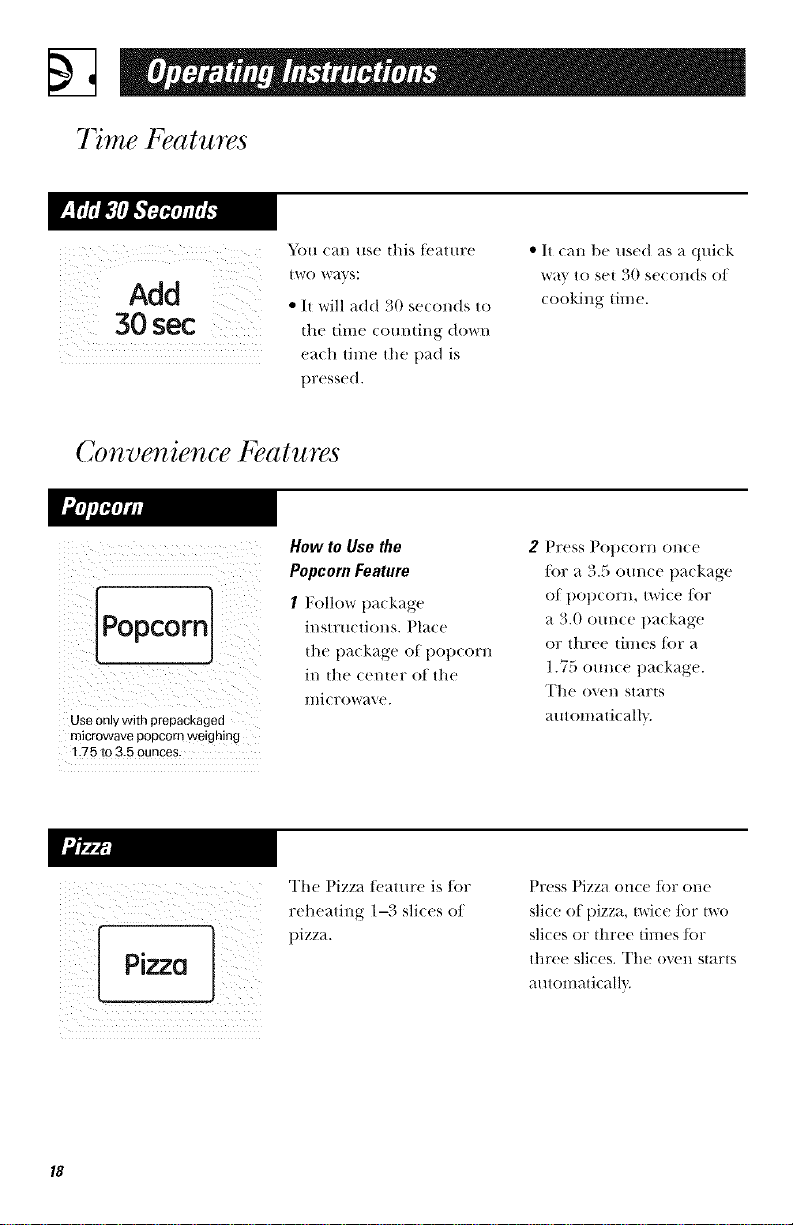
Time Features
You era/use this feature
Add
30 sec
tWO '€,'aS S _
• It will add 30 seconds to
tile time cotmting down
each time the pad is
pressed.
• It can be used as a qtfi(k
Wa_ to S( t )0 se(olldS of
((>()king time.
Convenience Features
iPopcorn
Use only with prepackaged
microwave popcorn weighing
1.75 to 3.5 ounces.
How to Use the
Popcorn Feature
1 Follow package
instructions. Pla(e
the package of l)ot)eorn
in the center of the
microwave.
2 Press Pol)eorll ol/ee
/or a 3.5 ()trace package
of popcorn, twice/or
a 3.0 ()trace llackage
or three times tor a
1.75 otmce package.
The ovel/ starts
mnomaticalh.
The Pizza t_,at ure is for
i i¸+++++++o
_i iiI__ P_
Pr(ss Pizza OIIC( ]()17 oi/(
slice of pizza, t_,,,ic,. ]or t_,,,o
slices or three umes/or
thr(( slices. Th( ov(n starts
automatic_dl}.
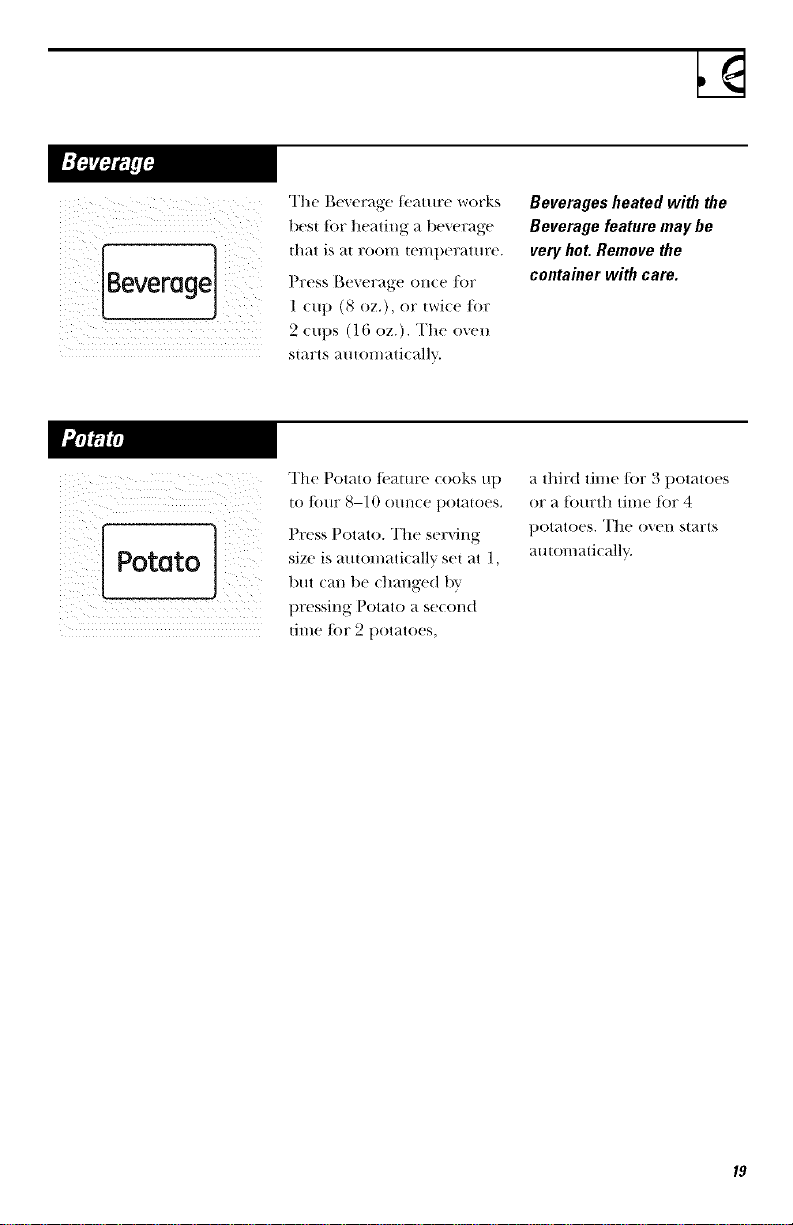
Beverage]
The Beverage t_'ature works
best tk)r heating a beverage
that is at room temperature.
Press Beverage on{e/i)r
1 cut) (8 oz.), or twice/i)r
2 cups (16 oz.). The oven
stall?IS alltOl//atJt allY.
Beverages heated with the
Beverage feature may be
very hot. Remove the
container with care.
The Potato i+_amr( cooks up
to four 8-10 ounce t)otato(s.
Press Potato. The serving
size is automatically set at 1,
but tan be thanged |)_r
pressing Potato a second
tittle/_)r 2 potatoes,
a third time/_)r 3 potatoes
or a t_)urth tittle t_)r 4
t)otatoes. The oven starts
autontaticalh'.
Convenience Features
Vegetable
Use the _2_getal)le i_ature
to took lip to 4 (lips of
fi'esh xegetables.
Press X_'getaMe once
to cook 1 cup of vegetables,
twi(e to (ook 2 (ups,
three times to cook 3 (ups
or ]()lit tl]//es to cook
4 cups. The oven stm:ts
a/ltOl//ati( allY.
ii i
The Reheat/i'amre reheats
previously cooked tbods.
Press Reheat once to
reheat a plate of le/iovers
(2-3 tbo(Is) or twice to
reheat pasta (8-10 oz.).
The oven starts
automatically.
2O
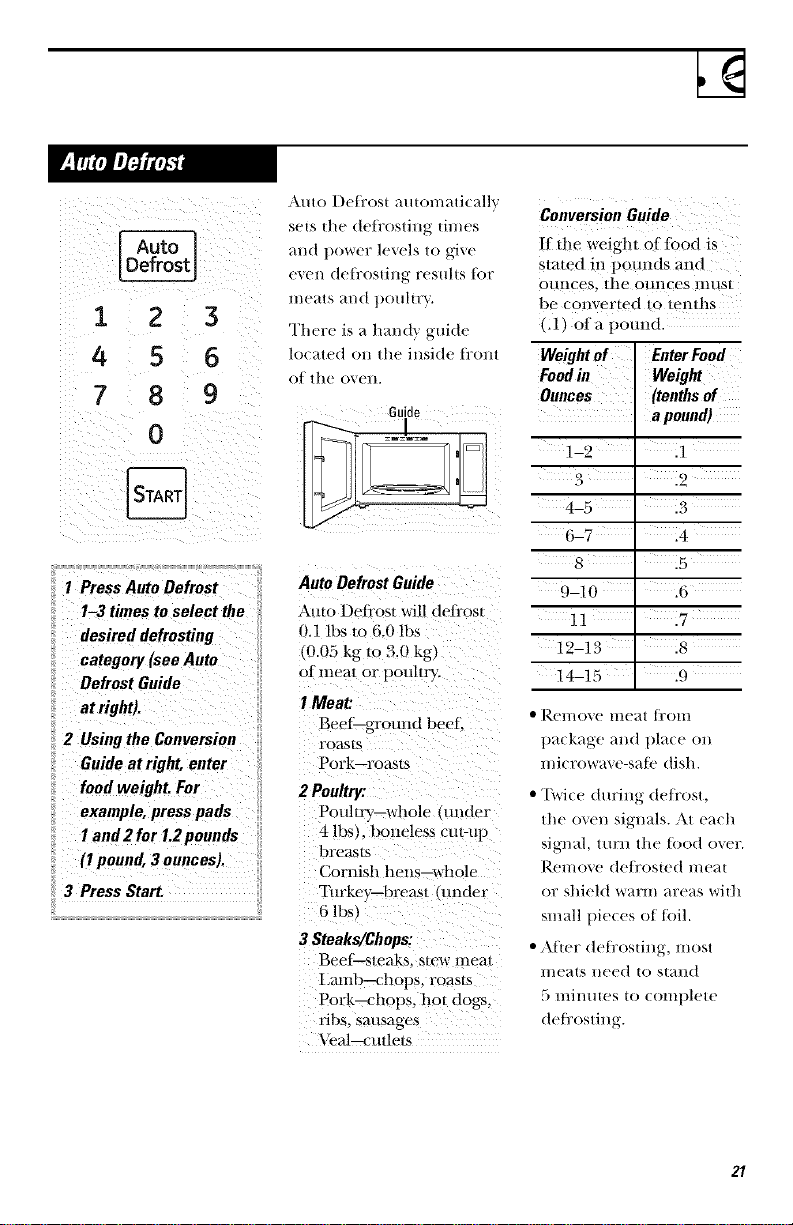
AutoI)efix/stattton/aticallv
setsthedefix/stingtin/es
mendefix/stingresultsti/r
nleatsand,}oultr,'.
1 _ ,
12 3
There is a handy guide
/4 5 6 lo(ated (hi tilt, inside fix;/nt
of the ovell.
7 8 9 au,do
Auto Defrost Guide
desired defrosting
:: o_tegoq(seeauto
::2 Using the Conversion
Guide at right, enter
food weight. For _i
:i example, press pads
ii I and 2 for l.z pounds :
:i ('P°und,'°u.°es*
;_3 PressStart.
Auto Deli_st wil! deti'ost
0,1lbsto6,0lbs
(0.05 kg to 3,0 kg)
of meat or poultry.
IMeat:
Beef--g_tmd beet;
Pork--roas_s
poultry--whole (under
4 !bs), b0nele.ss cut-up
breasts
Con-fish hens--\shole
Turke}_breast (under
a steaks/Chopsi
Beet_steaks, stray meat
Iimnb--chops, roasts
Pork--ch0ps, hot dogs,
fibs, sausages
\_al_utleks
Conversion Guide
!fthe weig!!t of fbod is
stated ill po}mds and
Oi!llCeS_ tile Ollllces 1Ill!St
be converted to tenths
(il) of a pound.
Weight of Enter Food
Food in Weight
Ounces (tenths of
a pound)
4-5
8 .5
9-10 .6
11 27
19-13 28
14-15 .9
• Rel//(/x,e nleat t]?()lll
t}a(kage and plate (in
lni{ r(/wa_, e-sat)! dish.
• "I\vice during de/i'ost,
tile oven signals. At each
signal, turn the toed o_er.
Renlove de/i'osted meat
or shieM warm areas with
snlall pieces of {oil.
• Alter defi'osting, most
l/lekltS lleed tO St_lll(|
,T lninlltes to t onltllete
(teI]'osting.
21
Other Features Your Model May Have
0
CLOCK
l 2 3
4 5 6
7 8 9
0
Press C1 ()CK to enter the
time ot da'L
I Press CI,()CK.
2 Enter time of day.
3 Press CI,()CK.
Timer 1
{
1 2 3
4 5 6
7 8 9
0
The Timer operaws as a
mimuc timer.
I Prcss Timer.
2 EIII_!F alllO/ln[ Of tilIle
you want to c()tmt down.
3 Press Start. When the
time is up, die timer will
signal.
The Timer t_ature
Ol)e]:_ttes withollt
l//i( FOW_t'_ (! (_11 (! r__'.
22
i_ ii i iiiiiiiiii _i
;; CLEA.ST°PI
P]?_'ss on(_' 1o t)_t/IS( •
cooking (all settings will
be saved).
Pr('ss S[_IFt to contJllHu
cooking.
PI_(!SS t_vi( (! |0 StO l) 5111d
settings.
0
You may lock file conn:ol
l)a]lelto prevent the'
microwave li'om being
accidentally started or used
by children.
To lock or mflock the
conu'ols, press and hold 0
1()]7 _tboHt t]lFee S('COll(Is.
When the control panel
is locked, I OCK or I,
al)l)ears in the disl)la }.
23

Notes
24
Microwave Terms
Term Definition
Arcing Ar(ing is the IlIi(FOVQI_,e |el'Ill foF st)arks ill the oxell. Areillg is
caLised 1)',:
• metal or foil touching the side of the oven.
• foil that is not molded to/ood (upturned edges aci Hike
antennas).
• metal su(h as tv,rist-ties, poultrY, pin&s ogold-nmmed" dishes."
• re(y(led paper towels (ontaining small metal pie(es.
Covering Coxers hold in moisture, allow tor more men heating and red uee
cooking time. X_mting plastic v41_lt) ()1_ (oxering with wax t)al)el _
;41lows ex(ess steaH/ 1o es(al)e.
Shielding In a regular oxen, )ou shield chicken breasts or baked foods 1o
foil to shield thin parts, su(h as the tills of wings and legs (m pouhry,
which would cook before larger parts.
Sta.ding Thne When roll co(,k with 17ealllal7 (,'_ellS, foods sllch as 17()_tsts(,r cakes _,lTe
allowed to stand to t]nish cooking or to set. Standing time is
especially important in microwave cooking. Note that a mierowaxed
cake is not placed on a cooling rack.
Venting Afler (oxering a dish wi|h plastic w17_tp,VOH _,ellt the plastic wra t1 llv
HI1711il/_ 1)a(k ol/e (OFllel" SO ex(ess ste_lH/ (all es( alle.
25
Care and Cleaning
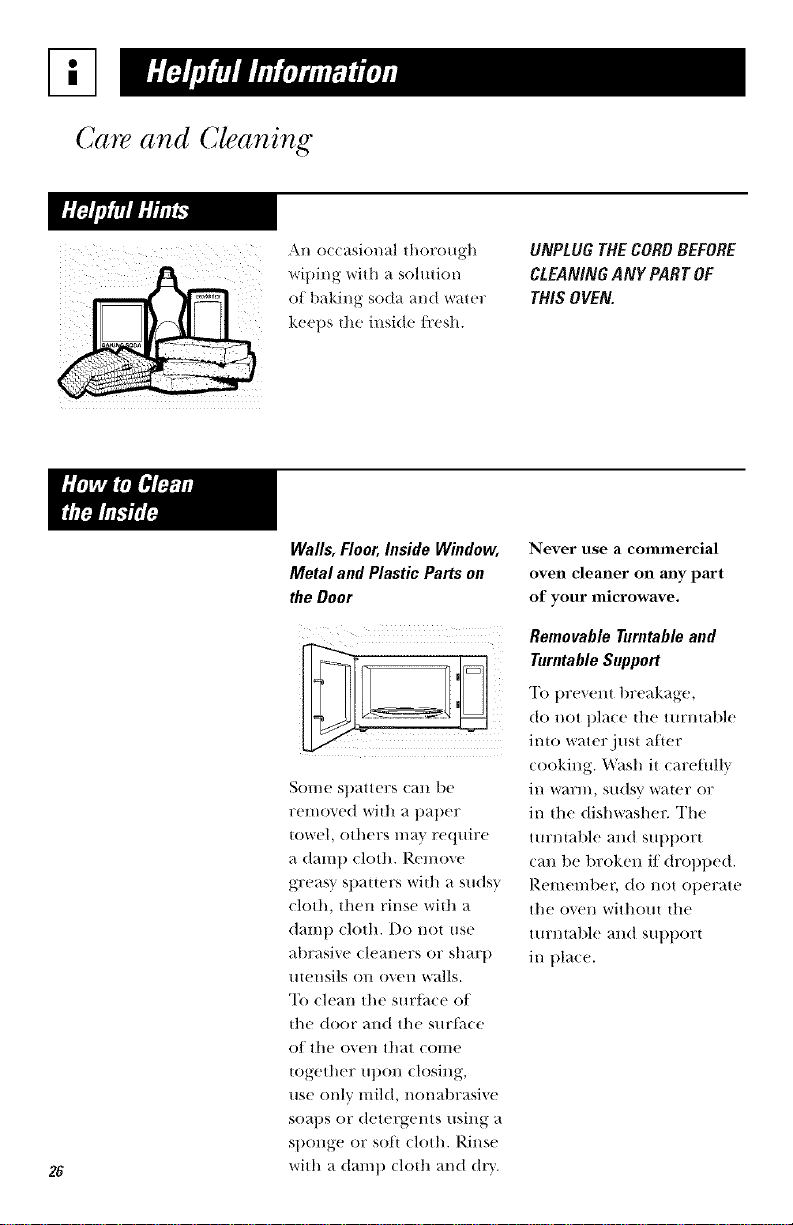
An occasional thorough
wiping with a solution
of baking soda and water
keeps the inside fi:esh.
UNPLUGTHECORDBEFORE
CLEANINGAN)" PARTOF
THISOVEN.
26
Walls,Floor,Inside Window,
Metal and PlasticPartson
the Door
Sortie spatters call be
ren/oved wifll a paper
towel, others n/a} require
a daulp ch)th. Remove
greasy spatters wi{h a sudsy
cloth, then rinse wifll a
damp cloth. Do not use
alwasive cl_'aners or sharp
mensils on oven walls.
"Ib clean the surthce of
the door and the surIh(e
of tile oven that conle
together upon closing,
use only ulild, nonabrasive
soaps or detergents using a
sponge or soil cloth. Rinse
with a damp clofll and dry.
Never use a connnercial
oven cleaner on any part
of your microwave.
Removable Turntable and
Turntable Support
To prevent breakage,
do not pla(e tlle turntable
into water just atter
cooking. Wash it carefully
ill warl//, sIlds_ wawr or
ill the dishwasher. The
turntable and support
call be broken if dropt)ed.
RelIl('l//t)('l, do not oper_.te
tile o_en without the
tllrntable alld Sllppor[
ill place.
I;I
containi.,ammonia
or alcohol on the
ii inicrowave oven.
iiiAmmonia or alcohol can
i damage the appearance
of the inicrowave.
Case
Clean the outside of the
microwave with a sudsy
(loth. Rinse and then dry.
Wipe the window clean
with a dam t) cloth.
Control Panel and Door
Wipe with a damp cloth.
Dry thoroughl}. Do not
use cleaning spra_s, large
amounts of soa t) and water,
al)rasives or shar l) ok!je(ts
on the panel--they Call
damage it. Some paper
towels can also scrat€h
the control panel.
Door Surface
It's important to kee t)
the area clealJ, where the
door seals against the
microwave. Llse only mild,
non-abrasive detergents
at)plied with a clean sponge
or s()/t ch)th. Rinse well.
Power Cord
If the cord becomes soiled,
mq)lug and wash with a
dam l) (loth. For stubborn
Spots, SH(/s_ water H/a_ be
used, but be (ertain to
rinse with _1damp (h)th
and dry thoroughly belore
plugging cord into outlet.
27
Troubleshooting Tips
Problem PossibleCause What toDo
Ovenwill not start
Controlpanel
lighted, yet oven
will not start
A fuse in your home
lnay be blown or the
circuit breaker tripped.
Power surge.
Plug not fully inserted
into wall outlet.
Door not
securely closed.
Start not pressed
after entering cooking
selection.
Another selection
entered already in oven
and Stop/Clear not
pressed to cancel it.
CooMng time not
entered after pressing
Time Cook.
Stop/Clear was
pressed accidentally.
Defrosting category
or food weight not
entered after pressing
Auto Defrost.
• Rel)lace fltse or reset circuit breaker,
• Lint)lug the microwave oven, then plug
it back in.
• Make sure tlle 3-t)rong plug 011 the
oven is fully inserted into wall outlet.
• ()pen tile door and close securely.
• Press Start.
• Press Stop!Clear twice.
• Make sm:e you ha_e entered cooking
time a/ler pressing Time Cook.
• Reset cooking program and press
Start.
• Make sm:e you have entered a
defl:osting camgov} and fi)od weight
atter pressing Auto De/i'ost.
28
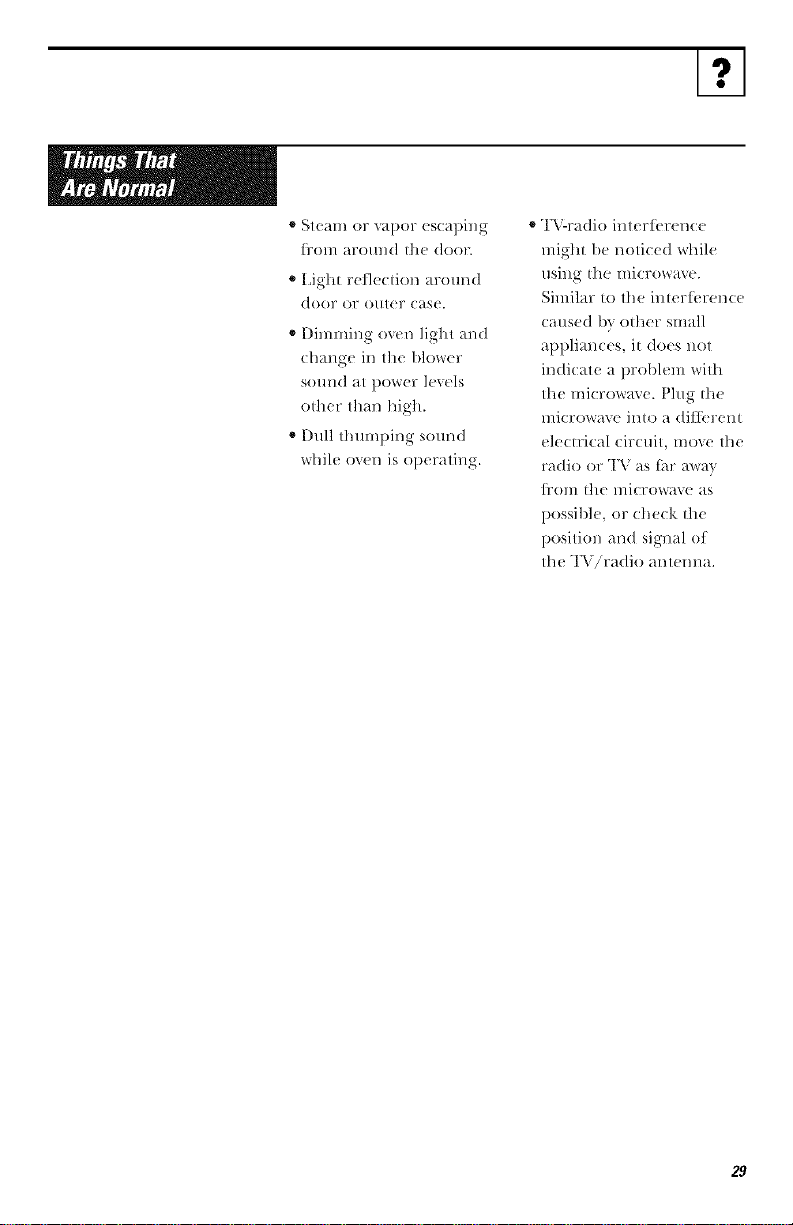
o Steam or vapor (scaping
1}'1)1/1 _ll'()t/l/d t]u. dool'.
" I,ight refl< ction around
door 017 ()//t_. Y (ase.
" Dimming oven light and
change in the blow< r
sound at power lewls
other than high.
" Dull thumping sound
while ov<n is operating.
" TV-radio interlbr< nc<
might be noticed while
Similar to the interlbrenc<
caused 1)xother small
appliances, it does not
indicate a problem with
tile microwave. Plug the
microwave into a dil]erent
electrical circuit, move the
radio or TV as liw :m'ay
]1701/1tll< I/Iic17ow;Iw. _l_S
possibl_, or check/he
position and signal of
the TViradio antemm.
29

Notes
30
GEMicrowave OvenWarranty.
_ Al! warranty service provided by our Factory Staple your receipt here.
Service Centers, or an authorized Customer Care_" Proof of the original
technician. To schedule service, on-line, 24 hours purchase date is needed
a day, visit us at ge. corn, or cal! 800.GE CARES to obtain service under
(800A32.2737). Please have serial and model the warrantg
numbers available when calling for service.
For ThePeriod Of"
One Year
From the date of the
original purchase
GEWill Replace:
Anypartol the iilicl:O\_,;l_,t o\ei/whi('h litils (h_e to kt delbct in
materials or worklnanship. DtllJng this limited one-year warranty,
GE will also provide, free ofchallrje, all labor and related se_Mce
costs to r_ l)lace d_e delbctive l)art.
What GEWill Not Cover."
i_i;Service trips to your home to teach you
how to use the product.
i_i;hnproper hlstallafion, delivery or
ulaintenance.
i_i;Product not accessible to provide
required service.
i_i;Failure of the product or dmnage to die
product if it is abused, ufisused (for
exmnple, cavity arch lg from wire rack or
metal/foil), or used for other dlan the
hltended purpose or used colmnercially.
i_i;Replacelnent of house fuses or resetting
of circuit breakers.
i_i:Dmnage to die product caused by
accident, fire, floods or acts of God.
i_i_hlcidental or cousequential damage
caused by possible defects wifll fllis
applimlce.
ii:: Dmnage caused after delivery.
EXCLUSIONOFIMPLIED WARRANTIES--Yoursole and exclusiveremedy isproduct
exchange asprovidedin thisLimited WarraMy.Any implied warranties, including the
implied warranties ofmerehantabilRyorfitnessfora particular purpose,are limited to
one year or theshortestperiod allowed bylaw.
Thiswarranty is extended to the original purchaser andan}/succeediegowner for productspurchasedfor home
use within theUSA. If theproduct is located in an area where serviceby a GEAuthorized Serviceris not
available, youmay be responsiblefor a tripcharge or youmay be required tobring theproduct to anAuthorized
GEServiceLocation for service,le Alaska, the warrant;/excludes theservice calls to ;/ourhome,
Some statesdo not allow theexclusioeor limita tioe of incidental or consequential damages.This warrant;/
gives you specific legalrights, and you maya/so have other rights which vary from state to state. Toknow what
yourlegal rights are, consult your localor state consumeraffairs office or yourstate'sAttomey Geeeral.
Warrantor: General Electric Company.Louisville, KY 40225
31
ConsumerSupport.
GEAppliancesWebsite 9eco,,
]Ime a question or n(_d assistan(e _ilh yo/ir applian(_ ? "Iiy file (;E Applian(es Wel:)sim
_4 hollrs a day, any day of l[l(. year! Fol- _le_l[er (oiiv(!ili_ ii((! _ii(] _s[_ 1 S(!l_i((! voll (all
no_._ downloa(/()wnel_S i'vlallllals, order paris or (_vell S(]l((]llle S(_lvi(e on-lille.
ScheduleService ge.com
Expert GE repair s(rvice is only one stq) away ti-om your dool: Get on-line and
S(]l( dll[( votlr servi(e at VOtlY ( OllVeiliell(e 24 holll-S ally (lav of th( veaY! ( )1 (all
80(I.(;E.(_kRI_S (800.432.2737) during normal busin(ss hours.
RealLifeDesignStudio
de.corn
GE supports the [ fniw'rsal Design (on(eptIproducL',, ser'd(es and emiromnem.s that
(all be used l)y people of all ages, sizes mid capabilities. We re(ognize the need to
design ti)r a wide rmlge of ph):,,i(al and mental abilities and impairments. For (let_dls
of GE's [ Jniversal I)esign applications, inchlding kiu:hen design ideas ti>r pe()ple with
disabilities, check out our _,i'bsite toda}; For d_e hearing impaired, please (:all
800.TDD.(;EAC (800.833.4322).
ExtendedWarranties
de.corn
Purchase a GE extended warranl_ and learn about special discotmt5 that are available
while v()ur warranty is still in etti>_t. Y_)u can pur(hase it on-line anytime, or call
800.626.2224 during normal business hours. (;E Consumer Itome SelaJces will
still be ttlere alter your warramy (_',:pires.
PartsandAccessories
de.corn
Individuals qualified to ser'dce their own appliances can hme [>arts or accessories
sent dire(tlv to their homes (VISA, MasterCard and Dis(ov('r (ards are accepted).
Order on-line rodin; 24 hours every (lay or b? phone at 800.626.2002 during normal
bllSiIleSS hotlrs.
Instructionscontainedin this manual coverprocedures tobe performedbyany user. Other
servicing generally should he referred toqualified service personnel.Cautionmust be
exercised, since improperservicing may cause unsafe operation.
ContactUs go.corn
If you are not satisfied with the service vou receive fiom GE, contact us on our Website
with all the derails including your phol_e nmnben <)rwrit(' to:
General Managel; Customer Relations
GE Appliances, .\pplia:nce l)ark
Louisville, KY 40225
RegisterYourAppliance de.corn
Register your new appfiance on-line---at yore* convenience! Timely produ(t registration
will allow ti)r enhan( ed ( omnluni( ation and prompt servi( e und(r tile terms of your
warranty, should tile need arise. Y_)u ma', also mail in the pre-printed registration card
included in the packing material.
MFL382894021
49-40563 05-07JR PrintedinChina JES0736

