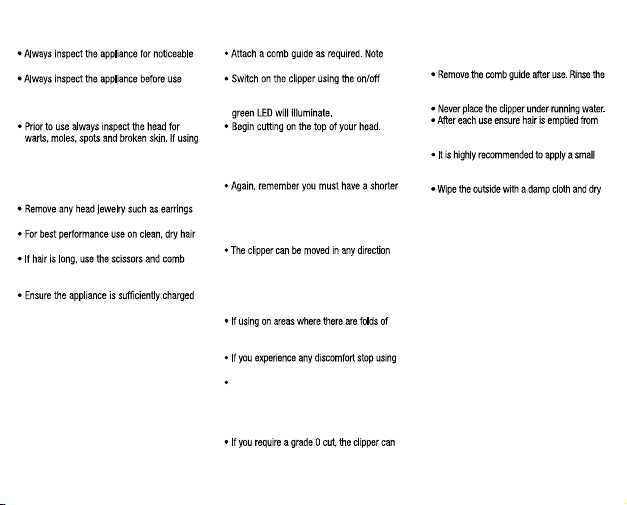
CLEANING & MAINTENANCE OF CLIPPER
To maintain optimum performance, the
appliance should be cleaned after each use:
comb guide under running water and dry
thoroughly before storage or use.
the blade area and use the cleaning brush to
clean thoroughly.
amount of oil (provided) to the blades before
each use.
thoroughly before use or storage.
STORAGE
When not in use, allow clipper to cool and
store in a safe, dry location and out of the
reach of children. Never pull, twist or wrap
the cord around the clipper.
MODEL HC900R
Model HC900R
LIMITED FIVE YEAR WARRANTY
Conair will repair or replace (at our option) your
unit free of charge for 60 months from the date of
purchase if the appliance is defective in workman-
ship or materials.
To obtain service under this warranty, return the
defective product to the service center listed below,
together with your purchase receipt and $5.00 for
postage and handling. California residents need
only provide proof of purchase and should call
absence of a purchase receipt, the warranty period
shall be 60 months from the date of manufacture.
ANY IMPLIED WARRANTIES, OBLIGATIONS, OR
LIABILITIES, INCLUDING BUT NOT LIMITED TO
THE IMPLIED WARRANTY OF MERCHANTABILITY
AND FITNESS FOR A PARTICULAR PURPOSE,
SHALL BE LIMITED IN DURATION TO THE 60
MONTH DURATION OF THIS WRITTEN, LIMITED
WARRANTY. Some states do not allow limitations
on how long an implied warranty lasts, so the above
limitations may not apply to you.
IN NO EVENT SHALL CONAIR BE LIABLE FOR
ANY SPECIAL, INCIDENTAL, OR CONSEQUENTIAL
DAMAGES FOR BREACH OF THIS OR ANY
OTHER WARRANTY, EXPRESS OR IMPLIED,
WHATSOEVER. Some states do not allow the exclu-
sion or limitation of special, incidental, or conse-
quential damages, so the above limitation may not
apply to you.
This warranty gives you specific legal rights, and you
may also have other rights, which vary from state
to state.
IB-10691
©2011 Conair Corporation
Service Center
Conair Corporation
Service Department
7475 North Glen Harbor Blvd.
Please register this product at
www.conair.com/registration
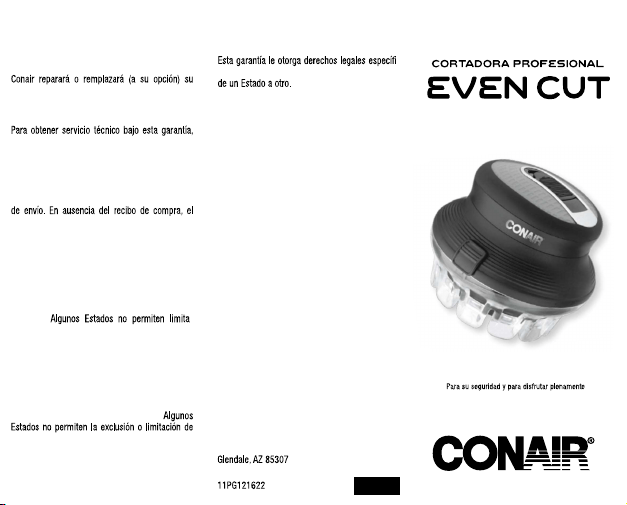
In str uction Booklet
For you r safety and continued enjoyment
of this pr oduct, always read the instruction
booklet carefully before using.
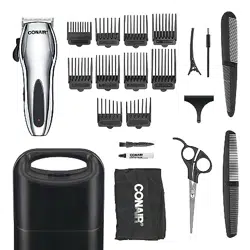
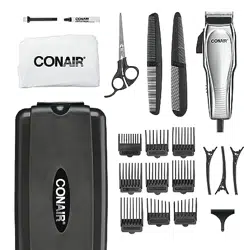
maintain a short, even cut – easily!
Stainless
Steel Blades
1
Barber Comb
2
Scissors
3
Neck Brush
4
Oil
5
Storage pouch
6
1
3
2
4
5
6
CLIPPING
Comb Guides section for specific lengths.
sliding switch located on top of the clipper
and the blades will start to move and the
Slowly and gently steer the clipper around
the scalp, taking care on areas where there
may be warts, moles, spots and broken
skin and keep away from the ears.
hair style, length to begin, as this item will
not work on longer, layered hair.
FOR BEST RESULTS USE IN A
CIRCULAR MOTION.
to cut your hair. Only apply gentle pressure.
Never force the clipper - if resistance is
experienced lift clipper away from the head,
empty hair from the clipper and resume
clipping.
skin, ensure the skin is stretched taught prior
to cutting hair in this area.
immediately.
NOTE - Hair will collect in the area inside
the blade ring. This may need to be emptied
before all the hair has been cut. Switch the
clipper off and remove any hair by simply
tapping gently on the top of the clipper.
be used without a comb guide attached for
an ultra close, even cut.
PREPARATION FOR USE
signs of damage. Do not use if damaged.
to ensure the clipper blades are free
from hair, debris etc. (see Cleaning &
Maintenance of clipper).
the clipper on yourself either use mirrors or
ask another person to check for you. Special
care should be taken when cutting hair
in areas that have warts, moles, spots or
broken skin, to prevent injury.
and necklaces before use.
that has been combed until tangle-free.
provided to cut the hair prior to using the
clipper.
or plugged into the outlet.
NOTE: The appliance should not be used for
longer than 15 minutes when operated from
the outlet.
WARNING
- The clipper is for use only
on the head. Never use the clipper on the face
or any other area of the body.
IMPORTANT - Do not attempt to trim hair close
to your ears with the clipper. Never allow ears
to enter the ring of the clipper blade.
BATTERY DISPOSAL
This appliance contains Nickel Metal Hydride
batteries. To protect the environment this
appliance and its batteries must be disposed
this appliance to a recycling center, where
the internal rechargeable battery should
be removed by a professional and recycled
separately. For more information about the
recycling of electrical and battery operated
appliances please contact your local council
office or your household waste disposal ser-
vice. For specific enquiries regarding the re-
placement of batteries in this product please
contact our Conair Customer Care Line.
Removing the Battery
Screw
Screw
Battery
ATTACHING A COMB GUIDE
To attach a comb guide, make sure the
appliance is switched off. Hold the clipper with
the blades facing downwards and place the
comb guide over the top of the clipper with the
teeth of the comb facing downwards. Release
the comb guide locking mechanism, located
on the side of the appliance, by sliding it away
from the comb guide. Line up the dot indicator
on the comb guide (Fig. 1) with the grade
setting marker on the clipper (Fig. 1) then gently
rotate the comb guide in a counter-clockwise
direction until it clicks into place (Fig. 2). Make
sure that the locking mechanism is in the
locked position and the comb guide is securely
in place before using the clipper.
into the socket on the side of the appliance.
socket.
handle will illuminate when the appliance is
correctly connected to the outlet.
approximately 20 minutes of use.
OILING INSTRUCTIONS
IMPORTANT
each use to oil the circular blades with the
oil provided. This ensures optimum cutting
performance.
For the first use you will need to use the oil
supplied with the product, unscrew the cap and
cut off the very end of the plastic tube with a
pair of scissors to release the oil.
Before each use, we recommend adding a few
drops of oil provided in the oil slots inside the
blade ring.
IMPORTANT SAFETY
INSTRUCTIONS
When using electrical appliances, especially
when children are present, basic safety precau-
tions should always be taken, including
the following:
READ ALL INSTRUCTIONS
BEFORE USING
KEEP AWAY FROM WATER
FOR HOUSEHOLD USE ONLY
DANGER –
live, even when the switch is off.
To reduce the risk of death or injury by
electric shock:
1. Always unplug appliance from
electrical outlet immediately after using
(except when charging unit).
2. Do not place or store appliance where it
could fall or be pulled into a tub or sink.
3. Do not use appliance while bathing or in
the shower.
4. Do not place appliance in, or drop into,
water or other liquid.
5. Do not reach for an appliance that has
fallen into water. UNPLUG IMMEDIATELY.
Dry location use only. DO NOT expose to
liquid, vapor or rain.
6. Unplug this appliance before cleaning.
7. Only use adapter that is specified with
this unit.
DO NOT REACH
INTO THE WATER
WARNING –
To reduce the risk of
burns, electric shock, fire, or injury to persons:
1. Never leave a plugged-in appliance
unattended.
2. This appliance should not be used by
children or individuals with certain disabilities.
3. Use appliance only for its intended use as
described in this manual. Only use attachments
recommended by the manufacturer. Do not use
an extension cord to operate the appliance.
4. Never operate the appliance if it has a
damaged cord or plug, is not working properly,
has been dropped or damaged, or dropped into
water. Return the appliance to a Conair service
center for examination and repair.
5. Keep the appliance cord away from heated
surfaces.
6. Do not pull, twist or wrap the cord around
the appliance.
7. Never drop or insert any object into any
opening of the appliance.
8. Do not place the appliance on any surface
while it is operating.
9. Do not use the appliance with a damaged
or broken comb or with teeth missing from the
blades, as injury may result. Before each use,
make certain the blades are aligned properly
and oiled.
10. Do not use the appliance outdoors or
where aerosol (spray) products are being used
or oxygen is being administered.
11. Do not short the polarity (output cord).
plugging the adapter into outlet.
12. This power unit is intended to be correct
as per instruction booklet.
13. For connection to a supply not in the
proper configuration for the power outlet.
to outlet. To disconnect, turn all controls to
"OFF", then remove plug from outlet.
15. When using the appliance with its cord,
be mindful of tangles or kinks in the cord.
turn the unit off and straighten cord before
operating again.
SAVE THESE
INSTRUCTIONS
USER MANUAL
revolution in home hair cutting. The clipper’s
unique circular blades mean that it can
be used in any direction over the head to
maintain an all over even cut.
The clipper comes with adapter:
FEATURES
corded for continuous power while plugged
into the outlet or use cordless for total
flexibility and control during use.
precise cutting.
your hand.
scissors, storage pouch, oil, and barber
cape.
The hair clipper is perfect for maintaining
designed with a unique rotary cutting
system and circular comb guides to give
a guaranteed even finish. Because of this
revolutionary technology the cutting technique
differs somewhat to that of a normal clipper,
in fact this cutting technique is much simpler!
to an even length. It is not however, suitable
for layering or grading.
length (1" or less is recommended), is needed
for initial use of this item. There are two comb
guides; the smaller comb guide is for grades
1-3 and the larger comb guide for grade 4.
Note Comb Guides section for detailed
breakdown of lengths.
Firstly, select the desired comb guide and
lock the length setting in place lining up the
grade length number to the grade setting
indicator line.
For the best results we advise you start
cutting the back of the head and with a
sweeping motion run from the back to the
front of your head concentrating on one area
until you reach the desired length.
Once you have completed this over your
whole head you should then finish using
circular motions as this ensures you achieve
you first begin cutting your hair you may
notice that some hair is being cut and other
hairs are left long. This is perfectly normal,
especially if you are cutting longer hair. This
is because hair grows in different directions
used in all directions against the hair growth.
So continue cutting in all directions until all
hair is cut to length, then the use of circular
motions over the whole head will ensure an
even finish.
OPERATION
CHARGING INSTRUCTIONS
IMPORTANT
but before you do anything you must take your
time to charge the unit for 16 hours before its
straight from the outlet, this initial super-charge
ensures optimum power performance to give
smooth fast cutting every time. Only use the
adaptor supplied with this appliance. Using
appliance should be fully charged
continuously for 16 hours. Maximum
battery capacity will only be reached after
3 charging and discharging cycles.
PRESERVING THE BATTERIES
the rechargeable batteries, the appliance has
to be fully discharged and then recharged for
16 hours every 3 months approximately.
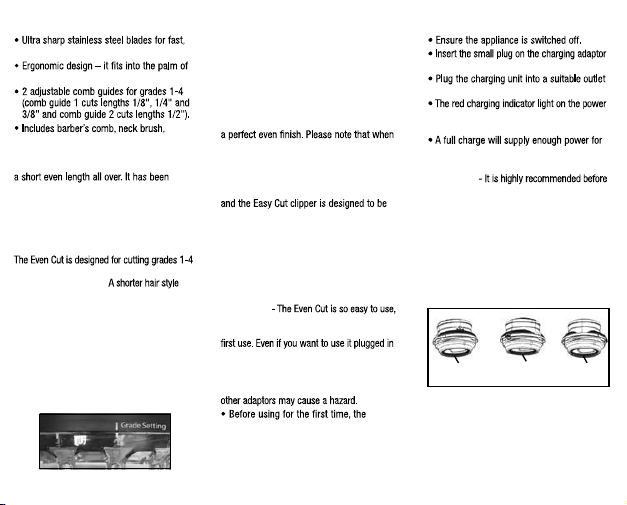
COMB GUIDES
This appliance is supplied with 2 adjustable
comb guides that provide 4 cutting lengths
from grades 1-4.
The comb guide with the shorter teeth will cut
at the 3 shorter lengths while the comb guide
with the longer teeth will cut at the 1 longer
length setting.
used without a comb guide for an ultra close,
even cut.
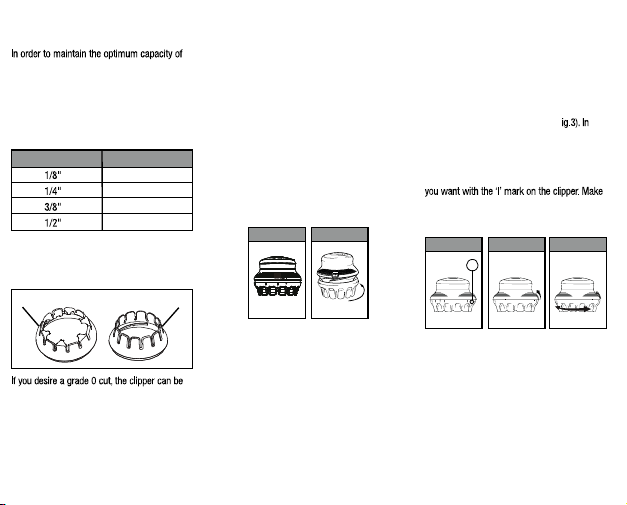
CUTTING LENGTH GRADE
#1
#2
#3
#4
Grades 1-3 Grades 4
Oil Slot 1 Oil Slot 2 Oil Slot 3
FIG. 1 FIG. 2
CHANGING THE COMB GUIDE
LENGTH SETTING
Comb guide 1 for grades 1-3, will lock into 3
different positions, providing 3 cutting length
grade settings. Comb guide 2 for grade 4,
locks into 1 position and provides 1 cutting
length grade setting. The comb guide will
be marked with its grade settings (F
order to change the grade setting release the
comb guide locking mechanism found on the
side of the clipper (Fig.4) and rotate the comb
guide either clockwise or anti-clockwise as
appropriate (Fig.5). Line up the grade setting
sure that the locking mechanism is in the
locked position and the comb guide is securely
in place before using the clipper.
REMOVING A COMB GUIDE
To remove the comb guide unclip the guide-
locking mechanism found on the side of
the clipper and rotate the comb guide in a
clockwise direction until it is completely free
of the clipper.
FIG. 3 FIG. 4 FIG. 5
2
ATTACHING A COMB GUIDE
To attach a comb guide, make sure the
appliance is switched off. Hold the clipper with
the blades facing downwards and place the
comb guide over the top of the clipper with the
teeth of the comb facing downwards. Release
the comb guide locking mechanism, located
on the side of the appliance, by sliding it away
from the comb guide. Line up the dot indicator
on the comb guide (Fig. 1) with the grade
setting marker on the clipper (Fig. 1) then gently
rotate the comb guide in a counter-clockwise
direction until it clicks into place (Fig. 2). Make
sure that the locking mechanism is in the
locked position and the comb guide is securely
in place before using the clipper.
into the socket on the side of the appliance.
socket.
handle will illuminate when the appliance is
correctly connected to the outlet.
approximately 20 minutes of use.
OILING INSTRUCTIONS
IMPORTANT
each use to oil the circular blades with the
oil provided. This ensures optimum cutting
performance.
For the first use you will need to use the oil
supplied with the product, unscrew the cap and
cut off the very end of the plastic tube with a
pair of scissors to release the oil.
Before each use, we recommend adding a few
drops of oil provided in the oil slots inside the
blade ring.
IMPORTANT SAFETY
INSTRUCTIONS
When using electrical appliances, especially
when children are present, basic safety precau-
tions should always be taken, including
the following:
READ ALL INSTRUCTIONS
BEFORE USING
KEEP AWAY FROM WATER
FOR HOUSEHOLD USE ONLY
DANGER –
live, even when the switch is off.
To reduce the risk of death or injury by
electric shock:
1. Always unplug appliance from
electrical outlet immediately after using
(except when charging unit).
2. Do not place or store appliance where it
could fall or be pulled into a tub or sink.
3. Do not use appliance while bathing or in
the shower.
4. Do not place appliance in, or drop into,
water or other liquid.
5. Do not reach for an appliance that has
fallen into water. UNPLUG IMMEDIATELY.
Dry location use only. DO NOT expose to
liquid, vapor or rain.
6. Unplug this appliance before cleaning.
7. Only use adapter that is specified with
this unit.
DO NOT REACH
INTO THE WATER
WARNING –
To reduce the risk of
burns, electric shock, fire, or injury to persons:
1. Never leave a plugged-in appliance
unattended.
2. This appliance should not be used by
children or individuals with certain disabilities.
3. Use appliance only for its intended use as
described in this manual. Only use attachments
recommended by the manufacturer. Do not use
an extension cord to operate the appliance.
4. Never operate the appliance if it has a
damaged cord or plug, is not working properly,
has been dropped or damaged, or dropped into
water. Return the appliance to a Conair service
center for examination and repair.
5. Keep the appliance cord away from heated
surfaces.
6. Do not pull, twist or wrap the cord around
the appliance.
7. Never drop or insert any object into any
opening of the appliance.
8. Do not place the appliance on any surface
while it is operating.
9. Do not use the appliance with a damaged
or broken comb or with teeth missing from the
blades, as injury may result. Before each use,
make certain the blades are aligned properly
and oiled.
10. Do not use the appliance outdoors or
where aerosol (spray) products are being used
or oxygen is being administered.
11. Do not short the polarity (output cord).
plugging the adapter into outlet.
12. This power unit is intended to be correct
as per instruction booklet.
13. For connection to a supply not in the
proper configuration for the power outlet.
to outlet. To disconnect, turn all controls to
"OFF", then remove plug from outlet.
15. When using the appliance with its cord,
be mindful of tangles or kinks in the cord.
turn the unit off and straighten cord before
operating again.
SAVE THESE
INSTRUCTIONS
USER MANUAL
revolution in home hair cutting. The clipper’s
unique circular blades mean that it can
be used in any direction over the head to
maintain an all over even cut.
The clipper comes with adapter:
FEATURES
corded for continuous power while plugged
into the outlet or use cordless for total
flexibility and control during use.
precise cutting.
your hand.
scissors, storage pouch, oil, and barber
cape.
The hair clipper is perfect for maintaining
designed with a unique rotary cutting
system and circular comb guides to give
a guaranteed even finish. Because of this
revolutionary technology the cutting technique
differs somewhat to that of a normal clipper,
in fact this cutting technique is much simpler!
to an even length. It is not however, suitable
for layering or grading.
length (1" or less is recommended), is needed
for initial use of this item. There are two comb
guides; the smaller comb guide is for grades
1-3 and the larger comb guide for grade 4.
Note Comb Guides section for detailed
breakdown of lengths.
Firstly, select the desired comb guide and
lock the length setting in place lining up the
grade length number to the grade setting
indicator line.
For the best results we advise you start
cutting the back of the head and with a
sweeping motion run from the back to the
front of your head concentrating on one area
until you reach the desired length.
Once you have completed this over your
whole head you should then finish using
circular motions as this ensures you achieve
you first begin cutting your hair you may
notice that some hair is being cut and other
hairs are left long. This is perfectly normal,
especially if you are cutting longer hair. This
is because hair grows in different directions
used in all directions against the hair growth.
So continue cutting in all directions until all
hair is cut to length, then the use of circular
motions over the whole head will ensure an
even finish.
OPERATION
CHARGING INSTRUCTIONS
IMPORTANT
but before you do anything you must take your
time to charge the unit for 16 hours before its
straight from the outlet, this initial super-charge
ensures optimum power performance to give
smooth fast cutting every time. Only use the
adaptor supplied with this appliance. Using
appliance should be fully charged
continuously for 16 hours. Maximum
battery capacity will only be reached after
3 charging and discharging cycles.
PRESERVING THE BATTERIES
the rechargeable batteries, the appliance has
to be fully discharged and then recharged for
16 hours every 3 months approximately.
COMB GUIDES
This appliance is supplied with 2 adjustable
comb guides that provide 4 cutting lengths
from grades 1-4.
The comb guide with the shorter teeth will cut
at the 3 shorter lengths while the comb guide
with the longer teeth will cut at the 1 longer
length setting.
used without a comb guide for an ultra close,
even cut.
CUTTING LENGTH GRADE
#1
#2
#3
#4
Grades 1-3 Grades 4
Oil Slot 1 Oil Slot 2 Oil Slot 3
FIG. 1 FIG. 2
CHANGING THE COMB GUIDE
LENGTH SETTING
Comb guide 1 for grades 1-3, will lock into 3
different positions, providing 3 cutting length
grade settings. Comb guide 2 for grade 4,
locks into 1 position and provides 1 cutting
length grade setting. The comb guide will
be marked with its grade settings (F
order to change the grade setting release the
comb guide locking mechanism found on the
side of the clipper (Fig.4) and rotate the comb
guide either clockwise or anti-clockwise as
appropriate (Fig.5). Line up the grade setting
sure that the locking mechanism is in the
locked position and the comb guide is securely
in place before using the clipper.
REMOVING A COMB GUIDE
To remove the comb guide unclip the guide-
locking mechanism found on the side of
the clipper and rotate the comb guide in a
clockwise direction until it is completely free
of the clipper.
FIG. 3 FIG. 4 FIG. 5
2
CLEANING & MAINTENANCE OF CLIPPER
To maintain optimum performance, the
appliance should be cleaned after each use:
comb guide under running water and dry
thoroughly before storage or use.
the blade area and use the cleaning brush to
clean thoroughly.
amount of oil (provided) to the blades before
each use.
thoroughly before use or storage.
STORAGE
When not in use, allow clipper to cool and
store in a safe, dry location and out of the
reach of children. Never pull, twist or wrap
the cord around the clipper.
MODEL HC900R
Model HC900R
LIMITED FIVE YEAR WARRANTY
Conair will repair or replace (at our option) your
unit free of charge for 60 months from the date of
purchase if the appliance is defective in workman-
ship or materials.
To obtain service under this warranty, return the
defective product to the service center listed below,
together with your purchase receipt and $5.00 for
postage and handling. California residents need
only provide proof of purchase and should call
absence of a purchase receipt, the warranty period
shall be 60 months from the date of manufacture.
ANY IMPLIED WARRANTIES, OBLIGATIONS, OR
LIABILITIES, INCLUDING BUT NOT LIMITED TO
THE IMPLIED WARRANTY OF MERCHANTABILITY
AND FITNESS FOR A PARTICULAR PURPOSE,
SHALL BE LIMITED IN DURATION TO THE 60
MONTH DURATION OF THIS WRITTEN, LIMITED
WARRANTY. Some states do not allow limitations
on how long an implied warranty lasts, so the above
limitations may not apply to you.
IN NO EVENT SHALL CONAIR BE LIABLE FOR
ANY SPECIAL, INCIDENTAL, OR CONSEQUENTIAL
DAMAGES FOR BREACH OF THIS OR ANY
OTHER WARRANTY, EXPRESS OR IMPLIED,
WHATSOEVER. Some states do not allow the exclu-
sion or limitation of special, incidental, or conse-
quential damages, so the above limitation may not
apply to you.
This warranty gives you specific legal rights, and you
may also have other rights, which vary from state
to state.
IB-10691
©2011 Conair Corporation
Service Center
Conair Corporation
Service Department
7475 North Glen Harbor Blvd.
Please register this product at
www.conair.com/registration
In str uction Booklet
For you r safety and continued enjoyment
of this pr oduct, always read the instruction
booklet carefully before using.
maintain a short, even cut – easily!
Stainless
Steel Blades
1
Barber Comb
2
Scissors
3
Neck Brush
4
Oil
5
Storage pouch
6
1
3
2
4
5
6
CLIPPING
Comb Guides section for specific lengths.
sliding switch located on top of the clipper
and the blades will start to move and the
Slowly and gently steer the clipper around
the scalp, taking care on areas where there
may be warts, moles, spots and broken
skin and keep away from the ears.
hair style, length to begin, as this item will
not work on longer, layered hair.
FOR BEST RESULTS USE IN A
CIRCULAR MOTION.
to cut your hair. Only apply gentle pressure.
Never force the clipper - if resistance is
experienced lift clipper away from the head,
empty hair from the clipper and resume
clipping.
skin, ensure the skin is stretched taught prior
to cutting hair in this area.
immediately.
NOTE - Hair will collect in the area inside
the blade ring. This may need to be emptied
before all the hair has been cut. Switch the
clipper off and remove any hair by simply
tapping gently on the top of the clipper.
be used without a comb guide attached for
an ultra close, even cut.
PREPARATION FOR USE
signs of damage. Do not use if damaged.
to ensure the clipper blades are free
from hair, debris etc. (see Cleaning &
Maintenance of clipper).
the clipper on yourself either use mirrors or
ask another person to check for you. Special
care should be taken when cutting hair
in areas that have warts, moles, spots or
broken skin, to prevent injury.
and necklaces before use.
that has been combed until tangle-free.
provided to cut the hair prior to using the
clipper.
or plugged into the outlet.
NOTE: The appliance should not be used for
longer than 15 minutes when operated from
the outlet.
WARNING
- The clipper is for use only
on the head. Never use the clipper on the face
or any other area of the body.
IMPORTANT - Do not attempt to trim hair close
to your ears with the clipper. Never allow ears
to enter the ring of the clipper blade.
BATTERY DISPOSAL
This appliance contains Nickel Metal Hydride
batteries. To protect the environment this
appliance and its batteries must be disposed
this appliance to a recycling center, where
the internal rechargeable battery should
be removed by a professional and recycled
separately. For more information about the
recycling of electrical and battery operated
appliances please contact your local council
office or your household waste disposal ser-
vice. For specific enquiries regarding the re-
placement of batteries in this product please
contact our Conair Customer Care Line.
Removing the Battery
Screw
Screw
Battery
aparato sin guía puesta.
LIMPIEZA Y MANTENIMIENTO
de cada uso, usando el aceite provisto.
usarlo.
ALMACENAJE
permita que enfríe y guárdelo en un lugar
seco y seguro, fuera del alcance de los
alrededor del aparato.
RECICLAJE DE LAS BATERÍAS
medio ambiente, estas baterías y el aparato
donde un profesional removerá la batería
recargable para reciclarla por separado.
comuníquese con las autoridades locales
en materia de reciclaje y eliminación de
MODELO HC900R
Modelo HC900R
GARANTÍA LIMITADA DE CINCO AÑOS
aparato sin cargo por un período de 60 meses a
partir de la fecha de compra si presentara defec-
tos de materiales o fabricación.
regrese su aparato al Centro de Servicio indicado
a continuación, junto con su recibo de compra y
un cheque o giro postal de US$5.00 por gastos de
manejo y envío. Los residentes de California sólo
necesitan dar una prueba de compra y deben lla-
mar al 1-800-366-0937 para recibir instrucciones
período de garantía será de 60 meses a partir de
la fecha de fabricación.
CUALQUIER GARANTÍA, OBLIGACIÓN O
RESPONSABILIDAD IMPLÍCITAS, INCLUYENDO
PERO NO LIMITADAS A LA GARANTÍA IMPLÍCITA
DE COMERCIABILIDAD Y APTITUD PARA UN
PROPÓSITO ESPECÍFICO, ESTARÁN LIMITADAS
POR LOS 60 MESES DE LA PRESENTE GARANTÍA
ESCRITA. -
ciones sobre la duración de una garantía implíci-
ta, de modo que las limitaciones mencionadas
pueden no regir para usted.
CONAIR NO SERÁ RESPONSABLE, EN
NINGÚN CASO, POR NINGÚN DAÑO ESPECIAL,
INCIDENTAL O CONSECUENTE DEBIDO AL
INCUMPLIMIENTO DE ESTA O CUALQUIER OTRA
GARANTÍA, EXPRESA O IMPLÍCITA.
daños especiales, incidentales o consecuentes, de
modo que las limitaciones mencionadas pueden
no regir para usted.
IB-10691
©2011 Conair Corporation
Centro de servicio
Conair Corporation
Service Department
7475 N. Glen Harbor Blvd.
Para registrar su producto, visítenos en:
www.conair.com/registration
Manual de instrucciones
de este producto, siempre lea las instrucciones
cuidadosamente antes de usarlo.
cortes cortos y uniformes, con facilidad
Cuchillas de
acero inoxidable
Cortadora recargable
Diseño ergonómico
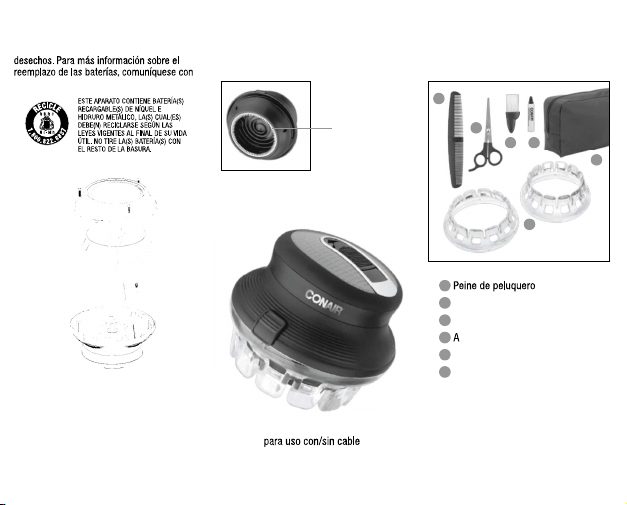
1
2
Tijeras
3
Cepillo para la nuca
4
ceite lubricante
5
Bolsa de almacenaje
6
2 guías ajustables
1
3
2
4
5
6
FUNCIONAMIENTO
la sección "Guías" para más información
acerca de las longitudes de corte).
indicador luminoso verde se encenderá.
cortadora suave y lentamente todo
verrugas, lunares, manchas o irritaciones
las orejas.
primer lugar; la cortadora no es apta para
cortar el cabello más largo.
PARA LOGRAR RESULTADOS ÓPTIMOS,
UTILICE MOVIMIENTOS CIRCULARES.
deseada, ejerciendo una presión suave.
Nunca fuerce la cortadora. Si siente
resistencia, apague el aparato y limpie las
cuchillas antes de continuar.
pliegues.
de molestia.
NOTA
acumularse en las cuchillas. Si fuera
necesario deshacerse de los recortes
antes del final del corte, apague el aparato
aparato.
PREPARACIÓN
Si está dañado, no lo use.
la presencia de verrugas, lunares,
manchas o irritaciones. Si usted corta
su propio cabello, haga esto frente un
espejo o pida a otra persona que lo haga.
alrededor de las verrugas, lunares,
manchas o irritaciones con mucho
cuidado.
debería estar limpio, seco y desenredado.
aparato.
NOTA: No utilice el aparato durante más de
15 minutos con cable.
ADVERTENCIA
- Utilice este
aparato solamente para cortar el cabello.
Nunca lo utilice para cortar vellos faciales o
pelos en otras partes del cuerpo.
IMPORTANTE - No acerque mucho el
aparato a las orejas. Nunca permita que las
cuchillas hagan contacto con las orejas.
nuestro servicio de atención al cliente.
Remoción de la batería
Tornillo
Tornillo
compartimiento
de la batería
-
cos y usted puede tener otros derechos que varían
dientes largos para conseguir cortes más
largos.
Si desea un corte al ras (nivel 0), utilice el
aparato sin guía puesta.
INSTALACIÓN DE LA GUÍA
Sostenga el aparato con las cuchillas
apuntando hacia abajo e instale la guía, con
sobre las cuchillas. Deslice el botón de
bloqueo de la guía, ubicado en el costado
del aparato. Haga coincidir el círculo con la
marca "l" (Fig.1) y gire la guía lentamente
en sentido antihorario hasta que haga clic y
antes de usar el aparato.
movimientos circulares para obtener
principio, el corte no parecerá uniforme.
cabello largo, por que el cabello crece en
Cut ha sido diseñada para cortar el cabello
en cualquier dirección, siempre y cuando
todas las direcciones hasta conseguir la
acabado uniforme.
FUNCIONAMIENTO
INSTRUCCIONES DE CARGA
IMPORTANTE
es muy fácil de usar, pero será necesario
cargarla durante 16 horas antes del
es imprescindible, aunque desee usar
desempeño óptimo y resultados rápidos,
adaptadores puede ser peligroso.
del primer uso. La batería recargable
apagado.
MEDIDAS DE
SEGURIDAD
IMPORTANTES
-
cialmente en la presencia de niños, debe
tomar precauciones básicas de seguridad,
entre las cuales las siguientes:
LEA TODAS LAS
INSTRUCCIONES
ANTES DE USARLO
MANTÉNGALO ALEJADO
DEL AGUA
PARA USO DOMÉSTICO
SOLAMENTE
PELIGRO –
Cualquier aparato
enchufado permanece bajo tensión, aunque
descarga:
1. Siempre desconecte el aparato
inmediatamente después de usarlo (al
menos que lo esté cargando).
2. No coloque ni guarde el aparato donde
pueda caer o ser empujado a una bañera o
un lavabo.
3. No lo use en el baño o la ducha.
4. No coloque el aparato ni lo deje caer al
agua u otro líquido.
DESCONÉCTELO INMEDIATAMENTE.
NO lo
exponga al agua, al vapor o a la lluvia.
6. Desconecte el aparato antes de limpiarlo.
7. Utilice el adaptador sector proveído
NO TRATE DE
ALCANZAR
LA UNIDAD EN
EL AGUA
ADVERTENCIA –
el riesgo de quemaduras, electrocución,
incendio o heridas:
1. Nunca deje el aparato desatendido
mientras esté conectado.
niños o personas con alguna discapacidad.
el propósito para el cual fue diseñado y
accesorios recomendados por el fabricante.
No utilice una extensión con este aparato.
4. No opere este aparato si el cordón o
la clavija estuviesen dañados, después
de que hubiese funcionado mal o que
se hubiese caído o si estuviese dañado.
Regrese el aparato a un centro de
servicio autorizado para su revisión y
reparación.
5. Mantenga el cable alejado de superficies
calientes.
alrededor del aparato.
las aberturas del aparato.
8. No coloque el aparato en ninguna
9. No utilice este aparato con guías o
lubricadas antes de cada uso.
10. No lo utilice en exteriores, ni lo haga
administrando oxígeno.
11. No cortocircuite el cordón. Siempre
conecte el cordón al aparato antes de
enchufar el adaptador en la toma de
corriente.
instrucciones.
13.
adaptador de enchufe (no incluido) para
Unidos.
14. Siempre conecte el cable al aparato
antes de conectarlo a la toma de corriente.
Siempre apague el aparato antes de
desconectarlo.
enredara durante el uso, apague el aparato
GUARDE ESTAS
INSTRUCCIONES
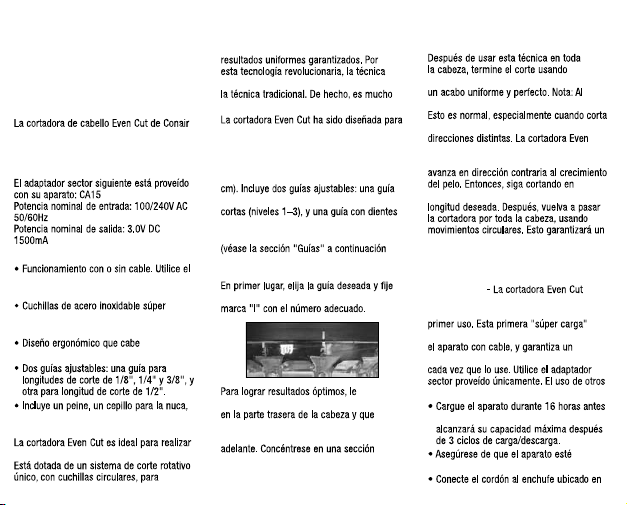
INSTRUCCIONES DE USO
es una herramienta revolucionaria, equipada
con cuchillas circulares que permiten cortar
el cabello en cualquier dirección, y siempre
obtener resultados uniformes.
CARACTERÍSTICAS
aparato con cable, o cárguelo para mayor
comodidad y control durante el uso.
afiladas, para lograr resultados rápidos y
precisos.
perfectamente en la palma de la mano.
tijeras, aceite lubricante, una capa y una
bolsa de almacenaje.
cortes cortos y uniformes, con facilidad.
usada para cortar el cabello es distinta de
más simple.
conseguir cortes uniformes, del nivel 1 al
nivel 4. No es apta para cortes en capas o
graduales. Tampoco es apta para cortar el
cabello medio-largo o largo. No se aconseja
cortar cabello de más de 1 pulgada (2.5
con dientes cortos, para longitudes de corte
largos, para longitud de corte más larga
(nivel 4).
para más información acerca de las
longitudes de corte).
la longitud de corte deseada, alineando la
recomendamos que empiece el corte
corte el cabello sección por sección con
movimientos amplios desde atrás hasta
solamente, hasta haber obtenido la longitud
deseada.
el costado del aparato.
corriente.
autonomía de 20 minutos.
LUBRIFICACIÓN
IMPORTANTE - Le recomendamos que
lubrique las cuchillas circulares antes de
asegurará un rendimiento óptimo.
retire la tapa y corte la punta del tubo con
tijeras.
provisto sobre las cuchillas, en las
VIDA ÚTIL
la capacidad de las baterías recargables,
le recomendamos que cargue el aparato
durante 16 horas cada tres meses.
GUÍAS
que proporcionan 4 longitudes de corte.
Utilice la guía con dientes cortos para
conseguir cortes más cortos y la guía con
LONGITUD DE CORTE NIVEL
#1
#2
#3
#4
Nivel 4
Hendidura 1 Hendidura 2 Hendidura 3
AJUSTE DE LA LONGITUD DE CORTE
La guía no. 1 proporciona 3 longitudes
proporciona 1 longitud de corte (nivel 4).
Los niveles están indicados sobre cada guía
(F
deslice el botón de bloqueo (Fig.4) y gire la
guía en sentido horario o antihorario (Fig.4)
usar el aparato.
REMOCIÓN DE LA GUÍA
de bloqueo de la misma y gírela en sentido
horario hasta que se libere completamente
del aparato.
FIG. 3 FIG. 4 FIG. 5
2
FIG. 1 FIG. 2
Configura ción del grado
dientes largos para conseguir cortes más
largos.
Si desea un corte al ras (nivel 0), utilice el
aparato sin guía puesta.
INSTALACIÓN DE LA GUÍA
Sostenga el aparato con las cuchillas
apuntando hacia abajo e instale la guía, con
sobre las cuchillas. Deslice el botón de
bloqueo de la guía, ubicado en el costado
del aparato. Haga coincidir el círculo con la
marca "l" (Fig.1) y gire la guía lentamente
en sentido antihorario hasta que haga clic y
antes de usar el aparato.
movimientos circulares para obtener
principio, el corte no parecerá uniforme.
cabello largo, por que el cabello crece en
Cut ha sido diseñada para cortar el cabello
en cualquier dirección, siempre y cuando
todas las direcciones hasta conseguir la
acabado uniforme.
FUNCIONAMIENTO
INSTRUCCIONES DE CARGA
IMPORTANTE
es muy fácil de usar, pero será necesario
cargarla durante 16 horas antes del
es imprescindible, aunque desee usar
desempeño óptimo y resultados rápidos,
adaptadores puede ser peligroso.
del primer uso. La batería recargable
apagado.
MEDIDAS DE
SEGURIDAD
IMPORTANTES
-
cialmente en la presencia de niños, debe
tomar precauciones básicas de seguridad,
entre las cuales las siguientes:
LEA TODAS LAS
INSTRUCCIONES
ANTES DE USARLO
MANTÉNGALO ALEJADO
DEL AGUA
PARA USO DOMÉSTICO
SOLAMENTE
PELIGRO –
Cualquier aparato
enchufado permanece bajo tensión, aunque
descarga:
1. Siempre desconecte el aparato
inmediatamente después de usarlo (al
menos que lo esté cargando).
2. No coloque ni guarde el aparato donde
pueda caer o ser empujado a una bañera o
un lavabo.
3. No lo use en el baño o la ducha.
4. No coloque el aparato ni lo deje caer al
agua u otro líquido.
DESCONÉCTELO INMEDIATAMENTE.
NO lo
exponga al agua, al vapor o a la lluvia.
6. Desconecte el aparato antes de limpiarlo.
7. Utilice el adaptador sector proveído
NO TRATE DE
ALCANZAR
LA UNIDAD EN
EL AGUA
ADVERTENCIA –
el riesgo de quemaduras, electrocución,
incendio o heridas:
1. Nunca deje el aparato desatendido
mientras esté conectado.
niños o personas con alguna discapacidad.
el propósito para el cual fue diseñado y
accesorios recomendados por el fabricante.
No utilice una extensión con este aparato.
4. No opere este aparato si el cordón o
la clavija estuviesen dañados, después
de que hubiese funcionado mal o que
se hubiese caído o si estuviese dañado.
Regrese el aparato a un centro de
servicio autorizado para su revisión y
reparación.
5. Mantenga el cable alejado de superficies
calientes.
alrededor del aparato.
las aberturas del aparato.
8. No coloque el aparato en ninguna
9. No utilice este aparato con guías o
lubricadas antes de cada uso.
10. No lo utilice en exteriores, ni lo haga
administrando oxígeno.
11. No cortocircuite el cordón. Siempre
conecte el cordón al aparato antes de
enchufar el adaptador en la toma de
corriente.
instrucciones.
13.
adaptador de enchufe (no incluido) para
Unidos.
14. Siempre conecte el cable al aparato
antes de conectarlo a la toma de corriente.
Siempre apague el aparato antes de
desconectarlo.
enredara durante el uso, apague el aparato
GUARDE ESTAS
INSTRUCCIONES
INSTRUCCIONES DE USO
es una herramienta revolucionaria, equipada
con cuchillas circulares que permiten cortar
el cabello en cualquier dirección, y siempre
obtener resultados uniformes.
CARACTERÍSTICAS
aparato con cable, o cárguelo para mayor
comodidad y control durante el uso.
afiladas, para lograr resultados rápidos y
precisos.
perfectamente en la palma de la mano.
tijeras, aceite lubricante, una capa y una
bolsa de almacenaje.
cortes cortos y uniformes, con facilidad.
usada para cortar el cabello es distinta de
más simple.
conseguir cortes uniformes, del nivel 1 al
nivel 4. No es apta para cortes en capas o
graduales. Tampoco es apta para cortar el
cabello medio-largo o largo. No se aconseja
cortar cabello de más de 1 pulgada (2.5
con dientes cortos, para longitudes de corte
largos, para longitud de corte más larga
(nivel 4).
para más información acerca de las
longitudes de corte).
la longitud de corte deseada, alineando la
recomendamos que empiece el corte
corte el cabello sección por sección con
movimientos amplios desde atrás hasta
solamente, hasta haber obtenido la longitud
deseada.
el costado del aparato.
corriente.
autonomía de 20 minutos.
LUBRIFICACIÓN
IMPORTANTE - Le recomendamos que
lubrique las cuchillas circulares antes de
asegurará un rendimiento óptimo.
retire la tapa y corte la punta del tubo con
tijeras.
provisto sobre las cuchillas, en las
VIDA ÚTIL
la capacidad de las baterías recargables,
le recomendamos que cargue el aparato
durante 16 horas cada tres meses.
GUÍAS
que proporcionan 4 longitudes de corte.
Utilice la guía con dientes cortos para
conseguir cortes más cortos y la guía con
LONGITUD DE CORTE NIVEL
#1
#2
#3
#4
Nivel 4
Hendidura 1 Hendidura 2 Hendidura 3
AJUSTE DE LA LONGITUD DE CORTE
La guía no. 1 proporciona 3 longitudes
proporciona 1 longitud de corte (nivel 4).
Los niveles están indicados sobre cada guía
(F
deslice el botón de bloqueo (Fig.4) y gire la
guía en sentido horario o antihorario (Fig.4)
usar el aparato.
REMOCIÓN DE LA GUÍA
de bloqueo de la misma y gírela en sentido
horario hasta que se libere completamente
del aparato.
FIG. 3 FIG. 4 FIG. 5
2
FIG. 1 FIG. 2
Configura ción del grado

aparato sin guía puesta.
LIMPIEZA Y MANTENIMIENTO
de cada uso, usando el aceite provisto.
usarlo.
ALMACENAJE
permita que enfríe y guárdelo en un lugar
seco y seguro, fuera del alcance de los
alrededor del aparato.
RECICLAJE DE LAS BATERÍAS
medio ambiente, estas baterías y el aparato
donde un profesional removerá la batería
recargable para reciclarla por separado.
comuníquese con las autoridades locales
en materia de reciclaje y eliminación de
MODELO HC900R
Modelo HC900R
GARANTÍA LIMITADA DE CINCO AÑOS
aparato sin cargo por un período de 60 meses a
partir de la fecha de compra si presentara defec-
tos de materiales o fabricación.
regrese su aparato al Centro de Servicio indicado
a continuación, junto con su recibo de compra y
un cheque o giro postal de US$5.00 por gastos de
manejo y envío. Los residentes de California sólo
necesitan dar una prueba de compra y deben lla-
mar al 1-800-366-0937 para recibir instrucciones
período de garantía será de 60 meses a partir de
la fecha de fabricación.
CUALQUIER GARANTÍA, OBLIGACIÓN O
RESPONSABILIDAD IMPLÍCITAS, INCLUYENDO
PERO NO LIMITADAS A LA GARANTÍA IMPLÍCITA
DE COMERCIABILIDAD Y APTITUD PARA UN
PROPÓSITO ESPECÍFICO, ESTARÁN LIMITADAS
POR LOS 60 MESES DE LA PRESENTE GARANTÍA
ESCRITA. -
ciones sobre la duración de una garantía implíci-
ta, de modo que las limitaciones mencionadas
pueden no regir para usted.
CONAIR NO SERÁ RESPONSABLE, EN
NINGÚN CASO, POR NINGÚN DAÑO ESPECIAL,
INCIDENTAL O CONSECUENTE DEBIDO AL
INCUMPLIMIENTO DE ESTA O CUALQUIER OTRA
GARANTÍA, EXPRESA O IMPLÍCITA.
daños especiales, incidentales o consecuentes, de
modo que las limitaciones mencionadas pueden
no regir para usted.
IB-10691
©2011 Conair Corporation
Centro de servicio
Conair Corporation
Service Department
7475 N. Glen Harbor Blvd.
Para registrar su producto, visítenos en:
www.conair.com/registration
Manual de instrucciones
de este producto, siempre lea las instrucciones
cuidadosamente antes de usarlo.
cortes cortos y uniformes, con facilidad
Cuchillas de
acero inoxidable
Cortadora recargable
Diseño ergonómico
1
2
Tijeras
3
Cepillo para la nuca
4
ceite lubricante
5
Bolsa de almacenaje
6
2 guías ajustables
1
3
2
4
5
6
FUNCIONAMIENTO
la sección "Guías" para más información
acerca de las longitudes de corte).
indicador luminoso verde se encenderá.
cortadora suave y lentamente todo
verrugas, lunares, manchas o irritaciones
las orejas.
primer lugar; la cortadora no es apta para
cortar el cabello más largo.
PARA LOGRAR RESULTADOS ÓPTIMOS,
UTILICE MOVIMIENTOS CIRCULARES.
deseada, ejerciendo una presión suave.
Nunca fuerce la cortadora. Si siente
resistencia, apague el aparato y limpie las
cuchillas antes de continuar.
pliegues.
de molestia.
NOTA
acumularse en las cuchillas. Si fuera
necesario deshacerse de los recortes
antes del final del corte, apague el aparato
aparato.
PREPARACIÓN
Si está dañado, no lo use.
la presencia de verrugas, lunares,
manchas o irritaciones. Si usted corta
su propio cabello, haga esto frente un
espejo o pida a otra persona que lo haga.
alrededor de las verrugas, lunares,
manchas o irritaciones con mucho
cuidado.
debería estar limpio, seco y desenredado.
aparato.
NOTA: No utilice el aparato durante más de
15 minutos con cable.
ADVERTENCIA
- Utilice este
aparato solamente para cortar el cabello.
Nunca lo utilice para cortar vellos faciales o
pelos en otras partes del cuerpo.
IMPORTANTE - No acerque mucho el
aparato a las orejas. Nunca permita que las
cuchillas hagan contacto con las orejas.
nuestro servicio de atención al cliente.
Remoción de la batería
Tornillo
Tornillo
compartimiento
de la batería
-
cos y usted puede tener otros derechos que varían