Loading ...
Loading ...
Loading ...
page 5
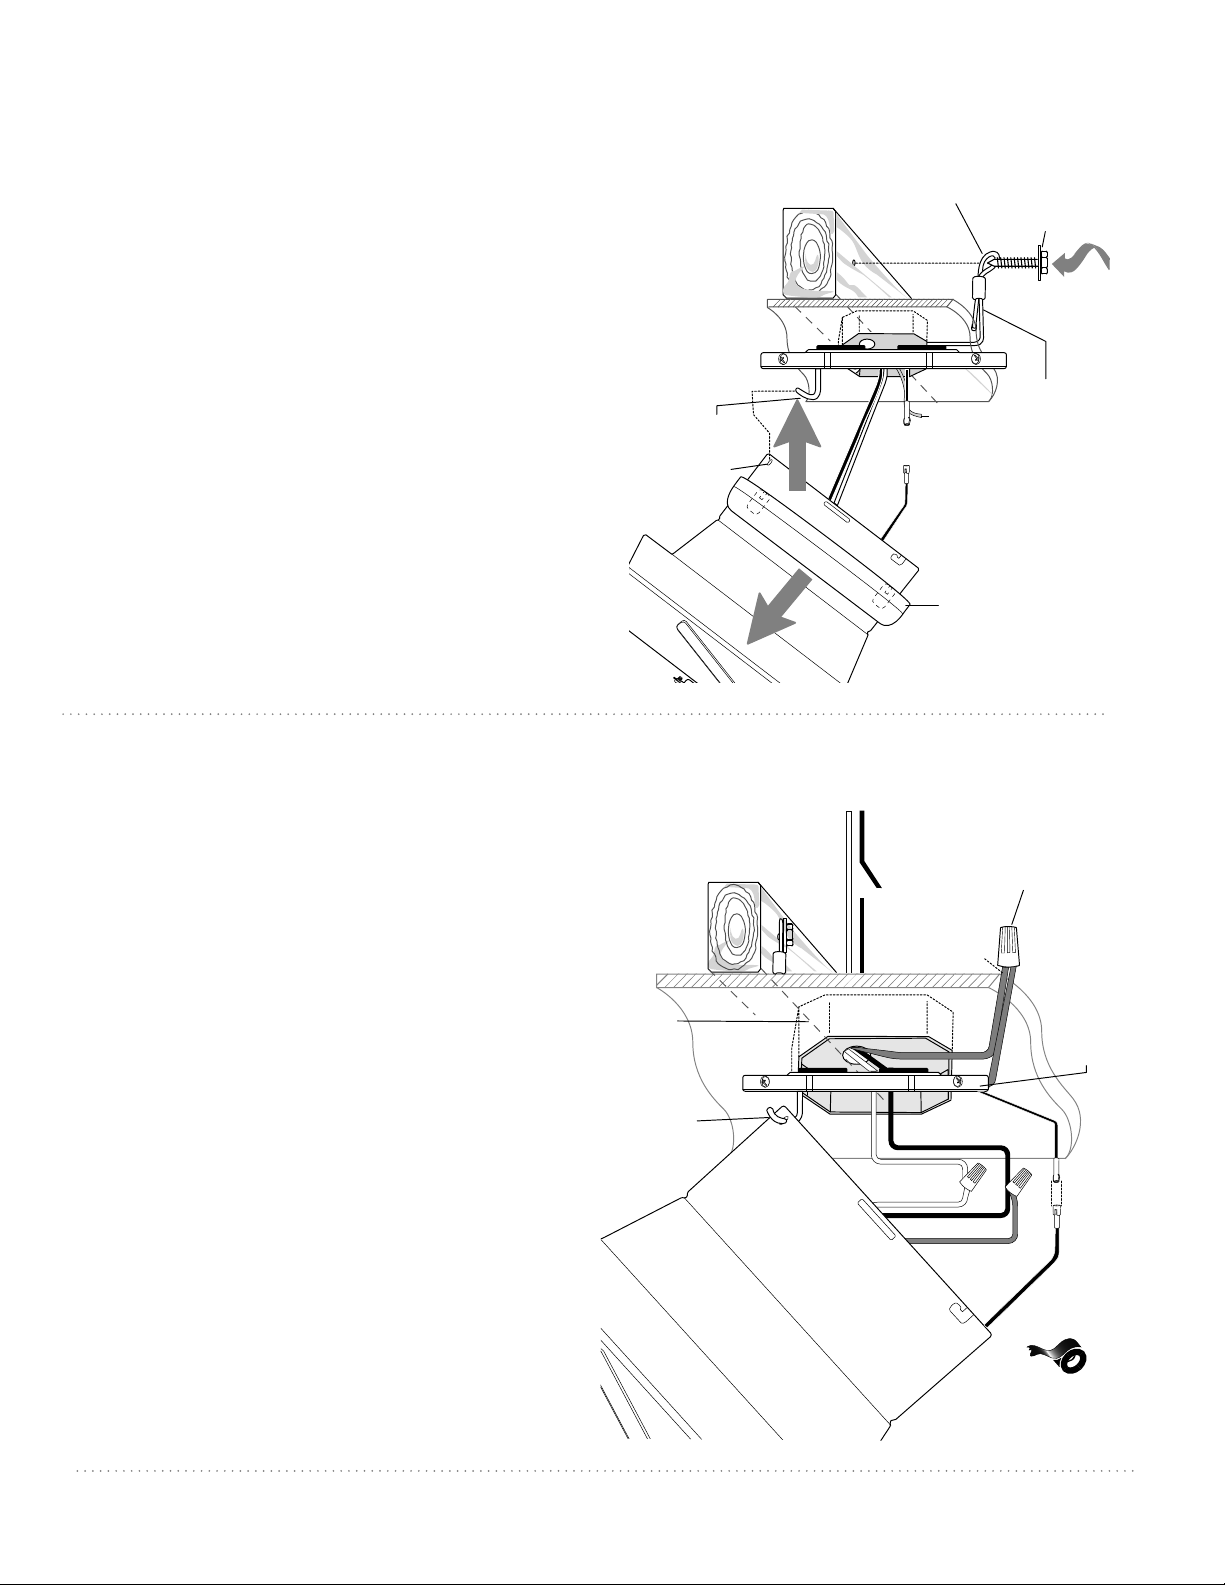
6. Wiring.
WARNING: Turn off circuit breakers to current fixture
from breaker panel and be sure switch is turned to
the OFF position.
CAUTION: Be sure outlet box is grounded properly
and that a ground wire (GREEN or Bare) is present.
Make sure all electrical connections comply with Local
Codes or Ordinances and the National Electrical Code.
If you are unfamiliar with electrical wiring or if the
house/building wires are different colors than those
referred to below, please use a qualified electrician.
Once fan has been temporarily hung on the
mounting plate, electrical wiring can be made
as follows:
Connect BLACK wire from fan to BLACK wire
from ceiling with wire connector provided.
Connect WHITE wire from fan to WHITE wire
from ceiling with wire connector provided.
Connect GROUND (GREEN) wire from mounting
plate to BARE/GREEN wire from ceiling with wire
connector provided.
* Wrap each wire connector separately with
electrical tape as an extra safety measure.
Connect male molex plug from mounting plate to
female molex plug in top of motor housing. Be sure
that molex connections snap together completely.
With wider opening facing up, place housing ring
over top of motor housing. Then, push housing
ring down past top edge of motor housing.
Lift motor housing to mounting plate and then
hang motor housing on j-hook on underside of
mounting plate. (Use one of the non-slotted holes
on the rim of the motor housing to do so.) This will
allow motor housing to hang out of the way while
wiring.
Tip: Seek the help of another person to hold the
stepladder in place and to lift the fan up to you
once you are set on the ladder.
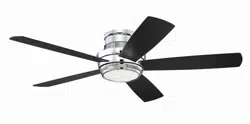
Find a secure attachment point (wood ceiling joist
highly recommended) and secure safety cable. It
will be necessary to use a heavy duty wood screw,
washer and lock washer (not supplied) with the
safety cable loop. If necessary, adjust the loop at
the end of the safety cable. The loop at the end of
the safety cable should just fit over the threads on
the wood screw. Test safety cable by pulling on
loose end of cable with pliers. If the safety cable slips,
the loop must be adjusted smaller. Extra cable slack
can be left in ceiling area.
5. Preparation for Wiring.
wood joist
safety
cable
loop
wood screw
and washer
safety
cable
non-slotted
hole
j-hook
motor housing
housing ring
mounting
plate
motor housing
*
WHITE
WHITE
BLACK
BLACK
BLUE
GREEN
wire
connector
(supply circuit)
WHITE
BLACK
SWITCH
outlet
box
GROUND
(GREEN
OR BARE)
wood
joist
j-hook
male
female
(wiring for fan)
Loading ...
Loading ...
Loading ...