Loading ...
Loading ...
• Do not force tool. It will work most efficiently at the
rate for which it was designed.
• Keep hands away from moving parts and cutting
surfaces.
• Never leave tool running unattended. Turn the power
off and do not leave tool until it comes to a complete
stop.
• Do not overreach. Keep proper footing and balance.
• Never stand on tool. Serious injury could occur if tool
is tipped or if blade is unintentionally contacted.
• Know your tool. Learn the tool's operation, applica-
tion and specific limitations.
• Use recommended accessories. Use of improper
accessories may cause risk of injury to persons.
• Handle workpiece correctly. Protect hands from pos-
sible injury.
• Turn machine off if it jams. Blade jams when it digs
too deeply into workpiece. (Motor force keeps it
stuck in the work.) Do not remove jammed or cut off
pieces until the saw is turned off, unplugged and the
blade has stopped.
• Maintain proper adjustment of blade tension, blade
guides and thrust bearings.
• Adjust upper guide to just clear workpiece.
• Hold workpiece firmly against table.
• DIRECTION OF FEED: Feed work into a blade or
cutter against the direction of rotation of the blade or
cutter only.
WARNING: The operation of any power tool can result
in foreign objects being thrown into the eyes, which can
result in severe eye damage. Always wear safety goggles
complying with United States ANSI Z87.1 (shown on
package) before commencing power tool operation.
Safety goggles are available through your Sears catalog.
Check for shipping damage. If damage has occurred, a
claim must be filed with carrier. Check for complete-
ness. Immediately report missing parts to dealer.
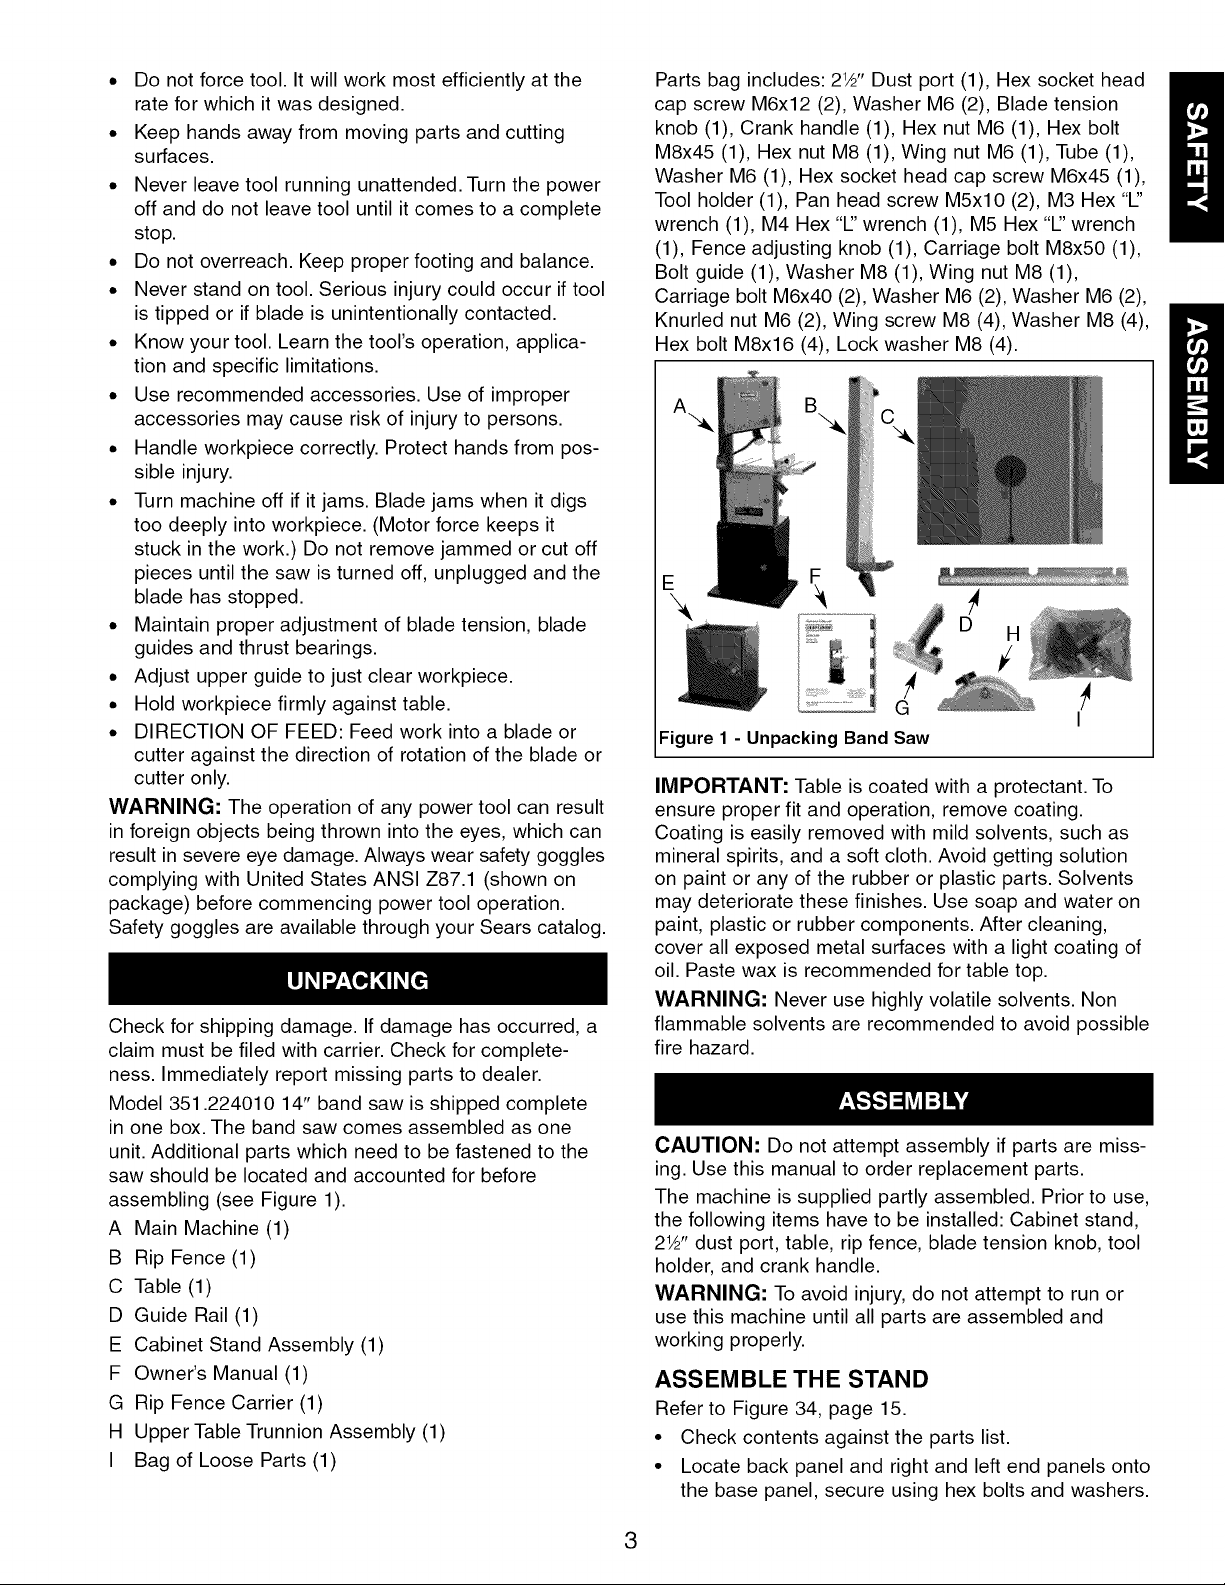
Model 351.224010 14" band saw is shipped complete
in one box. The band saw comes assembled as one
unit. Additional parts which need to be fastened to the
saw should be located and accounted for before
assembling (see Figure 1).
A Main Machine (1)
B Rip Fence (1)
C Table (1)
D Guide Rail (1)
E Cabinet Stand Assembly (1)
F Owner's Manual (1)
G Rip Fence Carrier (1)
H Upper Table Trunnion Assembly (1)
I Bag of Loose Parts (1)
Parts bag includes: 21_'' Dust port (1), Hex socket head
cap screw M6x12 (2), Washer M6 (2), Blade tension
/
knob (1), Crank handle (1), Hex nut M6 (1), Hex bolt
M8x45 (1), Hex nut M8 (1), Wing nut M6 (1), Tube (1),
Washer M6 (1), Hex socket head cap screw M6x45 (1),
Tool holder (1), Pan head screw M5xl 0 (2), M3 Hex "1"
wrench (1), M4 Hex "1" wrench (1), M5 Hex "1" wrench
(1), Fence adjusting knob (1), Carriage bolt M8x50 (1),
Bolt guide (1), Washer M8 (1), Wing nut M8 (1),
Carriage bolt M6x40 (2), Washer M6 (2), Washer M6 (2),
Knurled nut M6 (2), Wing screw M8 (4), Washer M8 (4),
Hex bolt M8x16 (4), Lock washer M8 (4).
E
D H
Figure 1 - Unpacking Band Saw
I
IMPORTANT: Table is coated with a protectant. To
ensure proper fit and operation, remove coating.
Coating is easily removed with mild solvents, such as
mineral spirits, and a soft cloth. Avoid getting solution
on paint or any of the rubber or plastic parts. Solvents
may deteriorate these finishes. Use soap and water on
paint, plastic or rubber components. After cleaning,
cover all exposed metal surfaces with a light coating of
oil. Paste wax is recommended for table top.
WARNING: Never use highly volatile solvents. Non
flammable solvents are recommended to avoid possible
fire hazard.
CAUTION: Do not attempt assembly if parts are miss-
ing. Use this manual to order replacement parts.
The machine is supplied partly assembled. Prior to use,
the following items have to be installed: Cabinet stand,
21_'' dust port, table, rip fence, blade tension knob, tool
holder, and crank handle.
WARNING: To avoid injury, do not attempt to run or
use this machine until all parts are assembled and
working properly.
ASSEMBLE THE STAND
Refer to Figure 34, page 15.
• Check contents against the parts list.
• Locate back panel and right and left end panels onto
the base panel, secure using hex bolts and washers.
3
Loading ...
Loading ...
Loading ...