Loading ...
Loading ...
Loading ...
11 ■English
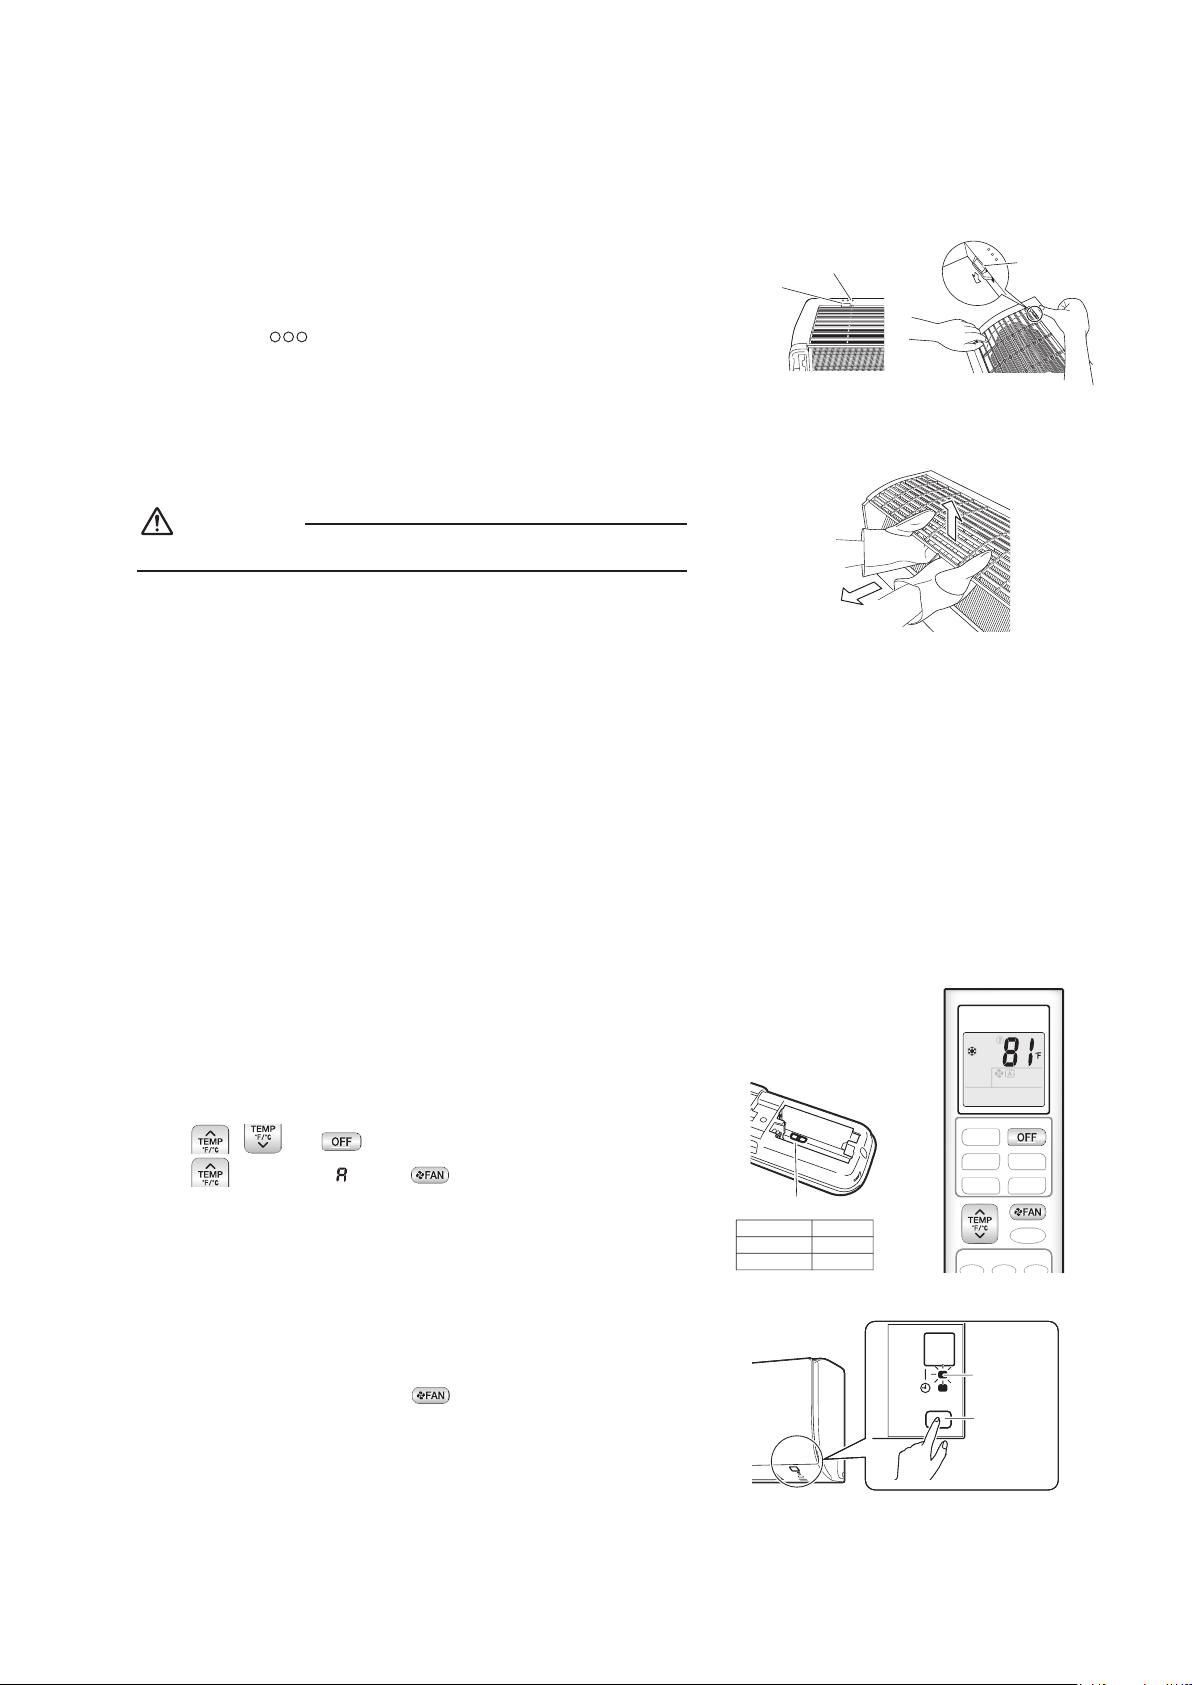
2. Removing and installing the front grille
• Removal method
1) Remove the front panel to remove the air lter.
2) Remove the 2 screws from the front grille.
(The 15, 18 and 24-class models have 3 screws.)
3) In front of the
mark on the front grille, there are 3 upper hooks.
Lightly pull the front grille toward you with one hand, and push down
on the hooks with the ngers of your other hand.
mark area
(3 locations)
Upper hook
Push
down.
Upper hook
When there is insuffi cient work space because the unit is close to ceiling
CAUTION
• Be sure to wear protection gloves.
Place both hands under the center of the front grille, and while pushing
up, pull it toward you.
• Installation method
1) Install the front grille and rmly engage the upper hooks (3 locations).
2) Install 2 screws of the front grille.
(The 15, 18 and 24-class models have 3 screws.)
3) Install the air lter and then mount the front panel.
3. How to set the different addresses
When 2 indoor units are installed in one room, the 2 wireless remote
controllers can be set for different addresses. Change the address setting
of one of the two units. When cutting the jumper be careful not to damage
any of the surrounding parts.
1) Remove the battery cover on the remote controller and cut the address
jumper.
2) Press
, and at the same time.
3) Press
, then select , press .
(The indoor unit OPERATION lamp will blink for about 1 minute.)
4) Press the indoor unit ON/OFF switch while the OPERATION lamp is
blinking.
Jumper
ADDRESS
EXIST 1
CUT 2
Jumper
• If setting could not be carried out completely while the OPERATION
lamp was blinking, carry out the setting process once again from the
beginning.
• After setting is complete, pressing
for about 5 seconds will cause
the remote controller to return to the previous display.
ON/OFF
Indoor unit
ON/OFF
switch
OPERATION
lamp
1) Push up.
2) Pull toward you.
01_EN_3P379970-5B.indd 11 10/29/2015 16:21:05
Loading ...
Loading ...