Loading ...
Loading ...
Loading ...

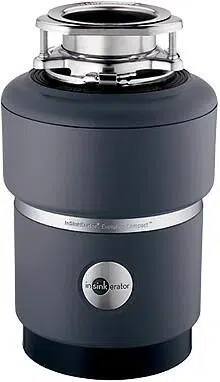
Evolution Compact®
Compact Size Food Waste Disposer/Triturador de Desperdicios de Alimentos de Tamaño Compacto/Broyeur de Déchets de Taille Compacte
9
E N G L I S H
• Read all instructions before using the appliance.
• To reduce the risk of injury, close supervision is required when an appliance is
used near children.
• Do not put fingers or hands into a waste disposer.
• Turn the power switch to the off position before attempting to clear a jam, remov-
i
ng an object from the disposer or pressing reset button.
• When attempting to loosen a jam in a waste disposer, use the self-service
Jam-Buster™ Wrench.
• When attempting to remove objects from a waste disposer, use long-handled
tongs or pliers.
• Afin de réduire les risques d’éjection de débris par le broyeur de déchets, ne pas
faire fonctionner l’appareil sans avoir préalablement mis en place l’écran pour
évier Quiet Collar®. Ne pas mettre les produits ou objets suivants dans le
broyeur de déchets : coquilles de palourde ou d’huître, nettoyants caustiques
pour drain ou produits similaires, verre, porcelaine ou plastique, métal (tel que
bouchons de bouteille, morceaux de métal, boîtes de conserve ou ustensiles),
graisse chaude ou autres liquides chauds.
•
When not operating a disposer, leave the stopper in place to reduce the risk
of objects falling into the disposer.
• This product is designed to dispose of normal household food waste; inserting
materials other than food waste into disposer could cause personal injury
and/or property damage.
• To reduce the risk of injury, do not use the sink containing the disposer for
purposes other than food preparation (such as baby bathing or washing hair).
• Do not dispose of the following in the disposer: paints, solvents, household
cleaners and chemicals, automotive fluids, plastic wrap.
• Replace Quiet Collar® Sink Baffle when worn to help prevent entry or ejec-
tion of material and water.
• FIRE HAZARD: Do not store flammable items such as rags, paper
or aerosol cans near disposer. Do not store or use gasoline or other flamma-
b
le vapors and liquids in vicinity of disposer.
Do not use plumber's putty on any other disposer connection other than
sink flange. Do not use thread sealants or pipe dope. These may harm dis-
p
oser and cause property damage.
C A U T I O N
Personal Injury: Do not position your head or body under disposer; unit
could fall during removal or installation.
W A R N I N G
When using electric appliances, basic precautions are always to be followed, including:
W A R N I N G
Regularly inspect disposer and plumbing fittings for water leaks, as
water leaks can cause property damage. Manufacturer cannot be held
responsible for property damage as a result of water leaks.
C A U T I O N
Do not operate disposer without Anti-Vibration Tailpipe Mount™ as water
leaks may result.
C A U T I O N
DO...
• First turn on cold water and then turn on the disposer. Continue running
cold water for several seconds after grinding is completed to flush the
drain line.
• Grind hard materials such as small bones, fruit pits, and ice. A
scouring action is created by the particles inside the grind chamber.
• Grind peelings from citrus fruits to freshen up drain smells.
• Use a disposer cleaner, degreaser, or deodorizer as necessary to
relieve objectionable odors caused by grease build-up.
DON’T...
• DON’T POUR GREASE OR FAT DOWN YOUR DISPOSER OR
ANY DRAIN. IT CAN BUILD UP IN PIPES AND CAUSE DRAIN
BLOCKAGES. PUT GREASE IN A JAR OR CAN AND DISPOSE
IN THE TRASH.
• Don’t use hot water when grinding food waste. It is OK to drain
hot water into the disposer between grinding periods.
• Don’t fill disposer with a lot of vegetable peels all at once. Instead, turn the
water and disposer on first and then feed the peels in gradually.
• Don’t grind large amounts of egg shells or fibrous materials like corn husks,
artichokes, etc., to avoid possible drain blockage.
• Don’t turn off disposer until grinding is completed and only sound of motor
and water is heard.
OPERATING INSTRUCTIONS
1. Remove stopper from sink opening and run cold water.
2. Turn on wall switch to start disposer.
3. Slowly insert food waste into disposer. CAUTION! Position stopper to minimize possible ejection of material while grinding.
4. After grinding is complete, turn disposer off and run water for a few seconds to flush drain line.
INSTRUCTIONS PERTAINING TO RISK OF FIRE, ELECTRIC SHOCK, OR INJURY TO PERSONS
IMPORTANT SAFETY INSTRUCTIONS
SAVE THESE INSTRUCTIONS
For all grounded, cord-connected disposers:
This disposer must be grounded to reduce the risk of electric shock in the event
of a malfunction or breakdown. Grounding provides a path of least resistance
for electric current. This disposer is equipped with a cord having an equipment-
grounding conductor and a grounding plug. The plug must be plugged into an
outlet that is properly installed and grounded in accordance with all local codes
and ordinances.
For permanently connected disposers:
This disposer must be connected to a grounded, metal, permanent wiring sys-
tem; or an equipment-grounding conductor must be run with the circuit conduc-
tors and connected to the equipment-grounding terminal or lead on the disposer.
GROUNDING INSTRUCTIONS
Improper connection of the equipment-grounding conductor can result in a
risk of electric shock. Check with a qualified electrician or serviceman if
you are in doubt as to whether the disposer is properly grounded. If the
plug provided with the disposer does not fit the outlet, do not modify the
plug or attempt to force the plug into the outlet – have a proper outlet in-
stalled by a qualified electrician.
• This disposer must be properly grounded.
• Do not attach ground wire to gas supply line.
• Disconnect power before installing or servicing disposer.
• If three-prong grounded plug is used, plug must be inserted into three-
hole grounded receptacle.
• All wiring must comply with local electrical codes.
• Do not reconnect electrical current at main service panel until proper
grounds are installed.
W A R N I N G
Stop and read
Deténgase y lea
Arrêter et lire
Loading ...
Loading ...
Loading ...