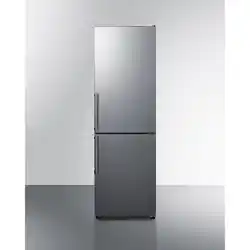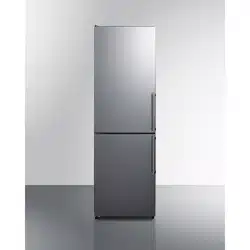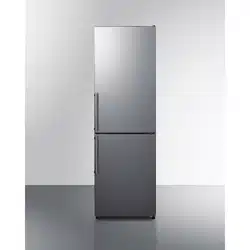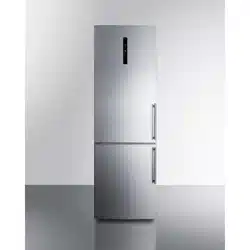
UPRIGHT REFRIGERATOR-FREEZER
Models:
FFBF249SS2
LBF249
BF249SS
FFBF181ES2
LBF181
BF181SS
BEFORE USE, PLEASE READ AND FOLLOW ALL SAFETY RULES AND
OPERATING INSTRUCTIONS
Felix Storch, Inc.
An ISO 9001:2015 registered company
770 Garrison Ave
Bronx, New York 10474
www.summitappliance.com

2
TABLE OF CONTENTS
Safety Information 3
Important Safeguards 3-4
Location of Parts 5
Installation Instructions 6-11
Locating your Appliance 6-7
Electrical Connection 7
Reversing the Door Swing of your Appliance 7-11
Operating your Appliance 12-17
Interior Features 17-19
Shelves 17
Door Shelves 17
Wine Bottle Rack 18
Fruit and Vegetable Bin with Humidity Control 18
FreshZone Drawer 19
MultiFlow Fan 19
AdeptTech 19
Storage Tips 20
Cleaning and Care 21
Troubleshooting 22-23
Limited Warranty 24
CALIFORNIA CARB/SNAP DISCLOSURE
This product uses eco-friendly hydrocarbon refrigerant and fully complies with California
CARB regulations.
However, we are required by California Law to provide the following disclosure statement in every
product sold in California.
"This equipment is prohibited from use in California with any refrigerants on the 'List of Prohibited
Substances' for that specific end-use, in accordance with California Code of Regulations, title 17,
section 95374. This disclosure statement has been reviewed and approved by Felix Storch, Inc. and
Felix Storch, Inc. attests, under penalty of perjury, that these statements are true and accurate."
This product does not use any refrigerants on the 'List of Prohibited Substances'"
3
SAFETY INFORMATION
Your safety and the safety of others are very important.
We have provided many important safety messages in this manual and on your appliance. Always read
and obey all safety messages.
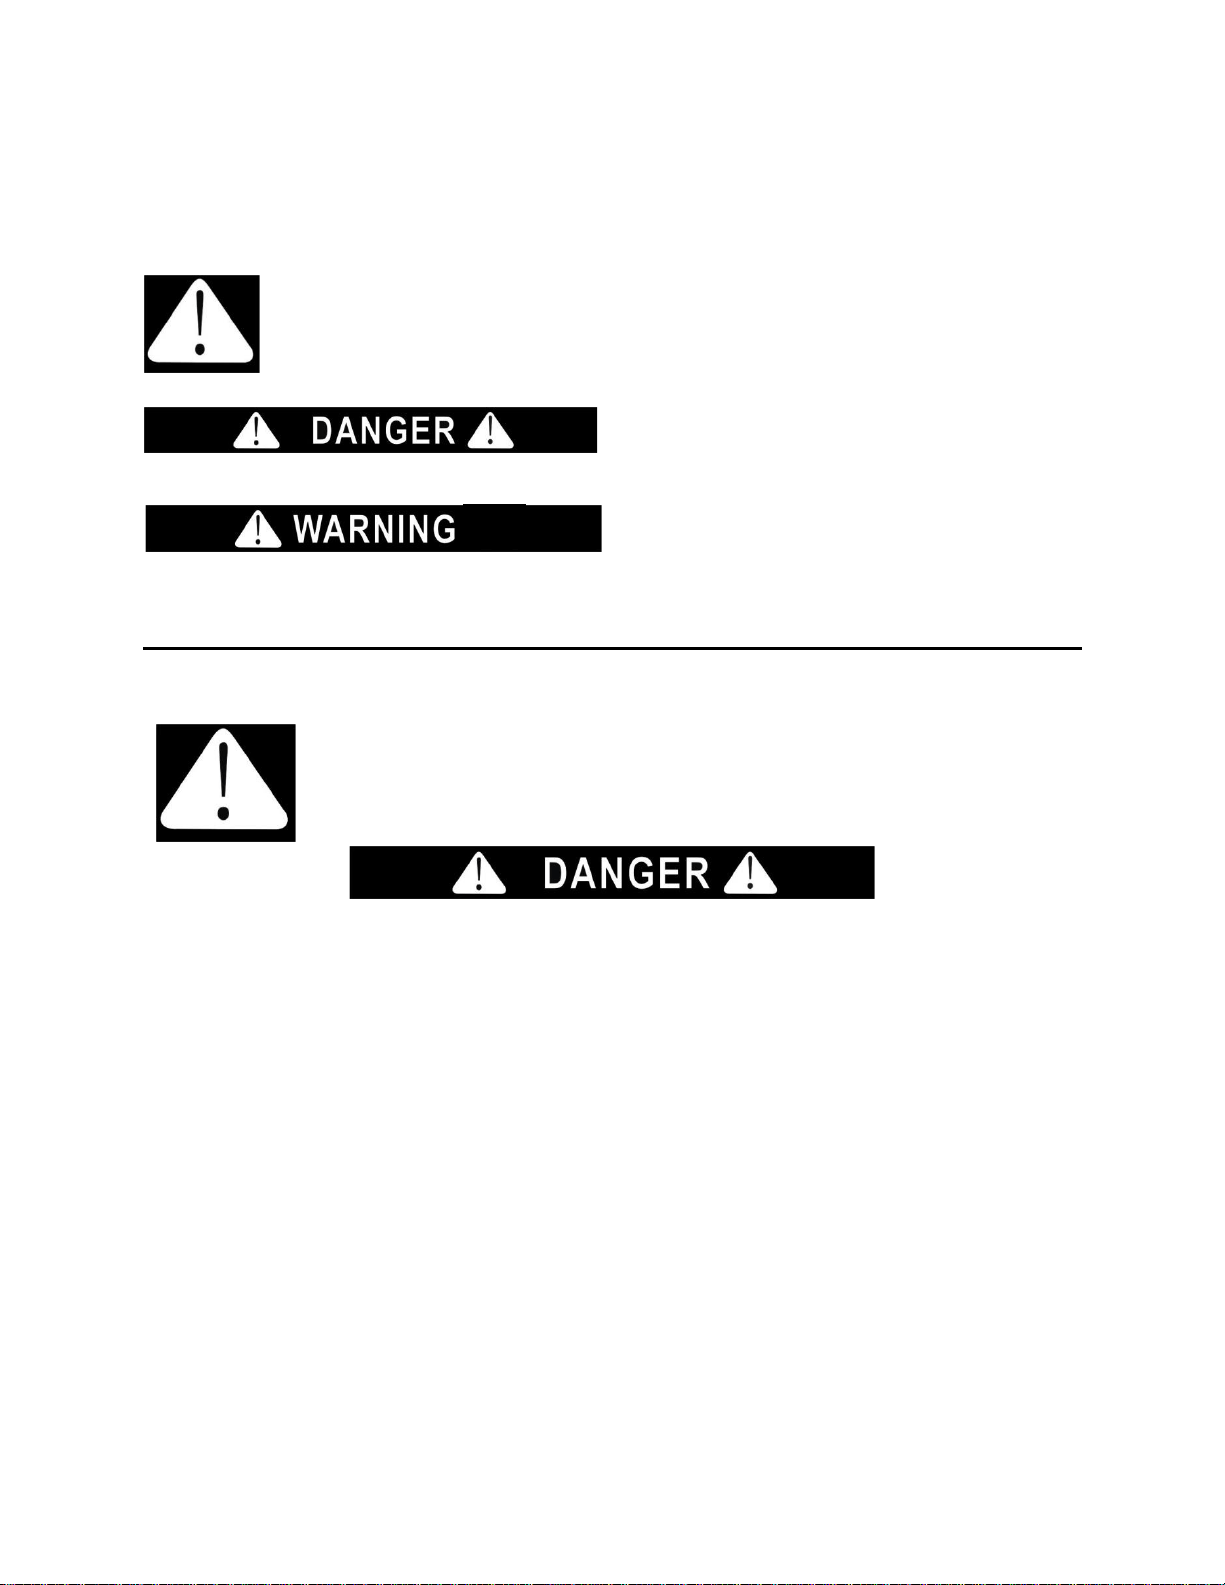
This is the Safety Alert Symbol. The symbol alerts you to potential hazards that
can kill or injure you and others. All safety messages will follow the Safety
Alert Symbol and either the word DANGER or WARNING.
DANGER means that failure to heed this safety
statement may result in severe personal injury or
death.
WARNING means that failure to heed this safety
statement may result in extensive product
damage, serious personal injury, or death.
All safety messages will alert you about the potential hazard, tell you how to reduce the chance of injury,
and let you know what can happen if the instructions are not followed.
IMPORTANT SAFEGUARDS
Before the refrigerator or freezer is used, it must be properly positioned and
installed as described in this manual, so read the manual carefully. To reduce the
risk of fire, electrical shock or injury when using the refrigerator or freezer, follow
basic precautions, including the following:
• Plug into a grounded 3-prong outlet, do not remove grounding prong, do not use an adapter, and do
not use an extension cord.
• Replace all panels before operating.
• It is recommended that a separate circuit serving only your refrigerator or freezer be provided. Use
receptacles that cannot be turned off by a switch or pull chain.
• Never clean refrigerator or freezer parts with flammable fluids. These fumes can create a fire hazard
or explosion. And do not store or use gasoline or other flammable vapors and liquids in the vicinity of
this or any other refrigerator or freezer. The fumes can create a fire hazard or explosion.
• Do not connect or disconnect the electric plug when your hands are wet.
• Unplug the refrigerator or freezer or disconnect power before cleaning or servicing. Failure to do so
can result in electrical shock or death.
• Do not attempt to repair or replace any part of your refrigerator or freezer unless it is specifically
recommended in this manual. All other servicing should be referred to a qualified technician.
• This appliance is CFC- and HFC-free and contains small quantities of Isobutane (R600a) which is
environmentally friendly, but flammable. It does not damage the ozone layer, nor does it increase the
greenhouse effect. Care must be taken during transportation and setting up of the appliance that no
parts of the cooling system are damaged. Leaking coolant can ignite and may damage the eyes.
• In the event of any damage:
- Avoid open flames and anything that creates a spark,
- Disconnect from the power supply,
- Air the room in which the refrigerator or freezer is located for several minutes and
- Contact the Service Department for advice.
4
• The more coolant there is in an appliance, the larger the room it should be installed in. In the event of
a leakage, if the appliance is in a small room, there is the danger of combustible gases building up.
For every ounce of coolant, at least 325 cubic feet of room space is required. The amount of coolant
in the appliance is stated on the data plate inside the appliance. It is hazardous for anyone other than
an Authorized Service Person to carry out servicing or repairs to this appliance.
• Take serious care when handling, moving and using the appliance to avoid either damaging the
refrigerant tubing or increasing the risk of a leak.
• Replacing component parts and servicing shall be done by factory authorized service personnel, so
as to minimize the risk of possible ignition due to incorrect parts or improper service.
FOLLOW WARNING CALLOUTS BELOW ONLY WHEN APPLICABLE TO YOUR MODEL
• Use two or more people to move and install the appliance. Failure to do so can result in back or other
injury.
• To ensure proper ventilation for your refrigerator or freezer, the front of the unit must be completely
unobstructed. Choose a well-ventilated area with temperatures above 44°F (7°C) and below 90°F
(32°C).
• The appliance should not be located next to ovens, grills or other sources of high heat.
• The appliance must be installed with all electrical, water and drain connections in accordance with
state and local codes. A standard electrical supply (115 V AC only, 60 Hz), properly grounded in
accordance with the National Electrical Code and local codes and ordinances, is required.
• Do not kink or pinch the power supply cord of the appliance.
• The size of the fuse (or circuit breaker) should be 15 amperes.
• It is important that the appliance be leveled in order to work properly. You may need to make several
adjustments to level it.
• All installations must be in accordance with local plumbing code requirements.
• Make certain that the pipes are not pinched, kinked or damaged during installation.
• Check for leaks after connection.
• Never allow children to operate, play with or crawl inside the appliance.
• Do not use solvent-based cleaning agents or abrasives on the interior. These cleaners may damage
or discolor the interior.
• Use this appliance only for its intended purpose as described in this User Manual.
• Keep fingers out of the “pinch point” areas. Clearances between the door and cabinet are necessarily
small. Be careful closing the door when children are in the area.
Risk of child entrapment!
Child entrapment and suffocation are not problems of the past. Junked or abandoned refrigerator or
freezers are still dangerous, even if they will “just sit for a few days”.
Before discarding your old refrigerator:
Take off the doors
Leave the shelves in place so that children may not easily climb inside.
• This appliance is not intended for use by persons (including children) whose physical, sensory or
mental capabilities may be different or reduced, who lack experience or knowledge, unless such
persons receive supervision or training to operate the appliance by a person responsible for their
safety.
• Do not store explosive substances such as aerosol cans with a flammable propellant in this
appliance.
- SAVE THESE INSTRUCTIONS –
5
LOCATION OF PARTS
A: Refrigerator
1. Control light
2. LED lighting
3. Multiflow column
4. Glass shelves
5. FreshZone drawer
6. CrispZone fruit and vegetables
drawer with humidity control
7. Bottom door shelves
8. Bottle shelves
B: Freezer
9. Top freezing and storage drawer
10. Deep SpaceBox drawer for
freezing and storage
11. Bottom storage drawer
The drawers are fitted with a system that prevents them from being unintentionally pulled out. To
remove a drawer from the appliance, pull it out as far as it will go, then lift at the front and pull out
completely.
6
INSTALLATION INSTRUCTIONS
Locating your Appliance
• Install the appliance in a dry and well ventilated room. The appliance will operate correctly if the
environment temperature is in the interval specified in the table. The appliance class is indicated
on the rating label with the basic information on the appliance.
Description
Class
Ambient temperature range °F
Relative humidity
Extended temperate
SN
+50 to +90
75%
Temperate
N
+61 to +90
Subtropical
ST
+61 to +100
Tropical
T
+61 to +109
CAUTION: Do not place an appliance in a room where temperature can drop to below 41 °F as this
may cause abnormal appliance operation or failure!
• After the installation, the main
power plug should be accessible.
• This appliance is not intended to
be used as a build-in appliance.
The appliance is intended for
free-standing installation. To
reach the rated/ minimum power
consumption, always provide 50
mm of clearance between the
wall and the back of the
appliance, and above the
appliance. Also allow adequate
air circulation on either side of
the appliance and above it.
• The appliance can also be
placed adjacent to or between
kitchen cabinets or cupboards, or
adjacent to a wall. In case of such placement, the appliance will operate flawlessly; however,
power consumption could increase. Observe the minimum clearance above and behind the
appliance, as indicated in the figure.
• Consider the space or clearance required to open the appliance door, in order to allow the
drawers and shelves to be pulled out or removed (see installation diagram).
• Do not place the appliance near appliances or devices radiating heat, such as a stove, a
radiator, water heater etc., and do not expose it to direct sunlight. The appliance should stand at
least 3 cm away from an electric or gas cooker or at least 30 cm away from an oil or solid fuel
stove. If the distance between such source of heat and the appliance is smaller, use an
insulating panel.
• On the upper part of the appliance the air is coming out, so try not to cover the opening for the
outflow air. Ignoring this caution may result in damage to the appliance.
Note: Place the appliance in a sufficiently large room. There should be at least 1 m3 of space per 8
grams of refrigerant. Amount of refrigerant is indicated on the rating plate in the appliance
interior. At the base of the kitchen unit intended for building in the integrated appliance, there
should be at least 200 cm
2
free space, for adequate air circulation.
7
• Appliance installation should be carried out by at least two
people to avoid any personal injury or damage to the
appliance.
• The appliance must stand level or tilted slightly to the back. It
should be stable and placed a solid base. At the front, the
appliance is fitted with two adjustable feet that can be used to
level the appliance. At the rear side, casters allow for easier installation of the appliance (only
with some models).
• After you have levelled the appliance using the adjustable feet, adjust the additional foot for extra
stability of the appliance.
• There should be a clearance of at least 5 cm between the appliance and any cupboard installed
above it, in order to allow adequate cooling of the condenser unit.
• Do not expose the appliance to direct sunlight and do not place it near sources of heat. If this
cannot be avoided, install an insulation panel.
Electrical Connection
Connect the appliance to the power main using the supplied power cord. The wall outlet should be
fitted with a ground contact (safety socket). Nominal voltage and frequency are indicated on the
rating label with basic information on the appliance.
The appliance must be connected to the power mains and grounded in compliance with the effective
standards and regulations. The appliance will withstand short-term deviations from the nominal
voltage, but not more than +/- 6%.
Reversing the Door Swing of your Appliance
CAUTION: Be sure to disconnect your appliance from the main power source before reversing the
direction of the door swing.
If the appliance has to be tilted to allow access to parts on the bottom, ask another person for
assistance or gently place the appliance on some soft padding to prevent damaging it. To reverse
the opening direction, proceed as follows:
1. Place the appliance in an upright position. Open the top door, and
remove the door racks (to prevent damaging them during this
procedure). Close the door.
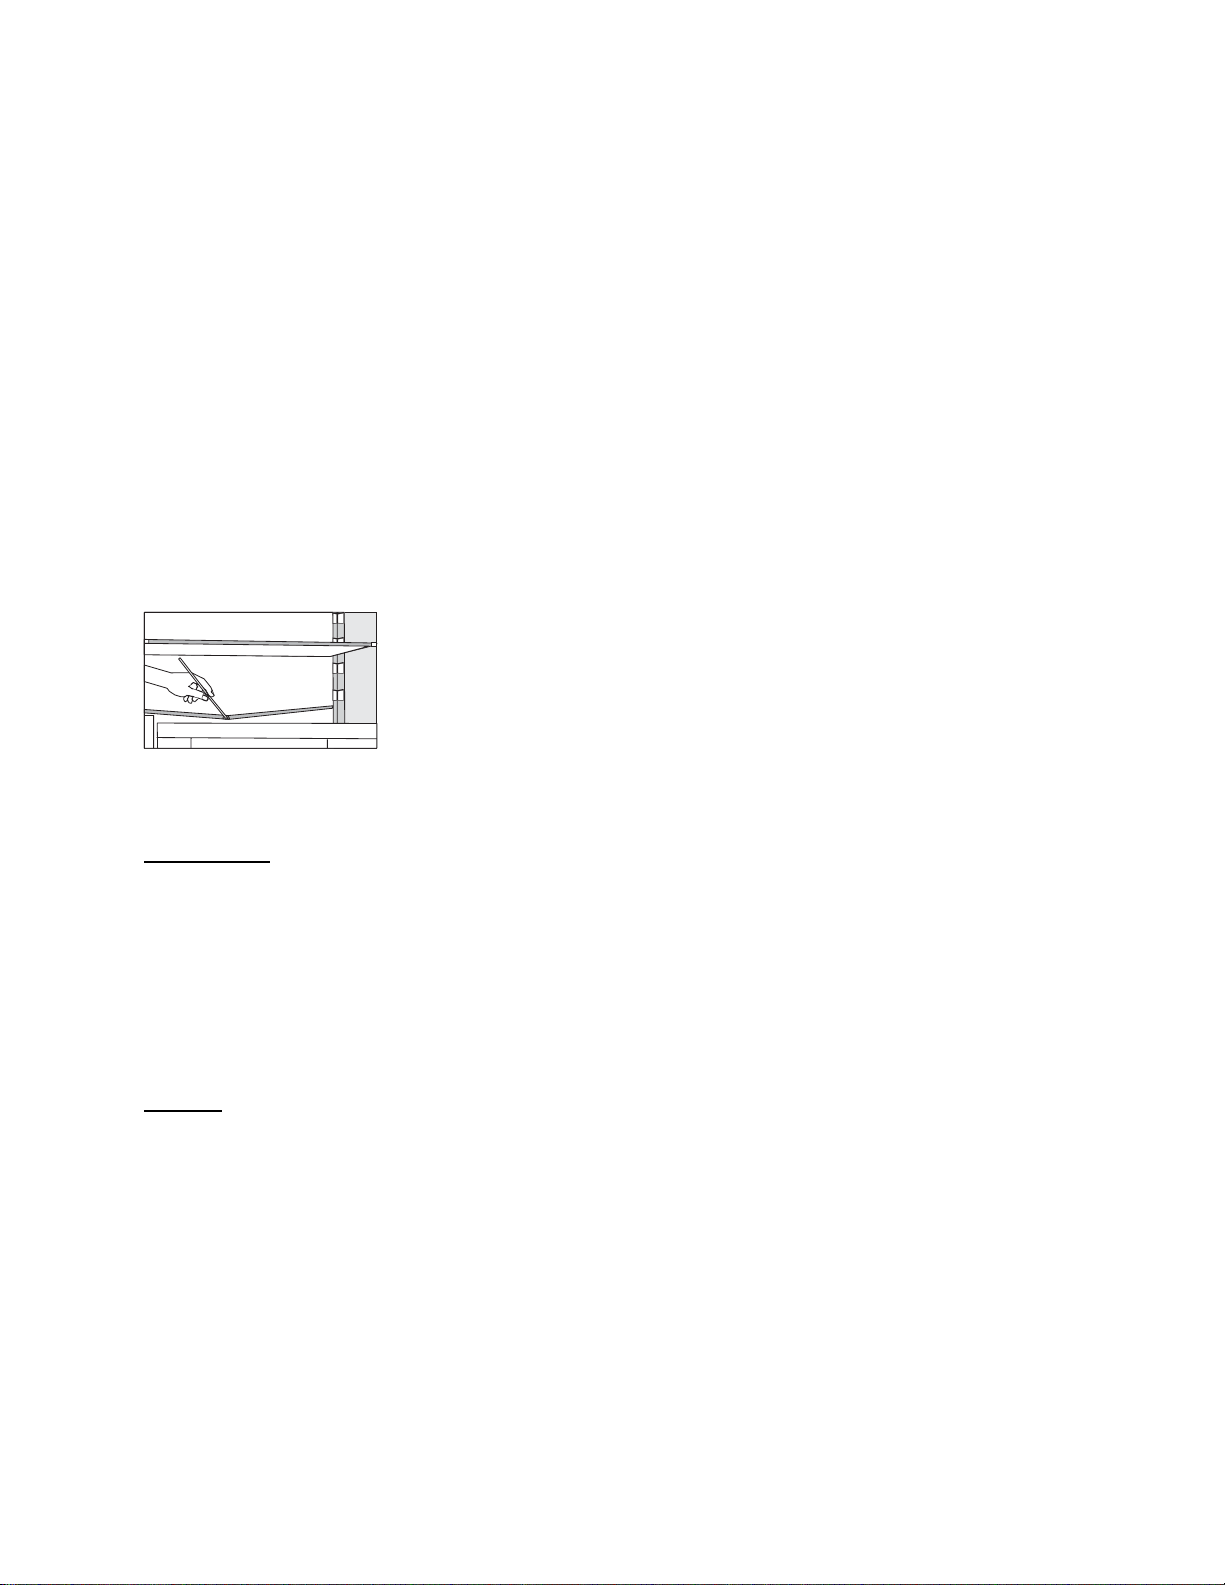
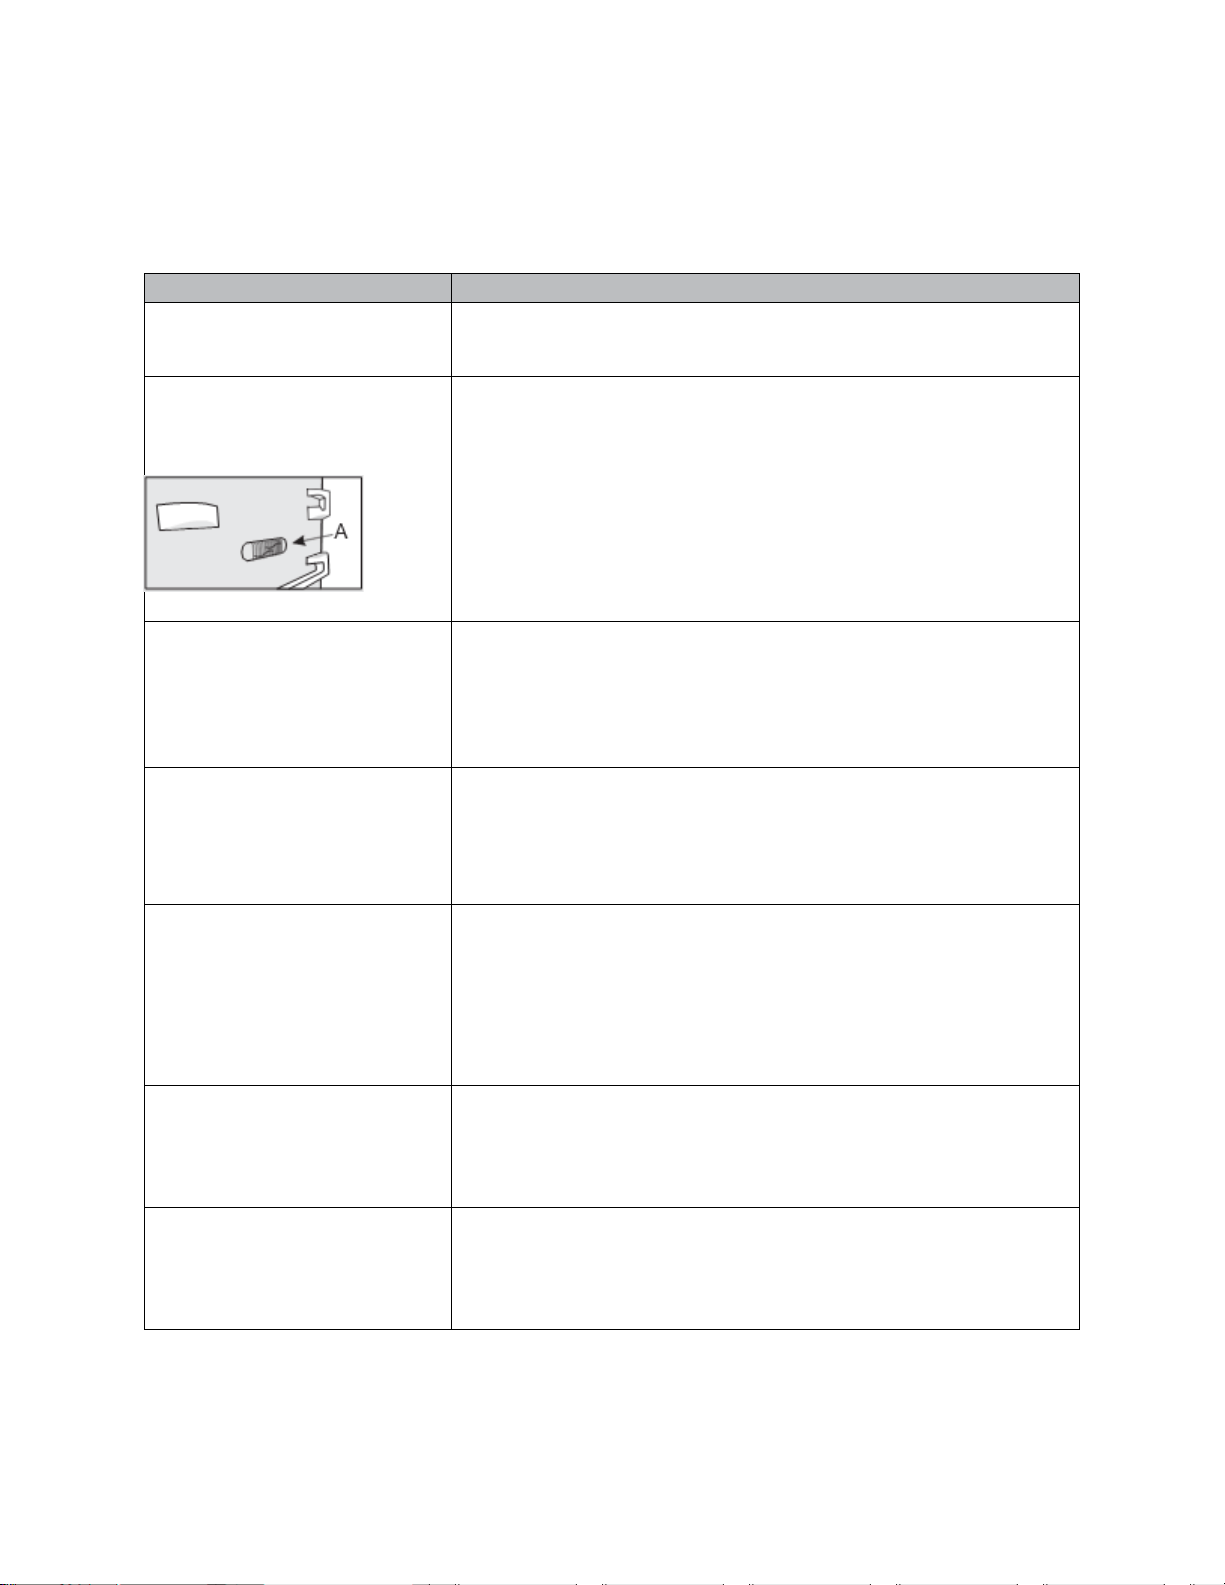
2. Remove the top hinge cap (1). Be particularly careful not to
damage the connector (A). Unplug the connector (A).
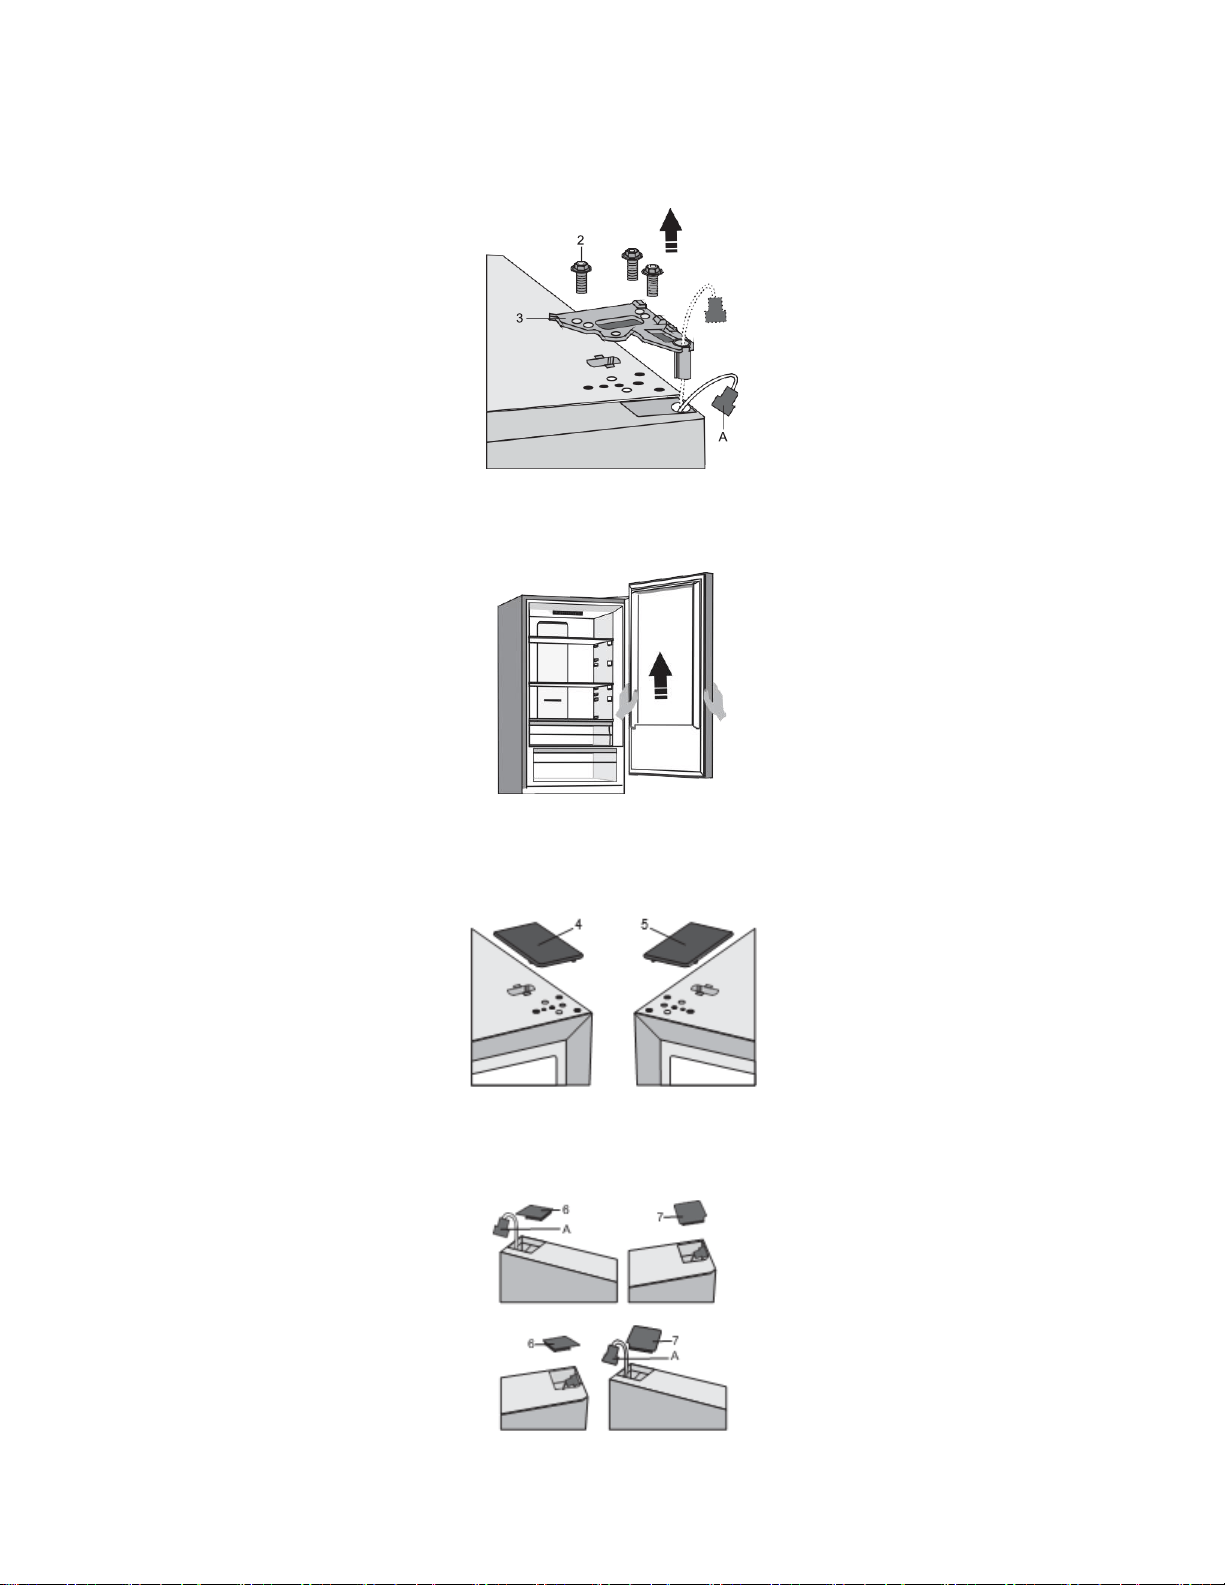
8
3. Undo the screws (2) and remove the hinge (3). Run the connector (A) through the hole in the
hinge. Hold the door while doing this to prevent it from falling.
4. Remove the top door from the middle hinge by carefully lifting it straight up. Lay the door onto a
smooth, soft surface.
5. Take the (right) cap/cover (4) from the supplied bag, and place it on the spot from with the top
hinge was removed. Remove and save the cap/cover from the other side (5) to which the hinge
will be relocated.
6. Remove the cap (6) from the left side of the top door, and pull out the connector (A). Then,
remove the cap (7) from the right side of the top door. Place the cap (7) on the left side of the top
door, and place the cap (6) on the right side of the top door.
9
7. Undo the screw (8) and remove the door retainer (10) and the door stop (9). Then, use a screw
(8) to install the door retainer supplied in the bag, and the door stop (9). Keep the door retainer
(10) in case you need it later.
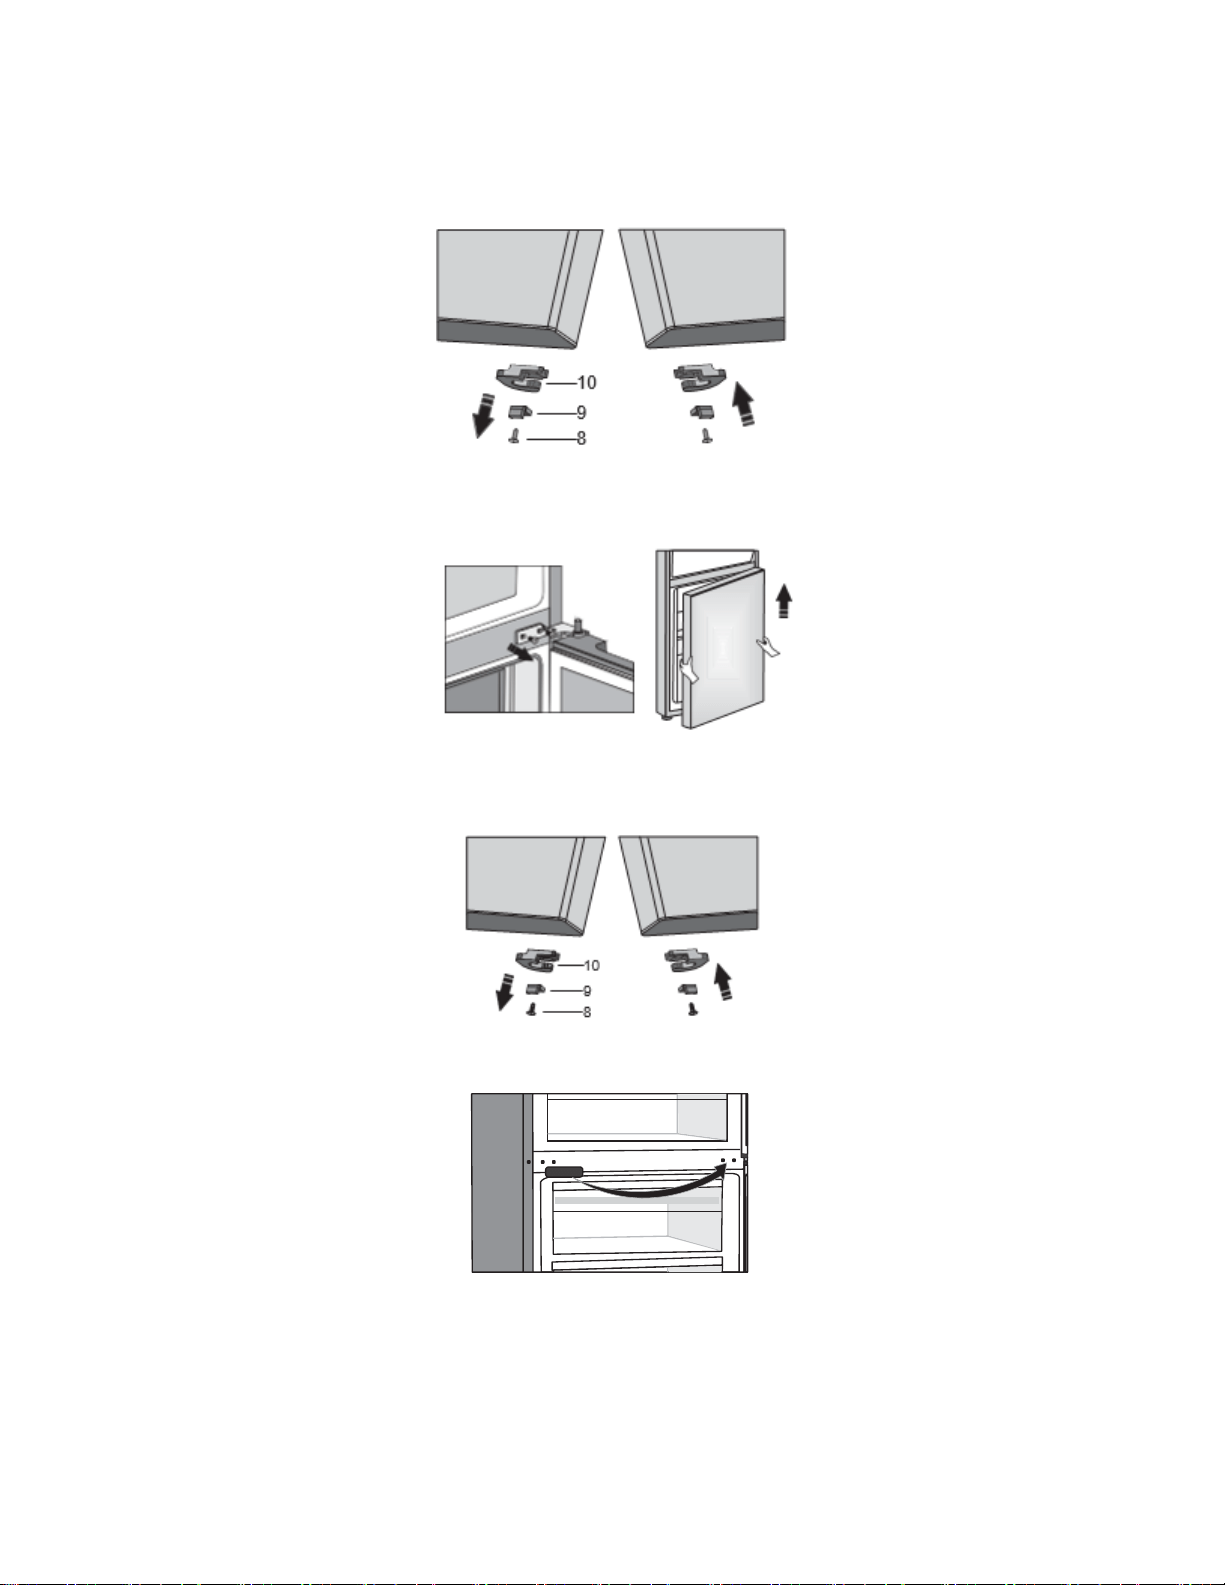
8. Undo the screws from the middle hinge and remove it. Then, remove the bottom door from the
bottom hinge.
9. Lay the bottom door onto a smooth surface. Undo the screw (8) and remove the door retainer
(10) and the door stop (9). Then, use a screw (8) to attach the door retainer supplied in the bag,
and the door stop (9). Keep the door retainer (10) in case you need it later.
10. Remove the middle hinge cap and replace it on the opposite side.
10
11. Tilt the appliance backwards and remove the adjustable foot (13).
12. Unscrew the bottom hinge (14). Remove the adjustable foot (13) from the bottom hinge pin (11).
Unscrew the pin (11) from the bottom hinge and screw it onto the opposite side of the hinge.
13. Use the screws to attach the foot from step 11 and the bottom hinge from step 12 to the opposite
side.
14. Place the bottom door onto the bottom hinge and hold them in place. Rotate the middle hinge by
180°. Place the washer in the correct position and adjust the position of the middle hinge so that
you can install and fix the bottom door.
15. Correctly position the top door, run the connector (A) through the hole in the top hinge (3) and
use the screws (2) to attach it. Hold the top door in place while positioning them. Reconnect the
connector (A).
11
16. Replace the upper hinge cap (1).
17. Open the top door, and replace the door racks. Then, close the door.
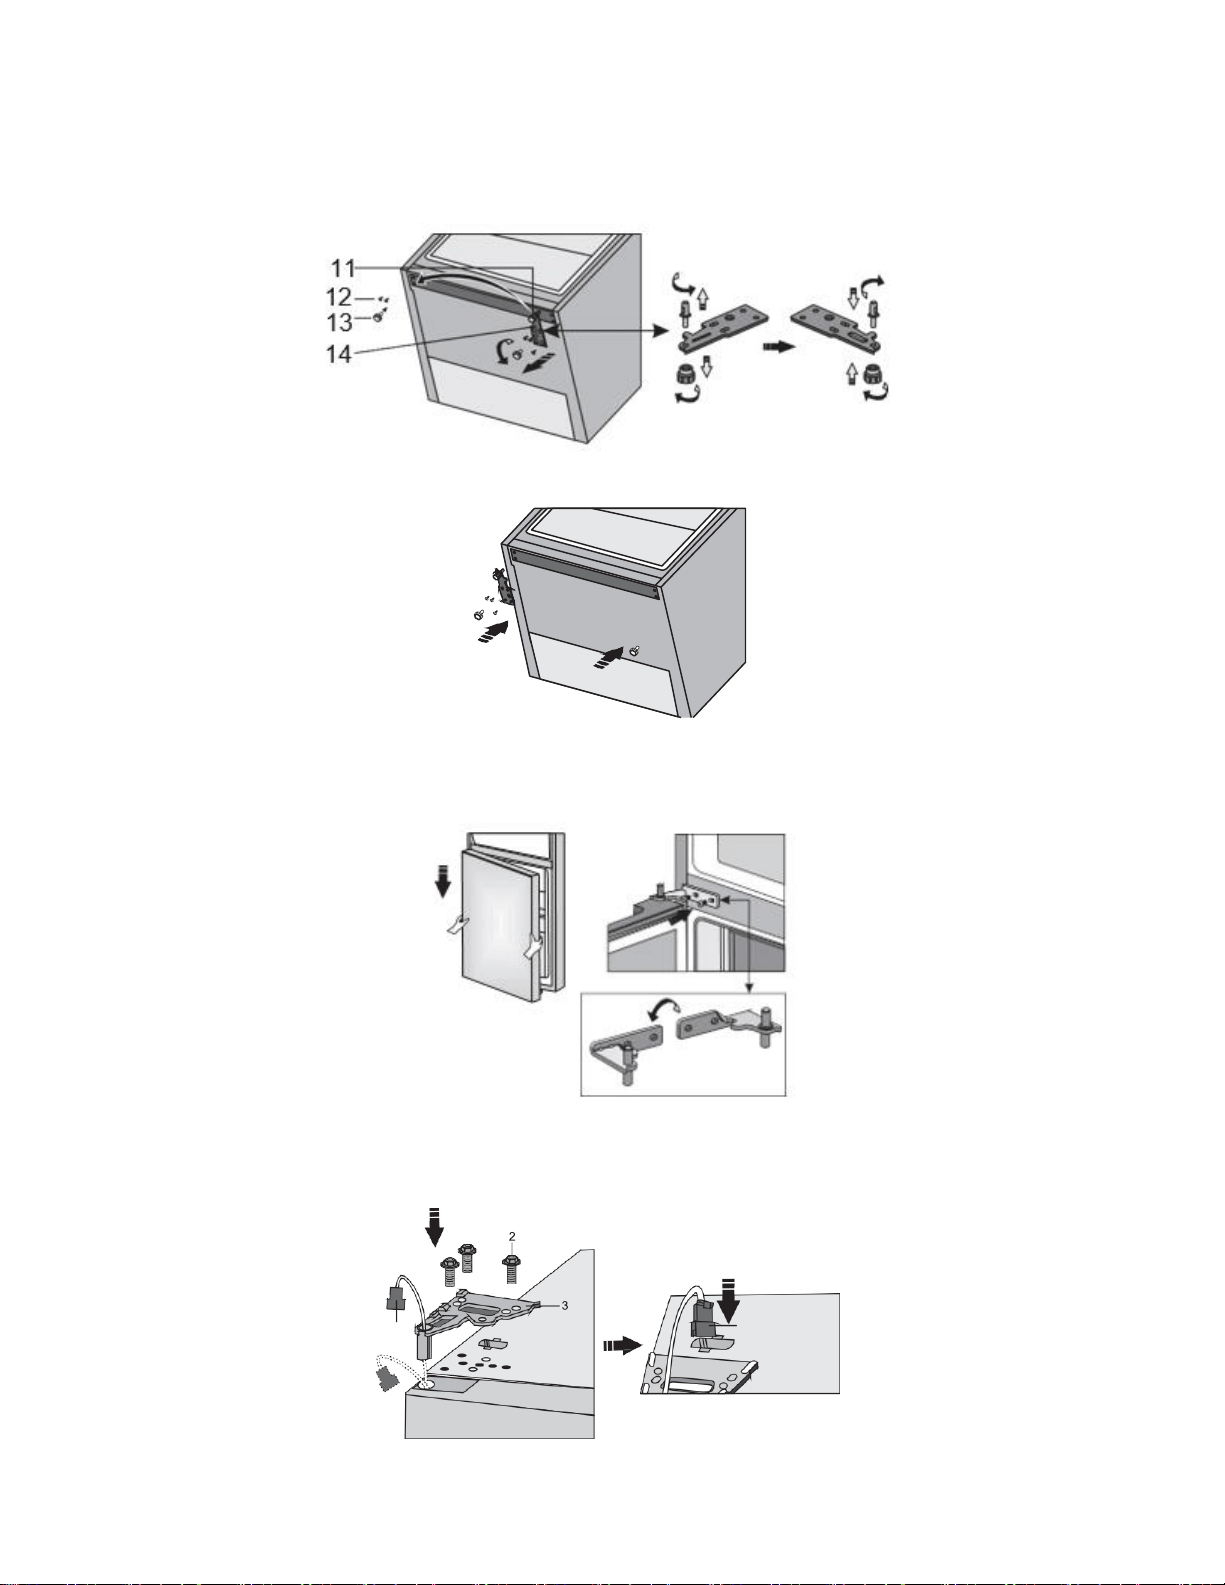
Note: If your model has a handle, then move it to the opposite side by following the instructions
below. Remove the top door and lay them onto a smooth surface. Remove the caps (1) and
(4) and undo the screws (2) as shown in the figure. Replace the handle (3) on the opposite
side, tighten the screws (2) and replace the caps (1) and (4).
12
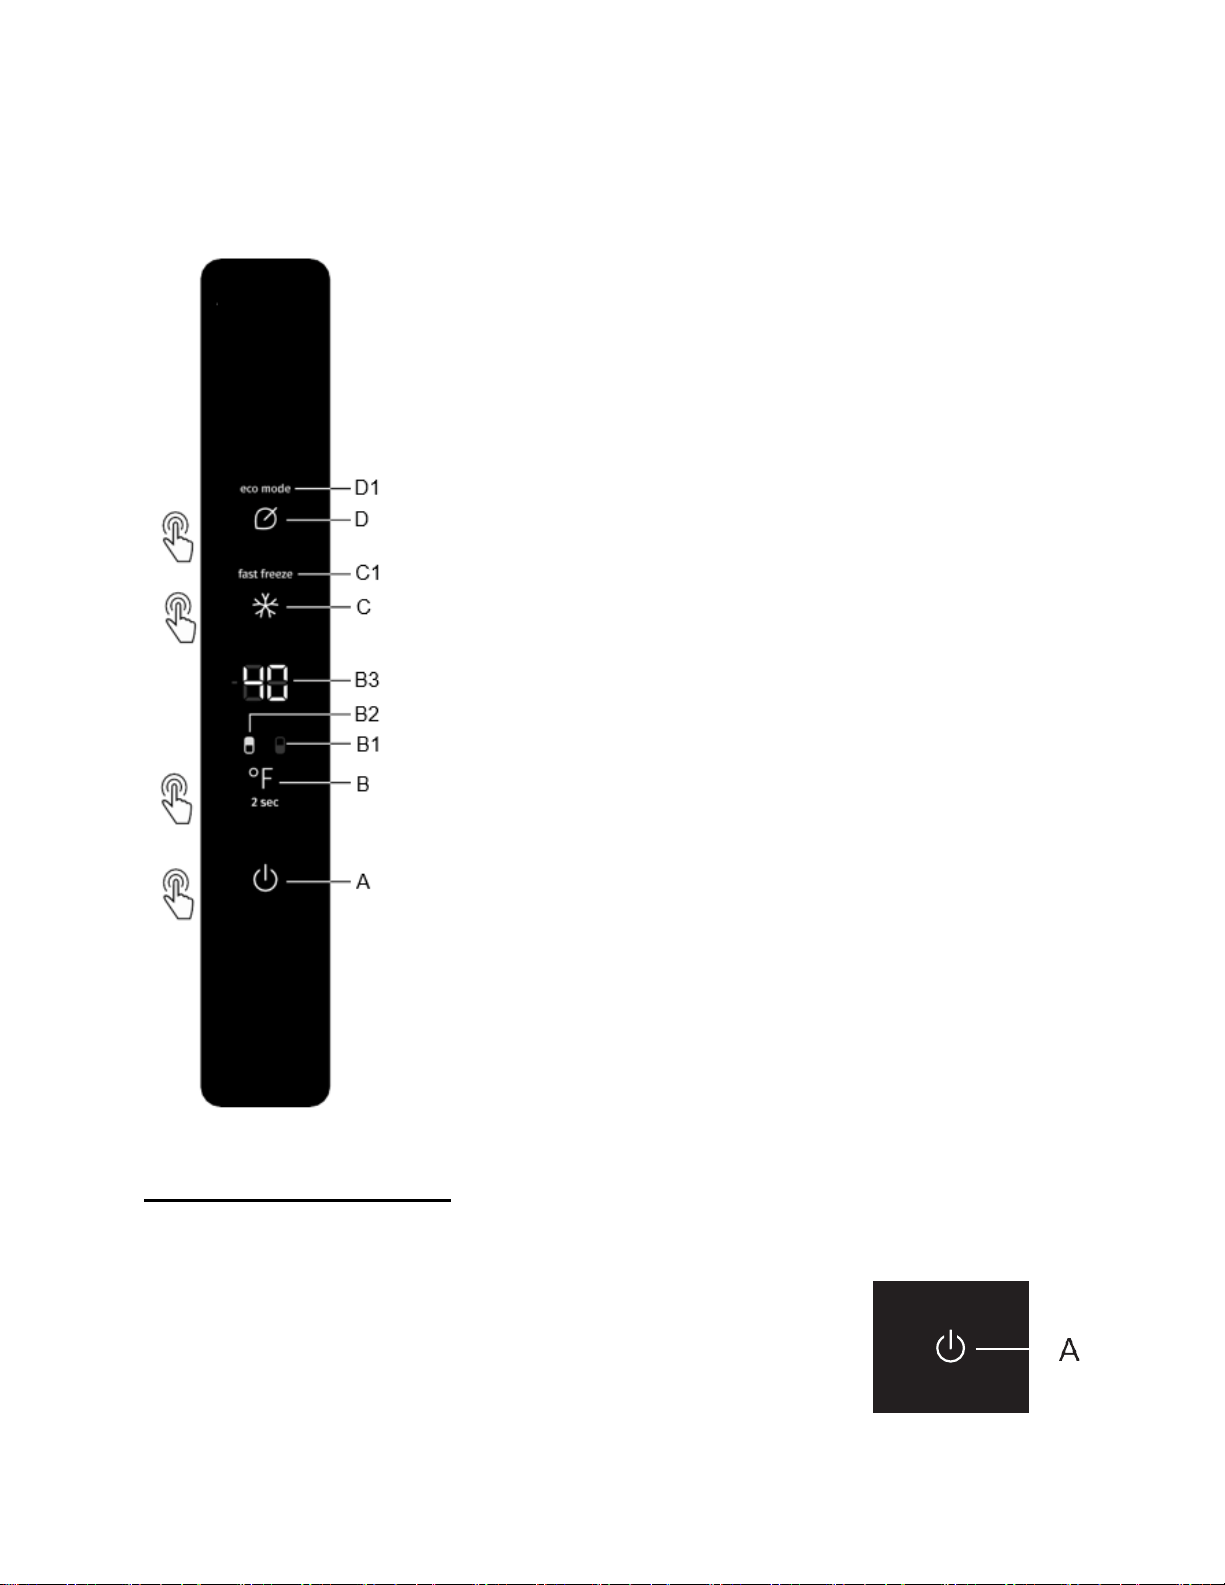
OPERATING YOUR APPLIANCE
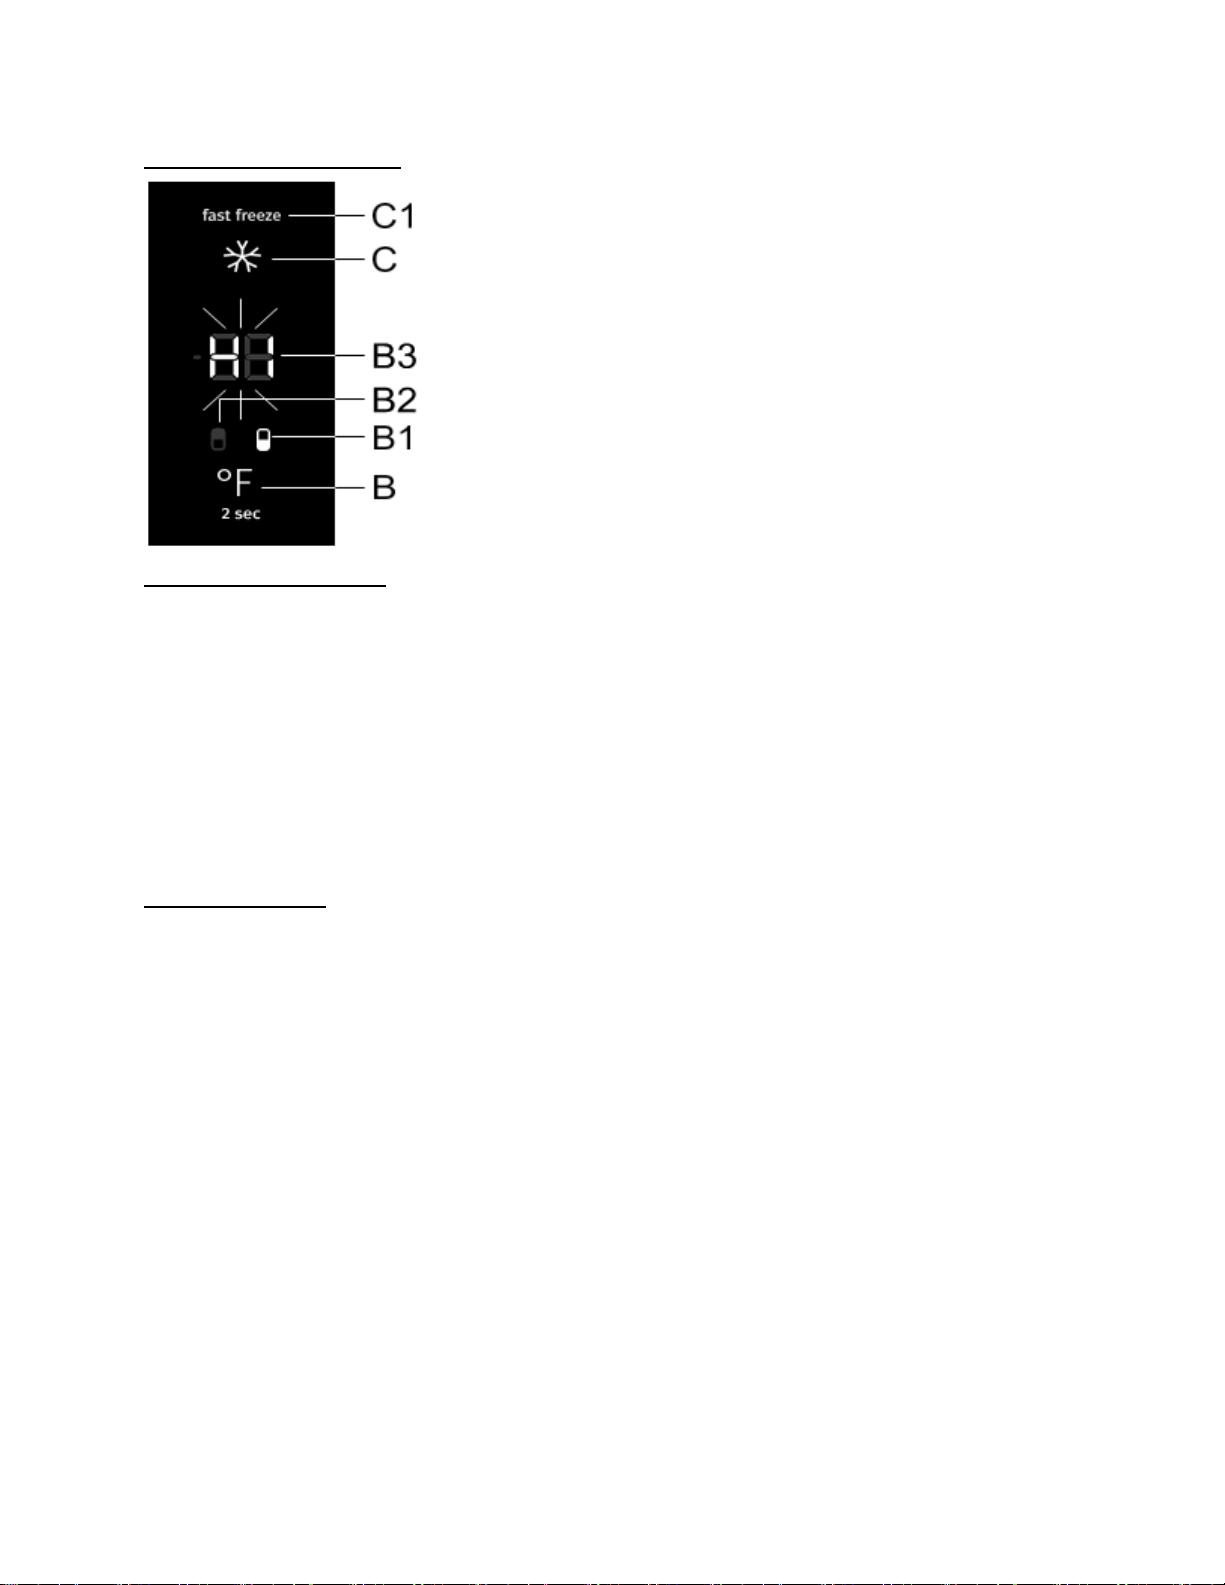
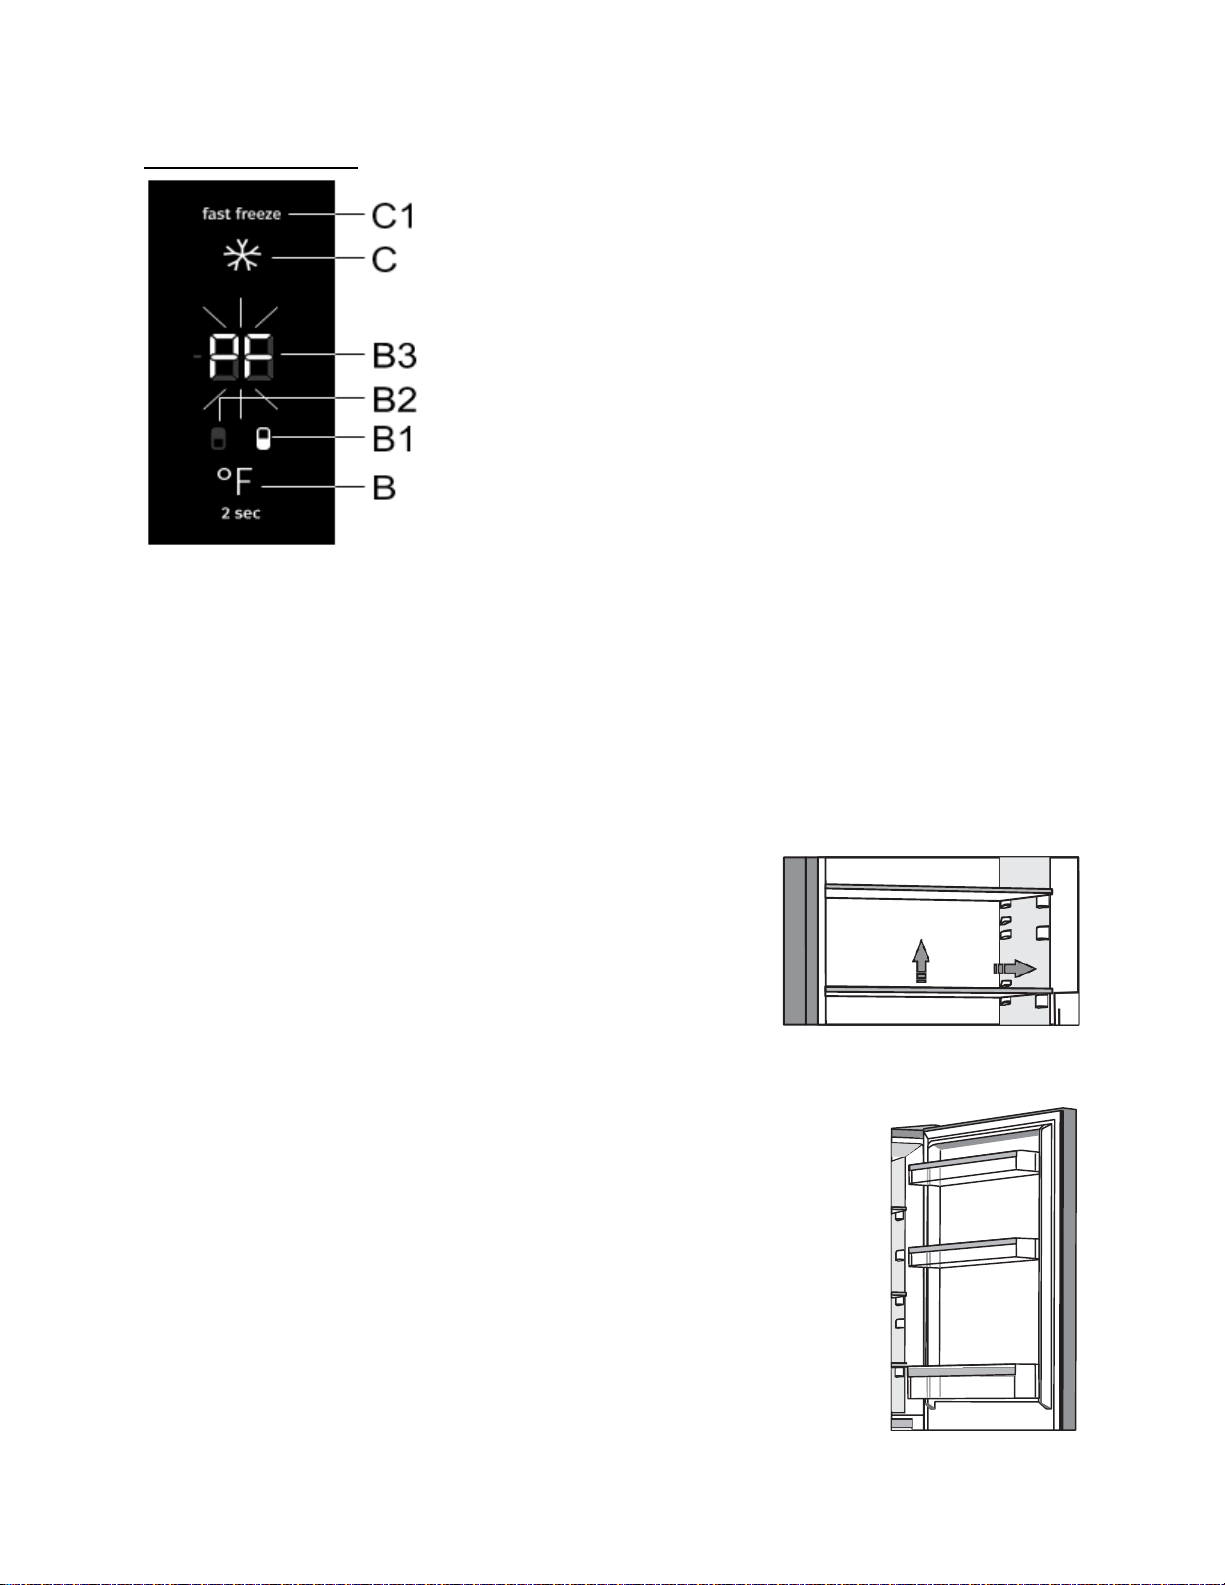
Control Panel
Turning the Appliance On/Off
When you connect the appliance to the main power source for the first time, the appliance will be in
standby mode (switched off, but powered).
• To switch on the appliance, press the (A) key. A The appliance will beep,
and the temperature will be displayed on display B3.
• To switch off the appliance, press the (A) key and hold it for at least 2
seconds. A beep will sound, and the outer segments of the display digits
B3 will light up in the clockwise direction. The appliance will return to
standby mode.
A
On/Off key
B
Temperature adjustment key and
refrigerator/freezer compartment
switch key
B1
Freezer compartment display
B2
Refrigerator compartment display
B3
Set temperature display
C
Intensive freezing (freezer boost)
on/off key
C1
Intensive freezing (freezer boost)
function indicator
D
EcoSmart function on/off key
D1
Eco function indicator
13
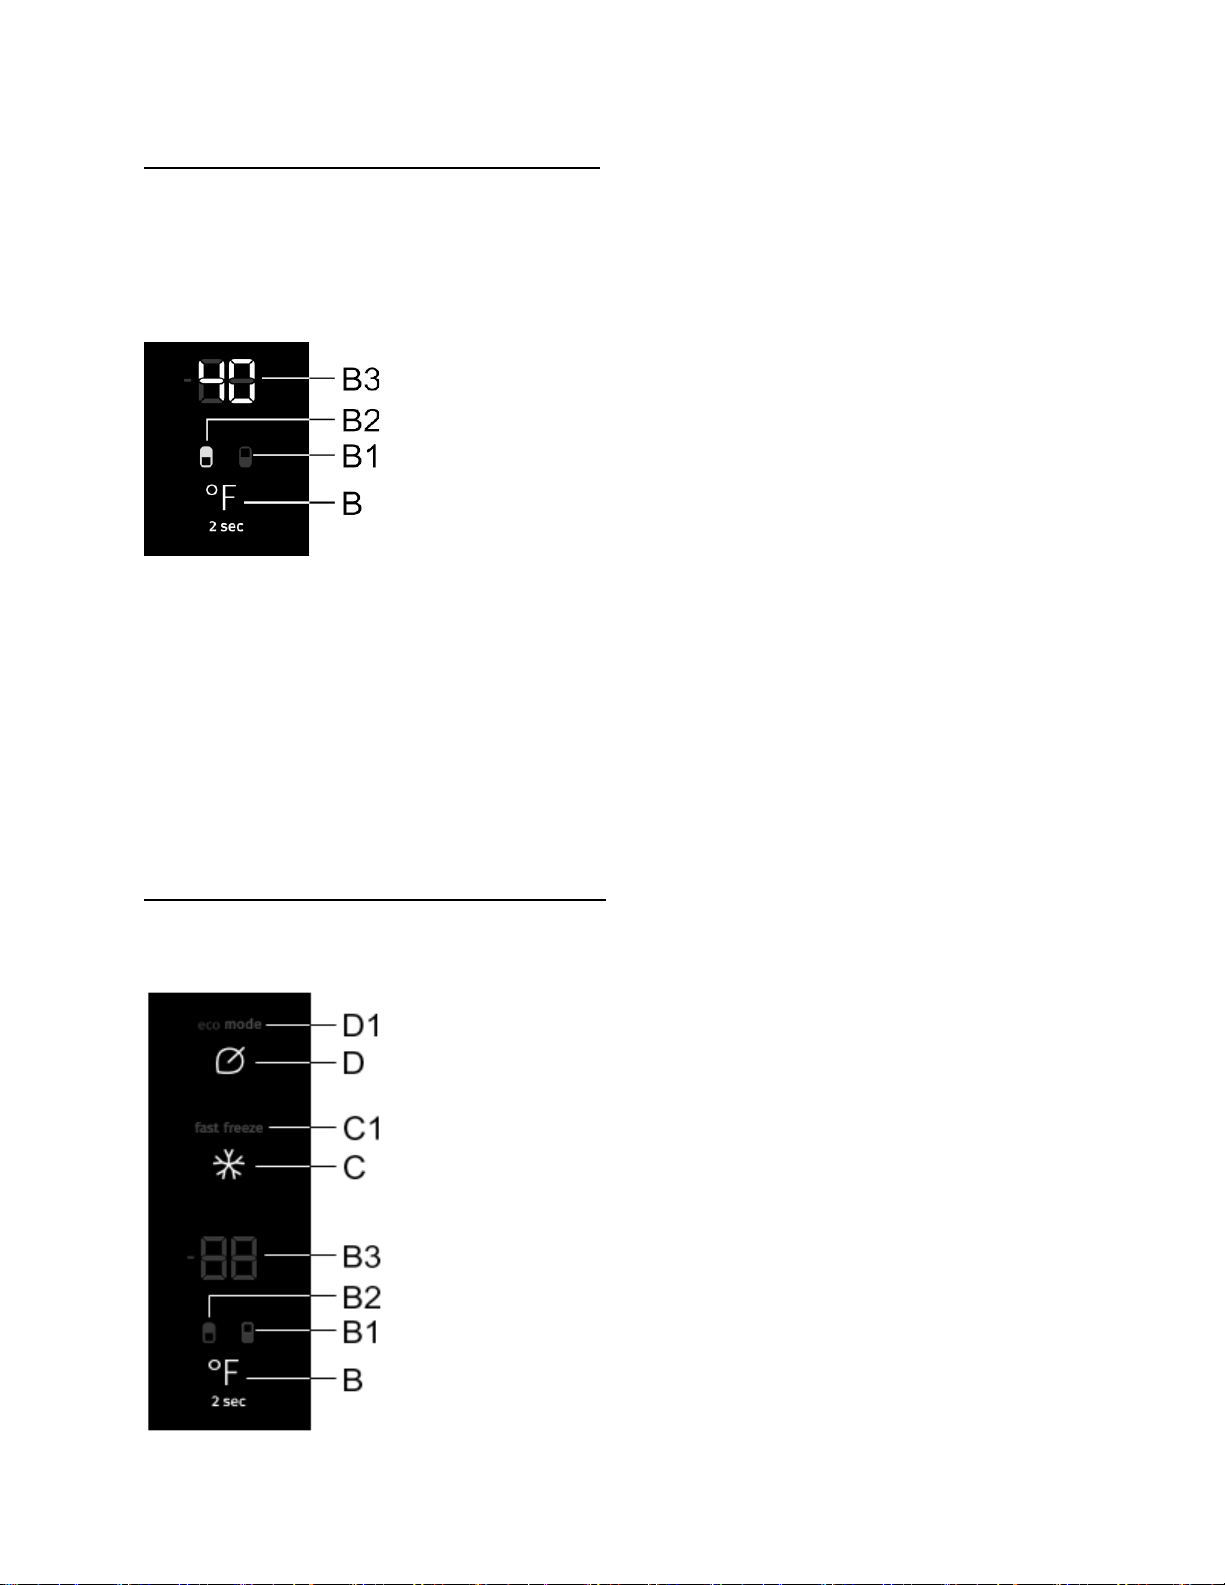
Adjusting the Temperature in the Appliance
• The appliance temperature is preset at the factory to the recommended setting, i.e. 40 °F for the
refrigerator compartment and 0 °F for the freezer compartment.
• After the appliance is switched on, it may take several hours for the set temperature to be
reached. Do not place any food into the refrigerator before the temperature drops to the selected
setting.
In this model, you can switch between setting the temperature of the
refrigerator and the temperature of the freezer compartment. To do this,
press the B key and hold it for two seconds until the symbol for the
desired compartment lights up: B1 for the freezer compartment and B2
for the refrigerator compartment.
The temperature in the refrigerator compartment can be set when the B2
symbol is lit. The temperature in the freezer compartment can be set
with the B1 symbol is lit.
Set the temperature by briefly pressing the B key.
• Every time you press (B) the key, the temperature will be increased by 1 °F. The setting you
choose will be stored as the most recent temperature set for the refrigerator compartment.
• The refrigerator compartment temperature can be set in the range from +34 °F to +46 °F.
o The recommended temperature setting is 40 °F.
• The freezer compartment temperature can be set in the range from 6 °F to –6 °F.
o The recommended temperature setting is 0 °F.
NOTE: 30 seconds after the most recent key is pressed, the freezer compartment display
automatically switches back to refrigerator compartment display. B2 will light up and the
temperature set for the refrigerator compartment is displayed on the B3 display unit.
Adjusting the Temperature in Standby Mode
30 second after you have pressed the most recent key, the control unit switches to standby mode.
All indicators on the control unit will be switched off. There are exceptions when some indicators
remain lit, although the control unit is in standby mode. Such exceptions include the following:
• If intensive freezing (freezer boost) is activated, then the indicator C1
will remain lit All other indicators are off.
• If the Eco function is activated, the indicator D1 will still be displayed
in standby mode. All other indicators are off.
• If the manual freezer compartment defrosting function is activated,
then
• CL will still be displayed on the B3 display unit, even when the control
unit is in the standby mode. All other indicators are off.
To switch back from the standby mode: briefly press the B key or open
the refrigerator compartment door. If the Eco function or the intensive
freezing (freezer boost) function are activated, then the C or D key,
respectively, may also be used to switch back from the control unit
standby mode, depending on which function is activated.
14
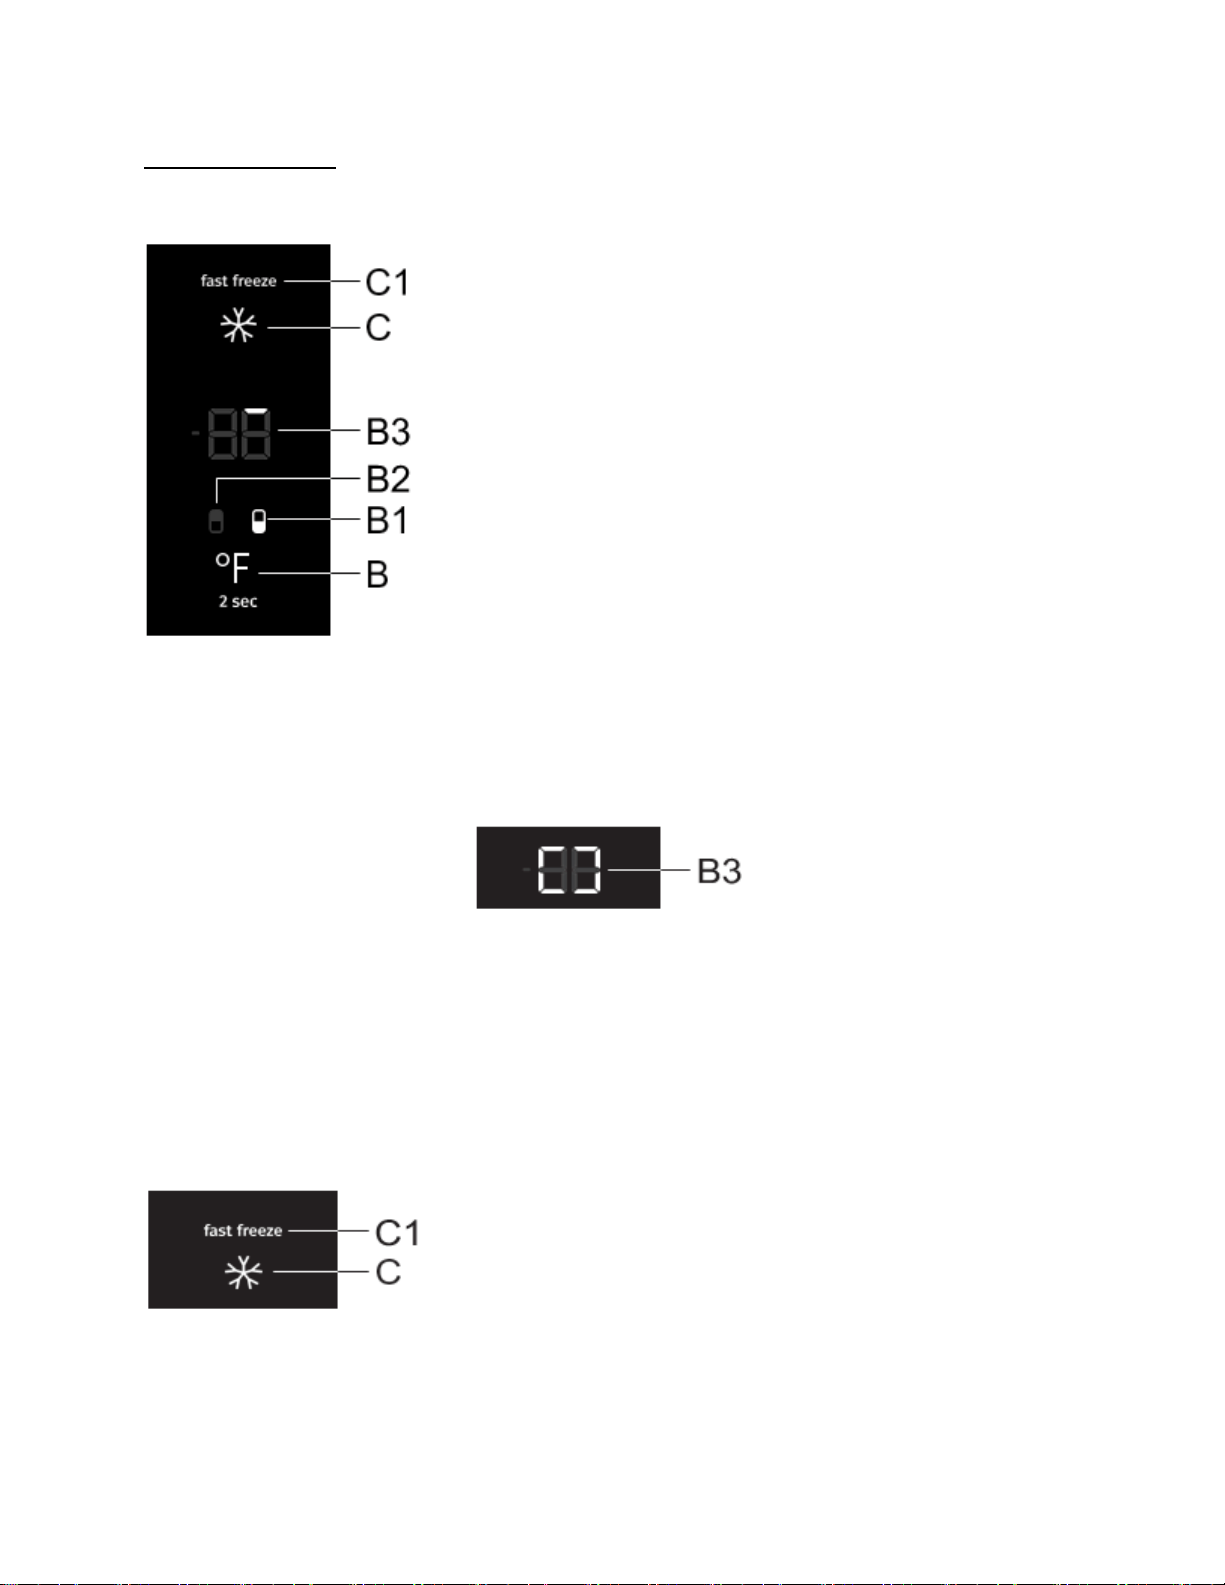
Intensive Freezing
Use this setting after switching on the appliance for the first time, before cleaning, or before inserting
a large amount of food.
• To activate the intensive freezing function, press the C key. You
will hear a beep, indicators B1 and C1 will light up.
• After 30 seconds, the display will automatically switch to the
refrigerator compartment display – the symbol B2 will light up and
the temperature set for the refrigerator compartment will be
displayed on the B3 display unit.
If you use the B key during operation to select the freezer compartment (B1 will light up), then you
will see the outer segments of the two digits on the display unit gradually lighting up in a circular
manner. At first, only the first segment (see figure above) will be lit; then, successive segment will
light up in the clockwise direction.
Towards the end of this function’s operation, all outer segments on the B3 display unit will be lit up.
When the refrigerator compartment temperature is displayed – and the B2 symbol is lit – briefly
press the C key to switch to the freezer compartment display. The B1 symbol will light up and the
status of the function, or how many of the outer segments are already lit up, will be displayed on the
B3 display unit. After 30 seconds, the display will automatically switch back to refrigerator
compartment temperature display, and the B2 symbol will light up.
The refrigerator compartment temperature can be set or adjusted while intensive freezing function is
activated. You may do so when the B2 symbol is lit up. Set the temperature by briefly pressing the B
key. The intensive freezing function remains activated nevertheless.
• Switching off: If the refrigerator compartment is active (B2 is lit
up), then first press the C key to switch to the freezer
compartment (B1 will be lit up), and then press the C key to
deactivate the function.
• If the freezer compartment is activated (symbol B1 is lit), then
press the C key to deactivate the function.
After the intensive freezing function is deactivated, the freezer temperature setting returns to the
most recent setting selected before the intensive freezing function was activated.
In case of a power supply failure or outage, the function will be reactivated.
15
When the intensive freezing function is activated, the appliance will operate with maximum power.
During this time, operation may be temporarily somewhat louder.
When the intensive freezing function is activated, temperature may be lower both in the refrigerator
and the freezer compartment.
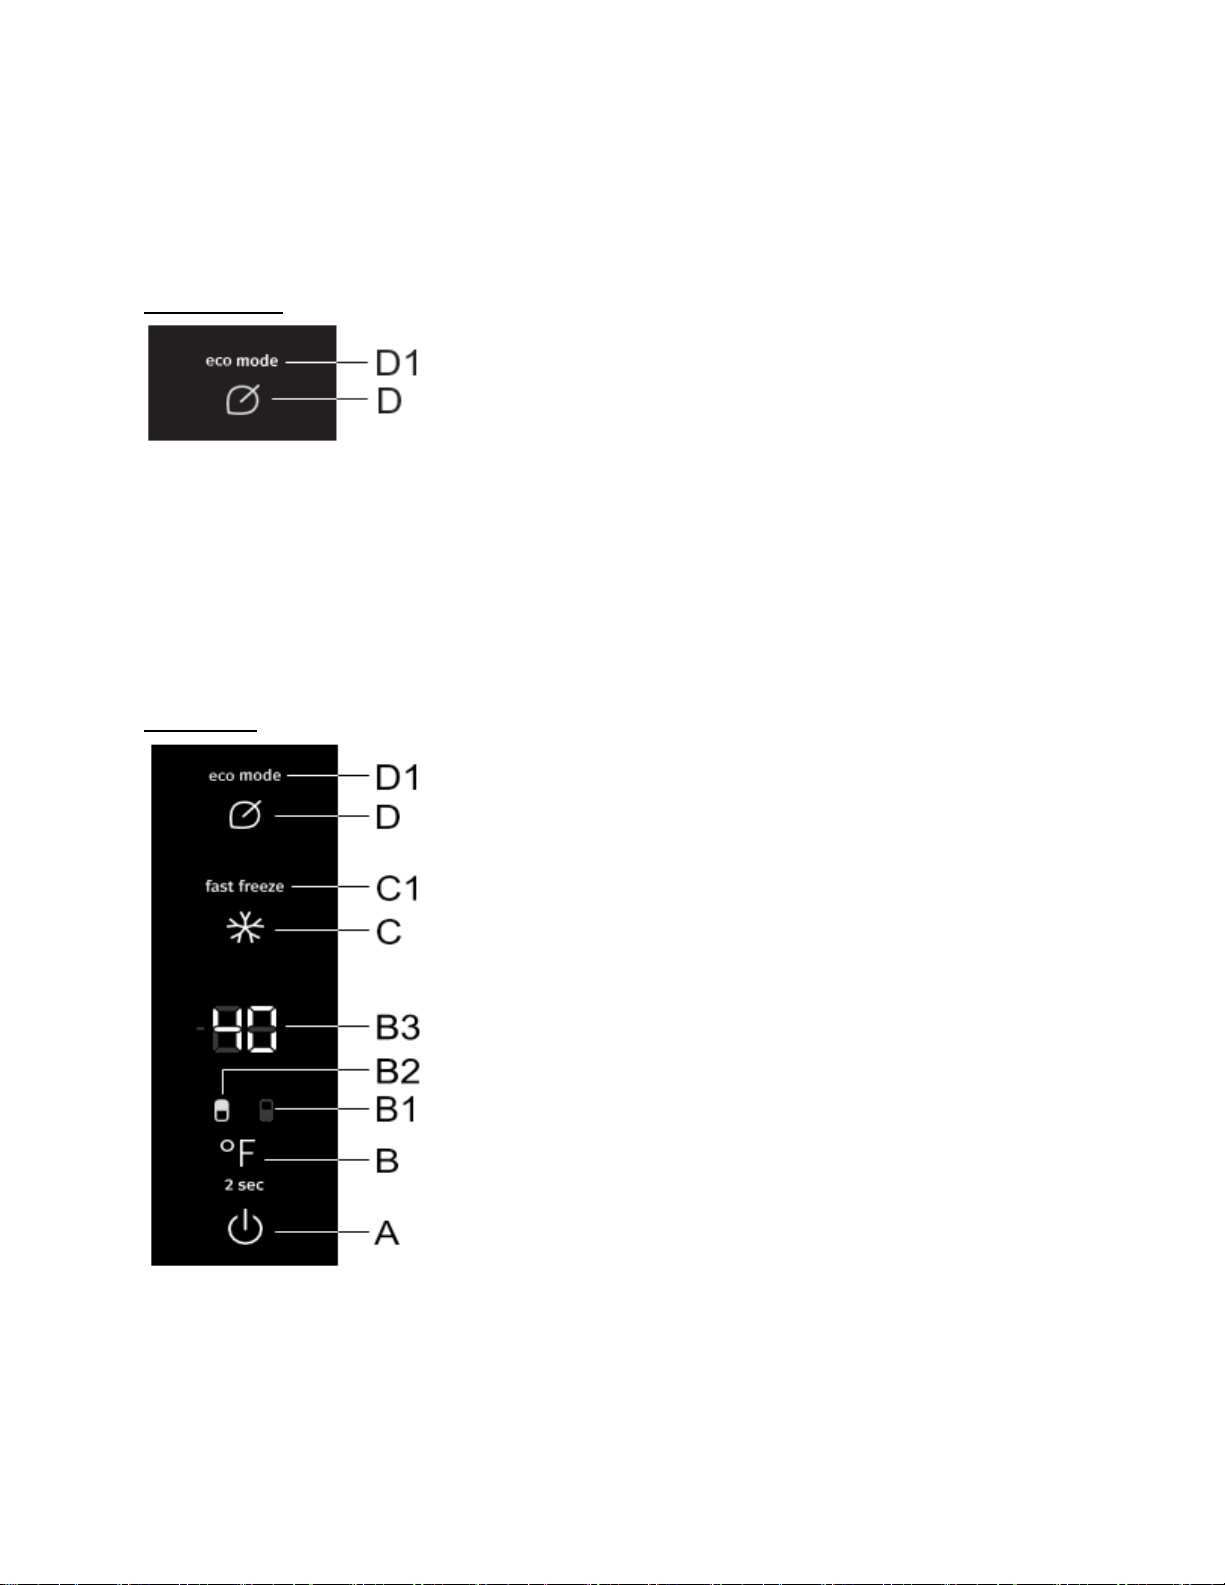
Eco Function
To activate the Eco function, briefly press the D key. The symbol D1
will light up. When this function is activated, the appliance operates
under optimum settings.
NOTE: If the intensive freezing function or the manual freezer compartment defrosting function are
activated, then the Eco function cannot be activated.
To switch off the Eco function, again briefly press the D key. The temperature will return to the most
recent setting.
The Eco function will also be deactivated when you use the B key to change the refrigerator
compartment temperature setting, or when you use the C key to activate the intensive freezing
function.
Child Lock
To activate the child lock, press the A and D keys and hold it for two
seconds. LL will briefly appear on the B3 display unit.
NOTE: The function will lock all keys except the A and D keys.
To deactivate the function, press and hold the A and D keys again.
In case of a power supply failure or outage, the function will be
reactivated/resumed.
16
High Temperature Alarm
• If the temperature inside the appliance is too high, then an
acoustic alarm will be activated (intermittent tone).
• HI will flash on the B3 display unit, and the symbol for the part of
the appliance where the temperature is too high (B1 or B2) will be
lit.
• Every time you switch on the appliance using the A key, a 24-hour
delay in alarm operation is activated. If the appliance fails to
reach a sufficiently low temperature after this period, the alarm
will be activated.
Switching off the alarm
• Acknowledge and turn off the acoustic alarm by pressing any key. Current temperature in the
compartment where the temperature is too high will start to flash on the B3 display unit. If you do
not acknowledge and switch off the acoustic alarm, then it will be activated every hour for
approximately 15 minutes.
• The next time you press the B key, the temperature set for the compartment in which the
temperature is currently too high will start to flash, and the symbol for the compartment where
the temperature is too high will be lit (B1 or B2). The temperature display will flash until the
temperature drops to below the alarm value.
• When the temperature drops to below the alarm value, then the temperature display will stop
flashing and it will be lit continuously. Refrigerator compartment temperature will be displayed
and the B2 symbol will light up.
Open Door Alarm
• If the refrigerator or freezer compartment door is open for too long, an acoustic alarm (repetitive
beep) will be activated. If the alarm is not deactivated manually, it will be sounded for 10 minutes.
The appliance will continue to operate as if the door was closed.
• To switch off the alarm, close the door.
NOTE: If you switch off the alarm by pressing any key, the alarm will be reactivated in 4 minutes if
the door is still open.
If you leave the door open for more than 10 minutes, then the alarm will stop. Appliance operation
switches to safe mode in order to provide sufficient cooling and prevent food spoilage, despite the
open door.
17
Power Supply Alarm
If the temperature in the appliance reached the alarm level during the
power outage, then the high temperature alarm will be activated
when power supply is restored. Acoustic alarm will be sounded, and
PF will flash on the display unit B3.
To acknowledge and turn off the acoustic alarm signal, press any
key. The highest measured temperature of the freezer compartment
will be displayed on the B3 display unit, and the B1 symbol will light
up.
The next time you press the B key, the highest measured
temperature of the refrigerator compartment will be displayed, and
the B2 symbol will be lit up.
When you press the B key again, the power supply failure alarm will be finally deactivated, and the
set temperature for the selected compartment will appear on the B3 display unit.
If the high temperature alarm is activated at the same time, it will operate as described in the chapter
High Temperature Alarm, after you have deactivated the power supply failure alarm.
INTERIOR FEATURES
NOTE: Not all features listed in this section may be available in your specific appliance.
Shelves
You can lay out the empty shelves to your liking across the
guides in the refrigerator interior without having to remove
them from the refrigerator.
To move the shelf or take it out from the refrigerator, slightly lift
it at the back, pull it towards you, and then either move it or
take it out of the appliance.
Store quickly perishable food at the back of the shelf where the
temperature is the lowest.
Door Shelves
The interior side of the refrigerator door is fitted with shelves intended for
storing cheese, butter, eggs, yoghurt, and other smaller packages, tubes,
cans etc.
You may arrange the shelves as desired by lifting them slightly from the
grooves that hold them in place and moving them to the desired spot, making
sure to fit them in the grooves there.
The bottom shelf is intended for storing bottles.
Maximum load on each door shelf is 5 kg.
2
1
18
Wire Bottle Rack
Some models also feature a wire bottle rack. It is protected against
being inadvertently pulled out. It can only be pulled out when it is
empty. To pull it out, lift it slightly at the back and pull it towards you.
Place the bottle rack so that the length of the bottles does not hinder
proper closing of the door.
The holder can take a maximum load of nine 0.75-litre bottles or 13
kilograms of total weight – see label on the right side in the appliance interior. Cans may also be
placed on the bottle rack (lengthwise or crosswise).
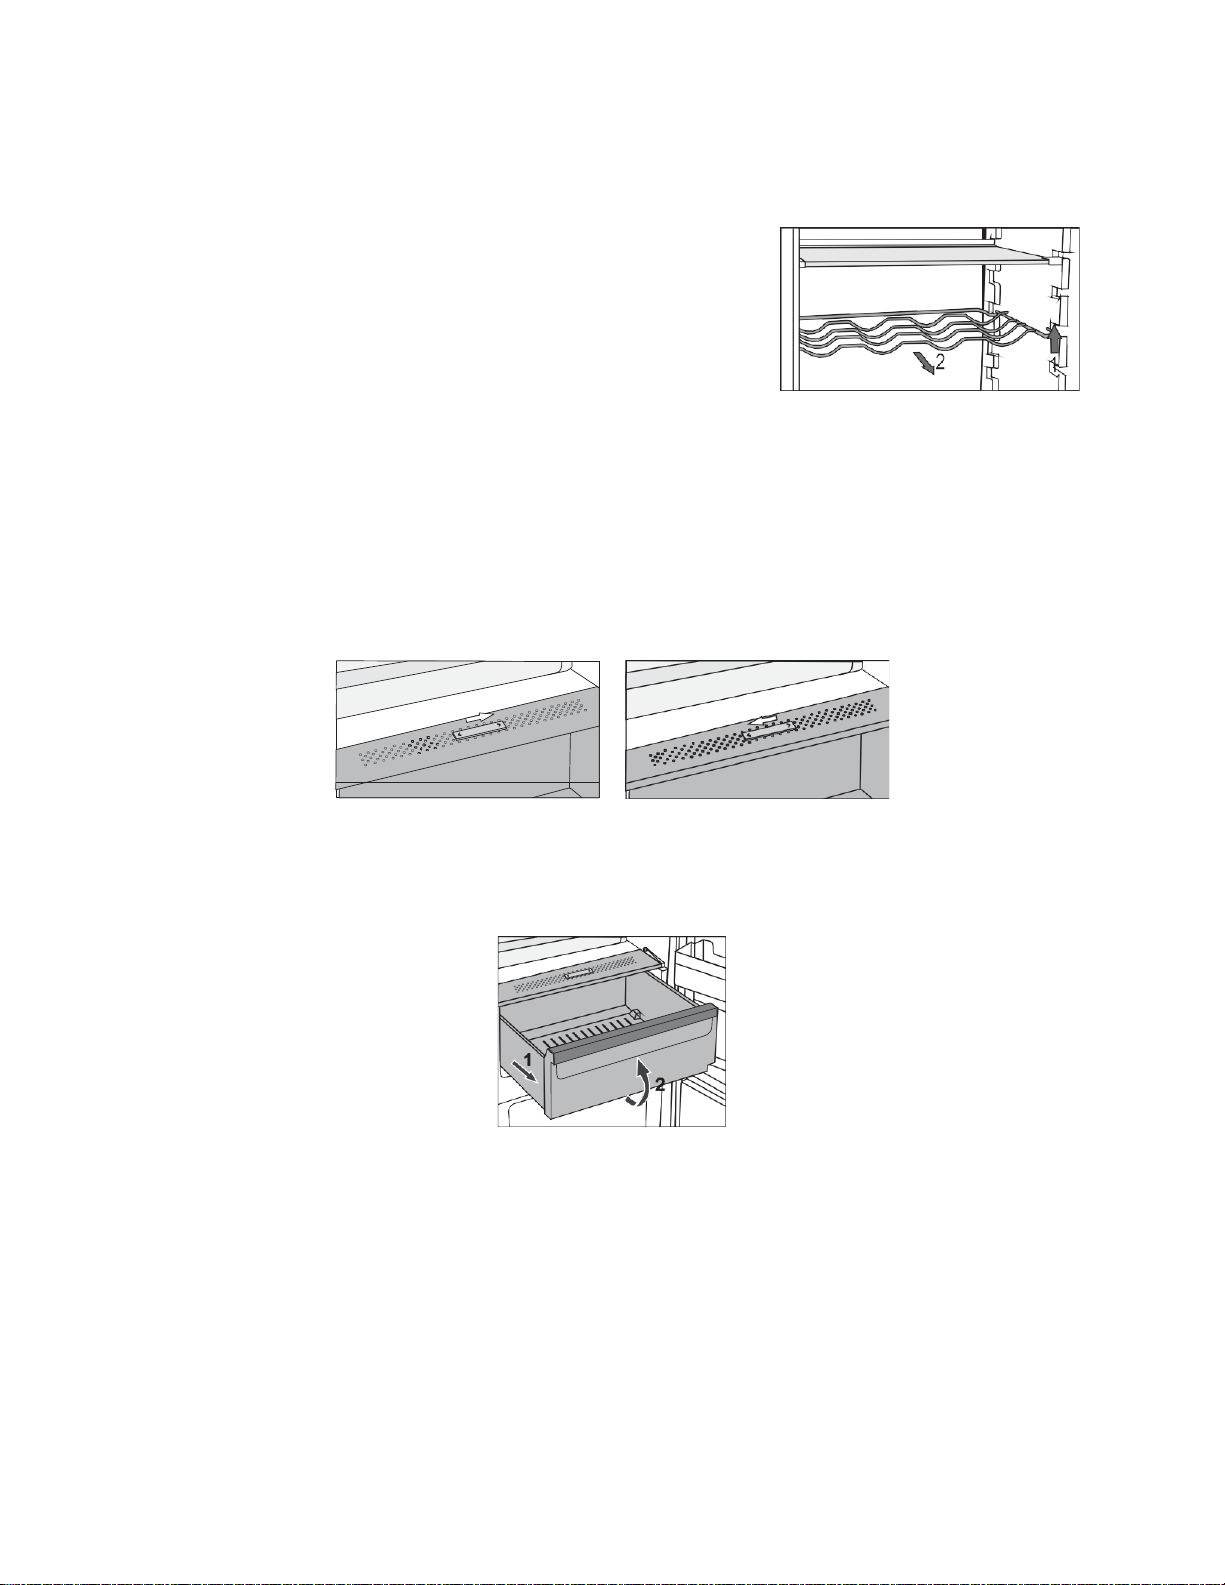
Fruit and Vegetable Bin with Humidity Control
The bin at the bottom of the refrigerator is intended for storing fruit and vegetables. It provides
humidity and prevents the stored food from drying out. The bin has integrated humidity regulator
which allows you to set the humidity level inside.
Slider position to the right: closed vents, higher humidity in the bin.
Slider position to the left: open vents, lower humidity in the bin.
If you observe droplets accumulating below the glass shelf, open the vents and wipe the shelf (see
chapter TROUBLESHOOTING).
To remove the bin, pull out the bin as far as it will go. Then, lift the front part and pull it out
completely.
19
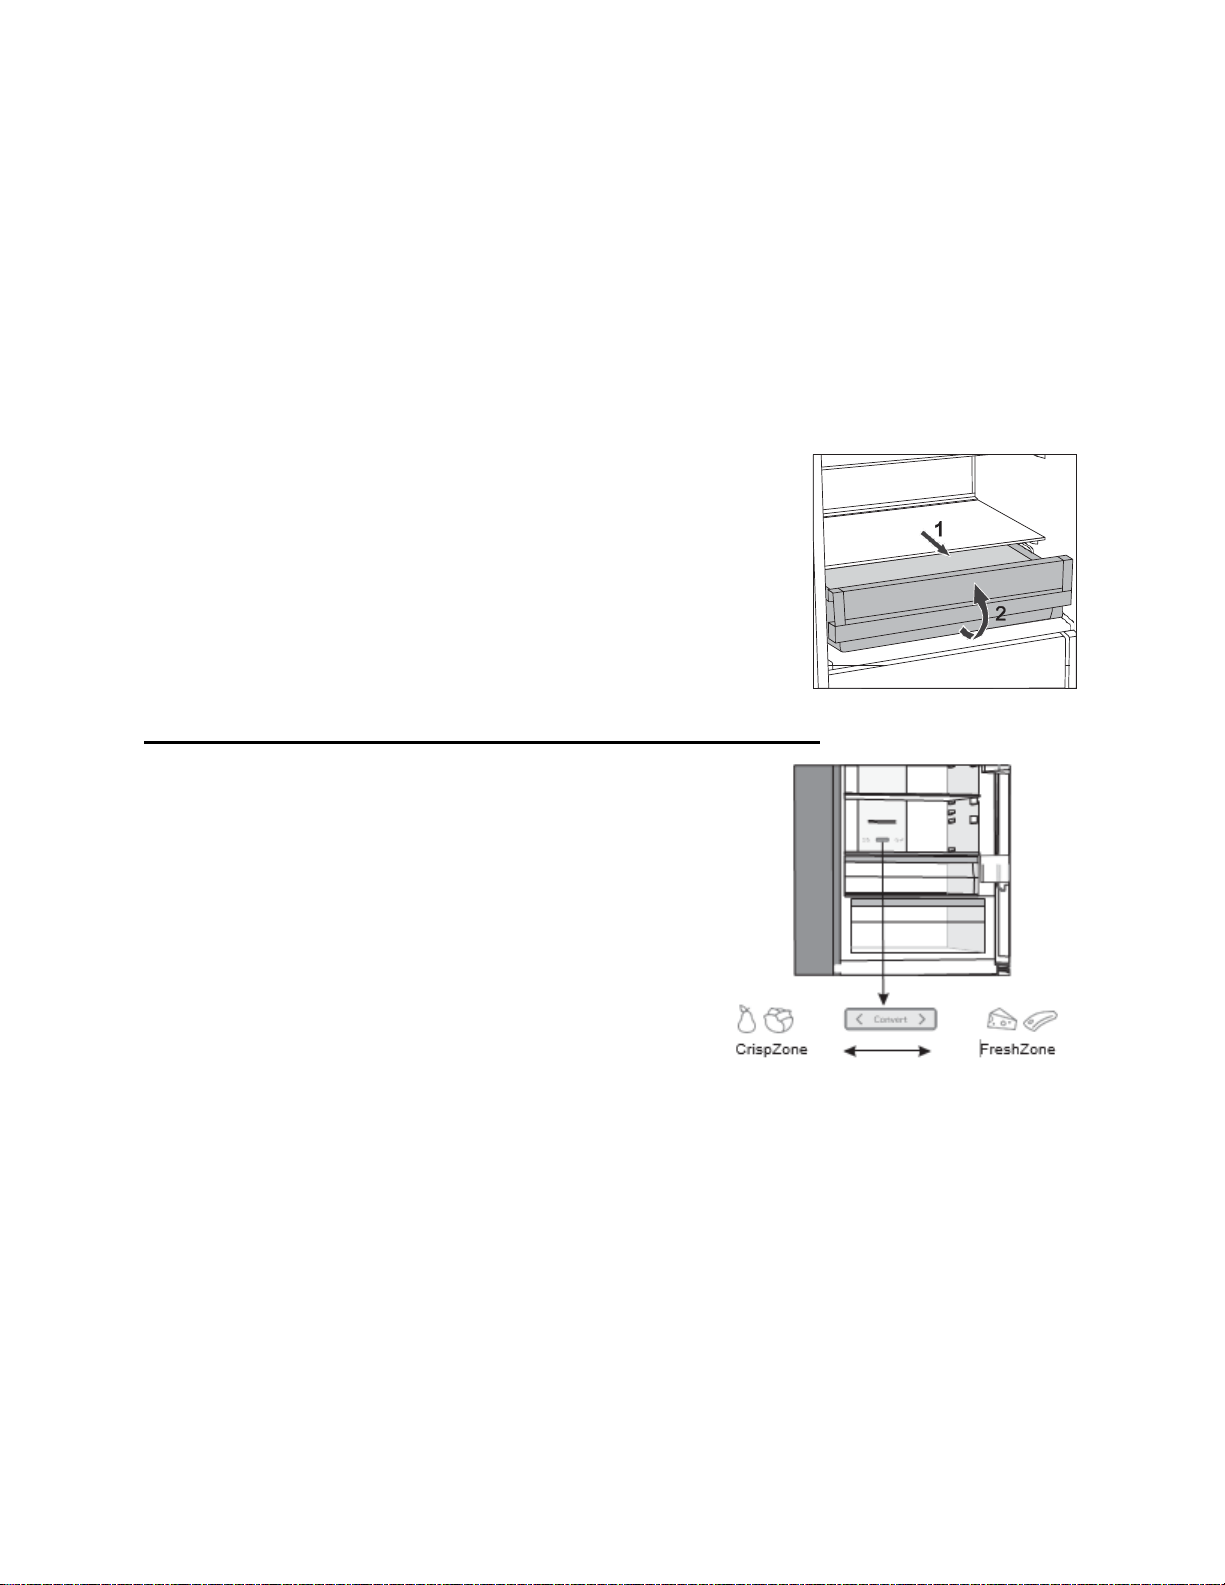
FreshZone Drawer
In the FreshZone compartment, food stays fresh longer than in a conventional refrigerator, retaining
more flavor and nutrients.
Decay and loss of mass are slowed down; therefore, fruit and vegetables remain fresh and natural
longer. For optimum performance, the drawer should be fully closed.
• When buying food, make sure it is fresh as this will determine the quality of the food, as well as
how long it will keep in the fridge.
• Store the food in closed containers or appropriate packaging to prevent it from emitting or
receiving odors.
• Take the food from the drawer 30 to 60 minutes before use to allow the aroma and flavor
develop at room temperature.
• Food sensitive to low temperature and not appropriate for storage
in the FreshZone drawer includes the following: pineapples,
avocado, bananas, olives, potatoes, eggplant, cucumbers, beans,
peppers (capsicum), melons, watermelons, pumpkins, squash,
zucchini etc.
To remove the drawer:
1. Pull out the drawer until it is blocked.
2. Then, lift it at the front and pull it all the way out.
Turning the FreshZone Drawer into a Fruit and Vegetable Drawer
• If you find you need extra space for your fruit and
vegetables, you can turn your FreshZone drawer into a
fruit and vegetables drawer (CrispZone).
• To do this, use the slider as follows:
o To use the drawer as a FreshZone: push the slider
to the right.
o To use the drawer as a fruit and vegetables drawer
(CrispZone): move the slider to the left.
MultiFlow Fan
The advanced MultiFlow fan system evenly equalizes the temperature throughout the entire
refrigerator. This system also allows placing any type of food on any shelf in the fridge.
AdaptTech
Innovative sensor technology allows adjusting appliance operation to the user's habits or behavior.
Adaptive intelligent system monitors, analyzes, and records on a daily and weekly basis the use of
appliance and adapts appliance operation to the perceived patterns. If the appliance is able to
anticipate increased frequency of door opening, the appliance will automatically lower the
temperature before such time to prevent the increase of food temperature as the door is opened
more often. The appliance will also anticipate adding larger amounts of food into the refrigerator or
freezer and adapt by cooling or freezing more intensively.

20
STORAGE TIPS
• Correct use of the appliance, appropriate packaging, maintaining the right temperature, and
observing the food hygiene standards have a decisive impact on the quality of food storage.
• Observe the expiry dates for the food, indicated on the packaging.
• Food stored in the refrigerator should be kept in closed containers or in appropriate packaging to
prevent it from emitting or receiving odors and humidity.
• Do not store inflammable, volatile, and explosive substances in the refrigerator.
• Bottles with high alcohol content should be tightly sealed and stored in an upright position.
• Some organic solutions, essential oils in lemon and orange peel, butter acid, etc. may damage
the plastic surfaces in case of a prolonged contact, causing damage and premature ageing of
these materials.
• Unpleasant odor warns of lacking cleanliness of the appliance or perished contents (see chapter
Cleaning the Appliance).
• If you are leaving home for a longer period of time, remove perishables from the refrigerator.
Avoid Food Contamination
• To avoid contamination of food, please respect the following instructions:
• Opening the door for long periods can cause a significant increase of the temperature in the
compartments of the appliance.
• Regularly clean surfaces that can come in contact with food and accessible drainage systems.
• Store raw meat and fish in suitable containers in the refrigerator, so that it is not in contact with or
drip onto other food.
• If the refrigerating appliance is left empty for long periods, switch off, defrost, clean, dry, and
leave the door open to prevent mold developing within the appliance.
Freezing
• To make use of the entire freezer volume, remove all drawers. To make sure the food is frozen
as soon as possible, place it directly onto the bottom of the freezer compartment.
• Activate the super freeze function 24 hours before freezing fresh food:
o Press and hold the B key until the light above the D symbol lights up. Make sure the fresh
food is not in contact with the food that is already frozen.
• When freezing smaller amounts of food (2-4 pounds), activating the super freeze function is not
required.
• Only use the freezer to freeze food appropriate for freezing. Always use quality and fresh food.
• Select the most suitable packaging for the food and use the packaging correctly.
• Make sure the packaging is air and water tight so that the food does not dry out and loose its
vitamins.
• Indicate the type of food, amount, and date of freezing on the packaging.
• It is important that the food freezes quickly. Therefore, smaller packages are recommended.
Refrigerate the food before freezing.
Thawing Frozen Food
• Defrost foods either in the refrigerator, in cold water, or in a microwave oven or a convection
oven with a suitable defrosting program
• Some frozen products can be cooked without prior defrosting. This will be specified by the
manufacturer on the packaging.
• Pack the food in small amounts. This will allow the food to defrost quicker.
• Use partly or completely defrosted food as soon as possible. Bacteria in defrosted food is
reactivated and the food will spoil fast. This applies particularly to fruit, vegetables, and ready-
made food.
• Do not re-freeze food that has been partly or completely defrosted.
21
CLEANING AND CARE
CAUTION: Before cleaning, unplug the appliance from the power mains – switch off the appliance
(see chapter Switching the Appliance On/Off) and unplug the power cord from the wall
outlet.
• Use a soft cloth to clean all surfaces. Cleaners that contain abrasive substances, acids, or solvents
are not suitable for cleaning as they may damage the surface.
• Clean the appliance exterior with water or a mild solution of suds.
• Lacquer-coated and aluminum surfaces may be cleaned with lukewarm water to which you have
added a mild detergent. Use of cleaners with low alcohol content is allowed (e.g. window cleaners).
Do not use cleaners containing alcohol for cleaning plastic materials.
• Appliance interior can be cleaned with lukewarm water to which you can add some vinegar.
• Do not wash the parts of appliance interior equipment in a dishwasher as they may be damaged.
• The condenser unit, located next to the compressor unit on the back of the appliance (only with
some models), has to be kept clean, free of dust or other impurities. Occasionally clean it using a
soft non-metal brush or a vacuum cleaner.
• A gutter and an opening for discharging the water from thawed frost
deposits are located underneath the cooling panel that cools the
refrigerator interior. The gutter and the opening may not be clogged.
Inspect them often and clean if necessary (e.g. with a plastic straw).
• Frost or ice build-up, 3–5 mm thick, will increase power consumption.
Therefore, it should be regularly removed (does not apply to NO
FROST freezers). Do not use any sharp objects, solvents, or sprays.
• After cleaning, switch the appliance back on and insert the food.
Defrosting
Refrigerator
• The refrigerator does not need defrosting because the ice on the back interior wall is thawed
automatically. Any accumulated ice will melt when the compressor unit is inactive. Drops will flow
through an opening in the refrigerator rear wall into a tray fitted above the compressor, from
where they will evaporate.
• Make sure the opening in the back wall of the refrigerator interior is never blocked by food or any
other object.
• If an excessive layer of ice is formed on the rear wall of refrigerator interior (3–5 mm), switch off
the appliance and defrost the appliance manually.
Freezer
• Defrost the freezer when an approximately 3–5mm layer of frost or ice has built up.
• 24 hours before defrosting, activate the super freeze function to additionally cool the food (see
section Freezing procedure).
• After this period, remove the food from the freezer and protect them from defrosting.
• Switch off the appliance (see chapter Switching the appliance on/off) and unplug the power cord.
• Do not use a knife or any other sharp object to remove the frost, as you may damage the cooling
system.
• To speed up the defrosting process, place a pot of hot water on the glass shelf.
• Clean and dry the appliance interior.
NOTE: If you have a NO FROST freezer, it will defrost automatically.
22
TROUBLESHOOTING
Many common freezer problems can be solved easily, without incurring the cost of a service call.
Listed below are several possible causes for common problems.
Problem:
Cause or remedy:
Appliance is connected to the
power mains but it does not
work.
Make sure there is voltage in the power outlet and that the
appliance is switched on.
Cooling system operates
continuously for a long period of
time:
Too high environment temperature.
Door opened too frequently or too long.
Door not closed correctly (possible impurities on the seal,
misaligned door, damaged seal etc.).
Too much fresh food inserted at once.
Sensor in the refrigerator (A) blocked by fresh food. Make sure the
air can circulate around the sensor (only with some models).
Excessive build-up of ice on the
back wall of refrigerator interior
can be a result of the following:
Door opened too frequently or too long.
Warm food placed in the refrigerator.
Food or containers in contact with the back interior wall of the
refrigerator.
Poor door sealing.
If the seal is dirty or damaged, clean or replace it.
Build-up of ice or frost in the
freezer interior:
Door was open for too long or too frequently.
The door is not properly closed.
The door has a poor seal (the gasket is dirty, the door is not
properly aligned, the gasket is damaged etc.).
Manually defrost the appliance.
Condensate (dew) on the shelf
above the drawers:
This is transient phenomenon which cannot be entirely avoided in
periods of high environment temperature and humidity. It subsides
when temperature and humidity are normalized. We recommend
cleaning the drawers more frequently and wiping the droplets
occasionally.
Open the humidity control slider.
Put food in bags or other packaging with a good seal.
Droplets on the refrigerator
compartment back wall.
This is normal. The refrigerator compartment is defrosted
automatically, which results in droplets of water that flows through
an opening in the
refrigerator compartment back wall into a tray above the
compressor unit, from which it evaporates.
Water is dripping/ leaking from
the refrigerator:
Clogged water discharge opening or water dripping past the water
gutter.
Clean the blocked opening, e.g. using a plastic straw.
If a thick layer of ice builds up, defrost the appliance manually (see
Defrosting the Appliance).
23
Door is difficult to open:
If you are trying to open the freezer door after just having closed it,
this could be difficult to do. As you open the door, some cool air
escapes from the appliance and it is replaced by warm air from the
environment. When this air is cooled, negative pressure is
generated which results in problems as you try to open the door.
After a few minutes, the condition is normalized and the door can
be easily opened again.
Appliance sides are warm.
This is normal. There are pipes and tubes installed in the appliance
sides, which tend to heat up during appliance operation.
LED lighting does not work:
If LED lighting does not work, call a service technician.
Do not attempt a repair of the LED lighting yourself, as there is
danger of contact with high voltage!
HI will appear on the display
unit.
Door opened too frequently or too long.
Door not closed correctly (possible impurities on the seal,
misaligned door, damaged seal etc.).
An extended power supply failure.
Too much fresh food inserted at once.
PF will appear on the display
unit (control unit 2).
An extended power failure.
E0 will appear on the display
unit.
Sensor keys are not responding. Call a service center for repair.
Until the appliance is repaired by a service technician, the
appliance will operate in safe mode. The appliance will
automatically preserve the most suitable temperature for each
compartment.
E1 or E2 will appear on the
display unit.
Temperature sensor error or fault. Call a service center for repair.
Until the appliance is repaired by a service technician, the
appliance will operate in safe mode. The appliance will
automatically preserve the most suitable temperature for each
compartment.
E9 will appear on the display
unit.
Door was open for too long. Close the door.
If the lighting in the compartment does not function either, then
there is a door sensor fault. Call a service center to arrange a
repair. The appliance will operate in safe mode until it is repaired.
The appliance will automatically preserve the most suitable
temperature for each compartment.
If you've checked the table above and find that you still need help with your cooktop, call our
Customer Service facility at 800-932-4267 between 9:00AM and 5:00PM ET. We will do our best to
answer your questions.
24
LIMITED WARRANTY
ONE-YEAR LIMITED WARRANTY
Within the 48 contiguous United States, for one year from the date of purchase, when this appliance is operated
and maintained according to instructions attached to or furnished with the product, warrantor will pay for factory-
specified parts and repair labor to correct defects in materials or workmanship. Service must be provided by a
designated service company. Outside the 48 states, all parts are warranted for one year from manufacturing
defects. Plastic parts, shelves and cabinets are warranted to be manufactured to commercially acceptable
standards, and are not covered from damage during handling or breakage.
5-YEAR COMPRESSOR WARRANTY
1. The compressor is covered for 5 years.
2. Replacement does not include labor.
ITEMS WARRANTOR WILL NOT PAY FOR:
1. Service calls to correct the installation of your appliance, to instruct you how to use your appliance, to replace or repair
fuses or to correct wiring or plumbing.
2. Service calls to repair or replace appliance light bulbs or broken shelves. Consumable parts (such as filters) are
excluded from warranty coverage.
3. Damage resulting from accident, alteration, misuse, abuse, fire, flood, acts of God, improper installation, installation
not in accordance with electrical or plumbing codes, or use of products not approved by warrantor.
4. Replacement parts or repair labor costs for appliances operated outside the United States.
5. Repairs to parts or systems resulting from unauthorized modifications made to the appliance.
6. The removal and reinstallation of your appliance if it is installed in an inaccessible location or is not installed in
accordance with published installation instructions.
DISCLAIMER OF IMPLIED WARRANTIES – LIMITATION OF REMEDIES
CUSTOMER'S SOLE AND EXCLUSIVE REMEDY UNDER THIS LIMITED WARRANTY SHALL BE PRODUCT
REPAIR AS PROVIDED HEREIN. IMPLIED WARRANTIES, INCLUDING WARRANTIES OF
MERCHANTABILITY OR FITNESS FOR A PARTICULAR PURPOSE, ARE LIMITED TO ONE YEAR.
WARRANTOR SHALL NOT BE LIABLE FOR INCIDENTAL OR CONSEQUENTIAL DAMAGES. SOME STATES
DO NOT ALLOW THE EXCLUSION OR LIMITATION OF INCIDENTAL OR CONSEQUENTIAL DAMAGES, OR
LIMITATIONS ON THE DURATION OF IMPLIED WARRANTIES OF MERCHANTABILITY OR FITNESS, SO
THESE EXCLUSIONS OR LIMITATIONS MAY NOT APPLY TO YOU. THIS WARRANTY GIVES YOU SPECIFIC
LEGAL RIGHTS AND YOU MAY ALSO HAVE OTHER RIGHTS, WHICH VARY FROM STATE TO STATE.
Felix Storch, Inc.
An ISO 9001:2015 registered company
770 Garrison Ave
Bronx, New York 10474
www.accucold.com
For parts and accessory ordering,
troubleshooting and helpful hints, visit:
www.summitappliance.com/support