
Loading ...
ELKAY RECOMMENDS THAT UNDERMOUNT SINKS SHOULD BE INSTALLED BY A PROFESSIONAL EXPERIENCED
INSTALLER.
Installation Instructions
II. UNDERMOUNT INSTALLATION
ATTENTION INSTALLER:
• WARNING: THE ENCLOSED CUTOUT TEMPLATE PROVIDES A SINK OPENING THAT WILL EXPOSE APPROXIMATELY
1/8" OF SINK RIM LEDGE AS SHOWN IN ILLUSTRATION H AND I.
•
•
ELKAY E-GRANITE UNDERMOUNT SINKS MUST BE FASTENED TO SOLID SURFACE COUNTERTOPS ONLY (I.E. GRANITE).
INSTALLATION
1. Punch out faucet holes in the sink per item 3 under the
Drop-in installation instructions.
2. Position template on countertop. Locate the template front
to rear, so sink will not interfere with the cabinet.
3. Trace a line around the template. Cut along the inside of
this line to provide opening. Also, trace a line around the
corresponding punched out faucet holes. Cut along the
inside of this line to provide an opening.
4. Note: The front and back of sink are supported by the
undermount support kit (optional accessory-LKUMSK36).
The sides are supported by mounting clips.
5. Install the 2 undermount supports (LKUMSK36) in front
and rear of cabinet following the instructions provided.
Position it as close to the cabinet as possible to avoid
interference with faucet or sink bowl.
6. Locate and provide for the mounting holes (following
the countertop manufacturer’s instructions). Holes should
allow for even spacing around sink. Type of fasteners to be
as recommended by coutertop supplier.
7. Fasten mounting brackets to coutertop loosely.
8. Using a high quality silicone adhesive caulk, apply a bead
evenly all around the top of the sink flanges.
9. Position and align the sink in the countertop opening
10. Tighten fasteners until mounting clips and undermount
support kit are snug against sink (see Illustrations H and I).
11. Check alignment of sink and faucet holes to countertop
opening.
12. Tighten fasteners evenly. Be careful not to overtighten.
Remove excess silicone.
I. DROP-IN INSTALLATION Cont.
8. Apply a bead of a high quality silicone adhesive caulk to the underside of the sink rim and position sink into countertop opening.
CAUTION: DO NOT USE EPOXY TO SEAL SINK.
9. Swing metal portion of clip (clamp) into the clip base. (See illustration E). Using a Phillips screw driver, turn screw until
clamp engages the countertop. Use shims if necessary.
10. Remove excess caulk and allow caulk to cure following the caulk manufacturer’s instructions.
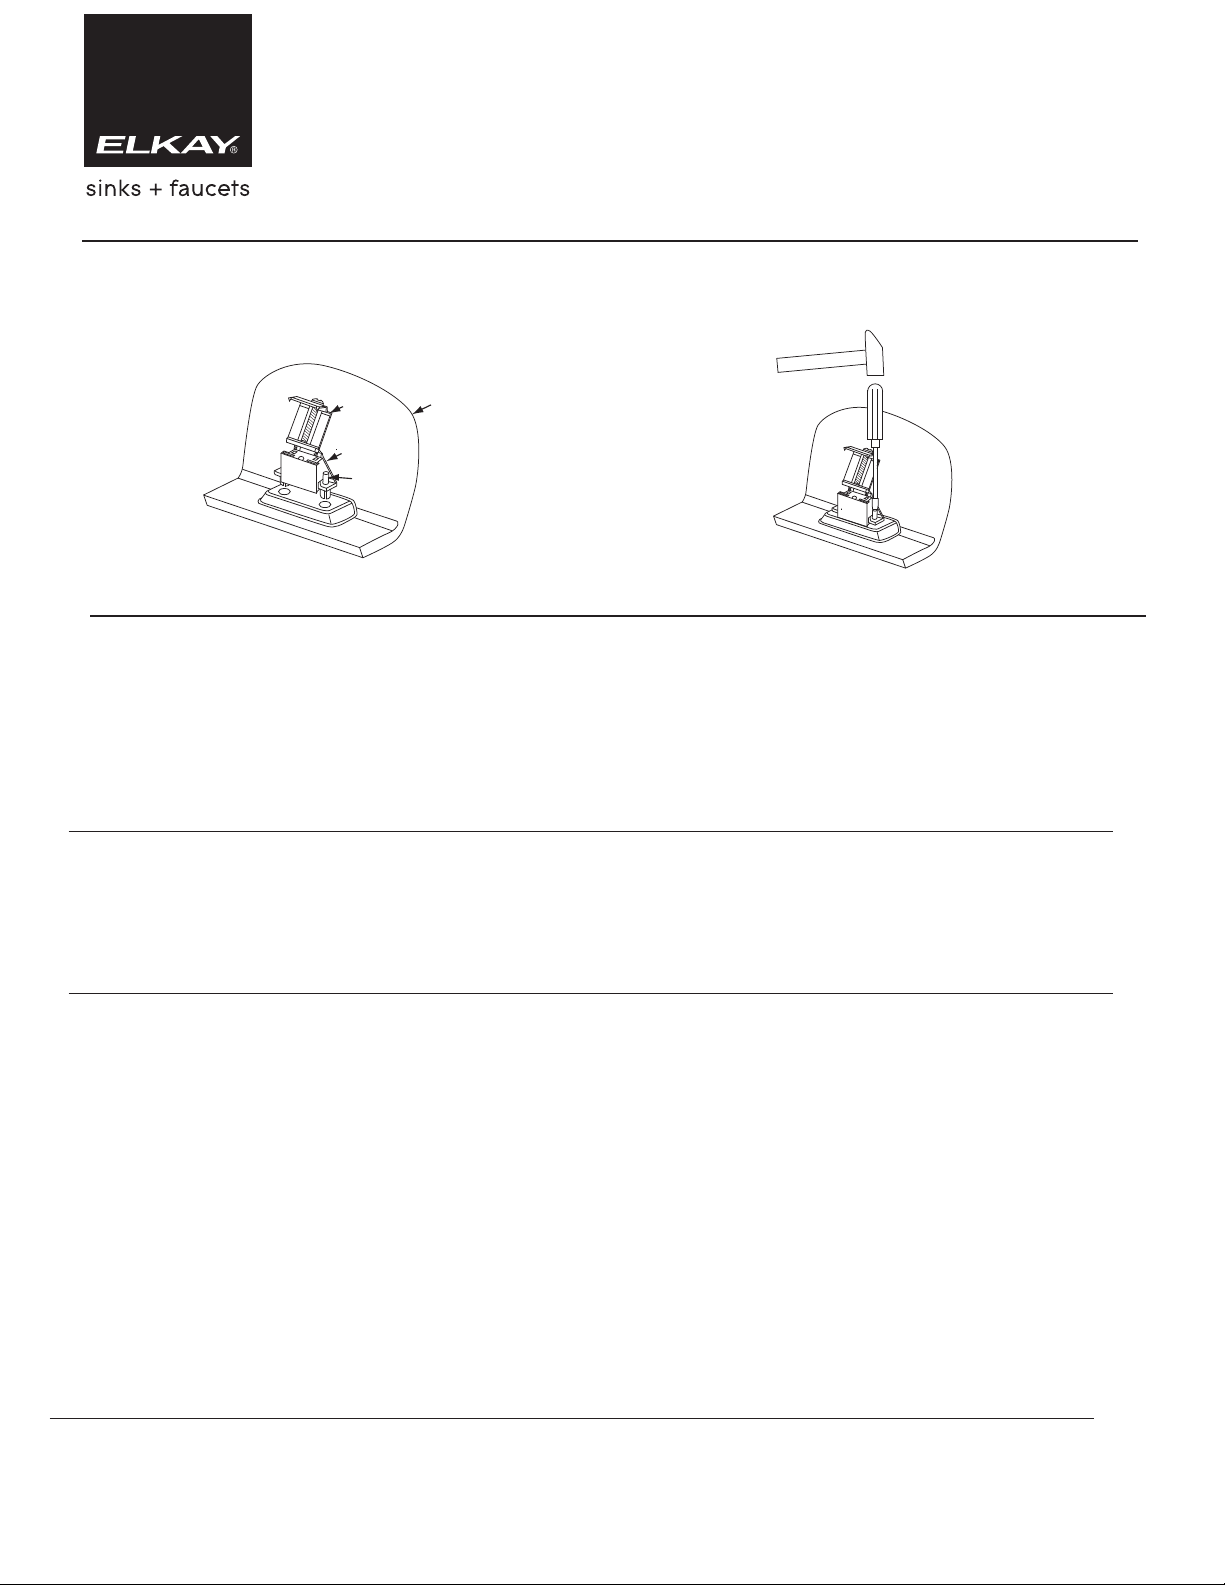
7. As shown in illustration F and G, align clips with the corresponding holes in the sink and gently push into place. Push plastic pins
on the clips inward completely so that the clip expands and engages the sink. Note that it may be necessary to use a pin punch or
screw driver and hammer to push pin in completely. Make sure metal portion of the clip (clamp) is in the open position so that the
sink can be dropped into cutout.
CLAMP
CLIP BASE
S
INK
PLASTIC
PINS
ILLUSTRATION G
ILLUSTRATION F
Loading ...