Loading ...
Loading ...
Loading ...
59MAINTENANCE
ENGLISH
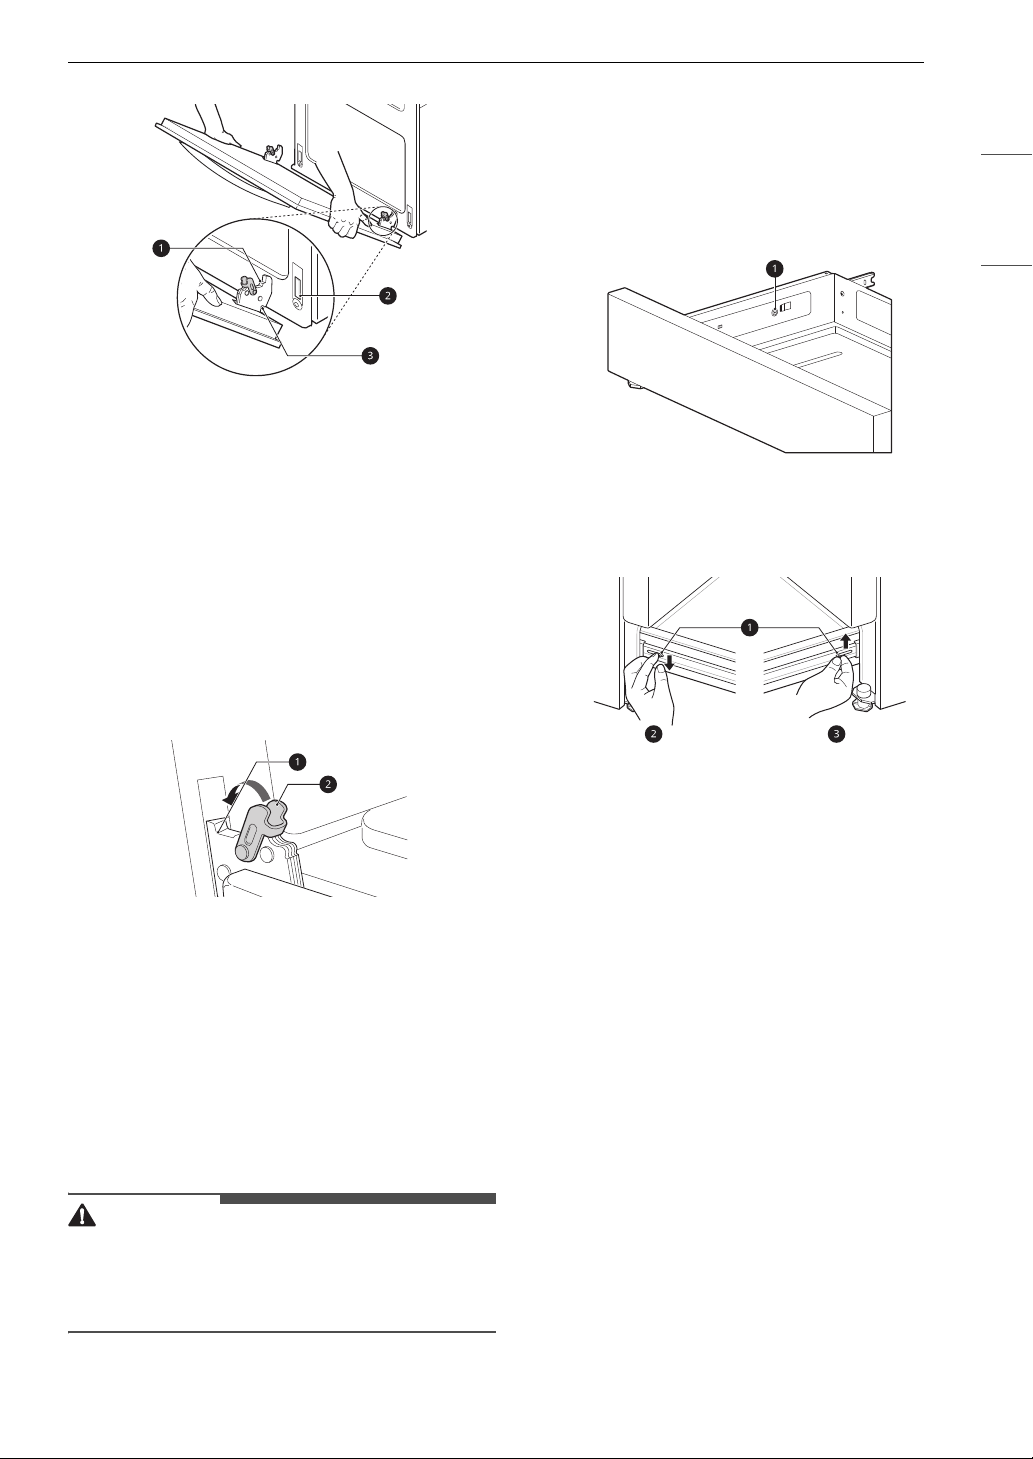
a Hinge arm
b Bottom edge of slot
c Indentation
3 Open the door fully. If the door will not open
fully, the indentation is not seated correctly in
the bottom edge of the slots.
4 Lock the hinge locks, rotating them back
toward the slots in the oven frame until they
lock.
a Hinge arm
b Hinge lock
5 Close the oven door.
Removing/Assembling Drawers
Removing Drawers
CAUTION
• Disconnect the electrical power to the range at
the main fuse or circuit breaker panel. Failure to
do so can result in severe personal injury, death,
or electrical shock.
Most cleaning can be done with the drawer in
place; however, the drawer may be removed if
further cleaning is needed. Use warm water to
thoroughly clean.
1 Fully open the drawer.
2 Unscrew the screw a on the back of the
drawer.
3 Locate the glide lever on each side of the
drawer. Push down on the left glide lever and
pull up on the right glide lever.
a Lever
b Push down with finger
c Pull up with finger
4 Pull the drawer away from the range.
Assembling Drawers
1 Pull the bearing glides to the front of the
chassis glide.
2 Align the glide on each side of the drawer with
the glide slots on the range.
3 Push the drawer into the range until levers
click (approximately 2 inches).
4 Screw the screws on the back of the drawer.
5 Pull the drawer open again to seat the
bearing glides into position.
Loading ...
Loading ...
Loading ...