Loading ...
Loading ...
3
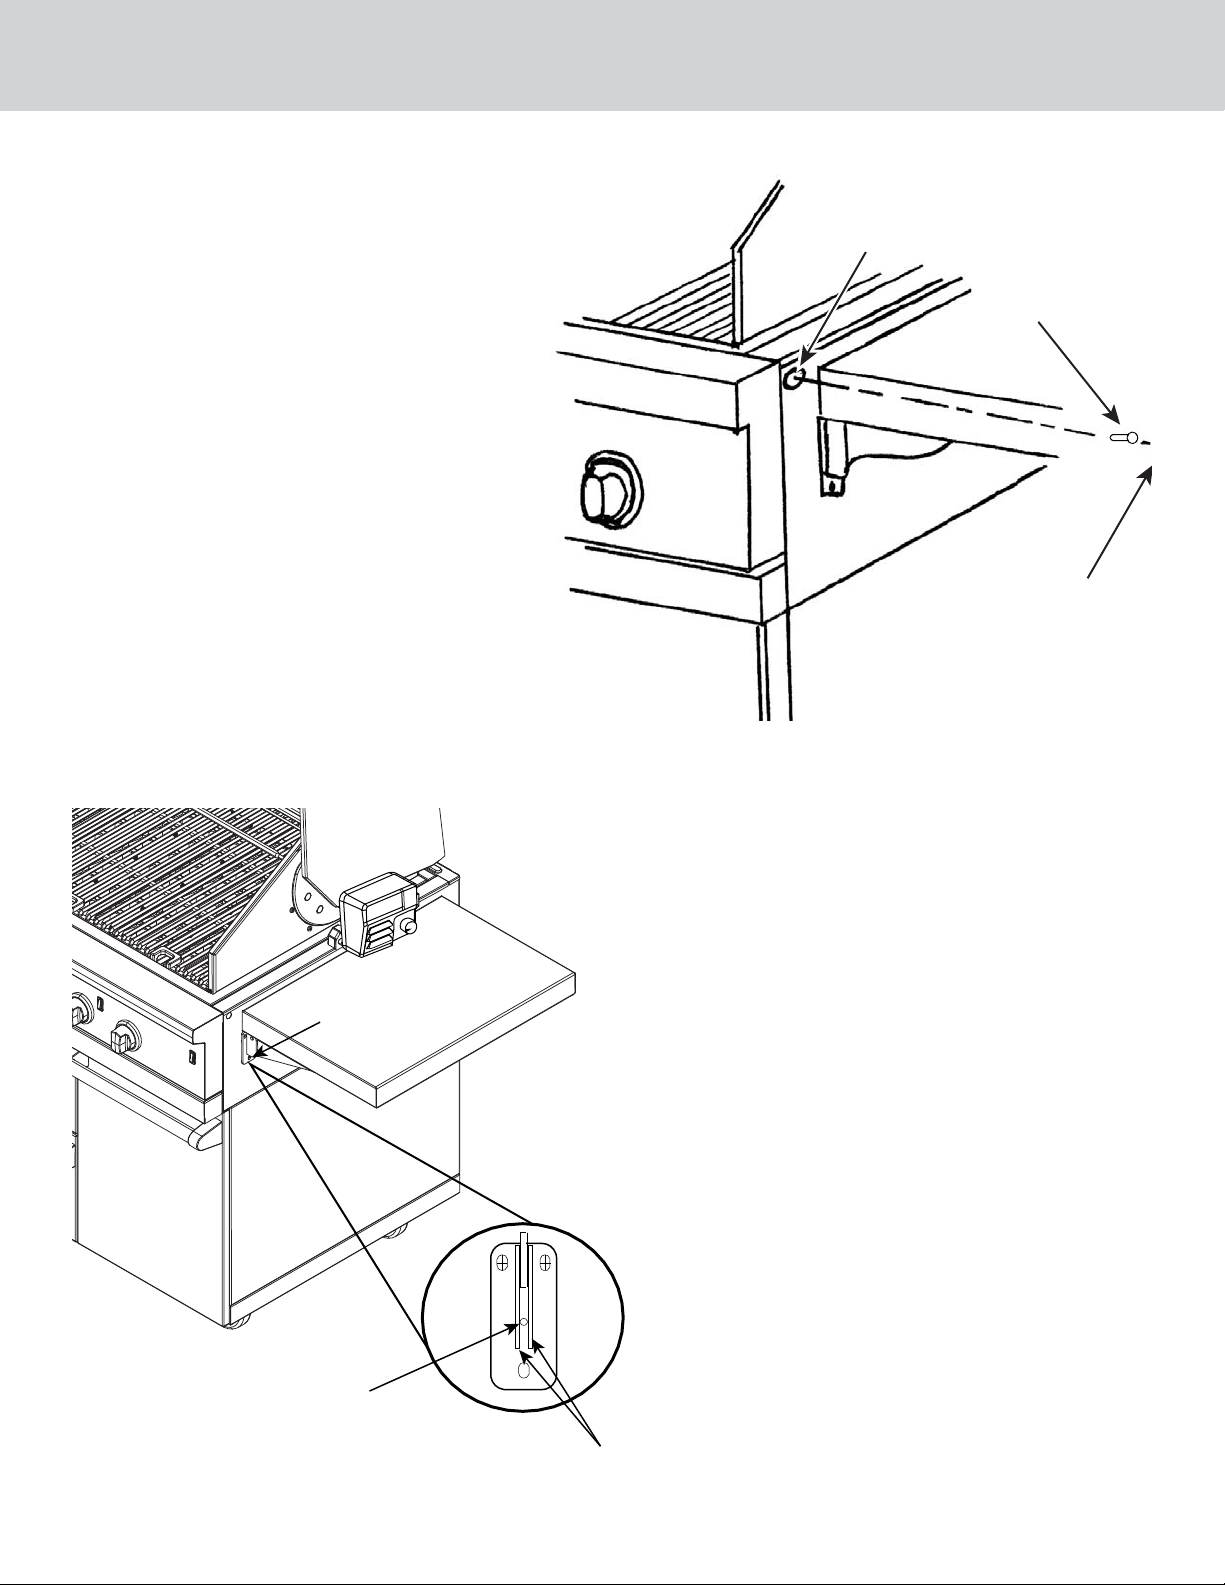
Attaching the grill to the cart
Once the grill has been mounted on
the cart, the back of the landing ledge should
be flush with the front sides of the cart. The
5/8” (1.6 cm) hole on the top front corners of
the cart should be aligned with the receiving
holes in the grill heat shields. If your grill does
not have the receiving holes in the heat
shield, you will need to drill them out with a
9/64” (.14 cm) drill bit. With the grill and cart
mounted together, place the drill bit in the 5/8
hole and center in the 1/4”x3/8” slot. Drill
through the heat shield. Take the #10X3/4”
(1.9 cm) sheet metal screws (A) supplied with
the cart and attach the cart sides to the grill.
After securing the grill to
the cart, snap the hole covers (B) supplied
with the cart into the 5/8” (1.6 cm) holes in
the cart corners.
5/8” (1.6 cm) dia. hole
(A) #10 x 3/4” (1.9 cm)
sheet metal screw
(B) 5/8” (1.6 cm) hole
Support
bracket
screws
Shelf
adjustment
screw
Supports
Front View
Leveling the Side Shelves
To level the side shelves, lift the shelf so that the
shelf adjustment screw is visible between the two
supports on the shelf brackets. Turn the screw
with a 3/32” (.2 cm) allen wrench counter clockwise to raise
the shelf and clockwise to lower the shelf (3/32” allen
wrench supplied with cart).
Loading ...
Loading ...
Loading ...