Loading ...
Loading ...
Loading ...
18
REFRIGERATED BASES & PIZZA PREP TABLES
OPERATIONS MANUAL
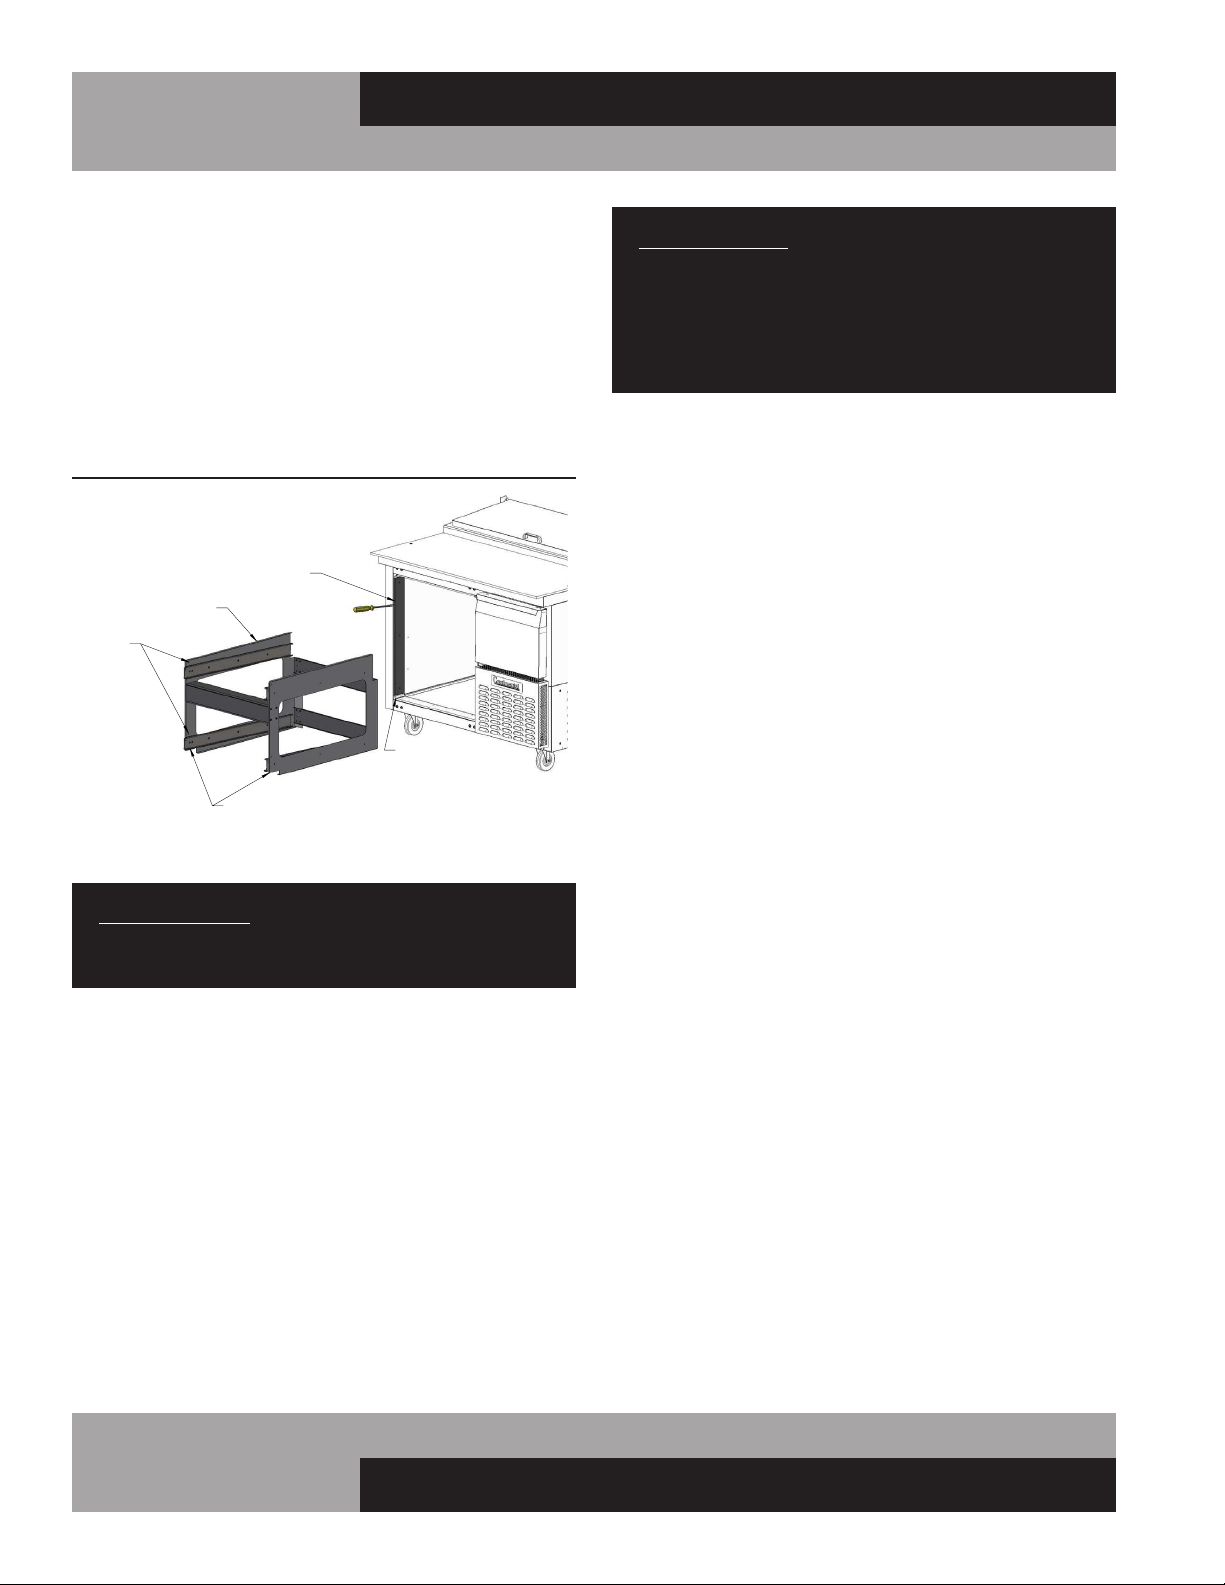
With the cage properly in place, use the holes along the front
sides of the cage assembly as a template to drill (6) 1/8” pilot
holes through side breakers and the metal underneath. Drive a
sheet metal screw into each of the front mounting holes, secur-
ing the front of the cage to the inside of the opening, and tighten
them snugly, without stripping the screws or the pilot holes.
To re-install the drawers into the cabinet, follow the instructions
in the “Removal of Drawers” section of this manual.
INSTALLING OVERSHELF OR DOUBLE OVERSHELF
IMPORTANT NOTE: Installing an overshelf is a two-per-
son job. Due to the weight, size and height of the shelf, do
not attempt to mount it alone, as this can cause injury.
To mount an overshelf to your cabinet, a Phillips-head screw-
driver (or a screw gun with Phillips bit) is required. Before
starting to assemble the overshelf, identify the following parts
provided:
1
/4-20 screws, 10-32 screws, uprights, top shelf, and
bottom shelf (for double overshelves only). If applicable, deter-
mine the height you want the bottom shelf to be located.
IMPORTANT NOTE: There are three pairs of holes provid-
ed in the uprights so the bottom shelf can be installed at
a height of 19”, 21”, or 23” above the top of the cabinet.
On double overshelves, this height will also determine
the distance between the bottom shelf and the top shelf
(13”, 15”, or 17”).
From the back of your cabinet, locate the two holes with thread-
ed inserts at each end of the Cabinet. (see Figure 14) Drive a
1
/4-
20 screw into each of the (4) threaded inserts, until the bottom
of the screw head is about
1
/8” away from the threaded insert.
Position the uprights at the back of the cabinet. Noting that
there are two keyhole slots on one face of each upright, locate
the keyholes at the bottom, facing the screws you just installed
in the cabinet. Lift the upright and place the large portion of
the keyhole slots over the screw heads and then lower it on to
the screws. Insert a Phillips screwdriver through the clearance
holes, on the opposite side of the keyhole slots (in the rear of
the uprights). Tighten the screws just until the upright is snug
against the unit, but leave a little play for alignment. Repeat this
procedure for the other upright.
To install a double overshelf (for single overshelf, skip to the
next paragraph) locate the bottom shelf, which has a large hole
in each rear corner. With one person holding each end of the
shelf, lift it above the top of the uprights and align it so the
large holes in the rear of the shelf fit over the uprights. Carefully
slide the shelf down, until the small holes on back of the shelf
line up with the correct holes in the uprights, depending on the
shelf height desired. Attach the shelf to the uprights, using two
10-32 screws on each end. Drive the screws until snug, but do
not tighten them completely.
With one person supporting each end of the top shelf, lift it
into position above the uprights and lower it down onto them.
Secure the shelf, using two 10-32 screws on each end, driving
them snugly but not tightly. Check the alignment of the shelves
and tighten all the screws. Double check that the shelves and
uprights are secured rigidly.
FIGURE 13: Drawer Cage
CAGE MOUNTING
HOLES
BREAKER CORNERS
BREAKER COVERS
NOTCHES WILL BE
SURROUNDING
BREAKER CORNERS
REMOVE SIDE
DRAWER CAGE
Loading ...
Loading ...
Loading ...