Loading ...
Loading ...
Loading ...
10
ASSEMBLY INSTRUCTIONS
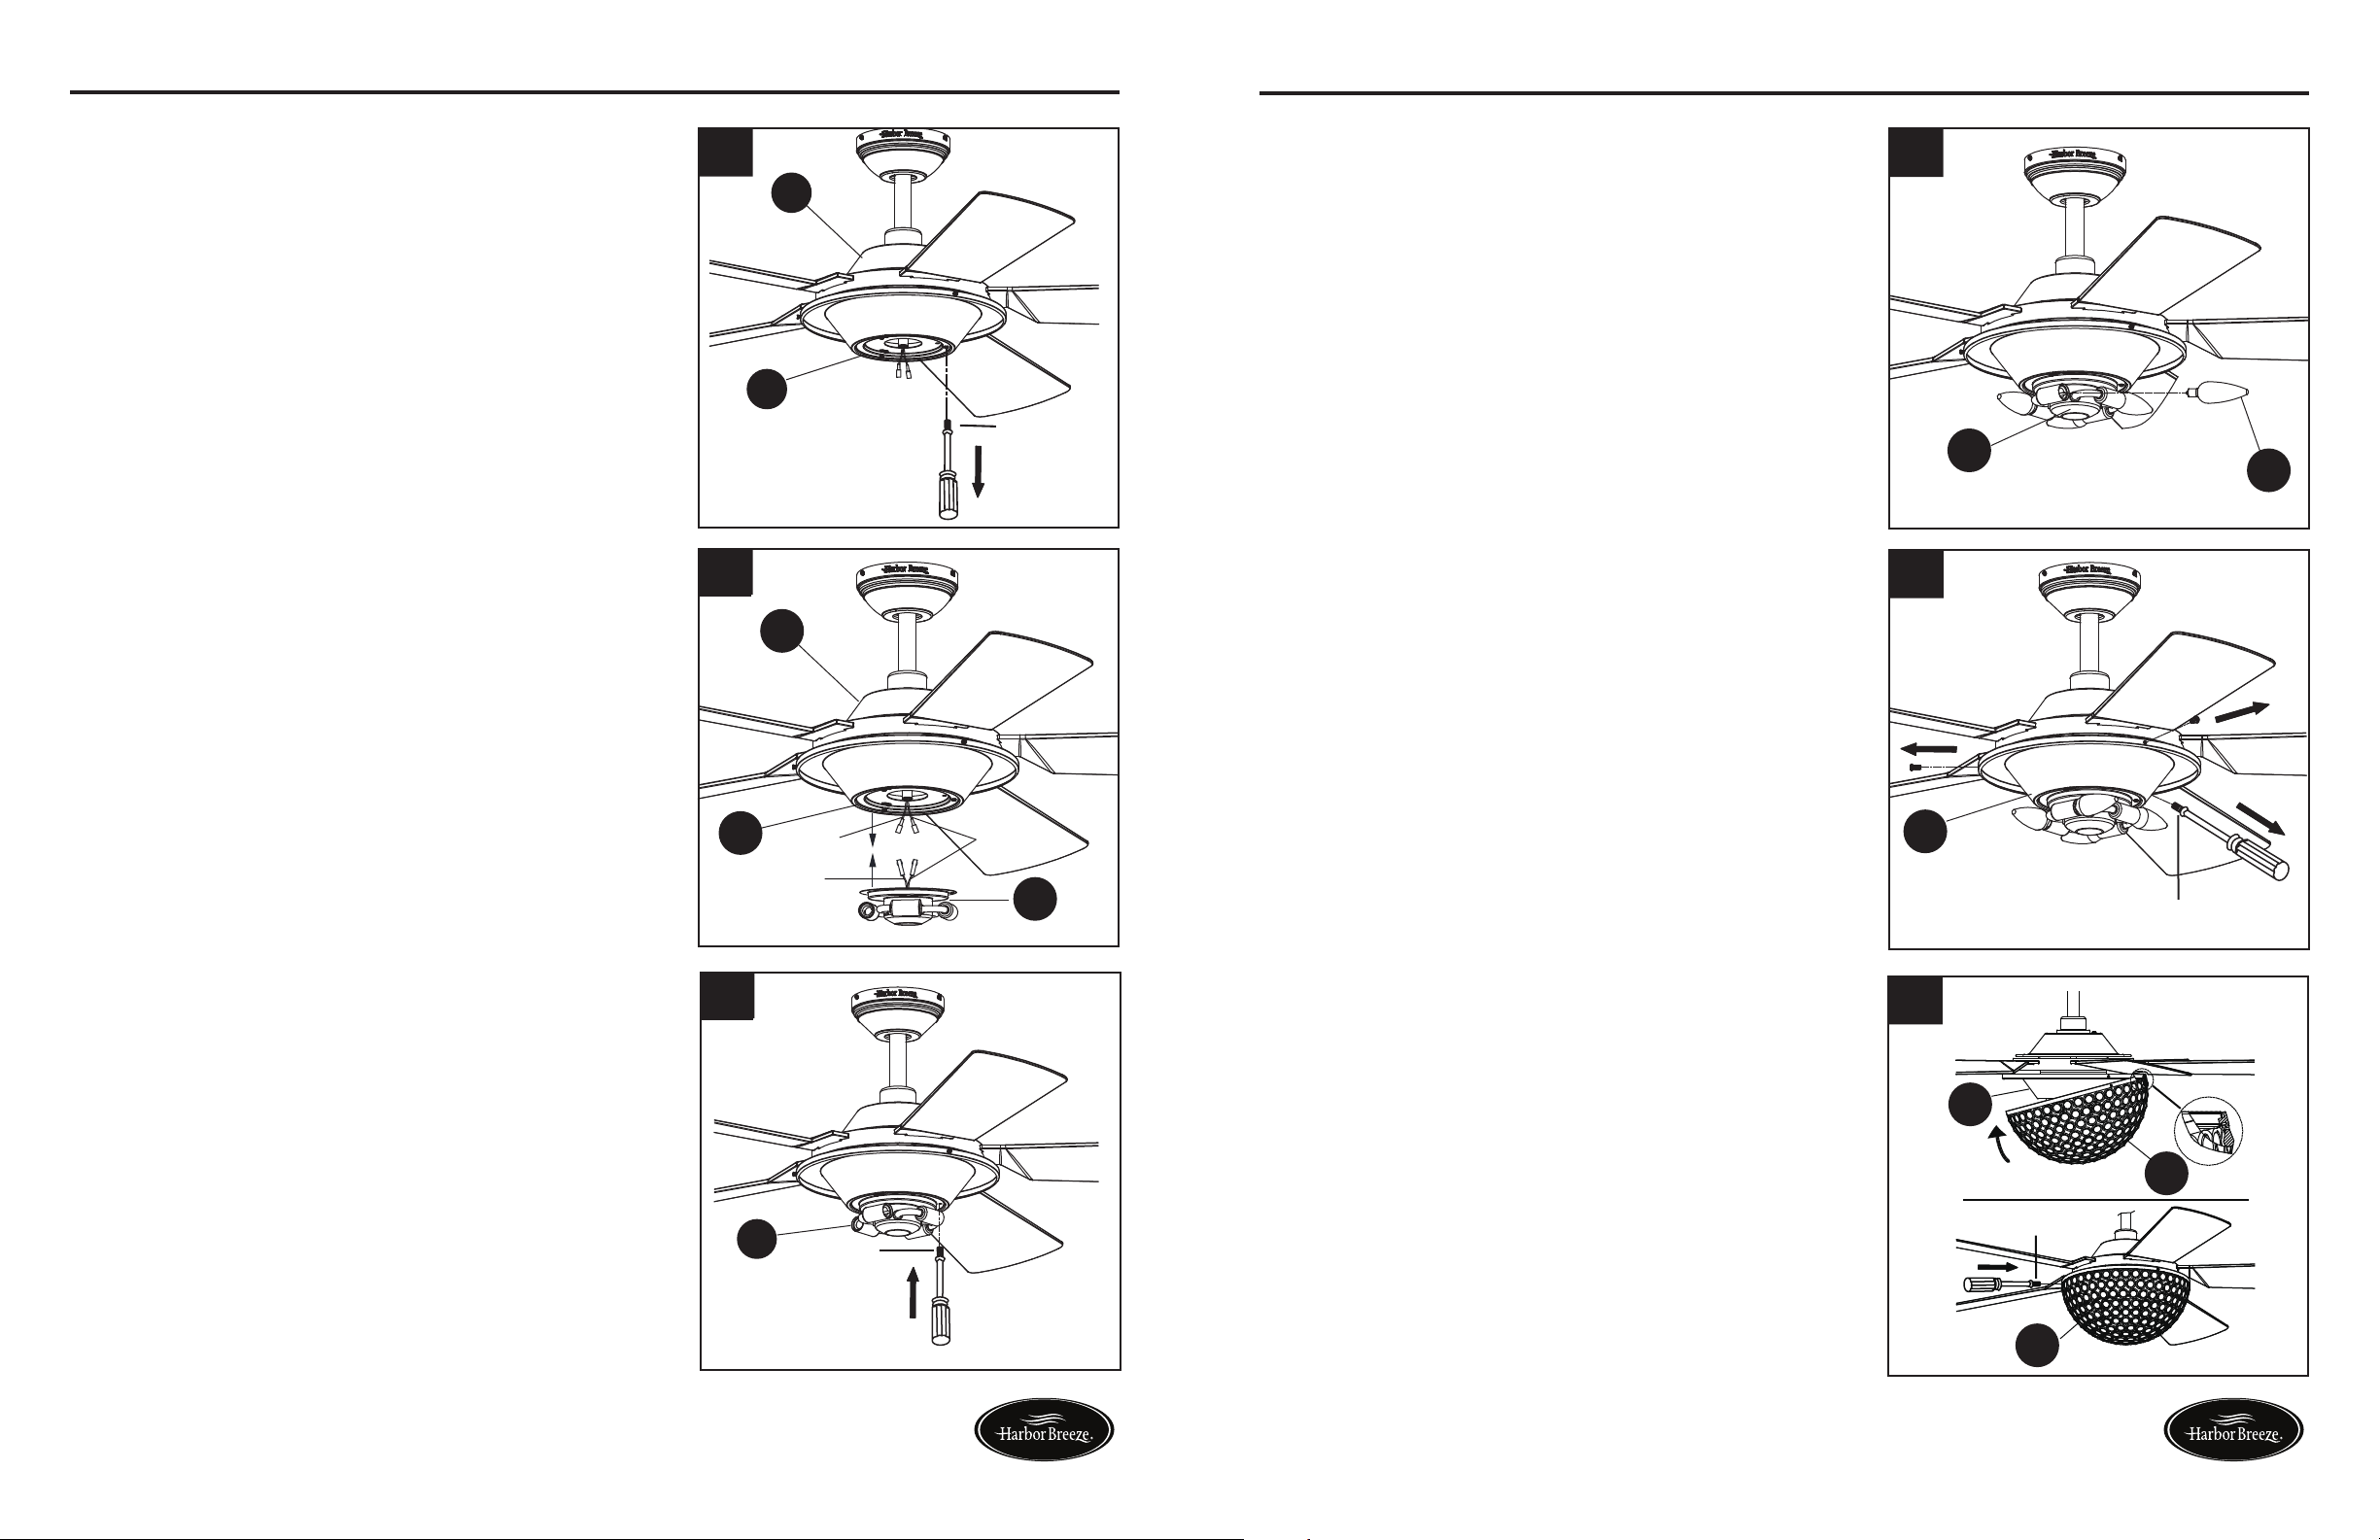
13. Remove one of the three screws from the tter
plate (G). Loosen but do not remove the other
two screws.
14. Connect the BLUE wire from the fan motor
assembly (F) to the BLACK wire from the light tter
assembly (I) and connect the WHITE wire from the
fan motor assembly (F) to the WHITE wire from the
light tter assembly (I) by connecting the plugs.
F
G
Screw 2
13
14
11
15
G
F
I
White
Blue
Black
15. Align the two keyslots in the light tter assembly (I)
with the two loosened screws on the tter plate (G).
Place the light tter assembly (I) over the two screws
and turn the light tter assembly (I) clockwise until it
locks. Re-install the previously removed screw, then
tighten all screws securely.
Screw 2
I
ASSEMBLY INSTRUCTIONS
16. Install bulbs (K) to sockets on light tter assembly (I).
IMPORTANT NOTE: Your fan has an energy-saving
wattage limiter included. If you replace the bulbs with
more than 190 watts, your fan will automatically turn
off. Ensure bulb wattage is always less than 190 watts!
K
I
16
Screw
G
17
J
J
G
Screw
18
17. Remove three screws from the side of tter
plate (G) and save.
18. Hang the shade (J) by aligning the hook on
the shade (J) with the hole on the tter plate
(G). Carefully push up the shade (J), aligning
the screw holes in tter plate (G) with shade
(J). Re-install the three screws and tighten
securely.
Lowes.com/harborbreeze Lowes.com/harborbreeze
Loading ...
Loading ...
Loading ...