Loading ...
Loading ...
Loading ...
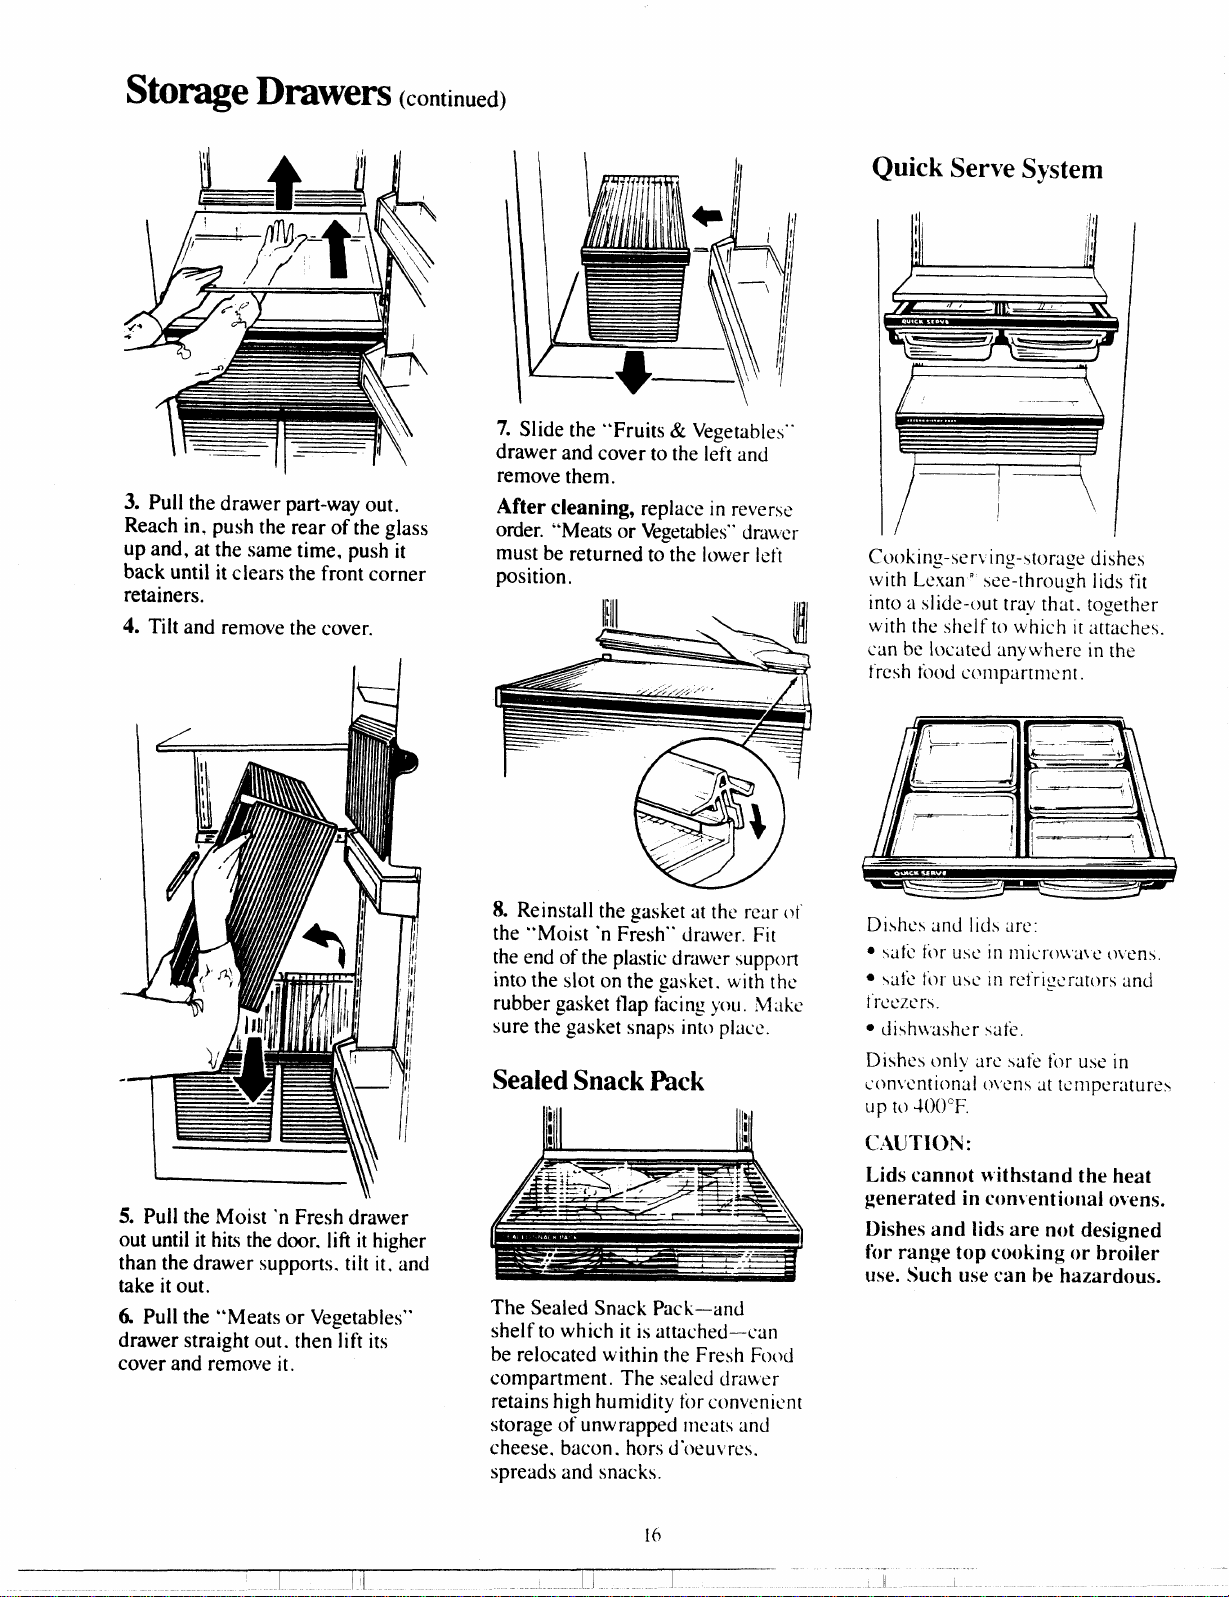
S@~e Drawers(continued)
3. Pull thedrawerpart-wayout.
Reachin, pushtherearof theglass
up and, at the same time. push it
back until it clears the front corner
retainers.
4. Tilt and remove the cover.
J
\
7. Slide the “Fruits& Vegetables””
drawer and cover to the left and
remove them.
After cleaning, replacein reverse
order. “Meats or Vegetables’qdrwer
must be returned to the lower left
position.
Y
8. Reinstall the gasket at the reur {Jr
the “Moist ‘n Fresh”” drawer. Fit
//1
~j
the end of the plastic drawer support
into the slot on the gasket. with the
: II
II
rubber gasket tlap hi ng you. MAc
~//
sure the gasket snaps int~>plticc.
-+
Sealed Snack I%ck
~j
\
5. Pull the Moist ‘n Fresh drawer
out until it hits the
door. lift it higher
than the drawer supports, tiIt it. and
take it out.
6 Pull the “Meats or Vegetables*’
drawer straight out. then lift its
cover and remove it.
I I II
The Sealed Snack Pack–id
shelf to which it is attached—can
be relocated within the Fresh FoLxl
compartment. The sealed drawer
retains high humidity for convenient
storage of unw rapped meats and
cheese. bacon. hors
d’oeuvres.
spreads
and snacks.
16
Quick Serve System
r’
I
Coi~king-scr\ iry-storage dishes
\vith L&m Rse;-throu~h lids fit
into a slide-out tray that. mgether
with the shelfto which 1[attaches.
can be located mywhere in the
fresh fcx~dLYmpart me nt.
C.LMJTION:
Lids cannot }vithstand the heat
generated in comentional ovens.
Dishes and lids are not designed
for rmge
top cooking or broiler
UW.Such use can be hazardous.
Loading ...
Loading ...
Loading ...