Loading ...
Loading ...
Loading ...
5
GETTING STARTED
1. Ensure that the unit is powered off and unplugged.
2. Select a firm, level, and flat location. Ensure the front of the unit faces away from the closest wall or furniture
and that no grilles are blocked. Portable air purifiers are more effective in rooms where all doors and windows
are closed.
NOTE: If the unit is placed on a light-colored carpet, a small mat or rug should be used underneath to
prevent staining. This is especially important in homes with contamination from smoking, fireplaces, or where
candles are burned.
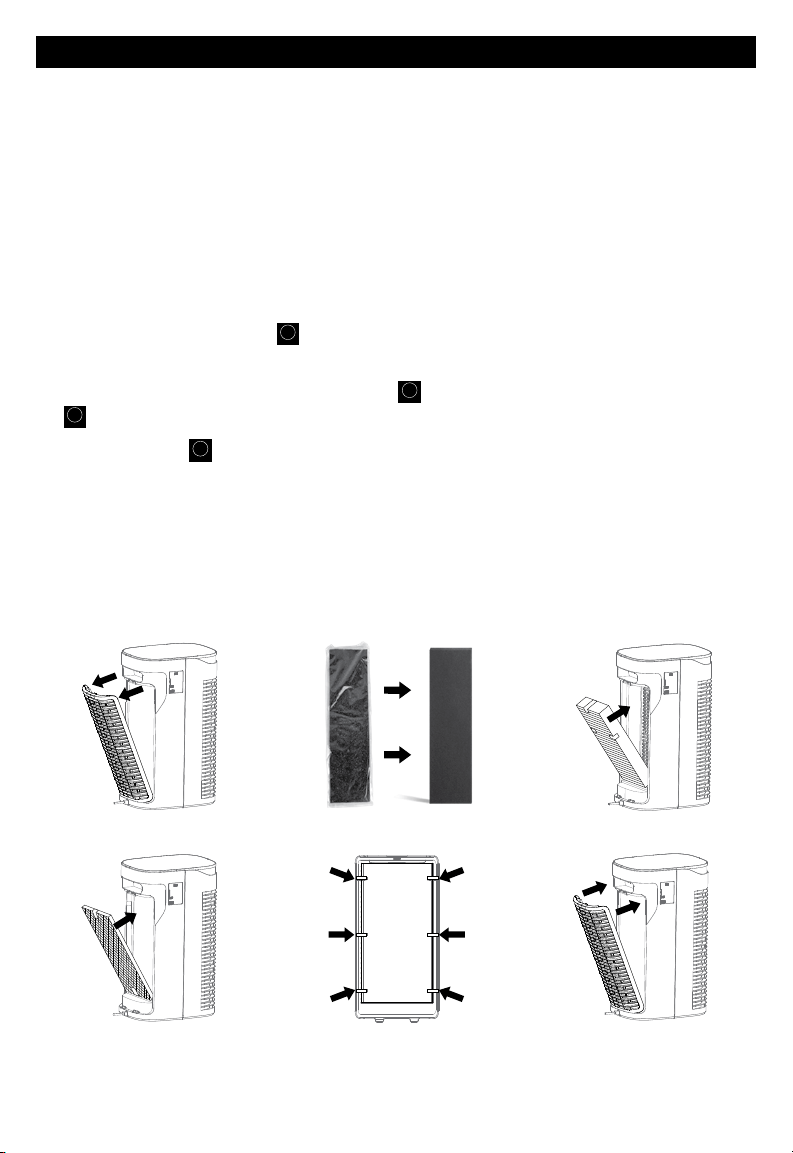
3. Remove the rear grille by grasping the sides of the grille and pulling forward. (Fig. 1).
4. Remove the Pre-Filter and HEPA Filter(s) from the air purifier. Remove protective plastic wrap from filters. (Fig. 2).
5. Place the Certified HEPA Filter(s)
Filter
G
back into the air purifier housing ensuring that the red removal pull
tabs are facing outwards (this will facilitate filter removal later). (Fig. 3).
6. If using the Optional Enhanced Odor and VOC Filter(s)
T
Filter
(sold separately), place in front of the HEPA Filter(s)
Filter
G
with the removal pull tabs facing outwards. (Fig. 4).
7. Place the Pre-Filter
A
Pre-Filter
on the rear grille and secure by placing the edges under the fasteners. (Fig. 5).
8. Replace the rear grille by placing the tabs on the bottom of the grille into the slots on the unit. Gently push
the top of the grille until secure. (Fig. 6).
Fig. 1
Fig. 4 Fig. 6
Fig. 3
Fig. 5
Fig. 2
Loading ...
Loading ...
Loading ...