Loading ...
Loading ...
Loading ...
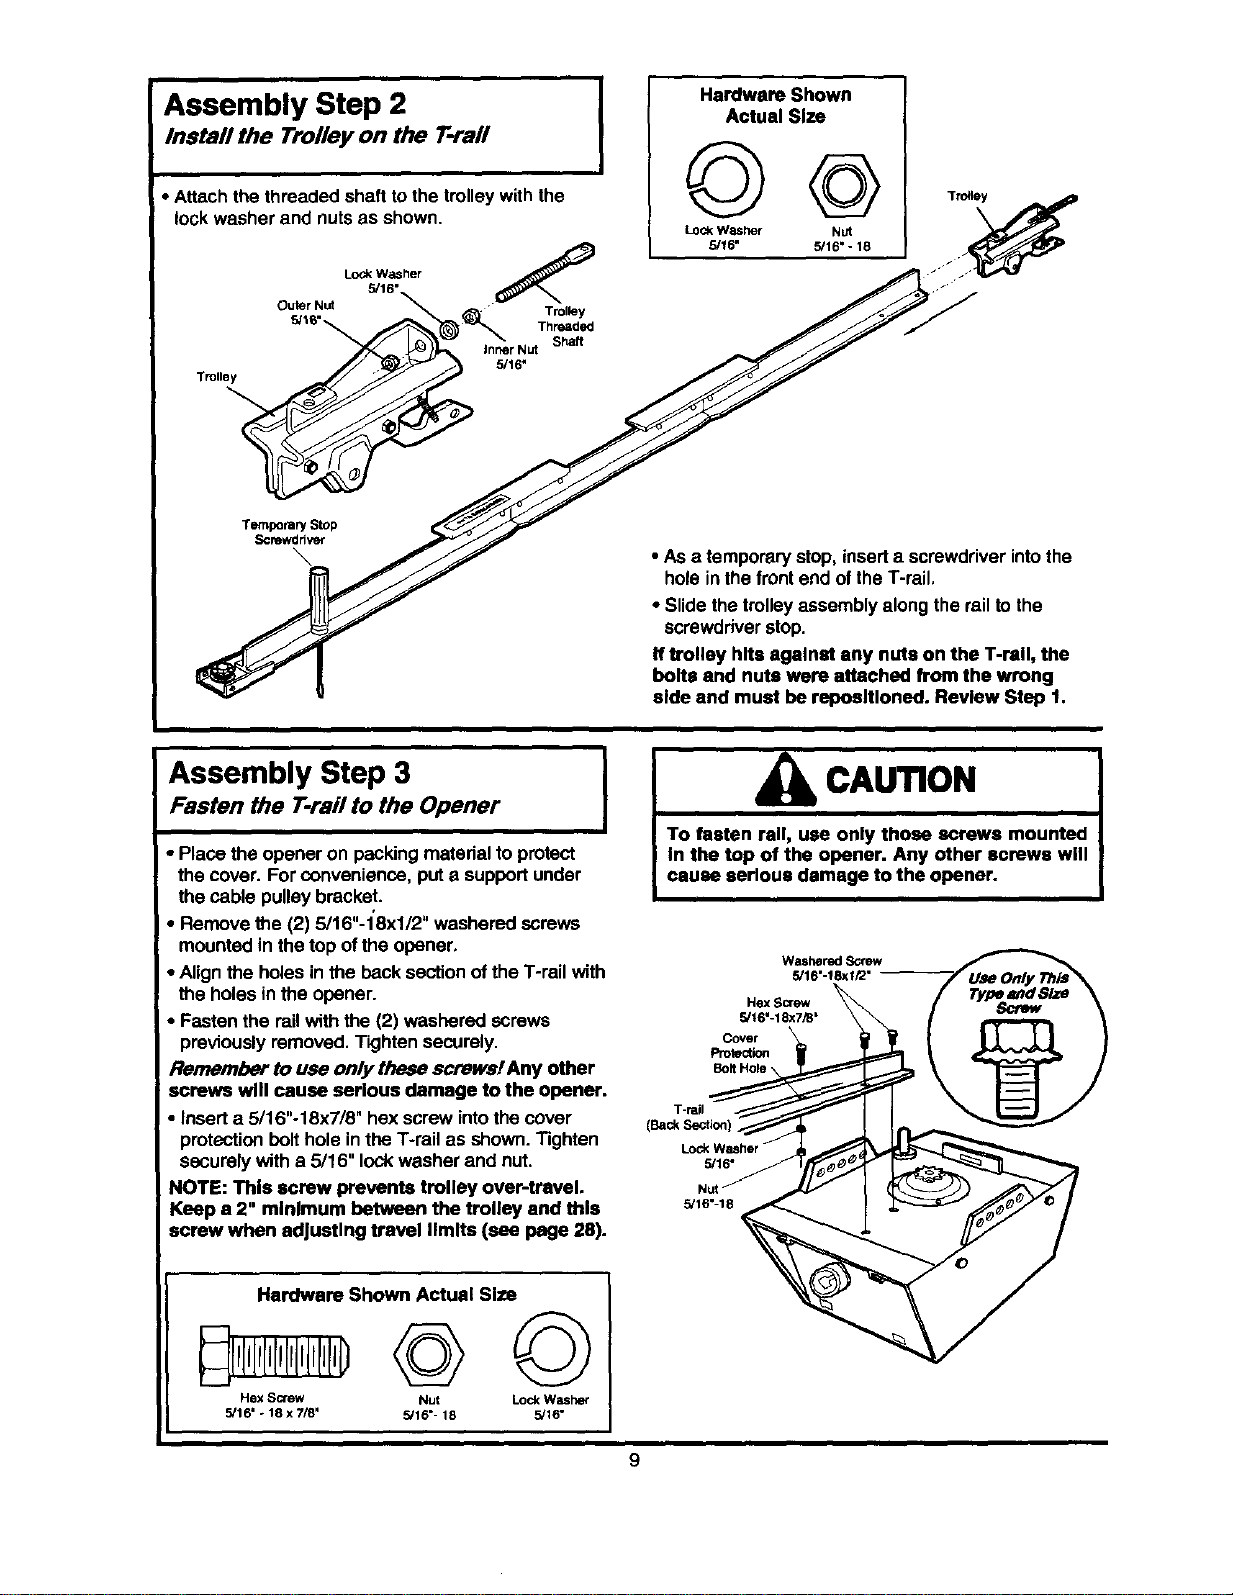
Assembly Step 2
Install the Trolley on the T-rail
• Attachthe threaded shafttothe trolleywith the
lock washer and nutsas shown.
Lock_/_s,her (_
Outer.Nuts/6_ _J_l_'_ _ .... ThreadedTr°'leYshaft
.o.le,
Temporary Stop
Screwddver
I
Hardware Shown
Actual Size
©@
Lock Washer Nut
5/16" 5/16" - 18
• As a temporary stop,insert a screwdriverintothe
hole inthe frontend of theT-rail,
• Slide thetrolleyassemblyalongthe railto the
screwdriverstop.
If trolley hits agalnat any nuts on the T-rell, the
bolts and nuts were attached from the wrong
aide and must be reposltloned. Review Step 1.
Assembly Step 3 ]
Fasten the T-rail to the Opener
I
• Place the opener on packing materialtoprotect
the cover. For convenience,put a supportunder
thecable pulley bracket.
• Remove the (2) 5/16"-1'8xl/2" washeredscrews
mountedin the top ofthe opener,
• Alignthe holesin the back sectionofthe T-rail with
the holesin the opener.
• Fasten the rail with the(2) washered screws
previouslyremoved, Tightensecurely.
Remember to use only these screws!Any other
screws will cause serious damage to the opener.
• Inserta 5/16"-18x718" hex screw intothe cover
protectionbolthole inthe T-rail as shown.Tighten
securelywith a 5/16" lockwasher and nut.
NOTE: This screw prevents trolley over-travel.
Keep a 2" minimum between the trolley and this
screw when adjusting travel limits (see page 28).
Hardware Shown Actual Size
Hex Screw Nut Lock Washer
5/16" * 18 x 7/8" 5/16"- 18 5/16"
CAUTION
To fasten rail, use only those screws mounted
In the top of the opener. Any other screws will
cause serious damage to the opener.
Washered Screw
5/16"-18xi/2" -
HexScr_
5/16"-18x7_"
CoVer t
Protection _
Bolt Hole _l
I-rail
Lock Washer
5/16 °
5/16"-
Loading ...
Loading ...
Loading ...