Loading ...
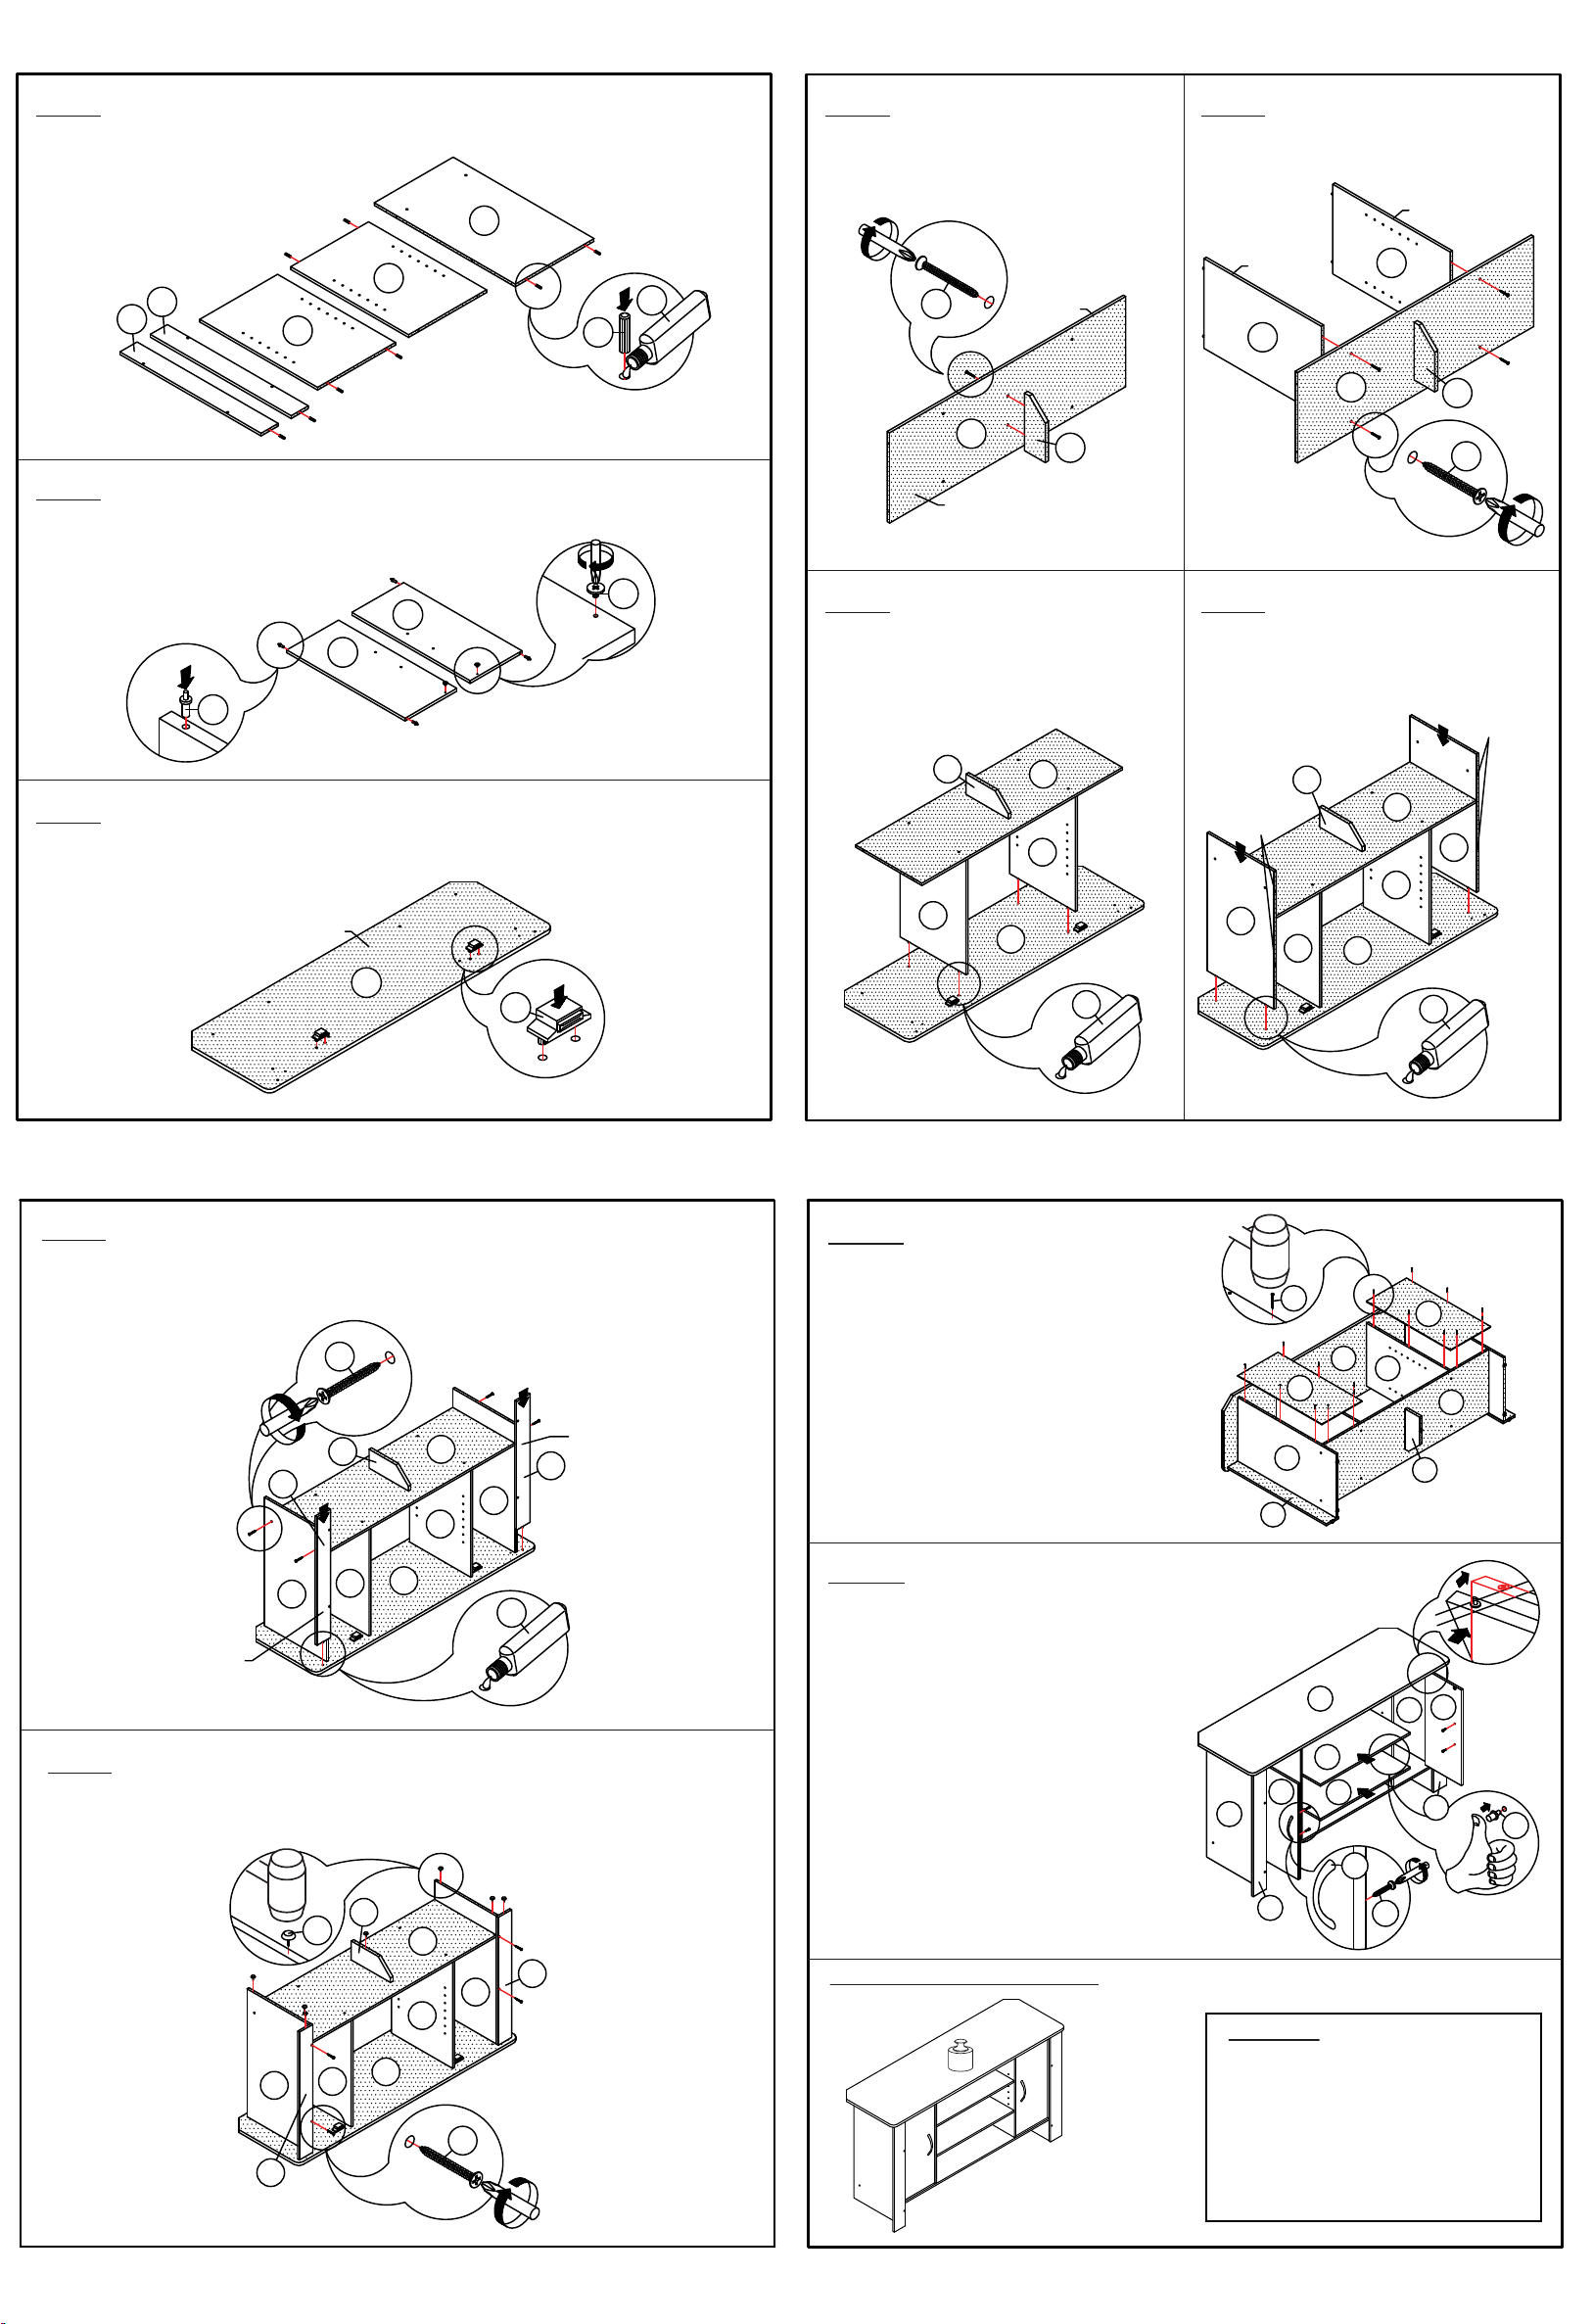
STEP 3
Install Magnetic Catches (3) to Top Panel (A), as shown.
STEP 2
Install Screw (4) and Door Holder (5) into Door Panel (G)&(H).
STEP 1
Install Dowel (2) into Panel (B)(C)(D)(I)&(J) using Glue (11).
3
A
UNFINISH SURFACE
5
G
4
H
D
C
I
J
2
B
11
x2
STEP 6
Attach assembled unit to Top Panel (A)
using Glue (11).
Attach Side Panel (B) to Top Panel (A)
using Glue (11).
STEP 7
STEP 4
Attach Leg Panel (K) to Bottom Panel (F)
using Screw (1).
Attach Panel (C)&(D) to Bottom Panel (F)
using Screw (1).
STEP 5
11
F
K
D
C
A
1
F
K
UNFINISH SURFACE
FINISH EDGE
SURFACE
C
D
K
F
1
FINISH EDGE
SURFACE
FINISH EDGE
SURFACE
11
F
K
D
C
A
B
B
SMALL HOLE
SURFACE
SMALL HOLE
SURFACE
3/6 4/6
9.1 Attach Panel (I)&(J) to Side Panel (B) using Screw (1).
9.2 Install Nail Leg (9) to Panel (B)(I)(J)&(K).
STEP 9
8.1 Attach Side Panel (B) to Bottom Panel (F) using Screw (1).
8.2 Attach Panel (I)&(J) to Top Panel (A) using Glue (11).
STEP 8
1
11
K
F
C
D
B
B
A
I
J
FINISH
SURFACE
FINISH
SURFACE
WARNING:
>This unit has been designed to support the
maximum loads shown. Exceeding these
load limits could cause sagging, instability,
product collapse, and/or serious injury.
>DO NOT allow children to climb on unit.
>Put heavier items on lower shelves.
11.1 Attach Door Panel (G)&(H) to Panel (A)&(F).
Make sure Door Holder (5) place into the hole.
11.2 Install Handle (7) to Door Panel (G)&(H)
using Screw (8).
11.3 Install Shelf Supports (6) to Panel (C)&(D).
Make sure left & right hole at the
same line.
11.4 Attach Shelf Panel (E) on the Shelf
Support (6).
STEP 11
Attach Back Panel (L) to the back position
of assembled unit using Power Pin (10).
STEP 10
Recommended Maximum Weight
*Unit in Pound(lbs)
40
DOOR
7
8
6
A
B
E
E
B
I
J
G
H
5/6 6/6
10
L
L
B
K
F
C
A
J
9
1
K
F
C
D
B
B
A
I
J
10 lbs
10 lbs
10 lbs