Loading ...
Loading ...
Loading ...
ASSEMBLY
iNSTALL BATTERY (See Figs. 4 & 5)
CAUTION: Do not short battery termi-
nals. Before installing battery, remove
metal bracelets, wristwatch bands,
rings, etc.
Positive terminal must be connected
first to prevent sparking from acciden-
tal grounding.
o Make sure draintube isfastened to drain hole inbattery
tray and battery tray is positioned in hole of battery
supporL
o Place battery inplastic tray, battery terminals to front of
tractor.
o First connect RED battery cable to positive (+) battery
terminal with hex bolt, flat washer, lock washer and hex
nut as shown Tighten securely
o Connect BLACK grounding cable to negative (-) bat-
tery terminal with remaining hex bolt, flat washer, lock
washer and hex nut. Tighten securely.
• Slide the two battery bolts through the terminal guard
and start the wing nuts onto the threads
• Position terminal guard over the battery as shown,
lower bolts into key holes and slide square shafts of
bolts into slots of key hole&
o Tighten wing nuts by hand making sure battery bolts
remain in slots of the key holes in the battery support.
= Be sure terminal access doors are closed.
Use terminal access doors for:
o Inspection for secure connections (to tighten hard-
ware).
, Inspection for corrosion.
o Testing battery.
o Jumping (if required).
Periodic charging.
LOCK _::,_.:.::;;..y- .,...... . HEX LOCI{ WASHER
"=-_;'-" --' : NUT /
WASHER . ,.., ,., dj_
(POSITIVE)
;"
FLAT
(NEGATIVE) '_ WASHER
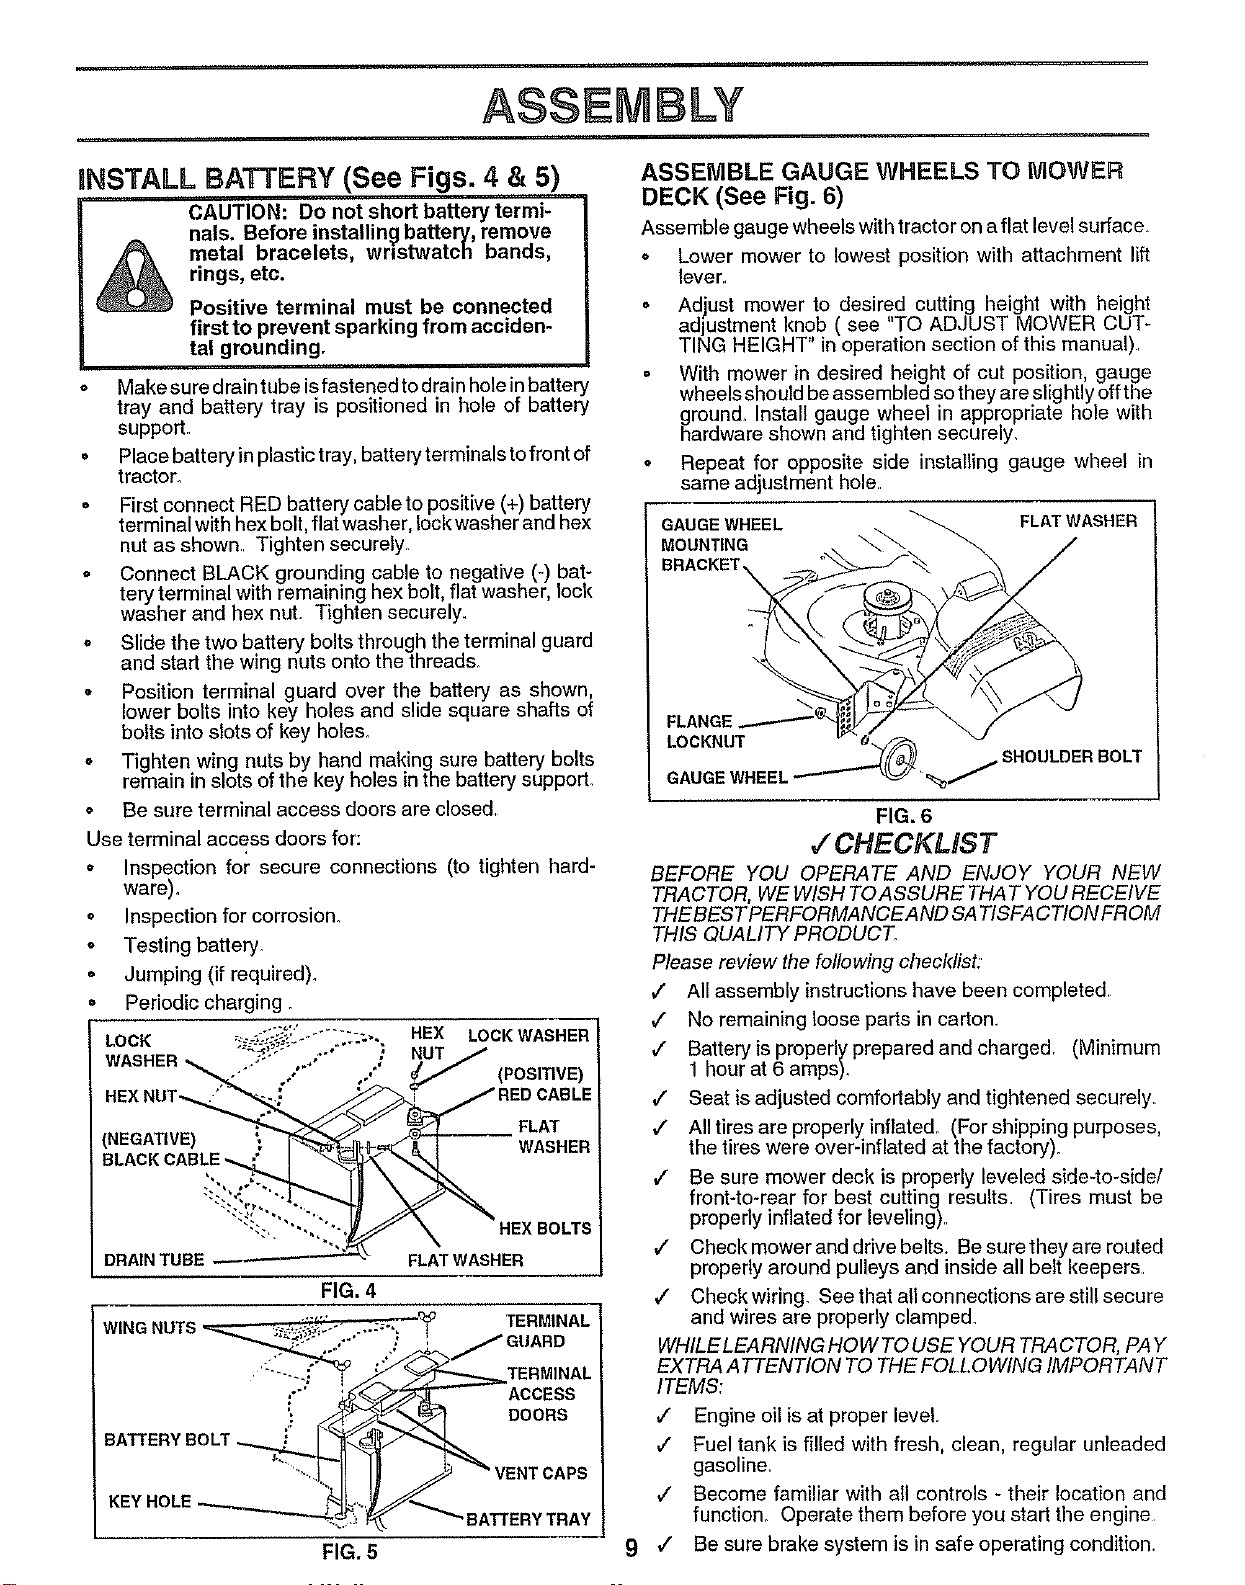
ASSEMBLE GAUGE WHEELS TO NIOWER
DECK (See Fig. 6)
Assemble gauge wheels with tractor on a flat level surface.
o Lower mower to lowest position with attachment lift
lever..
• Adjust mower to desired cutting height with height
adjustment knob ( see "TO ADJUST MOWER CUT-
TING HEIGHT in operation section of this manual)
• With mower in desired height of cut position, gauge
wheels should be assembled so they are slightly off the
ground. Install gauge wheel in appropriate hole with
hardware shown and tighten securely.
o Repeat for opposite side installing gauge wheel in
same adjustment hole.
'GAUGE WHEEL FLAT WASHER
MOUNTING \
BRACKET
9
FLANGE
LOCKNUT
GAUGE WHEEL
_/SHOULDER BOLT
FIG. 6
•/ CHECKLIST
BEFORE YOU OPERATE AND ENJOY YOUR NEW
TRACTOR, WE WISH TOASSURE THAT YOU RECEIVE
THEBESTPERFORMANCEAND SA TISFA CTIONFROM
THIS QUALITY PRODUCT.
Please review the following checldist:
,/ All assembly instructions have been completed.
,/ No remaining loose parts in carton
v" Battery is properly prepared and charged. (Minimum
1 hour at 6 amps).
,/ Seat is adjusted comfortably and tightened securely.
,/ All tires are properly inflated. (For shipping purposes,
the tires were over-inflated at the factory).
,/ Be sure mower deck is properly leveled side-to-side/
front-to-rear for best cutting results (Tires must be
properly inflated for leveling)
,/ Checkmoweranddrivebelts. Besuretheyarerouted
properly around pulleys and inside all belt keepers
,/ Check wiring. See that all connections are still secure
and wires are properly clamped
WHILELEARNING HO W TO USE YOUR TRA CTOR, PAY
EXTRA ATTENTION TO THE FOLLOWING IMPORTANT
ITEMS:
,/ Engine oil is at proper level
#" Fuel tank is filled with fresh, clean, regular unleaded
gasoline.
,/ Become familiar with all controls - their location and
function. Operate them before you start the engine
,f Be sure brake system is in safe operating condition.
Loading ...
Loading ...
Loading ...