Loading ...
Loading ...
Loading ...
8
MOUNTING THE RANGEHOOD ONTO THE WALL
1. There is a 1:1 installation hole position diagram for this model. It makes
the installation easier. Drill the holes according to diagram.
2. Fix the discharge collar onto the air outlet adapter.
3. Attach an adequate length of 150mm round duct to the air outlet
adapter.
4. Secure the hood mounting bracket to the wall using two mounting
screws and dry wall anchors. Align the hood body with the hood
mounting bracket. Gently lower the hood until it securely engages the
bracket. Add some securing screws using the holes provided.
NOTE: Make sure that the correct wall plugs are used to suit your wall. Rangehoods
are subject to vibration and the mounting must be very secure. The plugs included
suit most walls but check first. An unreinforced Gyprock type wall is not acceptable
as a secure surface. It must be reinforced first.
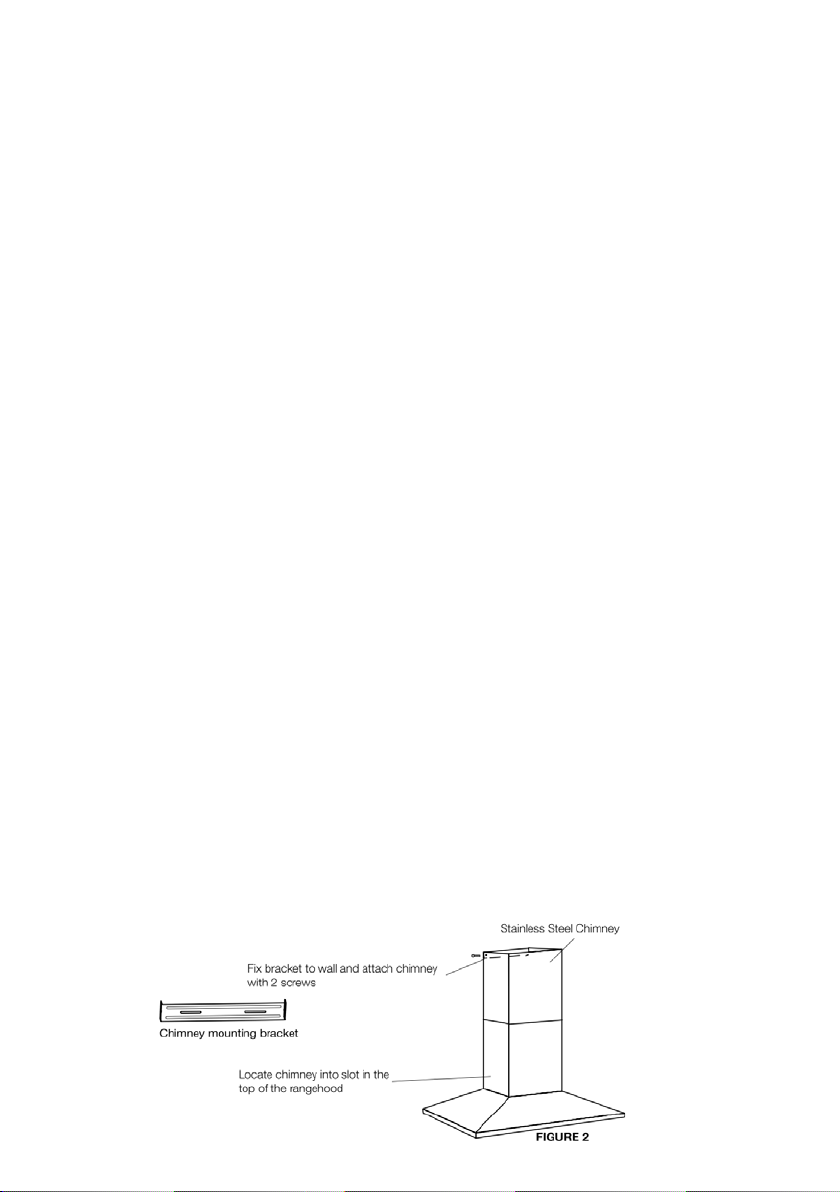
CHIMNEY INSTALLATION – remove the plastic. Be careful of sharp edges.
1. Carefully slide the stainless steel chimney down to the chimney bottom
and then place the chimney bottom into the recessed area on top of the
hood.
2. Secure the chimney mounting bracket to the wall in the top corner using
(2) ST 4.2 x 30mm mounting screws and dry anchors.
3. Raise the chimney top until its holes align with holes in the chimney
mounting bracket located on the wall.
4. Level the hood and secure the chimney with 2 chimney bracket screws.
Loading ...
Loading ...
Loading ...