Loading ...
Loading ...
Loading ...
4
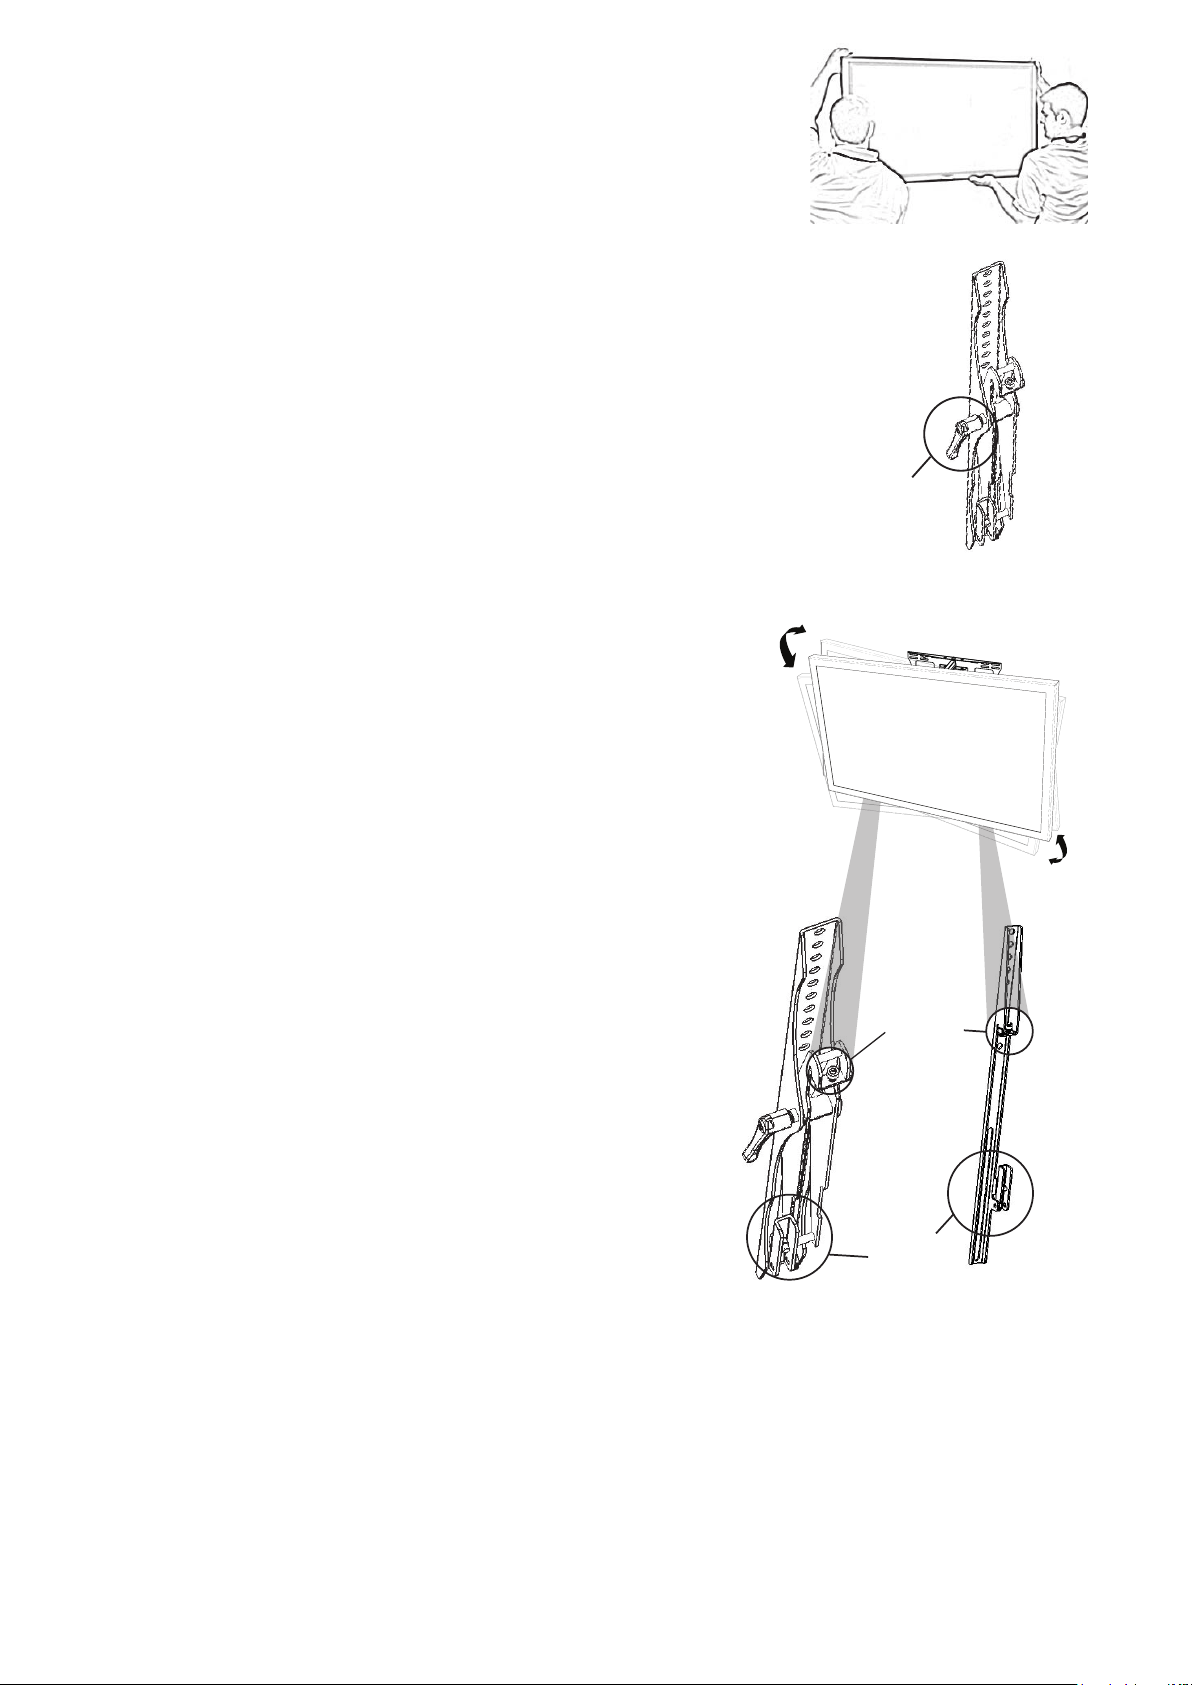
Step 3: Hang TV on the Wall Plate
A. Carefully lift the TV to hook the arms over the top lip of the
wall plate. Allow the lower portion of the arms to swivel in
under the bottom lip of the wall plate. Do not release the TV
until it is completely connected to the wall plate.
ADJUSTMENTS:
Adjust Horizontal Level and Tilt
Forward Tilt Adjustment (SB-WM-T-XL-BLK)
A. Turn tilt adjustment lever (ratchet) clockwise to tighten grip;
counterclockwise to loosen grip.
B. Pull tilt adjustment lever (ratchet) away from arm and then
turn clockwise/counterclockwise to desired location. Let the
tilt adjustment lever (ratchet) sit in place.
C. Repeat as needed to loosen/tighten the tilt.
Horizontal Adjustment
If TV is not horizontally level when mounted, tilt adjustment screws
are included at the top of each arm for micro-adjustments
(Figure 7). Use the provided hex key to raise or lower the screw,
which will in turn raise or lower the mount.
Due to TV weight, it may be easier to lift the TV slightly when ad-
justing the screw. Caution should be taken to avoid any slips or
drops to avoid damage and/or injuries.
Locking
A. To lock the arms to the wall bracket, twist the locking tabs
until the edge catches behind the bracket. The hex key can
be used as a tool to help with this step. Padlock is optional
(not included).
Tilt Adjustment Lever
(Ratchet)
±5° Horizontal
Adjustment
Tilt Adjustment
Screw
Locking
Tab
160519-0950
Figure 5
Figure 6
Figure 7
Lifetime Limited Warranty
SunbriteTV™ Mounts have a Lifetime Limited Warranty. This warranty includes parts and labor repairs on all com-
ponents found to be defective in material or workmanship under normal conditions of use. This warranty shall not
apply to products which have been abused, modied or disassembled. Products to be repaired under this war-
ranty must be returned to SunbriteTV or a designated service center with prior notication and an assigned return
authorization (RA) number.
Technical Support 866.838.5052