Loading ...
Loading ...
Loading ...
4
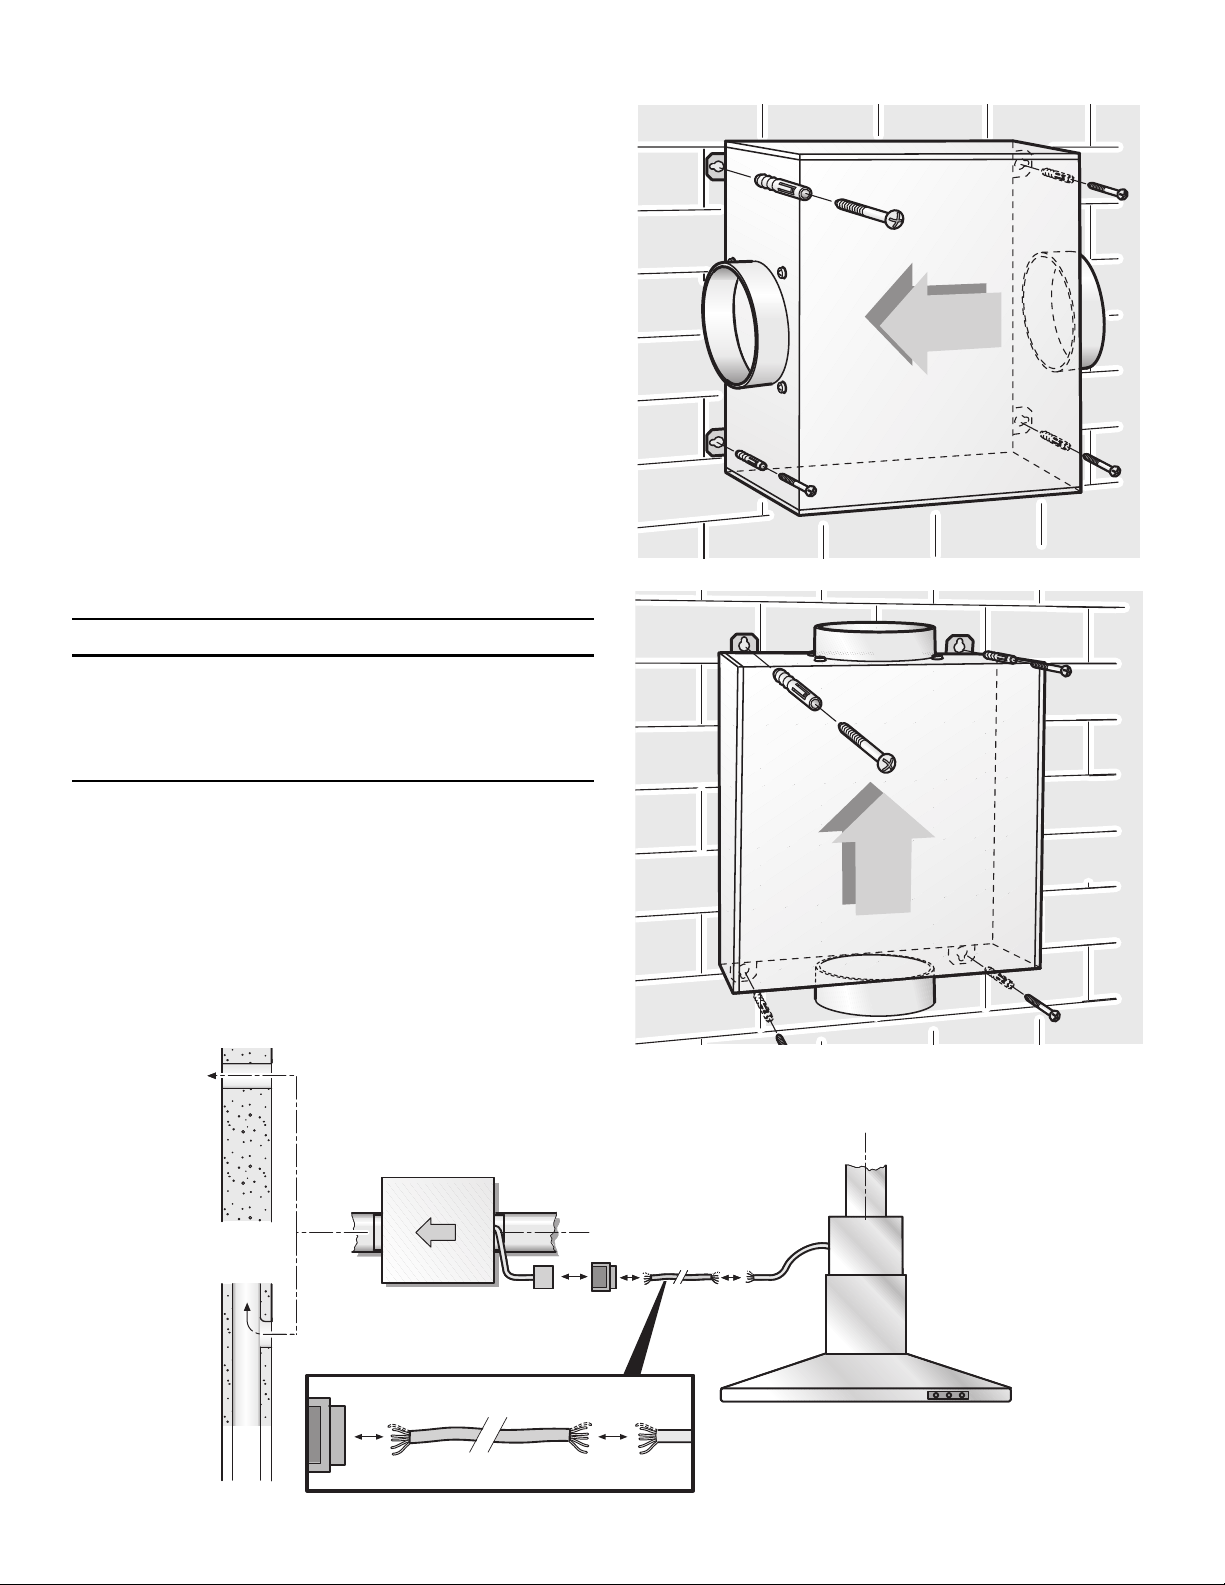
Step 3: INSTALLATION
1. Hold the blower on the wall.
Note the direction of the air flow.
2. Mark the four (x 4) mounting holes.
• At least one screw must be installed through a
stud.
• All hardware must be suitable for the wall’s
construction materials.
3. Drill the 4 x ¼'' (6.35 mm) Ø mounting holes.
Insert wall anchors and screw the blower to the wall.
4. Connect the ducting from the blower to the extractor
hood and feed to the outside.
5. Connect the blower to the extractor hood with an
extension cable, if required.
Use the added connector to hard-wire to the blower, if
required.
Use the wire diagram for connecting.
9 WARNING
•
The additional cover on the plug must always be
attached and closed for safety reasons.
• Not needed wires must be isolated, capped with
wire nuts and stored in a safe position.
NOTE: Confirm that the blower is securely attached to the
wall and all connections are secure.
Loading ...
Loading ...
Loading ...